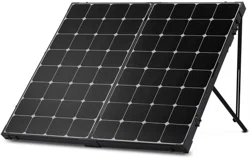
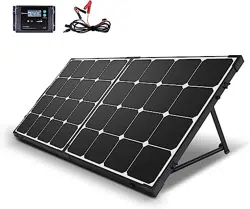
1. Unlatch and unfold unit then connect MC4 Connectors
2. Connect Battery Alligator Clips to 12V Battery
3.Unscrew butterfly nut tilt to desired angle and lock butterfly nut
To maximize the output, adjust the angle of the suitcase regularly to track the sun’s movement throughout the season
Operation
When the controller powers on, the Voyager will run a self-quality check mode and automatically display the figures on LCD before going into auto work.
Self-test starts, digital meter segments test
Software version test
Rated voltage Test
Rated Current Test
External battery temperature sensor test (if connected)
Selecting Battery Type
WARNING
Incorrect battery type setting may damage your battery. Please check your battery manufacturer’s specifications to when selecting battery type.
The Voyager provides 7 battery types for selection: Lithium-ion, LiFePO4, LTO, Gel, AGM, Flooded, and Calcium Battery. Press and hold the BATTERY TYPE Button for 3 seconds to go into battery selection mode.
Press the BATTERY TYPE Button until the desired battery is displayed. After a few seconds, the highly
NOTE
Lithium ion batteries shown in the LCD indicate different types shown below:
Pressing the AMP/VOLT Button will sequence through the following display parameters: Battery Voltage, Charging Current, Charged Capacity (Amp-hour), and Battery Temperature (if external temperature sensor connected)
NOTE: The following is an alternative display voltage for when the battery is Fully charged
System Status Icons
LED Behavior
NOTE: BV = Battery Voltage
LED Error Behavior
SystemStatus Troubleshooting
Description
Troubleshoot
Battery over voltage
Use a multi-meter to check the voltage of the battery. Make sure the battery voltage is not exceeding the rated specification of the charge controller. Disconnect battery.
Charge controller does not charge during daytime when the sun is shining on the solar panels.
Confirm that there is a tight and correct connection from the battery bank to the charge controller and the solar panels to the charge controller. Use a multi-meter to check if the polarity of the solar modules has been reversed on the charge controller’s solar terminals.
Everything is connected correctly, but the LCD on the controller does not turn on
Check the rated battery voltage. The LCD will not display on the charge controller unless there is at least 9V coming from the battery bank.
Maintenance
For best controller performance, it is recommended that these tasks be performed from time to time.
Check wiring going into the charge controller and make sure there is no wire damage or wear.
Tighten all terminals and inspect any loose, broken, or burnt up connections
Make sure readings in the LCD and LED are consistent.
Frequently Asked Questions
Q. Can the kit charge two or more 12V batteries connected in parallel?
A. Yes, it’s possible if the batteries have the same type and capacity and are wired in parallel as a single 12V battery bank.
Q. Is there any risk that the solar kit will over charge my battery?
A. One of the functions of the solar charge controller is to ensure that your battery is not over charged; therefore there is no risk of overcharge.
Q. Can I extend the battery leads?
A. Yes, it’s possible – please choose the same size of cable for extension. However, there longer the extension, the greater the line loss. Bigger gauge will be required for longer runs.
Q. Do I need to clean the solar panels?
A. Yes, it is recommended for better performance. Dust and dirt should first be swept off the panel surface using a soft brush. When the sweeping is complete, use a wet cloth to wipe the panel surface to remove remaining dirt and grime.
Q. Can rain damage the solar kit?
A. The solar panels and charge controller are both fully waterproof (IP66, IP65).
Technical Specifications
Solar Panel Parameters
Charge Controller Parameters
Battery Charging Parameters
Charging Parameters Glossary
Equalization Voltage—equalization voltage is a corrective over-charge of the battery. The user should consult their battery manufacturer regarding specific battery equalization capacity. This parameter sets the equalization voltage to set the battery at when it reaches the equalization state.
Boost Voltage—users should check with their battery manufacturer for proper charging parameters. In this stage, users set the boost voltage where the battery will reach a voltage level and remain there until the battery undergoes an absorption stage
Float Voltage—once the charge controller recognizes the set float voltage, it will commence floating. The battery is supposed to be fully charged in his state, and the charge current is reduced to maintain battery stability levels.