Operating Instructions for AV Receiver
Parts and Controls
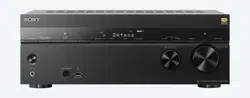
Receiver
Front panel


Power indicator
- Green: The receiver is turned on.
- Amber: The receiver is in standby mode, and you have set one of the following:
- [Control for HDMI], [Remote Start]*, [Bluetooth Standby], or [Network Standby]* is set to [On].
- [Standby Through] is set to [On] or [Auto].
- [Zone2 Power] or [HDMI Zone Power] is set to [On].
- The indicator goes off: The receiver is in standby mode and all of the following settings are set to [Off]:
- [Control for HDMI]
- [Standby Through]
- [Remote Start]*
- [Bluetooth Standby]
- [Network Standby]*
- [Zone2 Power] and [HDMI Zone Power]
* For USA, Canadian and Oceanian models only.
Indicators on the display panel


Note
These indicators may not light up depending on the speaker pattern setting.
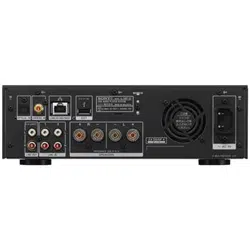
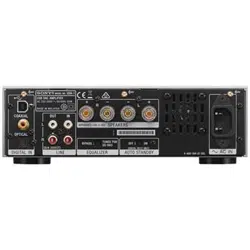
Rear panel


* All of the HDMI IN/OUT jacks on the receiver support HDCP 2.2. HDCP 2.2 is newly enhanced copyright protection technology that is used to protect content such as 4K movies.
About input/output of video signals
The digital video signals input to the HDMI IN jacks of this receiver are output from HDMI OUT A (TV) or HDMI OUT B/HDMI ZONE jacks only. The analog video signals input from VIDEO IN jacks are output from the MONITOR OUT jack only.
Use the following illustration as reference when you connect the receiver, AV device, and TV.

Note
When you connect the TV to the MONITOR OUT jack, the home menu of this receiver is not displayed on the TV screen. To operate this receiver using the menu on the TV screen, connect the TV to the HDMI OUT A (TV) or HDMI OUT B/HDMI ZONE jacks.
Remote control


Note
- The above explanation is intended to serve as examples.
- Depending on the model of your connected device, some functions explained in this section may not work with the supplied remote control.
Preparation
Installing Speakers
You can connect up to 7 speakers and 2 subwoofers to this AV receiver. Place the speakers and subwoofers according to the speaker system of your preference.
Location of each speaker

Note
- When you connect only one surround back speaker (SB), place the surround back speaker directly behind the listening position.
- As the subwoofer (SW) does not emit highly directional signals, you can place it wherever you want.
Names and functions of speakers
|
Abbreviations used in illustrations
|
Speaker name
|
Functions
|
|
FL
|
Front left speaker
|
Produces sounds from front left/right channels.
|
|
FR
|
Front right speaker
|
|
CNT
|
Center speaker
|
Produces vocal sounds from center channel.
|
|
SL
|
Surround left speaker
|
Produces sounds from surround left/right channels.
|
|
SR
|
Surround right speaker
|
|
SBL
|
Surround back left speaker
|
Produces sounds from surround back left/right channels.
|
|
SBR
|
Surround back right speaker
|
|
SB
|
Surround back speaker
|
Produces sounds from surround back channel.
|
|
SW
|
Subwoofer
|
Produces LFE (low frequency effect) channel sounds and reinforces bass parts of other channels.
|
|
TML
|
Top middle left speaker
|
Produces sounds from top middle left/right channels.
|
|
TMR
|
Top middle right speaker
|
|
FDL.
|
Front Dolby Atmos enabled left speaker
|
Produces sounds from the top middle left/right channels and reflects these sounds off the ceiling. Enables playing back sounds of Dolby Atmos 3D movies without the need to install ceiling speakers.
|
|
FDR
|
Front Dolby Atmos enabled right speaker
|
|
SDL
|
Surround Dolby Atmos enabled left speaker
|
Produces sounds from the top middle left/right channels and reflects these sounds off the ceiling. Enables playing back sounds of Dolby Atmos 3D movies without the need to install ceiling speakers.
|
|
SDR
|
Surround Dolby Atmos enabled right speaker
|
|
FHL.
|
Front high left speaker
|
Produces vertical sound effects from front height left/right channels.
|
|
FHR
|
Front high right speaker
|
Speaker configuration and speaker pattern settings
Select the speaker pattern according to the speaker configuration which you are using.
The table below shows examples of speaker configurations and speaker pattern settings. For speaker placement and connection diagrams for each speaker configuration example, see “Examples of speaker connections” (page 21).
|
Speaker configuration in each zone
|
[Surround Back Speaker Assign]*
|
[Speaker Pattern] setting
|
For connection, see page
|
|
Main zone
|
Zone 2
|
|
5.1-channel
|
Not used
|
—
|
[5.1]
|
21
|
|
7.1-channel using surround back speakers
|
Not used
|
—
|
[7.1]
|
22
|
|
5.1.2-channel using top middle speakers
|
Not used
|
—
|
[5.1.2 (TM)]
|
23
|
|
5.1.2-channel using Dolby Atmos enabled speakers
|
Not used
|
—
|
[5.1.2 (FD)]
|
24
|
|
5.1-channel with Zone 2 speakers
|
2-channel
|
[Zone2]
|
[5.1]
|
25
|
|
5.1-channel with Bi- Amplifier connection
|
Not used
|
[BI-AMP]
|
[5.1]
|
26
|
|
2.1-channel (for enjoying Front Surround)
|
Not used
|
—
|
[2.1]
|
28
|
* You can only set [Surround Back Speaker Assign] if the speaker pattern is set to a setting that does not have surround back and height speakers.
Tip
The receiver allows you to enjoy a surround-sound effect acoustically equivalent to that of up to a 7.1.2-channel speaker system when you select [Type A] or [Type B] for [SpeakerRelocation/PhantomSurroundBack] in the [Speaker Settings] menu.
When setting [SpeakerRelocation/PhantomSurroundBack], perform Auto Calibration beforehand (page 40).
Connecting Speakers
This receiver allows you to connect up to 7.1-channel system.
The speaker layout diagram is a guide for the ideal speaker placement. You do not need to adjust your speaker placement exactly the same as the diagram.
Note
- Connect speakers with a nominal impedance of 6 ohms to 16 ohms.
- Before connecting cables, be sure to disconnect the AC power cord (mains lead).
- Before connecting the AC power cord (mains lead), make sure that metallic wires of the speaker cables are not touching each other between the SPEAKERS terminals.
- When you connect a subwoofer with an auto standby function, turn off the function when watching movies. If the auto standby function is set to on, it turns to standby mode automatically based on the level of the input signal to the subwoofer, and the sound may not be output.
- If you have two subwoofers, you can connect them to both SUBWOOFER OUT jacks.
How to connect speaker cables
Be sure to connect the speaker cables correctly to the terminals of the speaker and this receiver. Also, be sure to tightly twist the speaker wire strands and insert them securely into the speaker terminals.

Note
- Be sure not remove too much of the speaker cable sleeves, so as to prevent the wires of the speaker cables from touching each other.
- Connect speaker cables properly with the polarities (+/–) matched between the receiver and the speakers.

- Improper connection may result in fatal damage to the receiver.
Examples of speaker connections
5.1-channel speaker system

 Monaural audio cable (not supplied)
 Speaker cable (not supplied)
7.1-channel speaker system using surround back speakers

Monaural audio cable (not supplied)
Speaker cable (not supplied)
* If you connect only one surround back speaker, connect it to the L (+/–) terminals. After you have made the connection, select a speaker pattern with only one surround back speaker connected for [Speaker Pattern] in [Speaker Settings].
5.1.2-channel speaker system using top middle speakers

Monaural audio cable (not supplied)
Speaker cable (not supplied)
* After you have made the connection, set [Speaker Pattern] in [Speaker Settings] to [5.1.2 (TM)].
5.1.2-channel speaker system using Dolby Atmos enabled speakers

Monaural audio cable (not supplied)
Speaker cable (not supplied)
* After you have made the connection, set [Speaker Pattern] in [Speaker Settings] to [5.1.2 (FD)].
5.1-channel speaker system with Zone 2 speakers

Monaural audio cable (not supplied)
Speaker cable (not supplied)
* Only USA and Canadian models are equipped with the SPEAKERS ZONE 2 terminals.
The USA and Canadian models are used for illustrative purposes in these Operating Instructions.
For other models, connect the speakers in Zone 2 to the SPEAKERS SURROUND BACK/HEIGHT (FRONT B/ BIAMP/ZONE 2) terminals.
For details on using the Zone 2 speakers, see “Enjoying sound from speakers located in other rooms (Zone 2)” (page 43).
Note
For USA and Canadian models, be sure to connect the speakers in Zone 2 to the SPEAKERS ZONE 2 terminals.
5.1-channel speaker system with Bi-Amplifier connection
When the front speakers are Bi-wire speakers, which are equipped with separate terminals for high-frequency sounds (tweeter) and low-frequency sounds (woofer), you can make the biamplifier connection. Connect each pair of terminals for tweeter and woofer to the SPEAKERS FRONT A terminals and SPEAKERS SURROUND BACK/HEIGHT terminals of this receiver. You can enjoy higher quality sound playback if you operate the tweeter and woofer using separate amplifiers.

Monaural audio cable (not supplied)
Speaker cable (not supplied)
Make sure that metal fittings of Hi/Lo attached to the speakers have been removed from the speakers to avoid receiver malfunction.
After you have made the connection, set [Surround Back Speaker Assign] in [Speaker Settings] to [BI-AMP].
Note
You can only set [Surround Back Speaker Assign] if the speaker pattern is set to a setting that does not have surround back and height/overhead speakers (page 19).
2.1-channel speaker system (for enjoying Front Surround)
If you select [Front Surround] for the sound field setting, you can enjoy virtual surround effects using only the two front speakers.
Place the speakers as shown below to enjoy Front Surround.

Tip
Change the direction of the front speakers little by little to search for and set the direction that gives you the best surround effects.

Monaural audio cable (not supplied)
Speaker cable (not supplied)
Connecting a TV
Connect a TV to the HDMI OUT or MONITOR OUT jack.
The menu is displayed on the TV screen only when you connect the TV to the HDMI OUT jack. Sony recommends that you use the HDMI OUT jack to connect the TV because in many cases you will have to perform the settings of this receiver using the menu.
For a 4K TV connection, visit the Help Guide.
Notes on connection
- Before connecting cables, be sure to disconnect the AC power cord (mains lead).
- Sony recommends that you use an HDMI cable made by Sony or another HDMI-authorized cable. Be sure to use a High Speed HDMI Cable with Ethernet. For video signals that require a high bandwidth such as 4K/60p 4:4:4, 4:2:2 and 4K/60p 4:2:0 10 bit etc., be sure to use a Premium High Speed HDMI Cable with Ethernet, which supports bandwidths up to 18 Gbps.
- When you use high bandwidth video formats such as 4K/60p 4:4:4, 4:2:2 and 4K/60p 4:2:0 10 bit, be sure to set the HDMI signal format. For details, see “Setting HDMI signal format” (page 42).
- We do not recommend using an HDMI-DVI conversion cable. If you connect an HDMI-DVI conversion cable to a DVI-D device, the sound and/or image may be lost. Connect separate audio cables or digital connecting cables, then reassign the input jacks if the sound is not output correctly.
- Depending on the status of the connection between the TV and the antenna (aerial), the image on the TV screen may be distorted. If this is the case, place the antenna (aerial) farther away from the receiver.
- When connecting an optical digital cable, insert the plugs straight until they click into place.
- Do not bend or tie optical digital cables.
- All of the digital audio jacks are compatible with 32 kHz, 44.1 kHz, 48 kHz, and 96 kHz sampling frequencies.
- When connecting a TV to the receiver via the TV IN jacks of the receiver, set the sound output jack of the TV to “Fixed” if it can be switched between “Fixed” or “Variable.”
- When you connect the TV to HDMI OUT B/HDMI ZONE jack, be sure to set [HDMI Out B Mode] to [Main] in the [HDMI Settings] menu. The home menu is not displayed on the TV screen if [HDMI Out B Mode] is set to [Zone].
Connecting a TV incompatible with the eARC and ARC functions via an HDMI connection
When you connect the receiver to a TV using the HDMI cable c, the receiver can output audio and video signals to the TV. Note, however, that you also need to connect the optical digital cable a or audio cable b to the TV in order to output TV audio from the speakers connected to the receiver.

Optical digital audio cable (not supplied)
Audio cable (not supplied)
 HDMI cable (not supplied)
Connecting a TV compatible with the eARC or ARC function via an HDMI connection
With just one HDMI cable connection, you can listen to the TV audio from the speakers connected to the receiver while the receiver sends audio and video signals to the TV.

HDMI cable (not supplied)
Note
- For this connection, you need to turn the Control for HDMI function on. Press HOME, then select [Setup] [HDMI Settings] – [Control for HDMI] – [On].
- You also need to perform the setting on the TV menu. Turn on the eARC or ARC function.
- If the HDMI OUT A (TV) jack on your receiver is labeled “ARC,” update the software of the receiver. For details, see “Updating the Software” (page 53). If the HDMI OUT A (TV) jack on your receiver is labeled “eARC/ARC,” its software already supports the eARC function.
Tip
If the HDMI jack of the TV (labeled “eARC” or “ARC”) is already connected to another device, disconnect the device and connect the receiver.
Connecting a TV without HDMI jacks
You need to connect the optical digital audio cable c or audio cable b to the TV in addition to connecting the video cable a.

Video cable (not supplied)
Audio cable (not supplied)
Optical digital audio cable (not supplied)
Note
- When you have connected the receiver and TV using the above method, video from the device connected to the VIDEO IN jacks is displayed on the TV.
- When you connect the receiver and TV using the above method, the menu is not displayed on the TV screen. To perform operations using the menu, you need to connect the TV via an HDMI connection.
Connecting Audio-Visual Devices
Connecting devices with HDMI jacks
Before connecting cables, be sure to disconnect the AC power cord (mains lead).
The HDMI IN jacks of the receiver are compatible with HDCP 2.2. To watch content protected by HDCP 2.2, such as 4K content, connect these HDMI IN jacks to HDCP 2.2-compatible HDMI jacks on the player. Refer to the operating instructions of the connected device for details.

Note
The HDMI IN VIDEO 1 jack supports bandwidths of up to 9 Gbps. If your device supports high-bandwidth video formats such as 4K/60p 4:4:4, 4:2:2, or 4K/60p 4:2:0 10 bit, connect your device to an HDMI IN jack other than the HDMI IN VIDEO 1 jack.
Tip
- This connection is an example. You can connect each HDMI device to any HDMI IN jacks.
- The BD/DVD and SA-CD/CD inputs have better sound quality. When you need a higher sound quality, connect your device to these HDMI IN jacks and select them as the input.
- The image quality depends on the type of connecting jack. We recommend you connect your devices via an HDMI connection if they have HDMI jacks.
Connecting devices with jacks other than HDMI jacks
Before connecting cables, be sure to disconnect the AC power cord (mains lead).

Audio cable (not supplied)
Video cable (not supplied)
Coaxial digital cable (not supplied)
* To connect a turntable that only has a PHONO output jack, you need to connect a phono equalizer (not supplied) between the turntable and this receiver.
Note
To listen to the sounds from a device connected to the AUDIO IN jacks, do not connect any device to the HDMI IN, COAXIAL IN, and OPTICAL IN jacks, which are labeled with the same device name (such as SAT/CATV, TV, VIDEO 1, and SA-CD/CD).
Tip
- You can connect devices other than those indicated above to the AUDIO IN jacks (SAT/CATV, VIDEO 1, and SACD/CD).
- You can rename each input so that the name can be displayed on the display panel of the receiver. For details, refer to “Changing the name for each input (Name)” in Help Guide.
Connecting another amplifier in Zone 2
Before connecting cables, be sure to disconnect the AC power cord (mains lead).

Audio cable (not supplied)
Note
- Only audio signals from [USB], [Bluetooth] (only when [Bluetooth Mode] is set to [Receiver]), [Home Network], [Music Service List], and [FM TUNER] and audio signals input from AUDIO IN jacks located on the rear panel of the receiver are output to the Zone 2 speakers.
- External digital input from OPTICAL IN, COAXIAL IN and HDMI IN jacks cannot be output to Zone 2.
- If you set [DSD Native] in [Audio Settings] to [On], no audio signals for DSD content from [USB] or [Home Network] are output to the Zone 2 speakers.
Connecting another amplifier or TV in the HDMI zone
Before connecting cables, be sure to disconnect the AC power cord (mains lead).

HDMI cable (not supplied)
Note
To use this connection, set [HDMI Out B Mode] in the [HDMI Settings] menu to [Zone].
Connecting to a network
Select the connection method based on your LAN (Local Area Network) environment.
The following illustrations are configuration examples of a home network with the receiver and a server.
When using wired LAN connection
Connect your receiver to the network using a LAN cable* (not supplied).

* We recommend using category 7 cables.
When using wireless LAN connection

Note
- Audio playback on a server may occasionally be interrupted if you use a wireless connection.
- When using a wireless connection, stand up both wireless LAN antennas for better performance.
Connecting the Antenna (aerial)
Before connecting the antenna (aerial), be sure to disconnect the AC power cord (mains lead).

Note
- Be sure to fully extend the FM wire antenna (aerial).
- After connecting the FM wire antenna (aerial), keep it as horizontal as possible.
Connecting the AC Power Cord (mains lead)
Before connecting the AC power cord (mains lead), be sure to make connections for speakers and the other devices.
1. Connect the AC power cord (mains lead) to a wall outlet.

2. Press  (power) to turn on the receiver.

You can also turn on the receiver using (power) on the remote control. To turn off the receiver, press (power) again.
Setting up the Receiver using the Easy Setup
To perform initial setup of the receiver, make sure a TV is connected to the receiver (page 29). Then, switch the input of the TV to the input to which the receiver is connected.
Note
It is not possible to perform the Easy Setup procedure using the indications on the front display panel.
When you turn on the receiver for the first time or after the receiver is initialized, the Easy Setup screen appears on the TV screen. Follow the on-screen instructions to make the basic settings using and
and  .
.

If the Easy Setup screen does not appear or you want to display the Easy Setup screen manually, you can display it by pressing HOME, then select [Setup] – [Easy Setup].

What you can do with Easy Setup
By performing Easy Setup, you can complete:
1: Language selection
2: Speaker settings Check your speaker system and perform Auto Calibration according to the configuration and arrangement of your speaker system.
3: Internet settings Select the network connection method and configure settings to connect the receiver to the network.
Performing Auto Calibration (D.C.A.C. EX)
Before you perform Auto Calibration
- Disconnect the headphones.
- Remove any obstacles between the calibration microphone and the speakers.
- Auto Calibration is not available when [Bluetooth Mode] is set to [Transmitter].
- For accurate measurement, make sure the environment is quiet and free from noise.
- Set the speaker output to a setting other than ”SPK OFF.” See “Selecting the front speakers” (page 41).
- Confirm the active subwoofer setup
- Before using a subwoofer, turn on the subwoofer and turn up the volume. Turn the LEVEL to just before the mid-point.
- When a subwoofer with a crossover frequency function is connected, set the value to maximum.
- When a subwoofer with an auto standby function is connected, set it to off (deactivated).

Note
Depending on the characteristics of the subwoofer you are using, the setup distance value may be different from the actual position.
- Connect the supplied calibration microphone to CALIBRATION MIC jack. Set up the calibration microphone at your listening position.

Note
- The speakers emit very loud sound during the calibration and the volume cannot be adjusted. Be considerate of your neighbors and any children who are present.
- If the muting function has been activated before you perform Auto Calibration, the muting function will shut off automatically.
- It may not be possible to take the correct measurements or to perform Auto Calibration at all if special speakers such as dipole speakers are used.
- If the measurement fails, follow the message, then select [Retry]. For details on the error code and warning message, see “List of messages after Auto Calibration measurements” (page 57).
To cancel Auto Calibration
The Auto Calibration function will be canceled when you perform the following during the measurement process:
- Press(power).
- Press the input buttons on the remote control or turn the INPUT SELECTOR on the receiver.
- Press (muting), MUSIC or AMP MENU. Press SPEAKERS on the receiver.
- Change the volume level.
- Connect the headphones.
Selecting the front speakers

Press SPEAKERS repeatedly.
The indicators on the display panel shows which set of terminals are selected.
- SPA: Speakers connected to the SPEAKERS FRONT A terminals.
- SPB*: Speakers connected to the SPEAKERS SURROUND BACK/HEIGHT(FRONT B/ BIAMP) terminals.
- SPA+B*: Speakers connected to both the SPEAKERS FRONT A and SPEAKERS SURROUND BACK/HEIGHT(FRONT B/ BIAMP) terminals (parallel connection).
- (None): “SPK OFF” appears on the display panel. No audio signals are output from any speaker terminals.
* To select "SPB" or "SPA+B", set [Surround Back Speaker Assign] in [Speaker Settings] to [Front B].
Note
This setting is not available when headphones are connected.
Listening/Watching
Enjoying Sound and Video
Playing AV devices/Listening to FM radio
You can connect AV devices to the receiver to enjoy a wide range of content such as movies and audio.
Also, you can listen to FM broadcasts in highquality sound through the built-in tuner.
1. Turn on the device you want to play.
2. Turn on the receiver.
3. Turn the TV on, and then switch the input of the TV to the input to which the receiver is connected.
4. Press HOME.
The home menu is displayed on the TV screen.
Depending on the TV, the home menu may take some time to appear on the TV screen.

5. Press  to select [Watch] or [Listen], then press .
The menu item list appears on the TV screen.
6. Select the device you want to play and start playback.
When you select [FM TUNER], tune in to your desired station by using the buttons on the remote control according to the guide on the TV screen. For details on operation, visit the Help Guide.
7. Press  +/– to adjust the volume.
You can also use MASTER VOLUME on the receiver.
Note
Before you turn off the receiver, be sure to turn down the volume level to avoid damaging your speakers the next time you turn on the receiver.
Tip
- You can turn INPUT SELECTOR on the receiver or press the input buttons on the remote control to select the device you want.
- To turn the volume up or down quickly
- Turn the MASTER VOLUME knob quickly.
- Press and hold one of the +/– buttons. To make fine adjustments
- Turn the MASTER VOLUME knob slowly.
- Press one of the +/– buttons and release it immediately.
Setting HDMI signal format
You can select a HDMI signal format according to video signals from devices connected to the HDMI IN jacks.
1. Press HOME, then select [Setup] – [HDMI Settings] [HDMI Signal Format].
2. Select the format you want.
- [Standard format]: Selects this when you do not use high bandwidth video format.
- [Enhanced format]: Selects this when you use high bandwidth video formats such as 4K/60p 4:4:4, 4:2:2 and 4K/ 60p 4:2:0 10 bit.
Note
- For details on the high bandwidth video format, visit the Help Guide.
- When [Enhanced format] is selected, we recommend you to use a Premium High Speed HDMI Cable with Ethernet, which can support bandwidth up to 18 Gbps.
- Some devices (cable box or satellite box, Blu-ray Disc player, and DVD player) does not work well with [Enhanced format] setting. In this case, select [Standard format].
- If your TV have similar menu for high bandwidth video format, check the setting on the TV menu when you select [Enhanced format] on this receiver. For details on the TV menu setting, refer to the operating instructions of the TV.
- Since the HDMI IN VIDEO 1 jack does not support video formats such as 4K/60p 4:4:4, 4:2:2 and 4K/ 60p 4:2:0 10 bit, you cannot set the HDMI signal format.
Enjoying sound from speakers located in other rooms (Zone 2)
1. Connect the speakers located in Zone 2 (page 25).
2. Turn on the receiver.
3. For USA and Canadian models: Set the priority for speaker terminals.
Press HOME, then select [Setup] [Speaker Settings] – [SURROUND BACK/ ZONE2 Priority] – [ZONE2 Terminals].
For other models: Select a speaker pattern, and set the assignment for the speaker terminals.
- Press HOME, then select [Setup] [Speaker Settings] – [Speaker Pattern].
- Select a speaker pattern without surround back speakers, and then select [Save].
- Select [Surround Back Speaker Assign] –[Zone2].
4. Press HOME, then select [Zone Controls].
5. Set [Zone2] – [Zone2 Power] – [On].
You can also press ZONE SELECT on the receiver repeatedly to select “ZONE2 ON ?”, then press ZONE POWER on the receiver to set.
6. Select [Zone2 Input], then select the source signals you want to output.
You can also turn INPUT SELECTOR on the receiver while “2. xxxx”* appears on the display panel.
Tip
If you want to listen to the same sound as main zone in Zone 2, select [SOURCE].
7. Start playback on the selected input device.
8. Select [Zone2 Volume], then adjust the volume.
You can also turn MASTER VOLUME on the receiver while “2. xxxx”* appears on the display panel.
* “xxxx” is the input name.
To exit zone operation
Set [Zone2 Power] to [Off] in step 5.
Note
- Only audio signals from [USB], [Bluetooth] (only when [Bluetooth Mode] is set to [Receiver]), [Home Network], [Music Service List], and [FM TUNER] and audio signals input from AUDIO IN jacks located on the rear panel of the receiver are output to the Zone 2 speakers.
- External digital input from OPTICAL IN, COAXIAL IN and HDMI IN jacks cannot be output to Zone 2.
- If you set [DSD Native] in [Audio Settings] to [On], no audio signals for DSD content from [USB] or [Home Network] are output to the Zone 2 speakers.
Enjoying sound from speakers located in other rooms using another amplifier (Zone 2)
1. Connect another amplifier located in Zone 2 (page 36).
2. Turn on the receiver in main zone and the amplifier in Zone 2.
3. Set the volume control for Zone 2.
Press HOME, then select [Setup] – [Zone Settings] – [Zone2 Line Out] – [Variable] or [Fixed].
- [Variable]: The volume for the ZONE 2 OUT jacks can be changed. Select this when using another amplifier that does not have volume control.
- [Fixed]: The volume for the ZONE 2 OUT jacks is fixed. Select this when using another amplifier with variable volume control.
4. Press HOME, then select [Zone Controls] – [Zone2] – [Zone2 Power] – [On].
You can also press ZONE SELECT on the receiver repeatedly to select “ZONE 2”, then press ZONE POWER on the receiver.
5. Select [Zone2 Input], then select the source signals you want to output.
You can also turn INPUT SELECTOR on the receiver while “2. xxxx”* appears on the display panel.
Tip
If you want to listen to the same sound as main zone in zone 2, select [SOURCE].
6. Start playback on the selected input device.
7. Adjust the volume.
Adjust the volume using the amplifier in Zone 2.
If you set [Zone2 Line Out] to [Variable] in step 3, select [Zone2 Volume] then adjust the volume. You can also turn MASTER VOLUME on the receiver while “2. xxxx”* appears on the display panel.
* “xxxx” is the input name.
To exit zone operation
Set [Zone2 Power] to [Off] in step 4.
Enjoying video and sound in another room using a TV or another amplifier (HDMI zone)
1. Connect another amplifier or TV in other room (page 37).
2. Turn on the receiver in main zone, the amplifier and TV in HDMI zone.
3. Set the assignment for the HDMI OUT B/HDMI ZONE jack to [Zone].
Press HOME, then select [Setup] – [HDMI Settings] – [HDMI Out B Mode] – [Zone].
4. Press HOME, then select [Zone Controls] – [HDMI Zone] [HDMI Zone Power] – [On].
You can also press ZONE SELECT on the receiver repeatedly to select “HDMI ZONE”, then press ZONE POWER on the receiver.
5. Select [HDMI Zone Input], then select the source signals you want to output.
You can also turn INPUT SELECTOR on the receiver while “H. xxxx”* appears on the display panel.
* “xxxx” is the input name.
6. Adjust the volume using the volume control on the amplifier or TV in HDMI zone.
Tip
- You can avoid possible interference to the signals in main zone by setting [Priority] to [Main Only] in the [HDMI Settings] menu. However, if the same input is selected in HDMI zone, there will be no video or audio output from HDMI zone. For details on the setting, refer to “Setting the priority for the main zone (Priority)” in Help Guide.
- The HDMI OUT B/HDMI ZONE jack supports bandwidths up to 9 Gbps if [HDMI Out B Mode] is set to [Zone] in the [HDMI Settings] menu.
To exit zone operation
Set [HDMI Zone Power] to [Off] in step 4.
Available inputs for each zone
Available inputs vary depending on the zone you have selected. Select the input you want on TV screen or display panel.
For details on the available inputs, refer to “Available inputs for each zone” in Help Guide.
For main zone
You can select all input source from every device connected to the receiver in the main zone.
For Zone 2
You cannot watch video in Zone 2. Sound is not available from devices connected to the HDMI IN jacks.
Note
- Signals from the HDMI IN, OPTICAL IN and COAXIAL IN jacks cannot be output to the speakers in Zone 2.
- You can select either [USB], [Home Network], [Music Service List] or [Bluetooth] from the main zone and Zone 2. Priority is given to the choice which has most recently been selected, even if a different choice has already been selected in one of the zones.
- If you connect BLUETOOTH headphones to the main zone while a connected device is playing and the current input in Zone 2 is [USB], [Home Network] or [Music Service List], the input for Zone 2 will change to [SOURCE]. In this case, only FM tuner and analog audio signal are output to Zone 2.
- If you connect BLUETOOTH headphones to the main zone while a connected device is playing, the BLUETOOTH headphones will be disconnected if you select [USB], [Home Network] or [Music Service List] in Zone 2.
- If you set [DSD Native] in [Audio Settings] to [On], no audio signals for DSD content from [USB] or [Home Network] are output to the Zone 2 speakers.
For HDMI zone
You can only watch video or listen to audio input from the HDMI IN jacks (except for VIDEO 1).
Selectable sound fields and their effects
|
Sound field
|
Display panel
|
Effects of the sound field
|
|
2CH/ MULTI
|
2ch Stereo
|
2CH STEREO
|
Plays back 2-channel audio signals without adding any surround effects. Monaural and multi-channel audio signals are output after being converted into a 2-channel signal.
This sound field is best suited for playing back audio signals as they are from two front speakers only, without adding any virtual surround effects.
The sound is output from the front left/right speakers only. There is no sound from the subwoofer.
|
|
Multi Ch Stereo
|
MULTI ST.
|
Outputs sound from all connected speakers.
When 2-channel or monaural audio signals are input, the receiver outputs sound from all speakers without adding any surround effects.
When multi-channel audio signals are input, sound may not be output from certain speakers depending on the speaker settings or playback content.
|
|
Direct
|
DIRECT
|
Plays back all audio signals without adding any surround effects.
|
|
A.F.D.
(Auto Format Decoding)
|
A.F.D.
|
Decodes and plays back audio signals using the optimal processing method according to the audio signal input.
|
|
MOVIE
|
Dolby Surround
|
DOLBY SURR
|
Dolby Surround upmixer expands traditional audio content for playback through any multi-channel speaker configuration, including height speakers.
This upmixer is a new and enhanced replacement for the popular Dolby Pro Logic II technology.
|
|
Neural:X
|
NEURAL:X
|
Neural:X remaps stereo, 5.1, and 7.1 movies and music to match your speaker layout.
|
|
Front Surround
|
FRONT SUR.
|
Reproduces full surround effects with only two front speakers using Sony's virtual signal processing technology.
|
|
MUSIC
|
Audio Enhancer
|
A. ENHANCER
|
Upscales existing sound sources to near high-resolution sound quality with DSEE HX (Digital Sound Enhancement Engine HX). This sound field makes you feel as if you are really at the recording studio or concert. DSEE HX only works on 2-channel sound sources with a sampling frequency of 44.1 kHz or 48 kHz input from the following: USB Home Network Music Service List Bluetooth However, it does not work during Wireless Multi-Room playback.
|
|
Headphones
|
Headphone(2ch)
|
HP 2CH
|
This mode is selected automatically if you use headphones (Other sound fields cannot be selected).
Plays back 2-channel audio signals without adding any surround effects. Sound from monaural and multi-channel audio signals are output after being converted into a 2- channel signal.
|
Note
- Depending on the audio format, if you select [Direct] and play a 5.1ch source when surround speakers and two surround back speakers are connected, the same audio as that from surround speakers will be output from surround back speakers, similar to that of a 7.1ch surround system. The sound level of surround and surround back speakers are adjusted automatically for optimum balance.
- Dolby Atmos is decoded as Dolby TrueHD or Dolby Digital Plus when a sound field other than [Multi Ch Stereo], [A.F.D.],or [Dolby Surround] is selected.
Network functions
What you can do with network features
You can enjoy playing back audio content in high-quality audio from a computer or network HDD, or iPhone/iPad/iPod or other smartphone or tablet connected to your home network either wired or wirelessly.
You can also enjoy music services such as internet radio by connecting internet.
You can also control this receiver from a smartphone by using the compatible apps.

This receiver supports AirPlay. You can enjoy audio content from an iPhone/iPad/iPod or your iTunes Library.
For details, refer to “Enjoying audio content from iTunes or an iPhone/iPad/iPod via the network (AirPlay)” in Help Guide.
You can play back audio content stored in various formats on a network location (computer, network HDD, etc.) via your home network.
For details, refer to “Enjoying content stored on a server on the home network (DLNA)” in Help Guide.
You can control your receiver wirelessly by installing the “SongPal” app on your smartphone or tablet device.
This feature is recommended when using the content playback feature, multi-zone features or SongPal Link feature of the receiver.
For details, refer to “Controlling the receiver using a smartphone or tablet device (SongPal)” in Help Guide.
You can control your receiver wirelessly by installing the Video & TV SideView app on your smartphone or tablet device. We highly recommend this app for customers who use a TV manufactured by Sony with the receiver. For details, refer to “Registering Video & TV SideView device to the receiver” in Help Guide.
With the receiver connected to the Internet, you can listen to music from a variety of music services.
For details, refer to “Enjoying music services offered on the Internet” in Help Guide.
Listening with BLUETOOTH headphones/ speakers
1. Press BLUETOOTH RX/TX repeatedly to select “BT TX.”
The BLUETOOTH mode switches to TX (transmitter).

2. Turn on the headphones/ speakers and set them to pairing mode.
3. Hold down CONNECTION PAIRING BLUETOOTH on the receiver for about 2 seconds.
“SEARCHING” flashes on the display panel for about 10 seconds, and then the name of detected BLUETOOTH device appears.

* “XXXXXX” represents the name of a detected BLUETOOTH device.
4. Press  to select the name of the headphones/speakers, and then press .
After “CONNECTING” flashes and the headphone name or speaker name is displayed, the BLUETOOTH connection is complete.

* “XXXXXX” represents the name of a detected BLUETOOTH device.
5. Press one of the input buttons to select the input you want.
The sound is output from the BLUETOOTH headphones/speakers. No sound is output from the receiver.
6. Adjust the volume of the BLUETOOTH headphones/ speakers.
Volume control on the receiver and remote control only works for the BLUETOOTH headphones/speakers.
Note
- The most recently connected BLUETOOTH device can be reconnected simply by performing step 1 above.
- The one-touch connection (NFC) cannot be used in TX (transmitter) mode.
- When “NOT. USE” appears on the display panel, you cannot switch BLUETOOTH mode. Check the following:
- BLUETOOTH function is in use
- [Bluetooth Mode] is set to [Off]
Tip
You can also switch the BLUETOOTH mode to TX (transmitter) mode by setting [Bluetooth Mode] to [Transmitter] in [Bluetooth Settings]. Then select the name of the headphones or speakers from [Device List] in [Bluetooth Settings]. If you cannot find your device name in the list, select [Scan].
Troubleshooting
If a problem occurs while operating the receiver, check the following to resolve the problem before consulting your nearest Sony dealer.
- Check to see if the problem is listed in this “Troubleshooting” section.
- Visit the Help Guide for detailed examples. You can search by a keyword using the online troubleshooting guide.
For the customers in Europe
For the customers in other areas
If the problem persists after doing all of the above, consult your nearest Sony dealer.
General
The receiver is turned off automatically.
- If [Auto Standby] is set to [On], set it to [Off].
- The sleep timer function was activated.
- “PROTECTOR” was activated.
The indicator on the display panel turns off.
- If the PURE DIRECT indicator on the front panel lights up, press PURE DIRECT to turn off this function.
- Press DIMMER on the receiver to adjust the brightness of the display panel.
Video
No image appears on the TV screen.
- Try pressing the input button on the remote control or turning INPUT SELECTOR on the receiver to select the input to which you want to listen.
- Set your TV to the appropriate input mode.
- Move your audio device away from the TV.
- Make sure that cables are correctly and securely connected to devices.
- Disconnect the HDMI cable from the receiver and TV and then reconnect the cable.
- Set [HDMI Signal Format] of the selected input to [Standard format] in the [HDMI Settings] menu.
- Some playback devices need to be set up.
- Refer to the operating instructions supplied with each device.
- Be sure to use a High Speed HDMI Cable with Ethernet when you view images or listen to sound, especially for 1080p, Deep Color (Deep Colour), 4K or 3D transmission. Premium High Speed HDMI Cable with Ethernet, which can support bandwidths up to 18 Gbps, is required for 4K/60p 4:4:4, 4:2:2 and 4K/60p 4:2:0 10 bit, etc.
- The output of the HDMI video signals of the receiver may be set to “HDMI OFF.” In this case, set to “HDMI A”, “HDMI B”, or “HDMI A + B” by pressing HDMI OUT on the remote control.
- If you want to play HDCP 2.2 content, connect the receiver to an HDMI input jack of a TV that is compatible with HDCP 2.2.
No 3D content appears on the TV screen.
- Depending on the TV or the video device, 3D content may not be displayed. For details on the 3D HDMI video format supported by the receiver, visit the Help Guide.
- Be sure to use a High Speed HDMI Cable with Ethernet.
No 4K content appears on the TV screen.
- Depending on the TV or the video device, 4K content may not be displayed. Check the video capability and settings of your TV and video device.
- Be sure to use a High Speed HDMI Cable with Ethernet.
- When you use high bandwidth video formats such as 4K/60p 4:4:4, 4:2:2 and 4K/60p 4:2:0 10 bit, a Premium High Speed HDMI Cable with Ethernet, which can support bandwidth up to 18 Gbps, is required.
- If your TV have similar menu for high bandwidth video format, check the setting on the TV menu when you select [Enhanced format] (page 42) on this receiver. For details on the TV menu setting, refer to the operating instructions of the TV.
- Be sure to connect the receiver to an HDMI input jack of a TV or video device that is supporting 4K. You have to connect an HDMI cable to an HDMI jack that supports HDCP 2.2 when you use a playback device for 4K resolution video content, etc.
The home menu does not appear on the TV screen.
- The home menu can only be used when you connect the TV to the HDMI OUT jack on the receiver.
- When you connect the TV to HDMI OUT B/ HDMI ZONE jack, be sure to set [HDMI Out B Mode] to [Main] in the [HDMI Settings] menu.
- Press HOME to display the home menu.
- Check that the TV is connected correctly.
- Disconnect the HDMI cable from the receiver and TV and then reconnect the cable.
- The home menu may take some time to appear on the TV screen depending on the TV.
HDR (High Dynamic Range) images cannot be displayed in HDR mode.
- Depending on the TV or video equipment, HDR images may not be displayed in HDR mode. Check the video capability and setting of your TV or video equipment.
- Some video equipment may not output HDR contents in HDR mode if [HDMI Signal Format] is set to [Standard format], even if both TV and video equipment support HDR and 18 Gbps band width. In this case set [HDMI Signal Format] of selected input to [Enhanced format] in the [HDMI Settings] menu. When you select [Enhanced format], use Premium High Speed HDMI cables with Ethernet which can support bandwidth up to 18 Gbps.
Audio
No sound or only a very low level of sound is heard, no matter which device is selected.
- Check that all connecting cables are inserted to their input/output jacks on the receiver, speakers and the devices.
- Check that the receiver and all devices are turned on.
- Check that MASTER VOLUME on the receiver is not set to “VOL MIN.”
- Press SPEAKERS on the receiver to select a setting other than "SPK OFF" (page 41).
- Check that headphones are not connected to the receiver.
- Press (muting) to cancel the muting function.
- Try pressing the input button on the remote control or turning INPUT SELECTOR on the receiver to select the input to which you want to listen.
- If you want to listen to sound from the TV speaker, set [Audio Out] to [TV + AMP] in the [HDMI Settings] menu. If you cannot play multi-channel audio source, set [AMP]. However, the sound will not be output through the TV speaker.
- Sound may be interrupted when the sampling frequency, number of channels or audio format of audio output signals from the playback device is switched.
- If you are listening with BLUETOOTH headphones, check that the [Bluetooth Mode] is set to [Transmitter].
- Sound for the center channel is not output if you set the speaker pattern to a setting that does not have a center speaker or when [DSD Native] is set to [On] and a DSD multi-channel source is being played back.
- Sound for surround left/right channels is not output if you set the speaker pattern to a setting that does not have surround speakers or when [DSD Native] is set to [On] and a DSD multi-channel source is being played back.
- No sound from [USB], [Bluetooth] (only when [Bluetooth Mode] is set to [Receiver]), [Home Network], and [Music Service List] is output to the Zone 2 speakers if you set [DSD Native] in [Audio Settings] to [On].
When a TV is connected to the receiver via an HDMI OUT A (TV) jack that supports the eARC or ARC function, sound from the TV is not output from the speakers connected to the receiver.
There is a time gap between the visual display on the TV and the audio output from the speaker connected to the receiver.
- Change the [A/V Sync] settings in the [Audio Settings] menu.
- Adjust the A/V Sync settings on the TV. For details, refer to the operating instructions of the TV.
The surround effect cannot be obtained.
- Be sure to select the optimal sound field for the content. For details on the sound fields, see “Selectable sound fields and their effects” (page 49).
- [Dolby Surround] and [Neural:X] do not work when the speaker pattern is set to [2.0] or [2.1].
The sound lags behind the picture.
When you listen to sound from one of the following sources and watch video using the Wireless Multi-Room function, the sound is delayed in order to synchronize it with the sound output from the speakers in another location.
Devices connected to the HDMI IN, OPTICAL IN, COAXIAL IN, or AUDIO IN jacks
TVs compatible with the eARC or ARC function and connected to the HDMI OUT A (TV) jack
If the sound lag bothers you, deactivate the synchronization with speakers in another location* by the following procedure.
* If you deactivate the synchronization with other speakers, the sound and video output from the receiver will be synchronized, but the sound output from speakers in another location will be delayed.
If sound is input from:
1. Press OPTIONS. The options menu appears.
2. Select [Multi-room Sync] - [Off].
If sound is input from :
1. Press AMP MENU.
The menu is displayed on the display panel of the receiver.
2. Press and to select “<AUDIO>” (Audio Settings) - “M/R SYNC” - “OFF.”
Network connection
Cannot connect to the network using WPS via a wireless LAN connection.
You cannot connect to a network using [Wi-Fi Protected Setup TM (WPS)] if your access point is set to WEP. Set up your network after searching the access point using the access point scan.
Cannot connect to the network.
- Check that the LAN cable is connected to the receiver when you want to connect the receiver to the network via a wired LAN connection.
- Check the network information. If the connection failed, set up the network connection again.
- If the receiver is connected through a wireless network, move the receiver and the wireless LAN router/access point closer to each other and perform the setup again.
- Make sure that you use a wireless LAN router/access point.
- Make sure that the wireless LAN router/ access point is turned on.
- Check the settings of the wireless LAN router/access point and perform the setup again. For details on the settings of devices, refer to the operating instructions of the devices.
- Wireless networks are influenced by electromagnetic radiation emitted by microwave ovens and other devices. Move the receiver away from these devices.
Cannot select the [Network Settings] menu.
Wait for a few moments after you have turned on the receiver, and then select the [Network Settings] menu again.
Error messages
"PROTECTOR" appears on the display panel.
The receiver will automatically turn off after a few seconds. Check the followings:
- There may be an electrical surge or power failure. Unplug the AC power cord (mains lead) and then plug in the cord again after 30 minutes.
- The receiver is covered and the ventilation holes are blocked. Remove the object covering the ventilation holes of the receiver.
- The impedance of the connected speakers is below the rated impedance range indicated on the back panel of the receiver. Reduce the volume level.
- Unplug the AC power cord (mains lead) and let the receiver cool down for 30 minutes while performing the following troubleshooting:
- Disconnect all of the speakers and subwoofer.
- Check that the speaker wires are tightly twisted on both ends.
- Connect the front speaker first, increase the volume level and operate the receiver for at least 30 minutes until it completely warms up. Then, connect each additional speaker one by one and test each additional speaker until you detect which speaker is causing the protection error.
After checking the above items and fixing any problems, plug in the AC power cord (mains lead) and turn on the receiver. If the problem persists, consult your nearest Sony dealer.
[Overload occurred.] appears on the TV screen.
An over-current from the (USB) port was detected. Disconnect the USB device as prompted in the warning message and close the message.
List of messages after Auto Calibration measurements
Code 30
Headphones are connected. Please disconnect the headphones and retry calibration.
Code 31
The front speakers are not selected correctly. Select the front speakers correctly using SPEAKERS on the receiver and perform Auto Calibration again while sound is being output. For details on selecting the front speakers, see “Selecting the front speakers” (page 41).
Code 32, Code 33
- Sound is not detected from one or both of the speakers.
- Sound is not detected from one or both of the front speakers. Please ensure that the calibration microphone is not damaged, and is connected to the CALIBRATION MIC jack on the front panel of the receiver, and that all speakers are properly connected.
- Sound is not detected from either the left or right surround speakers. Please ensure that the surround speakers are connected to the SURROUND terminals.
- The surround back speaker is connected to the SURROUND BACK/HEIGHT R terminal. When using only one surround back speaker, please connect it to the SURROUND BACK/HEIGHT L terminals.
- Only one height speaker is detected. Please ensure that both the height speakers are connected to the SURROUND BACK/HEIGHT terminals.
- Sound is not detected from any speakers, please ensure the calibration microphone is not damaged and is connected to the CALIBRATION MIC jack on the front panel of the receiver.
Code 34
Speakers are not placed in the proper position or the calibration microphone may be reversed.
Code 35
The speaker pattern configuration does not match calibration result. Please check the speaker pattern and connection.
Warning 40
The measurement has been completed, but the noise level is high. For best results, calibrate in as quiet a place as possible.
Warning 41, Warning 42
The input signal from the calibration microphone is too large. The microphone may be too close to the speakers. Please place the calibration microphone at your desired listening position. Please note, when using the receiver as a pre-amplifier, this message may appear by mistake. Please disregard.
Warning 43
The distance and phase of the subwoofer cannot be detected. Please check the subwoofer and re-calibrate in a quiet environment.
Warning 44
The measurement has been completed, but the speaker may need to be re-positioned. Please see "Installing Speakers" in the Help Guide.