Loading ...

809960 & 820037 - Wolf 27'' Microwave Trim Kit
Installation Instructions For MWCTRIM27
815099 / Rev B / September 2011
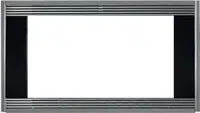
Top Duct
Assembly
Bottom Duct
Assembly
Frame Assy
Figure 4. Placing Microwave in Cabinet Cutout
Page 2 of 2
5. Place the microwave oven adjacent to the wall or
cabinet opening. Plug power cord into outlet.
6. Carefully guide the completed assembly between
the bottom cleats and push the assembly back.
Slide the assembly approximately 1/4'' to the right
of the center of cabinet opening to allow proper
cleanrance for microwave door to open and close.
When both top and bottom ducts are assembled
and correctly placed, their flanges will be tight
against the top and bottom outer edge of opening
(See Figure 4).
7. Secure bottom duct assembly using the two #8-15
x 1/2'' screws.
NOTE: Verify that the power cord is not pinched
between the oven and the wall.
8. Attach the frame assembly directly to the cabinet
frame, using four #6-18 x 1'' wood screws. The
inside edges of side frames should coincide with
the edges of the cabinet cutout (See Figure 5).
NOTE: Always be sure to pre-drill a pilot hole
before installing screws to avoid damage to cabi-
net or trim kit hardware.
NOTE: The flanged side of the frame assembly
should be placed on the left side of the cabinet
opening.
9. Adhere the decorative trim panels to the side
brackets so that they are tight to the side and bot-
tom of the frame (See Figure 6).
Decorative
Trim
Figure 5. Attaching Decorative Trim Panels
Decorative
Trim
(Sits tight to
side and bottom
of frame)
Figure 6. Decorative Trim / Frame Assembly