Loading ...
Loading ...
Loading ...
49-5000406 Rev. 7
Instructions d’installation
INSTRUCTIONS D’INSTALLATION
A.
EXIGENCES ET DÉTERMINATION DE L’EMPLACEMENT D’INSTALLATION SUR LE TOIT
Les climatiseurs couverts par ce manuel sont conçus pour
être installés sur le toit d’un véhicule
L’installation de ce climatiseur doit être conforme aux normes
HWGHOD1)3$
3RXUTXHO¶LQVWDOODWLRQVRLWDGpTXDWHXQHRXYHUWXUHFDUUpH
GHñ»[ñ»SRï»SRGDQVOHWRLWHWOHSODIRQGGX
véhicule récréatif.
,OGRLW\DYRLUGHjSRHQWUHOHSODIRQGHWOHWRLWGXYpKLFXOH
récréatif.
Les climatiseurs couverts par ce manuel sont conçus pour être
installés sur des ouvertures d’aération existantes sur un toit.
5HVSHFWH]OHVGLUHFWLYHVVXLYDQWHVVLDXFXQHRXYHUWXUH
d’aération n’est disponible sur le toit :
L’appareil doit être installé au centre de part et d’autre sur le
toit du véhicule récréatif.
/¶DSSDUHLOGRLWrWUHLQVWDOOpVXUXQHSDUWLHGXWRLWpWDQWj
niveau avec le toit du véhicule récréatif si ce dernier est
VWDWLRQQpVXUXQHVXUIDFHSODQHHWjQLYHDX
Le point d’installation sur le toit ne doit pas avoir une pente
G¶LQFOLQDLVRQGHSOXVGHGHJUpVYHUVO¶DYDQWRXO¶DUULqUHGX
véhicule récréatif.
Illustration 1 :
Unité extérieure GE Appliances
Illustration 2 :
Unité extérieure GE Profile
Illustration 3 : Unité intérieure sans conduits GE
Appliances (RARMN)
Illustration 4 :
Unité intérieure à conduits GE Appliances
(RAREN)
Illustration 5 :
Unité intérieure sans conduits GE Profile
(RPREN)
Illustration 6 : Unité intérieure à conduits GE Profile
(RPRED)
AVERTISSEMENT
RISQUE D’ÉLECTROCUTION
Des blessures graves ou mortelles peuvent survenir si ces instructions ne sont pas respectées.
'pEUDQFKH]ODVRXUFHG¶DOLPHQWDWLRQGH9&$DYDQWGHFRPPHQFHUO¶LQVWDOODWLRQRXOHVUpSDUDWLRQV
$VVXUH]YRXVTXHFHSURGXLWHVWPLVjODWHUUHFRQIRUPpPHQWDX[FRGHVHQYLJXHXU
• Installez toutes les pièces et les panneaux avant de mettre l’appareil en marche.
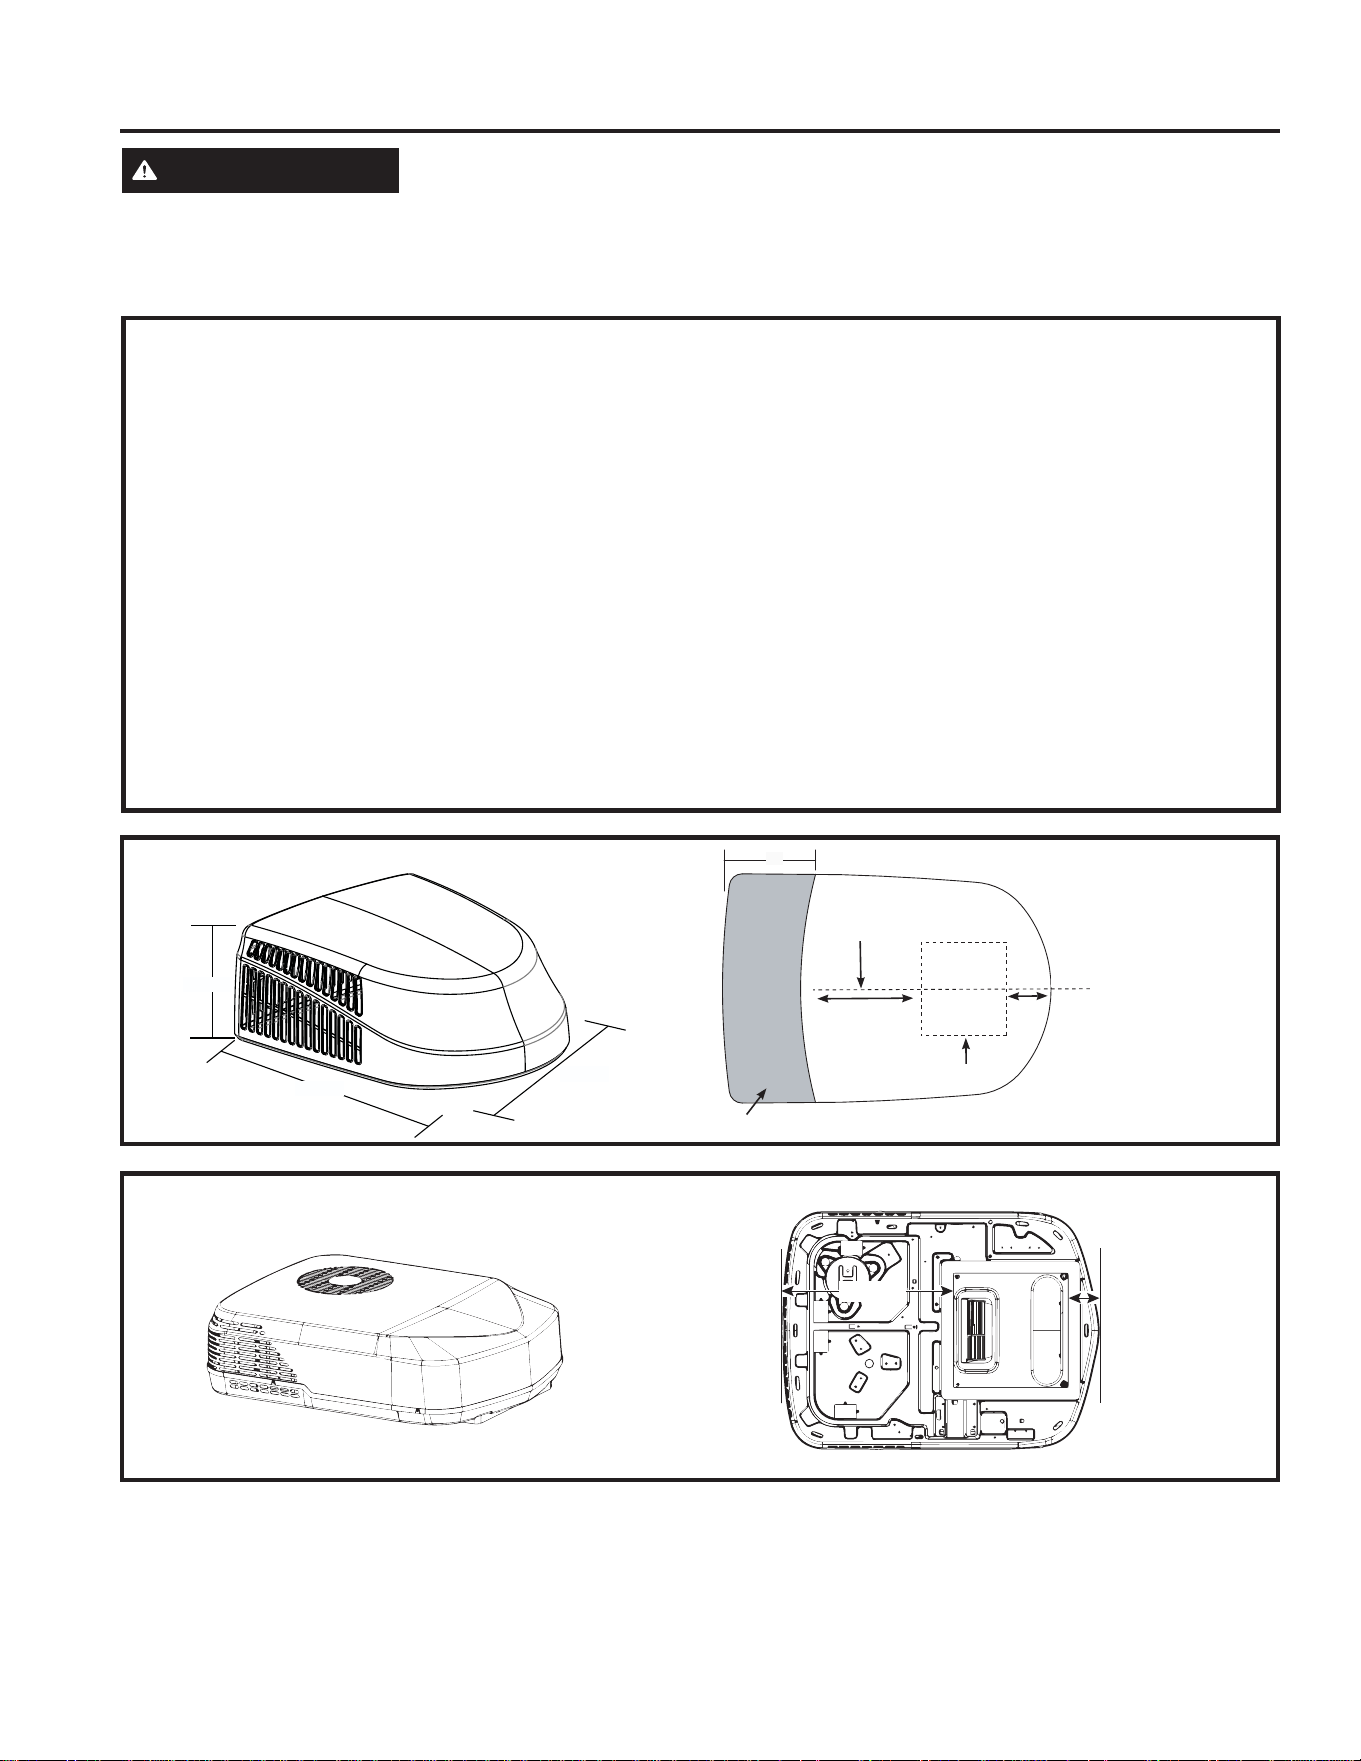
Illustration 1: Unité extérieure GE Appliances:
Illustration 2: Unité extérieure GE Profile:
32 - 7/8”
27 - 3/4”
13 - 7/8”
18”
Center Line of unit
Keep at least 18” free of obstructions at rear of unit.
Roof opening
Front
13 - 3/4”
4 - 3/4”
21.238”
3.834”
Ligne centrale de l’unité
Devant
Ouverture de toit
*DUGH]DXPRLQV´OLEUHVG¶REVWUXFWLRQVjO¶DUULqUHGHO¶XQLWp
Loading ...
Loading ...
Loading ...