Loading ...
Loading ...
Loading ...
15
CUSTOM/W
OOD
HOOD
STANDARD LIN
ER
FOR INSTALLATION WITH LINERS
When building a custom hood,
always follow all applicable codes and
standards.
WARNING
!
The Inca HC can be used with
custom cabinetry and hoods 30"
wide and up. Choose either a
custom liner or our Standard Liner
designed for 30" and 36" wide
installations.
Liners create a perfectly-sealed,
QRQFRPEXVWLEOH¿QLVKIRUWKH
underside of your custom/wood
hood.
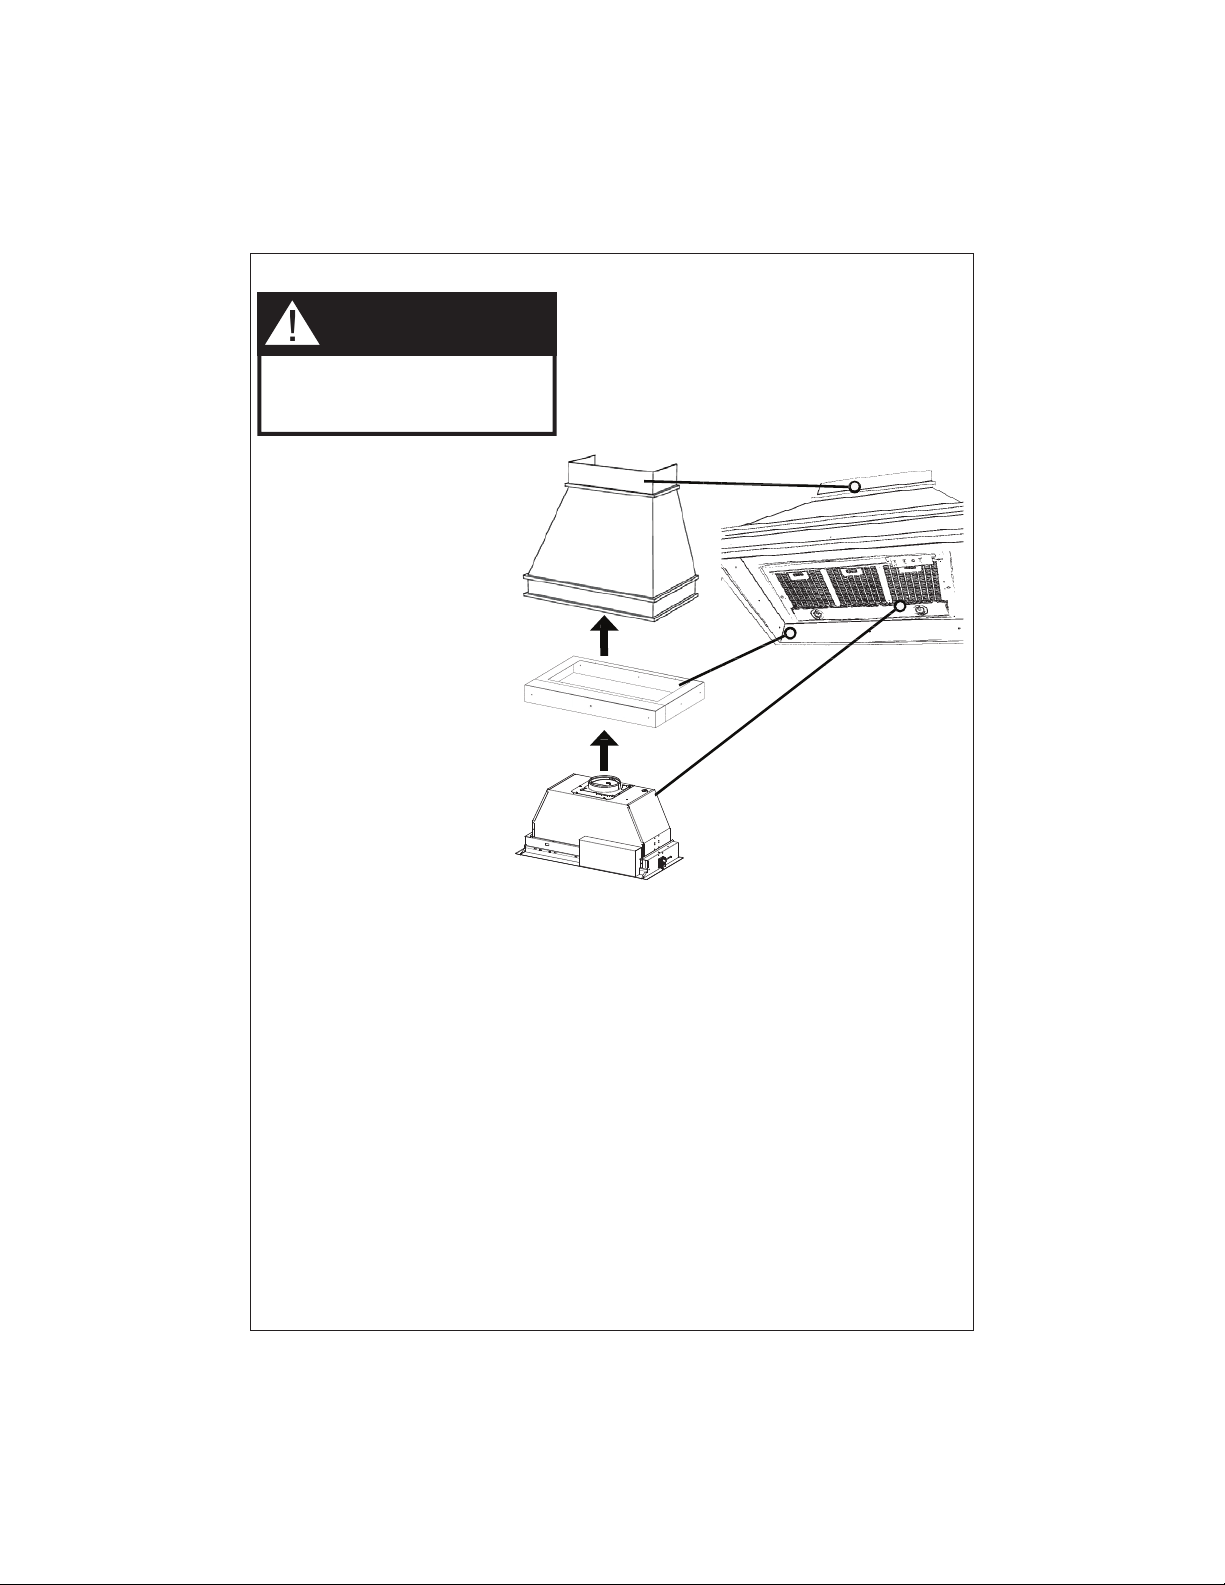
The Standard Liners are made
up of two sections: a larger, rear
section (pre-cut out for insertion of
the Inca Smart) and a front section
for a total adjustable depth between
16" and 17 7/8".
!!! IMPORTANT NOTE: YOU
MUST REMOVE THE ADDITIONAL
PERFORATED SECTION
AROUND THE PRE-CUT-
OUT WHEN INSTALLING THE
STANDARD LINER WITH THE
INCA HC SS MODEL.
Consider the shape, size, and
weight of the Inca HC and Liner
WRGHWHUPLQHWKHFRQ¿JXUDWLRQ
of the custom/wood hood.
1. The custom/wood hood must have a sturdy base
(3/4" plywood recommended) to accomodate the cut-
out for the Inca HC. The base must be recessed to ac-
comodate the height of the Liner (see LINER DIMEN-
SIONS on Page 13). The Liner attaches to the
bottom of the base using screws appropriate for the
size and material of your custom/ wood hood. The Inca
HC inserts into the cut-out in the Liner and base.
2. Position the rear section of the Liner so that it abuts
the back edge of your custom/ wood hood. Using a
pen, trace the outline of the pre-cut out. Remove the
Liner and proceed to MAKE YOUR CUT-OUTS. Install
both sections of the Liner and proceed to INSTALL
THE Range hood.
Loading ...
Loading ...
Loading ...