User manual Television
Connections and setup
Connecting an antenna, cable, or satellite box
If you are using an antenna, CATV cable without a set-top box, or a cable or satellite box that has only an antenna output, connect a 75-ohm coaxial cable (not provided) from the device to the ANT/CABLE input on the TV.
Tip: If you are using an antenna with a 300 ohm twin-lead cable, you need to use a 300-to-75 ohm adapter (not provided) to adapt the twin-lead cable to a connection that is compatible with the TV’s antenna input.
Tip: If you receive your TV stations through a set top box from a cable or satellite TV provider, connect it to the TV using the best connection method available. From most to least desirable:

- HDMI® input – Digital HD and SD video
- AV input – analog SD video
- Antenna input – analog SD video using NTSC
Connecting external equipment with a composite AV video cable
If the best connection available on your device is AV or composite video output, connect it to the TV using a composite AV cable (not provided). Composite AV cables typically have three RCA-type plugs on each end, color coded as follows:
- Yellow – Video
- Red – Audio, right channel
- White or black – Audio, left channel
Connect each plug to the corresponding connector on the device and on the TV.
Note: Select models have an AV Input that looks like a headphone jack. Use the breakout cable (included) to adapt this input to the three RCA-type plugs on your composite cable.
Connecting external equipment with an HDMI® cable

If possible, connect your devices using HDMI® cables (not provided).
They help to provide the best video quality and also carry audio signals, so that only one cable is needed. For better picture quality, we recommend that you use cables designated as High Speed HDMI® Cables.
Tip: You might need to configure the device to send its signal through its HDMI® connector.
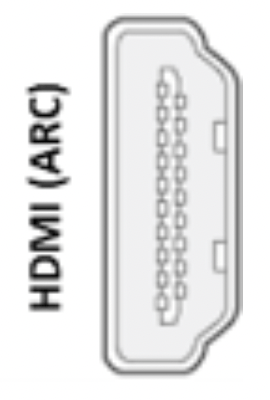
The connector labeled HDMI IN (ARC) has the additional ability to use the audio return channel to send digital audio to a receiver or sound bar, as explained in Connecting an AV receiver or digital sound bar.
TCL Roku TV remote
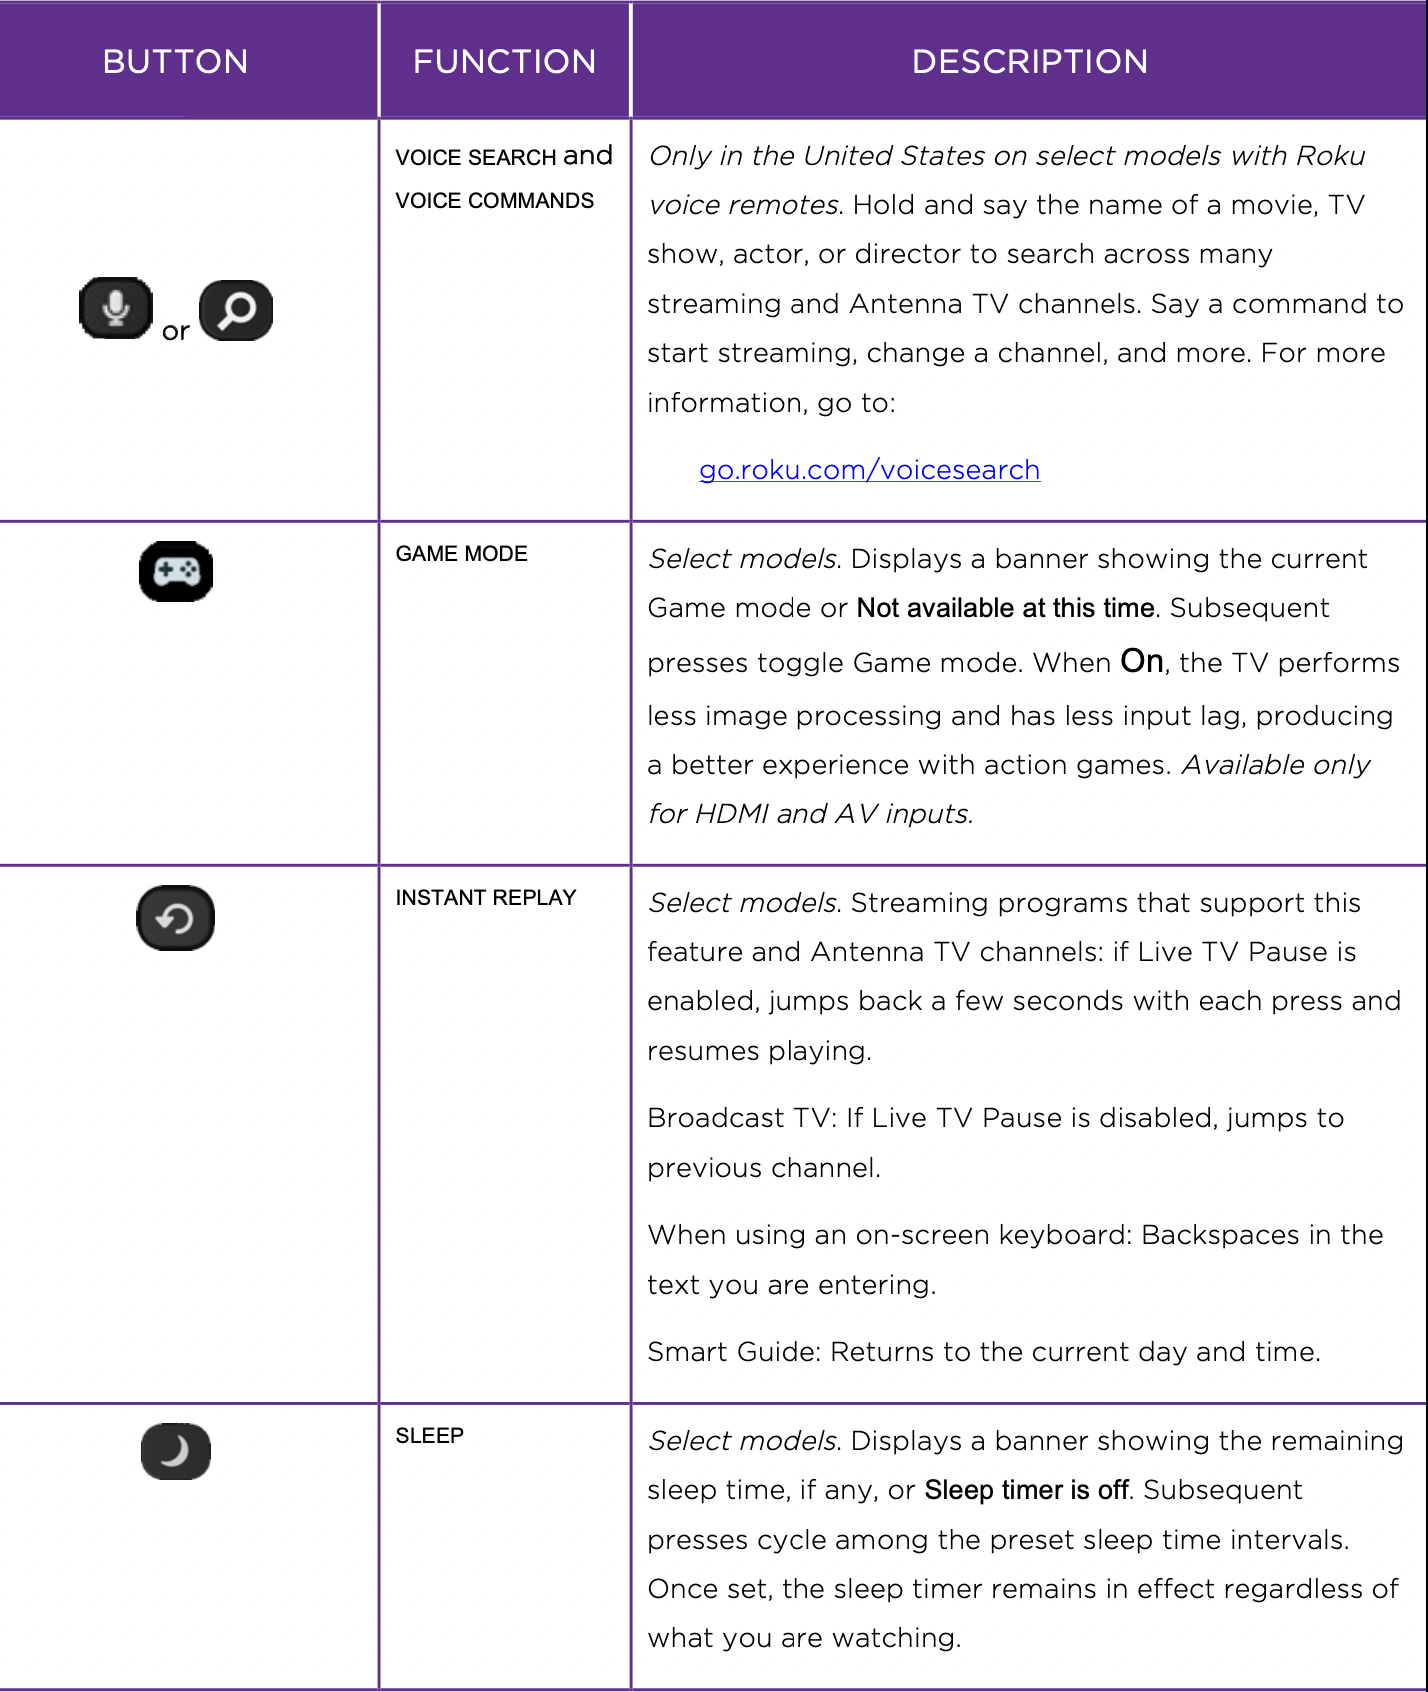
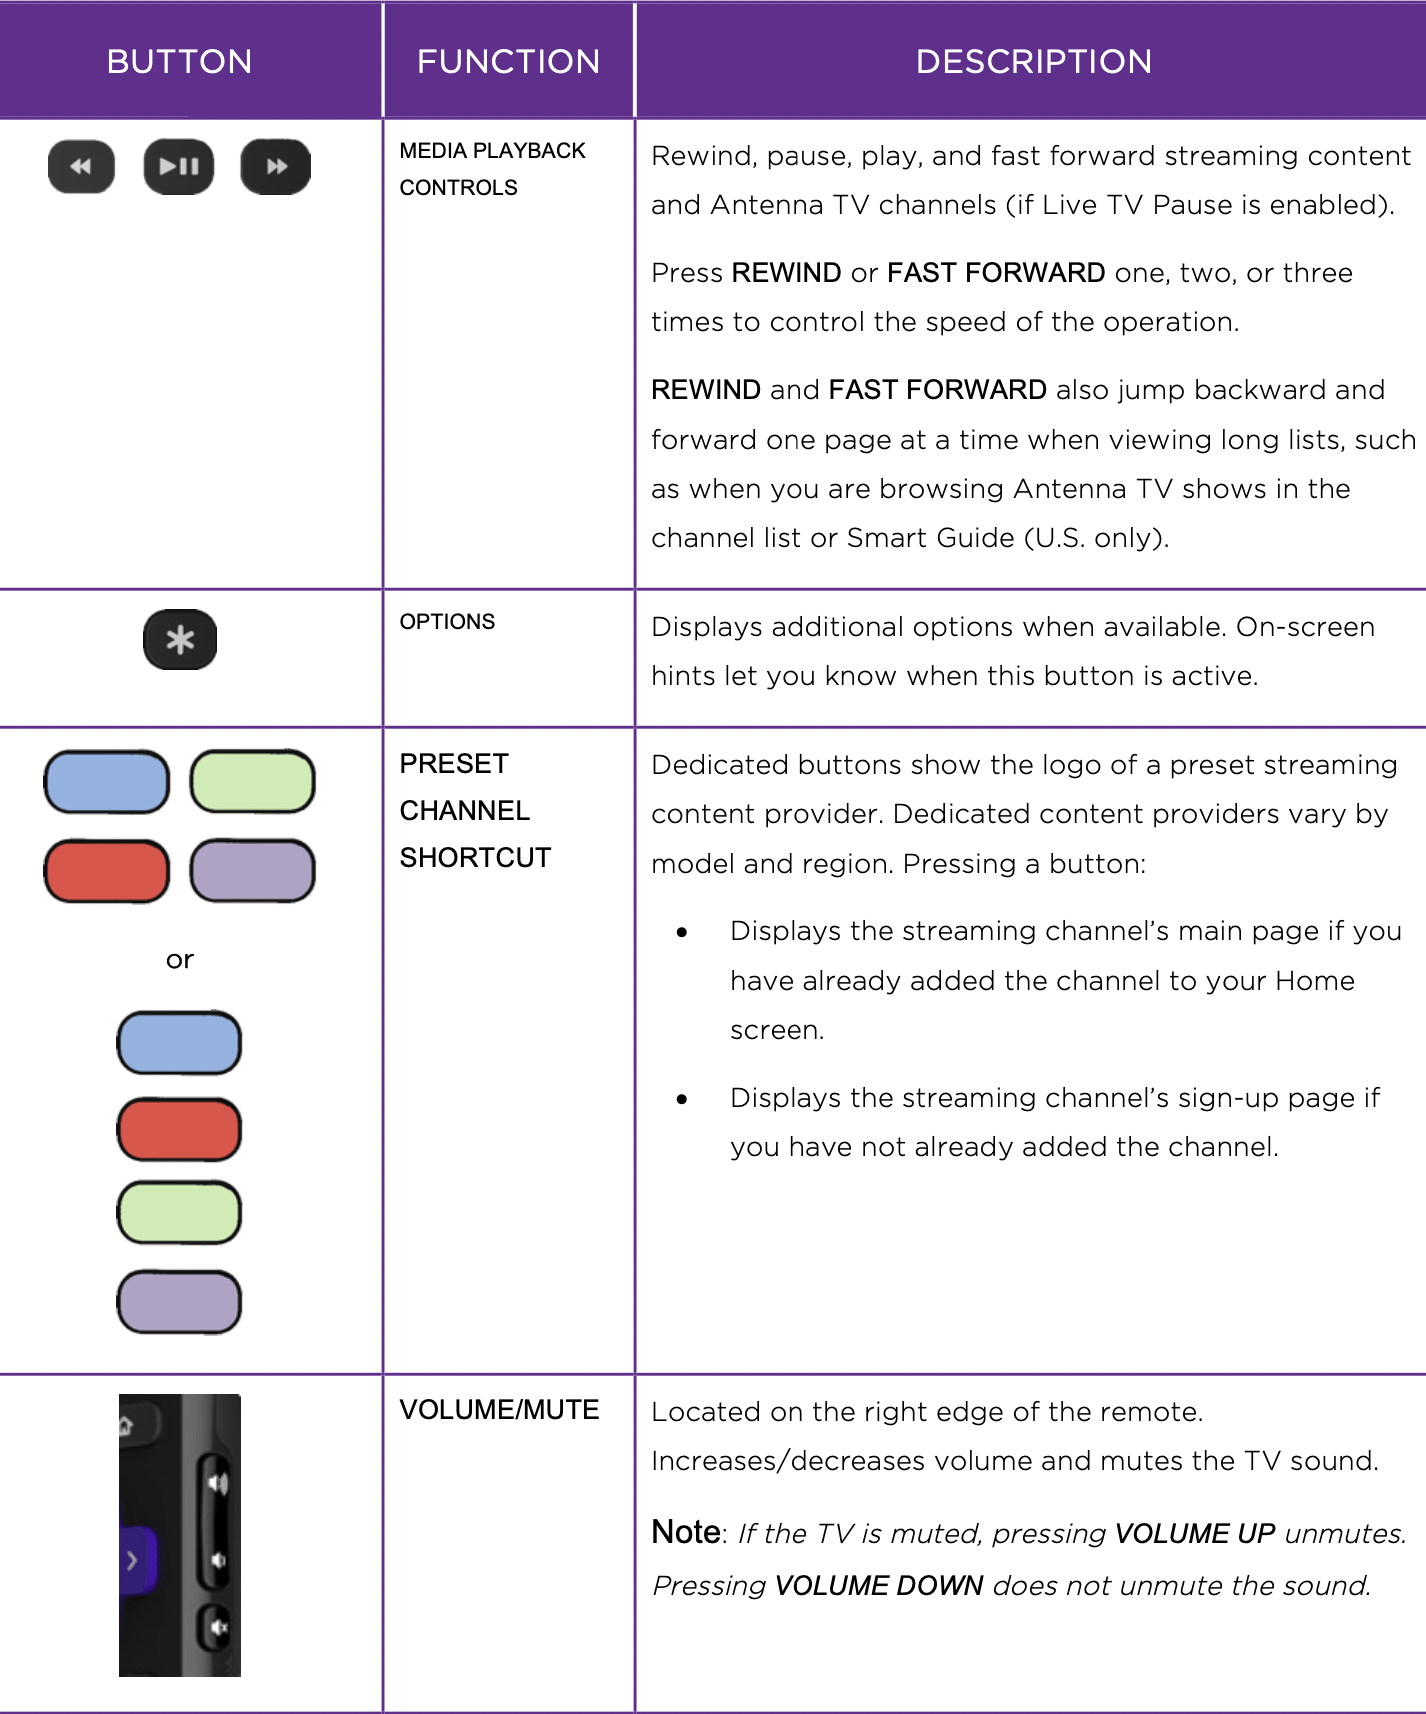
Use the following information to identify the buttons on your Roku remote.
Note: Certain remote buttons and features vary by model. Your remote might not have all buttons or features listed.
- If your remote has a microphone button
 just below the purple pad, then you have a Roku Voice Remote.
 - If your remote has a headphone jack on its left edge, then you have a Roku Enhanced Voice Remote.
The Roku voice remotes have additional capabilities as described in the following table.

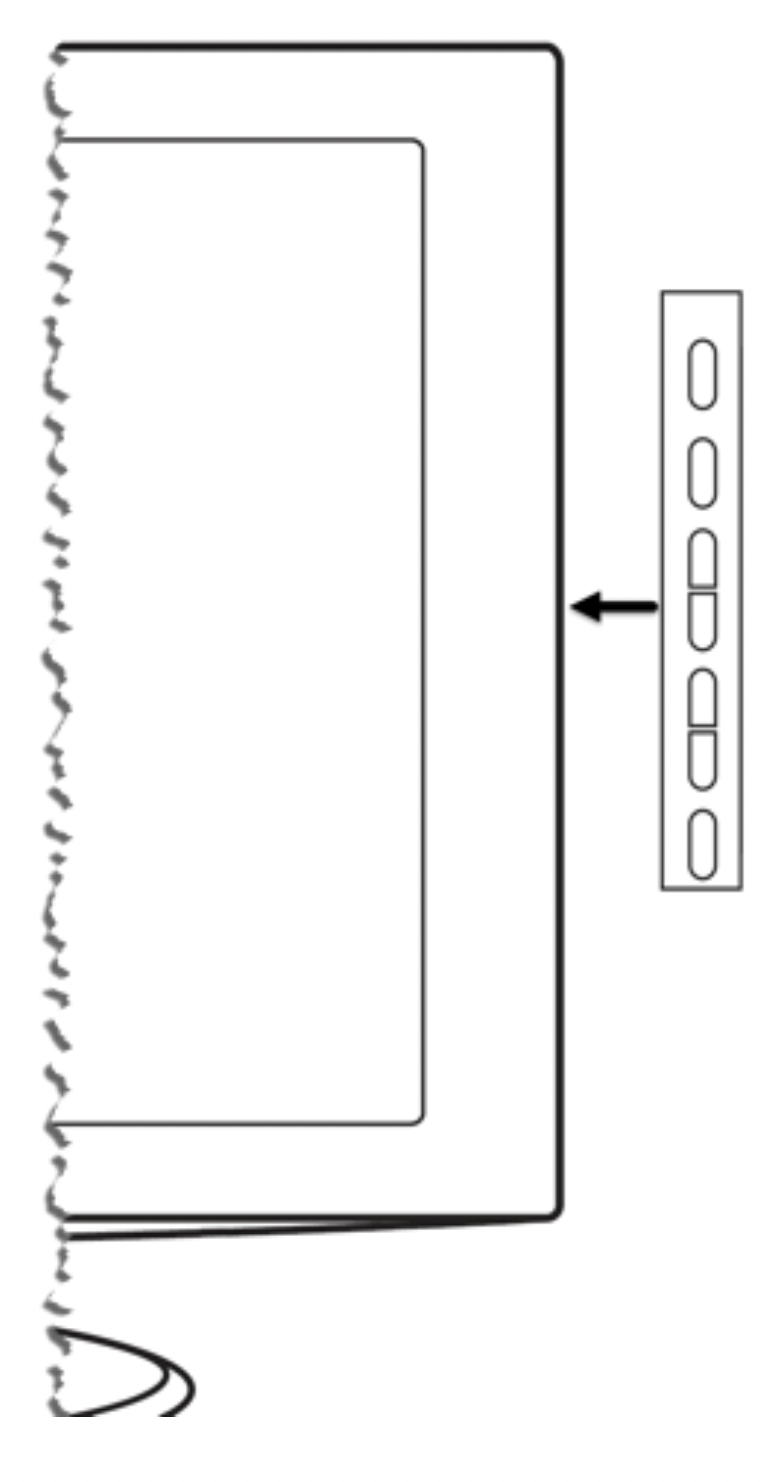
Panel buttons
Your TV has a set of panel buttons that perform simple control functions. The TV panel buttons are not a substitute for the remote, as they do not give you access to all TV functions.
Single button
If your TV has this style of panel button, you can perform the following functions:
- Turn TV on: short press.
- Display the Input List: short press when TV is on.
- Select the next input in the Input List: short press while the TV is showing the Input List.
- Dismiss the Input List without changing inputs: no press.
- Turn TV off: long press.
Short press = less than two seconds
Long press = more than two seconds
No press: = no press within two seconds
Three buttons
If your TV has this style of panel buttons, you can perform the following functions:
- Turn TV on: middle button, short or long press.
- Volume up: right button when Input List is not active.
- Volume down: left button when Input List is not active.
- Display Input List: middle button, short press when TV is on.
- Highlight next input in the Input List: right button when Input List is active.
- Highlight previous input in the Input List: left button when Input List is active.
- Select highlighted item in the Input List: middle button, short press, or no press.
- Turn TV off: middle button, long press.
Short press = less than two seconds
Long press = more than two seconds
No press: = no press within four seconds
Game-pad style joystick
If your TV has this style of panel button, you can perform the following functions:

- Press in: Toggle between power ON and Standby.
- Press up or down: Increase/decrease the volume.
- Press left or right: Switch inputs. Each press moves the highlight up or down one item. Pausing for a few moments selects the highlighted item.
Four buttons
If your TV has this style of panel buttons, you can perform the following functions:
- Power: Turns the power on and off.
- Input: Selects among TV inputs. Each press moves down one item. Pausing for a few moments selects the highlighted item.
- Volume + : Increases the volume.
- Volume – : Decreases the volume.
Five buttons (with mute)
If your TV has this style of panel buttons, you can perform the following functions.
Note that the order of the buttons might vary from model to model. Examine the panel button labels to determine your TV model’s layout.
- Power: Turns the power on and off.
- Input: Selects among TV inputs. Each press moves down one item. Pausing for a few moments selects the highlighted item.
- Volume + : Increases the volume.
- Volume – : Decreases the volume.
- Mute: Mutes and unmutes the sound.
Five buttons (without mute)
If your TV has this style of panel buttons, you can perform the following functions.
Note that the order of the buttons might vary from model to model. Examine the panel button labels to determine your TV model’s layout.
- Power: Turns the power on and off.
- Input + : Selects the next TV input. Each press moves down one item. Pausing for a few moments selects the highlighted item.
- Input - : Selects the previous TV input. Each press moves up one item. Pausing for a few moments selects the highlighted item.
- Volume + : Increases the volume.
- Volume – : Decreases the volume.
Seven buttons
If your TV has this style of panel buttons, you can perform the following functions.
Note that the order of the buttons might vary from model to model. Examine the panel button labels to determine your TV model’s layout.
- Input: Selects among TV inputs. Each press moves down one item. Pressing Channel + or Channel – moves the highlight up or down. Pausing for a few moments selects the highlighted item.
- Channel + : Moves the highlighted item up in the current menu.
- Channel – : Moves the highlighted item down in the current menu.
- Volume + : Increases the volume.
- Volume – : Decreases the volume.
- Mute: Mutes and unmutes the sound.
- Power: Turns the power on and off.
Guided Setup
Network connection
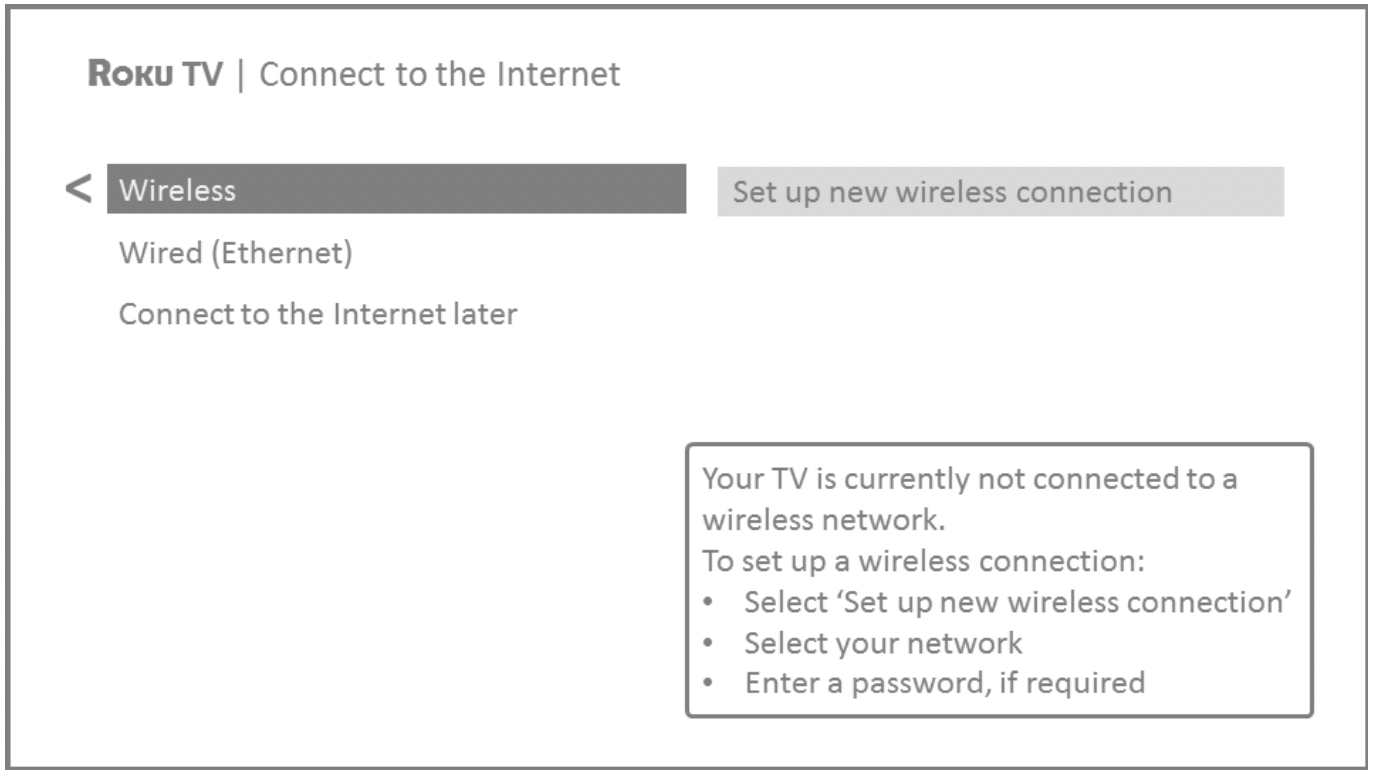
Only models that display the Connect to the Internet screen: Make a selection:
- Wireless connection – Highlight Set up new wireless connection and press OK. The TV prompts you through wireless setup. Skip ahead to the next step for help with the process.
- Wired connection – Highlight Connect to wired network and press OK. The TV immediately attempts to connect to your wired network, your local network, and then the Internet. Go to Step 9 to continue with Guided Setup.
- Connect to the Internet later – If you don’t want to connect to the Internet right now, you can skip this step and use the TV to watch Antenna TV channels, play games, and watch DVDs. When you’re ready to connect, it’s easy. We’ll show you how in Benefits of connecting.
Note: If you decide not to connect, Guided Setup skips ahead to setting up the devices that you’ve connected to your TV. Jump ahead to Connect your devices to complete Guided Setup.
On models that have wireless only, or models with both wired and wireless and you’ve selected Wireless: The TV scans for the wireless networks within range and displays them in order, with the strongest signals first. In addition to your own wireless signal, the TV might pick up signals from your neighbors.
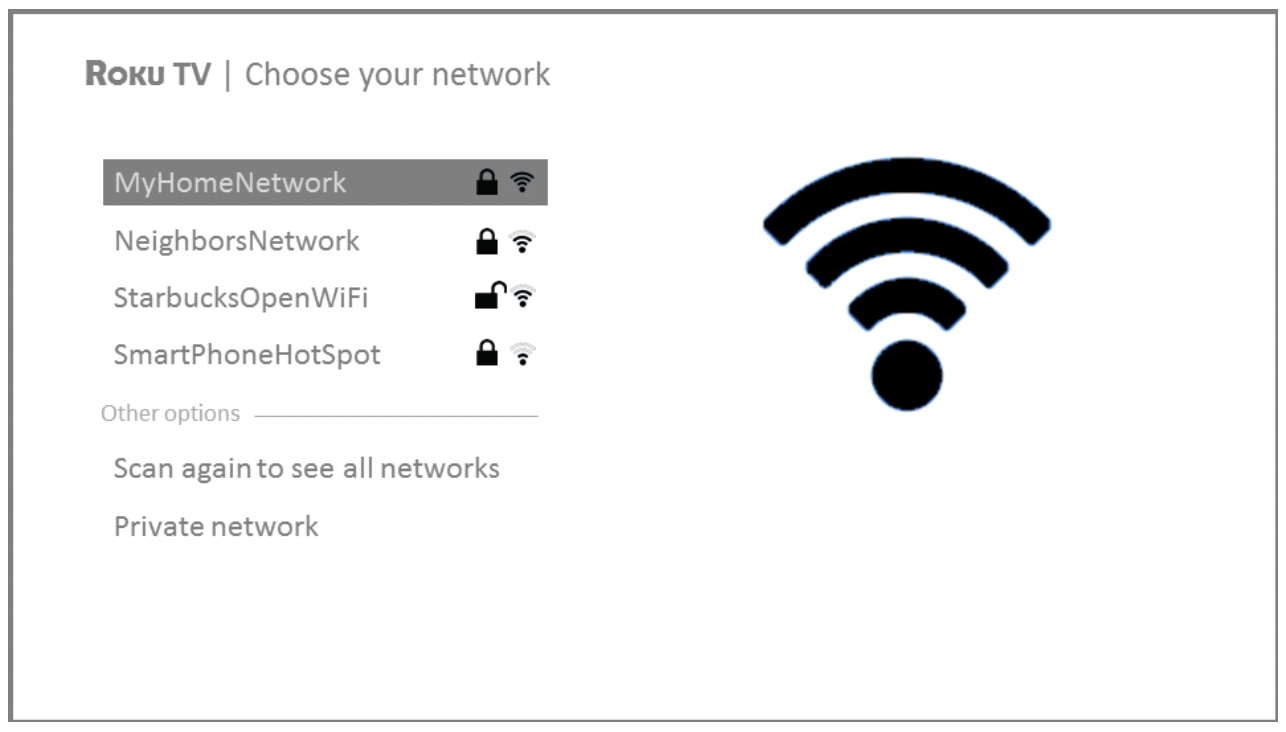
Press the UP or DOWN arrows to highlight the name of your wireless network, and then press OK to select it.
Note: Some networks, such as those often found in dorm rooms, hotels, and other public places, require you to read and agree to terms, enter a code, or provide identifying information before letting you connect to the Internet. If your TCL Roku TV detects that you are connecting to such a network, it prompts you through the connection process using your compatible smartphone or tablet to provide the needed information.
Other options
- Connect to the Internet later – If you don’t want to connect to the Internet right now, you can skip this step and use the TV to watch Antenna TV channels, play games, and watch DVDs. When you’re ready to connect, it’s easy. We’ll show you how in Benefits of connecting.
Note: If you decide not to connect, Guided Setup skips ahead to setting up the devices that you’ve connected to your TV. Jump ahead to Connect your devices to continue.
- Scan again / Scan again to see all networks – The name of this option depends on the number of wireless networks within range.
- Scan again appears if the list already shows all available wireless networks within range. If you don’t see your wireless network name in the list, you might need to adjust the location of your wireless router or the TV, turn on your router, or make other changes. When everything is ready, select Scan again to see if your network name now appears in the list.
- Scan again to see all networks appears if there are more wireless networks than the strongest ones it initially listed. If you don’t see your wireless network name in the list, this option displays the complete list. If you still don’t see your network name, you might have your router configured to provide wireless service as a “private network.”
Note: Highlighting either of these options displays an informational panel with the unique media access control (MAC) address of your TCL Roku TV. You will need the MAC address if your wireless router is configured to use MAC address filtering.
- Private network – If your wireless network name is hidden, it won’t appear in the list. Select Private network to display an on-screen keyboard, and use it to enter your network name. Unless you changed the factory-set network name, you can find the name (also called SSID) on a label on the router.
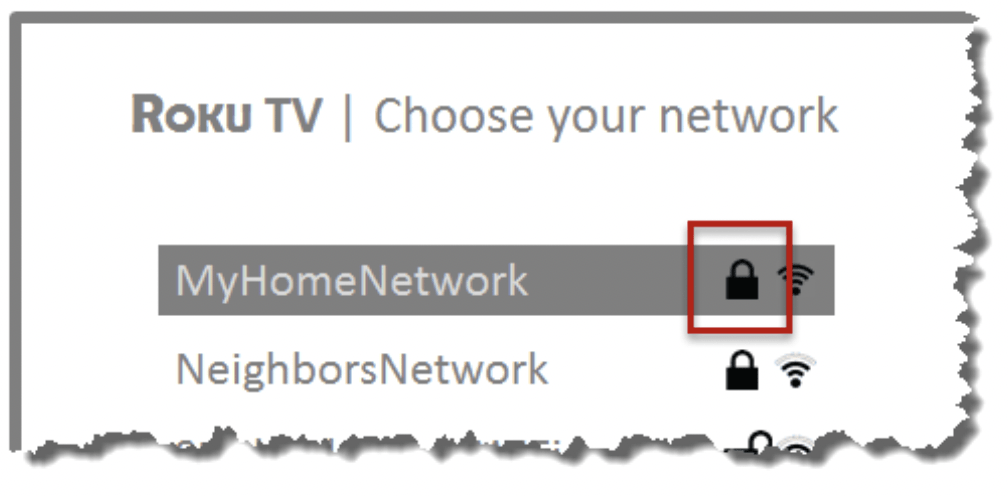
Tip: Wireless networks that are password-protected display a “padlock” icon adjacent to the name. This icon enables you to know that you are going to be prompted to enter a password after you select that network.
Connect your devices
Next, Guided Setup helps you set up the external devices that you want to use with it, such as a cable box, Blu-rayTM player, or game console.
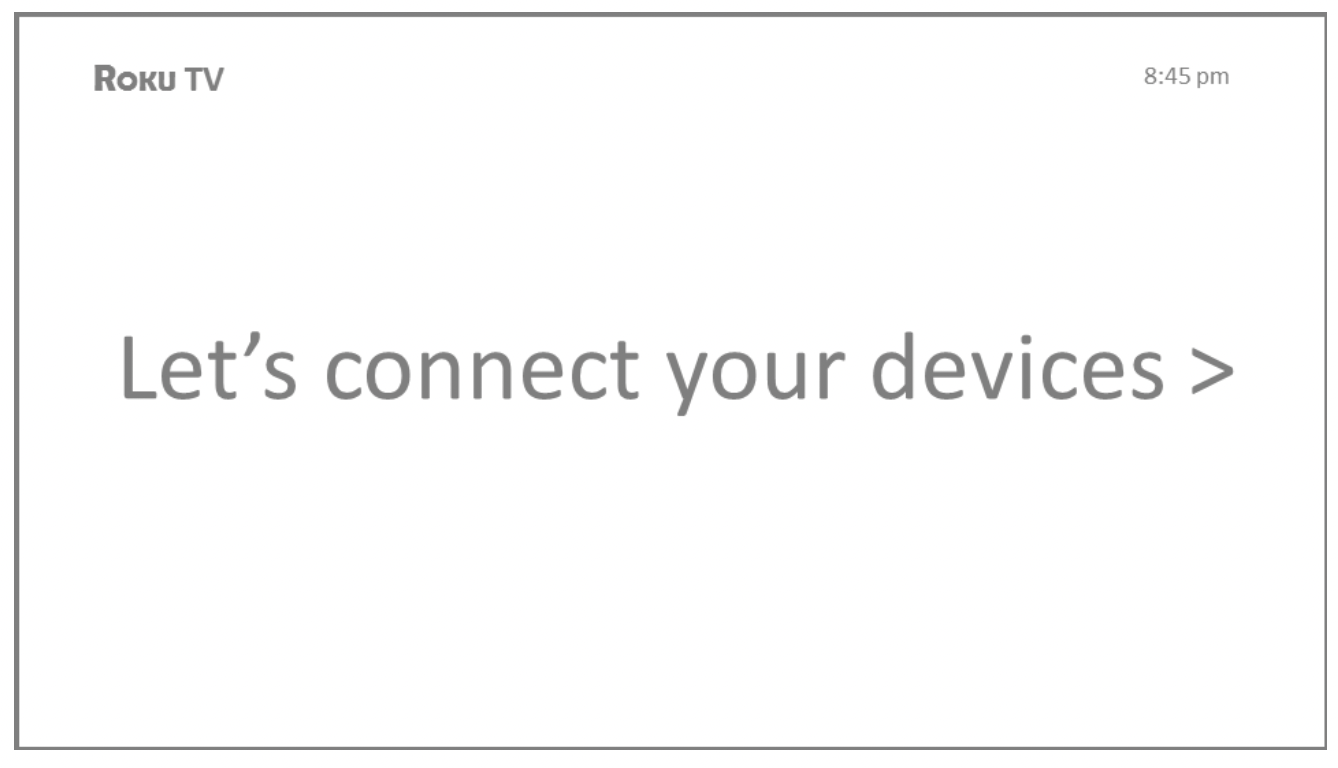
Press OK or the RIGHT arrow to proceed:
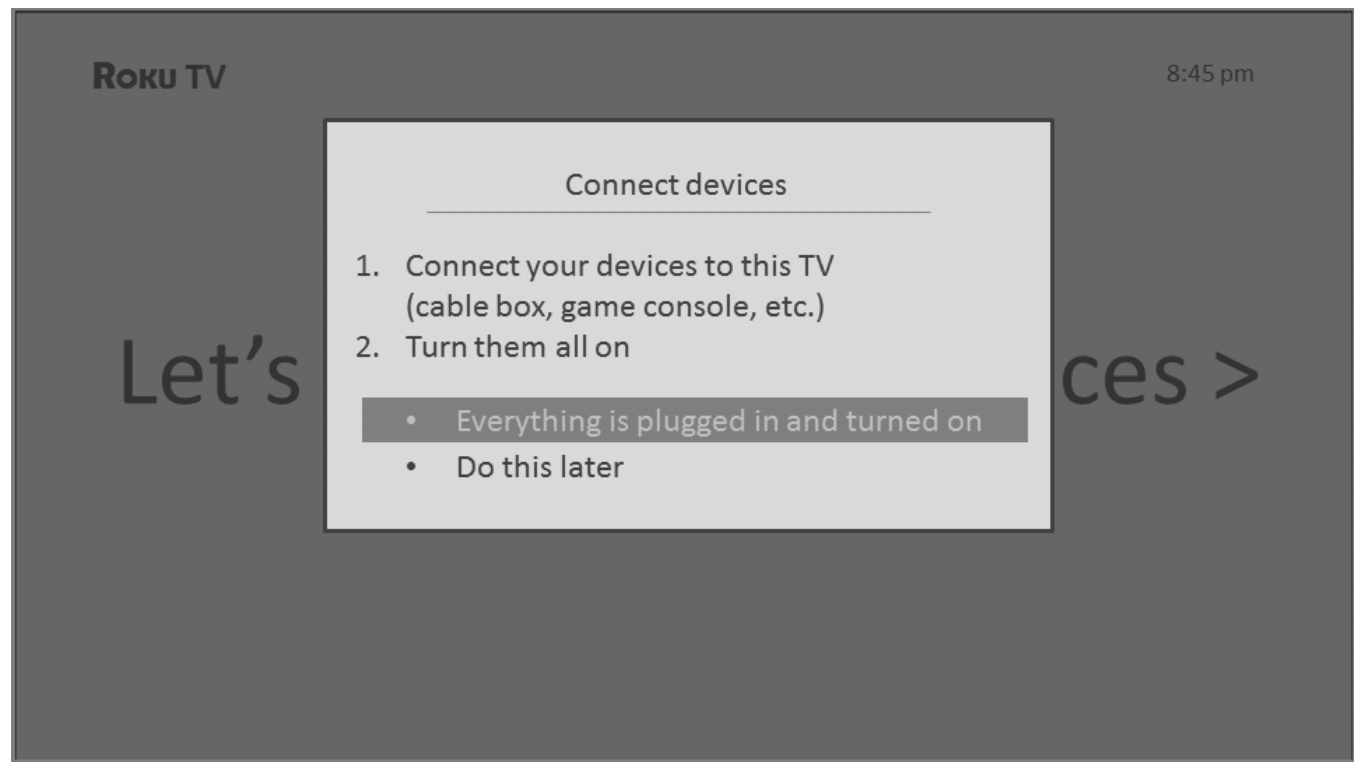
Connect all the devices you plan to use with your TV, turn them all on, and then select Everything is plugged in and turned on. The TV now takes you step by step through each of its inputs and asks what kind of device you have connected.
On each input that has a connected and active device, you can see its picture and hear its sound.
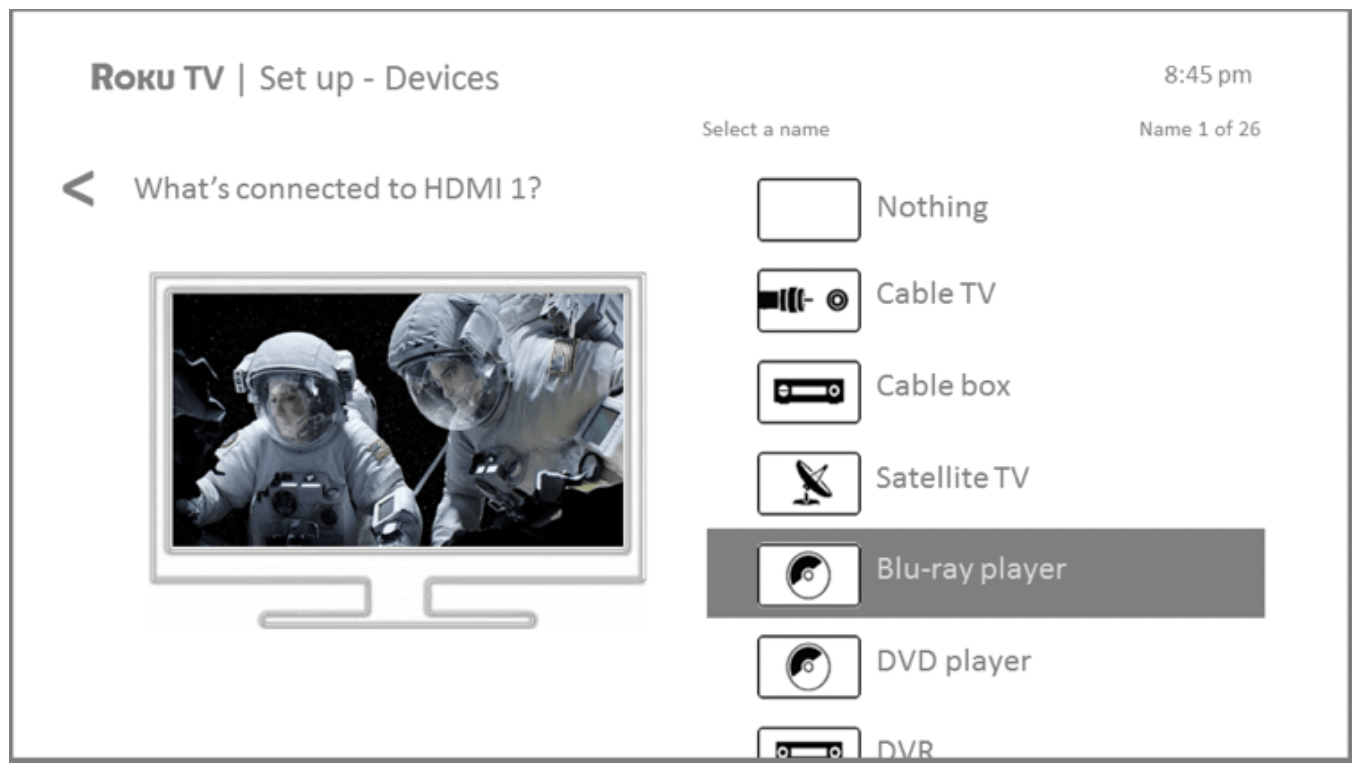
Press the UP or DOWN arrows to highlight the label you want to associate with the input. If you are not using the input, select Nothing, and the input won’t appear on the Home screen.
While setting up your devices, rather than using the predefined names and icons, you can set a custom name and icon. To do so, scroll up or down to highlight Set custom name & icon, and then press OK. Follow the instructions on the screen to enter a name and select an icon for the input. See Rename inputs for more information.
Note: If you have renamed the inputs, you cannot use voice commands to switch inputs. Voice commands can only switch among inputs that have their original names, such as “AV,” and “HDMI 1.”
Repeat the previous step for each input.
You’re done with Guided Setup.

Note: Some TCL Roku TVs, depending on where you live and other factors, show you an introductory video filled with some great hints and tips. If you’re not interested in viewing this video, press  on the remote to return to the TCL Roku TV Home screen.
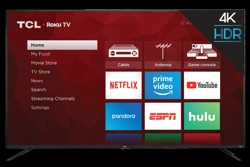
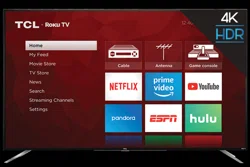
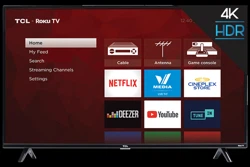
Whenever you press on the remote, the Home screen greets you.
From here, you can explore everything your TV has to offer. Press the arrow keys to move around, and press OK to select a highlighted item. We’ve designed the TV to encourage you to explore, and you can probably figure out most of the capabilities and settings on your own. If you have any questions or difficulties, you can find answers and solutions in this guide.
Using your TV
This section provides information on using the day-to-day features of your TV.
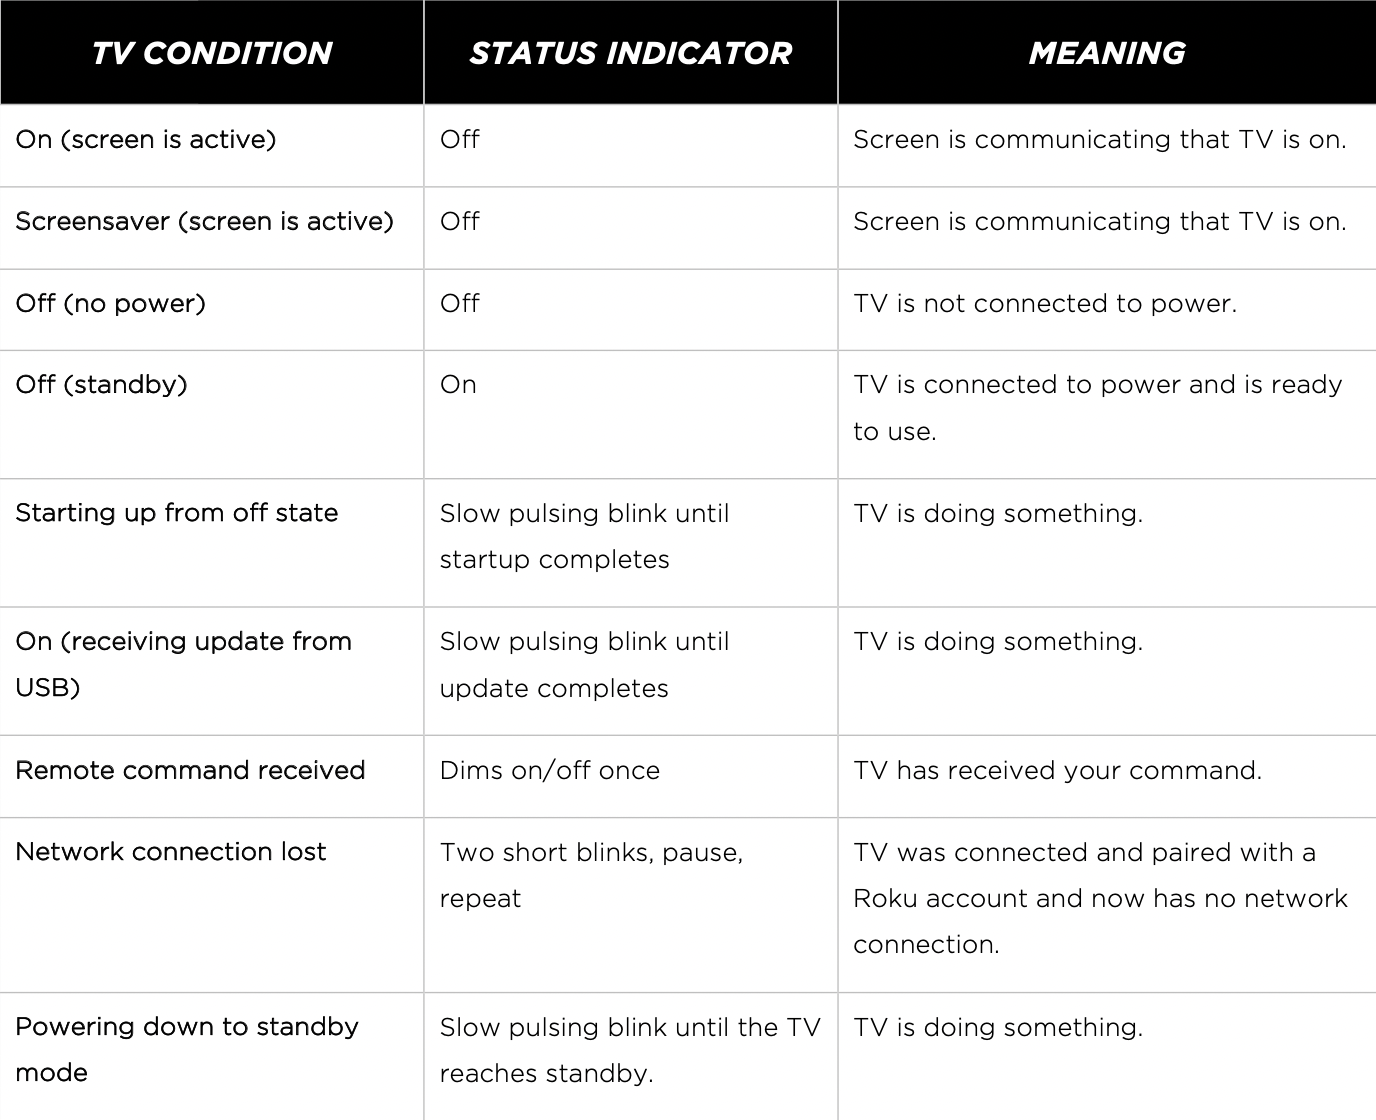
Status indicator
Your TV has a single status indicator. It goes on and off and blinks in different ways depending on the status of the TV, as shown in the following table:
Opting in to Smart TV experience (U.S. only)
Only in connected mode in the United States, the first time you select Antenna TV, an HDMI input, or AV input, your TV offers to enable the Smart TV experience. If you decide to enable it at this time, you’re all set to enjoy its recommendations and features.
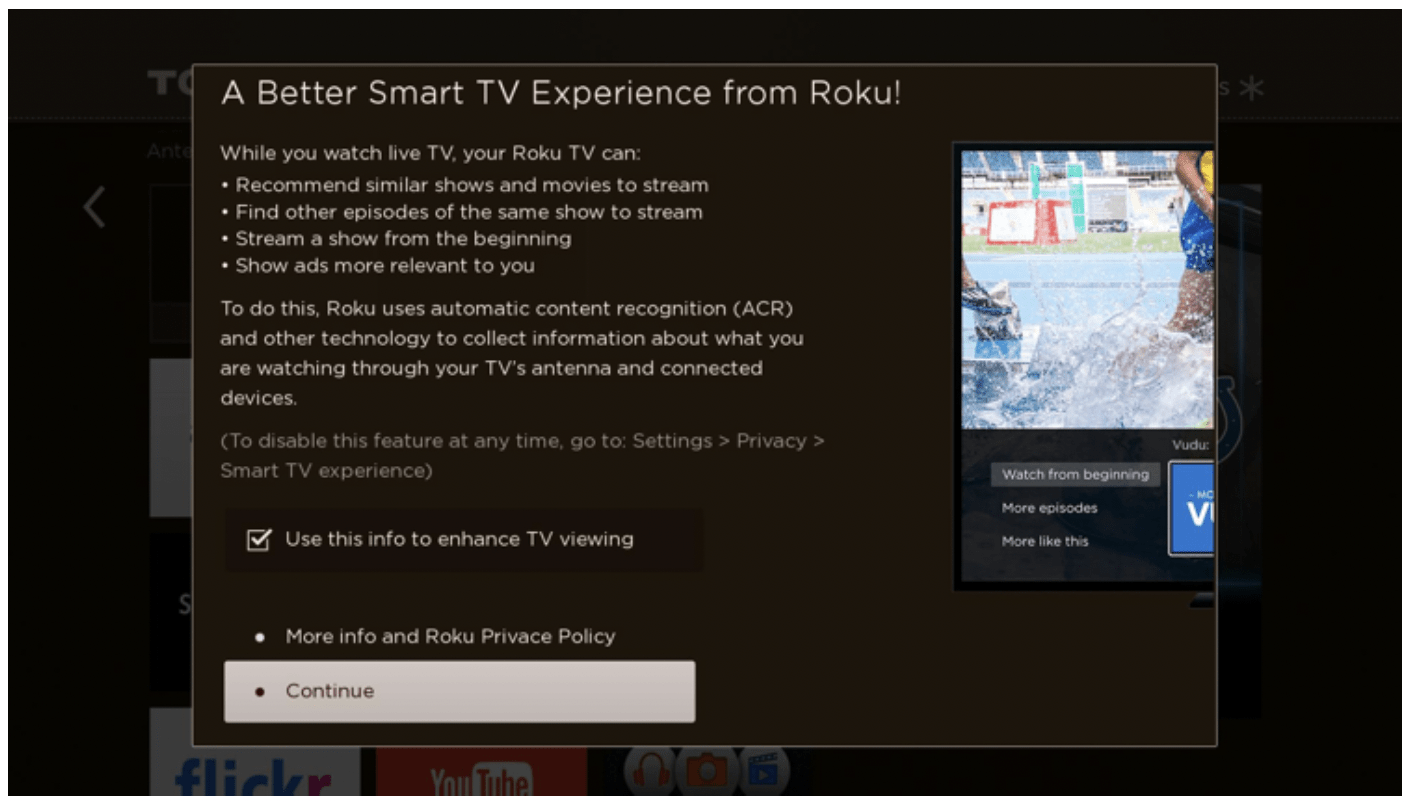
The Smart TV experience uses automatic content recognition (ACR) and other technology to collect information about what you watch through your Antenna TV, and on devices like media players and cable boxes connected to the HDMI or AV inputs. Opting in means that you give permission to analyze the programs you watch for the purpose of making recommendations, as well showing ads that are more relevant to you.
If you decide not to enable the Smart TV experience at this first opportunity, you can enable it later. Or, if you decide you’d rather not use the feature, you can disable it, but be aware that previously collected information is retained and not deleted.
Disable Smart TV experience
If you decide you want to disable Smart TV experience, follow these steps:
- From the Home screen, go to Settings > Privacy > Smart TV experience.
- Navigate to the right to highlight Use info from TV inputs.
- Press OK on the remote to clear the check box.
Disable Auto Notifications
If you want to keep the Smart TV experience enabled, but you do not want to see notifications while you are watching shows, you can disable notifications. To do so, follow these steps:
- From the Home screen, go to Settings > Privacy > Smart TV experience.
- Navigate to the right to highlight Use info from TV inputs.
- Press DOWN on the remote to highlight Enable auto notifications.
- Press OK on the remote to clear the check box.
Note: These settings do not affect recommendations for More Ways to Watch that you see in the Smart Guide when watching Antenna TV channels. Those recommendations come from the Smart Guide and do not rely on ACR technology.
Watching Antenna TV channels
Select the Antenna TV tile in the Home screen. Your TV remembers the last channel you watched and starts with that channel playing.
Changing channels
To change channels, you can do any of the following:
- Press the UP arrow to change to the next higher channel.
- Press the DOWN arrow to change to the next lower channel.
- Press the LEFT arrow to display the channel list (in non-connected mode) or Smart Guide (in connected mode), and then press the arrow keys to select the channel or show you want to watch. Press REWIND and FAST FORWARD to move through the list one page at a time. When you’ve highlighted the channel or show you want to watch, press OK. (If you decide you don’t want to change channels, press the BACK button).
- Only if Live TV Pause is not enabled, press
 to jump to the previous channel.
Press again to return to the channel you were watching before you pressed .
Note: If the button is not available on your remote, you can use this feature in the Roku mobile app.
Pausing Live TV
Live TV Pause gives your TCL Roku TV the ability to pause, play, fast forward, and rewind digital Antenna TV. You can pause Antenna TV for up to 90 minutes.
Requirements
To use this feature, you need to:
1. Connect your TV to the Internet. If you didn’t connect during Guided Setup, see What if I didn’t connect my TV?.
2. Provide your own dedicated USB drive with the following minimum specifications.
- 16 GB
- 15 Mbps read/write speed
- USB 2.0 compliant
A USB flash drive (thumb drive) meeting the minimum requirements is highly recommended. Note that using a larger drive does not extend the 90 minute pause time.
Important: After warning you and giving you a chance to cancel Live TV Pause setup, all existing content on your USB drive is erased when you enable this feature.
3. Connect your USB drive to the TV’s USB port.
Important: Some TV models have more than one USB port. You can connect your Live TV Pause USB drive to any port, but make sure that nothing is connected to other USB ports while enabling Live TV Pause. Reconnect other USB devices after you have finished enabling Live TV Pause.
4. Enable Live TV Pause, as explained in the following topic.
Enabling Live TV Pause
You can start setting up Live TV Pause in any of the following ways:
- Go to Settings > TV inputs > Antenna TV > Live TV Pause, and then select Enable.
- After completing a channel scan, select Set up Live TV Pause from the available options.
- Press Play/Pause on the Roku remote while watching a digital Antenna TV channel.
- Highlight the Antenna TV tile on the Home screen, press
 on the remote, and then select Enable Live TV Pause.
After starting setup of Live TV Pause in any of these ways, the TV prompts you through the steps needed to enable this feature. Setup takes only a few moments.
Note: Use of a USB hub is not supported.
Using Live TV Pause
If you have used the Roku remote to watch streaming channels, using Live TV Pause should be very familiar to you.
- While watching a digital Antenna TV channel, press PLAY/PAUSE to pause or play the content. After the TV program has been paused for 90 minutes, the TV resumes playing.
- After watching a channel for a while, press REWIND to jump back up to the point where you first started watching the channel, up to 90 minutes.
- After pausing or rewinding, press FAST FORWARD to jump ahead up to the point where you are once again watching the live TV program.
- Press FAST FORWARD or REWIND repeatedly to cycle through 1x, 2x, and 3x skip speeds. Press INSTANT REPLAY to play back the last several seconds of the program.
- When the program is paused, press the LEFT and RIGHT arrows to move forward and backward through the program approximately 10 seconds per press. Small frames appear across the screen to identify your location in the program.
Note: If the button is not available on your remote, you can use the Roku mobile app.
Whenever you use any of the Live TV Pause features, the TV momentarily displays a progress bar:
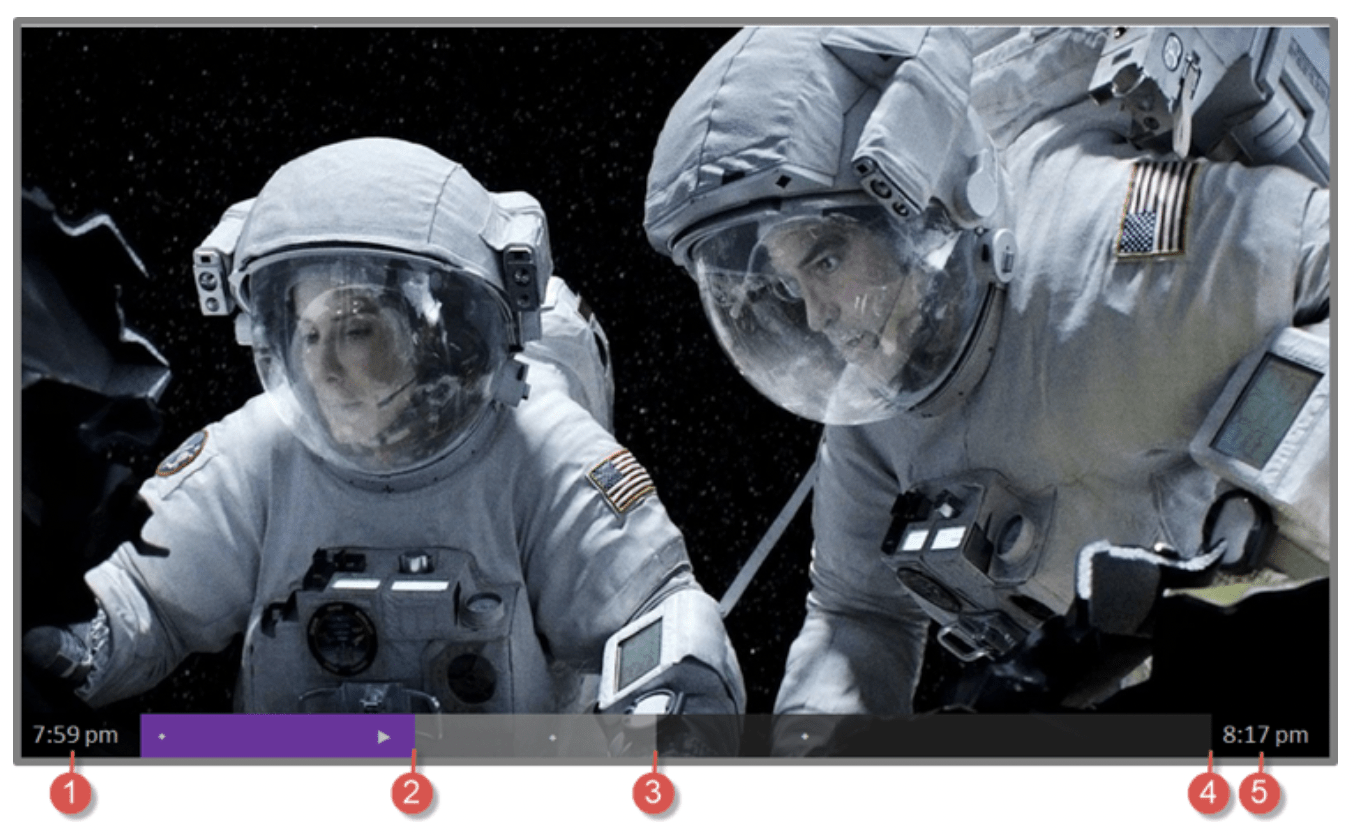
- Time at current playback position.
- Current playback position
- Extent of pause time, representing the amount of time this channel has been buffered, up to 90 minutes.
- 90 minute mark, representing the maximum extent of pause time.
- Current time.
The progress bar also displays tick marks at each half hour point, to help you locate the boundaries where one show ends and a new one begins.
Notes about Live TV Pause
- You can use Live TV Pause only with digital broadcast and cable channels received through the TV’s ANT input (ATSC and Clear QAM channels).
- Changing channels erases and restarts the Live TV Pause buffer.
- Returning to the Home screen, selecting another input, or turning off the TV erases and resets the Live TV Pause buffer.
- Removing the USB drive erases the Live TV Pause buffer.
Switching TV inputs
Switch TV inputs to access the device connected to that input, for example, a Blu-rayTM player. Switching inputs is as simple as highlighting the input’s tile in the Home screen, and pressing OK. The video signal on the input, if any, plays on the screen.
Tip: To learn how to add, remove, rename, and rearrange the tiles on your Home screen, see Customizing your TV.
Auto-detecting devices
Your TV automatically detects when you connect a new device to an HDMI® input and turn on its power. The input is automatically added to the Home screen if it isn’t already present.
Adjusting audio/video settings
While watching video content on any input, press to display the Options menu.
Press the UP and DOWN arrows to highlight an option, and then press the LEFT and RIGHT arrows to change the setting. To learn about each of the audio and video settings, see Adjusting TV settings.
Adjusting TV settings
You can adjust most picture and sound settings while you are watching a program by pressing to open the Options menu. There are some additional picture and sound settings in the Settings menu.
In most cases, the changes you make apply only to the input you are using. Antenna TV, the separate HDMI® inputs, and the AV input each have their own settings that the TV remembers when you return to that input. The TV also separately remembers the settings you specify while viewing streaming content.
Settings menu
Use the Settings menu to adjust overall TV settings. Press to go to the Home screen, and then navigate to Settings > TV picture settings.
You can adjust the following overall TV picture settings from the Settings screen:
- TV brightness – Provide a better viewing experience in darker or brighter rooms.
Increases or decreases the TV’s general brightness across all TV inputs.
Note: This setting is identical to the TV brightness setting you can access in the Options menu while watching a program. - HDR notification – On select models only: Controls whether the TV displays a notification in the upper right corner of the screen for a few seconds when HDR or Dolby Vision content begins to play.
- On – The TV displays a notification when HDR or Dolby Vision content begins to play.
- Off – The TV does not display a notification when HDR or Dolby Vision content begins to play.
Note: This setting does not affect the HDR or Dolby Vision notification that always appears in the program information banner. Press OK while watching a show to open the program information banner.
- Settings per input – Lists each TV input. Select an input, and then press to display the Options menu where you can adjust the input’s settings while watching a live picture and listening to the sound from that input.
Tip: You don’t have to go to the Settings menu first—you can display an input’s Options menu and adjust its settings whenever you are watching the input by pressing .
Options menu
The Options menu for each TV input provides many settings for controlling the appearance of the picture and the quality of the audio. To view the Options menu, press whenever you are watching a TV input or streaming a video (except when you are viewing the program information banner). The Options menu is a panel that appears over the left side of the screen:
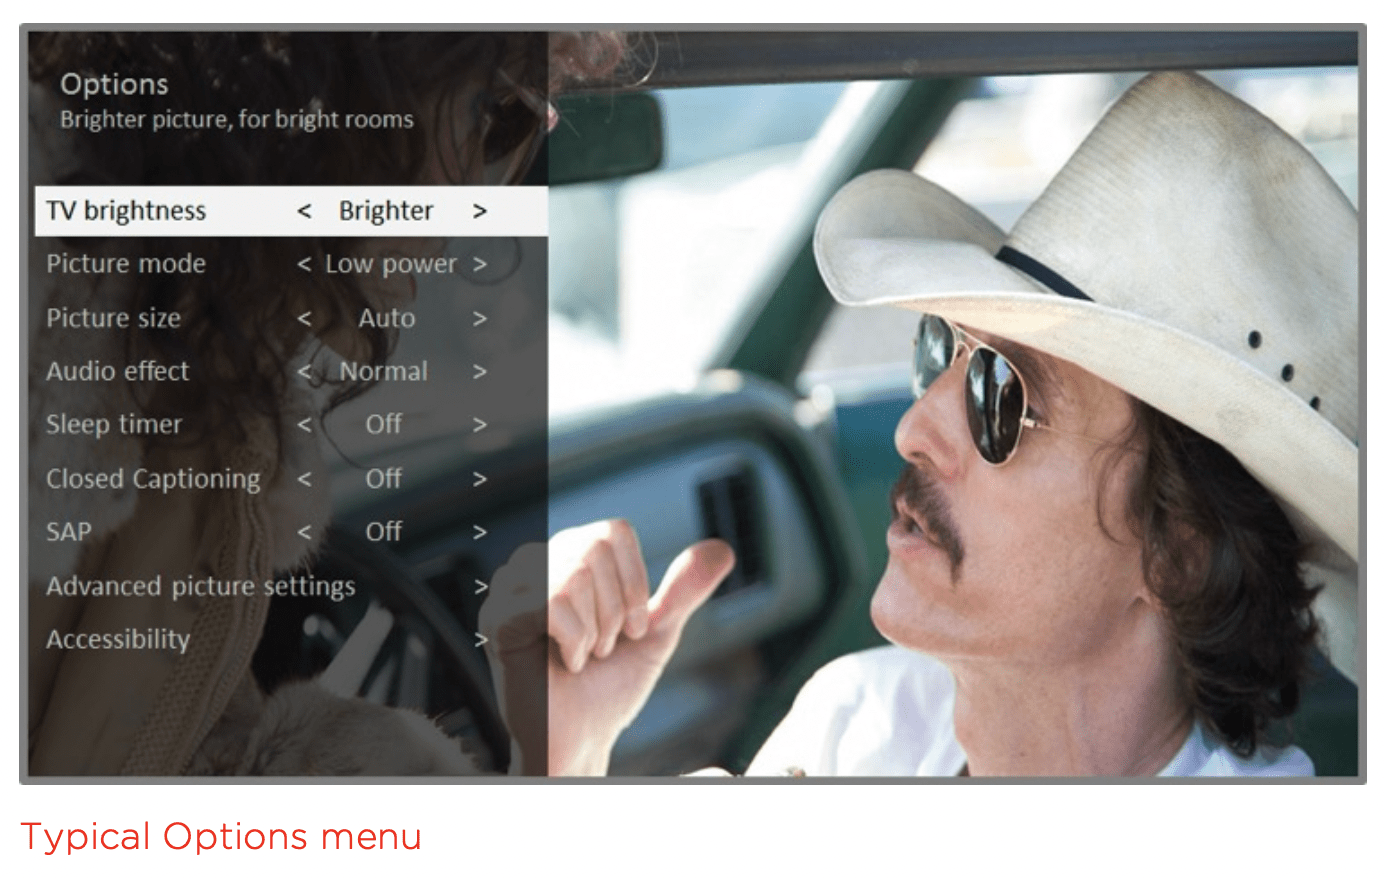
To adjust the settings on the Options menu, press the UP or DOWN arrow to highlight a setting, and then press the LEFT or RIGHT arrow to change the setting. You’ll see the changes you make right away in picture appearance or audio quality.
Tip: When you highlight a setting, the header text explains the effect of its current value. When you begin to adjust a setting, the other options are hidden so you can see more of the screen. Even though the other settings are hidden, you can move the highlight up or down to adjust the other settings. As soon as you press the UP or DOWN arrow, the other settings become visible again.
Options menu settings
- TV brightness – Affects the overall brightness of the picture. This setting applies across the entire TV; that is, to all TV inputs and is identical to the TV brightness setting under Settings > TV picture settings.
- Picture mode – Provides picture presets for various viewing preferences. This setting applies to the currently-selected input only.
- Picture size – Adjusts the aspect ratio of the picture, enabling you to view a picture in its original format, or zoom or stretch it to fill the screen. The Auto setting has been found to produce the best picture in most cases.
- Audio effect – Adjusts the sound quality output from the TV speakers. This setting applies across the entire TV; that is, to all TV inputs. It does not affect the sound quality for headphones, HDMI (ARC), or SPDIF (TOSLINK) connectors.
- Sleep timer – Sets a timer that turns off the TV after the specific amount of time. This setting remains in effect even if you stop watching the current input.
- Closed captioning – Controls when you see captions. This setting is only offered for Antenna TV, the AV input, and streaming videos. Any set value remains in effect across only these inputs.
- Antenna TV – Set captions to off, always on, on only when the TV sound is muted, or on only during instant replay (when Live TV Pause has been enabled).
- AV input – Set captions to off, always on, or on only when the TV sound is muted.
- Streaming video channel – For streaming content that provides closed captions, set captions to off, always on, on only when the TV sound is muted, or on only during instant replay (for streaming content that supports instant replay). Note that some streaming channels have other methods for turning captions on and off. In these cases, the Closed captioning option does not appear on the Options menu.
Note: If the button is not available on your remote, you can use this feature in the Roku mobile app. For more information, see Getting and using the Roku mobile app.
- Captioning track – Only in Canada: Selects which caption track to display when Closed Captioning is on. This setting remains in effect on all inputs that provide captions.
Note: Only in the United States, the Captioning track setting is located under Accessibility.
- SAP – Selects whether to play a secondary audio program or multichannel television sound, and which choice to play. This setting applies only to Antenna TV on digital channels.
- Advanced audio settings – Only on select models: Shows the Advanced audio settings menu.
- Advanced picture settings – Shows the Advanced picture settings menu.
Tip: To dismiss the Options menu, just wait a few seconds without pressing any buttons. Or press again to dismiss the menu immediately.
More settings
This section describes the features and settings of the TV that were not covered in the other parts of this guide.
Changing network settings
If needed, you can change your network settings at any time. For example, if you change the name of your wireless network (its SSID) or its password, you will need to change your TV’s settings so that it can continue to connect. Also, if you decided not to connect to the Internet in Guided Setup, you can use network settings to connect at a later time.
To change network settings, from the Home screen menu, navigate to Settings > Network, and then press the RIGHT arrow. At this point, you can choose the following options:
- About – Lists important information about your current network connection, such as status, connection type, IP addresses, and MAC address. This information is often useful when contacting customer support with connection issues.
- Check connection – Select your existing network connection type, and then press OK to start checking the network connection. The TV uses your current network information to reconfirm the wireless or wired network connection to the local network and the Internet connection.
- Set up connection – Select a network connection type, and then select the option to set up a new connection. Follow the on-screen instructions to complete the network connection. For help with each of the steps, see Network connection.
Note: Some networks, such as those found in dorm rooms, hotels, and other public places, may require you to read and agree to terms, enter a code, or provide identifying information before letting you connect to the Internet. For more information, see Using your TV in a hotel or dorm room.
Scanning for Antenna TV channels again
There will be times when you need to create a new channel list. For example, you:
- Change cable providers
- Reorient your TV antenna
- Move to a different city with different channels
Whenever you need to update your TV channel list, you can repeat the channel scan.
Tip: Repeat the channel scan from time to time to make sure you are receiving all of the latest channels. Broadcasters add and remove channels, move channels to different parts of the spectrum, and change the power levels of their channels periodically.
Note: Repeating the tuner channel scan unhides all hidden channels.
To repeat the channel scan, from the Home screen menu, navigate to Settings > TV inputs > Antenna TV > Scan again for channels. Then select Start finding channels to begin the channel scan process. The screens and options that appear during this process are identical to those described in How do I set up the TV tuner?
Setting the HDMI® mode (4K models only)
On 4K (UHD) TVs, you can independently configure each HDMI® input to match the capabilities of the connected device. From the Home screen menu, navigate to Settings > TV inputs, and then select an enabled HDMI® input. Next, select HDMI mode and then select one of the following settings:
- Auto – Let the TV determine the best setting. Use this option unless your HDMI® device does not correctly communicate its HDMI® version compatibility.
- HDMI 1.4 – Configure the input for compatibility with HDMI® version 1.4, which supports a maximum refresh rate of 30 Hz at full UHD resolution. Most HDMI® devices will work correctly with the TV in this mode.
- HDMI 2.0 – Configure the input for compatibility with HDMI® version 2.0, which supports a maximum refresh rate of 60 Hz at full UHD resolution. You must use this mode to view HDR content from the device connected to this HDMI® input. However, note that many older HDMI® devices do not work correctly when the TV’s HDMI® input is set to this mode.
Using the TV in a home theater
Your TV has several features that make it an ideal TV for a home theater. But you might not notice them because they remain in the background until you decide to use them.
Turning off the speakers
When you use your TV with a sound bar or an external amplifier and speakers, you’ll probably want to turn off the internal TV speakers.
To turn off the TV’s built-in speakers, in the Home screen menu, navigate to Settings > Audio > TV speakers and change the setting.
Tip: The TV’s internal speakers can be enabled and disabled automatically as needed by system audio control, as described in Enable system audio control. Using the headphone jack also turns off the internal speakers.
Setting up a digital audio connection
To take advantage of your TV’s advanced audio capabilities, connect it to an external amplifier, receiver, or sound bar by using either of these two digital audio connections:
- HDMI ARC – The HDMI® Audio Return Channel enables the TV to output digital audio on one of its HDMI® connectors. The connected amplifier can also function simultaneously as an input source to the TV, if needed. To use the ARC capability, you must connect an HDMI® cable from your amplifier’s HDMI® ARC connector to the HDMI ARC connector on the TV.
You also must:- Be sure your HDMI® cable is certified by HDMI®
- Enable HDMI ARC under Settings > System > Control other devices (CEC), as explained in Enable HDMI® ARC.
- SPDIF optical – The SPDIF optical connector outputs a digital audio signal. To use the optical output, connect a TOSLINK optical cable from the amplifier to the Optical or SPDIF connector on the TV.

Note: Dolby AudioTM supporting Dolby Digital PlusTM format is not available through the SPDIF optical output. This format is only available through the HDMI® ARC connection.
After making the required HDMI® ARC or SPDIF optical connection, go to Settings > Audio > S/PDIF and ARC option and select the audio format to use.
Note: In most cases, Auto detect is the best option. Other settings can result in no sound when the content you are viewing does not contain the audio stream type you selected.
Restarting the TV
You can restart the TV when necessary. Restarting has the same effect as unplugging the TV power and then plugging it in again.
To restart the TV, navigate to Settings > System > Power, and then select System restart. Highlight Restart, and then press OK to confirm restart.
While the TV restarts, the screen goes dark for a few seconds, and then displays the startup screen for a few more seconds. When the restart operation completes, the TV displays the activity you selected in Power on settings.
Resetting the TV
You can choose to reset only the TV picture and audio settings to their original values, or perform a full factory reset to return the TV to the state it was in when you first unpacked and turned it on.
Reset audio/video settings
To reset only the TV picture and audio settings to their original values, navigate to Settings > System > Advanced system settings > Factory reset, and then highlight Reset TV audio/video settings. Read the information on the screen to make sure you understand what the reset operation does.
To proceed with the reset operation, press PLAY/PAUSE three times in a row.
Factory reset everything
A full factory reset returns the TV’s settings to their original state and removes all personally identifiable information from the TV. When finished, you must repeat Guided Setup, reconnecting to the Internet, re-linking your Roku account, and reloading any streaming channels. You also must repeat Antenna TV setup and input configuration.
Factory reset is the recommended choice if you want to transfer the TV to another owner, and it is the only choice if you want to switch from Store mode to Home mode (if you inadvertently selected Store mode during Guided Setup).
To perform a factory reset, navigate to Settings > System > Advanced system settings > Factory reset, and then highlight Factory reset everything. Read the information on the screen to make sure you understand what this reset operation does.
To proceed with the full factory reset, use the on-screen number pad to enter the code displayed on the screen, and then select OK to proceed.
When the factory reset operation completes, the TV restarts and displays the first Guided Setup screen.
What if I can’t access the Factory Reset option?
It is possible for your TV to get into a state where you cannot access the various menus, including the menu option that lets you perform a factory reset operation. If that happens, you can force the TV to reset by following these steps.
Models with a RESET button
- Using a straightened paper clip or ball-point pen, press and hold the recessed RESET button on the TV connector panel.
- Continue to hold the RESET button for approximately 12 seconds. When the reset cycle completes, the status indicator comes on dim.
- Release the RESET button. The TV is now powered off.
- Turn on the TV and proceed through Guided Setup. See Guided Setup.
Models without a RESET button
- On the TV panel (not the remote) press and hold down the MUTE and POWER buttons.
- Unplug the TV power, and then plug it in while continuing to hold down the MUTE and POWER buttons.
- When you see the startup screen appear on the TV, release the buttons.
- Turn on the TV and proceed through Guided Setup. See Guided Setup.
Network connection reset
If you want to remove your network connection information without disturbing other settings, navigate from the Home screen to Settings > System > Advanced systems settings > Network connection reset, and then select Reset connection.
When you select this option, the TV removes your wireless network information, including the name of the connection (its SSID) and your wireless password, if any, and then it restarts. After restarting, your TV retains all of its other settings and its association with your Roku account.
After resetting your network connection, navigate from the Home screen to Settings > Network > Set up new connection to continue enjoying all of the benefits of your connected TV.
Changing your Roku Channel Store PIN preference
When you created your Roku account, you were given the opportunity to create a PIN code and to specify when it must be used. If you created a Channel Store PIN and want to change it, or you don’t remember your PIN, or if you didn’t create a Channel Store +PIN and want to add one, you can easily make these changes.
- On a computer, tablet, or smartphone, use your web browser to go to website my.roku.com and sign in. After signing in, the My Account page appears.
- Under PIN Preference, click Update to open the Choose Your PIN Preferences page.
- Skip this step if you just want to change your PIN. Otherwise, choose the option your prefer from among those listed:
- Require a PIN to make purchases or to add any item from the Channel Store.
- Require a PIN to make purchases.
- Do not require a PIN to make purchases.
- If you choose either of the first two options, enter your PIN twice in the appropriate boxes.
- Click Save Changes to save your changes and return to the My Account page. Note that your current setting is described under PIN Preference.
Other devices
Screen Mirroring your phone or tablet
Only in connected mode, your TV has a feature called screen mirroring that lets you mirror your compatible smartphone or tablet on your TV. Share videos, photos, web pages, and more from compatible devices.
By default, your TV’s screen mirroring mode is set to Prompt. In this mode, when your TV receives a screen mirroring request, it prompts you with the following options, unless you have previously selected Always accept or Always ignore for the device:
- Always accept – Always accept mirrored content from the mobile device without additional prompting in the future for this device.
- Accept – Accept mirrored content from the mobile device this time only.
- Prompt again next time this device attempts to mirror content.
- Ignore – Do not accept mirrored content from the mobile device at this time.
- Prompt again next time this device attempts to mirror content.
- Always ignore – Never accept mirrored content from this mobile device.
- If you prefer to always allow all screen mirroring attempts without prompting, go to Settings > System > Screen mirroring, and then change the Screen mirroring mode to Always allow.
- If you prefer to never allow screen mirroring from any device, change the Screen mirroring mode to Never allow.
For information on which devices may work with screen mirroring and instructions on how to use it, go to the following link on the Roku web site:
Getting and using the Roku mobile app
Roku makes the Roku mobile app free for compatible iOS® and Android™ mobile devices.
The Roku mobile app is an alternative remote for your TCL Roku TV. The Roku mobile app helps you find and add new Roku Channels, more easily search and find something to watch and, only in the United States, even use your voice to search without typing.
Find more information and get the Roku mobile app by using the following link to the
Private Listening on the Roku mobile app
Only on compatible Apple and Android devices, the Roku mobile app enables you to use headphones connected to your device to listen to streaming programs Antenna TV channels. Make sure you have the latest version of the Roku mobile app before using this feature.
Using a universal remote
In many cases, you can program your cable or satellite universal remote to also control your TV. You will need to have instructions for programming the remote handy. Check with your cable or satellite provider for instructions.
Care and Cleaning
- Caution: Turn off your TV before cleaning.
- Clean the TV as needed using a soft lint-free cloth. Be sure to occasionally dust the ventilation slots in the cabinet to help assure adequate ventilation.
- IMPORTANT: Never use strong cleaning agents, such as ammonia-based cleaners, or abrasive powder. These types of cleaners will damage the TV. The TV’s screen may be cleaned with a soft, lint-free cloth as well. Take care not to scratch or mar the screen. If necessary, you may use a cloth dampened with warm water. While cleaning, do not spray liquid directly on the screen, or allow liquid to run down the screen and inside the TV. Also, never place drinks or vases with water on top of the TV. This could increase the risk of fire, shock hazard or damage to the TV.