Operating instructions
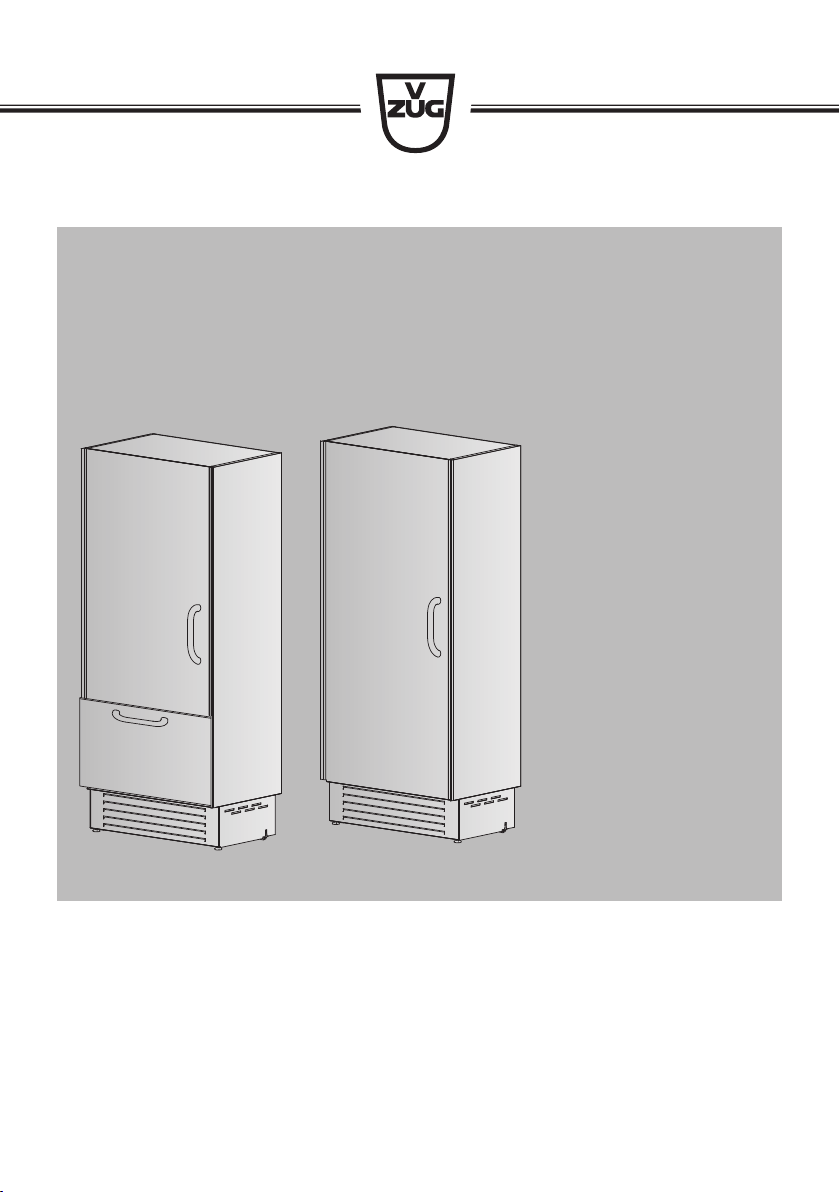
CombiCooler V6000 Supreme
Cooler V6000
Supreme
Refrigerator/Freezer
Thank you for choosing to buy one of our products. Your appliance is made to high
standards and is easy to use. Nevertheless, please take the time to read these operating
instructions in order to familiarize yourself with the appliance and get the best use out of
it.
Please follow the safety precautions.
Modifications
Text, diagrams and data correspond to the technical standard of the appliance at the
time these operating instructions went to press. The right to make technical modifications
for the purpose of the further development of the appliances is reserved.
Validity
The model number corresponds to the first alphanumerics on the identification plate.
These operating instructions apply to:
Model designation Type Size system
CombiCooler V6000 Supreme CCO6T-51096 90
Cooler V6000 Supreme CO6T-51098 90
Variations depending on the model are noted in the text.
© V-ZUG Ltd, CH-6302 Zug, 2020
2

3
Table of contents
1 Safety precautions 4
1.1 Symbols used......................................................... 4
1.2 General safety precautions.................................. 4
1.3 Appliance-specific safety precautions ............... 4
1.4 Appliance installation............................................ 5
1.5 Instructions for use................................................ 5
2 Using for the first time 8
3 Appliance description 8
3.1 Structure .................................................................. 8
3.2 Operating and display elements......................... 9
4 Operating the appliance 10
4.1 Basic procedure ..................................................10
4.2 Overview of start screen ....................................10
4.3 Switching the appliance on ...............................11
4.4 Setting the temperature......................................11
4.5 Switching the appliance off................................12
5 Using the appliance functions and set-
tings 13
5.1 Procedure for display with touch function ......13
5.2 Using the functions and settings ......................14
5.3 Brief description of the appliance functions...24
6 Switching on and using the ice-maker 26
6.1 Changing the water filter ....................................27
7 Interior and accessories 27
8 Tips and tricks 29
8.1 General information on using the appliance ..29
8.2 Notes on refrigerating and freezing food........29
8.3 Notes on saving energy .....................................30
9 Care and maintenance 30
9.1 General cleaning instructions............................30
9.2 Cleaning the interior............................................30
9.3 Cleaning and care for the ice-maker ...............31
9.4 Cleaning the condenser .....................................31
10 Noises 32
11 Trouble-shooting 32
12 Technical data 34
13 Disposal 35
14 Index 36
15 Service & Support 39
4
1 Safety precautions
1.1 Symbols used
Denotes important safety precau-
tions.
Failure to observe said precautions
can result in injury or in damage to
the appliance or fittings!
Information and precautions that
should be observed.
Information on disposal
Information about the Operating In-
structions
Symbol ISO 7010 W021
WARNING: Risk of fire / flammable
materials
▸ Indicates step-by-step instructions.
– Describes how the appliance reacts
to the steps taken.
▪ Indicates a list.
1.2 General safety precautions
▪ Read the operating instruc-
tions before using the appli-
ance for the first time.
▪ This appliance can be used
by children aged 8 and above
and by persons with reduced
physical, sensory or mental
capabilities, or lack of experi-
ence and/or knowledge,
provided they are supervised
or have been instructed on
the safe use of the appliance
and have understood the haz-
ards involved. Children shall
not play with the appliance.
Cleaning and user mainten-
ance shall not be undertaken
by children without supervi-
sion.
▪ If an appliance is not
equipped with a mains cable
and a plug or other means for
disconnecting from the mains
with a contact opening on
each pole complying with the
conditions of overvoltage cat-
egory III for full isolation, an
isolating device must be in-
corporated into the perman-
ently installed electrical install-
ation in accordance with the
installation regulations.
▪ If the mains cable of this ap-
pliance is damaged, it must
be replaced by the manufac-
turer or its Customer Services
or a similarly qualified person
in order to avoid hazard.
1.3 Appliance-specific safety
precautions
▪ Children aged from 3 to 8
years are allowed to load and
unload refrigerating appli-
ances.
1 Safety precautions
5
1.4 Appliance installation
▪ The appliance must be installed by
qualified personnel only.
▪ Each step must be carried out and
checked in full in the order specified.
▪ Electrical connections must be carried
out by qualified personnel in accord-
ance with the guidelines and standards
for low-voltage installations and the spe-
cifications of the local electricity supply
companies.
▪ A plug-in appliance may only be con-
nected to a socket outlet with earthing
contact, installed according to specifica-
tions. An all-pole mains isolating device
with 3mm contact opening should be
provided in the house wiring system.
Switches, plug and socket devices, cir-
cuit breakers and fusible cut-outs which
are accessible after installation and
which have all-poles switching are per-
missible as isolating devices. Effective
earthing and separately installed neutral
and earth conductors ensure safe and
fault-free operation. After installation,
live parts and cables with basic insula-
tion must not be accessible. Check old
installations.
▪ Refer to the identification plate for in-
formation on the required mains
voltage, current type and fuse protec-
tion.
▪ All plastering, plasterboarding, wall pa-
pering and painting work is to be car-
ried out prior to installing the appliance.
▪ Efficient repairs can only be guaranteed
if it is possible to de-install the complete
appliance at any time without causing
any damage.
▪ The ice-maker (depending on model)
needs to be connected to the domestic
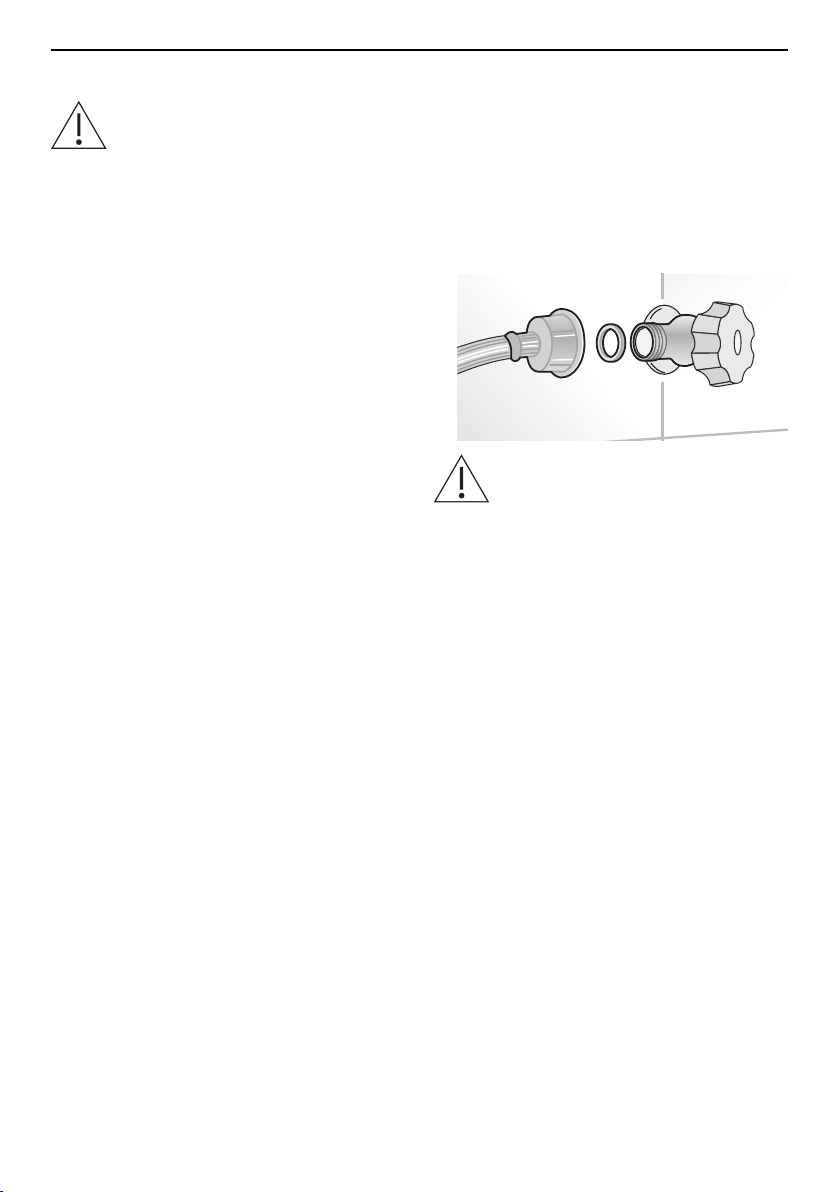
water supply. Use the water inlet hose
with 3/4 inch thread supplied for this.
The water pressure must be between
0.05 MPa and 0.5 MPa (between 0.5
bar and 5 bar). Any deviation in operat-
ing pressure can affect the functioning
of the appliance or cause leaks in the
hydraulic circuit.
▪ Check that there is a water filter cart-
ridge installed and that the water circuit
has been flushed before switching the
ice-maker on for the first time.
▪ The appliance must be supplied with
drinking water only. Establish the water
connection before establishing the elec-
trical connection, as needed (depend-
ing on model).
▪ Do not attempt to use a garden hose,
threaded adapter or braided supply
line. This would damage the threads on
the water connection solenoid of the ap-
pliance.
1.5 Instructions for use
Before using for the first time
▪ The appliance must be installed and
connected to the electricity supply in
accordance with the separate installa-
tion instructions. Have a qualified fitter/
electrician carry out the necessary
work.
▪ Electrical safety (protection against con-
tact) must be ensured by the installa-
tion.

1 Safety precautions
6
▪ If the appliance is visibly damaged, do
not use it. Contact our Customer Ser-
vices. Do not use the appliance if the
cold circuit is damaged.
▪ WARNING: The required room volume
for the appliance is at least 1m
3
per
8g refrigerant (isobutane R600a). In
rooms that are too small, a leak can
produce a flammable air-gas mixture.
The filled volume of the refrigerant is
shown on the identification plate.
▪ WARNING: When installing the appli-
ance, ensure the mains cable is not
trapped or damaged.
▪ WARNING: Do not locate multiple port-
able socket-outlets or portable power
supplies at the rear of the appliance.
▪ Avoid using extension cables.
▪ When installed, it is important to ensure
that the air inlets and vent openings are
not covered or blocked.
▪ Retain these operating instructions for
future reference.
▪ Operating instructions for the appliance
can be downloaded from
www.vzug.com.
▪ Dispose of the packaging material in
accordance with local regulations.
Correct use
▪ The appliance is designed for use in
the home for cooling and storing food.
The appliance must only be used as de-
scribed in the operating instructions.
▪ This appliance is intended for use in the
home and similar settings such as: in
staff kitchens in shops, offices and
other commercial establishments; in ag-
ricultural establishments; by guests in
hotels, motels and other accommoda-
tion establishments; in bed and break-
fast establishments. This appliance is
not intended for use in the professional
sector.
▪ The appliance corresponds to recog-
nized technology standards and the rel-
evant safety regulations. Proper use of
the appliance is essential to avoid dam-
age and accidents. Please therefore fol-
low the precautions given in these oper-
ating instructions.
▪ No liability is assumed for any damage
caused by improper or incorrect use or
by repairs carried out by an unqualified
person. In this case any warranty or
other liability claims are deemed null
and void.
▪ Any repairs, modifications or manipula-
tions to the appliance, especially any
electrically live parts, may only be car-
ried out by the manufacturer, its Cus-
tomer Services or a similarly qualified
person. Repairs if carried out incorrectly
may cause serious injury, damage to
the appliance and fittings, as well as af-
fect the functioning of the appliance. If
the appliance is not working properly or
in case a repair is needed, follow the in-
structions given in the «Service & Sup-
port» section. Contact our Customer
Services if necessary.
▪ Use original spare parts only.
Note on use
▪ Do not operate any electrical devices
inside the refrigerator compartment
and/or freezer compartment.
▪ High-proof alcohol should only be
stored tightly sealed and standing up-
right. Do not store explosive materials
or aerosol cans in close proximity to or
inside of the appliance. Danger of ex-
plosion!
▪ This appliance is CFC- and FC-free and
contains small quantities of the environ-
mentally friendly, but flammable refriger-
ant isobutane (R600a). When handling
the appliance take care not to damage
the cooling circuit. Any refrigerant that
escapes can ignite. If it were to become
damaged, avoid open flames and other

1 Safety precautions
7
ignition sources as isobutane is flam-
mable. Ventilate the room well for a few
minutes. Switch the appliance off and
disconnect from the power supply. Do
not turn on any power supplies. Notify
our Customer Services.
Caution: Risk of injury!
▪ Be careful not to put fingers in the door
hinges, as there is otherwise a risk of
injury if the appliance door is moved.
Particular care should be taken when
children are around.
▪ When positioning the shelves, be care-
ful not to put fingers in the guide rails.
▪ Cut the power going to the appliance
before cleaning. Pull out the mains plug
or switch off the fuse. Never pull the
mains plug out of the mains socket by
the cable or with wet hands. Hold the
mains plug and pull it straight out of the
mains socket.
▪ When the freezer compartment is in op-
eration do not touch the steel interior
walls with moist or wet hands as the
skin could stick to the very cold walls.
▪ Avoid prolonged skin contact with
frozen food. Never consume frozen
food or ice cubes that are straight out
of the freezer compartment or too cold.
Risk of burns from freezing!
▪ Do not place bottles or cans of drink in
the freezer compartment for a longer
period of time. Especially those contain-
ing carbonated drinks can burst during
freezing.
▪ To protect your eyesight, do not look
directly into the LED illumination system
when the light is switched on.
Caution: Risk to life!
▪ Packaging materials, e.g. plastic film
and polystyrene, can be dangerous for
children. Danger of suffocation! Keep
packaging material away from children.
▪ When carrying out maintenance work
on the appliance, including replacing
light bulbs (if how to remove them is
described in the Operating instructions),
cut off the electricity supply to the appli-
ance: remove the screw fuse from the
holder or switch the circuit breaker off,
or unplug from the mains socket.
How to avoid damaging the appliance
▪ Clean the appliance just with water or a
mild soapy solution (water and washing-
up liquid).
▪ Do not use pointed or sharp objects to
remove layers of ice or frozen-on food.
▪ No mechanical or artificial means other
than those recommended may be used
to accelerate defrosting.
▪ Store oils and fats upright in closed
containers. They must not come into
contact with the plastic parts or the
door seal.
2 Using for the first time
Before operating the newly installed appliance for the first time, the following steps
should be taken:
▸ Remove packaging and transport materials as well as any protective film from the in-
terior.
▸ Clean the interior and accessories with lukewarm water or a mild soapy solution (wa-
ter and washing-up liquid) and dry thoroughly.
▸ Check that all appliance door seals are completely dry and dry them if necessary.
▸ After switching the appliance on for the first time, it is recommended waiting for 12
hours without opening the doors or before loading food into it.
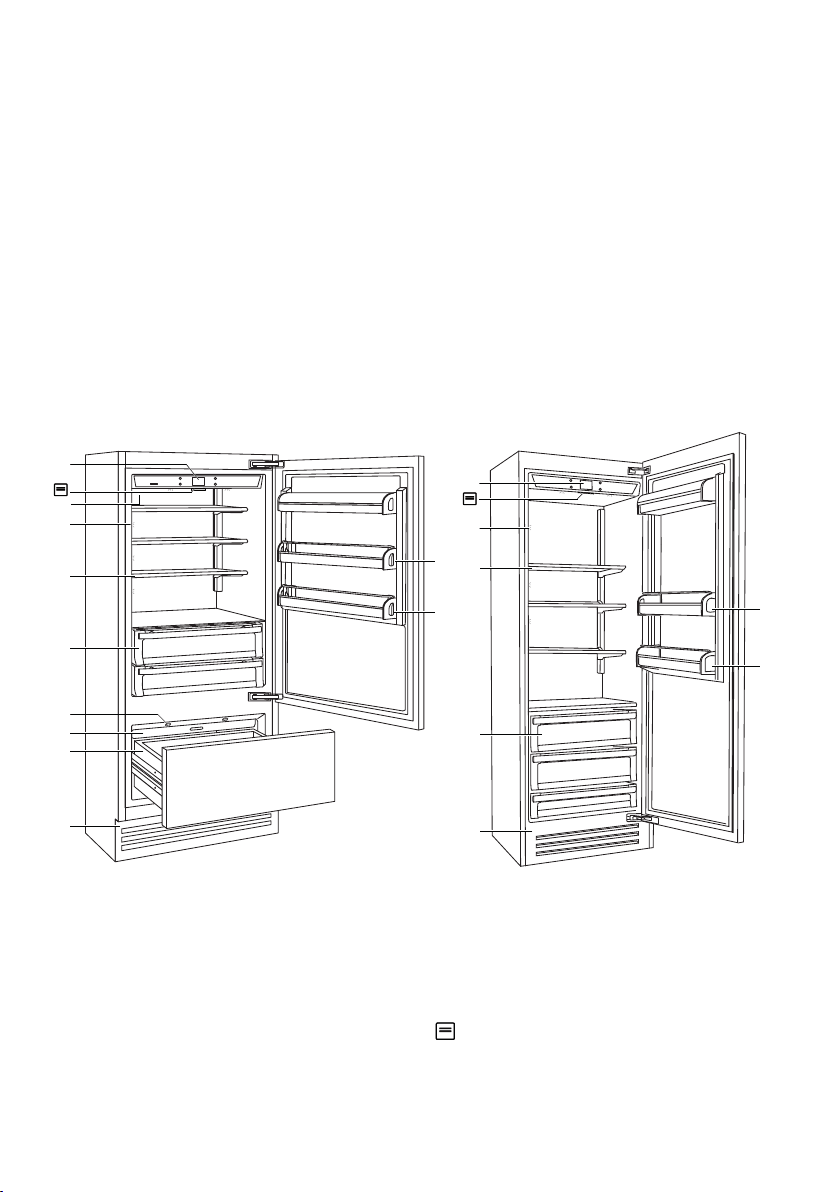
3 Appliance description
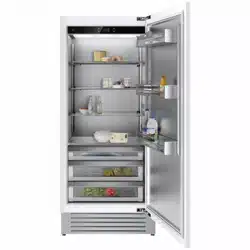
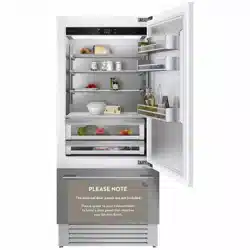
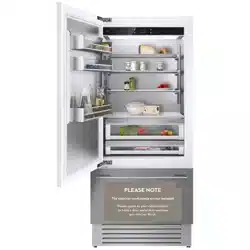
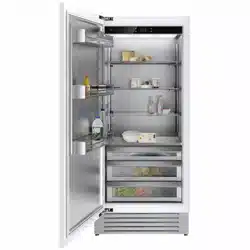
3.1 Structure
51096 CombiCooler V6000 Supreme 51098 Cooler V6000 Supreme
1
2
3
7
6
5
8
4
9
3
10
9
10
1
3
5
4
8
1
Operating and display elements
6
Ice-maker
2
Water filter
7
Freezer drawers
3
LED illumination
8
Condenser
4
Adjustable shelves
9
Door trays
5
Vegetable drawers
10
Door tray for bottles
Identification plate with serial number
(SN)
8

3 Appliance description
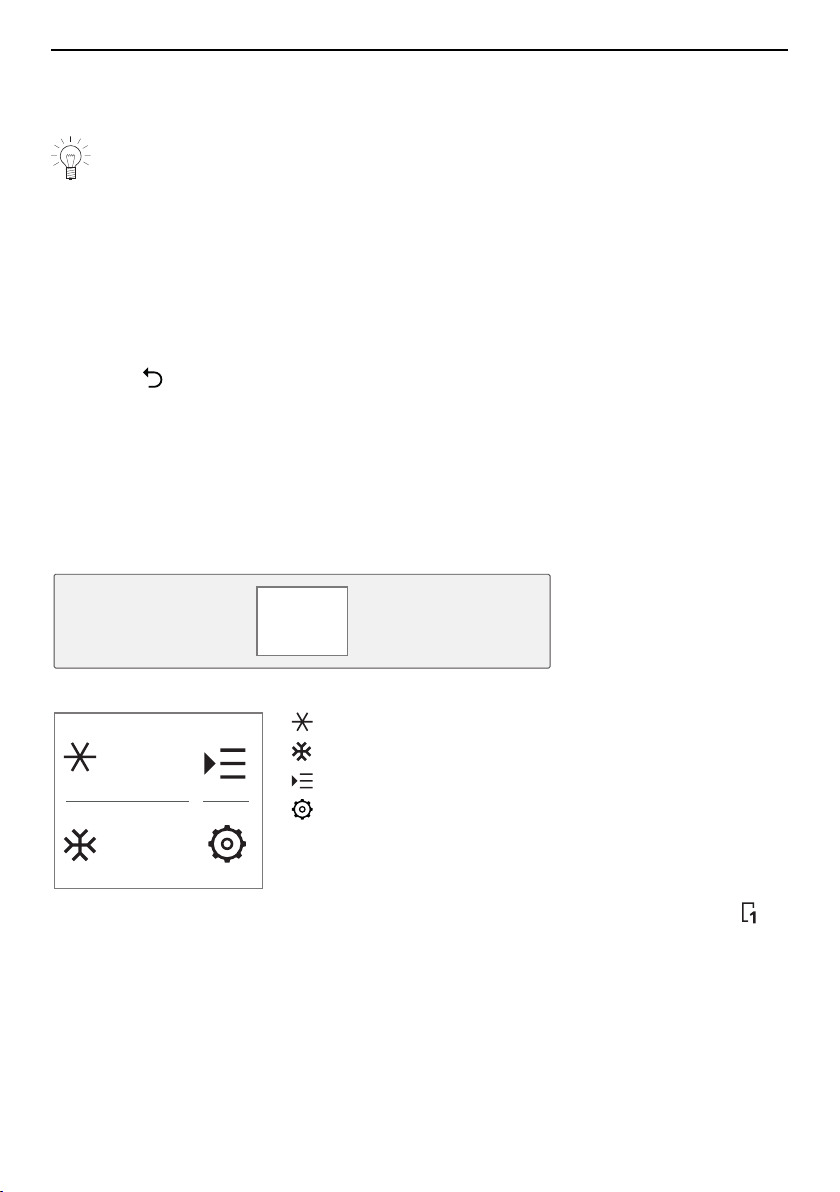
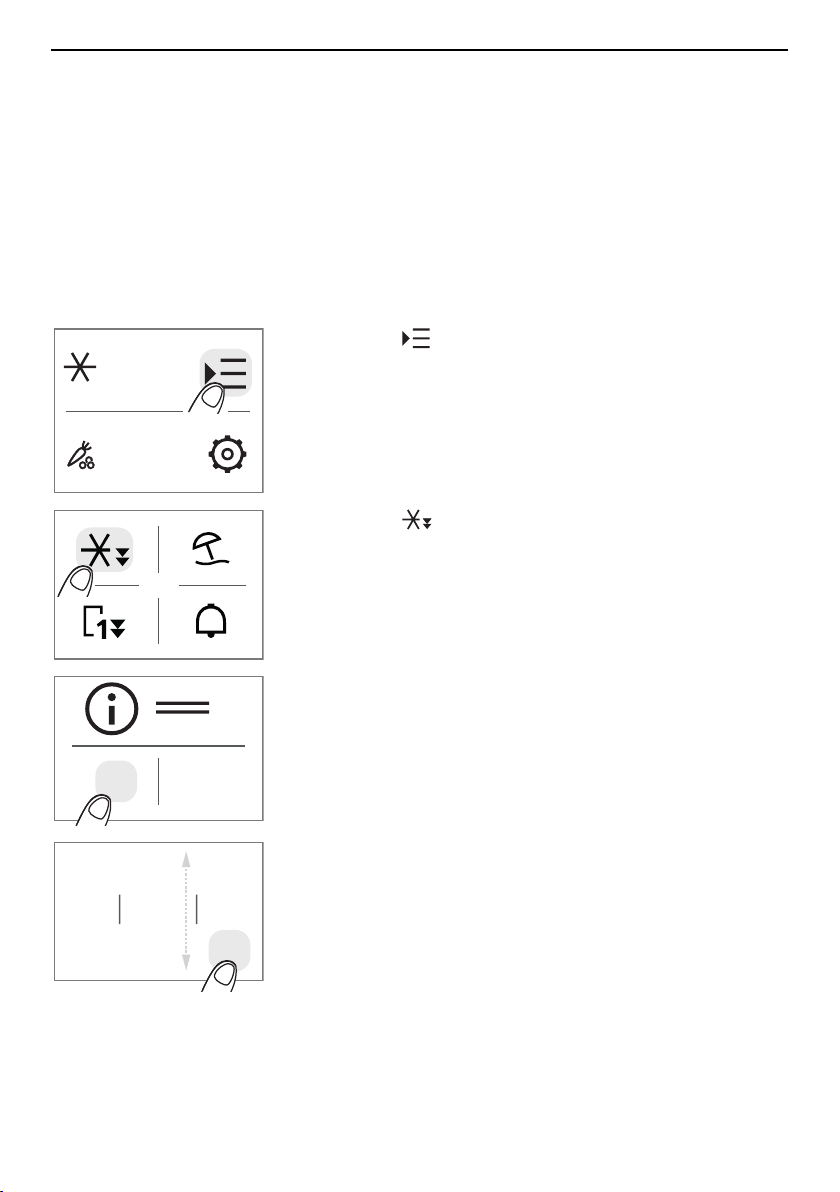
3.2 Operating and display elements
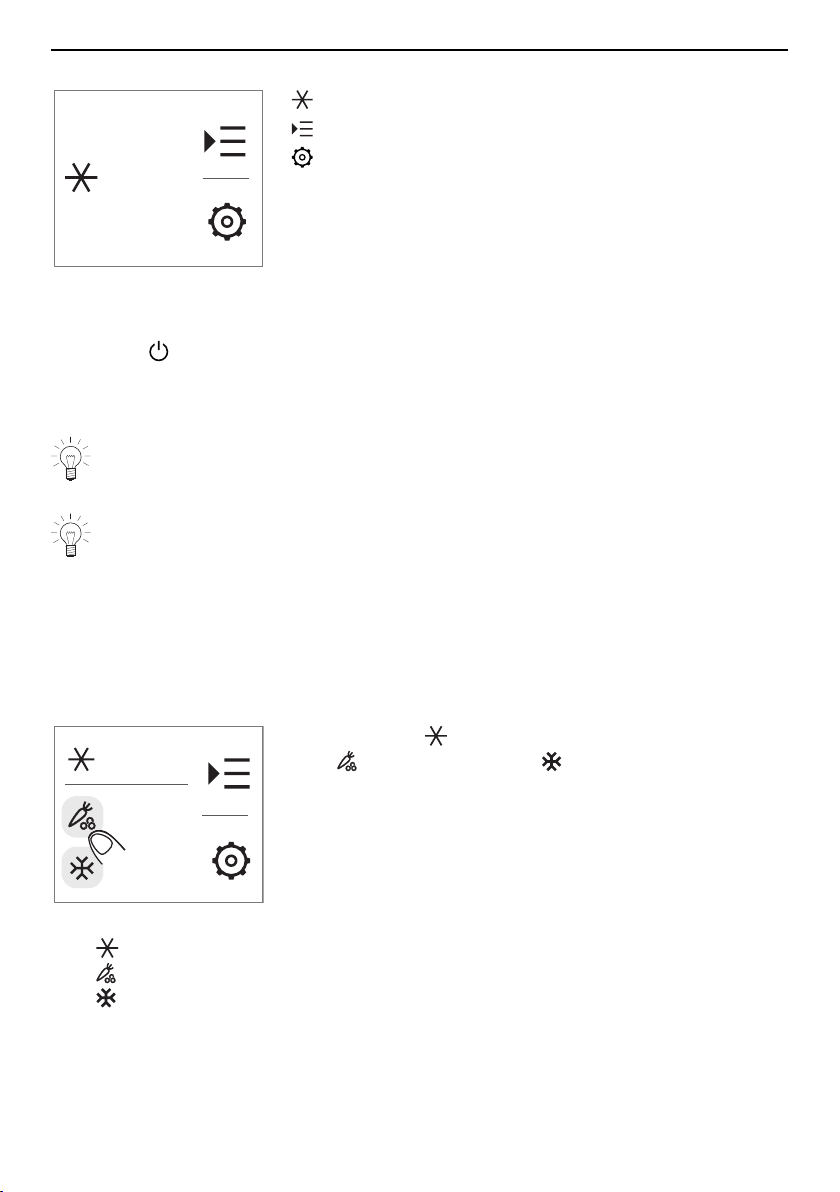
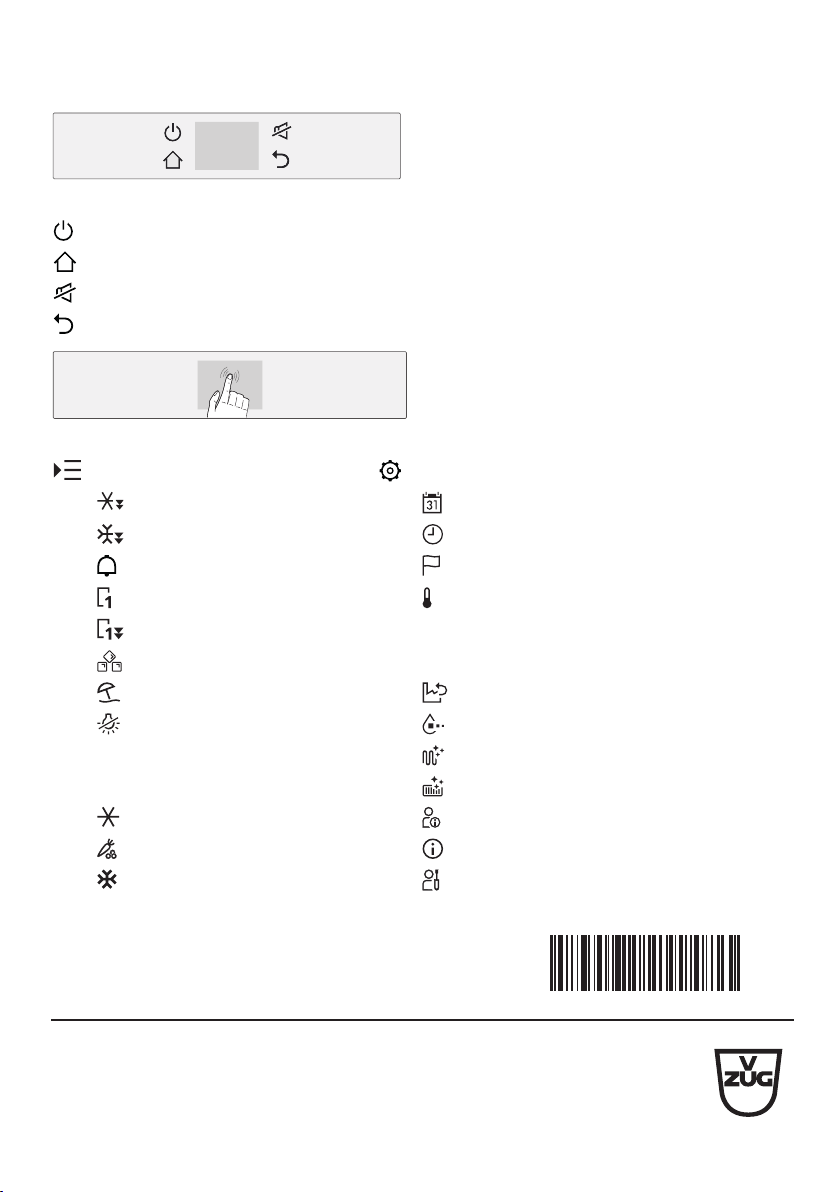
Navigation buttons
ON/OFF (hold for 3 seconds)
Home / Start screen
Acknowledge alarm
BACK: Cancel/Discard entry
Navigation touch display
Functions User setting
Fast cooling Date
Fast freezing* Time
Timer* Language
MonoFridge* Temperature unit °C / °F
Fast cooling MonoFridge*
Ice cube mode*
Other settings
Holiday function Restore factory setting
Sabbath mode Water filter reminder*
Cleaning water system*
Refrigerating zones
Condenser reminder
Refrigerator compartment Demo mode
FreshBox* Information about the appliance
Freezer compartment* Service
(*) Depending on model
9
4 Operating the appliance
4 Operating the appliance
4.1 Basic procedure
The appliance has a display with touch function. Submenus can be selected, mes-
sages confirmed and user settings activated or deactivated by touching the corres-
ponding position in the display.
▪ Various functions and options can be selected by touching the corresponding sym-
bols in the display or the navigation buttons.
▪ Scroll up or down to select the value to be set.
▪ Navigate the functions and settings by swiping to the left and right.
▪ Activated functions and settings are illuminated in orange; other selectable functions
and settings are illuminated in white. Functions and settings that cannot be selected
or changed are greyed out.
▪ Use the button at any time to cancel and discard a change to an existing setting
and without the value of the operating step being accepted. After about 5 seconds
without any interaction the setting is cancelled. The values set are not accepted.
▪ The actual values set are displayed when the door is opened. The appliance shows
the status through an arrow symbol next to the temperature indication in the display
until the temperatures are reached. An arrow pointing down indicates a cooling pro-
cess; an arrow pointing up indicates a rise in temperature in the corresponding zone.
4.2 Overview of start screen
Start screen for the CombiCooler V6000 Supreme (51096)
–
+
5 °C
18°C
Set temperature in the refrigerator compartment
Set temperature in the freezer compartment (*)
Navigate to the functions
Navigate to the settings
(*) This zone can be changed to a refrigerator compartment or a FreshBox with the
MonoFridge function.
10
4 Operating the appliance
Start screen for the Cooler V6000 Supreme (51098)
+
5 °C
Set temperature in the refrigerator compartment
Navigate to the functions
Navigate to the settings
4.3 Switching the appliance on
▸ Plug in the appliance at the mains socket.
▸ Hold the button depressed for 3 seconds.
– The appliance is switched on.
– The V-ZUG logo (display symbol) appears.
– The initial test runs (takes about 3 minutes).
A newly installed appliance takes at least 12 hours (empty state) – keeping the
door closed – to reach its normal operating temperatures. Any error message that
appears during this time is deactivated by pressing the alarm button.
When the appliance is started for the first time if instead of the stand-by message
a different message appears this means that the appliance has already started the
cooling process. During the initial set-up, the settings cannot be changed until the
set temperature is reached.
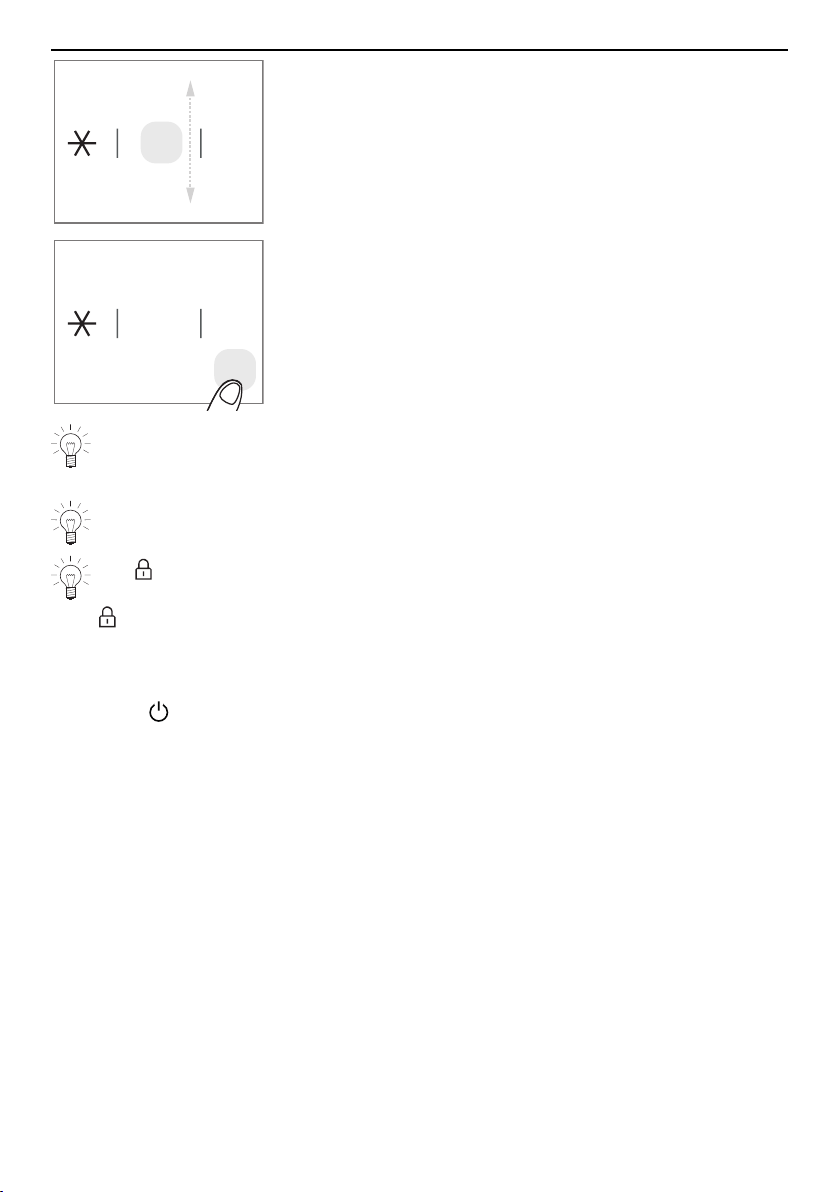
4.4 Setting the temperature
Enter the required temperature by touching the corresponding zone in the display.
Procedure using the example of the refrigerator compartment in the CombiCooler V6000
Supreme (51096):
–
+
5 °C
2
°C
18
°C
– Touch the button for the refrigerator compartment,
for the FreshBox and for the freezer compart-
ment.
Temperature ranges:
– Refrigerator compartment: 2 °C to 8 °C (35 °F to 46 °F).
– FreshBox: -2 °C to 2 °C (28 °F to 35 °F).
– Freezer compartment: -22 °C to -15 °C (-7 °F to 5 °F).
11
4 Operating the appliance
ON
OK
°C+4
+5
+6
+3
+2
▸ Select the desired temperature for the relevant zone by
scrolling up or down.
– The value selected is displayed in orange.
ON
OK
°C+4
+5
+6
+3
+2
▸ Confirm with the OK button to accept the entry.
– The temperature setting has been entered success-
fully.
– The temperature will be reached in a few hours, de-
pending on the setting.
The effective temperature may at times be different from the selected set value if
the door is open for an extended period of time or if warm food has been placed
inside.
If the temperature is set at 2 °C, the effective temperature may at times be colder
and cause product damage. In this case, set the temperature setting higher.
The symbol (value change locked) indicates that changes cannot be applied in
this particular instance. When certain functions (e.g. holiday function) are activated,
is displayed and signals that no change can be made to the temperature. This
remains the case until the relevant function is deactivated.
4.5 Switching the appliance off
▸ Hold the button depressed for 3 seconds.
– Confirm the security question that follows with Yes.
– The appliance switches off.
If the appliance is being taken out of operation, e.g. for repair work or disposal:
▸ Remove the mains plug from the mains socket.
▸ When not in use for an extended period of time: Empty and clean the appliance.
Leave the appliance doors and drawers open to prevent unpleasant odours forming.
12
5 Using the appliance functions and settings
5 Using the appliance functions and settings
5.1 Procedure for display with touch function
Setting the duration
The desired duration (days, minutes or hours) can be chosen for the following functions:
▪ Fast cooling (max. 12 hours), holiday function (max. 90 days)
▪ Fast freezing* (max. 72 hours), fast cooling MonoFridge* (max. 12 hours) and timer*
(max. 45 minutes).
(*) Feature available with the CombiCooler V6000 Supreme (51096).
The function selected ends automatically when the duration set is up.
Procedure using the example of fast cooling:
+
5 °C
+
0 °C
▸ Touch the button.
▸ Select the button.
NoYes
▸ Confirm the info question that follows with Yes.
OK
9
8
10
11
7
hour
Select the desired duration (max. 12 hours) by scrolling up
or down.
▸ Confirm with OK.
13
5 Using the appliance functions and settings
– The function is activated and displayed in orange
in the functions.
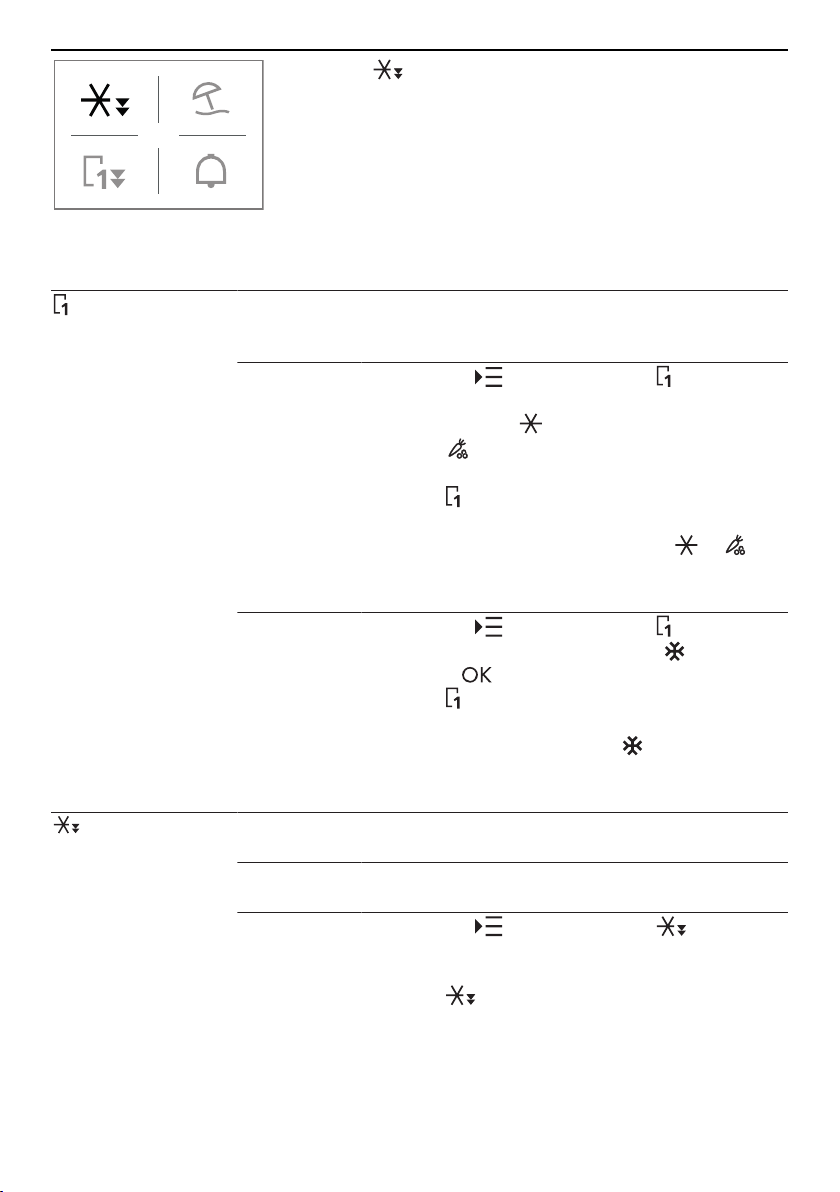
5.2 Using the functions and settings
Function Description
MonoFridge The freezer compartment operates as a second refrigerator com-
partment or a FreshBox. Feature available with the CombiCooler
V6000 Supreme (51096).
Activating
▸ Touch the button and select .
▸ Choose the desired zone:
– operate as a refrigerator compartment
– or a FreshBox.
▸ Confirm with OK.
– The function is activated and displayed in
orange in the overview.
– The activated refrigerating zone or now
appears in the start screen.
Deactivating
▸ Touch the button and select .
▸ Choose the freezer compartment and con-
firm with .
– The function is deactivated and displayed
in white in the overview.
– The freezer compartment now appears in
the start screen.
Fast cooling Preparing the refrigerator compartment ideally for loading food
and food items after a shopping trip.
Activating
For how to do this, see: Procedure for display with
touch function (see page 13).
Deactivating
▸ Touch the button and select .
▸ «Activate fast cooling?» appears. Confirm with
No.
– The function is deactivated and dis-
played in white in the overview.
14
5 Using the appliance functions and settings
Function Description
Fast freezing Preparing the freezer compartment ideally for loading food and
food items after a shopping trip. Feature available with the Combi-
Cooler V6000 Supreme (51096).
Activating
▸ Touch the button and select .
▸ «Activate fast freezing?» appears. Confirm with
Yes.
▸ Select the desired duration (max. 72 hours) by
scrolling up or down.
▸ Confirm with OK.
– The function is activated and displayed in
orange in the overview.
Deactivating
▸ Touch the button and select .
▸ «Activate fast freezing?» appears. Confirm with
No.
– The function is deactivated and displayed
in white in the overview.
Fast cooling
MonoFridge
Preparing the second refrigerator compartment (in the Mono-
Fridge mode) ideally for loading food and food items after a
shopping trip. Feature available with the CombiCooler V6000 Su-
preme (51096).
Activating
▸ Touch the button and select .
▸ «Activate fast cooling MonoFridge?» appears.
Confirm with Yes.
▸ Select the desired duration (max. 12 hours) by
scrolling up or down.
▸ Confirm with OK.
– The function is activated and displayed in
orange in the overview.
Deactivating
▸ Touch the button and select .
▸ «Activate fast cooling MonoFridge?» appears.
Confirm with No.
– The function is deactivated and displayed
in white in the overview.
15
5 Using the appliance functions and settings
Function Description
Timer Acoustic alarm emitted after the selected duration (max. 45
minutes) is up. Feature available with the CombiCooler V6000
Supreme (51096).
Activating
▸ Touch the button and select .
▸ «Activate timer?» appears. Confirm with Yes.
▸ Select the desired duration (max. 45 minutes)
by scrolling up or down.
▸ Confirm with OK.
– The function is activated and displayed in
orange in the overview.
Deactivating
▸ Touch the button and select .
▸ «Activate timer?» appears. Confirm with No.
– The function is deactivated and displayed
in white in the overview.
Holiday function Reduced cooling capacity for the refrigerator compartment
(14 °C). The freezer compartment operates at -18 °C.
Activating
▸ Touch the button and select .
▸ «Activate holiday function?» appears. Confirm
with Yes.
▸ Select the desired duration (max. 90 days) by
scrolling up or down.
▸ Confirm with OK.
– The function is activated and displayed in
orange in the overview.
Deactivating
▸ Touch the button and select .
▸ «Activate holiday function?» appears. Confirm
with No.
– The function is deactivated and displayed
in white in the overview.
16
5 Using the appliance functions and settings
Function Description
Sabbath mode The illumination is not affected by opening or closing the door.
The ice-maker and various functions are temporarily deactivated.
Activating
▸ Preparing for the Sabbath: Touch the button
and select .
▸ «Activate Sabbath mode?» appears. Confirm
with Yes.
▸ Activate the Sabbath mode with Yes.
– The function is activated. The message
«Sabbath mode» appears in the display.
Deactivating
▸ Touch the display to end the active Sabbath
mode.
▸ «Activate Sabbath mode?» appears. Confirm
with No.
– The function is deactivated and displayed
in white in the overview.
– The initial phase takes 3 minutes.
17
5 Using the appliance functions and settings
Function Description
Ice cube mode For regularly making ice cubes. Note: PartyIce and ice cube size
are inactive unless the ice cube mode is activated. Feature avail-
able with the CombiCooler V6000 Supreme (51096).
Activating
▸ Touch the button and select .
▸ «Activate ice cube mode?» appears. Confirm
with Yes.
– The function is activated and displayed in
orange in the overview.
Deactivating
▸ To completely switch off the ice cube mode
(e.g. for defrosting or changing the water filter):
Touch the button and select .
▸ Select «Ice cube mode on/off?» and confirm
with No .
– The function is deactivated and displayed
in white in the overview.
PartyIce
▸ After activating the ice cube mode: Select the
function.
▸ «Activate PartyIce?» appears. Confirm with Yes.
– The function is activated and displayed in
orange in the overview.
Deactivating
PartyIce
▸ With the ice cube mode active: Select .
▸ «Activate PartyIce?» appears. Confirm with No.
– The function is deactivated and displayed
in white in the overview.
/
Ice cube size
▸ After activating the ice cube mode, choose the
desired «Ice cube size»: Choose for medium
and for large.
– The size chosen is accepted.
– The corresponding symbol: for medium
and for large is displayed.
18
5 Using the appliance functions and settings
Setting Description
Accessing the user settings and other settings
.
Date Set the date.
Adjusting
▸ Touch the button and select .
▸ Select the «Year, month and day» by scrolling
up or down and confirm each time with OK.
– The date set is saved.
Time Set the time.
Adjusting
▸ Touch the button and select .
▸ Select a «12» or «24» hour time format.
▸ Select the «Hour and minutes» by scrolling up
or down and confirm each time with OK.
– The time set is saved.
Language Set the language.
Adjusting
▸ Touch the button and select .
▸ Select the desired «Language» by scrolling up
or down.
▸ Confirm with OK.
– The language set is saved.
°C / °F Switching between the unit of temperature.
Adjusting
▸ Touch the button and select .
▸ Touch the desired unit: «°C» or «°F»
▸ Confirm with OK.
– The temperature unit set is saved.
Factory settings Restore factory settings.
Selecting
▸ Touch the button and select .
▸ Confirm the info and security questions that fol-
low with Yes.
– The message «Reset running...» follows.
– Please wait until the message «Reset com-
pleted» appears.
19
5 Using the appliance functions and settings
Setting Description
Water filter
reminder
Reminder to regularly replace the water filter.
Activating
▸ Touch the button and select .
▸ «Activate reminder» appears. Confirm with Yes.
– «Next reminder in 360 days» appears in the
display.
▸ To exit the dialogue, press OK.
– The function is activated and displayed in
orange in the overview.
– A reminder appears in 360 days.
Deactivating
▸ Touch the button and select .
▸ «Next reminder…» appears along with the num-
ber of days remaining to the next reminder.
Confirm with OK.
▸ «Should the reminder remain active?» appears.
Confirm with No.
▸ «Deactivate reminder?» appears. Confirm with
Yes.
– The function is deactivated and displayed
in white in the overview.
Resetting
▸ Touch the button and select .
▸ «Next reminder…» appears along with the num-
ber of days remaining to the next reminder.
Touch Reset.
▸ «Reset reminder?» appears. Confirm with Yes.
– «Next reminder in 360 days» appears in the
display.
– The function is reset and displayed in or-
ange in the overview.
– A reminder appears in 360 days.
20
5 Using the appliance functions and settings
Setting Description
Cleaning
water system
Cleaning of the water system.
Selecting
▸ Touch the button and select .
▸ «Manual clean» appears. Confirm with Yes.
– The message «Please wait» appears.
▸ «Start cleaning» appears. Confirm with Enter.
– The message and status display «Cleaning
running» appears.
– The message «Please wait» appears.
▸ «Please empty ice bin» appears. Confirm with
OK.
▸ Remove and empty the ice bin, then place back
in position.
– The function has been carried out suc-
cessfully.
21
5 Using the appliance functions and settings
Setting Description
Condenser
reminder
Reminder to regularly clean the condenser.
Activating
▸ Touch the button and select .
▸ «Activate reminder» appears. Confirm with Yes.
– «Next reminder in 180 days» appears in the
display.
▸ To exit the dialogue, press OK.
– The function is activated and displayed in
orange in the overview.
– A reminder appears in 180 days.
Deactivating
▸ Touch the button and select .
▸ «Next reminder…» appears along with the num-
ber of days remaining to the next reminder.
Confirm with OK.
▸ «Should the reminder remain active?» appears.
Confirm with No.
▸ «Deactivate reminder?» appears. Confirm with
Yes.
– The function is deactivated and displayed
in white in the overview.
Resetting
▸ Touch the button and select .
▸ «Next reminder…» appears along with the num-
ber of days remaining to the next reminder.
Touch Reset.
▸ «Reset reminder?» appears. Confirm with Yes.
– «Next reminder in 180 days» appears in the
display.
– The function is reset and displayed in or-
ange in the overview.
– A reminder appears in 180 days.
22
5 Using the appliance functions and settings
Setting Description
Demo mode This setting enables specialist retailers to put the appliance into
the showroom mode for demonstration purposes. The demo
mode enables functions to be demonstrated without the appli-
ance being switched on.
Note: This setting is not recommended for private use. The demo
mode can only be activated with a valid password.
Activating
▸ Touch the button and select .
▸ «Activate demo mode?» appears. Confirm with
Yes.
▸ Enter the required password.
– The function is activated and displayed in
orange in the overview.
Deactivating
▸ Touch the button and select .
▸ «Deactivate demo mode?» appears. Confirm
with Yes.
▸ Enter the required password.
– The function is deactivated and displayed
in white in the overview.
Information Information about the appliance
Selecting
▸ Touch the button and select .
– Information about the appliance is displayed.
Service The service setting can only be accessed by Customer Services
with a valid password.
Selecting
▸ Touch the button and select .
▸ «Access service area? Password required» ap-
pears. Confirm with Yes.
▸ Enter the required service code.
– Service data appears.
▸ Confirm with Enter.
– The test starts.
23
5 Using the appliance functions and settings
5.3 Brief description of the appliance functions
MonoFridge
In the MonoFridge mode, the freezer compartment operates as a second refrigerator
compartment or a FreshBox. Prior to activating the MonoFridge, relocate food and food
items that by changing the operating mode can be spoiled through freezing or defrost-
ing. It takes several hours to reach the newly set temperature. Leave the door of the
second refrigerator compartment closed during this time. The fast freezing function
changes to fast cooling MonoFridge.
When the appliance is operated as a FreshBox food that is suitable can be stored for up
to three times longer than in a standard refrigerator compartment.
Depending on the temperature setting, there is a risk that products can freeze in
the FreshBox. In this case, set a higher temperature.
Since food spoils quicker through the transmission of germs, animal and vegetable
foodstuffs should be stored separately in the drawers. If such foodstuffs have to be
stored together for space reasons, it is recommended they be stored covered or
packaged.
Fruit and vegetables that are sensitive to the cold (e.g. tropical and citrus fruit, cu-
cumbers and tomatoes) should be stored outside the FreshBox in order to keep
their flavour and condition at their best.
Fast cooling / Fast cooling MonoFridge* / Fast freezing*
The fast cooling/freezing functions allow larger quantities of food, e.g. after shopping trip
or freezing pre-cooked meals, to be cooled more quickly. The temperature of the refriger-
ating zone (fast cooling, fast cooling MonoFridge) is lowered to the coldest value for a
maximum of 12 hours and similarly the temperature of the freezing zone (fast freezing) is
lowered to the coldest value for a maximum of 72 hours. During fast cooling/freezing,
the appliance operates at higher power, which increases the noise level above the nor-
mal operating noise level. Both functions switch off automatically. In the event of a power
failure, the function must be activated again. To prevent food that is already being stored
from warming up: activate fast cooling/freezing several hours beforehand (e.g. before go-
ing shopping). Fast freezing must be activated at least 24hours before freezing fresh
food. This may be shortened if storing food that is already frozen. (*) Depending on
model.
Holiday function
In the holiday mode, the freezer compartment operates at -18 °C. The refrigerator com-
partment and the second refrigerator compartment with MonoFridge activated operate at
a temperature of about 14°C for hygiene reasons. Keep the appliance doors closed.
The duration can be set between 1 and 90 days or can be ended manually at any time.
The holiday function cannot be activated for use with the FreshBox when the MonoFridge
is active. In the event of a power failure, the function remains activated when power is re-
stored. The holiday function is not intended to be used for the purpose of storing food in
the refrigerator compartment.
24
5 Using the appliance functions and settings
Sabbath mode
When the Sabbath mode is activated, all visual and acoustic warnings are turned off until
it is manually deactivated. The illumination is not affected by opening or closing the door.
The ice-maker and certain other functions are ended when the Sabbath mode is activ-
ated; no acoustic signal is emitted.
The appliance doors must be closed firmly as the visual and acoustic warnings are
turned off.
When the Sabbath mode is activated, no error messages are displayed and no
warnings are given. In certain circumstances, the appliance switches to the emer-
gency mode or cannot maintain the refrigerating temperatures for other reasons.
Check the quality of the food. Do not eat food that has thawed!
Risk of food poisoning.
Ice cube mode
For information, see: Switching on and using the ice-maker (see page 26)
Water filter reminder
When the setting is activated, both the amount of filtered water in litres and the time re-
maining until the filter is exhausted are displayed. When the reminder is reset, the filtered
water counter and time since the filter cartridge was last changed are also reset to null.
The counter has to be reset whenever the filter cartridge is changed.
Cleaning the water system
If the ice cube mode is deactivated or if the ice-maker is not used for a longer period of
time, it is recommended to manually clean the water system. To this end, carefully place
either the ice cube bin or a suitable receptacle for collecting water under the ice-maker
and close the drawer. Repeat the cleaning process until the water is clean. Wash the
bin/receptacle afterwards.
Deactivate the ice cube mode before cleaning the water system.
Condenser reminder
If the setting is activated, a reminder to manually clean the condenser appears every 180
days. For how to do this, see: Care and maintenance (see page 30).
25
6 Switching on and using the ice-maker
6 Switching on and using the ice-maker
Check that there is a water filter cartridge installed and that the water circuit has
been flushed before switching the ice-maker on for the first time.
When operating the ice-maker for the first time, it is recommended the first full bin
of ice made be discarded. The water filter should be cleaned before using the ice-
maker if the appliance has not been used for more than a month. Ice cubes are
only produced in the freezer compartment when the MonoFridge is deactivated.
The ice-maker continues to make ice cubes even if the ice cube bin is not in posi-
tion. The ice-maker switches off automatically when the holiday function is ac-
tivated!
It takes 12 to 24 hours for the ice-maker to run automatically. The ice-maker produces
10 ice cubes per cycle at a rate of roughly 10 cycles per 24 hours. This means that
roughly 100 ice cubes can be produced in 24 hours. The performance of the appliance
depends on the temperature set in the freezer compartment, the ambient air temperature
and how often the door is opened. The appliance makes ice cubes until the bin is full
and once the maximum level is reached it switches off automatically. The ice cube mode
must be switched off if the appliance is not connected to the water supply when in oper-
ation!
The size of ice cube – medium or large – can be chosen using the ice cube size
function. A larger amount of ice can be produced if the PartyIce function is activated.
The function switches off automatically after 24 hours. If the ice cubes are not removed
for a longer period of time, the ice cubes that have already been made gradually shrink,
stick together and become cloudy. Ice cubes can absorb odours from the surroundings
which affect their taste. Prevent odours developing:
▪ Clean the ice cube bin periodically with warm water and then wipe dry. Make sure the
function is switched off before cleaning it.
▪ Dispose of any food that is spoiled in the freezer compartment. Store food in contain-
ers or packaging as airtight as possible to prevent odours developing.
▪ Check the water filter and replace if necessary as well as periodically.
▪ Check the quality of the domestic water supply.
Do not use the ice cube bin to store bottles or to cool food down quickly. The ice-
maker can get blocked and damaged.
26
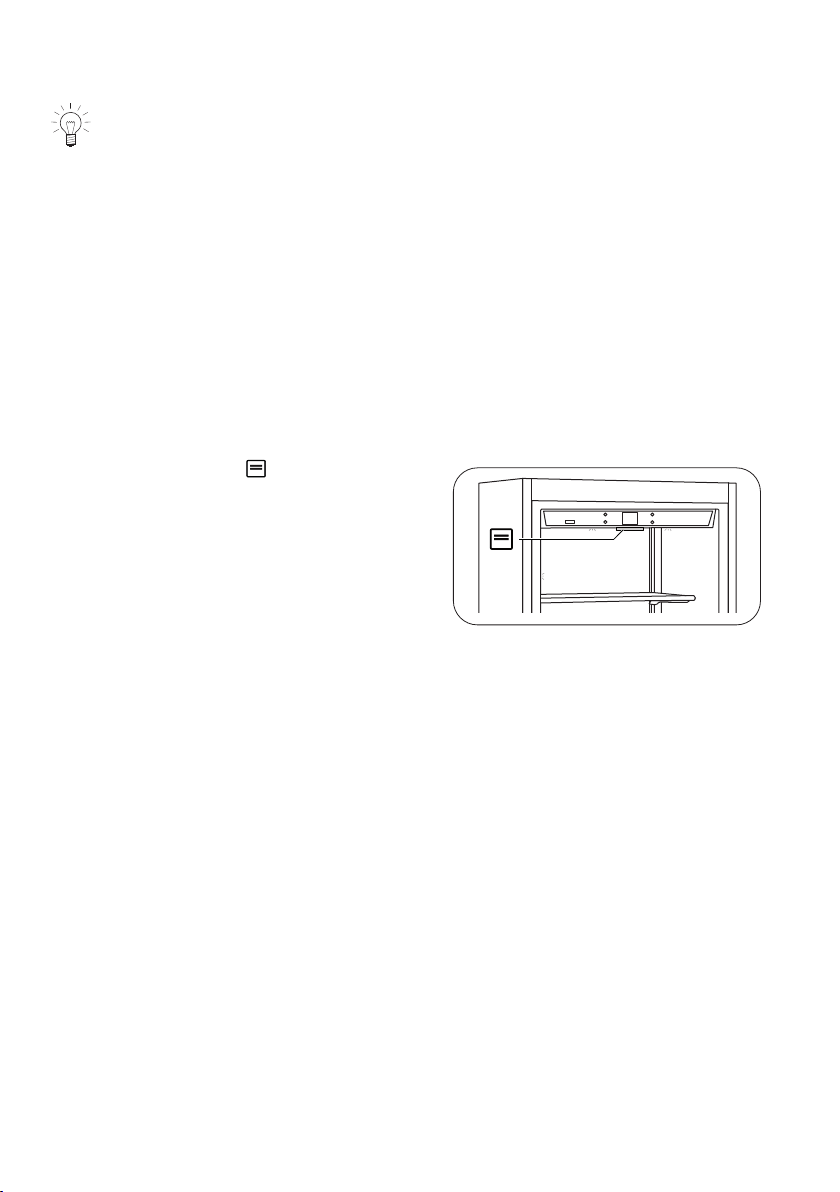
7 Interior and accessories
6.1 Changing the water filter
The water filter ensures optimal water quality for making ice cubes from up to 3,000 l of
water and for up to 12 months. When the filter is almost exhausted a corresponding
message appears in the display.
The filter is located behind the glass panel in the top of the refri-
gerator compartment.
▸ Pull the two levers at either side of the glass panel to release
the lock.
▸ Carefully pull out the glass panel.
▸ Remove the filter cartridge from its holder with one quarter
turn anti-clockwise.
A small amount of water will escape when you do this – this is
normal.
▸ Take the end cap off the new cartridge, set the cartridge in
the holder and turn clockwise one quarter turn until it clicks
into place.
7 Interior and accessories
In the CombiCooler V6000 Supreme (51096), the vegetable drawer, freezer drawer and
ice cube bin can all be removed. The shelves and the door trays on the inside of the re-
frigerator compartment door are height-adjustable. (*) Depending on model
Vegetable drawer
The drawer is on guide rails.
▸ Lift, pull out and remove the drawer.
Freezer drawer*
The drawer is on guide rails.
▸ Remove the adjacent fastening screws (2x).
▸ Lift, pull out and remove the drawer.
▸ To remove the lower main drawer: First unscrew the locking
nuts (4×).
27
7 Interior and accessories
Ice cube bin*
The ice cube bin is located in the top freezer drawer.
▸ After being pulled out, make sure that the ice cube bin is put
back in position correctly.
Keep hands and fingers away from the ice-maker when in operation.
Shelves
The shelves are height-adjustable.
▸ To change the height of a shelf, release the safety cover at
the back and raise the shelf at the front, tilting it slightly.
To remove a shelf:
▸ Raise the shelf and then pull out.
Door trays
1
2
1
2
To adjust or remove the door trays located on the inside of the
appliance door:
▸ Hold the door tray at both ends and push upwards until it
comes out of its fixture.
▸ Pull it outwards. Reverse the steps to put the tray back in
place.
When the appliance is new, it may require a little more effort to adjust the door
trays and shelves.
28
8 Tips and tricks
8 Tips and tricks
8.1 General information on using the appliance
▪ When closing an appliance door make sure that it forms a proper seal all the way
round.
▪ It can take several hours for food and beverages to cool down from room temperature
to the temperature of the refrigerator compartment.
▪ Opening the door for long periods can cause a significant increase of the temperature
in the refrigerating zones of the appliance.
▪ Make sure that food or food items on the glass shelves do not tip over when the appli-
ance door is closed or prevent it from closing properly.
▪ Surfaces that can come in contact with food and accessible drainage systems must
be cleaned regularly.
▪ Changing the temperature setting has no effect on the cooling rate. The fast cooling/
freezing functions increase the cooling rate.
▪ Placing very warm or very cold items (e.g. warm, bottled sauces or frozen food for de-
frosting) directly in front of a temperature sensor (integrated in the right-hand side wall
of the upper section of the refrigerator compartment and above the top drawer of the
freezer compartment) can affect the temperature regulation of the refrigerating appli-
ance adversely: it may cool too little or too much.
▪ Ensure that the air outlets are not blocked by food items.
8.2 Notes on refrigerating and freezing food
▪ Activate the fast cooling/freezing function before putting the food or food items in
the appliance (e.g. before going shopping).
▪ High-protein and high-fat foods are delicate/perishable and have a relatively short
storage life.
▪ Observe best-before and use-by dates.
▪ Wrap or cover food in the refrigerator compartment to prevent it from drying out and
flavours from transferring.
▪ Transfer the contents of opened tins to sealable containers.
▪ Store raw meat and fish in suitable containers in the refrigerator, so that it is not in
contact with or drip onto other food.
▪ There is a risk that freezing fresh food could cause food that is already frozen to par-
tially thaw. Freeze smaller quantities and avoid contact with food that has already
been frozen.
▪ Depending on the product, the following packaging materials are suitable: freezer
bags, aluminium foil or plastic boxes. Freezer burn can be avoided by making the
food packaging as airtight as possible.
▪ Do not refreeze food once defrosted! Only after being prepared (through cooking or
frying) can food be refrozen.
▪ Blanch vegetables before freezing. Aubergines, sweet peppers, courgettes, mush-
rooms, asparagus and herbs do not have to be blanched.
▪ The following products are not suitable for freezing: radishes, lettuces, cucumbers,
raw unshelled eggs, boiled eggs, dairy products such as yogurt, cream cheese, curd
cheese and mayonnaise.
29

9 Care and maintenance
▪ Do not defrost frozen food at room temperature or on the heating. Food defrosts
slowly in the refrigerator compartment. As a quick alternative, defrost in a microwave
or steam cooker.
8.3 Notes on saving energy
▪ Leave the drawers, glass shelves and door trays as far as possible in the positions
that they were in upon delivery. These ensure ideal temperature distribution and effi-
ciency.
▪ Only open the appliance doors when necessary and keep them open for as short a
time as possible.
▪ Allow hot or warm food to cool down before putting it in the appliance.
▪ Store food that releases moisture in closed containers or covered in the refrigerator
compartment. Moisture reduces the cooling capacity.
▪ For ideal air circulation: Do not store food and food items too close to each other.
9 Care and maintenance
9.1 General cleaning instructions
For the hygienic storage of food, the interior should always be kept clean.
Before cleaning, disconnect the appliance from the mains!
Do not use any abrasive cleaning agents or scouring cloths to clean the appliance.
Take care not to press too hard when cleaning the plastic surfaces.
Do not use acidic or strongly alkaline cleaning agents on metal surfaces. Take
care not to damage the refrigerant circuit.
Risk of damage to the appliance.
▸ Clean the steel surfaces with the microfibre cloth and special sponge supplied with
the appliance. To bring the shine back to the steel, slightly dampen the microfibre
cloth before using it. Please observe the detailed instructions contained in the set sup-
plied.
▸ Always wipe in the direction of the satin finish lines of the steel.
▸ Do not use the sponge on aluminium surfaces such as the handles or glass shelf
trims.
9.2 Cleaning the interior
For the hygienic storage of food, the interior should always be kept clean.
Avoid bringing cold parts made of glass such as the shelves into direct contact
with boiling water! Wash all removable accessories by hand, not in the dish-
washer.
Risk of damage to the appliance or permanent deformation.
▸ Condensation can form in the vegetable drawers and on the glass shelves, depending
on the kind and quantity of food being stored. Regularly wipe away any condensation
with a dry cloth.
30
9 Care and maintenance
▸ Ice can build up in the bottom of the FreshBox drawers (if a low temperature has been
set). If this is the case, set the FreshBox temperature to +2 °C, and wipe away the de-
frosted condensate the next day with a dry cloth. If the layer of ice is thick, it may be
necessary to switch off the FreshBox to defrost.
▸ Clean the interior periodically with a mild soapy solution and wipe completely dry.
Do not use water on the electrical parts, light bulbs or control panels.
Risk of damage to the appliance and its parts.
▸ If the appliance is not to be used for a longer period of time, switch it off. Empty and
clean the appliance. Leave the refrigerator and freezer compartment doors open.
9.3 Cleaning and care for the ice-maker
Failure to follow the cleaning and care instructions can affect the quality of the ice
cubes produced.
When using the appliance for the first time and each time after replacing the filter, it is
advisable to discard the ice produced in the first 24 hours.
Clean the ice cube bin regularly simply by holding it under cool, running drinking water.
The filter must be changed whenever the LED on the control panel illuminates or when
the system has not been used for a longer period of time (>30 days).
It is recommended that the ice cube dispensing system be disinfected with a sodium hy-
pochlorite-based disinfectant which is suitable for use on materials that come into con-
tact with food and does not change their properties. Flush the system through with at
least 2 litres of water before use.
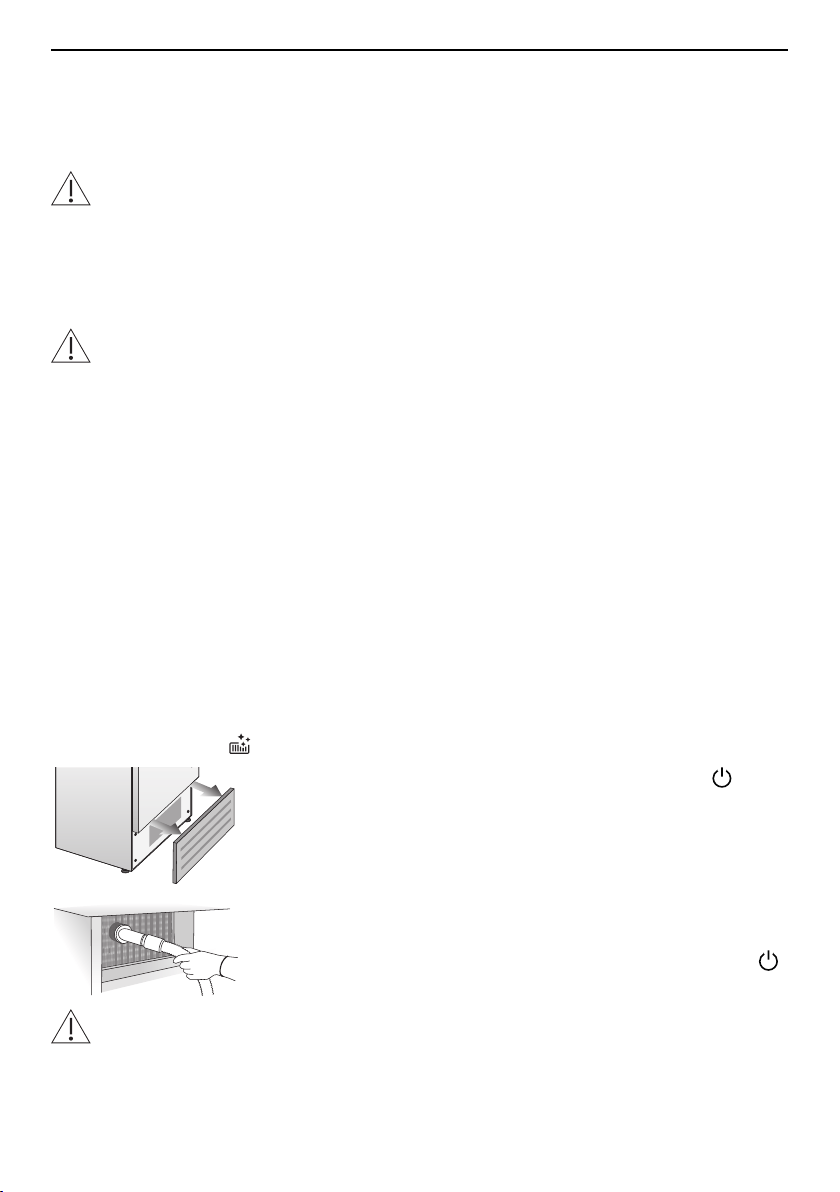
9.4 Cleaning the condenser
The condenser is located behind the front ventilation grille in the bottom part of the appli-
ance. Use a vacuum cleaner with a soft brush attachment on full power to clean the slots
in the ventilation grille. If there is a heavy build-up of dust, the ventilation grille can be re-
moved in order to clean the condenser more thoroughly. A reminder appears in the dis-
play every 180 days. Clean the condenser and then reset the countdown reminder. How
to reset the reminder : Using the functions and settings (see page 14).
▸ Switch off the appliance by pressing and holding the but-
ton for 3 seconds.
▸ Wait for around 30 minutes until the condenser temperature
has reached the ambient air temperature.
▸ Remove the grille below the appliance door(s).
Remove all dust deposits from the condenser, taking care not to
damage it.
▸ Switch the appliance back on by pressing and holding the
button for 3 seconds.
The fins on the condenser are sharp! Use suitable protective equipment for hands
and arms in order to be able to clean the condenser safely.
31
10 Noises
10 Noises
The appliance can make various noises during operation. Although the appliance is
noise-optimized, some noise cannot be eliminated completely. This noise depends on
the size of the appliance, how it is installed and the cooling requirements (e.g. fast cool-
ing), the ambient temperature and the installation conditions. Operating noises are partic-
ularly audible immediately after switching on the compressor; however, these noises be-
come quieter as the appliance runs.
Unusual noises are often caused by improper installation. The appliance must be in-
stalled on a level and stable surface. In open kitchens or in the case of appliances in-
stalled in partitioned areas, normal operating noises may seem louder. This is not a fault
but rather an effect of the design/architecture.
11 Trouble-shooting
This section lists faults that can be solved simply by following the instructions given. If
the fault cannot be remedied, please contact Customer Services. Before contacting Cus-
tomer Services:
▸ Please note down the serial number (SN), which is shown on the identification plate
, and
▸ the sequence of events that led to the fault.
Display message / Fault Solution / Measures
Display: Power failure! ▪ The appliance turns back on automatic-
ally when power is restored and dis-
plays the warmest recorded temperat-
ures.
▸ Press the button to acknowledge the
acoustic alarm message.
▸ Check any refrigerated or frozen food
and discard if spoiled.
Display: Appliance door open ▪ One or more appliance doors are left
open for more than 3 minutes.
▸ Close the appliance door/s.
Display: Replace water filter ▪ The message appears when the remain-
ing filter capacity is at 20%.
▸ Please change the filter as soon as pos-
sible. Further info: Cleaning and care for
the ice-maker (see page 31).
32
11 Trouble-shooting
Display message / Fault Solution / Measures
Display: Refrigerator compartment too warm
Display: FreshBox too warm
Display: Freezer compartment too warm
▪ The appliance displays the warmest re-
corded temperatures in the correspond-
ing zone.
▸ Press the button to acknowledge the
acoustic alarm message.
▸ Do not place warm foods right next to
the temperature sensor. Further info:
General information on using the appli-
ance (see page 29).
Display: Refrigerator compartment too cold
Display: FreshBox too cold
Display: Freezer compartment too cold
▸ Wait for 12 hours.
▸ If the fault persists, please contact Cus-
tomer Services.
Display: Error code
▸ Press the button to acknowledge the
acoustic alarm message.
▸ Contact Customer Services.
Display: Call Customer Services
▸ Press the button to acknowledge the
acoustic alarm message.
▸ Keep the appliance doors closed.
▸ Contact Customer Services.
Display: Clean condenser ▸ A message appears every 180 days.
▸ Please clean the condenser as soon as
possible. Further info: Cleaning the con-
denser (see page 31).
The appliance is not working. ▪ If there is an interruption in the power
supply:
▸ Check the power supply.
▸ Change the fuse.
▸ Reset the automatic circuit breaker.
▪ If the mains voltage is too high:
▸ Have the electrical installation checked
by an expert.
▪ The appliance may otherwise be defect-
ive:
▸ Contact Customer Services.
The illumination is not working. ▪ The Sabbath mode may be active.
▸ Deactivate the Sabbath mode. Further
info: Using the functions and settings
(see page 14).
▪ If the Sabbath mode is deactivated and
the illumination is still not working: LED
illumination is defective.
▸ Contact Customer Services.
33
12 Technical data
Display message / Fault Solution / Measures
The ice-maker is not working. ▸ Make sure that the appliance is connec-
ted to the water supply.
▸ Make sure that the ice-maker is
switched on. Further info: Using the
functions and settings (see page 14).
▸ If the filter has not been replaced for
some time, the flow of water may be im-
peded. Further info: Replacing filter:
Cleaning and care for the ice-maker
(see page 31).
The ice-maker does not produce a large
quantity of ice cubes.
▪ It produces roughly 10 ice cubes in 2
hours.
Ice cubes can freeze into a block of ice. ▪ If ice cubes are used infrequently, it
may well occur that the cubes freeze to-
gether to form a block of ice.
▸ Remove the block of ice and wait for
the ice cube bin to fill with ice cubes
again.
The ice cubes have a funny taste or colour. ▪ When using the ice-maker for the first
time, it is recommended the first full bin
of ice made be discarded.
▸ It may be necessary to replace the filter
cartridge, especially if the appliance has
been switched off for more than a
month or the filter cartridge has not
been changed for more than 6 months.
▸ If the problem could not be resolved:
Call a fitter or a specialist in water treat-
ment systems.
12 Technical data
Product data
▸ See the identification plate, energy label and www.vzug.com.
External dimensions
▸ See installation instructions
Electrical connection
▸ See identification plate
34
13 Disposal
13 Disposal
13.1 Packaging
Never allow children to play with packaging material due to the danger of injury or
suffocation. Store the packaging material in a safe location or dispose of it in an
environmentally-friendly way.
13.2 Safety
Render the appliance unusable to prevent accidents caused by improper use (e.g.
through children playing):
▸ Disconnect the appliance from the mains. With a fixed appliance, this is to be carried
out by a qualified electrician. Then cut the mains cable off flush with the appliance.
▸ When disposing of the appliance, make sure that the appliance door cannot be acci-
dentally closed.
▸ Ensure that the refrigerant circuit is not damaged during the disposal of the appliance.
▸ The refrigerant circuit and insulation in the appliance do not contain any substances
that are harmful to the ozone layer.
13.3 Disposal
▪ The «crossed‐out wheeled bin» symbol requires the separate collection of waste
electrical and electronic equipment (WEEE). Such equipment can contain hazardous,
environmentally harmful materials.
▪ These appliances are to be handed over to a designated collection point for the recyc-
ling of electrical and electronic equipment and must not be disposed of with unsorted
household waste. And in this way, you will be helping to protect resources and the en-
vironment.
▪ For more information, please contact the local authorities.
35

14 Index
A
Appliance disposal .......................................... 35
Appliance functions......................................... 13
Appliance information ..................................... 23
Appliance installation ......................................... 5
C
Care and maintenance ................................... 30
Cleaning............................................................. 30
Cleaning the condenser .......................... 22, 31
Cleaning the ice-maker................................... 31
Cleaning the interior ........................................ 30
Cleaning the water system............................. 21
D
Demo mode ...................................................... 23
Disposal............................................................. 35
E
Electrical connection ....................................... 34
F
Fast cooling ...................................................... 14
Fast cooling MonoFridge ............................... 15
Fast freezing ..................................................... 15
H
Holiday function................................................ 16
I
Ice cube mode ................................................. 18
Ice cube size..................................................... 18
Ice-maker.................................................... 26, 27
Identification plate..................................... 34, 39
Initial set-up ..................................................... 5, 8
Instructions for use ............................................. 5
Introduction ....................................................... 10
M
Model designation .............................................. 2
Model number ..................................................... 2
MonoFridge....................................................... 14
N
Noises ................................................................ 32
Notes.................................................................. 37
O
ON/OFF ......................................................... 9, 40
Operating and display elements...................... 9
Operating the appliance................... 10, 11, 12
Overview ............................................................ 10
P
PartyIce .............................................................. 18
Product data ..................................................... 34
R
Restoring factory settings............................... 19
S
Sabbath mode.................................................. 17
Safety warnings
Appliance installation.....................................5
Appliance-specific ..........................................4
Correct use ......................................................6
General .............................................................4
Service & Support............................................ 39
Setting the date ................................................ 19
Setting the language ....................................... 19
Setting the temperature .................................. 11
Setting the time ................................................ 19
Switching on ..................................................... 11
Switching the appliance off............................ 12
Switching the appliance on............................ 11
Symbols ................................................................ 4
T
Technical data .................................................. 34
Technical questions......................................... 39
Temperature unit.............................................. 19
Timer .................................................................. 16
Tips ..................................................................... 29
Trouble-shooting .............................................. 32
Type....................................................................... 2
U
Using for the first time................................... 5, 8
V
Validity................................................................... 2
Value change locked ...................................... 11
W
Warranty extensions ........................................ 39
Water filter ......................................................... 20
36

37
Notes

38
15 Service & Support
The «Trouble-shooting» section gives you valuable tips on how to deal with minor
malfunctions yourself, saving you the time and trouble of calling out a service tech-
nician and any cost that goes along with it.
Information on the V-ZUG warranty can be found at www.vzug.com →Service
→Warranty information. Please read this information carefully.
Please register your appliance straightaway online at www.vzug.com →Service
→Warranty registration. This will allow you to take advantage of the best possible support
in the event of a fault in the appliance during the guarantee period. You will require the
serial number (SN) and appliance designation to register your appliance. You will find
them on the identification plate of your appliance.
My appliance information:
SN: __________________________ Appliance: ________________________________
Please have this appliance information to hand when contacting V-ZUG. Thank you.
The identification plate is located be-
hind the glass panel in the top of the refri-
gerator compartment. Remove the glass
panel to access the identification plate.
Your repair order
At www.vzug.com →Service→Service number you will find the telephone number of your
nearest V‑ZUG service centre.
Technical questions, accessories, warranty extensions
V-ZUG is happy to help you with any general administrative or technical queries, to take
your orders for accessories and spare parts and to inform you about our progressive
service agreements.
39
Quick instructions
Navigation buttons
ON/OFF (hold for 3 seconds)
Home / Start screen
Acknowledge alarm
BACK: Cancel/Discard entry
Navigation touch display
Functions User setting
Fast cooling Date
Fast freezing* Time
Timer* Language
MonoFridge* Temperature unit °C / °F
Fast cooling MonoFridge*
Ice cube mode*
Other settings
Holiday function Restore factory setting
Sabbath mode Water filter reminder*
Cleaning water system*
Refrigerating zones
Condenser reminder
Refrigerator compartment Demo mode
FreshBox* Information about the appliance
Freezer compartment* Service
(*) Depending on model
V-ZUG Ltd, Industriestrasse 66, CH-6302 Zug
[email protected], www.vzug.com
1098875-R01