Loading ...
Loading ...
Loading ...
49-6000243 Rev. 0
13
INSTALLATION INSTRUCTIONS
Installation Instructions
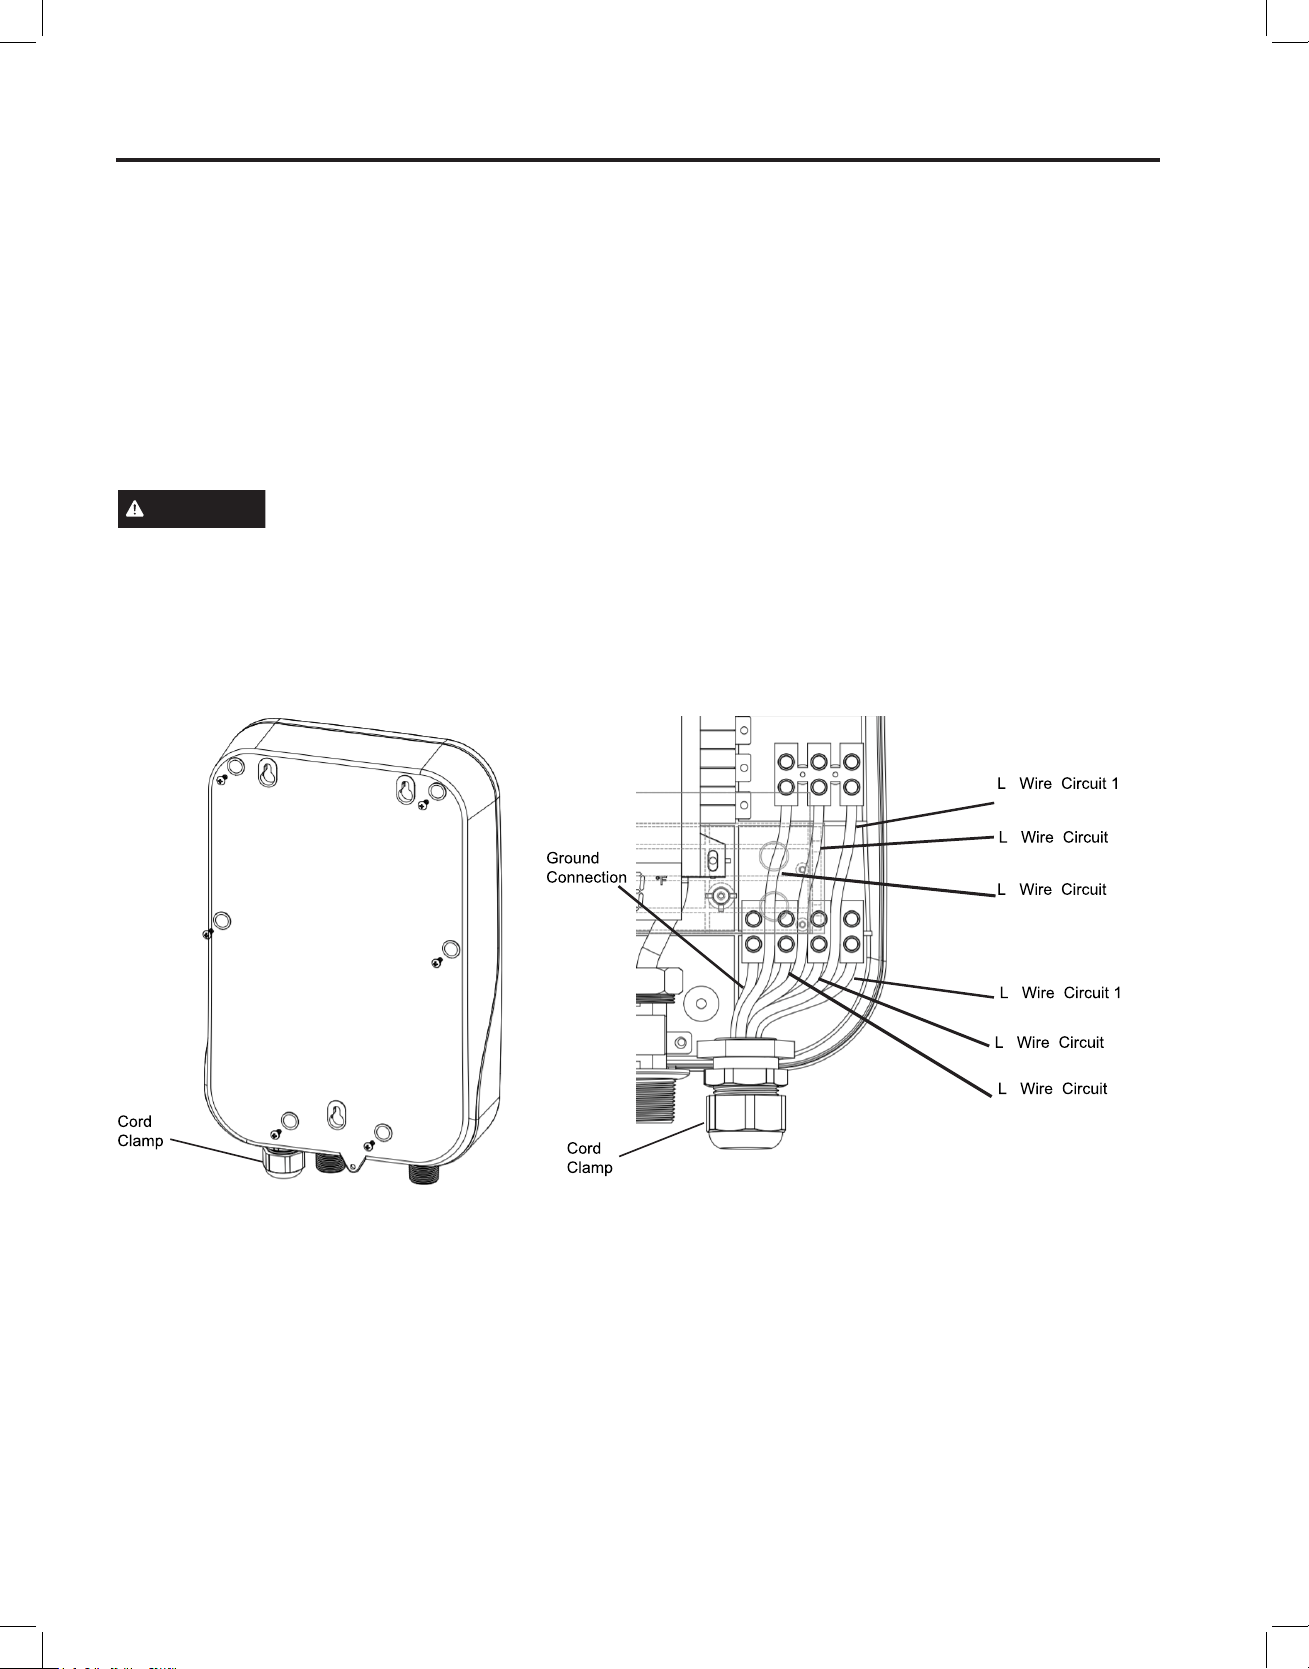
ELECTRICAL CONNECTIONS
To establish electrical connections for the water heater, reference the following diagrams for each applicabel model.
NOTE: Model number can be found on the product rating label. Make sure you are referencing the correct diagram
for your model of water heater.
Tools required:
• Phillips head screwdriver
• Flat head screwdriver
• Scissors
Models: GE18SNHPDG, GE24DNHPDG, GE27DNHPDG
To connect power to the water heater:
1. Turn the power off at the fuse or circuit.
WARNING
Risk of electrical shock, Ensure power to all electrical connections is OFF before
proceeding. Some models are connected to more than one branch circuit, and more than one disconnect
may be required to de-energize the equipment. All branch circuits powering this equipment must be
disconnected.
2. Remove the six screws securing the front and rear cover to access wire connection terminal block.
3. Route power cord through flexible gasket inside water heater.
NOTE: cut opening in flexible gasket just large enough to create opening for power cord to pass through.
2
:
2
: 2
2 : 3
(Not applicable for
GE18SNHPDG)
1
:
1
: 2
1
: 3
(Not applicable for
GE18SNHPDG)
4. Install electrical connections for each individual circuit and wire pairing: L1 to L1, L2 to L2, and Ground to Ground.
NOTE: Models GE
24DNHPDG and GE27DNHPDG will have two open terminals for ground wires. Connect a
maximum of two ground wires per terminal opening. For models with three branch circuits, this means one ground
terminal opening will have two ground wires and the other ground terminal opening will have one ground wire.
5. Replace front case and six screws securing front and rear case.
6. Do NOT turn on power supply to water heater until completing mounting and plumbing section of installation
instructions.
7. Proceed to mounting instructions.
Loading ...
Loading ...
Loading ...