Loading ...
Loading ...
Loading ...
Step 1:
Remove the warming pad from the
package along with the controller(s).
Step 2:
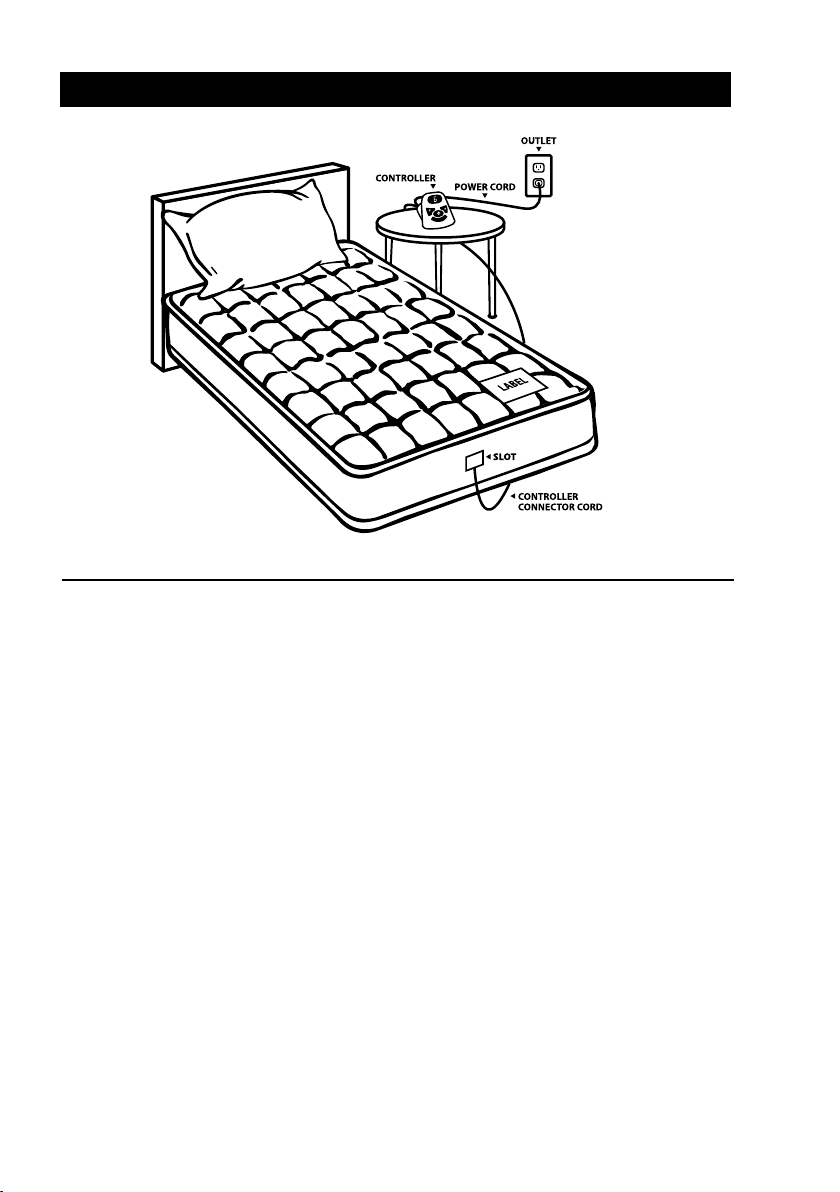
Lay the warming pad out flat, with
the connector(s) located at the bottom.
The label should be located at the bottom
near your feet, and visible.
Step 3:
Before attaching the connector, run the
connector from the controller through
the slot in the warming pad’s skirt so that
it is between the warming pad and the
mattress, with the cord hanging freely
to the controller. This will make it eas-
ier to secure the warming pad skirt to
the mattress and ensure the cord is not
twisted or severely bent. Securely attach
the connector cord from the controller to
the connector on the warming pad. Make
sure that the connection is firmly secured.
Secure the warming pad’s skirt or strap to
the mattress.
For King and Queen size warming pads,
ensure both controllers are connected in
order to utilize/heat both sides of the
warming pad. Alternatively, one connec-
tor may be connected to the side of the
warming pad you wish to utilize/heat.
One controller controls one side.
Step 4:
Insert the power cord from the control-
ler(s) into a standard home 120V AC, 60Hz
wall outlet. Make sure the controller(s) is
not covered, that any vents in the control-
ler housing are not obstructed, and the
controller(s) is not suspended by its cords.
Getting Started - Mattress Pad
8 Customer Support: 800.789.6441
Loading ...
Loading ...
Loading ...