
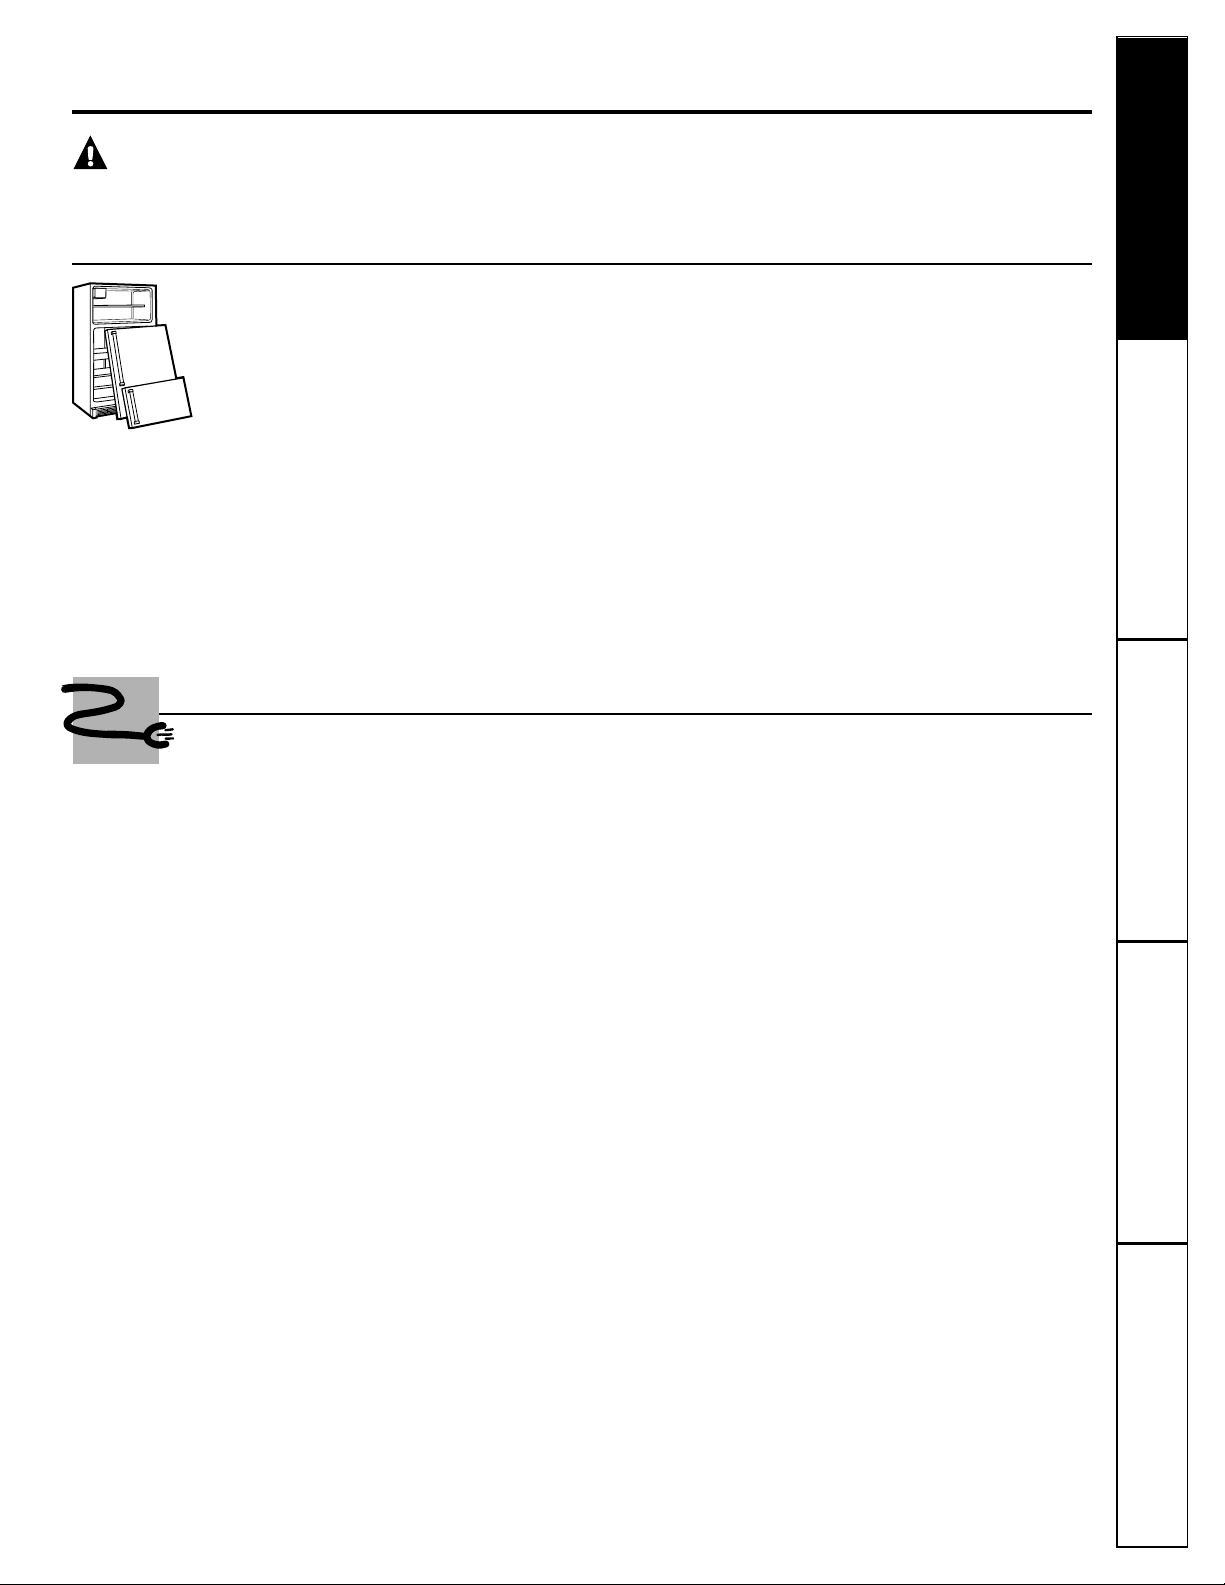
Refrigerators
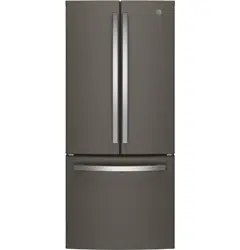
Bottom-Freezer
162D9629P005 49-60135-1 WR6S1 08-02 JR
Model 18
GEAppliances.com
Safety Instructions . . . . . . . .2–4
Operating Instructions
Additional Features . . . . . . . . . .8
Automatic Icemaker . . . . . .9, 10
Care and Cleaning . . . . . . .11, 12
Crispers and Pans . . . . . . . . . . .7
Getting Started . . . . . . . . . . . . .5
Replacing the Light Bulbs . . . .12
Shelves, Bins and
Water Dispenser . . . . . . . . . . . .6
Installation Instructions
Preparing to Install
the Refrigerator . . . . . . . . . . . .13
Reversing the Door Swing . . 14–17
Troubleshooting Tips . . . 18–20
Normal Operating Sounds . . .18
Consumer Support
Consumer Support . . . . . . . . . 24
Warranty (Canadian) . . . . . . . 22
Warranty (U.S.) . . . . . . . . . . . .23
Write the model and serial numbers here:
Model # ________________________
Serial # ________________________
Find these numbers on a label on the
left side, near the top of the freezer
compartment.
Owner’s Manual and
Installation Instructions
Consumer Support Troubleshooting Tips
Operating Instructions Safety InstructionsInstallation Instructions
2
IMPORTANT SAFETY INFORMATION.
READ ALL INSTRUCTIONS BEFORE USING.
WARNING!
Use this appliance only for its intended purpose as described in this Owner’s Manual.
SAFETY PRECAUTIONS
When using electrical appliances, basic safety precautions should be followed, including the following:
■
■ This refrigerator must be properly installed
and located in accordance with the Installation
Instructions before it is used.
■
■ Do not allow children to climb, stand or hang
on the shelves in the refrigerator. They could
damage the refrigerator and seriously injure
themselves.
■
■ Do not touch the cold surfaces in the freezer
compartment when hands are damp or wet.
Skin may stick to these extremely cold surfaces.
■
■ Do not store or use gasoline or other flammable
vapors and liquids in the vicinity of this or any
other appliance.
■
■ Do not refreeze frozen foods which have
thawed completely.
■
■ In refrigerators with automatic icemakers, avoid
contact with the moving parts of the ejector
mechanism, or with the heating element located
on the bottom of the icemaker. Do not place
fingers or hands on the automatic icemaking
mechanism while the refrigerator is plugged in.
■
■ Keep fingers out of the “pinch point” areas;
clearances between the doors and between
the doors and cabinet are necessarily small.
Be careful closing doors when children are
in the area.
■
■ Unplug the refrigerator before cleaning and
making repairs.
NOTE: We strongly recommend that any servicing be
performed by a qualified individual.
■
■ Before replacing a burned-out light bulb,
unplug the refrigerator or turn off power at the
circuit breaker or fuse box in order to avoid
contact with a live wire filament. (A burned-out
light bulb may break when being replaced.)
■
■ Turning the control to the OFF position does
not remove power to the light circuit.
3
Consumer SupportTroubleshooting TipsOperating InstructionsSafety Instructions Installation Instructions
PROPER DISPOSAL OF THE REFRIGERATOR
Child entrapment and suffocation are not problems
of the past. Junked or abandoned refrigerators are
still dangerous…even if they will sit for “just a few
days.” If you are getting rid of your old refrigerator,
please follow the instructions below to help prevent
accidents.
Before You Throw Away Your Old Refrigerator
or Freezer:
■ Take off the doors.
■ Leave the shelves in place so that children
may not easily climb inside.
CFC Disposal
Your old refrigerator has a cooling system that used
CFCs (chlorofluorocarbons). CFCs are believed to
harm stratospheric ozone.
If you are throwing away your old refrigerator, make
sure the CFC refrigerant is removed for proper
disposal by a qualified servicer. If you intentionally
release this CFC refrigerant you can be subject to
fines and imprisonment under provisions of
environmental legislation.
USE OF EXTENSION CORDS
Because of potential safety hazards under certain conditions, we strongly recommend
against the use of an extension cord.
However, if you must use an extension cord, it is absolutely necessary that it be a UL-listed (in the United
States) or a CSA certified (in Canada), 3-wire grounding type appliance extension cord having a grounding
type plug and outlet and that the electrical rating of the cord be 15 amperes (minimum) and 120 volts.
DANGER! RISK OF CHILD ENTRAPMENT
GEAppliances.com

4
Consumer Support Troubleshooting Tips
Operating Instructions Safety InstructionsInstallation Instructions
Troubleshooting Tips
Installation Instructions Safety InstructionsOperating Instructions
Troubleshooting Tips
Installation Instructions Safety InstructionsOperating Instructions
IMPORTANT SAFETY INFORMATION.
READ ALL INSTRUCTIONS BEFORE USING.
WARNING!
HOW TO CONNECT ELECTRICITY
Do not, under any circumstances, cut or remove the third (ground) prong from the power cord.
For personal safety, this appliance must be properly grounded.
The power cord of this appliance is equipped
with a 3-prong (grounding) plug which mates
with a standard 3-prong (grounding) wall outlet
to minimize the possibility of electric shock hazard
from this appliance.
Have the wall outlet and circuit checked by
a qualified electrician to make sure the outlet
is properly grounded.
Where a standard 2-prong wall outlet is
encountered, it is your personal responsibility
and obligation to have it replaced with a properly
grounded 3-prong wall outlet.
The refrigerator should always be plugged into
its own individual electrical outlet which has
a voltage rating that matches the rating plate.
This provides the best performance and also
prevents overloading house wiring circuits which
could cause a fire hazard from overheated wires.
Never unplug your refrigerator by pulling on
the power cord. Always grip plug firmly and pull
straight out from the outlet.
Repair or replace immediately all power cords
that have become frayed or otherwise damaged.
Do not use a cord that shows cracks or abrasion
damage along its length or at either end.
When moving the refrigerator away from the
wall, be careful not to roll over or damage the
power cord.
USE OF ADAPTER PLUGS (Adapter plugs not permitted in Canada)
Because of potential safety hazards under certain conditions, we strongly recommend against
the use of an adapter plug.
However, if you must use an adapter, where local
codes permit, a temporary connection may be made
to a properly grounded 2-prong wall outlet by use
of a UL-listed adapter available at most local
hardware stores.
The larger slot in the adapter must be aligned with
the larger slot in the wall outlet to provide proper
polarity in the connection of the power cord.
When disconnecting the power cord from the
adapter, always hold the adapter in place with one
hand while pulling the power cord plug with the
other hand. If this is not done, the adapter ground
terminal is very likely to break with repeated use.
If the adapter ground terminal breaks, DO NOT USE
the refrigerator until a proper ground has been
established.
Attaching the adapter ground terminal to a wall outlet
cover screw does not ground the appliance unless the
cover screw is metal and not insulated, and the wall
outlet is grounded through the house wiring. You should
have the circuit checked by a qualified electrician to make
sure the outlet is properly grounded.
READ AND FOLLOW THIS SAFETY INFORMATION CAREFULLY.
SAVE THESE INSTRUCTIONS

Consumer SupportTroubleshooting TipsOperating Instructions
Safety Instructions
Installation Instructions
5
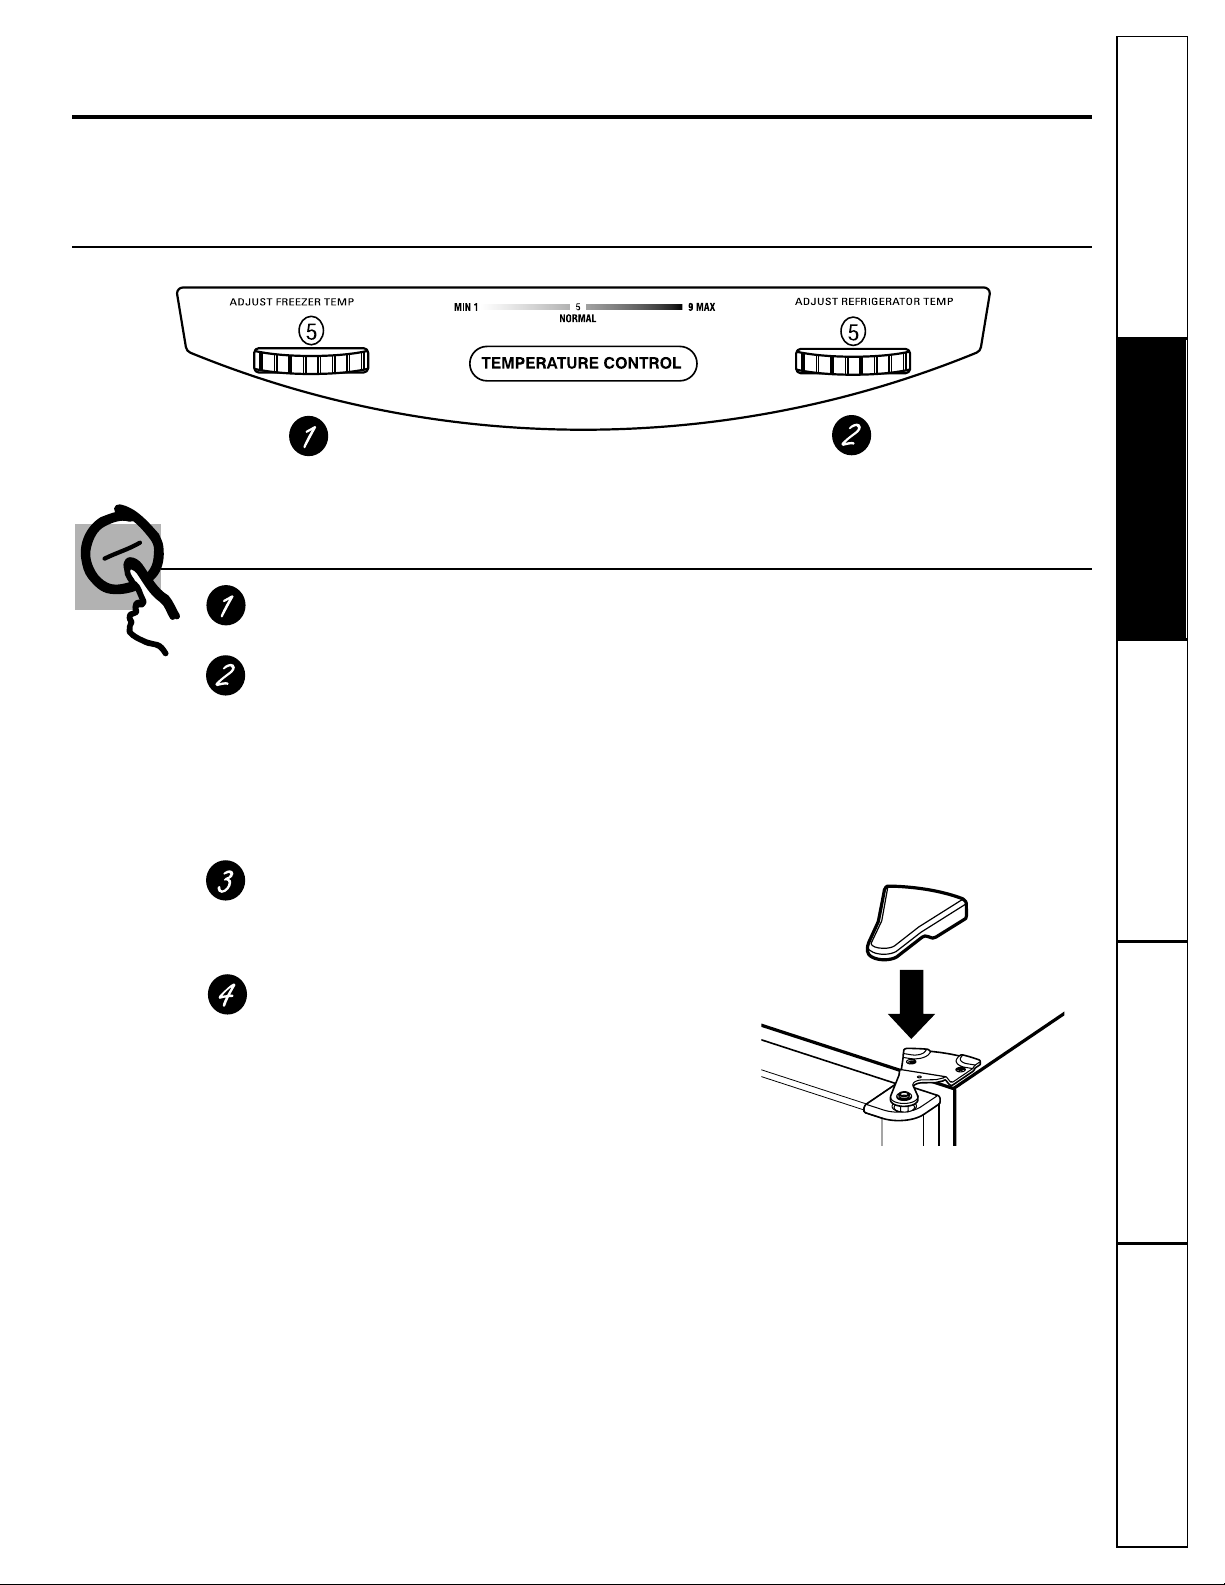
Getting started. GEAppliances.com
Checklist
Freezer Control
The freezer control maintains the temperature in the freezer compartment.
Refrigerator Control
The refrigerator control maintains the temperature throughout the refrigerator compartment.
Moving the refrigerator control to OFF stops cooling in both areas---refrigerator and freezer---but
does not shut off power to the refrigerator.
After changing the controls, allow 24 hours for the refrigerator to reach the temperature you have set.
Install Top Hinge Cover
If not already installed, locate the plastic hinge
cover inside the parts kit and carefully snap it over
the top hinge.
Adjust Rollers So Doors/Drawer Automatically Close
The refrigerator should be elevated slightly at the front so
the doors/drawer will close automatically when partially
open. See Preparing to Install the Refrigerator.
Initially set the refrigerator and freezer controls at 5.
For refrigerator and freezer, 5 is normal, 9 is coldest.
If you want colder or warmer temperatures, adjust the
refrigerator temperature first. When satisfied with that
setting, adjust the freezer temperature.
COLD 1
9 COLDEST
NORMAL
Top Hinge Cover Part Nos.
WR2S56 Bisque
WR2S72 Black
WR2S8 White

Consumer Support Troubleshooting Tips
Operating Instructions Safety InstructionsInstallation Instructions
Troubleshooting Tips
Installation Instructions Safety InstructionsOperating Instructions
Troubleshooting Tips
Installation Instructions Safety InstructionsOperating Instructions
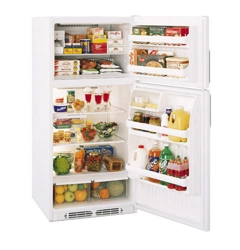
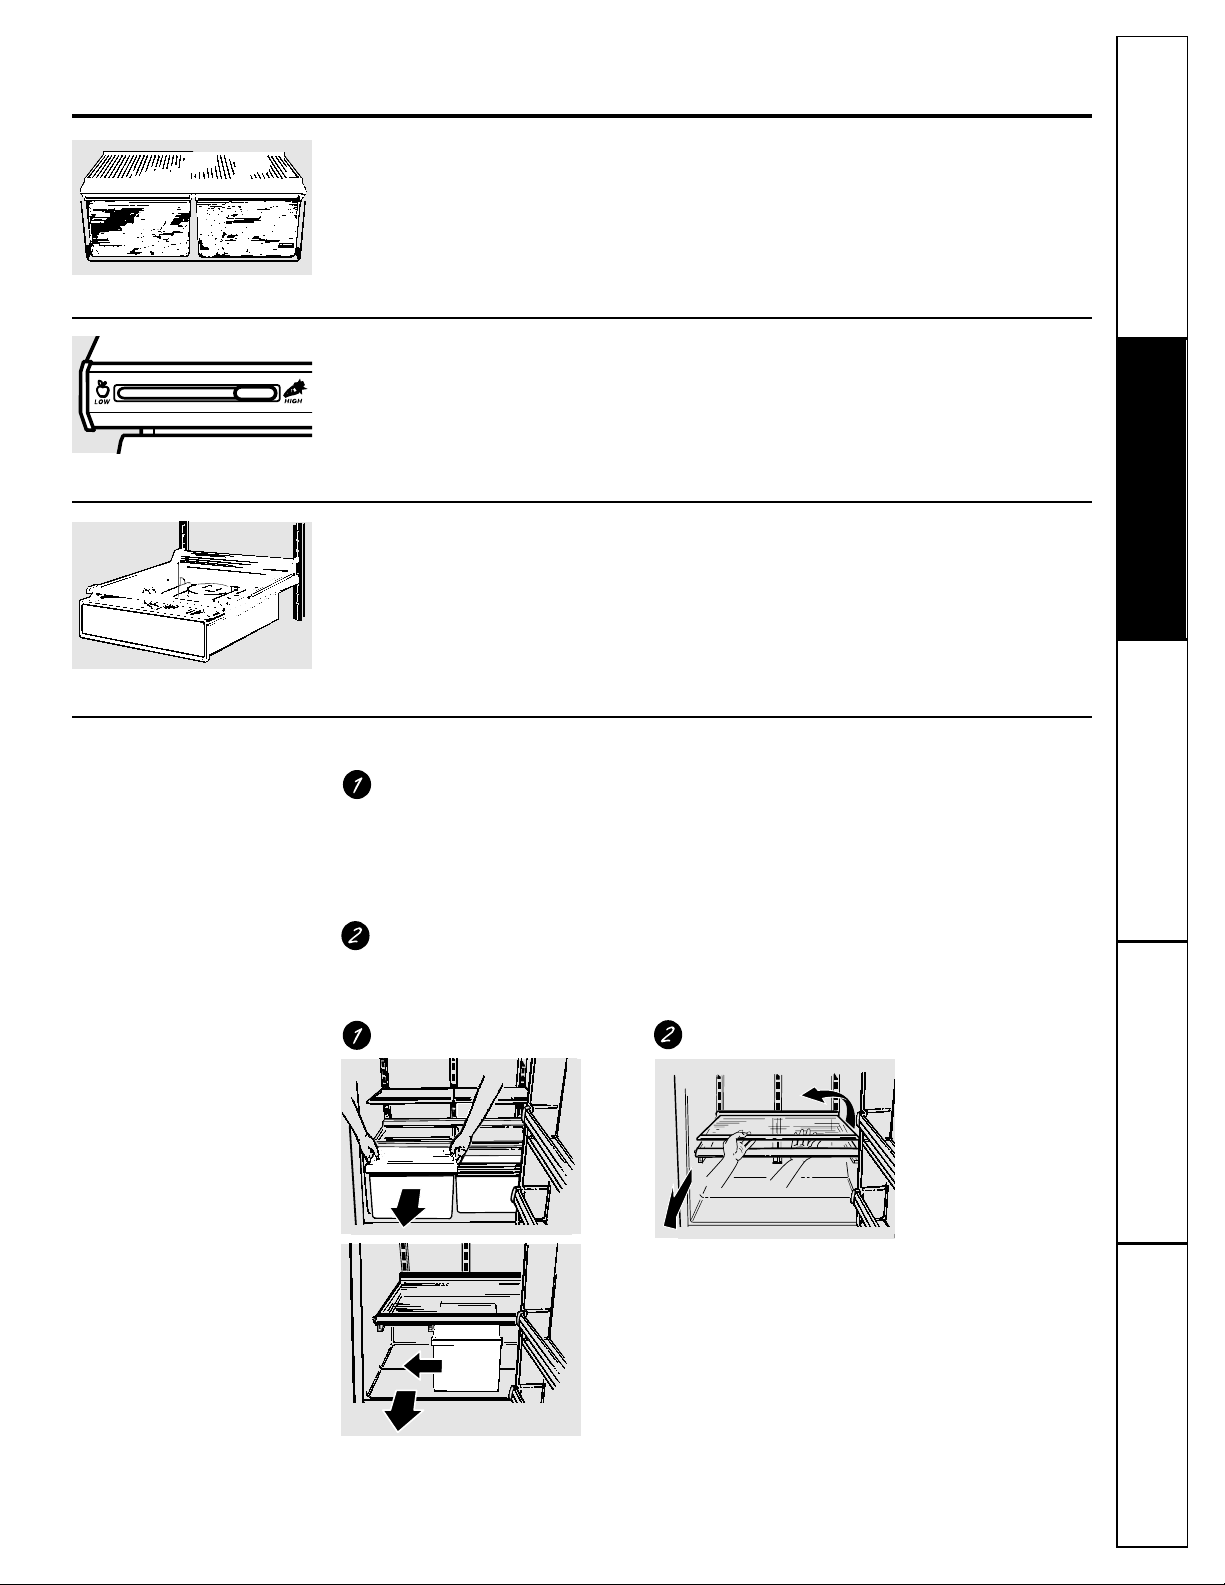
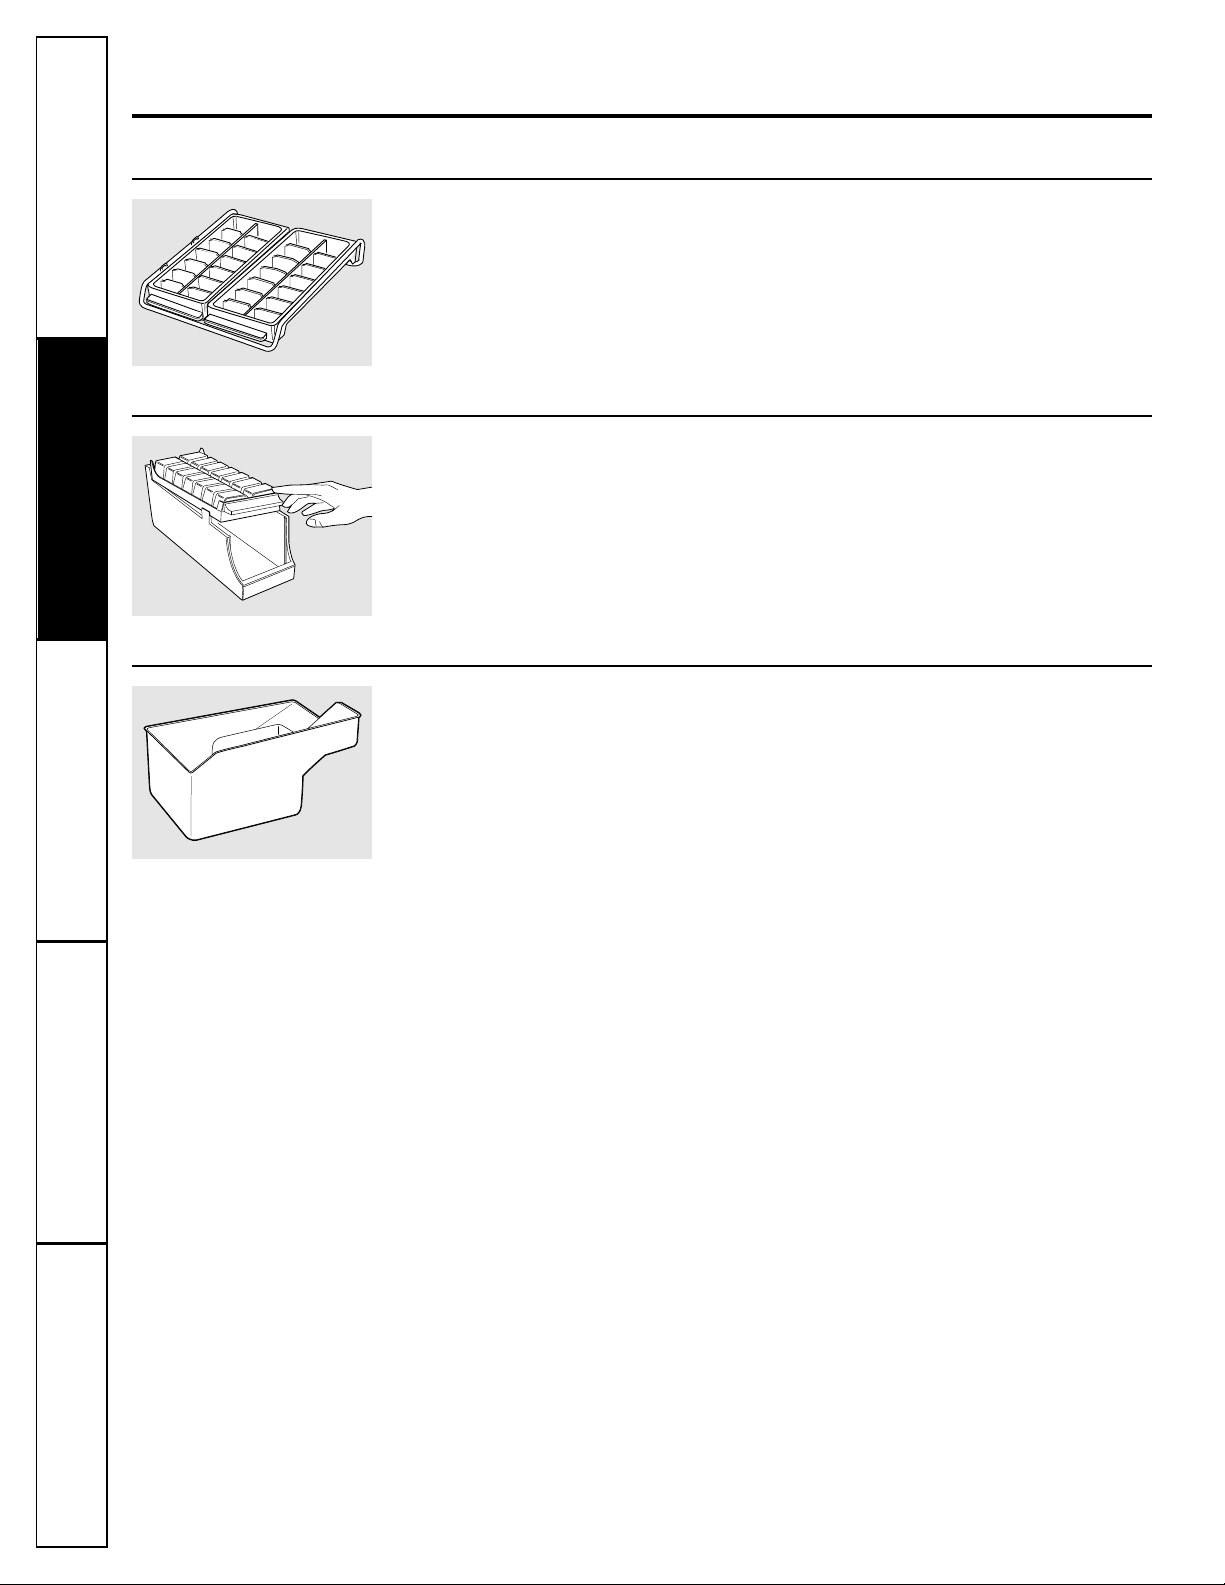
About the refrigerator shelves, bins and water dispenser.
Not all features are on all models.
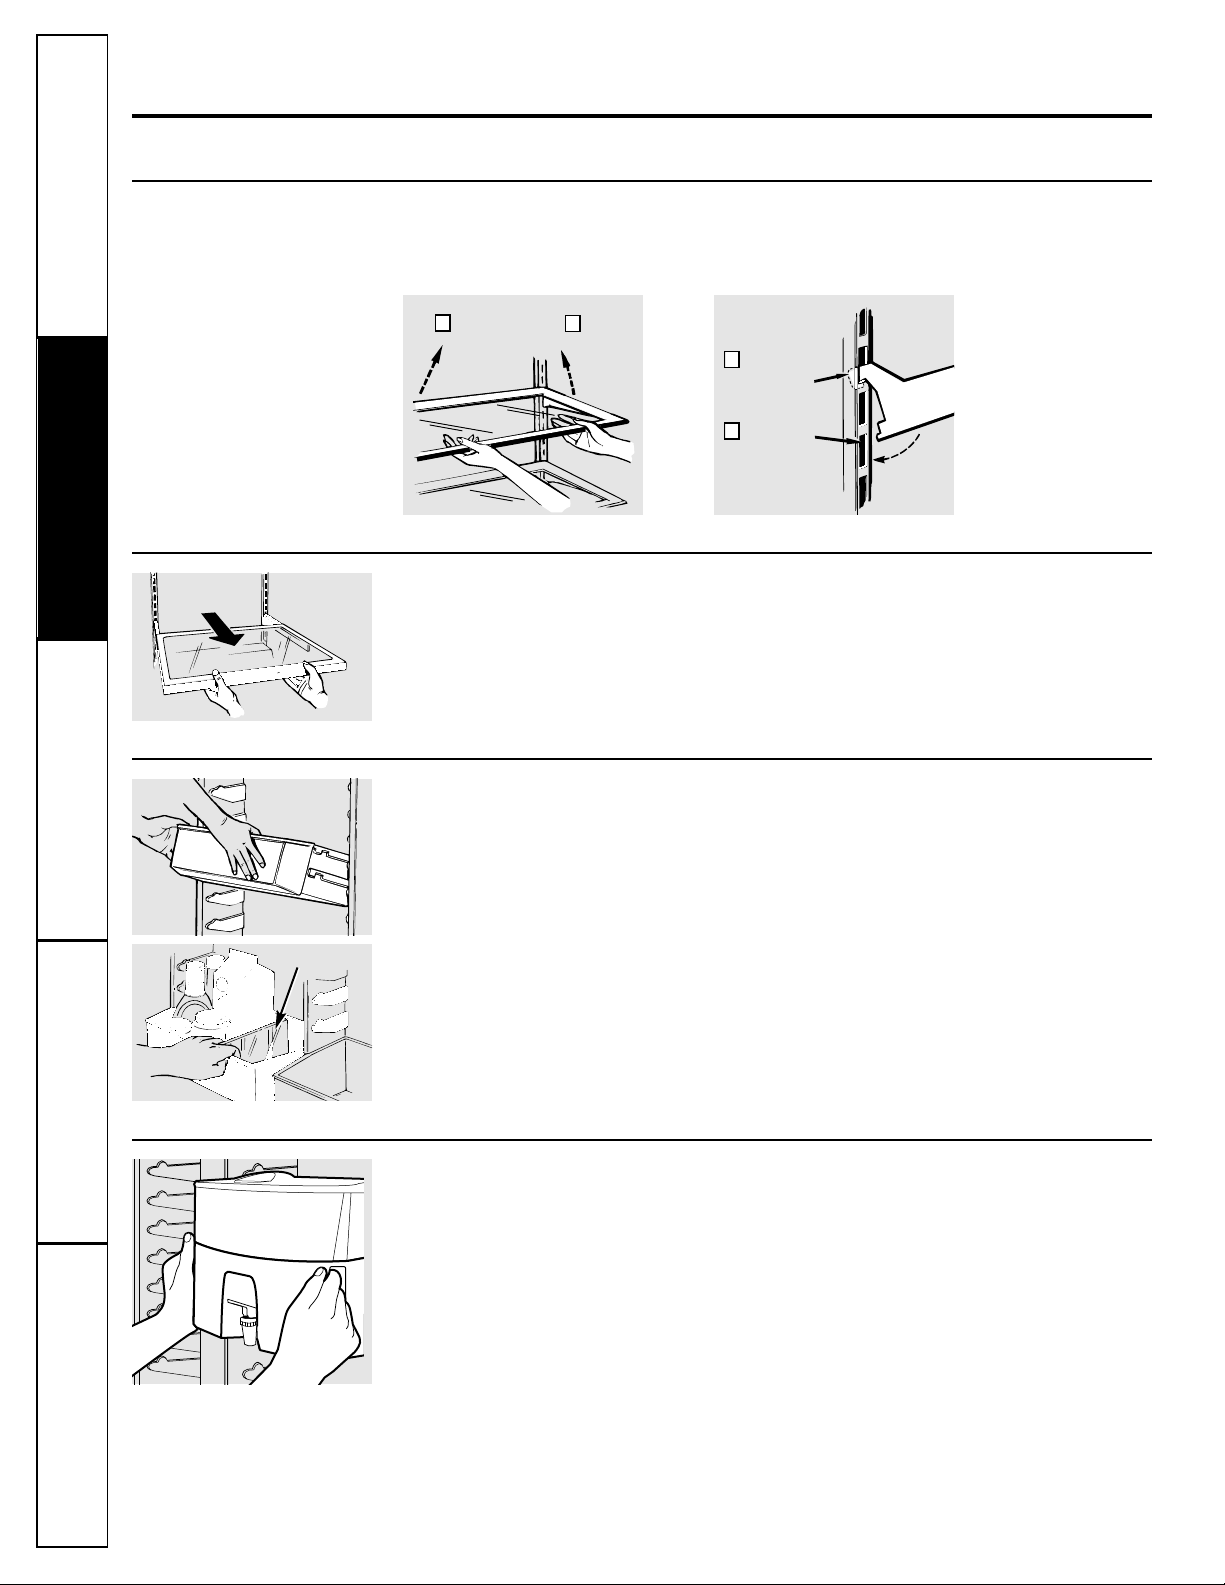
Rearranging the Shelves
Glass and wire shelves in the refrigerator compartment are adjustable.
To Remove To Replace
Lift up and out
2
Insert
top hook
1
Lower to
lock in place
2
Tilt up
1
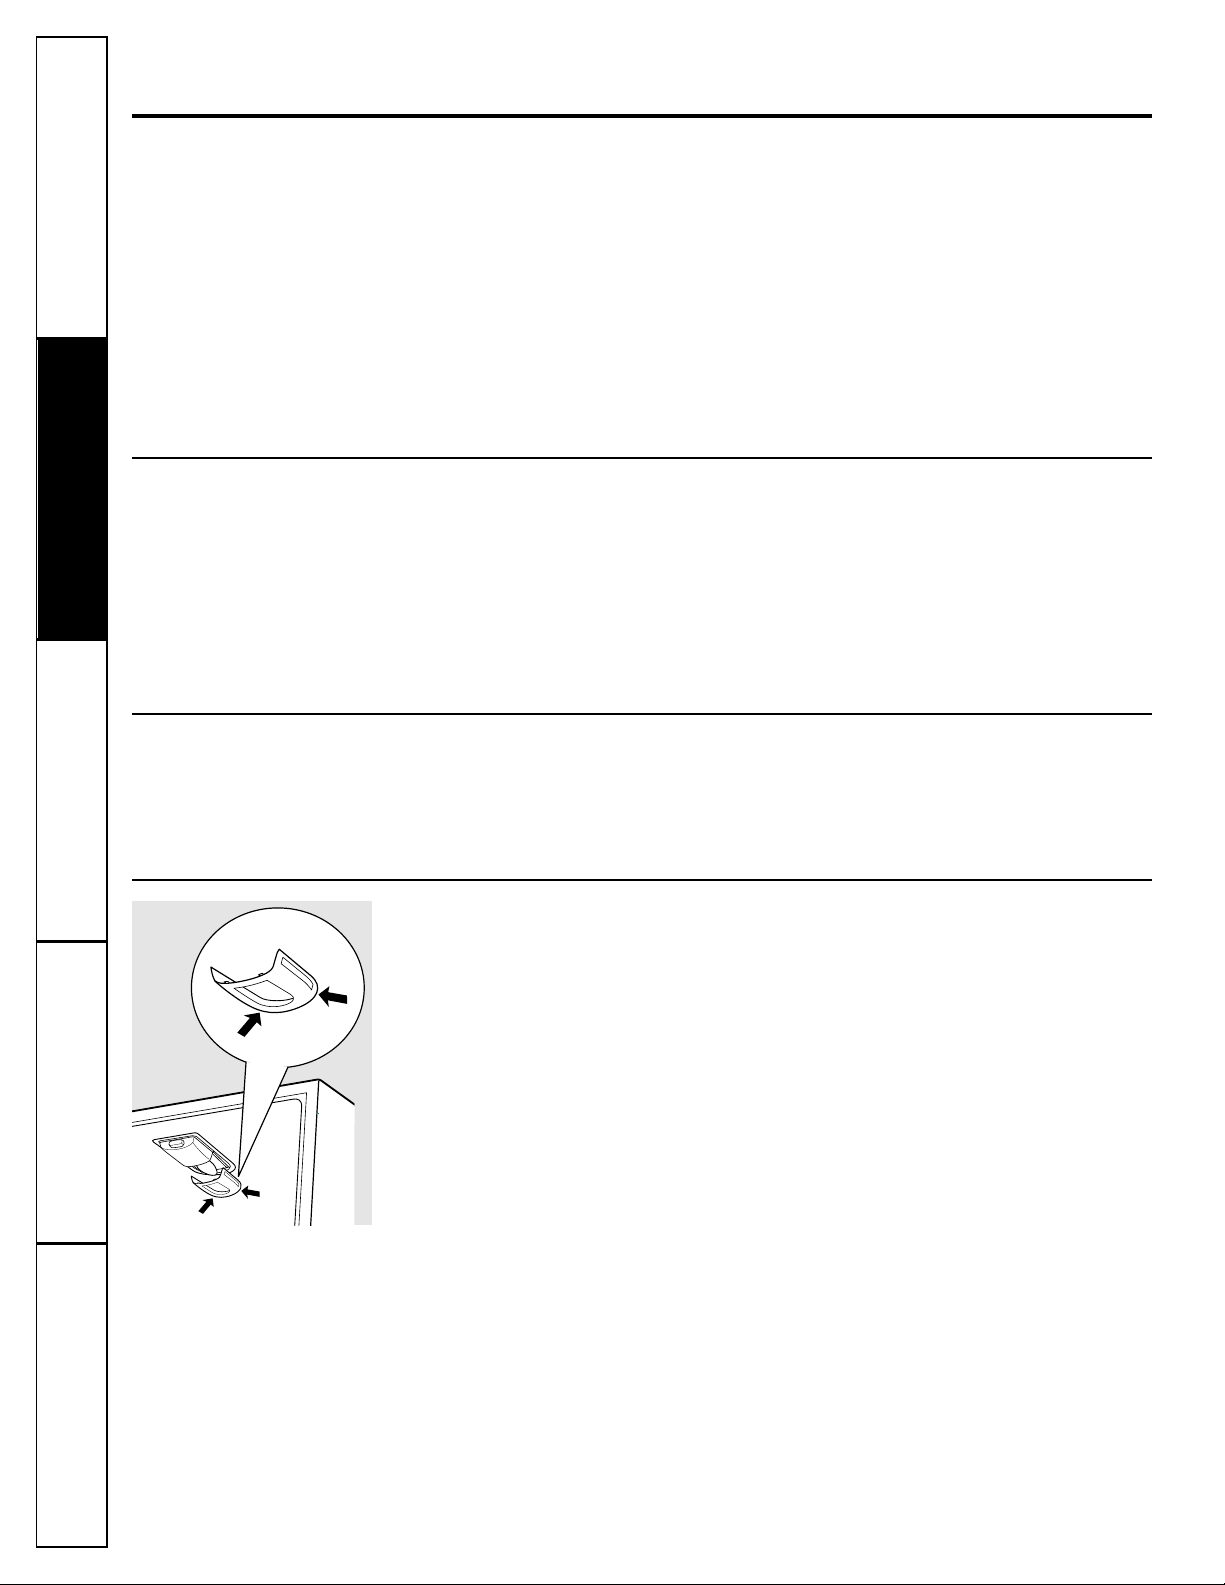
Adjustable Door Bins
Adjustable bins can easily be carried from
refrigerator to work area.
To remove: Tilt the bin up and pull out
on the molded supports until it comes
completely out of the door.
To replace or relocate: Select desired height,
engage the bin in the molded supports of
the door and slide the bin in. The bin will
hook in place.
The snuggers help prevent tipping, spilling
or sliding of small items stored on the door
shelf. Place a finger on either side of the
divider near the front and move it back
and forth to fit your needs.
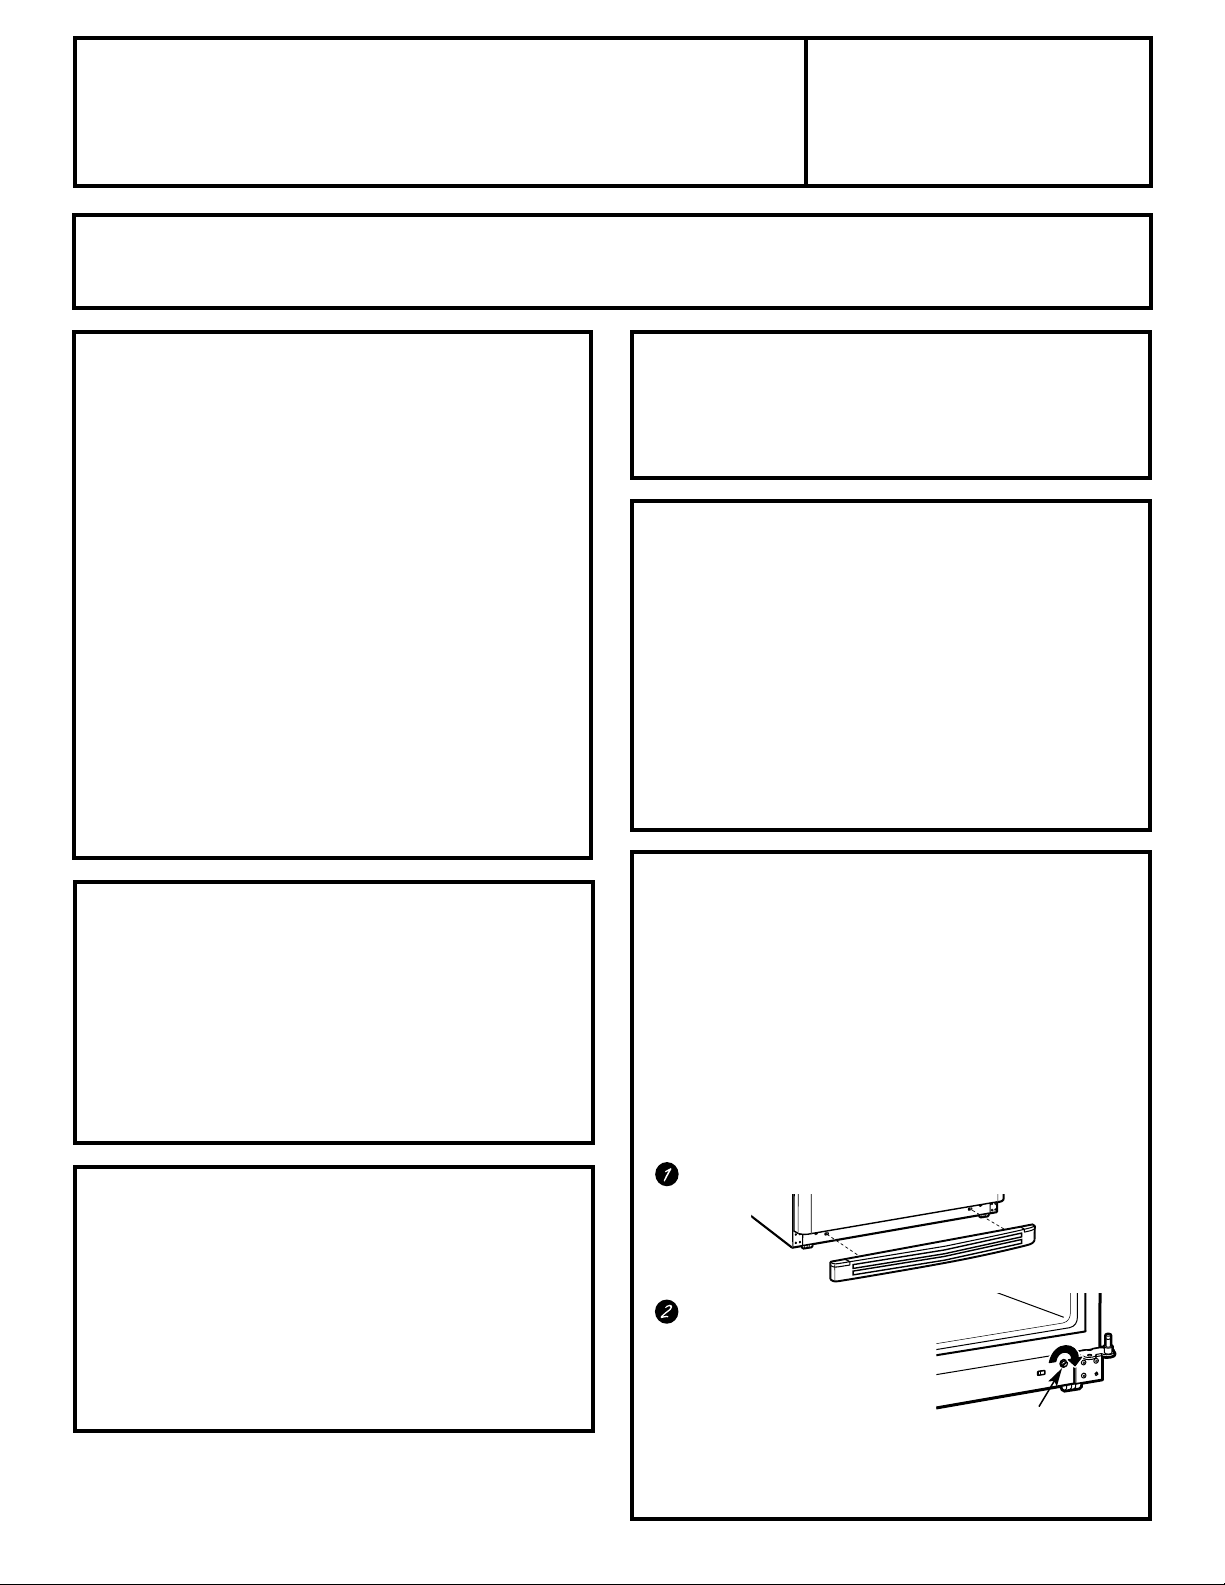
Brita
®
Water Dispenser
To install: Grasp the dispenser as shown.
Using a slight backward tilt, align the
mounting brackets on the dispenser with
the support brackets in the refrigerator door.
Gently slide the dispenser back until it
touches the door and lower it into the
support brackets.
To remove: Tilt the dispenser up at the front
and pull it forward on the molded support
brackets until it comes completely out of
the door.
Slide-Out Spillproof Shelf
The slide-out spillproof shelf allows you
to reach items stored behind others. The
special edges are designed to help prevent
spills from dripping to lower shelves.
Make sure you push the shelves all the way back
in before you close the door.
6
Snugger
7
Consumer SupportTroubleshooting TipsOperating Instructions
Safety Instructions
Installation Instructions
About the crispers and pans.
GEAppliances.com
Adjustable Humidity Crispers
Slide the control all the way to the
HIGH setting to provide high humidity
recommended for most vegetables.
Slide the control all the way to the
LOW setting to provide lower humidity
levels recommended for most fruits.
Detachable Snack Pan
The slide-out snack pan can be
removed and taken to the sink or
food preparation area.
The pan and the adjustable shelf
to which it attaches can be relocated
at any level.
Crisper and Cover Removal
To Remove Crispers:
These drawers can be removed easily by lifting up slightly
while pulling the drawers past the stop location.
When the door cannot be opened enough to pull the drawer
straight out, slide the drawer toward the middle and remove it.
To Remove Cover:
Remove the glass, then the frame. When replacing the glass,
push the rear edge firmly into the frame.
Fruit and Vegetable Crispers

8
Consumer Support Troubleshooting Tips
Operating Instructions Safety InstructionsInstallation Instructions
Troubleshooting Tips
Installation Instructions Safety InstructionsOperating Instructions
Troubleshooting Tips
Installation Instructions Safety InstructionsOperating Instructions
Some additional features.
Not all features are on all models.
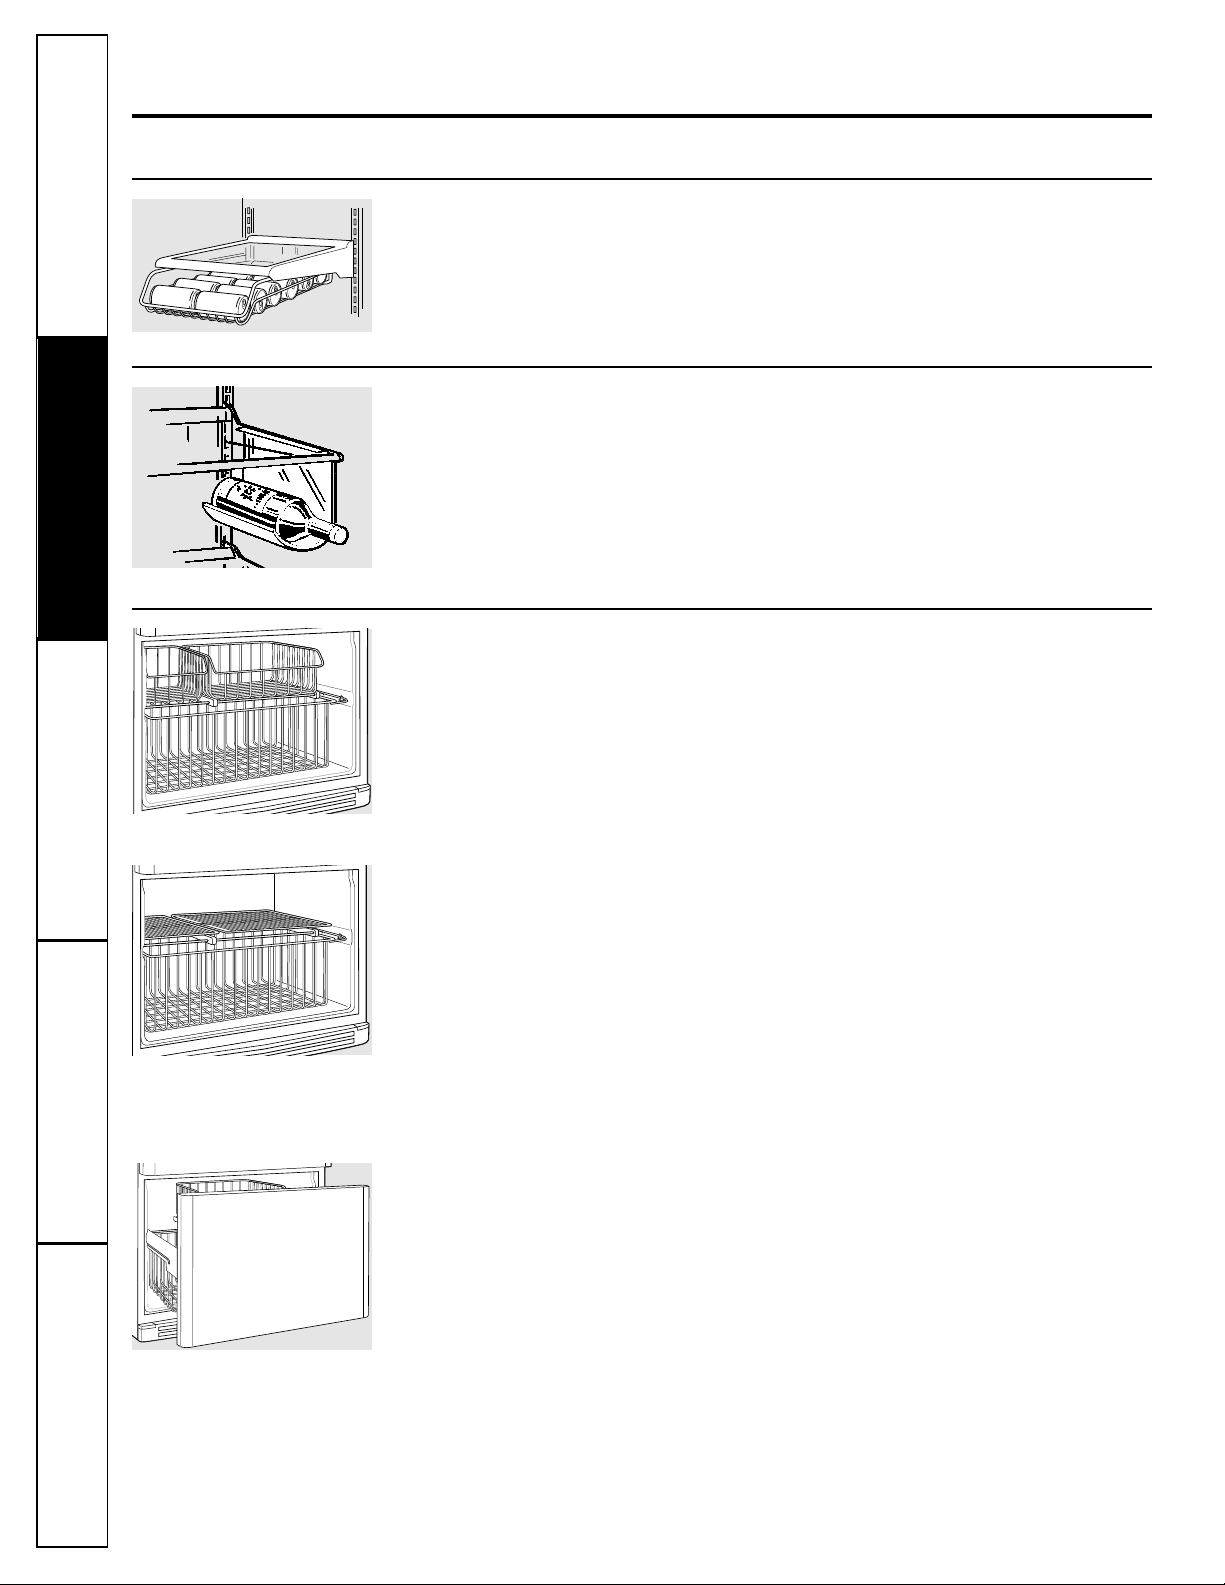
Beverage Rack (on some models)
This slide-out rack provides storage for
a variety of beverages.
The rack and the adjustable shelf to which
it attaches can be relocated to any level.
Removable Wine Rack (on some models)
This rack is designed to hold a bottle on
its side.
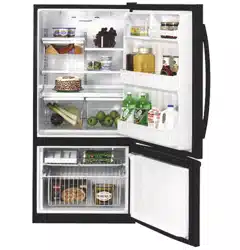
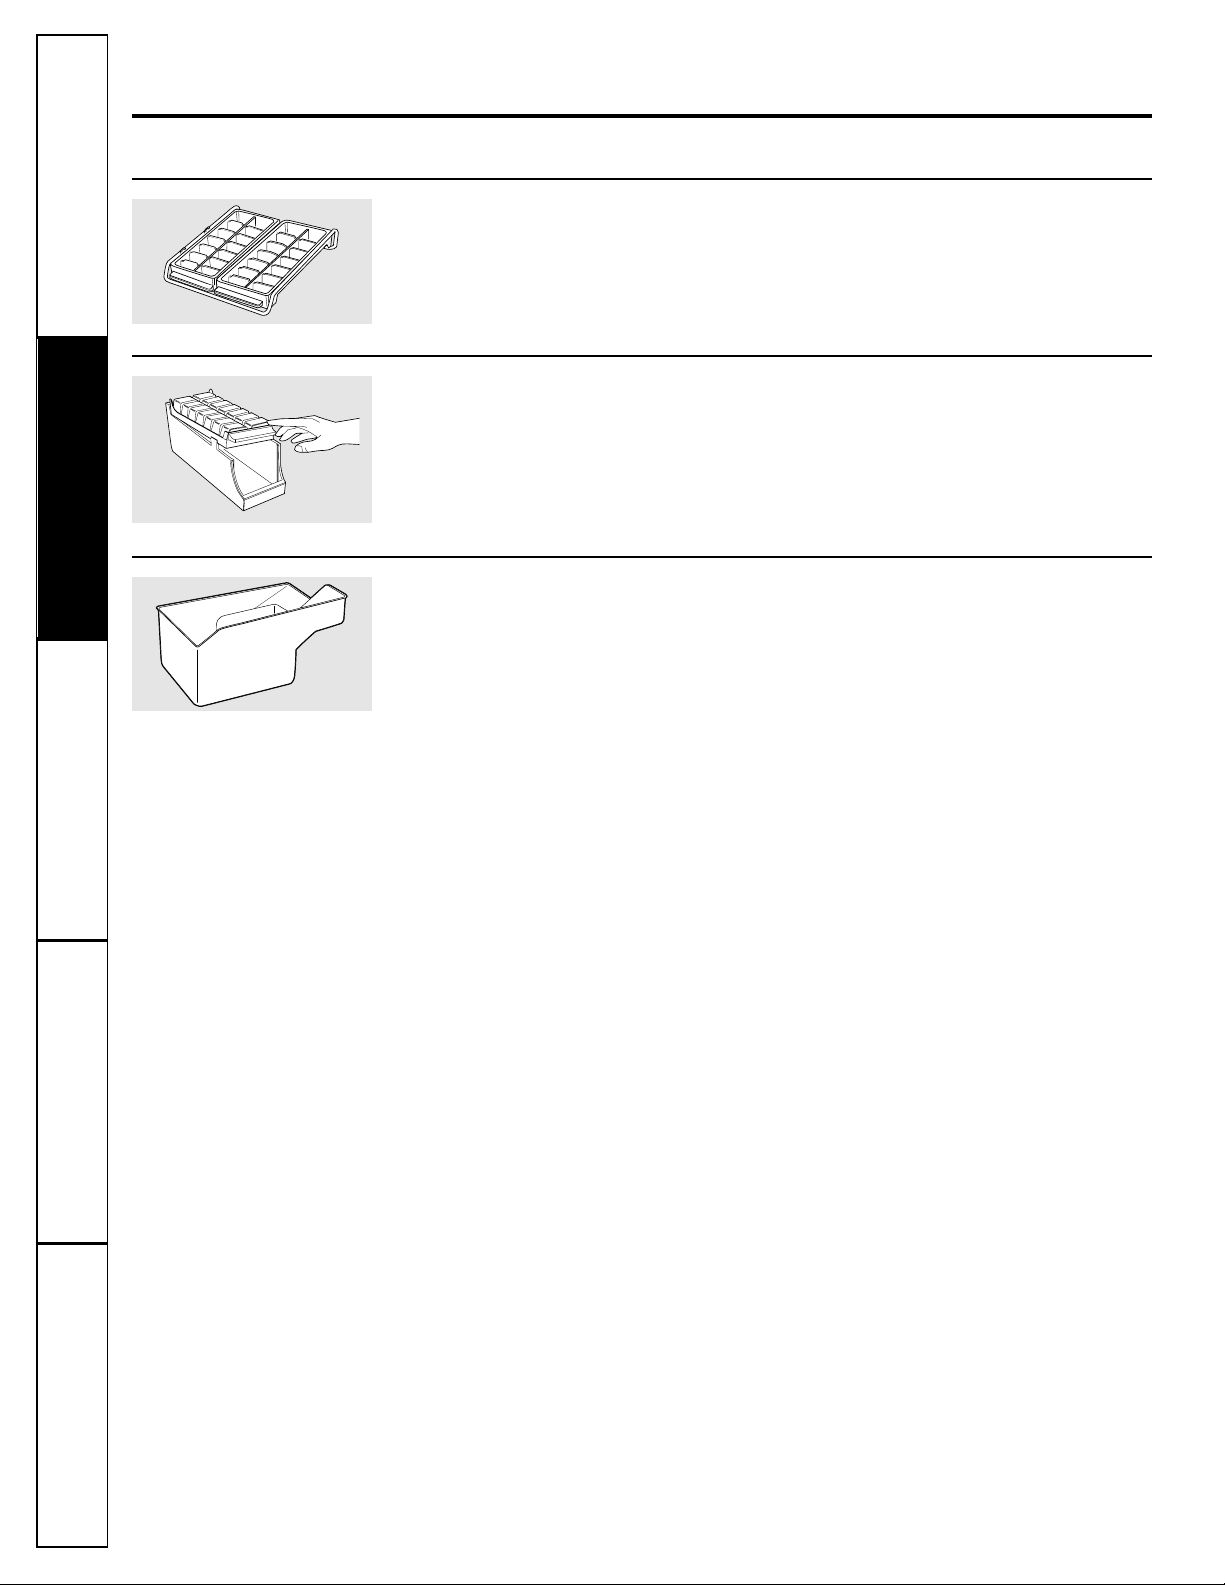
Freezer Shelves and Baskets
On swing door models with three sliding
baskets: Both the lower and upper baskets
slide out to provide easy access to foods
stored in the freezer. When the lower
basket is pulled out, the upper basket may
be pushed back to further improve access
to the lower basket.
On swing door models with one sliding
basket and two split fixed shelves:
The lower basket slides out to provide
easy access to foods stored in this basket.
The top full width fixed shelf provides a
convenient location to store ice cube trays
and ice bucket as well as a variety of foods.
On drawer models: The lower basket slides
out when the drawer is opened to provide
easy access to foods stored in this basket.
The upper basket may be pushed back to
further improve access to the lower basket.
The baskets may be easily removed for
cleaning spills or crumbs off the freezer
floor, or for installing an icemaker.
Consumer SupportTroubleshooting TipsOperating Instructions
Safety Instructions
Installation Instructions
About the automatic icemaker. GEAppliances.com
Icemaker Accessory Kit
If your refrigerator did not come already
equipped with an automatic icemaker,
an icemaker accessory kit (IM-4 for U.S.
models, or IM4-1 for Canadian models) is
available at extra cost.
Automatic Icemaker (on some models)
The icemaker will produce seven cubes
per cycle---approximately 100–130 cubes
in a 24-hour period, depending on
freezer compartment temperature,
room temperature, number of door
openings and other use conditions.
If the refrigerator is operated before the
water connection is made to the icemaker,
set the power switch to O (off).
When the refrigerator has been connected
to the water supply, set the power switch to
I (on). Do not open the door/drawer for
approximately 4 hours. This will allow the
freezer to reach the correct operating
temperature for making ice, and will
prevent water from spilling out of the
icemaker mold.
Special Note about the Green Power Light:
Even when the icemaker power switch is in
the I (on) position, power to the icemaker
will be interrupted when the freezer
door/drawer is open. This prevents ice
ejecting from the icemaker from missing
the ice bucket and dropping into the back
of the freezer. Because power to the
icemaker is interrupted while the
door/drawer is open, the green power light
on the icemaker will be off. To make sure
the icemaker is working properly, press the
freezer light switch located on the upper
right side of the freezer compartment. The
power light on the icemaker will come on.
The icemaker will fill with water when it
cools to 15°F (–10°C). A newly-installed
refrigerator may take 12 to 24 hours to
begin making ice cubes.
Throw away the first few batches of ice to
allow the water line to clear.
Be sure nothing interferes with the sweep
of the feeler arm.
When the bin fills to the level of the feeler
arm, the icemaker will stop producing ice.
It is normal for several cubes to be joined
together.
If ice is not used frequently, old ice cubes
will become cloudy, taste stale and shrink.
If ice cubes get stuck in the icemaker, set
the power switch to O (off) and remove the
cubes. Set the power switch to I (on) to
restart the icemaker.
After the icemaker has been turned on
again, there will be a delay of about
45 minutes before the icemaker resumes
operations.
NOTE: In homes with lower-than-average water
pressure, you may hear the icemaker cycle multiple
times when making one batch of ice.
A newly-installed refrigerator may take 12–24 hours to begin making ice.
Icemaker
Feeler Arm
Power Switch
Icemaker Installation
A special icemaker mounting block must
be used when installing an icemaker.
Directions on how to install the icemaker
mounting block are included in the
Icemaker Accessory Kit Installation
Instructions.
For U.S. models, the mounting block
is included with the refrigerator. For
Canadian models, the mounting block
is included in the optional icemaker
accessory kit (IM4-1).
Mounting Block
Part No. WR2M3604
Screws
Part No. WR1M478
9
Consumer Support Troubleshooting Tips
Operating Instructions Safety InstructionsInstallation Instructions
Troubleshooting Tips
Installation Instructions Safety InstructionsOperating Instructions
Troubleshooting Tips
Installation Instructions Safety InstructionsOperating Instructions
10
About the automatic icemaker.
A newly-installed refrigerator may take 12–24 hours to begin making ice.
Ice Cube Tray Shelf (on some models)
Some models have a small separate shelf
for ice cube trays.
Ice Trays and Bucket (on some models)
To remove ice cubes from the tray, place
the tray upside down on the bucket as
shown. Press down on the tray and the
cubes will pop out.
Large Ice Bucket (on some models)
This bucket is required when using an
automatic icemaker. When installing an
icemaker, the upper left basket must be
removed in order to make room for the
large ice bucket. If an icemaker is not
installed, the bucket can be removed
to provide more capacity in the freezer
compartment. For U.S. models, the bucket
is included with the refrigerator. For
Canadian models, the bucket is included
in the optional icemaker accessory
kit (IM4-1).
Part No.
WR30S1

11
Care and cleaning of the refrigerator.
GEAppliances.com
Cleaning the Outside
Keep the outside clean. Wipe with a clean
cloth lightly dampened with mild liquid
dish detergent. Dry and polish with a clean,
soft cloth.
Do not wipe the refrigerator with a soiled dish
cloth or wet towel. These may leave a residue
that can erode the paint. Do not use scouring
pads, powdered cleaners, bleach or cleaners
containing bleach because these products can
scratch and weaken the paint finish.
The stainless steel panels and door handles
(on some models) can be cleaned with
a commercially available stainless steel
cleaner such as Stainless Steel Magic.
™
Stainless Steel Magic is available at Ace,
True Value, Servistar, HWI and other
leading stores. It is also available through
GE Parts and Accessories, 800.626.2002, or
visit our Website, GEAppliances.com. In
Canada, call 1.888.261.3055 or visit our
Website, geappliances.ca. Order part
number WX10X15.
Do not use appliance wax or polish on the
stainless steel.
Cleaning the Inside
To help prevent odors, leave an open box of
baking soda in the fresh food and freezer
compartments.
Unplug the refrigerator before cleaning. If this
is not practical, wring excess moisture out
of sponge or cloth when cleaning around
switches, lights or controls.
Use warm water and baking soda solution---
about a tablespoon (15 ml) of baking soda
to a quart (1 l) of water. This both cleans
and neutralizes odors. Rinse and wipe dry.
After cleaning the door gaskets, apply a
thin layer of paraffin wax to the door
gaskets at the hinge side. This helps keep
the gaskets from sticking and bending out
of shape.
Avoid cleaning cold glass shelves (on
some models) with hot water because
the extreme temperature difference
may cause them to break. Handle glass
shelves carefully. Bumping tempered
glass can cause it to shatter.
The Brita
®
Water Dispenser (on some models)
is dishwasher safe.
Do not wash any other plastic refrigerator parts
in the dishwasher.
Consumer SupportTroubleshooting TipsOperating Instructions
Safety Instructions
Installation Instructions
12
Care and cleaning of the refrigerator.
Preparing for Vacation
For long vacations or absences, remove
food and unplug the refrigerator. Move
the control to the OFF position, and clean
the interior with a baking soda solution
of one tablespoon (15 ml) of baking soda
to one quart (1 l) of water. Leave the
doors open.
If an icemaker is installed, move the
icemaker feeler arm to the STOP (up)
position and shut off the water supply
to the refrigerator.
Preparing to Move
Secure all loose items such as grille,
shelves and drawers by taping them
securely in place to prevent damage.
Be sure the refrigerator stays in an upright
position during moving.
Replacing the Light Bulbs
To replace a burned-out bulb, unplug the
refrigerator from its electrical outlet.
In the refrigerator compartment, remove
the lens cover by gently applying pressure
to the back corners of the lens cover and
pulling the cover free from the control
housing. Unscrew the bulb when cool
and replace it with an appliance bulb
of the same or lower wattage.
There is also a light in the refrigerator
control panel. To replace it, simply
unscrew the bulb when cool and
replace it with an appliance bulb of
the same or lower wattage.
In the freezer compartment, simply unscrew
and replace the bulb after ensuring the
refrigerator is unplugged.
Turning the control to the OFF position does not
remove power to the light circuit.
Behind the Refrigerator
Be careful when moving the refrigerator
away from the wall. All types of floor
coverings can be damaged, particularly
cushioned coverings and those with
embossed surfaces.
Pull the refrigerator straight out and return
it to position by pushing it straight in.
Moving the refrigerator in a side direction
may result in damage to the floor covering
or refrigerator.
When pushing the refrigerator back,
make sure you don’t roll over the
power cord.
Consumer Support Troubleshooting Tips
Operating Instructions Safety InstructionsInstallation Instructions
Troubleshooting Tips
Installation Instructions Safety InstructionsOperating Instructions
Troubleshooting Tips
Installation Instructions Safety InstructionsOperating Instructions
13
BEFORE YOU BEGIN
Read these instructions completely and carefully.
•
IMPORTANT – Save these
instructions for local inspector’s use.
•
IMPORTANT – Observe all
governing codes and ordinances.
• Note to Installer – Be sure to leave these
instructions with the Consumer.
• Note to Consumer – Keep these instructions
for future reference.
• Skill level – Installation of this appliance requires
basic mechanical skills.
• Completion time – Refrigerator Installation
15 minutes
• Proper installation is the responsibility of the
installer.
• Product failure due to improper installation is not
covered under the Warranty.
• Do not install the refrigerator where the temperature
will go below 60°F (16°C) because it will not run often
enough to maintain proper temperatures.
• Do not install the refrigerator where the temperature
will go above 100°F (37°C) because it will not perform
properly.
• Install the refrigerator on a floor strong enough to
support it when fully loaded.
REFRIGERATOR LOCATION
Installation
Refrigerator
Instructions
Model 18
Allow the following clearances for ease of installation,
proper air circulation and plumbing and electrical
connections:
• Sides 1/8″ (3 mm)
• Top 1″ (25 mm)
• Back 1″ (25 mm)
If the refrigerator is against a wall on either side, allow
a minimum of 1
3
⁄4″ (45 mm) between the wall and the
side of the refrigerator to allow for door and handle
clearance.
CLEARANCES
If the refrigerator has an icemaker, it will have to be
connected to a cold water line. A GE water supply kit
(containing tubing, shutoff valve, fittings and
instructions) is available at extra cost from your dealer,
by visiting our Website at GEAppliances.com (in
Canada at geappliances.ca) or from Parts and
Accessories, 800.626.2002 (in Canada 1.888.261.3055).
WATER SUPPLY TO THE ICEMAKER
(ON SOME MODELS)
Questions? Call 800.GE.CARES (800.432.2737) or Visit our Website at: GEAppliances.com
In Canada, call 1.800.361.3400
or Visit our Website at: geappliances.ca
Remove all packaging tape and peel-off films. These
tapes were added to secure and protect your refrigerator
during shipping.
PACKAGING TAPE
The rollers have 2 purposes:
■ The rollers are used to level the refrigerator.
NOTE: It is recommended that the refrigerator be
elevated 1/2″ (13 mm) in the front. When installing an
icemaker, make sure that the icemaker is completely
level while maintaining the refrigerator incline.
■ Rollers allow you to move the refrigerator away from
the wall for cleaning.
To adjust the rollers:
Remove the base grille by pulling it straight out.
Turn the two front roller
adjusting screws clockwise
to raise the refrigerator,
counterclockwise to lower it.
Use a 3/8″ socket wrench,
adjustable wrench or pliers.
NOTE: The refrigerator must be supported by all four
rollers. To test, move the refrigerator to make sure it
does not rock.
ROLLERS
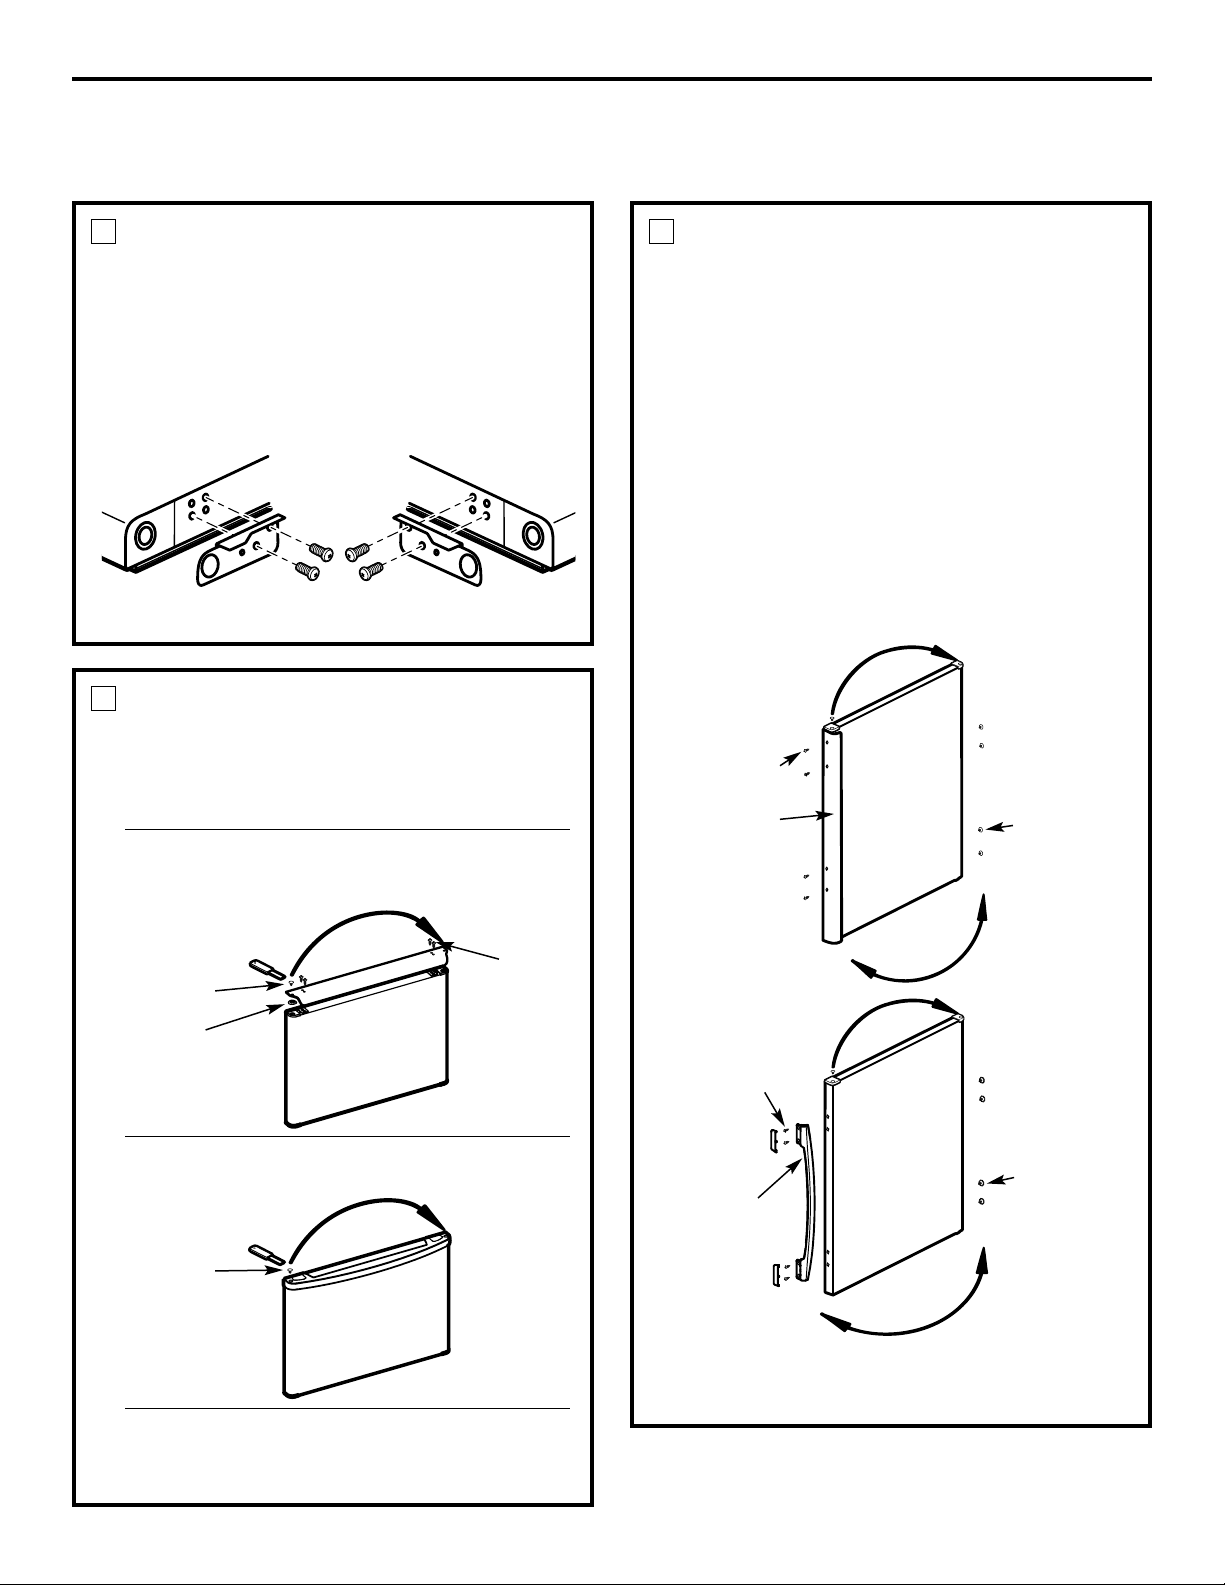
Front Roller Adjusting Screw

REVERSING THE DOOR SWING
When reversing the door swing:
• Read the instructions all the way through before
starting.
• NOTE: Doors on stainless steel models are not
reversible.
• Handle parts carefully to avoid scratching paint.
• Set screws down by their related parts to avoid using
them in the wrong places.
• Provide a non-scratching work surface for the doors.
These instructions are for changing the hinges from
the right side to the left side---if you ever want to
change the hinges back to the right side, follow these
same instructions and reverse all references to left
and right.
Unplug the refrigerator from its electrical outlet.
Empty all door shelves, including the dairy compartment.
IMPORTANT NOTES
Installation Instructions
REMOVE THE REFRIGERATOR
DOOR (TOP DOOR)
1
7/32,″ 5/16″ and 3/8″
socket wrench (6-point sockets
are recommended)
TOOLS YOU WILL NEED
Phillips screwdriver
Putty knife or
thin-blade screwdriver
Tape the door shut with masking tape.
Remove the hinge cover. With a 5/16″ socket
wrench, remove the two screws that hold the top
hinge to the cabinet.
Lift the hinge straight up to free the hinge pin from
the socket in the top of the door.
Remove tape, tilt the door away from the cabinet and
lift it to free its bottom socket from the hinge pin on
the center hinge bracket.
Set the door on a non-scratching surface with the
outside up.
Masking tape
T-20 or T-25 Torx Driver,
whichever your model
requires
14
Read these instructions completely and carefully.
REMOVE THE FREEZER DOOR
(BOTTOM DOOR) (For freezer
swing door models only)
2
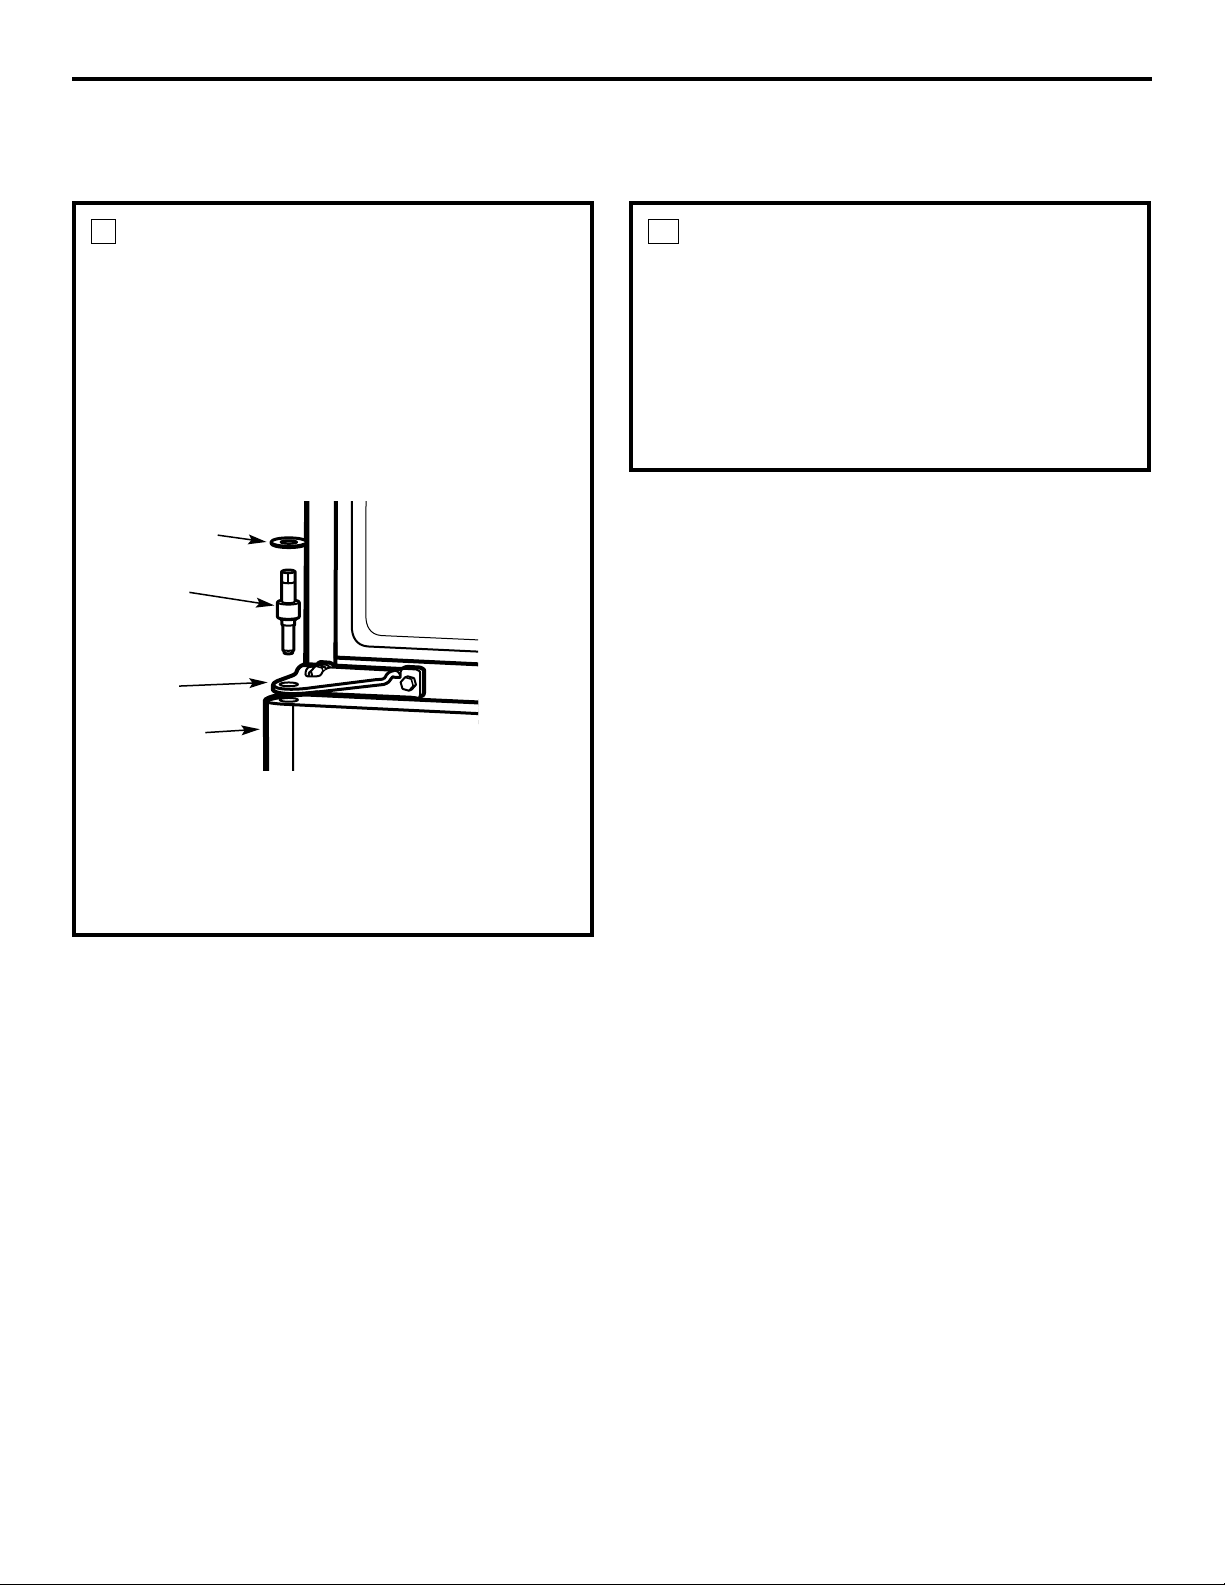
Tape the door shut with masking tape.
Remove the hinge pin
with a 7/32″ socket
wrench.
Remove tape and tilt the
door away from the cabinet.
Remove and save the
washer on the hinge pin.
Lift the door straight up
to free its bottom socket
from the pin in the
bottom hinge bracket.
REMOVE CENTER HINGE PIN
(For models with a freezer drawer)
Remove the hinge pin with a 7/32″ socket wrench.
Plastic washer
Hinge pin
Center hinge
bracket
Freezer door

15
Installation Instructions
TRANSFER CENTER HINGE
BRACKET TO THE LEFT
Remove the center hinge bracket and shim by
removing the three screws. NOTE: Keep these screws
with the hinge bracket. They are longer screws and will
be used when installing the hinge on the other side.
Remove the three painted screws and take washers
from the center left side of the cabinet. Screw them
into the holes on the right side, which were uncovered
above.
Place the center hinge bracket and shim over the holes
at the center left side of the cabinet. Insert the three
screws that were removed with the center hinge bracket
at the beginning of Step 4 and tighten securely.
Do not install the hinge pin yet.
4
TRANSFER BOTTOM HINGE
BRACKET TO THE LEFT (For
freezer swing door models only)
Pull the base grille straight out to gain access to the
hinge bracket screws.
Using a 5/16″ socket wrench, remove the hinge
bracket, screws, plastic washer and spacer shim from
the bottom right side of the cabinet.
Reinstall the spacer shim, hinge bracket, screws and
plastic washer to the bottom left side of the cabinet.
Remove the cap from the left end of the base grille.
Install the cap, supplied inside the kit, on the right
end of the base grille. Reinstall the base grille and
push it firmly into place.
3
TRANSFER TOP HINGE
TO THE LEFT
Interchange hinge and shim at top right with two
plug buttons at top left of cabinet. Do not tighten
screws on hinge side at this time.
5
REVERSING THE DOOR SWING (CONT.)
Installation Instructions
16
TRANSFER DOOR STOPS
On each door, remove the metal door stop. Use the
center hinge pin as a guide to align the door stop,
supplied inside the kit, on the opposite side, after
reversing the handles.
On freezer drawer models, only the refrigerator door
has a door stop.
6
TRANSFER REFRIGERATOR
DOOR HANDLE TO THE RIGHT
Remove the four handle mounting screws. On some
models, you must first remove the screw covers.
Using a putty knife, remove the four screw hole plug
buttons from the right side of the door.
Reinstall the plug buttons on the left side of the door.
Align the handle over the holes in the right side of
the door and install the four mounting screws and
screw covers (on some models).
At the top of the door, remove the plug button using
a putty knife and reinstall it in the top right hand
side hole.
One of the illustrations below will look like your
refrigerator door handle.
NOTE: Make sure the door stop on the bottom of
the door has been transferred to the left side of the
door as explained in step 6.
8
PREPARE FREEZER HANDLE
FOR DOOR SWING CHANGE (For
freezer swing door models only)
One of the illustrations below will look like your
freezer door handle.
Remove the four handle mounting screws. Remove
the plug button and plug button retainer and transfer
them to the opposite side. Reinstall handle.
Remove the plug button and transfer it to the
opposite side.
NOTE: Make sure the door stop on the bottom of the
door has been transferred to the left side of the door
as explained in step 6.
7
Plug button
Plug button
retainer
Plug button
Refrigerator
door
Handle
mounting
screws
Handle
Plug button
Refrigerator
door
Handle
mounting
screws
Handle
Plug button
Handle
mounting
screws
Installation Instructions
REHANG FREEZER DOOR (For
freezer swing door models only)
Lower bottom socket of freezer door onto pin on
bottom hinge bracket. Be sure washer is in place.
Tilt door toward cabinet and gently push door under
center hinge bracket and align with the hole in the
center hinge bracket.
Reinstall hinge pin with a 7/32″ socket wrench so it
extends through the hole in the center hinge bracket
and into socket on top of freezer door.
9
REHANG REFRIGERATOR DOOR
Lower bottom socket of the refrigerator door onto
center hinge pin. Be sure washer is in place.
Tilt door toward cabinet, lifting the top hinge so the
pin fits into the socket on top of the door.
Tighten the top hinge screws after supporting the
door on the handle side and ensuring the gap
between the doors is even all across the front.
Replace the hinge cover.
10
17
Plastic washer
Hinge pin
Center hinge
bracket
Freezer door
REPLACE CENTER HINGE PIN
(For models with a freezer drawer)
Reinstall hinge pin with a 7/32″ socket wrench
so it extends through the hole in the center hinge
bracket.
Consumer Support Troubleshooting Tips
Operating Instructions Safety InstructionsInstallation Instructions
Troubleshooting Tips
Installation Instructions Safety InstructionsOperating Instructions
Troubleshooting Tips
Installation Instructions Safety InstructionsOperating Instructions
18
Normal operating sounds.
Depending on the placement of the refrigerator in your kitchen,
you may want to place a piece of rubber backed carpet under
the refrigerator to reduce noise.
Evaporator Fan. You may hear air being forced through the cabinet
by the fan.
Evaporator. The flow of refrigerant through the evaporator may create a
boiling or gurgling sound.
Defrost Heater. During defrost cycles, water dripping onto the heater may
cause a hissing or sizzling sound. After defrosting, a popping sound may
occur and the evaporator may create a boiling or gurgling sound.
Cold Control & Defrost Timer. These parts can produce a snapping sound
when turning the refrigerator on or off. The timer also produces a sound
similar to an electric clock.
Water Pan. Water may be heard running into the drain pan during the
defrost cycle.
Compressor. Modern, high efficiency compressors operate much faster
than older models. The compressor may have a high pitched hum or
pulsating sound.
Condenser Fan. You may hear air being forced over the condenser by the fan.
Before you call for service…
Troubleshooting Tips
Save time and money! Review the charts on the following
pages first and you may not need to call for service.
Problem Possible Causes What To Do
Refrigerator does not Refrigerator in defrost cycle. • Wait about 45 minutes for defrost cycle to end.
operate
Control in OFF position. • Move the control to a temperature setting.
Refrigerator is unplugged. • Push the plug completely into the outlet.
The fuse is blown/circuit • Replace fuse or reset the breaker.
breaker is tripped.
Vibration or rattling Rollers need adjusting. • See Preparing to Install the Refrigerator.
(slight vibration
is normal)
1
2
3
4
5
6
7

GEAppliances.com
Problem Possible Causes What To Do
Motor operates for Normal when refrigerator • Wait 24 hours for the refrigerator to completely
long periods or cycles is first plugged in. cool down.
on and off frequently.
Often occurs when large • This is normal.
(Modern refrigerators
amounts of food are
with more storage
placed in refrigerator.
space and a larger
Door left open. • Check to see if package is holding door open.
freezer require more
• Rollers must be properly adjusted so doors/drawers
operating time. They
will close automatically when partially open. See
start and stop often
Preparing to Install the Refrigerator.
to maintain even
Hot weather or frequent • This is normal.
door openings.
Temperature control • See Getting started.
set at the coldest setting.
Refrigerator or freezer Temperature controls not set • See Getting started.
compartment too warm cold enough.
Warm weather or frequent • Set the temperature control one step colder.
door openings. See Getting started.
Door left open. • Check to see if package is holding door open.
• Rollers must be properly adjusted so doors/drawers
will close automatically when partially open. See
Preparing to Install the Refrigerator.
Frost or ice crystals Door left open. • Check to see if package is holding door open.
on frozen food
• Rollers must be properly adjusted so doors/drawers
(frost within package
will close automatically when partially open. See
is normal)
Preparing to Install the Refrigerator.
Too frequent or too long
door openings.
Ice cubes have Food transmitting odor/taste • Wrap foods well.
odor/taste to ice cubes.
Interior of refrigerator •See Care and cleaning.
needs cleaning.
Slow ice cube freezing Door left open. • Check to see if package is holding door open.
• Rollers must be properly adjusted so doors/drawers
will close automatically when partially open. See
Preparing to Install the Refrigerator.
Freezer control not set • See Getting started.
cold enough.
Refrigerator has odor Foods transmitting • Foods with strong odors should be tightly wrapped.
odor to refrigerator.
• Keep an open box of baking soda in the refrigerator;
replace every three months.
Interior needs cleaning. • See Care and cleaning.
temperatures.)
19
Consumer SupportTroubleshooting TipsOperating InstructionsSafety Instructions Installation Instructions

20
Before you call for service…
Problem Possible Causes What To Do
Moisture forms on Not unusual during • Wipe surface dry and reset the refrigerator control
outside of refrigerator periods of high humidity. one setting colder.
Moisture collects inside Too frequent or too
(in humid weather, air long door openings.
carries moisture into
refrigerator when doors
are opened)
Food freezing in Food too close to air vent. • Move the food away from the air vent (near the controls).
the refrigerator
Refrigerator control is set • Move the refrigerator control to a warmer temperature.
too cold.
Door/drawer does not Rollers need adjusting. •See Preparing to Install the Refrigerator.
close by itself
Interior light does No power at outlet. • Replace fuse or reset the breaker.
not work
Light bulb burned out. •See Replacing the light bulbs.
Door squeaks when Hinge and/or gasket needs
opened lubrication.
Freezer door/drawer This is normal if, after popping • This indicates that there is a good seal on the freezer
pops open when open, the freezer door/drawer door/drawer. If the freezer door/drawer does not
refrigerator door closed on its own. automatically close after popping open, then see the
is closed Problem: Door/drawer does not close by itself, above.
Icemaker power switch Freezer door/drawer is open. •This is normal. Power to the icemaker is interrupted
is in the I (on) position, when the freezer door/drawer is open to prevent ice
but green power light from ejecting and dropping into the back of the freezer.
is not on To check if icemaker is working properly, press the
freezer light switch located on the upper right side
of the freezer. The green power light will come on.
Water is spilling out Freezer door/drawer was • Clean up spill, then shut the freezer door/drawer and
of icemaker mold opened shortly after icemaker do not open for approximately 4 hours. This will allow
was installed. the freezer to reach the correct operating temperature
for making ice.
Freezer door left open for an • Because of door openings, freezer could not maintain
extended period, then opened the correct operating temperature for making ice. Clean
and closed frequently soon after. up spill, then shut the freezer door/drawer and do not
open for approximately 4 hours.
Cubes too small/ Not enough water pressure • Collar type self-piercing water valves are not
reduced ice production to icemaker water valve. recommended unless a 1/4″ hole is predrilled in home
water line. See Installing the Water Line instructions in
the Icemaker Accessory Kit Installation Instructions.
Consumer Support Troubleshooting Tips
Operating Instructions Safety InstructionsInstallation Instructions
Troubleshooting Tips
Installation Instructions Safety InstructionsOperating Instructions
Troubleshooting Tips
Installation Instructions Safety InstructionsOperating Instructions

21
Notes.
Consumer SupportTroubleshooting TipsOperating InstructionsSafety Instructions Installation Instructions

22
CUSTOMER WARRANTY
(for customers in Canada)
Your refrigerator is warranted to be free of defects in material and workmanship.
What is covered How Long Warranted Parts Labour
(From Date of Sale) Repair or Replace
at Camco’s Option
Compressor:
GE Profile Models Ten (10) Years Ten (10) Years Five (5) Years
GE Models Five (5) Years Five (5) Years Five (5) Years
Sealed System (including Five (5) Years Five (5) Years Five (5) Years
evaporator, condenser
tubing and refrigerant)
All Other Parts One (1) Year One (1) Year One (1) Year
TERMS AND CONDITIONS:
1. This warranty applies only for single
family domestic use in Canada when the
Refrigerator has been properly installed
according to the instructions supplied by
Camco and is connected to an adequate
and proper utility service.
Damage due to abuse, accident,
commercial use, and alteration or
defacing of the serial plate cancels all
obligations of this warranty.
Service during this warranty period must
be performed by an Authorized Camco
Service Agent.
2. Neither Camco nor the Dealer is liable for
any claims or damages resulting from
failure of the Refrigerator or from service
delays beyond their reasonable control.
3.
To obtain warranty service, purchaser
must present the original Bill of Sale.
Components repaired or replaced are
warranted through the remainder of the
original warranty period only.
4. This warranty is in addition to any
statutory warranty.
WHAT IS NOT COVERED:
• Owner is responsible to pay for service
calls related to product installation and/or
teaching how to use the product.
• Damage to finish must be reported
within 48 hours following the delivery
of the appliance, as indicated on the
Consumer Notice label posted on the
exterior of the refrigerator door.
• Improper installation—proper installation
includes adequate air circulation to the
refrigeration system, adequate electrical,
plumbing and other connecting facilities.
• Replacement of house fuses or resetting
of circuit breakers.
• Replacement of light bulbs.
• Damage to product caused by accident,
fire, floods or acts of God.
• Loss of food due to spoilage.
• Proper use and care of product as listed
in the owner’s manual, proper setting of
controls.
• WARRANTOR IS NOT RESPONSIBLE
FOR CONSEQUENTIAL DAMAGES.
IMPORTANT
Keep this warranty and your bill of sale as proof of original purchase and purchase date.
Camco Service is available coast to coast.
If further help is needed concerning this
warranty, contact:
Manager, Consumer Relations
Camco Inc., Consumer Service
1 Factory Lane
Suite 310,
Moncton, New Brunswick
E1C 9M3
Staple your receipt here.
Proof of the original purchase
date is needed to obtain service
under the warranty.
23
Refrigerator Warranty (For customers in the United States)
For The Period Of: GE Will Replace:
One Year Any part of the refrigerator which fails due to a defect in materials or workmanship.
From the date of the During this full one-year warranty, GE will also provide, free of charge, all labor
original purchase and in-home service to replace the defective part.
Five Years Any part of the sealed refrigerating system (the compressor, condenser, evaporator
From the date of the and all connecting tubing) which fails due to a defect in materials or workmanship.
original purchase During this full five-year sealed refrigerating system warranty, GE will also provide,
free of charge, all labor and in-home service to replace the defective part.
■ Service trips to your home to teach you how to use
the product.
■ Improper installation.
■ Failure of the product if it is abused, misused, or used for
other than the intended purpose or used commercially.
■ Loss of food due to spoilage.
■ Replacement of house fuses or resetting of circuit
breakers.
■ Damage to the product caused by accident, fire, floods
or acts of God.
■ Incidental or consequential damage caused by possible
defects with this appliance.
What GE Will Not Cover:
This warranty is extended to the original purchaser and any succeeding owner for products purchased for home
use within the USA. In Alaska, the warranty excludes the cost of shipping or service calls to your home.
Some states do not allow the exclusion or limitation of incidental or consequential damages. This warranty gives
you specific legal rights, and you may also have other rights which vary from state to state. To know what your
legal rights are, consult your local or state consumer affairs office or your state’s Attorney General.
Warrantor: General Electric Company. Louisville, KY 40225
All warranty service provided by our Factory Service
Centers, or an authorized Customer Care
®
technician.
To schedule service, on-line, 24 hours a day, visit us at
www.GEAppliances.com, or call 800.GE.CARES (800.432.2737).
Staple your receipt here.
Proof of the original purchase
date is needed to obtain service
under the warranty.
Consumer SupportTroubleshooting TipsOperating InstructionsSafety Instructions Installation Instructions
Consumer Support.
GE Appliances Website
In the U.S.: GEAppliances.com
Have a question or need assistance with your appliance? Try the GE Appliances Website 24 hours a day,
any day of the year! For greater convenience and faster service, you can now download Owner’s Manuals,
order parts, catalogs, or even schedule service on-line. You can also “Ask Our Team of Experts
™
” your questions,
and so much more... In Canada: geappliances.ca
Schedule Service In the U.S.: GEAppliances.com
Expert GE repair service is only one step away from your door. Get on-line and schedule your service at your
convenience 24 hours any day of the year! Or call 800.GE.CARES (800.432.2737) during normal business hours.
In Canada, call 1.800.361.3400
Real Life Design Studio In the U.S.: GEAppliances.com
GE supports the Universal Design concept---products, services and environments that can be used by people of all
ages, sizes and capabilities. We recognize the need to design for a wide range of physical and mental abilities and
impairments. For details of GE’s Universal Design applications, including kitchen design ideas for people with
disabilities, check out our Website today. For the hearing impaired, please call 800.TDD.GEAC (800.833.4322).
In Canada, contact: Manager, Consumer Relations, Camco, Inc.
Suite 310, 1 Factory Lane
Moncton, N.B. E1C 9M3
Extended Warranties In the U.S.: GEAppliances.com
Purchase a GE extended warranty and learn about special discounts that are available while your warranty is still
in effect. You can purchase it on-line anytime, or call 800.626.2224 during normal business hours. GE Consumer
Home Services will still be there after your warranty expires. In Canada, call 1.888.261.2133
Parts and Accessories In the U.S.: GEAppliances.com
Individuals qualified to service their own appliances can have parts or accessories sent directly to their homes
(VISA, MasterCard and Discover cards are accepted). Order on-line today, 24 hours every day or by phone at
800.626.2002 during normal business hours.
Instructions contained in this manual cover procedures to be performed by any user. Other servicing generally should be
referred to qualified service personnel. Caution must be exercised, since improper servicing may cause unsafe operation.
Customers in Canada should consult the yellow pages for the nearest Camco service center, or call 1.888.261.3055.
Contact Us In the U.S.: GEAppliances.com
If you are not satisfied with the service you receive from GE, contact us on our Website with all the details
including your phone number, or write to: General Manager, Customer Relations
GE Appliances, Appliance Park
Louisville, KY 40225
In Canada: geappliances.ca, or write to: Director, Consumer Relations, Camco, Inc.
Suite 310, 1 Factory Lane
Moncton, N.B. E1C 9M3
Register Your Appliance In the U.S.: GEAppliances.com
Register your new appliance on-line----at your convenience! Timely product registration will allow for
enhanced communication and prompt service under the terms of your warranty, should the need arise.
You may also mail in the pre-printed registration card included in the packing material.
In Canada: geappliances.ca
Printed in Canada
24

Réfrigérateurs
Congélateur inférieur
electromenagersge.ca
Mesures de sécurité . . . . . . .2–4
Fonctionnement
Caractéristiques
supplémentaires . . . . . . . . . . . .8
Clayettes, balconnets et
distributeur d’eau . . . . . . . . . . .6
Mise en marche . . . . . . . . . . . . .5
Compartiments à fruits
et légumes et les contenants . . .7
Entretien et nettoyage . . . .11, 12
Machine à glaçons
automatique . . . . . . . . . . . . .9, 10
Remplacement des
ampoules . . . . . . . . . . . . . . . . .12
Instructions d’installation
Préparation à l’installation
du réfrigérateur . . . . . . . . . . . .13
Inversion du sens
d’ouverture des portes . . . . 14–17
Conseils de dépannage . . 18–20
Bruits de fonctionnement
normaux . . . . . . . . . . . . . . . . .18
Soutien au consommateur
Soutien au
consommateur . . . . . . . . . . . . 24
Garantie . . . . . . . . . . . . . . . . . 21
Écrivez ici le numéro de modèle
et le numéro de série :
Modèle # ______________________
Série # ________________________
Ils figurent sur l’étiquette qui se
trouve sur le côte gauche, près du
haut du compartiment congélateur.
Modèle 18
Manuel d’utilisation
et d’installation
2
MESURES DE SÉCURITÉ IMPORTANTES.
LISEZ D’ABORD TOUTES LES DIRECTIVES.
AVERTISSEMENT!
N’utilisez cet électroménager que pour l’usage auquel il est destiné, comme expliqué dans le présent manuel.
MESURES DE SÉCURITÉ
Lorsque vous utilisez un appareil électrique, observez toujours les mesures de sécurité de base,
y compris les suivantes.
■ Installez le réfrigérateur conformément aux
directives d’installation avant de l’utiliser.
■ Ne laissez pas les enfants grimper, s’asseoir,
se tenir debout ni se pendre aux clayettes du
réfrigérateur. Ils pourraient endommager le
réfrigérateur et se blesser gravement.
■ Ne touchez pas les surfaces froides du
congélateur si vous avez les mains humides
ou mouillées : la peau risque d’adhérer à ces
surfaces très froides.
■ N’entreposez et n’utilisez pas d’essence ou
autres vapeurs et liquides inflammables à
proximité de cet appareil ou de tout autre
appareil électroménager.
■ Ne recongelez pas les aliments surgelés qui ont
complètement dégelé.
■
■ Si votre réfrigérateur est doté d’une
machine à glaçons automatique, évitez tout
contact avec les pièces mobiles du mécanisme
d’éjection ou avec l’élément chauffant situé
à la partie inférieure de la machine à glaçons.
Ne mettez pas les doigts ou les mains dans le
méca-nisme de la machine à glaçons lorsque
le réfrigérateur est branché.
■ Éloignez les doigts des parties du réfrigérateur où
l’on peut facilement se pincer : les espaces entre
les portes et entre les portes et les placards sont
toujours étroits. Soyez prudent lorsque vous fermez
les portes de l’appareil en présence des enfants.
■ Débranchez votre réfrigérateur avant de le
nettoyer ou de le réparer.
REMARQUE : Nous vous recommandons vivement de
confier toute réparation à un technicien qualifié.
■ Avant de remplacer une ampoule grillée, le
réfrigérateur doit être débranché pour éviter tout
contact avec un fil sous tension. (Une ampoule
grillée peut se briser pendant l’opération.)
■ Lorsque vous réglez la commande sur ARRÊT,
l’alimentation électrique de l’ampoule n’est
pas coupée.
Soutien au
consommateur
Conseils de dépannage
Fonctionnement
Mesures de sécurité
Installation
COMMENT VOUS DÉBARRASSER
CONVENABLEMENT DE VOTRE ANCIEN RÉFRIGÉRATEUR
Les enfants pris au piège ou morts d’asphyxie sont
toujours d’actualité. Les réfrigérateurs abandonnés
sont toujours aussi dangereux, même si on n’attend
que «quelques jours» pour s’en débarrasser.
Si vous ne gardez pas votre ancien réfrigérateur,
veuillez suivre les directives ci-dessous afin de
prévenir les accidents.
Avant de vous débarrasser de votre ancien
réfrigérateur ou congélateur :
■ Démontez les portes.
■ Laissez les clayettes en place afin d’empêcher
les enfants de grimper à l’intérieur.
Se débarrasser du CFC
Votre ancien réfrigérateur a un système
de refroidissement qui a utilisé les CFC
(chlorofluorocarbones). Les CFC sont jugés
nocifs pour l’ozone stratosphérique.
Si vous vous débarrassez de votre ancien
réfrigérateur, assurez-vous que le frigorigène avec
CFC soit enlevé correctement par un technicien
qualifié. Si vous libérez intentionnellement ce
frigorigène avec CFC vous pouvez être soumis aux
contraventions et à l’emprisonnement sous
provisions des lois sur l’environnement.
CORDONS PROLONGATEURS
Nous vous recommandons fortement de ne pas utiliser de cordons prolongateurs à cause des risques
potentiels qu’ils présentent dans certaines conditions.
Toutefois si vous décidez d’utiliser tout de même un cordon prolongateur, il est absolument nécessaire
qu’il s’agisse d’un cordon à 3 fils avec mise à la terre pour appareils électroménagers homologué UL
(aux États-Unis) ou certifié CSA (au Canada), pourvu d’une fiche et d’une prise mises à la terre
de 15 ampères (minimum) et de 120 volts.
DANGER! RISQUES POUR LES ENFANTS
3
electromenagersge.
ca
Soutien au
consommateur
Conseils de dépannageFonctionnementMesures de sécurité Installation
4
MESURES DE SÉCURITÉ IMPORTANTES.
LISEZ D’ABORD TOUTES LES DIRECTIVES.
AVERTISSEMENT!
RACCORDEMENT ÉLECTRIQUE
Ne coupez ni retirez en aucun cas la troisième broche (mise à la terre) de la fiche du cordon
d’alimentation. Pour votre sécurité, cet appareil doit être correctement mis à la terre.
Le cordon d’alimentation de cet appareil est
muni d’une fiche à 3 broches (mise à la terre)
qui se branche dans une prise murale ordinaire
à 3 alvéoles (mise à la terre) pour réduire au
minimum les risques de chocs électriques.
Faites examiner la prise de courant et le circuit
par un électricien qualifié pour vous assurer que
la prise est correctement mise à la terre.
Si la prise murale est du type standard à 2 alvéoles,
il vous incombe de la faire remplacer par une prise
à 3 alvéoles correctement mise à la terre.
Le réfrigérateur doit toujours être branché dans sa
propre prise de courant, dont la tension nominale
est identique à celle indiquée sur la plaque
signalétique.
Cette précaution est recommandée pour garantir
un rendement optimum et éviter une surcharge des
circuits électriques de la résidence, ce qui pourrait
créer un risque d’incendie par surchauffe des fils.
Ne débranchez jamais le réfrigérateur en tirant sur
le cordon d’alimentation. Saisissez fermement la
fiche du cordon et tirez droit pour la retirer de la
prise.
Réparez ou remplacez immédiatement tout cordon
effiloché ou endommagé. N’utilisez pas un cordon
fendillé ou présentant des signes d’usure.
Lorsque vous déplacez votre réfrigérateur du mur,
faites attention de ne pas le faire rouler sur le cordon
d’alimentation afin de ne pas l’endommager.
FICHE D’ADAPTATION
(Fiches d’adaptation non permises au Canada)
Nous vous recommandons fortement de ne pas utiliser une fiche d’adaptation à cause des risques
potentiels qu’elle présente dans certaines circonstances.
Toutefois, si vous décidez d’utiliser tout de même
une fiche d’adaptation, vous pouvez effectuer un
raccordement temporaire, si les codes locaux le
permettent, dans une prise de courant à 2 alvéoles
adéquatement mise à la terre en utilisant une fiche
d’adaptation homologuée UL, en vente dans la
plupart des quincailleries.
La fente la plus longue de la fiche doit être alignée
avec la fente la plus longue de la prise murale afin
d’assurer la polarité appropriée pour le
branchement du cordon d’alimentation.
Lorsque vous débranchez le cordon d’alimentation
de la fiche d’adaptation, saisissez toujours la fiche
d’une main pendant que vous tirez sur la fiche
du cordon d’alimentation de l’autre. Sinon,
la borne de mise à la terre de la fiche d’adaptation
risque de casser avec le temps.
Si la borne de mise à la terre de la fiche casse,
N’UTILISEZ PAS l’appareil tant qu’une mise à la
terre adéquate n’aura pas été rétablie.
Le fait de fixer la borne de mise à la terre de la fiche
d’adaptation à la plaque de la prise de courant n’assure
pas automatiquement la mise à la terre de l’appareil. Il
faut que la vis soit en métal, non isolée, et que la prise de
courant soit mise à la terre par l’entremise du câblage de
la résidence. Faites vérifier le circuit par un électricien
qualifié pour vous assurer que la prise est adéquatement
mise à la terre.
VEUILLEZ LIRE ET SUIVRE ATTENTIVEMENT CES MESURES DE SÉCURITÉ.
CONSERVEZ CES DIRECTIVES
Soutien au
consommateur
Conseils de dépannage
Fonctionnement
Mesures de sécurité
Installation
5
Mise en marche.
electromenagersge.
ca
Liste de contrôle
Commande du compartiment congélateur
La commande du compartiment congélateur maintient la température dans le congélateur.
Commande du compartiment réfrigérateur
La commande du compartiment réfrigérateur maintient la température dans le réfrigérateur.
Lorsque vous tournez la commande du compartiment réfrigérateur à OFF (arrêt), le refroidissement
cesse dans les deux compartiments–réfrigérateur et congélateur–mais vous ne coupez pas le courant
électrique qui alimente le réfrigérateur.
Après avoir modifié le réglage des commandes, attendez toujours 24 heures pour permettre au
réfrigérateur d’atteindre la température que vous avez réglée.
Installation du couvercle de charnière supérieure
Si votre réfrigérateur n’a pas de couvercle de charnière,
trouver le dans la trousse de pièces et fixez-le soigneusement
sur la charnière supérieure.
Réglage des roulettes de manière à ce que les
portes et les tiroirs se ferment automatiquement
Vous devez soulever légèrement votre réfrigérateur à l’avant,
de manière à ce que les portes et les tiroirs se ferment
automatiquement quand ils sont partiellement ouverts.
Consultez Préparation à l’installation du réfrigérateur.
Lorsque vous branchez l’appareil, réglez les commandes
du réfrigérateur et du congélateur à «5». Dans les
compartiments réfrigérateur et congélateur, «5» représente
le réglage normal et «9» le réglage le plus froid.
Si vous désirez augmenter ou abaisser la température,
réglez d’abord la température du réfrigérateur. Lorsque la
température désirée aura été atteinte, réglez ensuite celle
du congélateur.
Soutien au
consommateur
Conseils de dépannageFonctionnementMesures de sécurité Installation
Pièce n
o
– Couvercle de
charnière supérieure
WR2S56 Bisque
WR2S72 Noir
WR2S8 Blanc
6
Les clayettes, balconnets et distributeur d’eau.
Toutes les caractéristiques ne sont pas disponibles sur tous les modèles.
La disposition de vos clayettes
Les clayettes de verre et de métal du compartiment réfrigérateur sont réglables.
Pour retirer une clayette Pour remettre une clayette en place
Soulevez et
dégagez
2
Engagez l’ergot
supérieur
1
Abaissez
pour
verrouiller
2
Inclinez
vers
le haut
1
Clayette anti-débordements
La clayette coulissante vous permet
d’atteindre les aliments rangés derrière
d’autres. Ses rebords spéciaux sont conçus
pour empêcher les aliments renversés de
couler sur les clayettes inférieures.
Prenez soin de pousser les clayettes jusqu’au fond
avant de refermer la porte.
Balconnets réglables de la porte
Vous pouvez facilement transporter les
balconnets réglables du réfrigérateur à
votre plan de travail.
Pour les retirer : Inclinez le balconnet et
sortez-le sur les supports moulés jusqu’à ce
qu’il se libère complètement de la porte.
Pour les remettre en place ou les déplacer :
Choisissez la hauteur de clayette désirée,
engagez le balconnet dans les supports
moulés de la porte et glissez-le.
Le balconnet s’accrochera en place.
Les séparateurs retiennent fermement les
produits de petite taille en les empêchant
de basculer, de se renverser et de glisser.
Saisissez l’avant du séparateur entre deux
doigts, puis déplacez le séparateur selon
vos besoins.
Séparateur
Distributeur d’eau Brita
®
Installation : Tenez le distributeur comme
dans la figure.
En le faisant légèrement basculer vers
l’arrière, alignez les supports de montage
du distributeur à ceux de la porte du
réfrigérateur.
Faites glisser doucement le distributeur vers
l’arrière jusqu’à ce qu’il touche la porte et
faite-le descendre dans les supports de
montage de la porte.
Enlèvement : Faites basculer le devant du
distributeur vers le haut et tirez-le vers
l’avant sur le support de montage moulé
jusqu’à ce qu’il sorte complètement de
la porte.
Soutien au
consommateur
Conseils de dépannage
Fonctionnement
Mesures de sécuritéInstallation

7
Au sujet des compartiments
à fruits et légumes et les contenants.
electromenagersge.
ca
Compartiments à humidité réglable
Réglez la commande sur HIGH pour que
le bac conserve le degré d’humidité élevé
recommandé pour la conservation de la
plupart des légumes.
Réglez la commande sur LOW pour que le
bac conserve le degré d’humidité abaissé
recommandé pour la conservation de la
plupart des fruits.
Contenant à collation amovible
Le contenant à collation coulissant peut
être enlevé et transporté jusqu’à l’évier
ou au plan de travail.
Le contenant et la clayette réglable
à laquelle il s’accroche peuvent être
positionnés à n’importe quel niveau.
Enlèvement des compartiments à fruits et légumes et leurs couvercles
Enlèvement des compartiments à fruits et légumes :
Ces bacs peuvent être facilement enlevés en les inclinant légèrement
puis en les tirant au-delà de leurs butées.
Si vous ne pouvez pas ouvrir la porte suffisamment pour enlever le
bac en le tirant droit vers vous, glissez-le vers le milieu et enlevez-le.
Enlèvement des couvercles :
Enlevez le verre et ensuite le cadre. Lors de la remise en place du
verre, poussez le bord arrière fermement dans le cadre.
Soutien au
consommateur
Conseils de dépannageFonctionnementMesures de sécurité Installation
Bacs à fruits et à légumes
8
Quelques caractéristiques supplémentaires.
Toutes les caractéristiques ne sont pas disponibles sur tous les modèles.
Support à boissons (sur certains modèles)
Ce support coulissant vous permet de
ranger un grand nombre de boissons.
Le support et la clayette réglable à laquelle
il s’attache peuvent être positionnés à
n’importe quel niveau.
Support à bouteille de vin amovible
(sur certains modèles)
Le support à bouteille de vin est conçu
pour tenir une bouteille couchée.
Paniers et clayettes du congélateur
Sur les modèles avec porte ordinaire et
contenant trois paniers coulissants :
Les paniers inférieurs et supérieurs sont
coulissants afin de faciliter l’accès aux
aliments rangés dans le congélateur.
Lorsque le panier inférieur est retiré, le
panier supérieur peut être repoussé afin
d’améliorer l’accès au panier inférieur.
Sur les modèles avec porte ordinaire et
contenant un panier coulissant et deux
clayettes fixes de demi-largeur : Le panier
inférieur est coulissant afin de faciliter
l’accès aux aliments rangés dans ce panier.
Le panier supérieur peut être poussé vers
l’arrière pour améliorer encore plus l’accès
au panier inférieur.
La clayette fixe de pleine largeur au
niveau supérieur est un endroit idéal
pour ranger des bacs à glaçons et toutes
sortes d’aliments.
Sur les modèles avec tiroir : Le panier
inférieur glisse vers l’extérieur à l’ouverture
de le tiroir pour faciliter l’accès aux
aliments rangés dans ce panier.
Les paniers peuvent facilement être enlevés
pour nettoyer les déversements ou les
miettes sur le plancher du congélateur ou
pour installer une machine à glaçons.
Soutien au
consommateur
Conseils de dépannage
Fonctionnement
Mesures de sécuritéInstallation

Ensemble facultatif de machine à glaçons
Si votre réfrigérateur n’est pas déjà doté
d’une machine à glaçons automatique, vous
pouvez vous procurer, moyennant des frais
supplémentaires, un ensemble de machine
à glaçons facultatif (IM-4 pour les modèles
américains ou IM4-1 pour les modèles
canadiens.)
Installation de la machine à glaçons
Vous devez utiliser un bloc de montage
spécial pour machine à glaçons pour monter
une machine à glaçons. Les instructions
d’installation du bloc de montage de la
machine à glaçons se trouvent dans les
instructions d’installation de la machine
à glaçons.
Pour les modèles américains, le bloc de
montage est compris dans le réfrigérateur.
Pour les modèles canadiens, le bloc de
montage est compris dans l’ensemble
accessoire en option de machine à glaçons
(IM4-1).
Machine à glaçons automatique
(sur certains modèles)
La machine à glaçons produit sept glaçons
par cycle, soit environ 100 à 130 glaçons
par 24 heures, selon la température du
compartiment congélation, la température
de la pièce, le nombre de fois que la porte est
ouverte et les autres conditions d’utilisation.
Si vous faites fonctionner le réfrigérateur
avant de raccorder l’eau à la machine à
glaçons, mettez le commutateur de marche
en position O (arrêt).
Après avoir raccordé le réfrigérateur à
l’alimentation d’eau, mettez le commutateur
de marche en position I (marche). N’ouvrez pas
la porte ou le tiroir pendant environ 4 heures.
Cela permettra au compartiment congélation
d’atteindre la bonne température de
fonctionnement pour faire de la glace et
cela empêchera l’eau de déborder du moule
à glaçons.
Note spéciale sur la lumière verte de marche :
Même quand l’interrupteur de courant de la
machine à glaçons se trouve en position I
(marche), le courant alimentant la machine à
glaçons est coupé quand la porte ou le tiroir
du compartiment congélation est ouvert.
Cela empêche la glace projetée par la
machine à glaçons de manquer le bac à
glaçons et d’aller à l’arrière du compartiment
congélation. Comme l’alimentation en
courant de la machine à glaçons est
interrompue quand la porte ou le tiroir est
ouvert, la lumière verte de marche de la
machine à glaçon s’éteint. Pour vous assurer
que la machine à glaçons fonctionne bien,
appuyez sur l’interrupteur de lumière du
compartiment congélation situé en haut et à
droite du compartiment congélation. La
lumière de marche de la machine à glaçons
doit s’allumer.
La machine à glaçons se remplira d’eau si
sa température baisse à -10°C (15°F). Un
réfrigérateur nouvellement installé prend de
12 à 24 heures pour commencer à produire
des glaçons.
Jetez les premiers lots de glaçons pour
permettre à la conduite d’eau de se purger.
Assurez-vous que rien ne gène la course du
bras palpeur.
Quand le bac se remplit jusqu’au niveau du
bras palpeur, la machine à glaçons s’arrête de
produire des glaçons.
Il est normal de trouver des glaçons qui soient
soudés ensemble.
Si vous n’utilisez pas souvent vos glaçons,
les vieux glaçons deviennent opaques,
prennent un mauvais goût et rétrécissent.
Si les glaçons se coincent dans la machine
à glaçons, mettez le commutateur de marche
en position O (arrêt) et enlevez les glaçons.
Remettez le commutateur de marche en
position I (marche) pour remettre en marche
la machine à glaçons.
Quand vous remettez en marche la machine à
glaçons, vous devez attendre 45 minutes avant
qu’elle se remette à fabriquer des glaçons.
NOTE : Dans les maisons qui ont une pression d’eau
plus faible que la moyenne, vous pouvez entendre la
machine à glaçons recommencer plusieurs fois son
cycle pour produire une livraison de glaçons.
Machine à glaçons automatique.
electromenagersge.
ca
Un réfrigérateur nouvellement installé prend de 12 à 24 heures pour commencer à produire des glaçons.
Machine
à glaçons
Bras palpeur
Commutateur de marche
9
Soutien au
consommateur
Conseils de dépannageFonctionnementMesures de sécurité Installation
Bloc de montage
Pièce n
o
WR2M3604
Vis
Pièce n
o
WR1M478
10
Soutien au
consommateur
Conseils de dépannage
Fonctionnement
Mesures de sécuritéInstallation
Machine à glaçons automatique.
Un réfrigérateur nouvellement installé prend de 12 à 24 heures pour commencer à produire des glaçons.
Clayette pour bacs à glaçons (sur certains modèles)
Certains modèles possèdent une petite
clayette séparée pour le rangement des bacs
à glaçons.
Bacs à glaçons et seau à glace (sur certains modèles)
Pour enlever les glaçons du bac, mettez le bac
sur le seau à glace à l’envers, comme illustré.
Les glaçons sortiront lorsque vous appuyez sur
le bac à glaçons.
Grand seau à glaçons (sur certains modèles)
Vous devez utiliser ce seau pour utiliser la
machine à glaçons automatique. Pour
installer une machine à glaçons, vous devez
enlever la clayette du haut à gauche pour
permettre l’installation du grand seau à
glaçons. Si vous n’avez pas de machine à
glaçons, vous pouvez enlever le seau à glaçons
pour avoir davantage de place dans le
compartiment congélateur. Pour les modèles
américains, le seau est compris dans le
réfrigérateur. Pour les modèles canadiens, le
seau est compris dans l’ensemble accessoire
en option de machine à glaçons (IM4-1).
Pièce n
o
WR30S1

Entretien et nettoyage du réfrigérateur.
electromenagersge.
ca
Nettoyage de l’extérieur
Gardez l’extérieur du réfrigérateur propre.
Essuyez-le avec un linge propre légèrement
humecté d’un détergent liquide doux pour
la vaisselle. Séchez et polissez avec un linge
doux et propre.
N’essuyez pas le réfrigérateur avec un linge à
vaisselle sale ou une serviette humide : ils
pourraient laisser un résidu qui pourra endommager
la peinture. N’utilisez pas de tampons à récurer, de
produits nettoyants en poudre, de javellisants ou de
produits nettoyants contenant un javellisant, car ces
produits peuvent égratigner la peinture et la rendre
moins résistante.
Vous pouvez nettoyer les panneaux et les
poignées de porte en acier inoxydable avec un
nettoyant d’acier inoxydable vendu sur le
marché, comme le Stainless Steel Magic.
™
Vous trouverez le Stainless Steel Magic chez
Ace, True Value, Servistar, HWI et dans
d’autres magasins connus. Vous pouvez
également le commander en vous adressant
au Service de pièces et accessoires GE par
téléphone au numéro 800.626.2002 ou à
notre site Web GEAppliances.com.
Au Canada, appelez le 1.888.261.3055
ou visitez notre site Web,
electromenagersge.ca. Commandez
la pièce numéro WX10X15.
N’utilisez pas de cire pour appareils ménagers sur
l’acier inoxydable.
Nettoyage de l’intérieur
Pour éviter les mauvaises odeurs, laissez
une boîte ouverte de bicarbonate de soude
dans les compartiments réfrigérateur et
congélateur.
Débranchez le réfrigérateur avant de le
nettoyer. S’il est trop difficile de le faire,
essorez bien votre linge ou votre éponge
pour enlever l’excès d’eau lorsque vous
nettoyez autour des interrupteurs, des
lampes ou des commandes.
Utilisez une solution d’eau tiède et de
bicarbonate de soude—environ une
cuillère à soupe (15 ml) de bicarbonate
de soude par pinte (1 l) d’eau—afin de
nettoyer tout en neutralisant les odeurs.
Rincez et essuyez bien.
Après avoir nettoyé les joints de porte,
appliquez une fine couche de paraffine
sur les joints du côté des charnières pour
empêcher les joints de coller et de se
déformer.
Évitez de nettoyer les tablettes en verre
(sur certains modèles) encore froides
dans de l’eau chaude car elles risquent
de se casser à cause de l’écart excessif
de température. Manipulez les tablettes
en verre avec prudence. Si vous cognez
le verre trempé, il pourra se briser.
Le distributeur d’eau Brita
®
(sur certains modèles)
peut être lavé dans un lave-vaisselle.
Ne lavez aucune autre pièce en matière plastique
du réfrigérateur dans un lave-vaisselle.
Soutien au
consommateur
Conseils de dépannageFonctionnementMesures de sécurité Installation
11

Entretien et nettoyage du réfrigérateur.
Départ en vacances
Lorsque vous vous absentez pendant une
période prolongée, videz et débranchez
le réfrigérateur. Réglez la commande sur
ARRÊT et nettoyez l’intérieur avec une
solution d’eau et de bicarbonate de soude,
à raison d’une cuillère à soupe (15 ml) de
bicarbonate par pinte (1 l) d’eau. Laissez
les portes ouvertes.
Si une machine à glaçons est installée,
déplacer le bras d’approvisionnement de
la machine à glaçons à la position STOP
(élevée) et fermer l’approvisionnement
d’eau au réfrigérateur.
Déménagement
Immobilisez toutes les pièces amovibles,
tels que la grille, les clayettes et les bacs,
à l’aide de ruban gommé pour éviter de
les endommager.
Assurez-vous que le réfrigérateur demeure debout
pendant son déménagement.
Remplacement des ampoules
Avant de remplacer une ampoule grillée,
débranchez le réfrigérateur de sa prise
murale.
Au compartiment réfrigérateur, enlevez la
lentille qui protège l’ampoule en appuyant
doucement sur le côté de la lentille et
dégagez celle-ci du boîtier. Dévissez
l’ampoule lorsqu’elle a refroidi et
remplacez-la avec une ampoule pour
électroménagers de la même puissance
ou de puissance inférieure.
Il y a aussi une lampe dans le panneau
de contrôle du réfrigérateur. Pour la
remplacer, dévissez-la simplement quand
elle est froide et remplacez-la par une
ampoule pour électromenagers de la même
puissance ou de puissance inférieure.
Au compartiment congélateur, dévissez tout
simplement l’ampoule et remplacez-la en
vous assurant que le réfrigérateur est
débranché.
Lorsque vous réglez la commande sur ARRÊT
l’alimentation électrique de l’ampoule n’est
pas coupée.
12
Soutien au
consommateur
Conseils de dépannage
Fonctionnement
Mesures de sécuritéInstallation
Derrière le réfrigérateur
Prenez un soin particulier lorsque vous
éloignez le réfrigérateur du mur. Tous les
types de revêtements de sol peuvent être
endommagés, particulièrement ceux qui
sont coussinés ou dont la surface est gaufrée.
Tirez le réfrigérateur en ligne droite et,
lorsque vous le remettez en place,
poussez-le vers le mur en ligne droite.
Les déplacements latéraux du réfrigérateur
pourraient endommager le revêtement
de sol ou le réfrigérateur.
Lorsque vous remettez le réfrigérateur
en place en le poussant, veillez à ne
pas le faire rouler sur le cordon
d’alimentation.
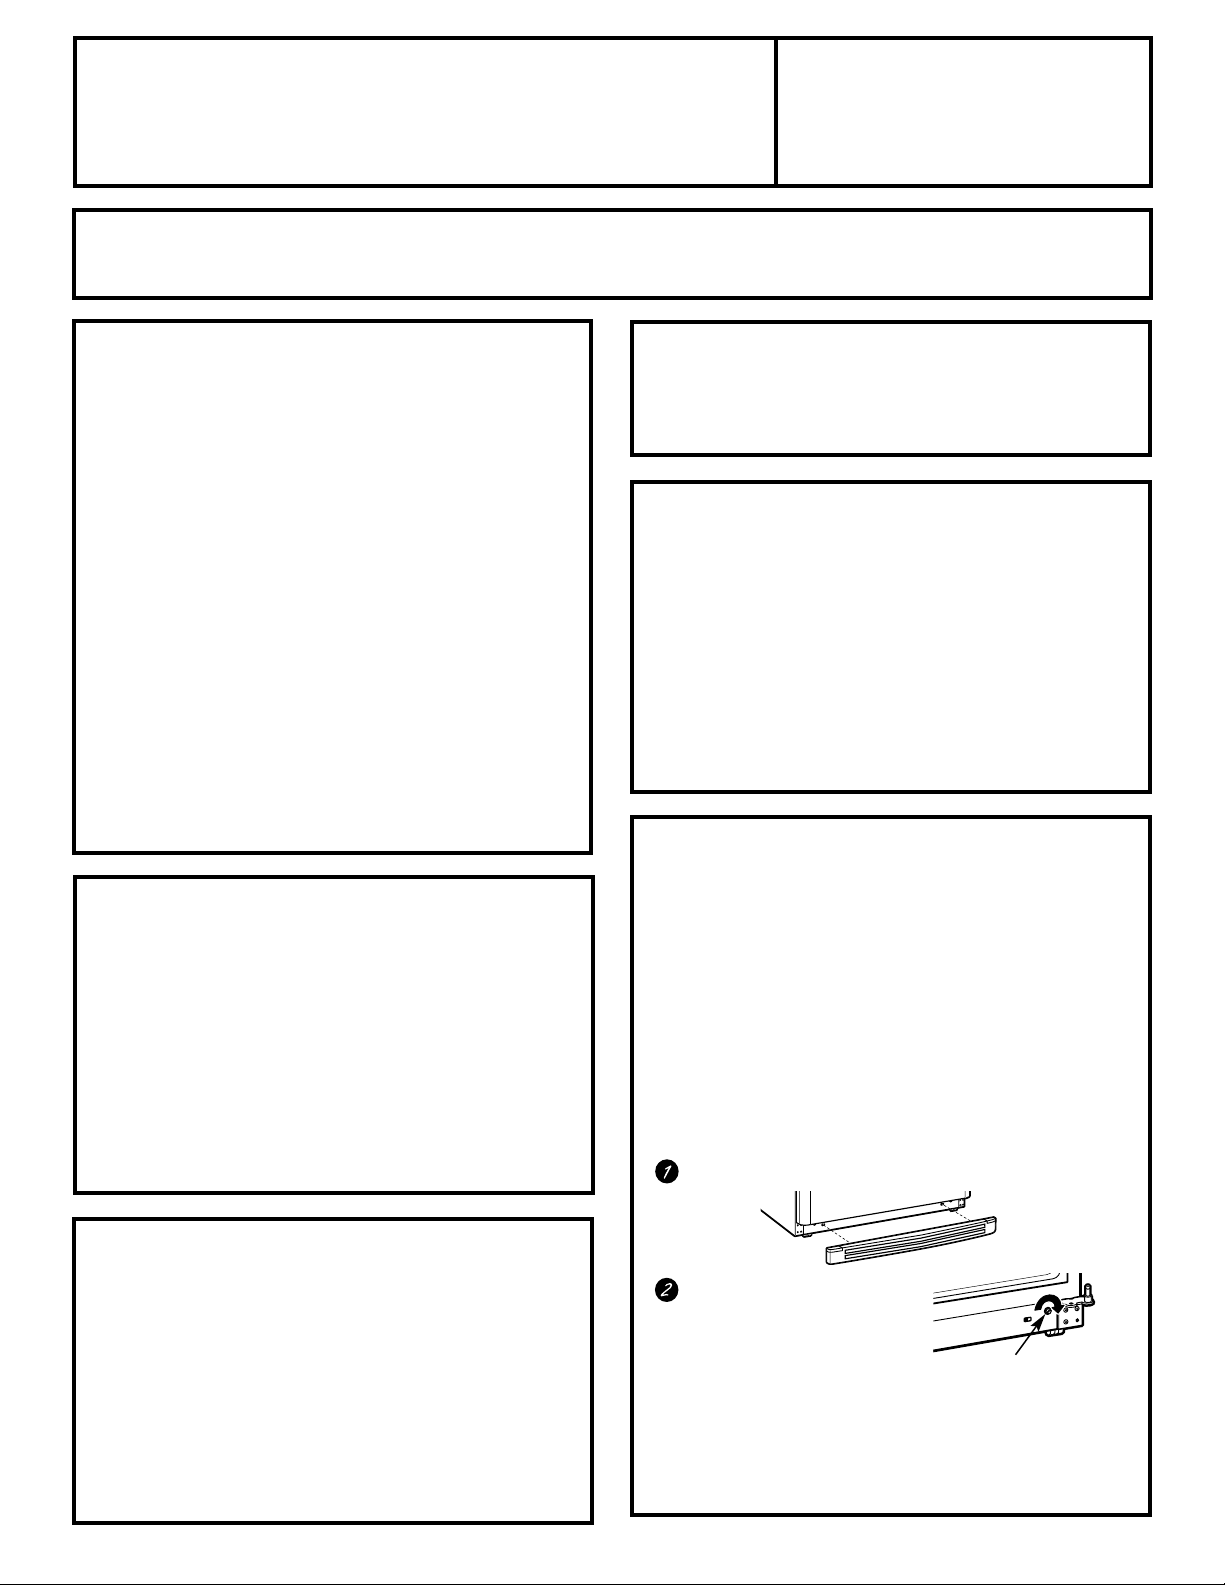
AVANT DE COMMENCER
Veuillez lire toutes les directives attentivement.
•
IMPORTANT – Conservez ces
instructions pour l’inspecteur local.
•
IMPORTANT – Respectez toutes les
ordonnances et les codes locaux.
• Note à l’installateur – Assurez-vous de laisser ces
instructions au consommateur.
• Note au consommateur – Conservez ces
instructions pour référence future.
• Niveau de compétence – L’installation de cet appareil
nécessite des compétences mécaniques de base.
• Temps d’installation – Installation du réfrigérateur
15 minutes
• L’installateur est responsable de bien installer ce
réfrigérateur.
• Toute panne du produit due à une mauvaise
installation n’est pas couverte par la garantie.
• N’installez jamais votre réfrigérateur dans un
emplacement où la température ambiante sera
inférieure à 16°C (60°F). Il ne se mettra pas en marche
suffisamment souvent pour maintenir des températures
convenables.
• N’installez jamais votre réfrigérateur dans un
emplacement où la température ambiante sera
supérieure à 37°C (100°F). Il ne fonctionnera pas bien.
• Installez votre réfrigérateur sur un plancher
suffisamment solide pour le porter lorsqu’il est plein.
EMPLACEMENT DU RÉFRIGÉRATEUR
Si vous avez des questions, appelez le 1.800.361.3400 ou visitez notre site Web à l’adresse :
electromenagersge.ca
Instructions
Réfrigérateur
d’installation
Modèle 18
Prévoyez les dégagements suivants pour faciliter
l’installation, la bonne circulation d’air et les
raccordements de plomberie et d’électricité :
• Côtés : 3 mm (1/8 po)
• Haut : 25 mm (1 po)
• Arrière : 25 mm (1 po)
Si un côté ou l’autre de votre réfrigérateur est contre
un mur, laissez au moins 45 mm (1
3
⁄4 po) d’espace libre
entre le mur et le côté du réfrigérateur pour pouvoir
bien ouvrir la porte.
DÉGAGEMENTS
Si votre réfrigérateur a une machine à glaçons, il faut le
brancher à une conduite d’eau froide. Vous pouvez
acheter une trousse d’alimentation d’eau GE (contenant
la tuyauterie, le robinet d’arrêt, les joints et les
instructions) chez votre revendeur ou en vous adressant
à notre site Web à l’adresse electromenagersge.ca ou
à notre service de Pièces et accessoires au numéro
de téléphone 1.888.261.3055.
ALIMENTATION D’EAU DE
LA MACHINE À GLAÇONS
(SUR CERTAINS MODÈLES)
13
Enlevez tout le ruban d’emballage et la pellicule
détachable. Nous avons ajouté ces rubans pour protéger
et bien fermer votre réfrigérateur pendant le transport.
RUBAN D’EMBALLAGE
Les roulettes jouent deux rôles :
■ Les roulettes donnent la possibilité de mettre le
réfrigérateur de niveau.
REMARQUE : Nous vous recommandons de soulever
l’avant du réfrigérateur de 13 mm (1/2 po). Si vous
installez une machine à glaçons, assurez-vous que la
machine à glaçons soit bien horizontale tout en
maintenant l’inclinaison du réfrigérateur.
■ Les roulettes vous permettent d’avancer le réfrigérateur
pour le nettoyage.
Pour régler les roulettes
:
Enlevez la grille de base en la tirant droit vers vous.
Tournez les deux vis de
réglage des roulettes avant
dans le sens horaire pour
relever le réfrigérateur, et
tournez-les dans le sens
antihoraire pour l’abaisser. Pour ce faire, utilisez une
clé à douille de 3/8 po, une clé à molette ou des pinces.
REMARQUE : Votre réfrigérateur doit être soutenu par les
quatre roulettes. Pour vérifier, bougez votre réfrigérateur
pour vous assurer qu’il ne se balance pas.
ROULETTES
Vis de réglage de la roulette arrière
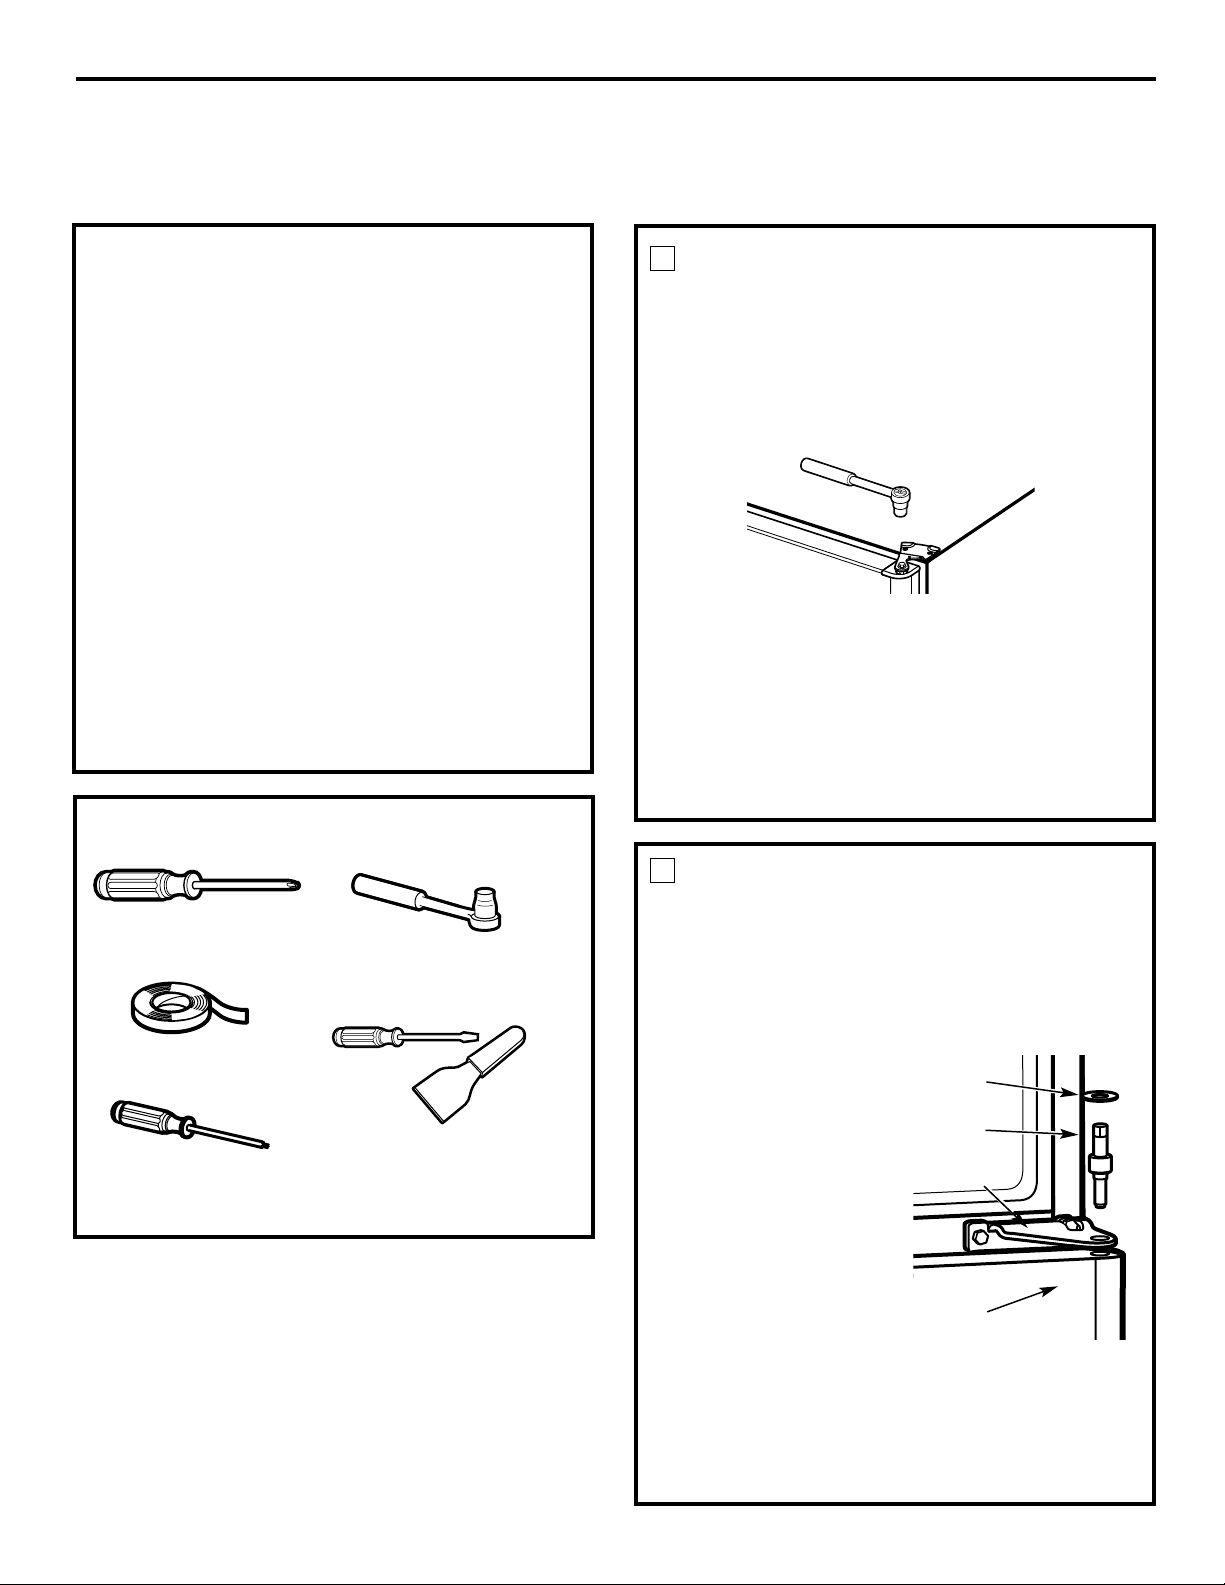
INVERSION DES PORTES
Lorsque vous invertissez le sens d’ouverture des portes :
• Lisez toutes les directives avant de commencer.
• REMARQUE : Les portes sur les modèles en acier
inoxydable ne sont pas réversibles.
• Manipulez les pièces avec précaution pour éviter de
rayer la peinture.
• Posez les vis à côté des pièces correspondantes pour
éviter de les utiliser aux mauvais endroits.
• Prévoyez un plan de travail qui ne se raye pas pour
poser les portes.
Ces directives s’appliquent au transfert des charnières
du côté droit au côté gauche. Si vous décidez plus tard
de déplacer les charnières du côté droit, procédez de la
même façon (en intervertissant simplement les références
aux côtés gauche et droit).
Débranchez le réfrigérateur de sa prise murale.
Videz tous les balconnets de porte, y compris le
compartiment à produits laitiers.
NOTES IMPORTANTES
Instructions d’installation
ENLÈVEMENT DE LA PORTE
DU RÉFRIGÉRATEUR
(PORTE SUPÉRIEURE)
1
Clé à douille
de 7/32 po, 5/16 po et 3/8 po
OUTILS REQUIS
Tournevis Phillips
Couteau à mastic ou tournevis
à lame mince
Maintenez la porte fermée au moyen de ruban-cache.
Enlevez le couvre-charnière. À l’aide d’une clé à
douille de 5/16 po, enlevez les deux vis qui retiennent
la charnière supérieure à la carrosserie.
Soulevez la charnière pour dégager l’axe de
charnière de la douille située sur le dessus de la porte.
Enlevez le ruban-cache, éloignez la porte de la
carrosserie en l’inclinant et soulevez-la afin de la
dégager de l’axe de la charnière intermédiaire.
Posez la porte sur une surface douce qui ne risque
pas de l’égratigner en prenant soin de la coucher sur
sa contre-porte.
Ruban-cache
Tournevis à tête de force
T-20 ou T-25, selon votre
modèle de réfrigérateur
14
Veuillez lire toutes les directives attentivement.
ENLEVEZ LA PORTE DU
CONGÉLATEUR (PORTE
INFÉRIEURE) (Pour les modèles
avec porte du congélateur ordinaire
seulement)
2
Maintenez la porte fermée au moyen de ruban-cache.
À l’aide d’une clé à douille
de 7/32 po, enlevez l’axe
de charnière.
Enlevez le ruban-cache
et éloignez la porte de la
carrosserie en l’inclinant.
Enlevez la rondelle et
mettez-la sur l’axe de
charnière.
Soulevez la porte afin de
la dégager de l’axe de la
charnière inférieure.
ENLEVEZ L’AXE DE CHARNIÈRE
(Pour les modèles avec tiroir
du congélateur)
À l’aide d’une clé à douille de 7/32 po, enlevez l’axe
de charnière.
Rondelle
de plastique
Axe de
charnière
Charnière
intermédiaire
Porte du
congélateur
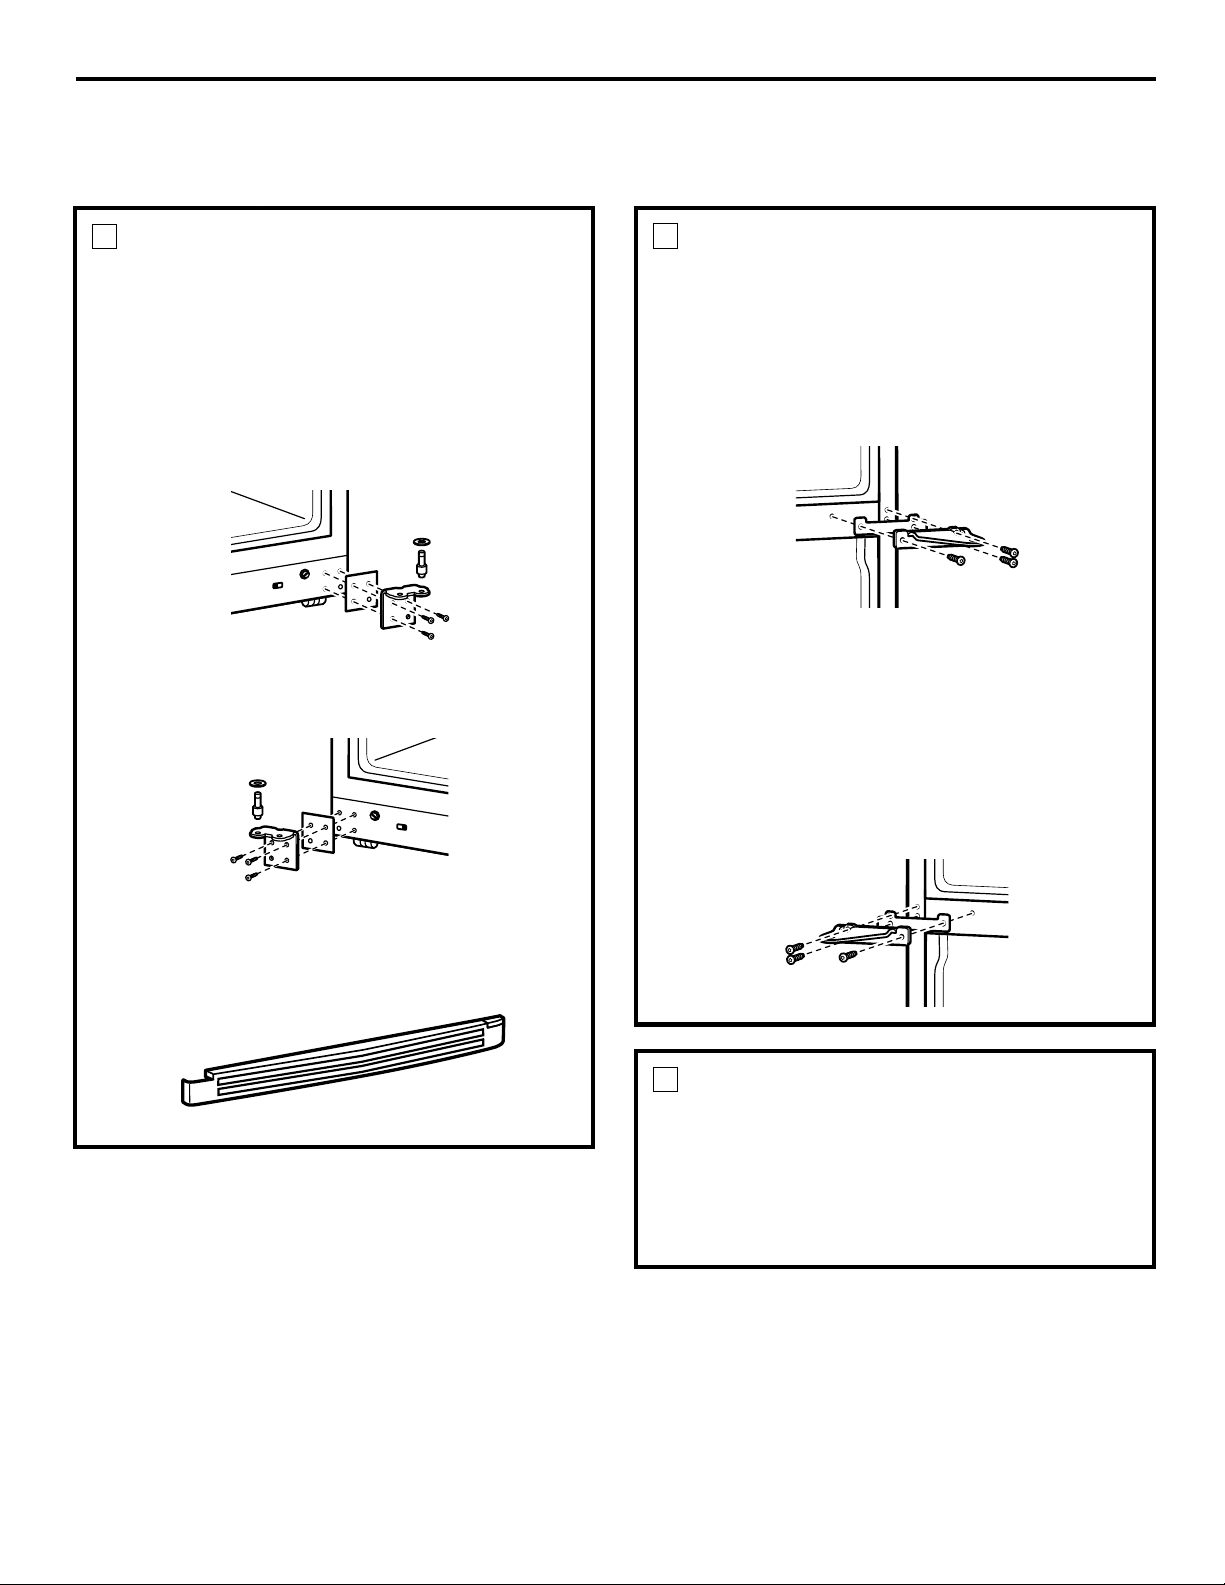
15
Instructions d’installation
TRANSFERT DE LA CHARNIÈRE
INTERMÉDIAIRE VERS LE CÔTÉ
GAUCHE
Dévissez les trois vis et enlevez la charnière
intermédiaire. REMARQUE : Gardez ces vis avec
la charnière. Ces vis sont longues et seront utilisées
pour l’installation de la charnière de l’autre côté
de l’appareil.
Enlevez les trois vis peintes et les rondelles situées au
centre du côté gauche de la carrosserie. Vissez-les au
côté droit, dans les trous libérés ci-dessus.
Remettez la charnière intermédiaire et la cale
par-dessus les trous situés au centre du côté gauche
de l’appareil. Insérez les trois vis qui ont été enlevées
en même temps que la charnière intermédiaire au
début de l’étape 4 et serrez-les solidement.
N’installez pas encore l’axe de charnière.
4
TRANSFERT DE LA CHARNIÈRE
INFÉRIEURE VERS LE CÔTÉ
GAUCHE (Pour les modèles avec
porte ordinaire seulement)
Tirez droit la grille de base afin de pouvoir accéder
aux vis de la charnière.
À l’aide d’une clé à douille de 5/16 po, enlevez la
charnière, la vis, la rondelle de plastique et la cale
du côté droit inférieur droit de la carrosserie.
Remettez en place la cale, la charnière, les vis et la
rondelle de plastique au côté gauche inférieur de
la carrosserie.
Enlevez le capuchon au côté gauche de la grille de
base. Installez le capuchon, fourni avec la trousse, au
côté droit de la grille de base. Réinstallez la grille de
base et pressez-la firmement.
3
TRANSFERT DE LA CHARNIÈRE
SUPÉRIEURE VERS LE CÔTÉ
GAUCHE
Inversez la charnière et la cale au côté droit supérieur
avec les capuchons situés au côté gauche supérieur de
l’appareil. Pour l’instant, ne serrez pas les vis du côté
de la charnière.
5
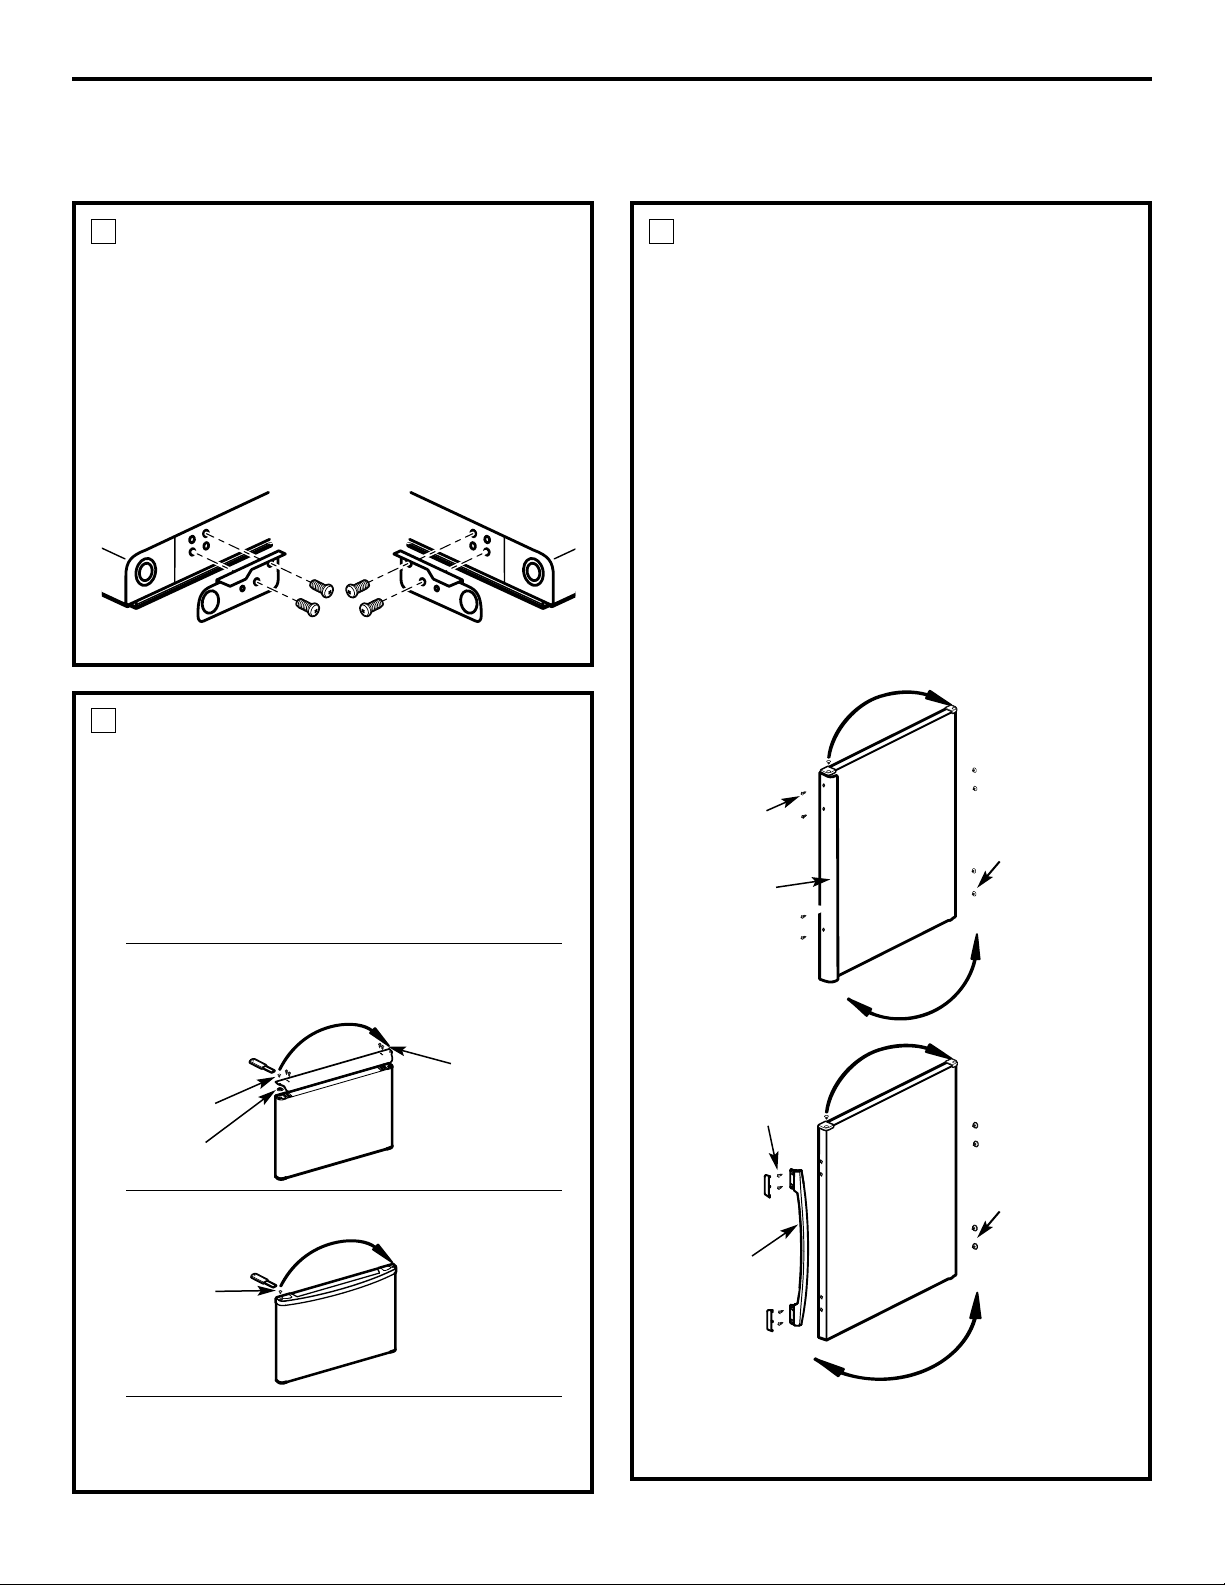
INVERSION DES PORTES (SUITE)
Instructions d’installation
16
TRANSFERT DES BUTÉES
DE PORTE
Enlevez la butée de porte en métal de chaque porte.
Utilisez l’axe de charnière intermédiaire comme
guide pour aligner la butée de porte, fourni dans la
trousse, de l’autre côté, après avoir changé les
poignées de côté.
Sur les modèles avec congélateur à tiroir, seule
la porte du réfrigérateur est munie d’une butée.
6
TRANSFERT DE LA POIGNÉE
DE PORTE DU RÉFRIGÉRATEUR
À DROITE
Enlevez les quatre vis de montage de la poignée. Sur
certains modèles, vous devez d’abord enlever les
couvercles de vis.
À l’aide d’un couteau à mastic, enlevez les quatre
capuchons pour trous de vis du côté droit de la porte.
Réinstallez les capuchons au côté gauche de la porte.
Alignez la poignée avec les trous du côté droit de la
porte et installez les quatre vis de montage et les
couvercles de vis (sur certains modèles).
À la partie supérieure de la porte, enlevez le capuchon
à l’aide d’un couteau à mastic et réinstallez-le dans le
trou situé sur la partie supérieure du côté droit.
L’une des illustrations ci-dessous montre la poignée
de porte de votre réfrigérateur.
REMARQUE : Vérifiez que la butée de porte située à
la partie inférieure de la porte a été transférée au côté
gauche de la porte comme expliqué ci-dessus (étape 6).
8
Vis de
montage de
la poignée
Poignée
Porte du
réfrigérateur
Capuchon
Vis de
montage de
la poignée
Poignée
Porte du
réfrigérateur
Capuchon
PRÉPAREZ LA POIGNÉE
DU CONGÉLATEUR POUR
L’INVERSEMENT DE
L’OUVERTURE DE LA PORTE
(Pour les modèles avec porte
ordinaire seulement)
L’une des illustrations ci-dessous montre votre
poignée de porte de votre congélateur.
Enlevez les quatre vis de montage de la poignée.
Enlevez le capuchon et son soutien et faites-le
passer de l’autre côté. Remontez la poignée.
Enlevez le capuchon et faites-le passer de l’autre côté.
REMARQUE : Assurez-vous que la butée au bas
de la porte est transférée au côté gauche comme
expliqué ci-dessus (étape 6).
7
Capuchon
Soutien du
capuchon
Capuchon
Vis de
montage de
la poignée
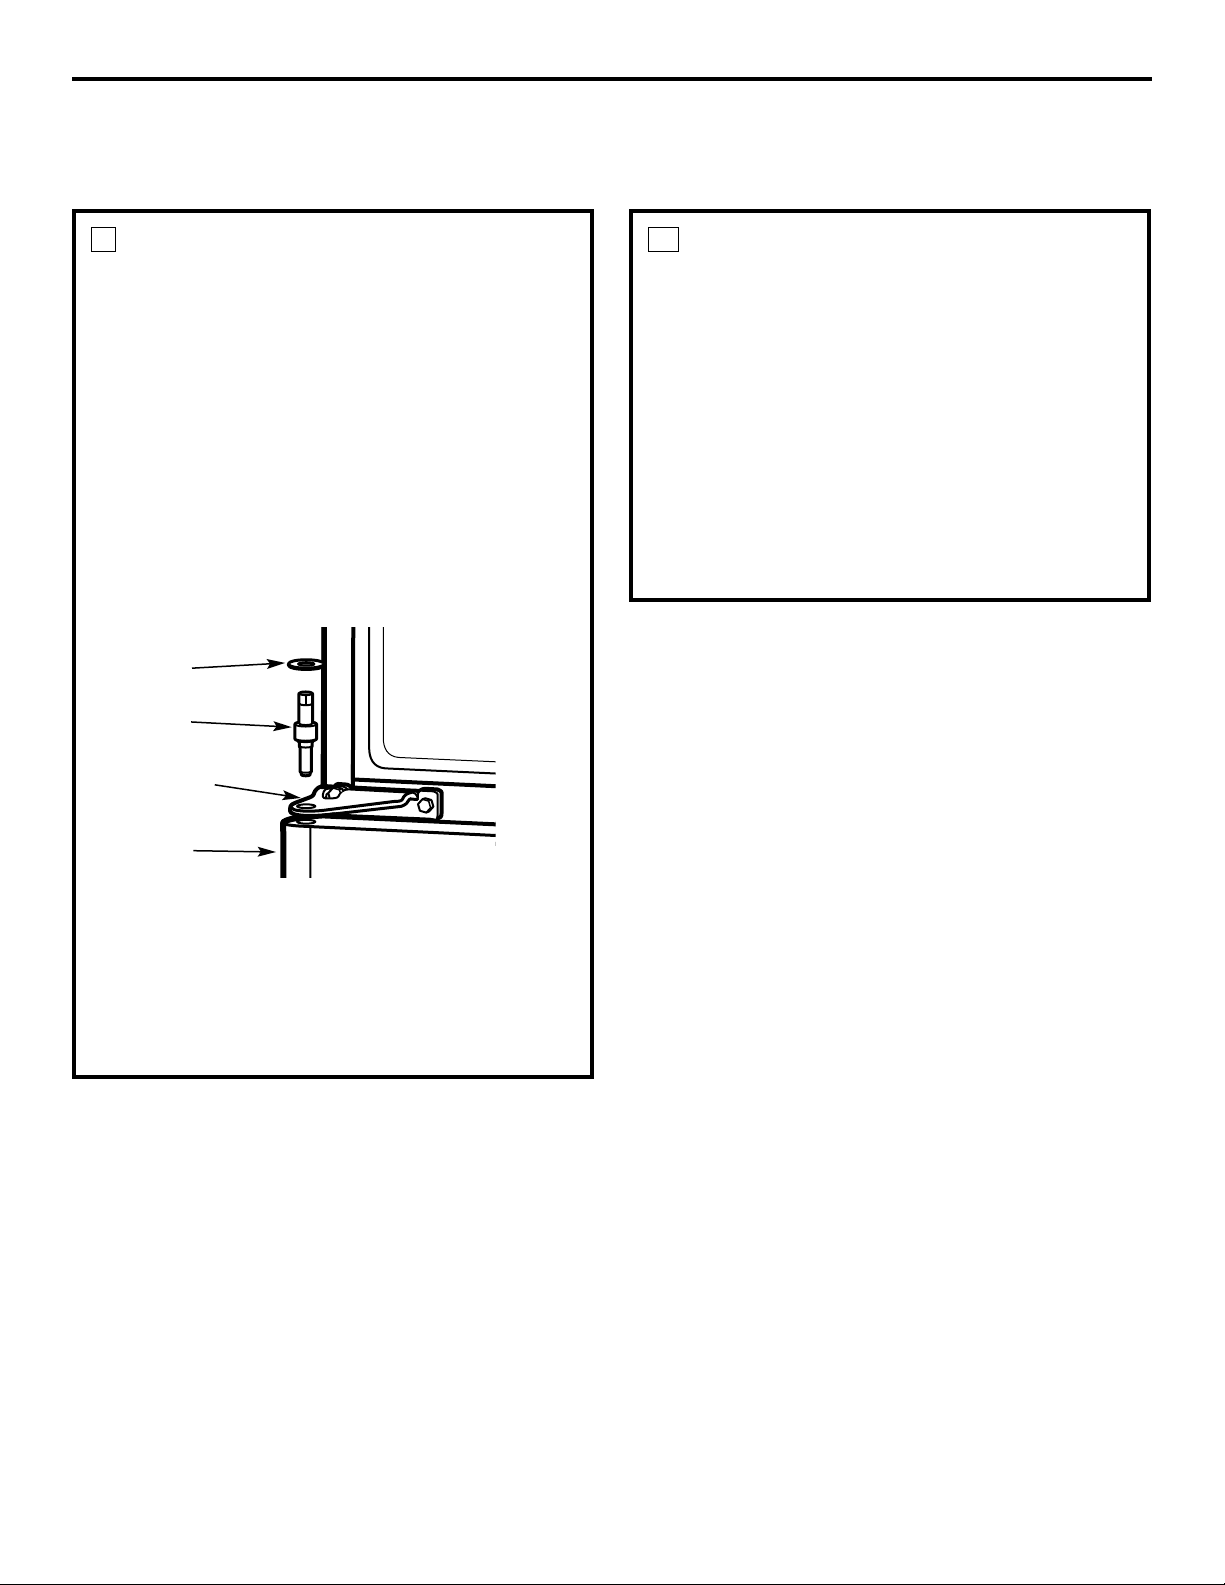
Instructions d’installation
RÉINSTALLEZ LA PORTE DU
CONGÉLATEUR (Pour les modèles
avec porte du congélateur ordinaire
seulement)
Installez la douille inférieure de la porte du
congélateur sur l’axe de la charnière inférieure.
Assurez-vous que la rondelle est bien en place.
Inclinez la porte vers la carrosserie et poussez la porte
doucement sous la charnière intermédiaire tout en
l’alignant avec le trou de la charnière intermédiaire.
À l’aide d’une clé à douille de 7/32 po, réinstallez
l’axe de charnière de façon qu’il dépasse le trou au
centre de la charnière intermédiaire et s’enfonce
dans la douille située à la partie supérieure de la
porte du congélateur.
9
RÉINSTALLEZ LA PORTE
DU RÉFRIGÉRATEUR
Installez la douille inférieure de la porte du
réfrigérateur sur l’axe de la charnière intermédiaire.
Assurez-vous que la rondelle est bien en place.
Inclinez la porte vers la carrosserie et soulevez la
charnière supérieure de façon qu’elle s’enfonce dans
la douille située à la partie supérieure de la porte du
réfrigérateur.
Tout en soutenant la porte du côté de la poignée,
serrez les vis de la charnière supérieure et assurez-vous
que le jeu entre les deux portes est uniforme sur le
devant.
Remettez en place le couvre-charnière.
10
17
Rondelle de
plastique
Axe de
charnière
Charnière
intermédiaire
Porte du
congélateur
RÉINSTALLEZ L’AXE DE
CHARNIÈRE (Pour les modèles
avec tiroir du congélateur)
À l’aide d’une clé à douille de 7/32 po, réinstallez
l’axe de charnière de façon qu’il dépasse le trou au
centre de la charnière intermédiaire.
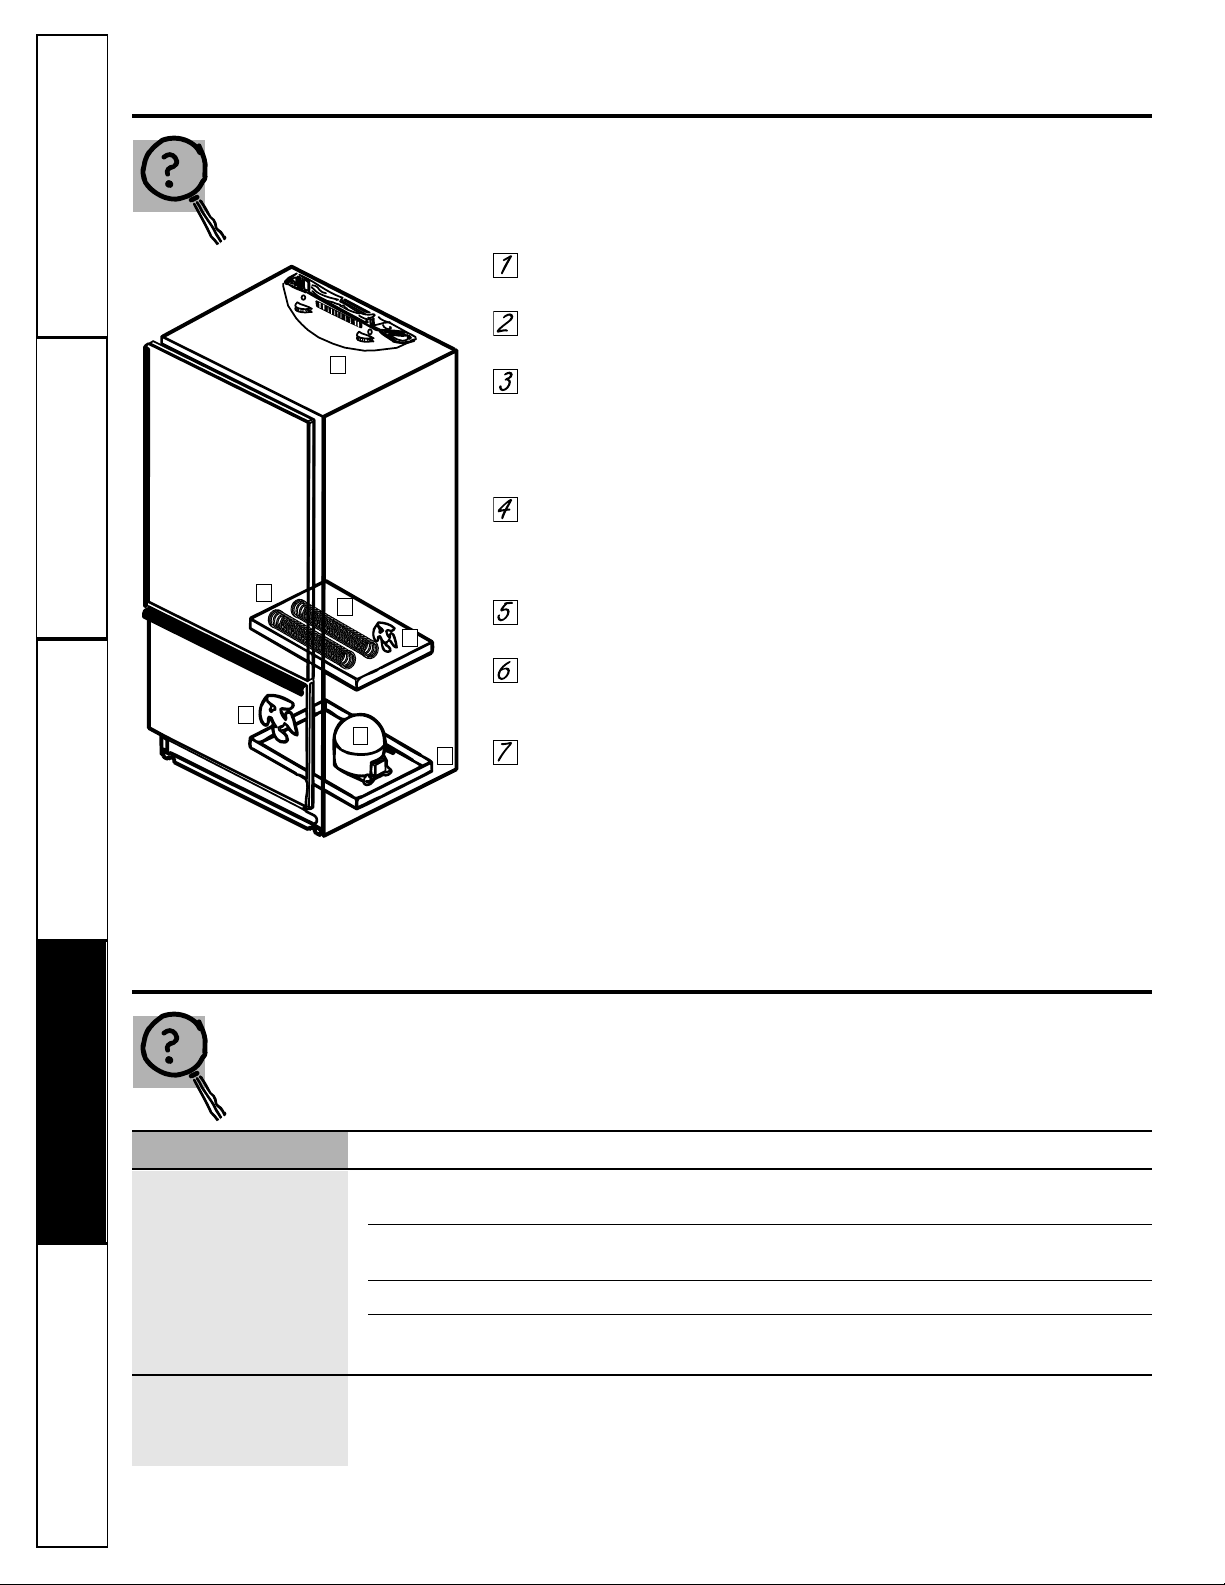
Soutien au
consommateur
Conseils de dépannage
Fonctionnement
Mesures de sécuritéInstallation
18
Bruits de fonctionnement normaux.
Selon l’emplacement du réfrigérateur dans votre cuisine, vous
aurez peut-être envie d’installer celui-ci sur un tapis caoutchouté
afin de réduire le bruit de l’appareil.
Ventilateur de l’évaporateur. Vous entendrez peut-être de l’air envoyé dans
l’appareil par le ventilateur.
Évaporateur. Le frigorigène qui circule dans l’évaporateur peut produire un
bruit de bouillonnement ou de gargouillement.
Élément de dégivrage. Pendant les cycles de dégivrage, de l’eau qui s’égoutte
sur l’élément de dégivrage peut produire un crépitement ou un sifflement.
Après le dégivrage, un bruit de craquement peut se produire et
l’évaporateur peut produire un bruit de bouillonnement ou de
gargouillement.
Commande de température et minuterie de dégivrage. Ces pièces peuvent
produire un bruit lorsque le réfrigérateur se met en marche ou s’arrête.
La minuterie de dégivrage produit aussi un bruit similaire à celui d’une
pendule électrique.
Plateau de dégivrage. On peut entendre de l’eau qui s’égoutte dans le
plateau de dégivrage pendant le cycle de dégivrage.
Compresseur. Les compresseurs modernes à rendement hautement efficace
fonctionnent beaucoup plus rapidement que les modèles anciens et
peuvent produire un bourdonnement ou un bruit de pulsation.
Ventilateur du condenseur. Vous entendrez peut-être de l’air envoyé
au-dessus du condenseur par le ventilateur.
Avant d’appeler un réparateur…
Conseils de dépannage—Économisez du temps et de
l’argent! Consultez d’abord les tableaux qui suivent et vous
pourrez peut-être éviter de faire appel à un réparateur.
Problème Causes possibles Correctifs
Le réfrigérateur ne
Le cycle de dégivrage est en cours.
•Attendez environ 45 minutes afin que le cycle de
fonctionne pas dégivrage puisse terminer.
La commande est réglée •Réglez la commande de température sur un réglage
sur ARRÊT. de température.
Le réfrigérateur est débranché. •Enfoncez la fiche de l’appareil dans la prise murale.
Le disjoncteur ou le fusible •Remplacez le fusible ou réenclenchez le disjoncteur.
peut avoir sauté.
Vibration ou bruit Les roulettes ont besoin •Consultez Préparation à l’installation du réfrigérateur.
métallique (une légère d’être réglés.
vibration est normale)
1
2
3
4
5
6
7
electromenagersge.
ca
Soutien au
consommateur
Conseils de dépannageFonctionnementMesures de sécurité Installation
Problème Causes possibles Correctifs
Le moteur fonctionne Ceci est normal lorsque le •Attendez 24 heures pour que le réfrigérateur refroidisse
pendant de longues réfrigérateur vient d’être branché. complètement.
périodes ou démarre
Ceci arrive souvent lorsque • C’est normal.
et s’arrête fréquemment.
une grande quantité d’aliments
a été mise au réfrigérateur.
(Les réfrigérateurs
Porte laissée ouverte. •Vérifiez qu’il n’y a pas un paquet qui empêche
modernes et leurs
la porte de fermer.
• Vous devez régler les roulettes de manière à ce que les
portes et les tiroirs se ferment automatiquement quand ils
sont partiellement ouverts. Consultez Préparation à
l’installation du réfrigérateur.
congélateurs étant plus
Temps chaud ou ouverture • C’est normal.
grands, leur moteur doit
fréquente des portes.
fonctionner plus
Les commandes de température • Consultez Mise en marche.
longtemps. Ils démarrent
ont été réglées aux températures
et s’arrêtent afin de
les plus basses.
Température trop élevée La commande de température • Consultez Mise en marche.
dans le congélateur ou du réfrigérateur ou du
le réfrigérateur congélateur n’est pas réglée
à une température assez basse.
Temps chaud ou ouverture • Abaissez la commande de température d’une position.
fréquente des portes. Consultez Mise en marche.
Porte laissée ouverte. •Vérifiez qu’il n’y a pas un paquet qui empêche la
porte de fermer.
•Vous devez régler les roulettes de manière à ce que les
portes et les tiroirs se ferment automatiquement quand ils
sont partiellement ouverts. Consultez Préparation à
l’installation du réfrigérateur.
Givre sur les aliments Porte laissée ouverte. •Vérifiez qu’il n’y a pas un paquet qui empêche la
surgelés (il est normal porte de fermer.
que du givre se forme à
• Vous devez régler les roulettes de manière à ce que les
l’intérieur du paquet)
portes et les tiroirs se ferment automatiquement quand ils
sont partiellement ouverts. Consultez Préparation à
l’installation du réfrigérateur.
Les portes ont été ouvertes trop
souvent ou pendant trop longtemps.
Odeur/saveur Des aliments ont transmis leur • Emballez bien les aliments.
anormale des glaçons odeur/goût aux glaçons.
Il faut nettoyer l’intérieur du •Consultez Entretien et nettoyage.
réfrigérateur.
Formation lente des Porte laissée ouverte. •Vérifiez qu’il n’y a pas un paquet qui empêche la porte
glaçons de fermer.
• Vous devez régler les roulettes de manière à ce que les
portes et les tiroirs se ferment automatiquement quand ils
sont partiellement ouverts. Consultez Préparation à
l’installation du réfrigérateur.
La commande de température •Consultez Mise en marche.
du congélateur n’est pas réglée à
une température assez basse.
Odeur dans Des aliments ont transmis • Les aliments à odeur forte doivent être emballés
le réfrigérateur leur odeur au réfrigérateur. hermétiquement.
• Gardez une boîte ouverte de bicarbonate de soude
dans le réfrigérateur.
Il faut nettoyer l’intérieur. •Consultez Entretien et nettoyage.
Le moteur fonctionne
pendant de longues
périodes ou démarre et
s’arrête fréquemment.
(Les réfrigérateurs
modernes et leurs
congélateurs étant plus
grands, leur moteur doit
fonctionner plus
longtemps. Ils démarrent
et s’arrêtent afin de
maintenir des
températures uniformes.)
19
Problème Causes possibles Correctifs
De la condensation Cela n’est pas inhabituel pendant • Essuyez bien la surface extérieure et abaissez la
s’accumule à l’extérieur les périodes de forte humidité. commande du réfrigérateur d’une position.
De la condensation Les portes sont ouvertes trop
s’accumule à l’intérieur fréquemment ou pendant trop
(par temps humide, longtemps.
l’ouverture des portes
laisse entrer de
l’humidité)
Les aliments rangés Les aliments sont trop près du • Éloignez les aliments du conduit d’air du congélateur.
au réfrigérateur conduit d’air du congélateur.
sont congelés
La commande de température •Réglez la commande de température du réfrigérateur
du réfrigérateur est réglée sur une température plus élevée.
à une température trop basse.
La porte ou le tiroir ne Les roulettes avant ou les pieds •Consultez Préparation à l’installation du réfrigérateur.
ferme pas d’elle-même avant ont besoin d’être réglés.
L’éclairage intérieur Il n’y a pas de courant au niveau • Remplacez le fusible ou réenclenchez le disjoncteur.
ne fonctionne pas de la prise.
L’ampoule est grillée. •Consultez Remplacement des ampoules.
La porte grince lorsqu’elle La charnière et (ou) le joint de la
est ouverte porte a besoin d’être lubrifié.
La porte du compartiment C’est normal si, après s’être • Cela indique qu’il y a une bonne charge sur la porte ou
congélation ou les tiroirs ouverte, la porte ou le tiroir le tiroir du compartiment congélation. Si la porte ou le
sont ouverts alors que la du compartiment congélation tiroir du compartiment congélation ne se ferme pas
porte du compartiment s’est fermée d’elle-même. automatiquement après s’être ouverte, consultez la section
réfrigération est fermée Problème : la porte ou le tiroir du compartiment congélation
ne se ferme pas seule, ci-dessus.
L’interrupteur de marche La porte ou le tiroir du • C’est normal. L’alimentation de courant à la machine
de la machine à glaçons compartiment congélation à glaçons s’arrête quand la porte ou le tiroir du
est en position I (marche), est ouvert. compartiment congélation est ouvert pour empêcher
mais la lumière verte de la glace d’être projetée et d’aller à l’arrière du
marche est éteinte compartiment congélation. Pour vous assurer que la
machine à glaçons fonctionne bien, appuyez sur
l’interrupteur de lumière du compartiment congélation
situé en haut et à droite du compartiment congélation.
La lumière verte de marche doit s’allumer.
De l’eau se répand en La porte ou le tiroir du • Nettoyez le débordemnt, puis fermez la porte ou le tiroir
dehors de la machine compartiment congélation a été du compartiment congélateur et ne l’ouvrez pas pendant
à glaçons ouvert peu après l’installation environ 4 heures. Cela permettra au compartiment
de la machine à glaçons. congélation d’atteindre la bonne température pour
fabriquer des glaçons.
La porte du compartiment • À cause des ouvertures de porte, le compartiment
congélation a été laissée ouverte congélation n’a pas pu atteindre la bonne température
pendant longtemps, puis ouverte de fonctionnement pour fabriquer des glaçons. Nettoyez
et fermée fréquemment depuis. le débordement, puis fermez la porte ou le tiroir du
compartiment congélateur et ne l’ouvrez pas pendant
environ 4 heures.
Les glaçons sont de trop Pas assez de pression de l’eau • Les robinets à eau autotarodeurs ne sont pas
petite taille. La production dans le robinet de la machine recommandés, à moins qu’un trou de 1/4″ ne soit déjà
de glaçons est réduite à glaçons. percé dans la conduite d’eau de la maison. Consultez les
instructions de la section Installation de la conduite
d’eau dans les instructions d’installation de l’ensemble
accessoire de machine à glaçons.
Avant d’appeler un réparateur…
Soutien au
consommateur
Conseils de dépannage
Fonctionnement
Mesures de sécuritéInstallation
20
GARANTIE DU CLIENT
(pour la clientèle au Canada)
Votre réfrigérateur est garanti contre tout défaut de matériau et de fabrication.
Ce que cette Durée de garantie Pièces Main-d’oeuvre
garantie couvre (à partir de la Réparation ou
date d’achat) remplacement au
choix de Camco
Compresseur :
Modèles de GE Profile Dix (10) ans Dix (10) ans Cinq (5) ans
Modèles de GE Cinq (5) ans Cinq (5) ans Cinq (5) ans
Système scellé (y Cinq (5) ans Cinq (5) ans Cinq (5) ans
compris l’évaporateur, la
tuyauterie du condenseur
et le frigorigène)
Toutes les autres pièces Un (1) an Un (1) an Un (1) an
TERMES ET CONDITIONS :
1. La présente garantie ne s’applique qu’à
l’utilisation domestique par une seule famille
au Canada, lorsque le réfrigérateur a été
installé conformément aux instructions
fournies par Camco et est alimenté
correctement en eau et en électricité.
Les dommages dûs à une utilisation
abusive, un accident, une exploitation
commerciale, ainsi que la modification,
l’enlèvement ou l’altération de la plaque
signalétique annulent la présente
garantie.
L’entretien effectué dans le cadre de la
présente garantie doit l’être par un
réparateur agréé Camco.
2. Camco et le marchand ne peuvent être
tenus pour responsables en cas de
réclamations ou dommages résultant
de toute panne du réfrigérateur ou d’un
entretien retardé pour des raisons qui
raisonnablement échappent à leur contrôle.
3. L’acheteur doit, pour obtenir un service
dans le cadre de la garantie, présenter
la facture originale. Les éléments
réparés ou remplacés ne sont garantis
que pendant le restant de la période de
garantie initiale.
4. Cette garantie est en sus de toute
garantie statutaire.
EXCLUSIONS DE LA GARANTIE :
• Le propriétaire est responsable de payer
les appels de service relatifs à l’installation
et/ou l’apprentissage du fonctionnement
de ce produit.
• Tout dommage au fini doit être signalé
dans les 48 heures qui suivent la livraison
de l’appareil électroménager, comme
l’indique l’étiquette d’avis au
consommateur placée à l’intérieur
de la porte du réfrigérateur.
• Installation incorrecte—l’installation
correcte inclut la bonne circulation d’air
pour le système de réfrigération, des
possibilités de branchement aux circuits
électriques, d’alimentation en eau et autres.
• Remplacement des fusibles ou
réarmement des disjoncteurs.
• Remplacement des ampoules électriques.
• Dommages subis par l’appareil à la suite
d’un accident, d’un incendie, d’inondations
ou en cas de force majeure.
• Perte des aliments dûe à la déterioration.
• Utilisation correcte et entretien adéquat
de l’appareil selon les manuel
d’utilisation, réglage correct des
commandes.
• LE GARANT N’EST PAS RESPONSABLE
DES DOMMAGES INDIRECTS.
IMPORTANT
Gardez cette garantie et votre facture originale comme preuve d’achat et preuve
de la date d’achat.
Camco vous offre ses services dans tout le pays.
Pour de plus amples renseignements sur la
présente garantie, veuillez prendre contact avec :
Directeur, Relations avec les consommateurs
Camco Inc., 1 Factory Lane, Bureau 310
Moncton, New Brunswick E1C 9M3
Agraphez votre reçu ici.
Vous devez fournir la preuve de
l’achat original pour obtenir des
services en vertu de la garantie.
21

22
Notes.
Soutien au
consommateur
Conseils de dépannage
Fonctionnement
Mesures de sécuritéInstallation

23
Notes.
Soutien au
consommateur
Conseils de dépannage
FonctionnementMesures de sécurité Installation
Imprimé aux Canada
Service à la clientèle.
Site Web appareils électroménagers GE
electromenagersge.ca
Vous avez une question ou vous avez besoin d’aide pour votre appareil électroménager? Contactez-nous
par Internet au site electromenagersge.ca 24 heures par jour, tous les jours de l’année.
Service de réparations 1.800.361.3400
Service de réparations GE est tout près de vous.
Pour faire réparer votre électroménager GE, il suffit de nous téléphoner.
Studio de conception réaliste
Sur demande, GE peut fournir une brochure sur l’aménagement d’une cuisine pour les personnes
à mobilité réduite.
Écrivez: Directeur, Relations avec les consommateurs, Camco, Inc.
Bureau 310, 1 Factory Lane
Moncton, N.B. E1C 9M3
Prolongation de garantie electromenagersge.ca
Achetez un contrat d’entretien GE avant que votre garantie n’expire et bénéficiez d’un rabais substantiel.
Ainsi le service après-vente GE sera toujours là après expiration de la garantie.
Visitez notre site Web ou appelez-nous au 1.800.461.3636.
Pièces et accessoires
Ceux qui désirent réparer eux-mêmes leurs électroménagers peuvent recevoir pièces et accessoires
directement à la maison (cartes VISA, MasterCard et Discover acceptées).
Les directives stipulées dans le présent manuel peuvent être effectuées par n’importe quel utilisateur. Les autres
réparations doivent généralement être effectuées par un technicien qualifié. Soyez prudent, car une réparation
inadéquate peut affecter le fonctionnement sécuritaire de l’appareil.
Vous trouverez dans les pages jaunes de votre annuaire le numéro du Centre de service Camco le plus
proche. Autrement, appelez-nous au 1.888.261.3055.
Contactez-nous
Si vous n’êtes pas satisfait du service après-vente dont vous avez bénéficié :
Premièrement, communiquez avec les gens qui ont réparé votre appareil.
Ensuite, si vous n’êtes toujours pas satisfait envoyez tous les détails—numéro de téléphone compris—au
Directeur, Relations avec les consommateurs, Camco, Inc.
Bureau 310, 1 Factory Lane
Moncton, N.B. E1C 9M3
Inscrivez votre appareil électroménager electromenagersge.ca
Inscrivez votre appareil électroménager en direct, aussitôt que possible. Cela améliorera nos
communications et notre service après-vente. Vous pouvez également nous envoyer par la poste
le formulaire d’inscription joint à votre documentation.
24