Loading ...
Loading ...
Loading ...
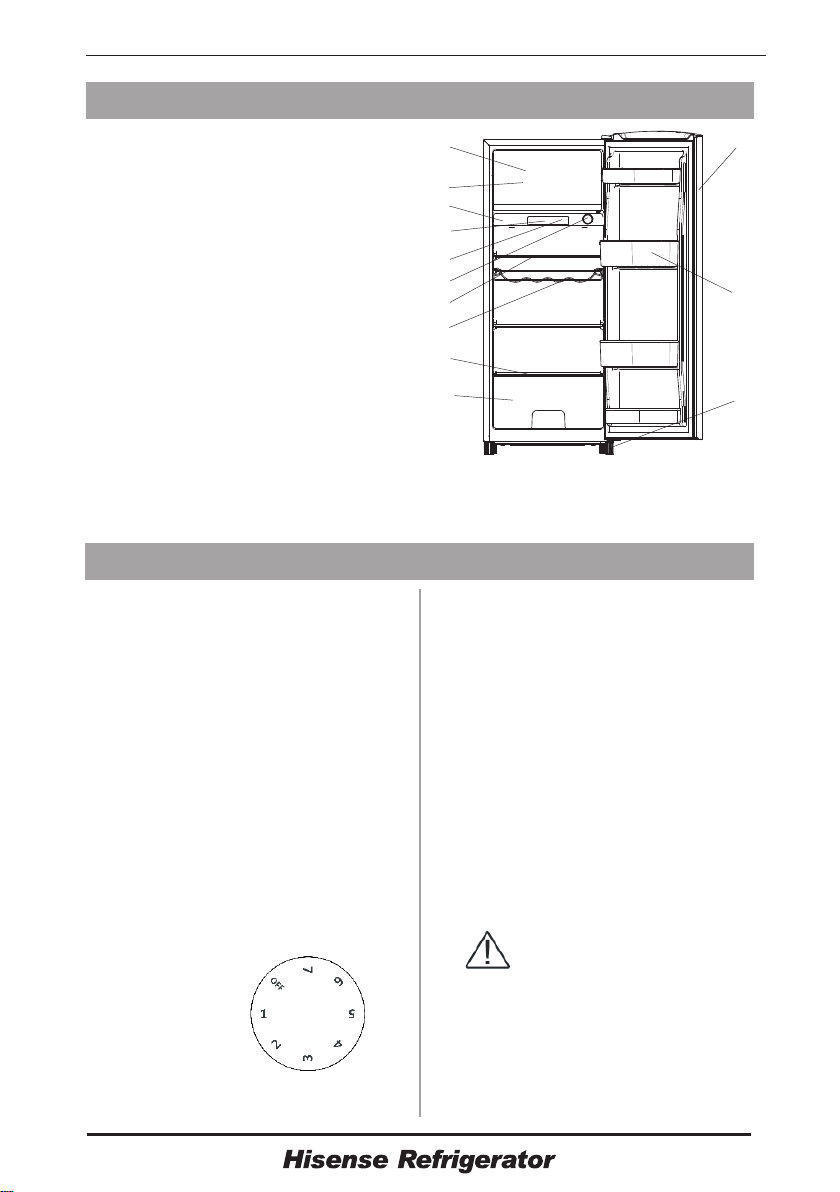
Description of the appliance
1. Freezer chamber
2. Ice tray(in Freezer chamber )
3. Temperature regulator
4. Lamp cover
5. LED light(in the lamp cover)
6. Control knob
7. Storage shelves
8. Wine rack
9. Crisper cover
10. Crisper
11. Door
12. Door racks
13. Adjustable feet
View of the appliance
Control panel
Note: Due to continual modification of our products, your refrigerator may be slightly different
from this instruction Manual, but its functions and usage methods remain the same.
Starting up and temperature regulation
Insert the plug of the connection lead into
the plug socket with a protective grounding
contact. When the refrigerator compartment
door is opened, the internal lighting is
switched on.
The temperature selector knob is located on
the back side of the refrigerator
compartment.
Setting “off” means no cooling
Turn the temperature control to “off” position
stops the cooling cycle,but does not shut off
the power of the refrigerator.
Setting “1” means
Highest temperature, warmest setting.
Setting “7” (end-stop) means
Lowest temperature, coldest setting.
Important! High ambient temperatures (e.g.
on hot summer days) and a cold setting
(position 6 to 7) may cause the compressor
to run continuously or even non-stop!
Reason: When the ambient temperature is
high, the compressor must run continuously
to maintain the low temperature in the
appliance.
Warning!
Don’t try to repair the appliance
and change the LED light
yourself.
If the LED light can’t work, please contact
your specialist dealer or your local
Customer Service Center to change it.
Important! Normally, we advise you select a
setting of 2, 3 or 4; if you want the
temperature higher or lower, please turn the
knob to a warmer or colder setting
accordingly. When you turn the knob to a
colder setting, this can lead to the more
energy efficiency. Otherwise, it would result
the consumption of energy.
1
2
3
4
5
6
7
8
9
10
11
12
13
8
Loading ...
Loading ...
Loading ...