Loading ...
Loading ...
Loading ...
8
1
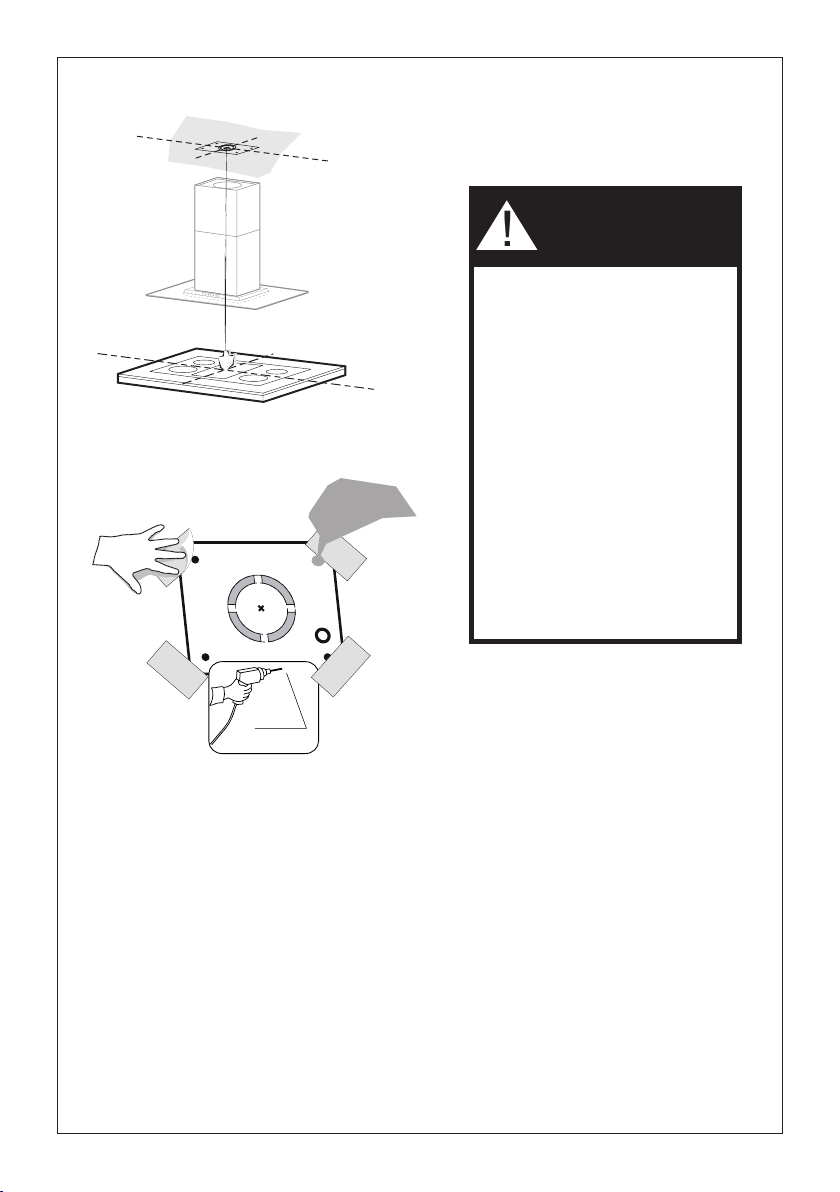
Putathick,protectivecoveringovercooktop,
set-in range or countertop to protect from
damage or dirt.
Determineandclearlymarkwithapencilonthe
ceiling where the rangehood will be installed.
A template 21 for mounting the support is
supplied in the carton with the support. Use
thistemplatetomarkholesfor
support on the ceiling.
Determineand make necessary cutsforthe
ductwork.Theductopeningisshownonthe
mounting template. Install
ductworkbeforemountingthehood.
Determine the proper location for the Power
Supply Cable as indicated on the template.
Use a 1 1/4" Drill Bit to make this hole. Run
thePowerSupplyCable.Usecaulkingtoseal
around the hole.
A knockout for threading through the Power
Supply from the ceiling is located on the top
of the frame. Do not connect the Power Cable
to the Wiring Box or power up the hood at this
time.Runenoughpowercablefromtheceiling
to reach the wiring box on the hood.
Ø 10 mm
x4
21
1 1/4"
Donotmakeanycutoutsuntilyouhavedecidedwhetherthisinstallationwillbeductedor
non-duct and then plan accordingly.
DUE TO THE SIZE AND
WEIGHT OF THIS RANGE-
HOOD, THE SUPPORT MUST
BE FIRMLY ATTACHED TO
THE CEILING. For plaster or
sheet rock ceiling, the support
must be attached to the joists.
If this is not possible, a support
structure must be built behind
the plaster or sheet rock. The
manufacturer assumes no re-
sponsibility forinjury or damage
caused by improper installa-
tions.
WARNING
!
Loading ...
Loading ...
Loading ...