Loading ...
Loading ...
Loading ...
24
Basic Adjustment Settings (Continued)
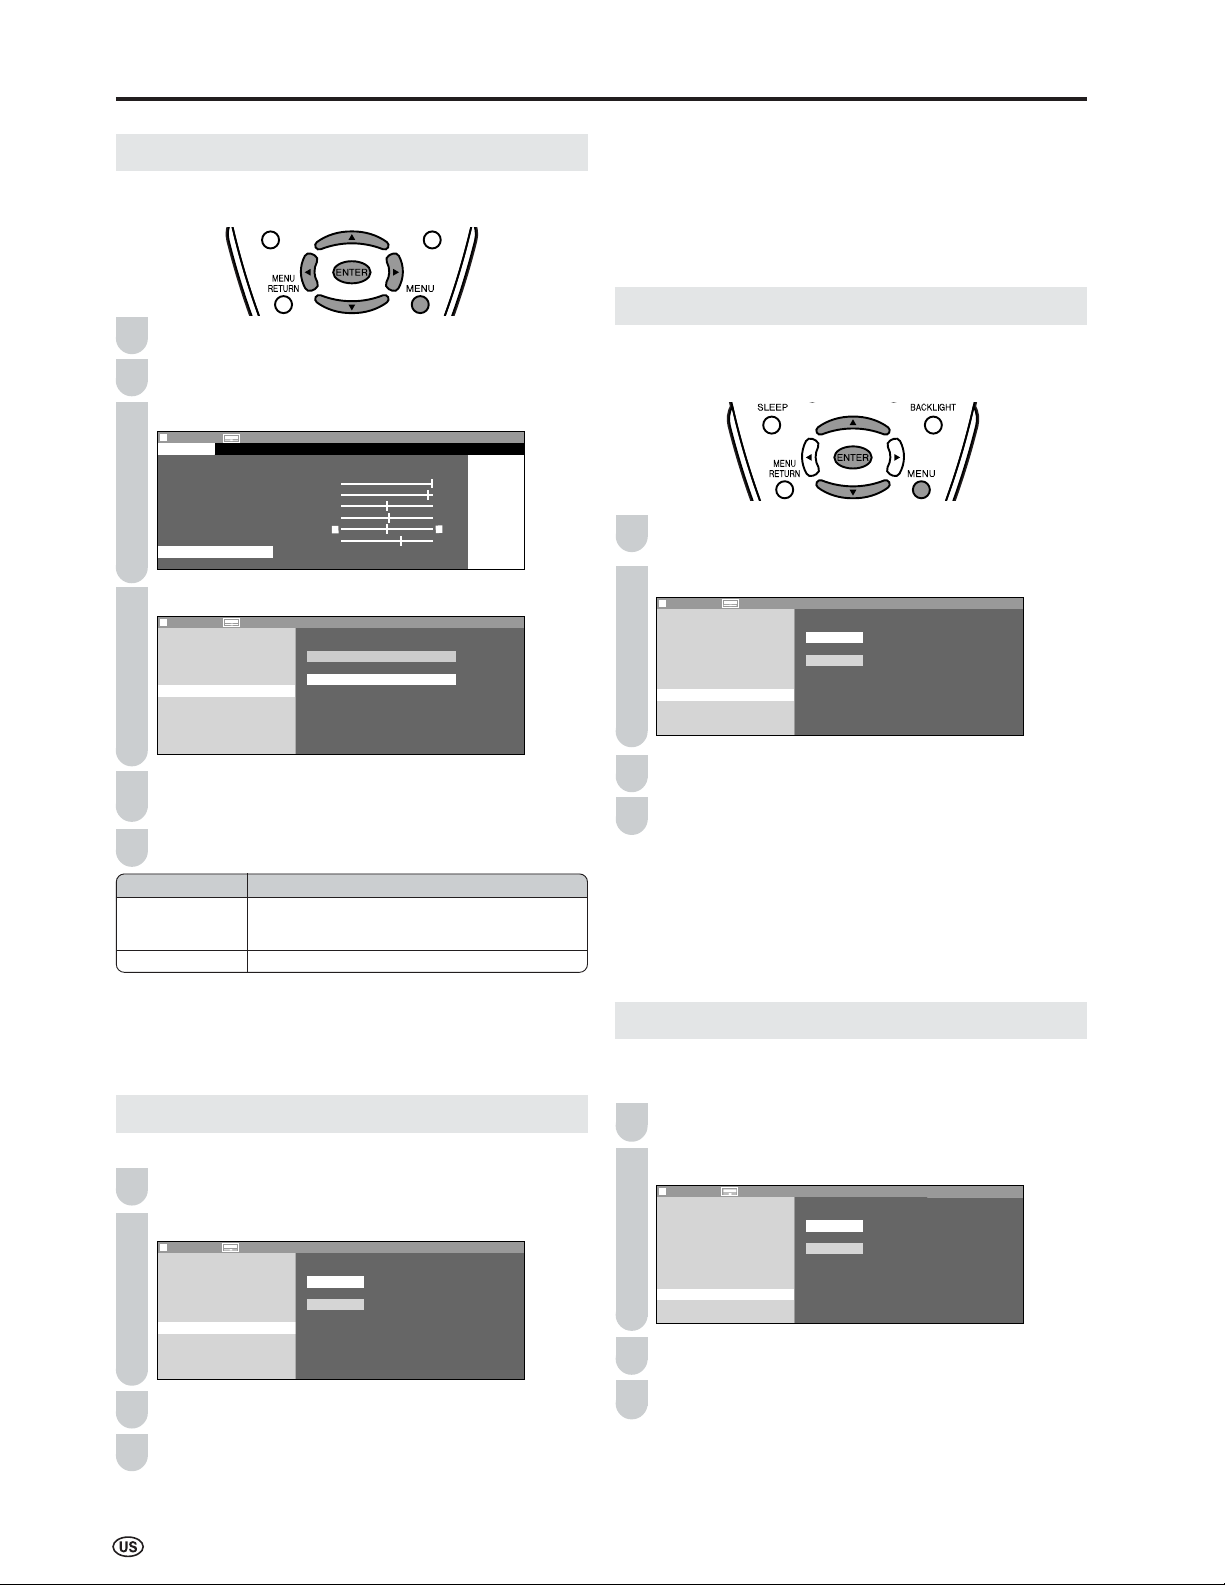
I/P SETTING
Adjusting the image and input signal can give you a more
beautiful picture.
Press MENU to display the Menu screen.
Press \/| to select “PICTURE”.
Press '/" to select “ADVANCED”, and press ENTER.
MENU[
MENU[
PICTURE
…
A D V A N C E D ]
PICTURE
S
AUDIO
SETUP
OPTION
A V M O D E [ D Y N A M I C ]
O P C [ O F F ]
B A C K L I G H T [
BRIGHT
]
C O N T R A S T [ 5 6 ]
B R I G H T N E S S [ ] – +
C O L O R [ + 2 ] – +
TINT [
TINT [
]
S H A R P N E S S [ + 4 ] – +
A D V A N C E D
R E S E T
0
0
Press '/" to select “I/P SETTING”, and press ENTER.
MENU[
MENU[
PICTURE
…
A D V A N C E D ]
SELECT OPTION
SELECT OPTION
C O L O R T E M P .
R E D [ ] I N T E R L A C E
G R E E N [ ]
B L U E [ ] P R O G R E S S I V E
I / P S E T T I N G
N O I S E C L E A N
F I L M M O D E
Q U I C K S H O O T
R E S E T
0
0
0
Press '/" to select “INTERLACE” or “PROGRESSIVE”,
and press ENTER.
Press MENU to exit.
A
• “I/P SETTING” cannot be set when 480P, 576P, 720P or 1080
I
signal or no signal is received from the COMPONENT terminals.
• “I/P SETTING” cannot be adjusted when the PC mode is selected
as an input mode.
NOISE CLEAN
Produces a clearer video image.
Repeat Steps 1 to 3 of I/P SETTING.
Press '/" to select “NOISE CLEAN”, and press ENTER.
MENU[
MENU[
PICTURE
…
A D V A N C E D ]
SELECT OPTION
SELECT OPTION
C O L O R T E M P .
R E D [ ] O N
G R E E N [ ]
B L U E [ ] O F F
I / P S E T T I N G
N O I S E C L E A N
F I L M M O D E
Q U I C K S H O O T
R E S E T
0
0
0
Press '/" to select “ON”, and press ENTER.
Press MENU to exit.
3
Selected item
INTERLACE
PROGRESSIVE
Description
Use this setting when you cannot get a clear
picture with PROGRESSIVE. (Especially suitable
for media with special effects like game software.)
Normally, you should select this setting.
A
• “NOISE CLEAN” cannot be set when 1080
I or 720P signal or no
signal is received from the COMPONENT terminals.
• “NOISE CLEAN” cannot be adjusted when the PC mode is
selected as an input mode.
• ”NOISE CLEAN” cannot be adjusted when “I/P SETTING” is set to
“INTERLACE”.
FILM MODE
Automatically detects a film-based source (originally encoded
at 24 frames/second), analyses it, and then recreates each
still film frame for cinematic picture quality.
Repeat Steps 1 to 3 of I/P SETTING.
Press '/" to select “FILM MODE”, and press ENTER.
MENU[
MENU[
PICTURE
…
A D V A N C E D ]
SELECT OPTION
SELECT OPTION
C O L O R T E M P .
R E D [ ] O N
G R E E N [ ]
B L U E [ ] O F F
I / P S E T T I N G
N O I S E C L E A N
F I L M M O D E
Q U I C K S H O O T
R E S E T
0
0
0
Press '/" to select “ON”, and press ENTER.
Press MENU to exit.
A
• Set “FILM MODE” to “ON” manually to detect a film-based source
(originally encoded at 24 frames/second) when the input source
has vertical frequency of 50 Hz (e.g. PAL, SECAM, etc.).
•
“FILM MODE” cannot be set when 480P, 576P, 720P or 1080
I
signal
or no signal is received from the COMPONENT terminals.
•
“FILM MODE” cannot be
adjusted when the PC mode is selected
as an input mode.
QUICK SHOOT
Provides sharp pictures suitable for fast moving images such
as a sports program.
Repeat Steps 1 to 3 of I/P SETTING.
Press '/" to select “QUICK SHOOT”, and press ENTER.
MENU[
MENU[
PICTURE
…
A D V A N C E D ]
SELECT OPTION
SELECT OPTION
C O L O R T E M P .
R E D [ ] O N
G R E E N [ ]
B L U E [ ] O F F
I / P S E T T I N G
N O I S E C L E A N
F I L M M O D E
Q U I C K S H O O T
R E S E T
0
0
0
Press '/" to select “ON”, and press
ENTER
.
Press MENU to exit.
A
• “QUICK SHOOT” may cause image noise. If this occurs, set the
function to “OFF”.
• “QUICK SHOOT” cannot be adjusted when the PC mode is
selected as an input mode.
2
3
1
4
1
2
4
5
6
2
3
4
1
2
4
3
1
Loading ...
Loading ...
Loading ...