Loading ...
Loading ...
Loading ...
ENGLISH
11
ASSEMBLING AND PREPARING
3
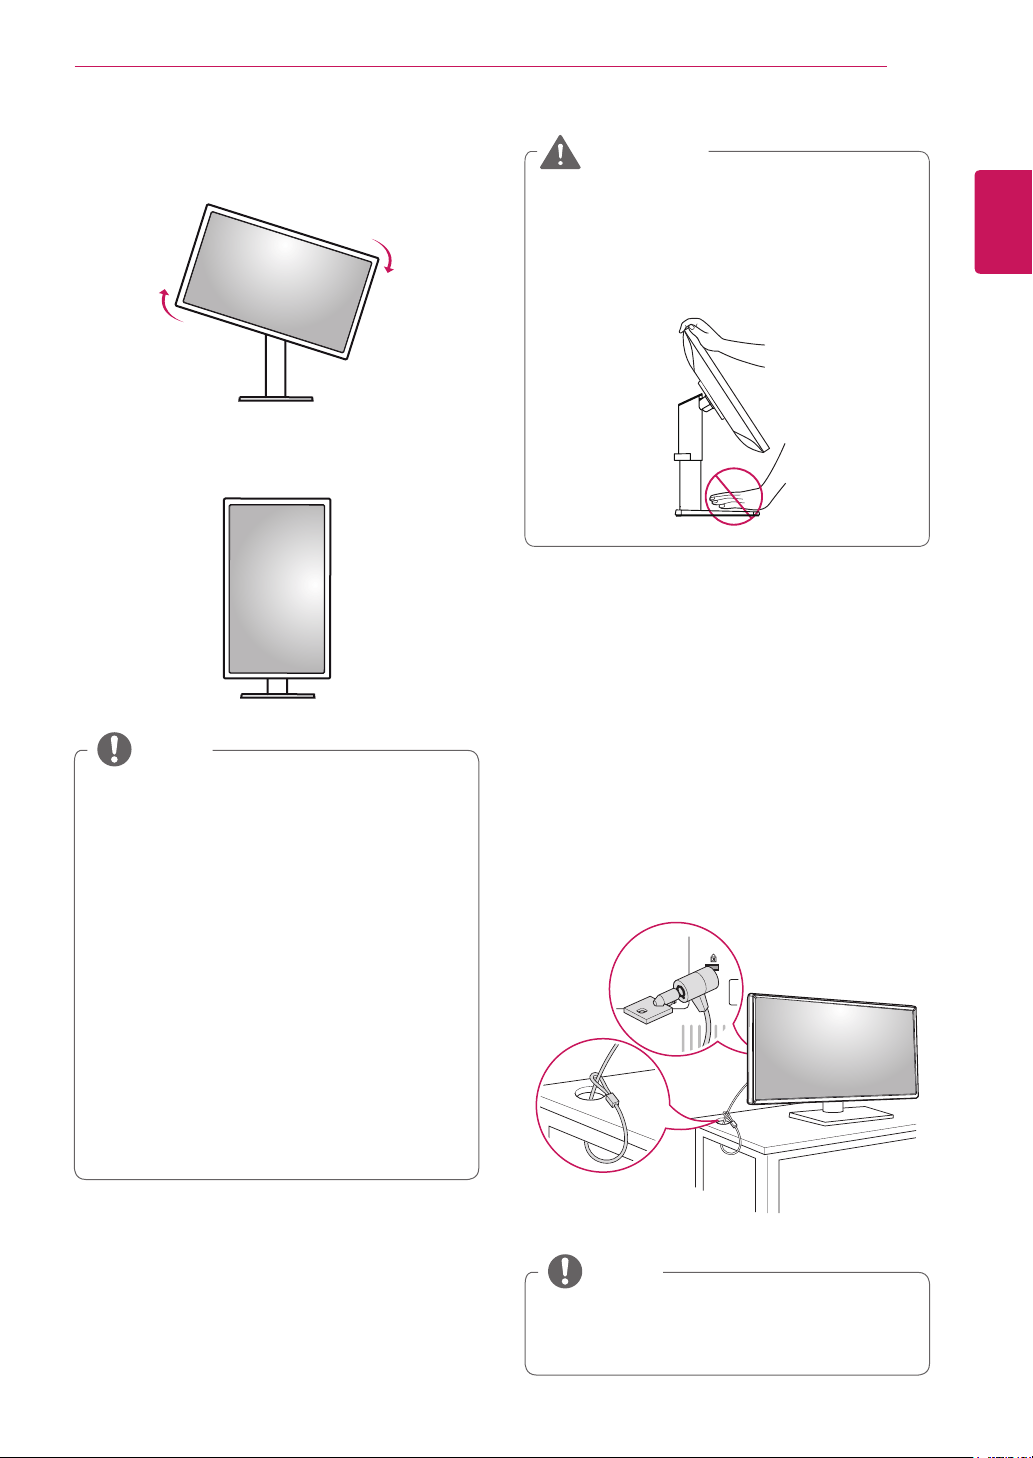
Rotate the monitor clockwise as shown in the
figure.
4
Complete the installation by rotating the moni-
tor 90° as shown below.
y
Auto Pivot feature of the display is not sup-
ported.
y
The screen can be rotated easily using the
screen pivot shortcut key provided with your
Windows operating system. Note that some
Windows versions and some graphics card
drivers may use different settings for the
screen pivot key or may not support the pivot
key at all.
y
Supported Windows versions: Windows 7 and
Windows 8.1
y
Windows screen pivot shortcut keys
-
0°: Ctrl + Alt + Up arrow key (↑)
-
90°: Ctrl + Alt + Left arrow key (←)
-
180°: Ctrl + Alt + Down arrow key (↓)
-
270°: Ctrl + Alt + Right arrow key (→)
NOTE
Using the Kensington Lock
The Kensington security system connector is
located at the back of the Monitor set.
For more information on installation and usage,
refer to the Kensington lock owner's manual or visit
the website at http://www.kensington.com.
Connect the monitor to a table using the Kensing-
ton security system cable.
y
The Kensington security system is optional.
You can obtain optional accessories from most
electronics stores.
NOTE
y
Take care when rotating the monitor if the
cable is connected.
y
To avoid injury when rotating the display, do
not place your fingers between the display and
the stand base.
WARNING
Loading ...
Loading ...
Loading ...