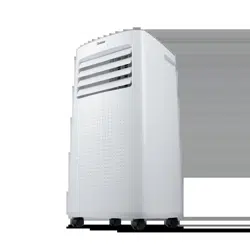
Operating Instructions 3.5kW Portable Air Conditioner
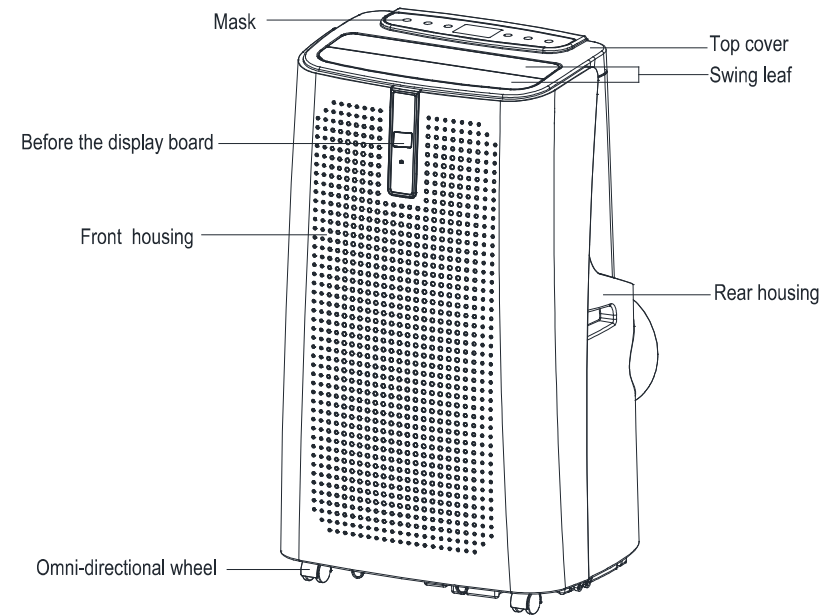
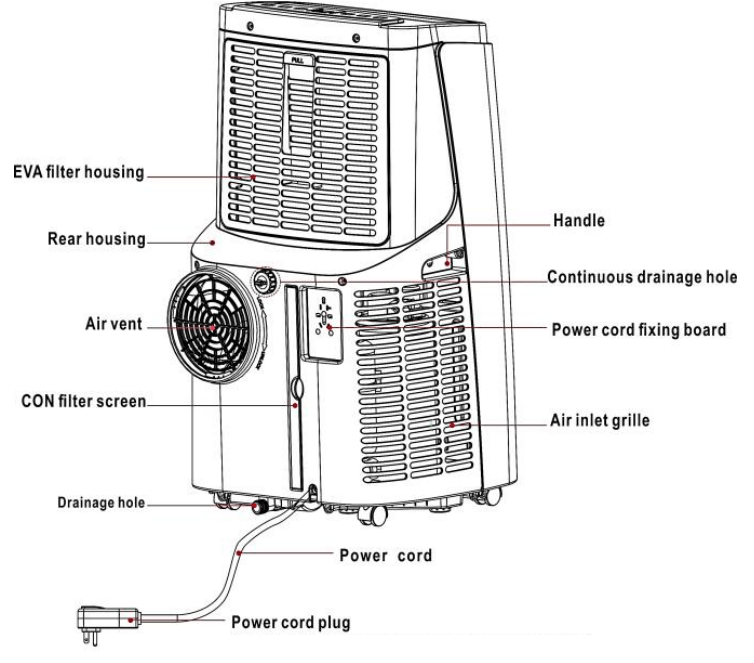
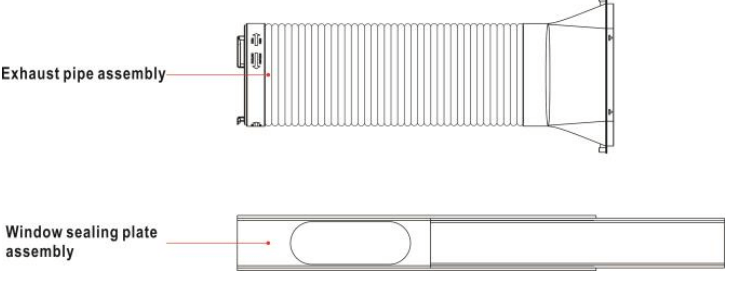
Components
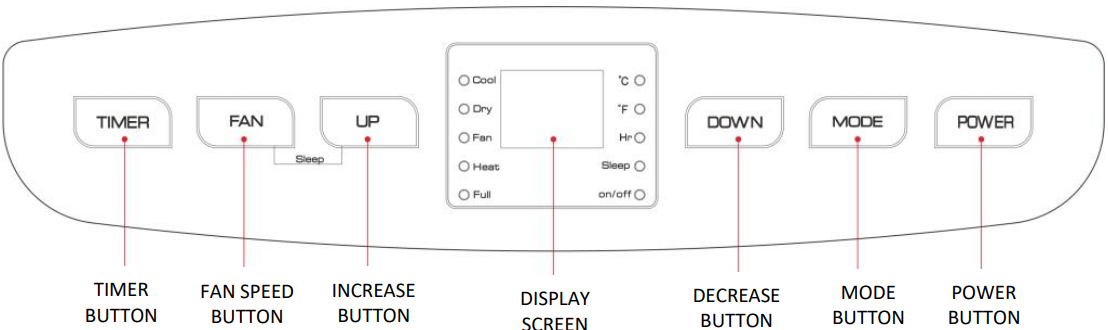
Control Panel and Remote Control
This Portable Air Conditioner is designed to be operated in cooling mode, heating mode or dehumidifying mode. When switching between these functions keep an interval of at least 3 minutes between each ON/OFF.
Allow the refrigerant to settle by leaving the appliance to stand for two hours after transport or after the unit has been on its side. Ensure the unit is in the OFF setting before connecting it to the mains supply.
When the appliance is powered on for the first time, it will beep, and then the unit will be in standby.
Power Button
Press the button to turn the unit ON and OFF.
Mode Button
Press the button to switch between Cooling → Dehumidification → Fan → Heating modes.
Fan Speed Button
In cooling, fan or heating mode press the button to select between high, medium or low fan speed operation.
In dehumidification mode the fan will automatically be set to low speed operation. This cannot be changed.
Temperature Setting
To set the desired temperature, press UP or DOWN button. The range is 16-31oC.
This function is not available in fan or dehumidification mode.
Simultaneously press both buttons to switch between Celsius (℃) and Fahrenheit (℉).
Timer Setting
The timer can be set to turn the unit ON or OFF from 1-24 hours.
To set the timer to turn the unit OFF, press the TIMER button while the unit is operating and set the desired number of hours before the unit turns off.
To set the timer to turn the unit ON, press the TIMER button while the unit is in standby and set the desired number of hours before the unit turns on.
Sleep Mode
In the Cooling/Heating Mode, Press the UP and Fan buttons together to turn on the sleep mode. The unit will work in Energy-Saving and quiet mode.
Note: You cannot not use sleep mode in the Dehumidifying or Fan modes.
Operating your Air Conditioner
REMOTE CONTROL
The remote control has the same functions as the unit control panel.
Power Button
Press the button to turn the unit ON and OFF.
Mode Button
Press the button to switch between Cooling → Dehumidification → Fan → Heating modes.
Fan Speed Button
In cooling, fan or heating mode press the button to select between high, medium or low fan speed operation. In dehumidification mode the fan will automatically be set to low speed operation. This cannot be changed.
Temperature Setting
To set the desired temperature, press UP or DOWN button. The range is 16-31oC.
This function is not available in fan or dehumidification mode.
Simultaneously press both buttons to switch between Celsius (℃) and Fahrenheit (℉).
Timer Setting
The timer can be set to turn the unit ON or OFF from 1-24 hours.
To set the timer to turn the unit OFF, press the TIMER button while the unit is operating and set the desired number of hours before the unit turns off.
To set the timer to turn the unit ON, press the TIMER button while the unit is in standby and set the desired number of hours before the unit turns on.
Sleep Mode
In the Cooling/Heating Mode, Press the SLEEP button to turn on the sleep mode. The unit will work in EnergySaving and quiet mode.
Note: You cannot not use sleep mode in the Dehumidifying or Fan modes.
Press to switch between Celsius (℃) and Fahrenheit (℉).
Press to activate the swinging louvre.
Care and Maintenance
Manual Drainage
The unit will stop once it has filled with water. Turn off the unit and unplug the power plug.
Move the unit carefully, so as not to spill the water in the water pan at the bottom of the body.
Find a place to drain the water or place a bucket below the water outlet on the back of the unit.
Unscrew the drainage cover and unplug the water plug, the water will automatically flow into the water container. During drainage, the body can be tilted slightly backwards. When the water is discharged, replace the water plug, and retighten the drainage cover.
Allow unit to sit for at least 5 minutes before turning back on.
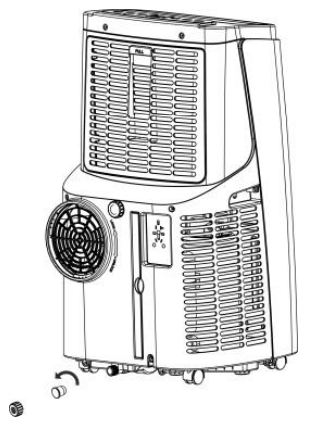
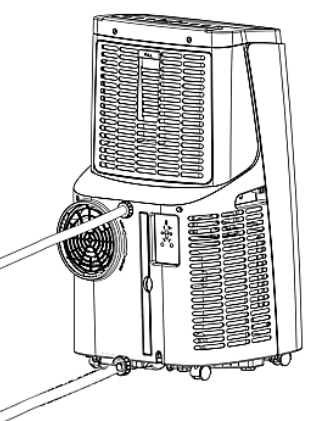
Continuous Drainage
The unit can be operated with permanent drainage but you need to be able to allow the water to drain outside via gravity.
When the appliance is in Cooling or Dehumidify mode, the continuous drainage hose needs to be inserted into the top drain hole. Remove the water plug to allow the hose to be inserted.
When the appliance is in Heating mode, the continuous drainage hose needs to be inserted into the water tank drain hole at the bottom. Remove the water plug to allow the hose to be inserted.
Do not use this Air Conditioner with a programmer, remote-control system, separate timer or any other device that switches the Air Conditioner on automatically.
CARE AND CLEANING
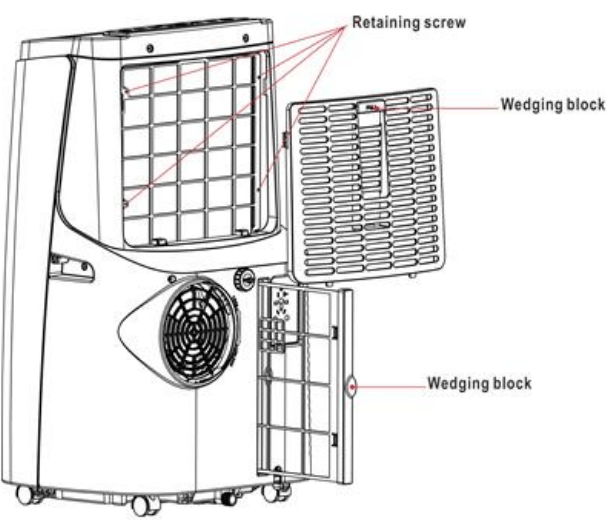
Clean the upper filter screen frame
Clasp the wedging block of the EVA filter screen frame with hands. Force down from the outside to remove the EVA filter screen frame. Unscrew four screws fixing the EVA filter screen and the rear housing to remove the EVA filter screen (as shown in the below figure)
Put the EVA filter screen into warm water with neutral detergent (about 40 ℃ / 104 ℉) and dry it in the shade after rinsing clean.
Clean the lower filter screen frame
Hold the handle of the CON filter screen frame, and pull it outward gently to remove it.
Put the CON filter screen into warm water with neutral detergent (about 40 ℃) and dry it in the shade after rinsing clean.
NEVER USE UNIT WITHOUT THE AIR FILTER.
The exterior may be cleaned with a soft, dry cloth. If the device is extremely dirty wipe the device with a slightly damp (not wet) cloth. Never spray the device with water. DO NOT immerse the unit in water and never allow water to enter the motor housing. DO NOT use harsh chemicals to clean the unit.
Do not attempt to dismantle the Air Conditioner. There are no user serviceable parts. For service or repair, contact an authorised electrical service technician.
STORAGE
To store the unit, remove the plug from the socket. Remove the rubber plug from the drainage hole at the bottom of unit, and connect a drain hose to the lower fixing clip. All the water in the water tank will drain out. Allow the Container and the Air Conditioner to dry completely. Clean the air filter. Refit the rubber plug. Store the device in a dust-free location, preferably covered with a sheet of plastic.
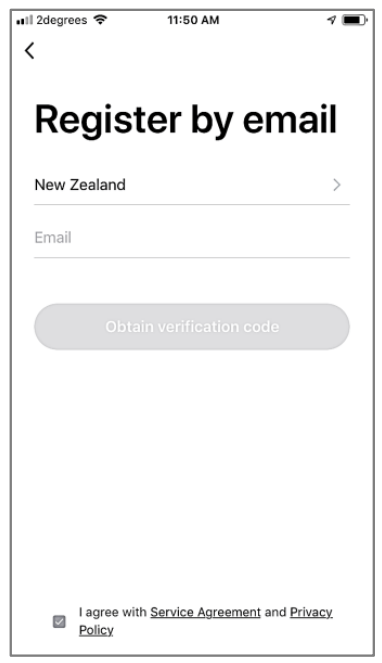
WiFi – Downloading and Setting up APP
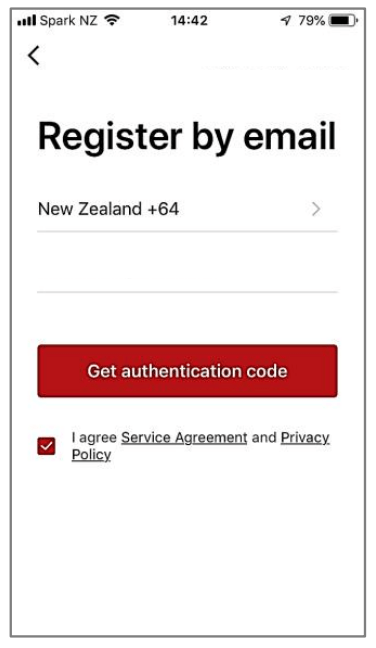
You need to register an email address.
Enter you email address then press 'Get authentication code'.
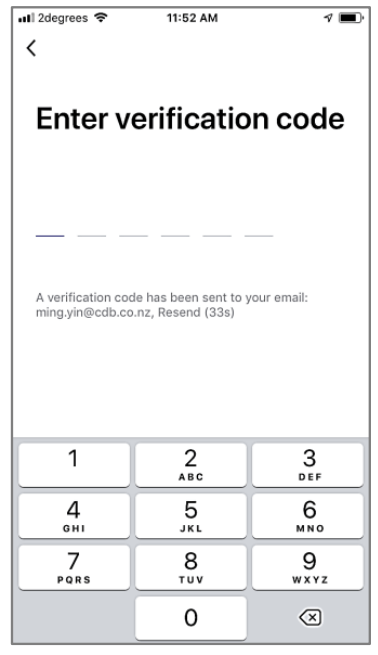
Pairing APP to Fan
Enter the verification code that you will receive by email
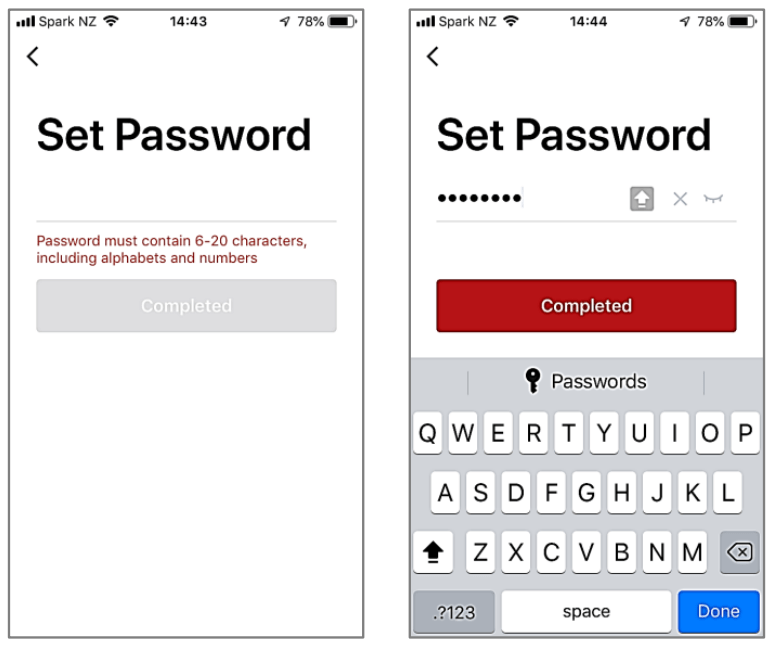
Next you will be prompted to Set a Password. The password must contain 6 - 20 characters and must be a mix of letters and numbers.
Plug the fan into the mains power and make sure the mains power switch is on.
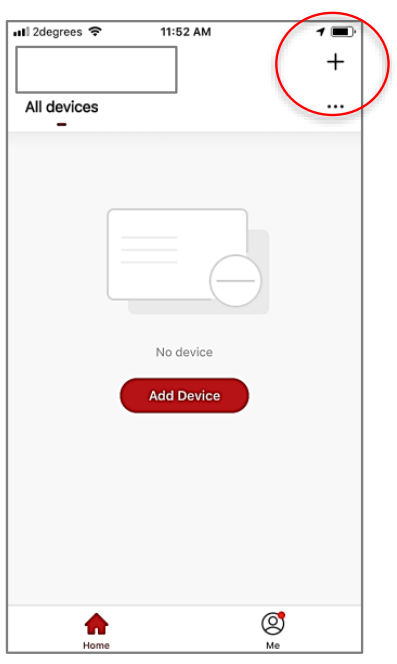
On your phone open the Goldair app. Then tap the '+' button at the top right of the screen.
Your appliance should be ready to connect to your smart phone from when you first turn it on.
However if this is not the case or if your fan drops off the WiFi signal, press and hold the TIMER button on the unit for 5 – 10 seconds until the WiFi symbol starts flashing.
A beep will sound indicating the unit is trying to connect to the WiFI and to the app on the phone.
A WiFi icon will appear on the display screen and will start to blink every second indicating its in the WiFi connecting mode.
Tap ‘Confirm indicator rapidly blink’ on the phone.
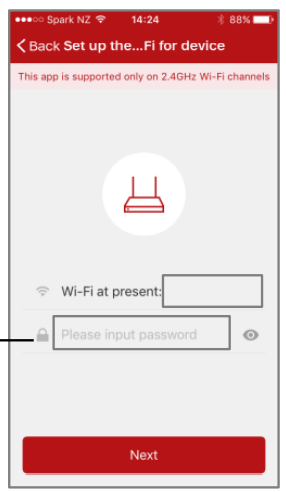
Choose/confirm which WiFi to connect to. Note: your phone may pick up other WiFi signals (e.g. neighbours) so you will need to choose.
Enter your WiFi password
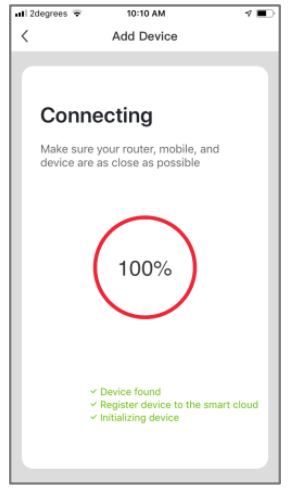
The phone will then connect to the fan. Ensure you have a good strong signal from your WiFi router. Note: The WiFi indicator on the fan may go off during this pairing process.
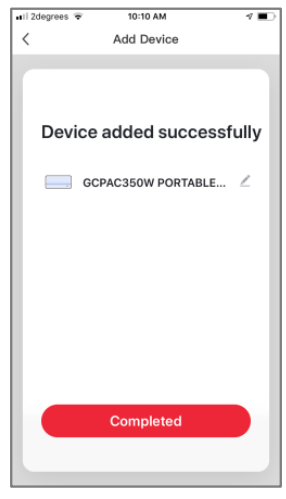
Once complete the screen showing 'device added successfully' will appear.
Rename the fan if desired.
Tap 'Completed' to continue.
Operating your Fan from the APP
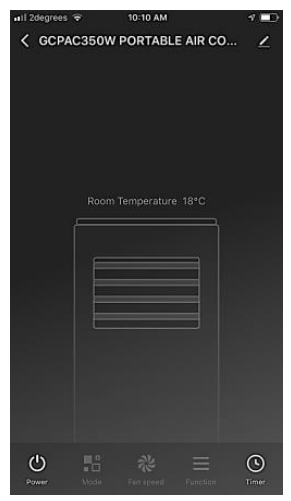
When the phone interface shows the addition is successful, and the WIFI indicator on the appliance will stop flashing.
Once pairing is complete and the main control screen on your phone will appear showing the appliance as OFF.
If the phone and fan fail to connect, then you will need to try to connect again as per the above process.
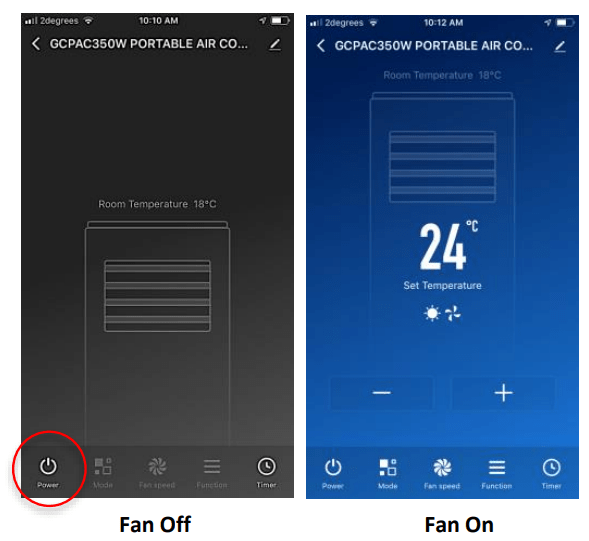
POWER
Open the 'GOLDAIR' APP to select the appliance (when using one mobile phone to control multiple appliances, you need to select the appliance to be operated).
Select the appliance to be operated and enter the operation interface.
Tap the Power/Switch icon down at the bottom left and the appliance will turn on.
You can now control the appliance.
To turn the appliance off again tap the Power/Switch icon.
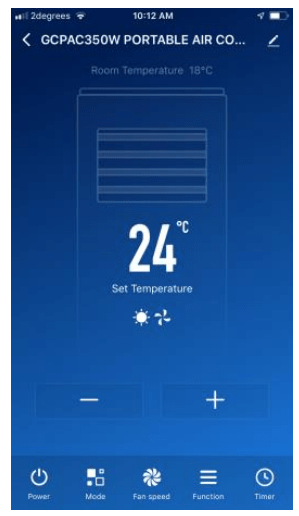
TEMPERATURE SETTING
To set the desired temperature, press + or - buttons. The range is 16-31oC. This function is not available in fan or dehumidification mode.
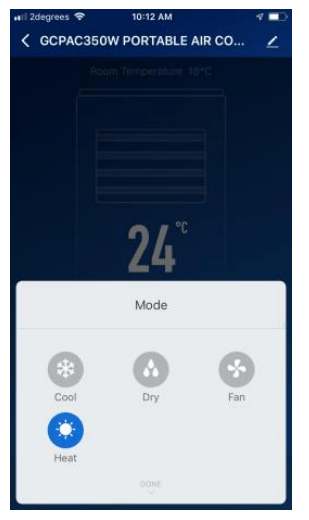
MODE
Press the MODE icon on the main page to take you into the MODE selection page.
There are 3 modes the appliance can operate into. To select the mode you want, press the corresponding icon.
COOL, DRY, FAN or HEAT
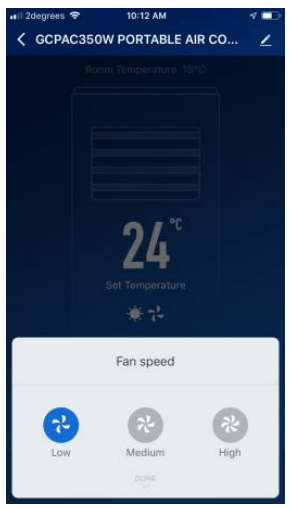
SPEED
Press the FAN SPEED icon on the main page to take you into the FAN SPEED selection page.
To select the three different speed settings, Press the corresponding icon.
LOW, MEDIUM or HIGH
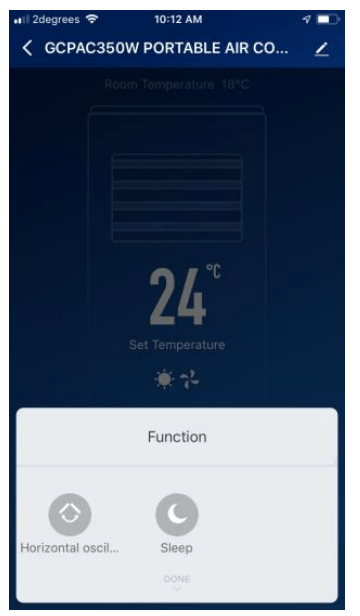
FUNCTION
Horizontal Oscillation
Press to activate the swinging louvre.
Sleep In the Cooling Mode, Press the SLEEP button to turn on the sleep mode. The unit will work in Energy-Saving and quiet mode.
Note: You cannot not use sleep mode in the Dehumidifying or Fan modes.
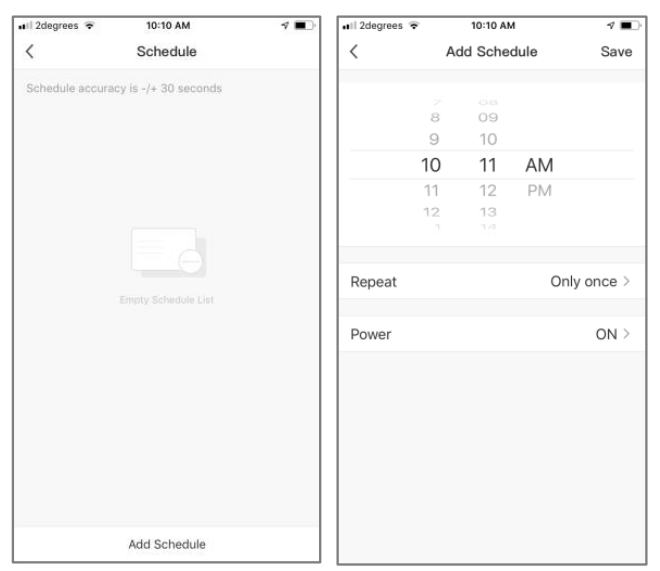
TIMER
You can set up a schedule timer so that the appliance can turn on and off as you want it to.
This timer can be set whether the appliance is On or Off on the APP.
Troubleshooting
Problems
Reasons
Solutions
The air conditioner does not work.
There is no electricity.
Turn it on after connecting it to a socket with electricity.
The water-full indicator will flash.
Discharge the water inside.
The ambient temperature is too low or too high
Recommend to use the machine in at the temperature of 7-35 ℃ (44-95 ℉).
In cooling mode, the room temperature is lower than the set temperature; in heating mode, the room temperature is higher than the set temperature.
Change the set temperature.
In dehumidification mode, the ambient temperature is low.
The machine is placed in a room with an ambient temperature of greater than 17 ℃ (62 ℉).
The cooling or heating effect is not good
There is direct sunlight.
Pull the Curtain.
Doors or windows are open; there are a lot of people; or in cooling mode, there are other sources of heat.
Close doors and windows.
The filter screen is dirty.
Clean or replace the filter screen.
The air inlet or outlet is blocked.
Clear obstructions.
Loud Noise
The air conditioner is not placed on a flat surface.
Put the air conditioner on a flat and hard place (to reduce noise).
Compressor does not work.
Frost production starts.
Wait for 3 minutes until the temperature is lowered, and then restart the machine.
Overheat protection starts.
The remote control does not work.
The distance between the machine and the remote control is too far.
Move the remote control closer to the air conditioner, and make sure that the remote control directly faces to the direction of the remote control receiver.
The remote control is not aligned with the direction of the remote control receiver
Batteries are dead.
Replace batteries.
Displays 'E1'.
The room temperature sensor is abnormal
Check the room temperature sensor and related circuitry.
Displays 'E2'.
The pipe temperature sensor is abnormal
Check the pipe temperature sensor and related circuitry.

 Power Button
  Mode Button
  Fan Speed Button
  Temperature Setting
  Timer Setting
  Sleep Mode
  Press to switch between Celsius (℃) and Fahrenheit (℉).
  Press to activate the swinging louvre.