Loading ...
Loading ...
Loading ...
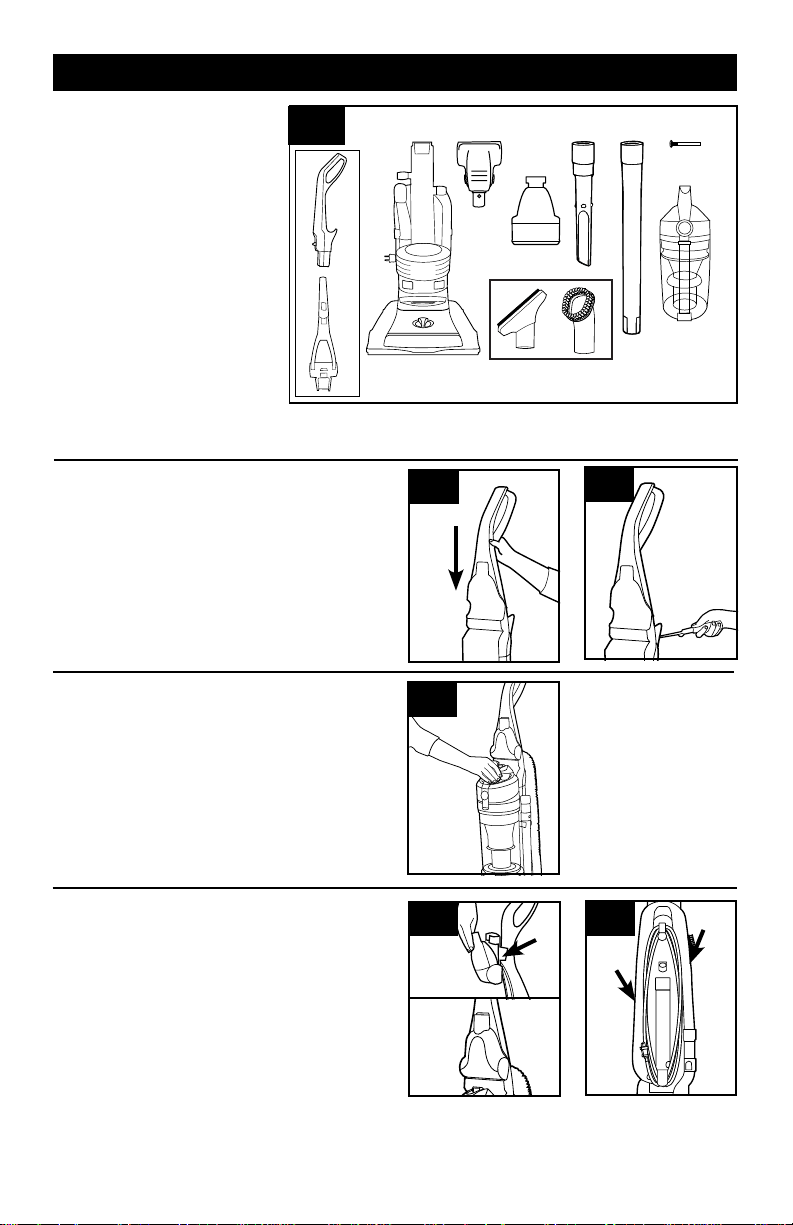
ATTACH HANDLE
(varies per model)
POSITION TOOLS
1. VACUUM ASSEMBLY
A. Handle*
B. Vacuum Base
C. Powered Hand Tool*
D. Powered Hand Tool Clip*
E. Crevice Tool
F. Dusting/Upholstery Tool*
G. Wand
H. Screw (for assembly)
I. Dirt Cup
*Varies per model
Remove all parts from carton and
identify each item shown.
Make sure all parts are located
before disposing of packing
materials.
5
B
C
E
1.2
Note: Remove the screw located in the vacuum
base and set aside until instruction 1.3
1.2 Insert handle section into vacuum base. Push
down firmly.
1.3 Using a Phillips screwdriver, fasten (1) screw
behind handle into vacuum base.
ATTACH DIRT CUP
1.4
1.4 Place bottom of dirt cup into vacuum body first.
Pivot cup into vacuum. Dirt cup is secure when you
hear a click.
1.5 1.6
1.5 Secure Powered Hand Tool Clip (A) over
ridges on side of handle. Attach bottom of Powered
Hand Tool and pivot into clip until secure.
1.6 Place Crevice Tool into Wand and slide into
tool storage area on left back side (B) of vacuum
and place Upholstery Tool on right back side (C) of
vacuum as shown.
B
C
CARTON CONTENTS
1.1
F
G H
I
A
D
A
Actual model may vary from images shown.
1.3
Loading ...
Loading ...
Loading ...