Loading ...
Loading ...
Loading ...

14 15
• Remove the lid of the milk container.
• Fill the container with about 100 grams / 0.22 lb of milk
for each cappuccino to be prepared (g. 19). Never exceed
the MAX level (corresponding to about 750 ml / 25.36 oz)
marked on the jug.
You should ideally use skimmed or semi-skimmed milk at
refrigerator temperature (about 5°C / 41°F).
• Make sure the intake tube is correctly inserted in the rub-
ber washer (g. 20) then replace the milk container lid.
• Position the frothed milk regulator (B1) between the
words CAPPUCCINO and CAFFELATTE printed on the milk
container lid.
The quality of froth can be adjusted by moving the frothed
milk regulator towards the word CAFFELATTE for a denser
froth.
Moving it towards the word CAPPUCCINO obtains a less
dense froth.
NO froth (hot milk)
“Less dense” froth
Froth regulator
“Denser” froth
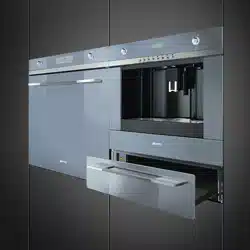
• Remove the hot water spout (g 21) and attach the milk
container to the nozzle (g. 22).
• Position the milk tube as shown in g. 23 and then place a
suciently large cup under the coee and milk spouts.
• Turn the knob (C11) to the right.
“CAPPUCCINO...” is displayed and after a few seconds,
frothed milk ows out of the milk spout into the cup below.
(Delivery stops automatically).
• The appliance then grinds the beans, delivers the coee
and displays the “ready” message again.
• The cappuccino is now ready. Sweeten to taste and, if de-
sired, sprinkle the froth with a little cocoa powder.
NOTE 1: While making cappuccino, the ow of frothed milk or
coee can be interrupted by turning the knob (C11) to the
right.
NOTE 2: If the milk in the container nishes while delivering
frothed milk, remove the container and add milk.
Then re-attach it and turn the knob (C11) to the right to
request cappuccino again.
NOTE 3: To ensure the complete cleanliness and hygiene of the
milk frother, always clean the circuits in the milk container lid
after making cappuccino
• Place a recipient under the milk spout;
• Press the CLEAN button on the lid and hold down for at
least 3 seconds (g. 25). The appliance displays “CLEAN-
ING”.
After cleaning, remove the milk container and place in the
refrigerator.
The milk should not be left out of the refrigerator for more
than 15 minutes.
NOTE 4: To change the quantity of coee or frothed milk the
appliance delivers automatically into the cup, proceed as de-
scribed in the section “Changing the quantity of coee and milk
for cappuccino”.
MAKING FROTHED MILK WITHOUT COFFEE
• Remove the lid of the milk container.
• Fill the container with the quantity of milk you want to
prepare (g. 19).
• Replace the lid on the milk container.
• Attach the milk container to the appliance (g. 22).
• Place a suciently large cup under the spout (g. 23).
• Turn the knob (C11) to the left.
“FROTHED MILK” is displayed and after a few seconds,
frothed milk ows out of the milk spout into the cup below.
• After delivery, clean the tubes inside the milk container
by pressing the CLEAN button as described in the previous
section (note 3).
CHANGING THE QUANTITY OF COFFEE AND MILK
FOR CAPPUCCINO
The appliance is set by default to automatically deliver a stand-
ard cappuccino.
To change these quantities, proceed as follows:
• Fill the container with milk up to the maximum level indi-
cated on the container.
• Turn the knob (C11) to the right and keep it turned for
at least 3 seconds until “MILK FOR CAPPUCCINO PROGRAM
QUANTITY” is displayed. Release the knob.
The appliance starts delivering milk.
• Once the required quantity of milk has been delivered, turn
the knob (C11) to the right again. Milk delivery stops.
(You should not deliver frothed milk for more than 3 min-
utes at a time.)
• After a few seconds, the appliance delivers coee into the
cup and displays “COFFEE FOR CAPPUCC. PROGRAM QUAN-
TITY”.
• Once the required quantity of coee has been delivered,
turn the knob (C11) to the right again. Coee delivery
stops.
The appliance is now re-programmed with the new settings and
displays: READY.
Loading ...
Loading ...
Loading ...