
Loading ...
Loading ...
Loading ...
4
For more information about our company or products, please visit our website at www.alpine4u.com or call us (USA) 1-877-710-0162
DISMANTLING AND REASSEMBLING
(Figure 2.2)
WARNING: Always unplug or disconnect all appliances in the pond from the electrical supply before installing,
repairing, maintaining or handling the equipment in the water.
Dismantling (See Figure 2.1 on page 3):
A. Follow the safety instructions. Unplug the power cord.
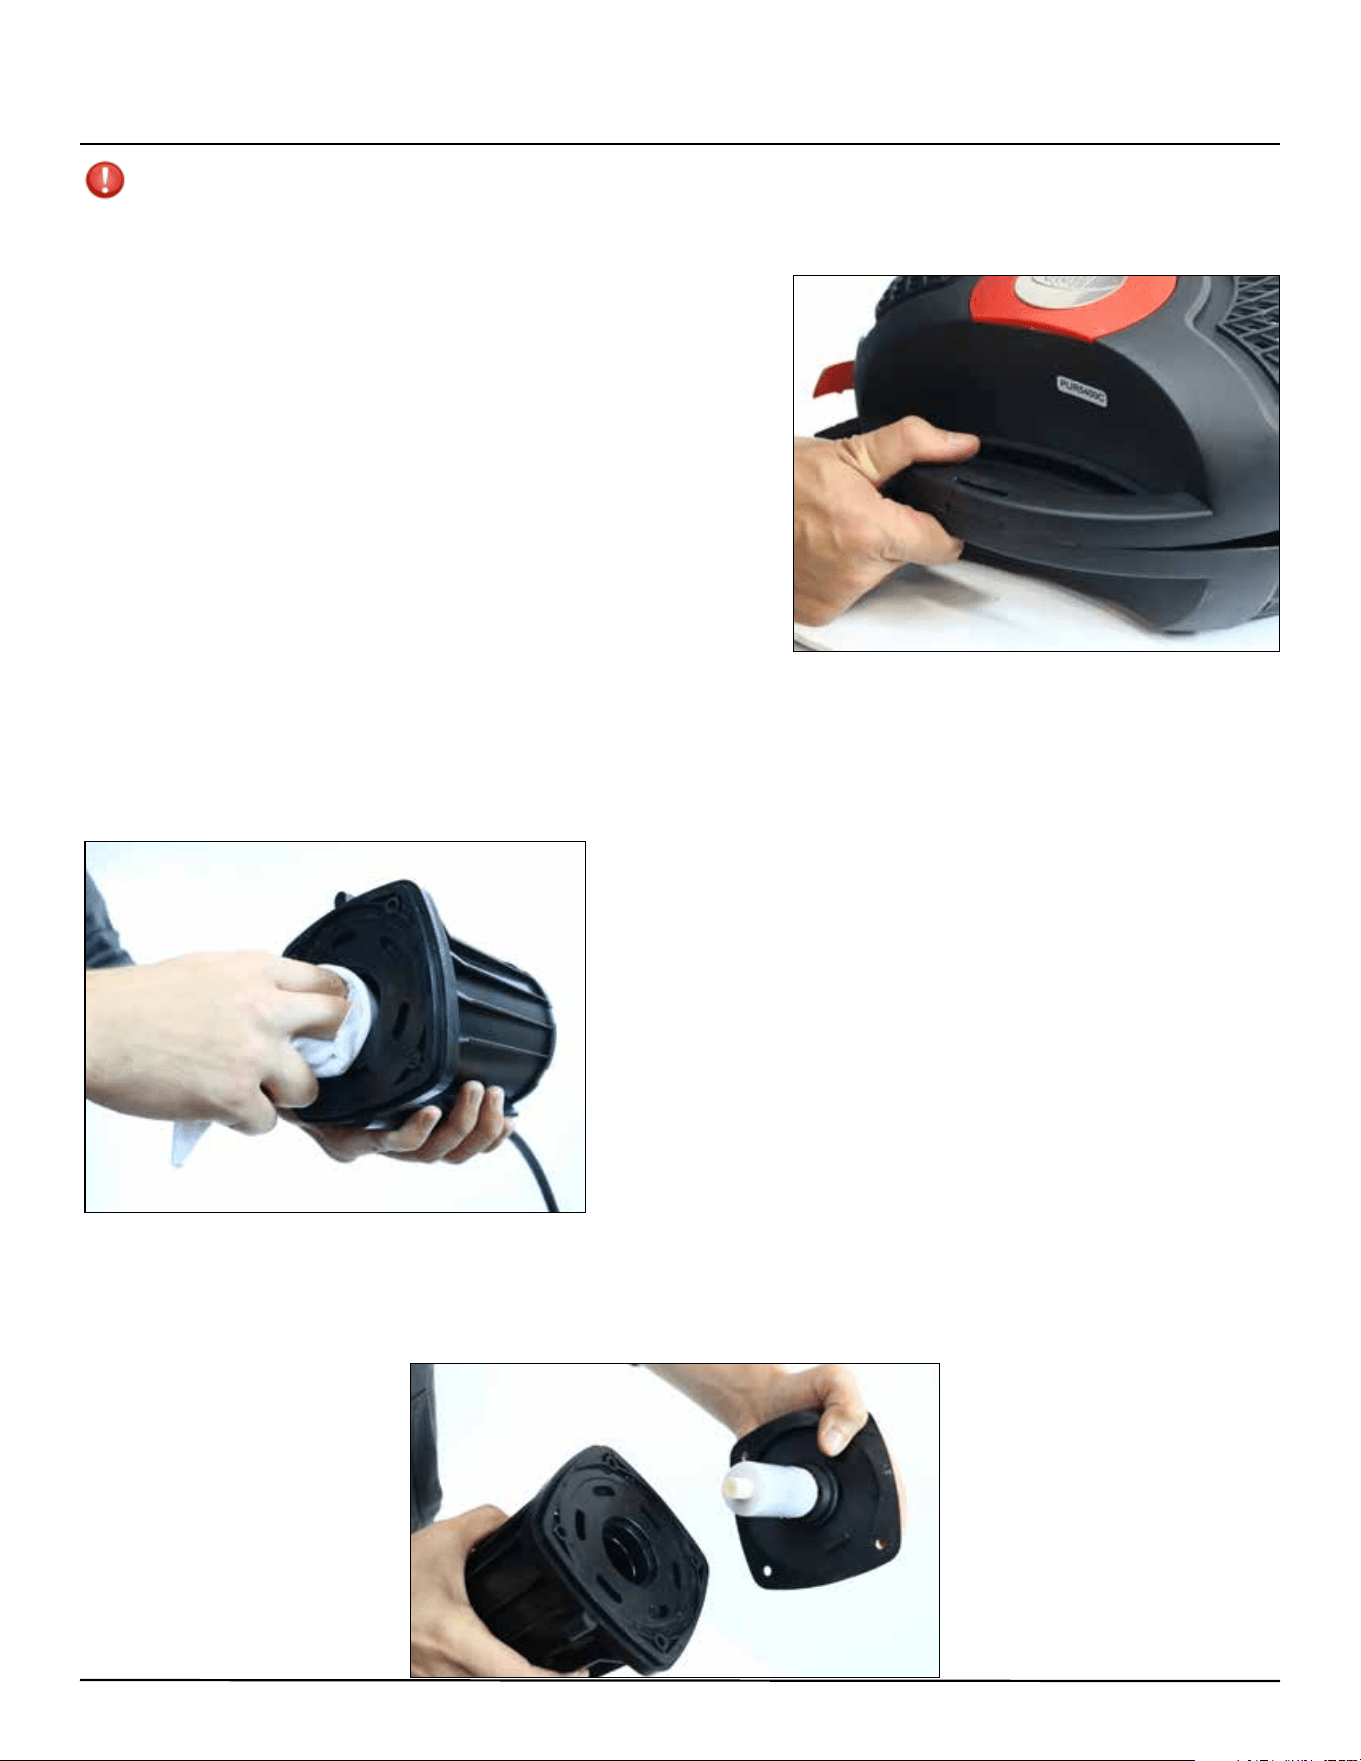
B. Remove the top pre-lter cage (26) from the bottom pre-lter cage
(15) by opening the four clips (23). Then push upper handle from the
top pre-lter cage (26) towards the pump to release the cage.
See gure 2.2
C. Remove the steel screw (8) from the cable clamp (22) to release
the cord.
D. Remove two steel screws (8) from the upper bracket (21) and remove.
E. Remove two steel screws (8) from the lower bracket (18) and remove.
F. Remove the pond pump (20) with the pump casing from the bottom
pre-lter cage (15).
G. Remove the four pump casing screws (19) and remove pump front
cover (3).
H. Remove the impeller (5) from the pump body (9). Important Note:
The impeller magnet is powerful and will be pulled back towards
the pump body (9) with great force. Ensure your ngers do not get
clamped in the process. Pay attention to the O-ring (4), it will be attached
to the pump body (9).
I. Clean all parts with clear water and a soft sponge or cloth. See gure 2.3
J. Replace defective parts (if any).
Reassemble (See Figure 2.1 on page 3):
A. Insert the impeller (5) back into the pump body (9) Important
Note: The impeller magnet is powerful and will be pulled back
towards the pump body (9) with great force. Ensure your
ngers do not get clamped in the process. See gure 2.4
B. Replace the O-ring (4) and properly t to the pump body (9).
C. Check whether the impeller (5) can rotate freely.
D. Replace the pump front cover (3) on the pump body (9) and
then evenly tighten the four pump casing screws (19).
E. Replace the pond pump (20) with the pump front cover (3) back
in to bottom pre-lter cage (15).
F. Place the upper bracket (21) over the pond pump (20) securing
into the grooves. Then screw two steel screws (8) into place.
G. Place the lower bracket (18) over the pond pump (20). Then
screw two steel screws (8) into place.
H. Replace the cord into the cable clamp (22) and insert a steel
screw (8).
I. Replace the top pre-lter cage (26) by pushing the upper handle into the bottom pre-lter cage (15) clicking into place.
Then close the 4 clips (23).
J. Restart the pump in water after properly reinstalling all the components.
(Figure 2.3)
(Figure 2.4)
Loading ...
Loading ...
Loading ...