Loading ...
Loading ...
Loading ...
6
2. Setting up the monitor
4
Connecting to your PC
Fast Charger
RJ45
279P1
Fast Charger
279P1LR
1
31 2
4
5
6
7
8
9
1
31 2
4
5
6
8
9
10
11
10
11
USB docking (USB C-C)
OR
a b
USB C
USB
a-1
a-2
USB Type-C
USB docking (USB A-C)
OR
279P1
279P1
a b
USB C
USB
a-1
a-2
USB Type-A
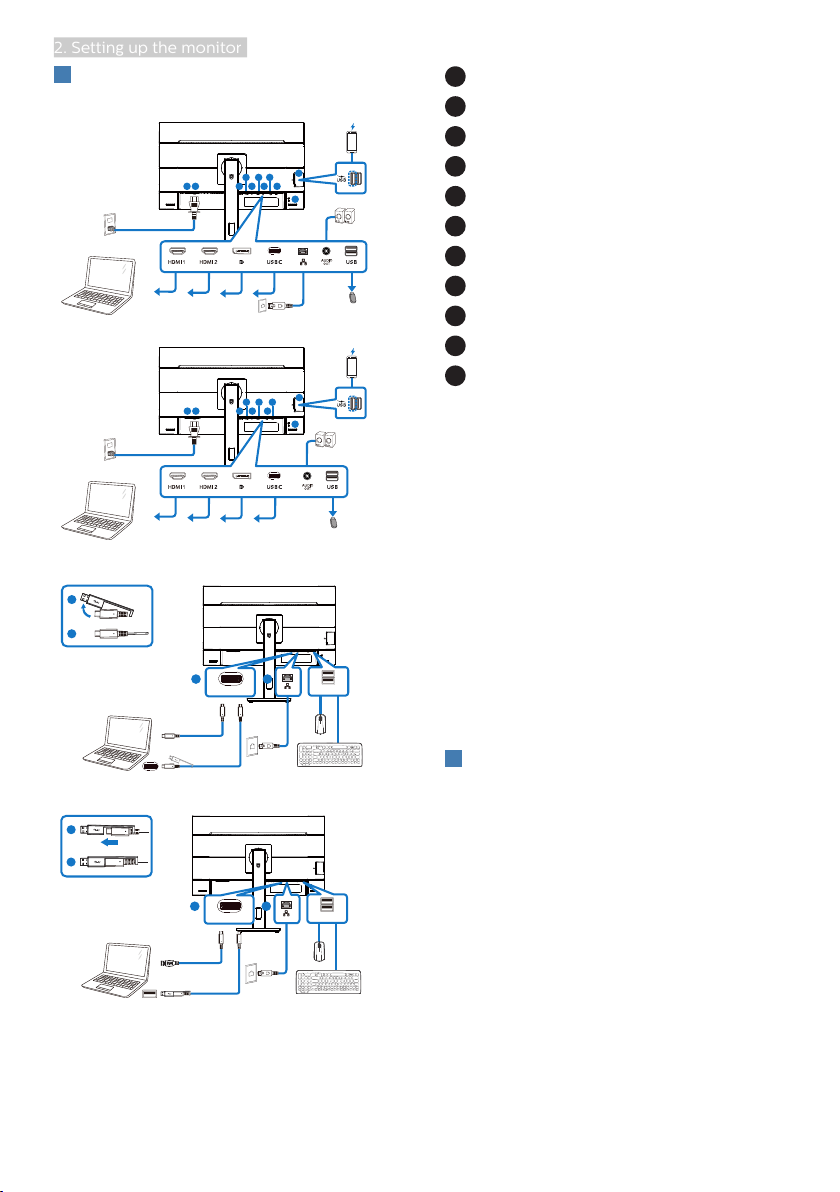
1
Power Switch
2
AC power input
3
HDMI1 input
4
HDMI2 input
5
DisplayPort input
6
USB C
7
RJ45 input(279P1)
8
Audio out
9
USB downstream
10
USB downstream/USB fast charger
11
Kensington anti-theft lock
Connect to PC
1. Connect the power cord to the back
of the monitor firmly.
2. Turn off your computer and unplug
its power cable.
3. Connect the monitor signal cable to
the video connector on the back of
your computer.
4. Plug the power cord of your
computer and your monitor into a
nearby outlet.
5. Turn on your computer and monitor.
If the monitor displays an image,
installation is complete.
5
USB C driver installation for
RJ45(279P1)
Before using the USB C docking display,
please ensure to install the USB C
driver.
You can find the “LAN Drivers” from CD
disk if bundled or go to Philips website
support page to download the driver.
Please follow the steps for the
installation:
1. Install the LAN driver that matches
your system.
Loading ...
Loading ...
Loading ...