Loading ...
Loading ...
English
INSTALLING FEET
ES10, ES20, ES30
The supplied self-adhesive rubber feet may be attached to the bottom corners
of your speakers to protect your furniture.
CHANGING THE FEET
ES80, ES90, ES100
The ES80, ES90 and ES100 feature attractive outboard feet, installed at the
factory. However, if you would like to replace them with the less visible
inboard feet (included), follow the instructions below.
1. Remove the four feet on the bottom of the speaker by loosening the two
screws in each foot. Keep the screws for later use.
2. Attach the black inboard feet to the outer (closest to front of speaker for
front feet, closest to rear of speaker for rear feet) holes, from which you just
removed the feet, using the same screws you just removed.
3. Hand-tighten securely, using a handheld Phillips (+ tip) screwdriver.
Do not use a powered screwdriver of any type.
4. Replace the screw in the inner hole.
CAUTION: Floorstanding (tower) loudspeakers have a high center
of gravity and may become unstable and tip over during earthquakes, or if
rocked, tipped or improperly positioned. If this is a concern, these speakers
should be anchored to the wall behind them, using the same procedures and
hardware customary for anchoring bookcases and wall units. The customer is
responsible for proper installation and proper selection of hardware.
INSTALLING SPIKED FEET
ES80, ES90, ES100
Four metal spikes are supplied for use when using the outboard feet and the
speaker is to be placed on a carpeted surface, to decouple the speaker from
the floor and prevent unwanted damping. To insert the spikes, gently lay the
speaker on its side (not its front or back) on a soft, nonabrasive surface. Each
spike screws into the threaded insert in each outer foot. Make sure all four
spikes are screwed in completely for stability.
NEVER drag the speaker to move it, as this will damage the spikes, the feet
and/or the wood cabinet itself. ALWAYS lift the speaker and carry it to its
new location.
WALL-MOUNTING
ES10
The ES10 may be wall-mounted. The customer is responsible for proper
selection and use of mounting hardware (available through hardware stores),
to properly and safely wall-mount the speakers. THESE PRODUCTS
ARE NOT INTENDED FOR CEILING MOUNTING.
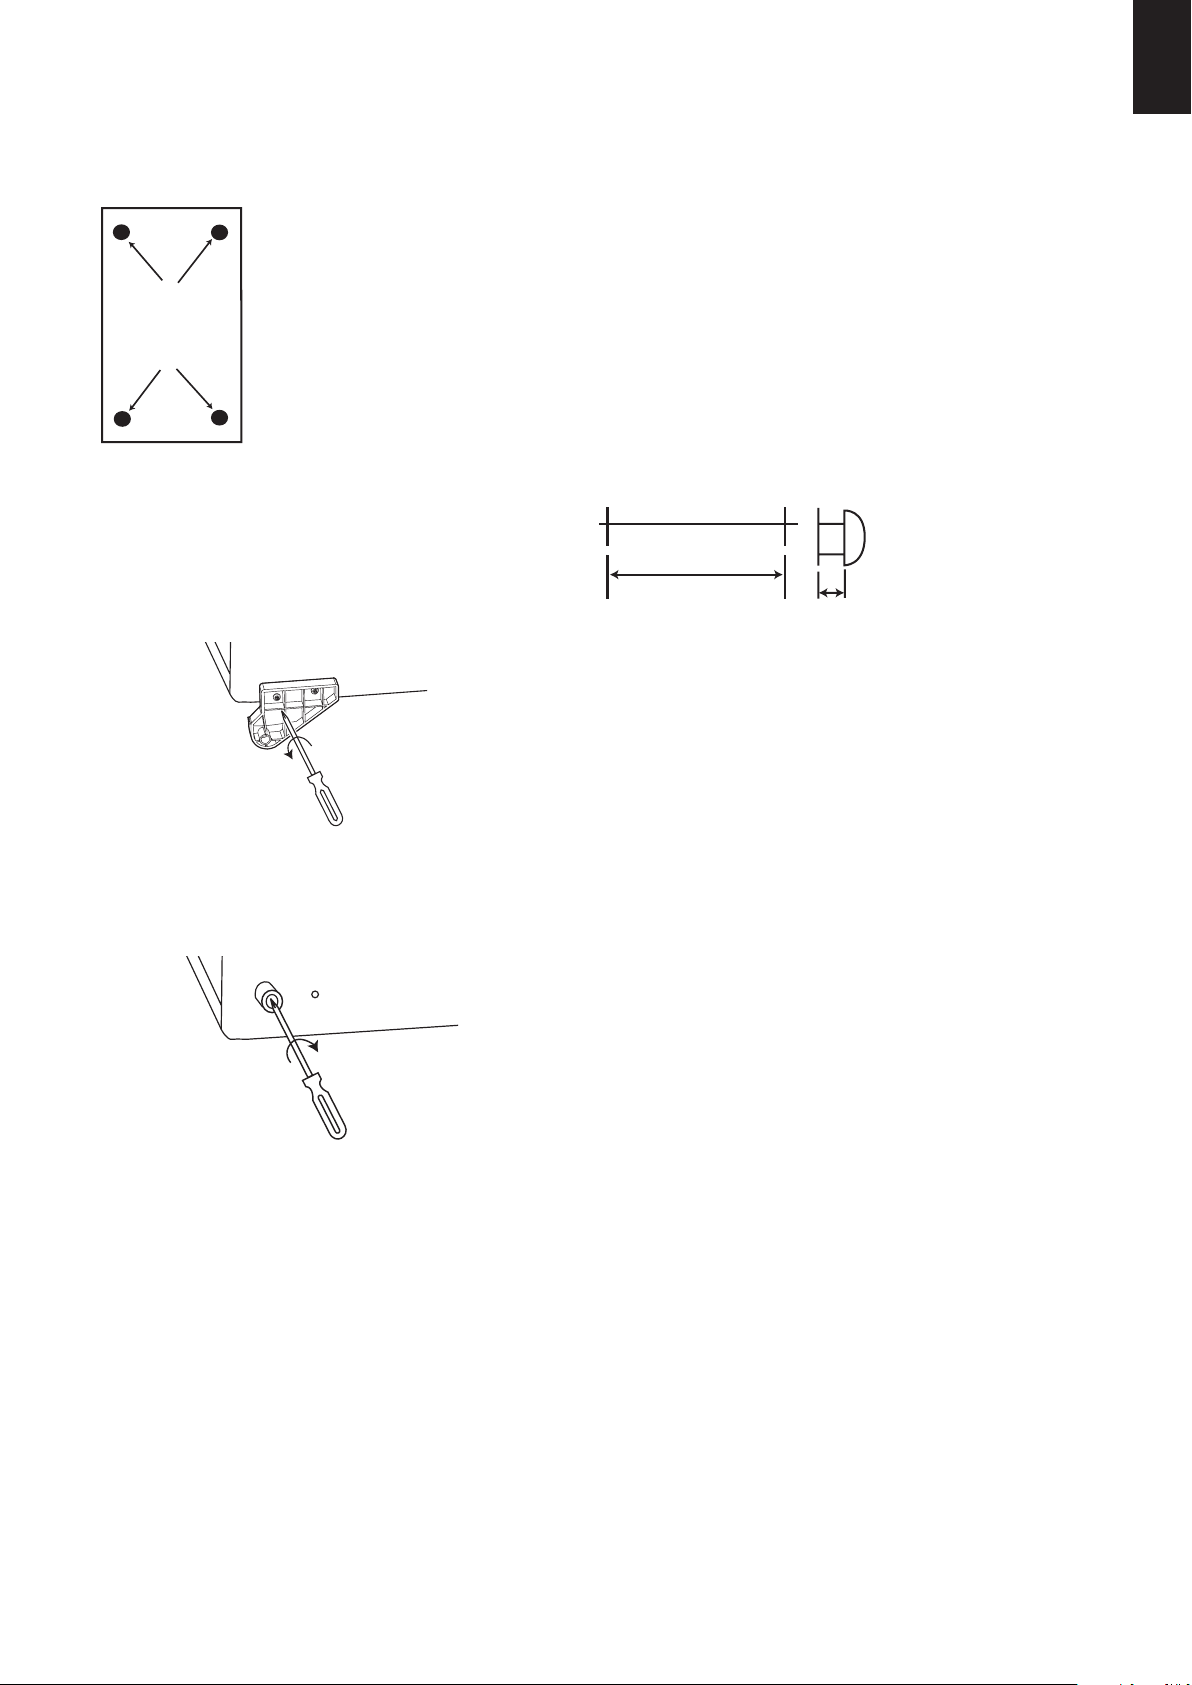
Two no. 8 round-head or pan-
head screws should be used per
loudspeaker. The screw head
should be between 5/16 inch
(8mm) and 1/4 inch (6.3mm) in
diameter, and the screw should
be at least 2 inches (50mm) in
length.
When installing screws in any wall, always use properly selected wall
anchors. Attach two of the four self-adhesive rubber pads that came with the
loudspeaker to the back of the enclosure in the two bottom corners so that the
cabinet is spaced evenly from the wall. Select a suitable mounting location on
a wall. (The ceiling is not a suitable mounting location.)
Drill two pilot holes, appropriately sized for the specific self-tapping screw
or wall anchor that you will be using. The holes should be 10 inches (254mm)
apart. The holes should be 3/4 inch (19mm) below where you want the top
of the enclosure to be positioned. Use a carpenter’s level to ensure that the
holes are even and that the speaker will mount on the level.
Install the two screws into either a wooden wall stud or anchor, and tighten
them until the back of each screw head is about 1/8 inch (3mm) from the wall.
Install the loudspeaker by slowly moving the cabinet toward the screws so
that the screw heads clear the larger circular portion of the two keyholes.
Once both screw heads have entered the keyholes, the loudspeaker should
gently be lowered onto the screw shafts. Check that the loudspeaker is firmly
locked onto the screws by gently pulling the speaker down and forward.
254mm (10")
3mm
(1/8")
3
Place pads here
Place pads here
33487_JBL_ES_Series_Eng 21/06/07 15:56 Side 3
Loading ...
Loading ...
Loading ...