WALKMAN User Guide
Print
Getting Started
How to Use the Software
Music
Videos/Photos
FM Radio
Timer
Settings
Troubleshooting
Important Information
Specifications
Contents list
Top page
NWZ-E363/E364
User Guide
Use this manual if you encounter any problems, or have any questions about the player.
Back to top
Copyright 2011 Sony Corporation
1
WALKMAN User Guide
Print
Getting Started
How to Use the Software
Music
Videos/Photos
FM Radio
Timer
Settings
Troubleshooting
Important Information
Specifications
Contents list
Top page > Getting Started
Getting Started
Before Use
Before first use
How to use this User Guide
Operation flow of “WALKMAN”
What you can do with “WALKMAN”
Operation flow to enjoy music
Operation flow to enjoy videos and photos
Power/Charging
Turning the player on and off
Charging the battery
About battery life
Initial Settings
Selecting the display language [Language Settings]
Setting the current time [Set Date-Time]
Parts and Controls
Parts and controls
About the Software
About the software
Home Menu/Option Menu
About the Home menu
How to use the Home menu
How to use the option menu
Back to top
Copyright 2011 Sony Corporation
2
WALKMAN User Guide
Print
Getting Started
How to Use the Software
Music
Videos/Photos
FM Radio
Timer
Settings
Troubleshooting
Important Information
Specifications
Contents list
Top page > How to Use the Software
How to Use the Software
Windows Media Player
Importing music from CDs using Windows Media Player
Transferring music using Windows Media Player
Content Transfer
Transferring music using Content Transfer
Transferring videos/photos using Content Transfer
Windows Explorer (Drag-and-Drop)
Transferring music using Windows Explorer
Transferring videos/photos using Windows Explorer
Back to top
Copyright 2011 Sony Corporation
3

WALKMAN User Guide
Print
Getting Started
How to Use the Software
Music
Videos/Photos
FM Radio
Timer
Settings
Troubleshooting
Important Information
Specifications
Contents list
Top page > Music
Music
Playing Music
Playing music
Browsing and using the music screen
Searching for songs
Playing the songs in a playlist
Playing all songs in random order
Deleting songs
Music Option Menu
Using the music option menu
Music Settings
Setting the play mode [Play Mode]
Setting the sound quality (CLEAR BASS) [Equalizer]
Listening with Clear Stereo [Clear Stereo]
Adjusting the volume level [Dynamic Normalizer]
Back to top
Copyright 2011 Sony Corporation
4
WALKMAN User Guide
Print
Getting Started
How to Use the Software
Music
Videos/Photos
FM Radio
Timer
Settings
Troubleshooting
Important Information
Specifications
Contents list
Top page > Videos/Photos
Videos/Photos
Watching Videos
Watching videos [Videos]
Browsing and using the video screen
Deleting videos
Video Option Menu
Using the video option menu
Video Settings
Setting the zoom function [Zoom]
Setting the display of the video screen [Display]
Setting the video orientation [Video Orientation]
Viewing Photos
Viewing photos [Photos]
Browsing and using the photo screen
Playing a slide show
Deleting photos
Photo Option Menu
Using the photo option menu
Photo Settings
Photo orientation [Photo Orientation]
Setting the display of the photo screen [Display]
Setting the slide show play mode [Slide Show Repeat]
Setting the interval of a slide show [Slide Show Interval]
Back to top
Copyright 2011 Sony Corporation
5
WALKMAN User Guide
Print
Getting Started
How to Use the Software
Music
Videos/Photos
FM Radio
Timer
Settings
Troubleshooting
Important Information
Specifications
Contents list
Top page > FM Radio
FM Radio
Listening to FM Radio
Listening to FM radio [FM Radio]
Browsing and using the FM radio screen
Presetting broadcast stations automatically [Auto Preset]
Presetting broadcast stations manually
Deleting preset broadcast stations [Delete from Preset]
FM Radio Option Menu
Using the FM radio option menu
FM Radio Settings
Setting the reception [Scan Sensitivity]
Setting monaural/stereo [Mono/Auto]
Back to top
Copyright 2011 Sony Corporation
6
WALKMAN User Guide
Print
Getting Started
How to Use the Software
Music
Videos/Photos
FM Radio
Timer
Settings
Troubleshooting
Important Information
Specifications
Contents list
Top page > Timer
Timer
Setting the Timer
About the timer
Setting the alarm [Alarm]
Setting the sleep timer [Sleep Timer]
Back to top
Copyright 2011 Sony Corporation
7
WALKMAN User Guide
Print
Getting Started
How to Use the Software
Music
Videos/Photos
FM Radio
Timer
Settings
Troubleshooting
Important Information
Specifications
Contents list
Top page > Settings
Settings
Common Settings
Displaying the player information [Unit Information]
Limiting the volume [AVLS (Volume Limit)]
Turning off the beep sound [Beep Settings]
Setting the screensaver type [Screensaver]
Adjusting the brightness of the screen [Brightness]
Setting the current time [Set Date-Time]
Setting the date format [Date Display Format]
Setting the time format [Time Display Format]
Returning to the factory settings [Reset all Settings]
Formatting memory [Format]
Selecting the display language [Language Settings]
Music Settings
Setting the play mode [Play Mode]
Setting the sound quality (CLEAR BASS) [Equalizer]
Listening with Clear Stereo [Clear Stereo]
Adjusting the volume level [Dynamic Normalizer]
Video Settings
Setting the zoom function [Zoom]
Setting the display of the video screen [Display]
Setting the video orientation [Video Orientation]
Photo Settings
Photo orientation [Photo Orientation]
Setting the display of the photo screen [Display]
Setting the slide show play mode [Slide Show Repeat]
Setting the interval of a slide show [Slide Show Interval]
FM Radio Settings
Setting the reception [Scan Sensitivity]
Setting monaural/stereo [Mono/Auto]
Back to top
Copyright 2011 Sony Corporation
8

WALKMAN User Guide
Print
Getting Started
How to Use the Software
Music
Videos/Photos
FM Radio
Timer
Settings
Troubleshooting
Important Information
Specifications
Contents list
Top page > Troubleshooting
Troubleshooting
To Deal with a Trouble
What can I do to solve a problem?
Customer support Web site
Possible Causes of Symptoms
Table of contents for symptoms and possible causes
Operation
Display
Power
Connection to a computer
FM Radio
Other
Messages
Back to top
Copyright 2011 Sony Corporation
9
WALKMAN User Guide
Print
Getting Started
How to Use the Software
Music
Videos/Photos
FM Radio
Timer
Settings
Troubleshooting
Important Information
Specifications
Contents list
Top page > Important Information
Important Information
Precautions
Important product information
Warning
Caution
Notice for users
Notes on the headphones
Notes on the software
Cleaning
Notes on cleaning
Storing Data
Storing data
Upgrading the Player’s Firmware
Upgrading the player’s firmware
License and Trademark Notice
License and trademark notice
Back to top
Copyright 2011 Sony Corporation
10
WALKMAN User Guide
Print
Getting Started
How to Use the Software
Music
Videos/Photos
FM Radio
Timer
Settings
Troubleshooting
Important Information
Specifications
Contents list
Top page > Specifications
Specifications
Specifications
Specifications
Supplied items
System requirements
What are Format and Bit Rate
What is audio format?
What is video format?
What is photo format?
Back to top
Copyright 2011 Sony Corporation
11
WALKMAN User Guide
Print
Getting Started
How to Use the Software
Music
Videos/Photos
FM Radio
Timer
Settings
Troubleshooting
Important Information
Specifications
Contents list
Top page > Contents list
Contents list
Getting Started
Before Use
Before first use
How to use this User Guide
Operation flow of “WALKMAN”
What you can do with “WALKMAN”
Operation flow to enjoy music
Operation flow to enjoy videos and photos
Power/Charging
Turning the player on and off
Charging the battery
About battery life
Initial Settings
Selecting the display language [Language Settings]
Setting the current time [Set Date-Time]
Parts and Controls
Parts and controls
About the Software
About the software
Home Menu/Option Menu
About the Home menu
How to use the Home menu
How to use the option menu
Back to top
How to Use the Software
Windows Media Player
Importing music from CDs using Windows Media Player
Transferring music using Windows Media Player
Content Transfer
Transferring music using Content Transfer
Transferring videos/photos using Content Transfer
Windows Explorer (Drag-and-Drop)
Transferring music using Windows Explorer
Transferring videos/photos using Windows Explorer
Back to top
12

Music
Playing Music
Playing music
Browsing and using the music screen
Searching for songs
Playing the songs in a playlist
Playing all songs in random order
Deleting songs
Music Option Menu
Using the music option menu
Music Settings
Setting the play mode [Play Mode]
Setting the sound quality (CLEAR BASS) [Equalizer]
Listening with Clear Stereo [Clear Stereo]
Adjusting the volume level [Dynamic Normalizer]
Back to top
Videos/Photos
Watching Videos
Watching videos [Videos]
Browsing and using the video screen
Deleting videos
Video Option Menu
Using the video option menu
Video Settings
Setting the zoom function [Zoom]
Setting the display of the video screen [Display]
Setting the video orientation [Video Orientation]
Viewing Photos
Viewing photos [Photos]
Browsing and using the photo screen
Playing a slide show
Deleting photos
Photo Option Menu
Using the photo option menu
Photo Settings
Photo orientation [Photo Orientation]
Setting the display of the photo screen [Display]
Setting the slide show play mode [Slide Show Repeat]
Setting the interval of a slide show [Slide Show Interval]
Back to top
FM Radio
Listening to FM Radio
13

Setting the interval of a slide show [Slide Show Interval]
FM Radio Settings
Setting the reception [Scan Sensitivity]
Setting monaural/stereo [Mono/Auto]
Back to top
Troubleshooting
To Deal with a Trouble
What can I do to solve a problem?
Customer support Web site
Possible Causes of Symptoms
Table of contents for symptoms and possible causes
Operation
Display
Power
Connection to a computer
FM Radio
Other
Messages
Back to top
Important Information
Precautions
Important product information
Warning
Caution
Notice for users
Notes on the headphones
Notes on the software
Cleaning
Notes on cleaning
Storing Data
Storing data
Upgrading the Player’s Firmware
Upgrading the player’s firmware
License and Trademark Notice
License and trademark notice
Back to top
Specifications
Specifications
Specifications
Supplied items
System requirements
15

WALKMAN User Guide
Print
Getting Started
How to Use the Software
Music
Videos/Photos
FM Radio
Timer
Settings
Troubleshooting
Important Information
Specifications
Contents list
Top page > Getting Started > Before Use > Before first use
Before first use
Thank you for purchasing this “WALKMAN.”
This User Guide explains how to transfer music, videos and photos to the player and how to use
various functions of it. Browse this User Guide for necessary information.
Before you start using the player, be sure to read “Important Information” that contains important
information on the use of the player. To read it, click “Important Information” in the side bar on
the left of the browser window.
Also, “Quick Start Guide” supplied with the player contains important information for you.
For information about the customer support Web site, see [Details].
About model names mentioned in this User Guide
Depending on the country/region in which you have purchased the player, some models may not
be available.
About Windows operating system and Windows Media Player
Make sure that the operating system is Windows XP (Service Pack 3 or later), Windows Vista
(Service Pack 1 or later) or Windows 7 (*1), and the installed Windows Media Player version on
your computer is 11 (Windows XP/Windows Vista) or 12 (Windows 7).
For details about usage or support on Windows Media Player, refer to Windows Media Player
information from the following web site:
http://support.microsoft.com/
(*1) [Compatibility mode] for Windows XP is not supported.
About battery charging
The battery might not be charged at time of purchase. See [Details] for how to charge the
battery.
Back to top
Copyright 2011 Sony Corporation
17
WALKMAN User Guide
Print
Getting Started
How to Use the Software
Music
Videos/Photos
FM Radio
Timer
Settings
Troubleshooting
Important Information
Specifications
Contents list
Top page > Getting Started > Before Use > How to use this User Guide
How to use this User Guide
Selecting a topic to display
Returning to a previous page
Printing out a page
This User Guide explains how to use each function of the player, how to change settings, and
how to troubleshoot a problem.
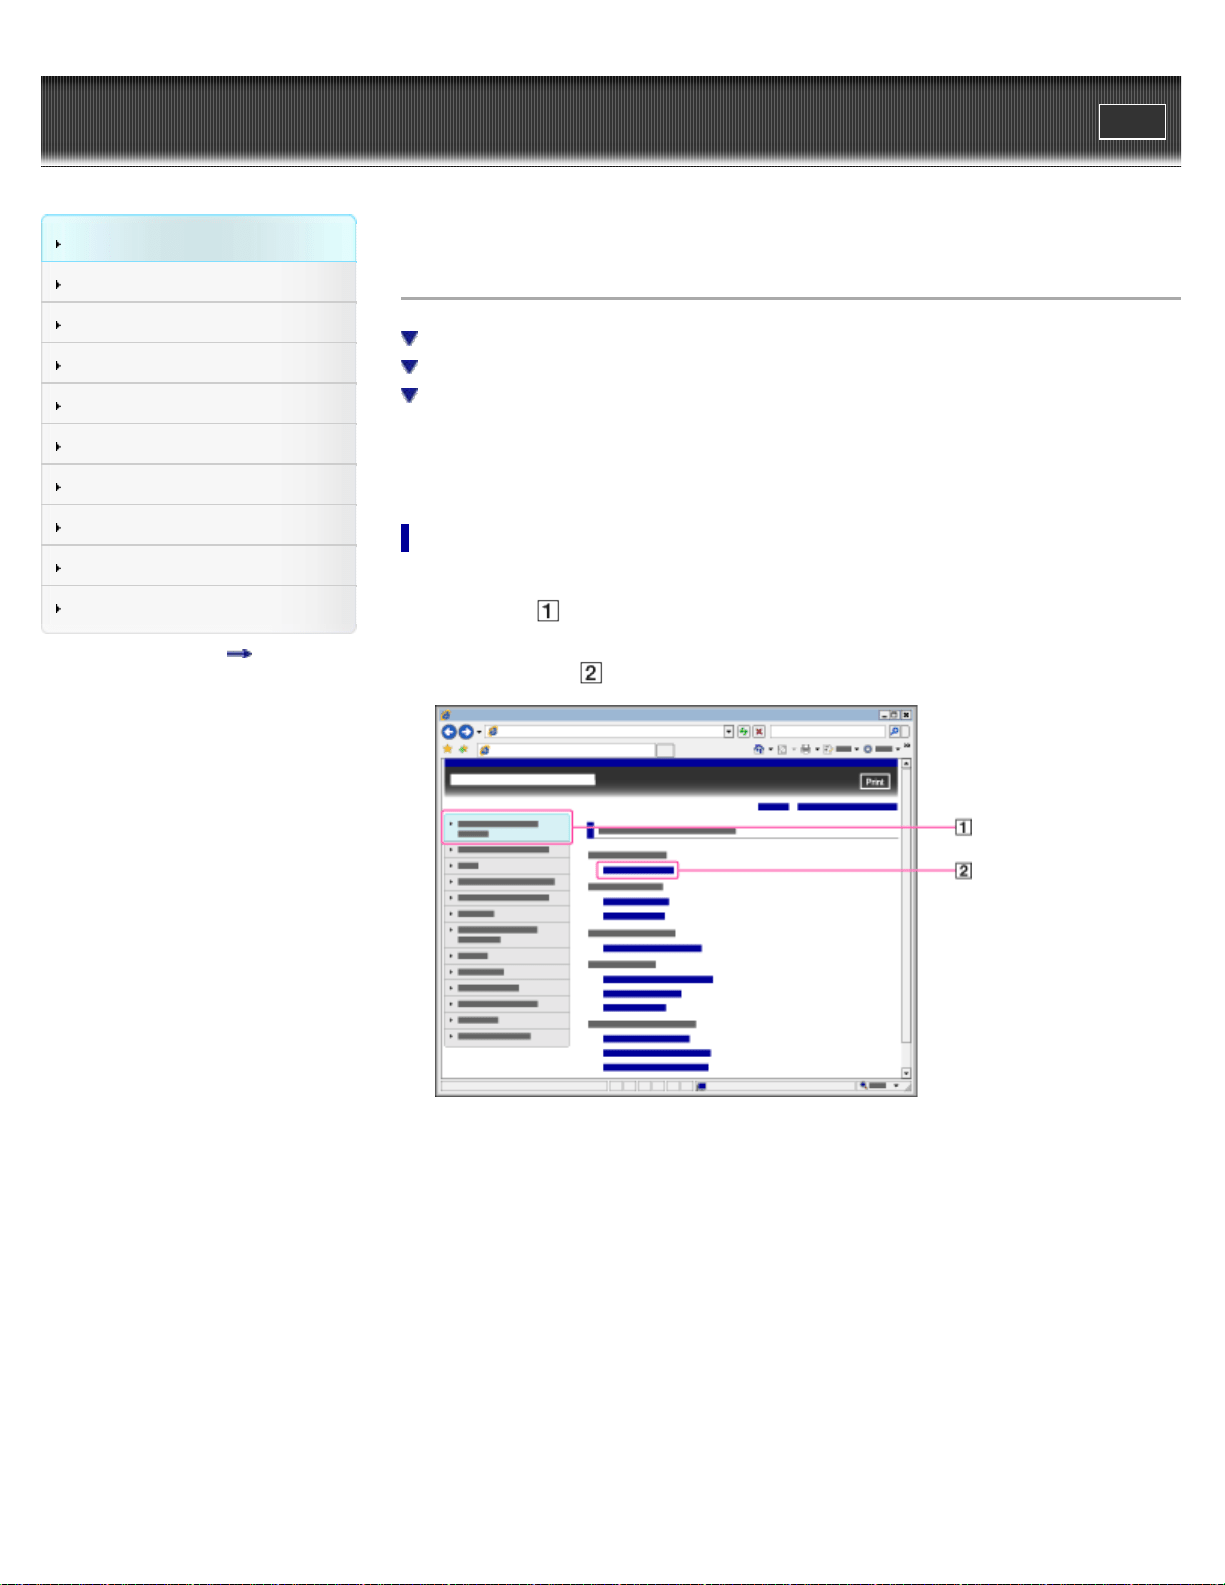
Selecting a topic to display
Internet Explorer 7 is used for illustration purposes.
1. Click a title (
) in the side bar on the left of the browser window.
The title’s topic list appears in the right pane.
2. Click a topic title (
) in the list.
Descriptions appear in the right pane.
18
Changing the font size
You can change the font size by changing the setting of your web browser. For how to change
the font size setting, refer to the Help of your web browser.
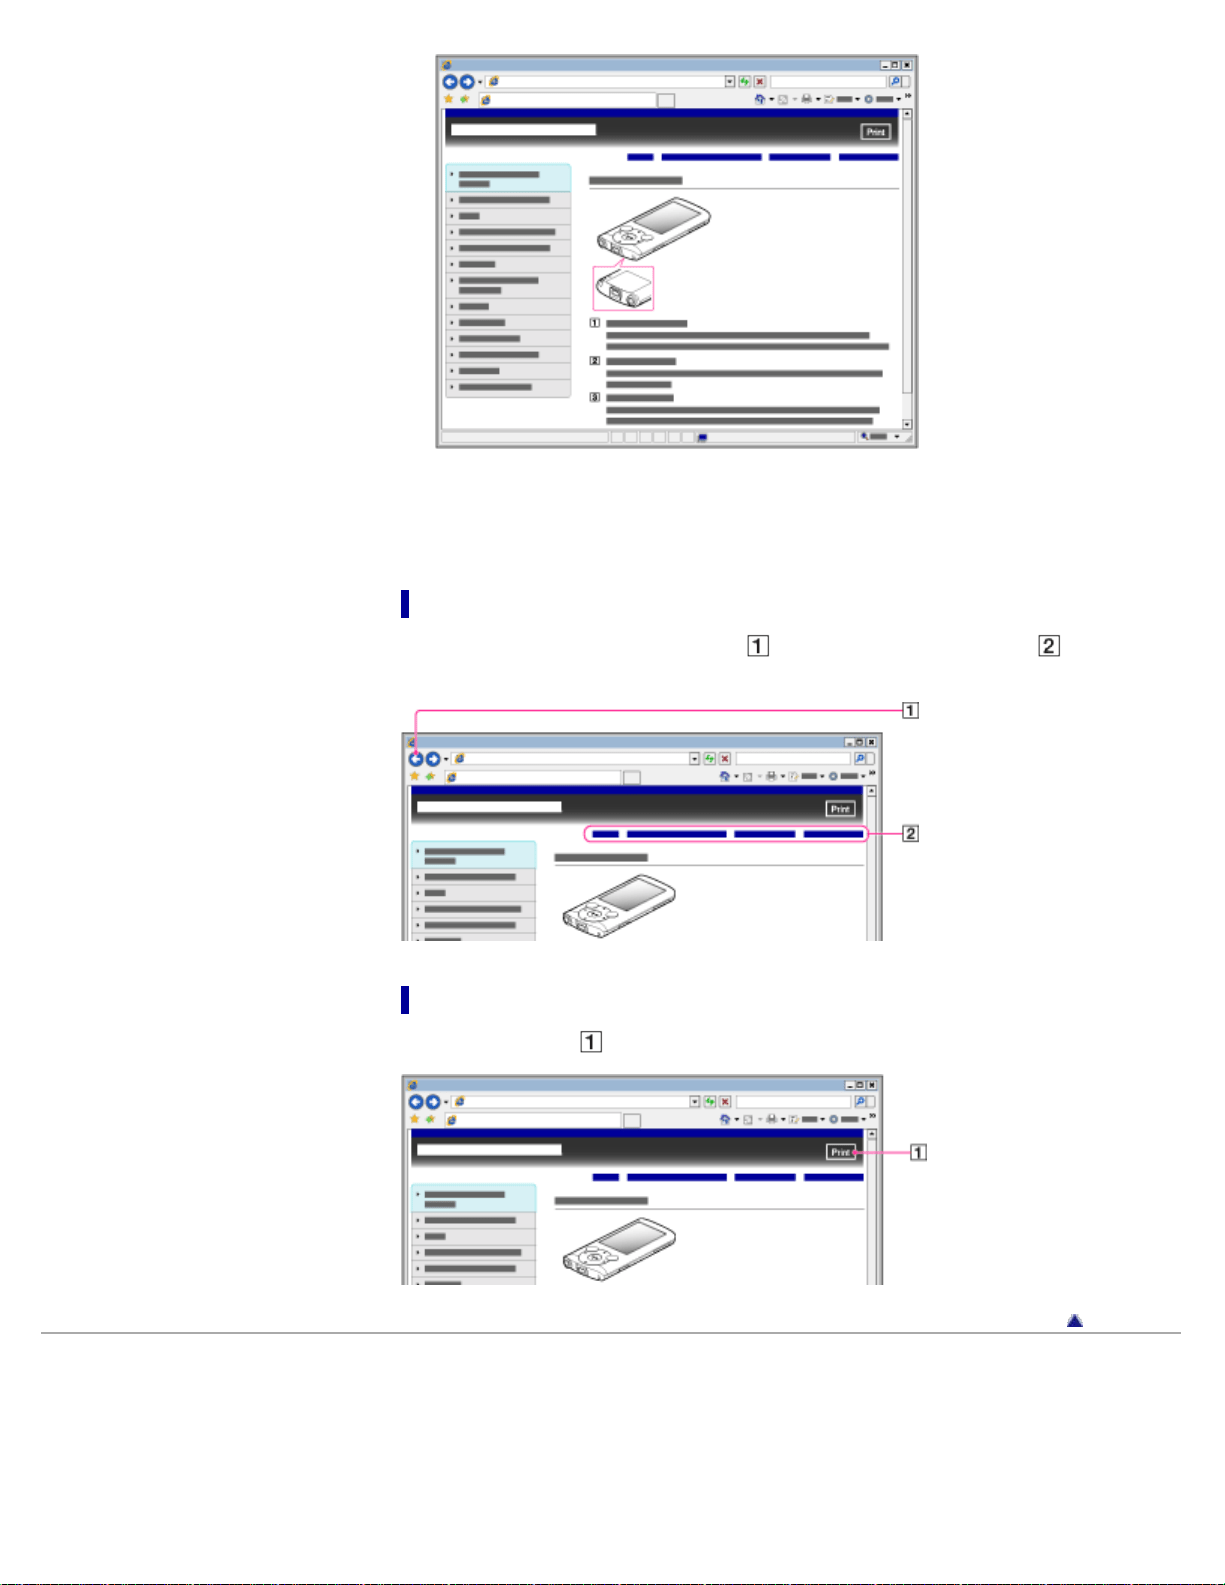
Returning to a previous page
Use the back button of your web browser ( ) or breadcrumb trail navigation ( ) to return to a
page you previously viewed.
Printing out a page
Click the print button ( ) to print out a page you are viewing.
Back to top
Copyright 2011 Sony Corporation
19
WALKMAN User Guide
Print
Getting Started
How to Use the Software
Music
Videos/Photos
FM Radio
Timer
Settings
Troubleshooting
Important Information
Specifications
Contents list
Top page > Getting Started > Operation flow of “WALKMAN” > What you can do with
“WALKMAN”
What you can do with “WALKMAN”
Enjoying music, videos and photos transferred from a computer
Your “WALKMAN” incorporates various functions. This page introduces some of its major
features to you.
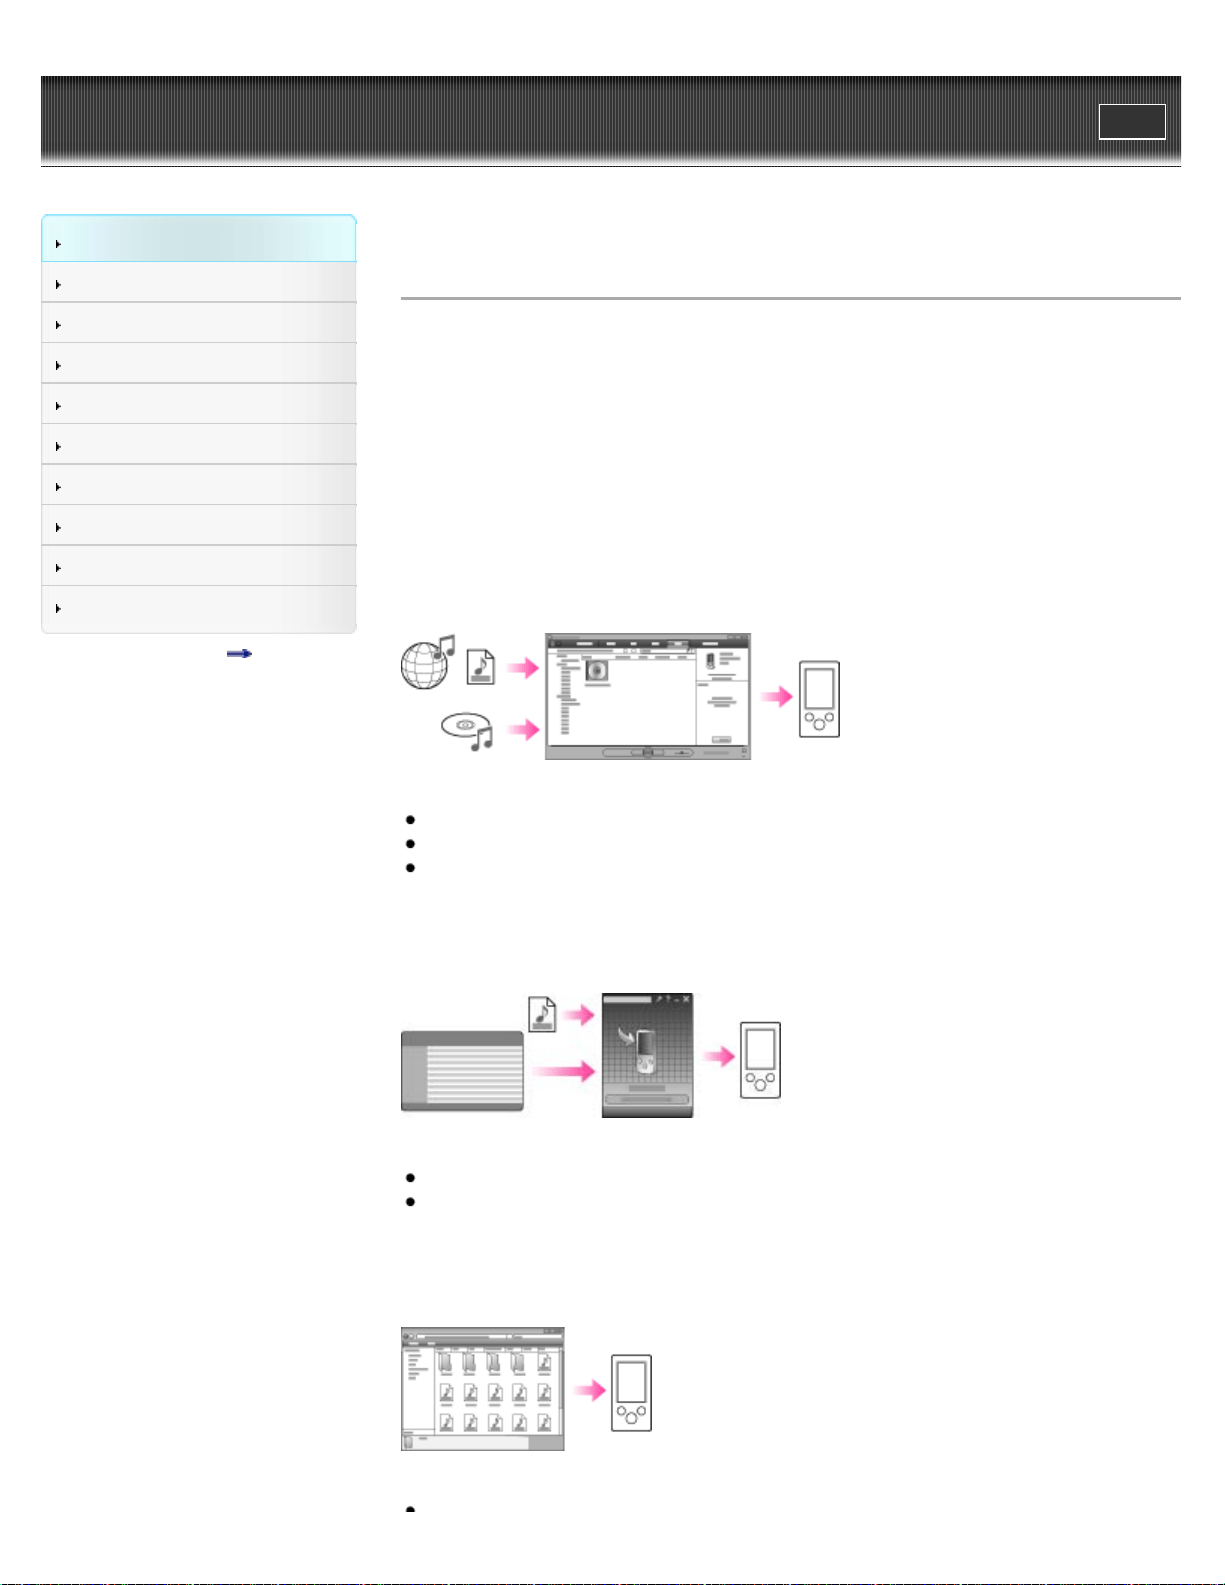
You need to transfer music, videos or photos from a computer to your “WALKMAN” to enjoy
them.
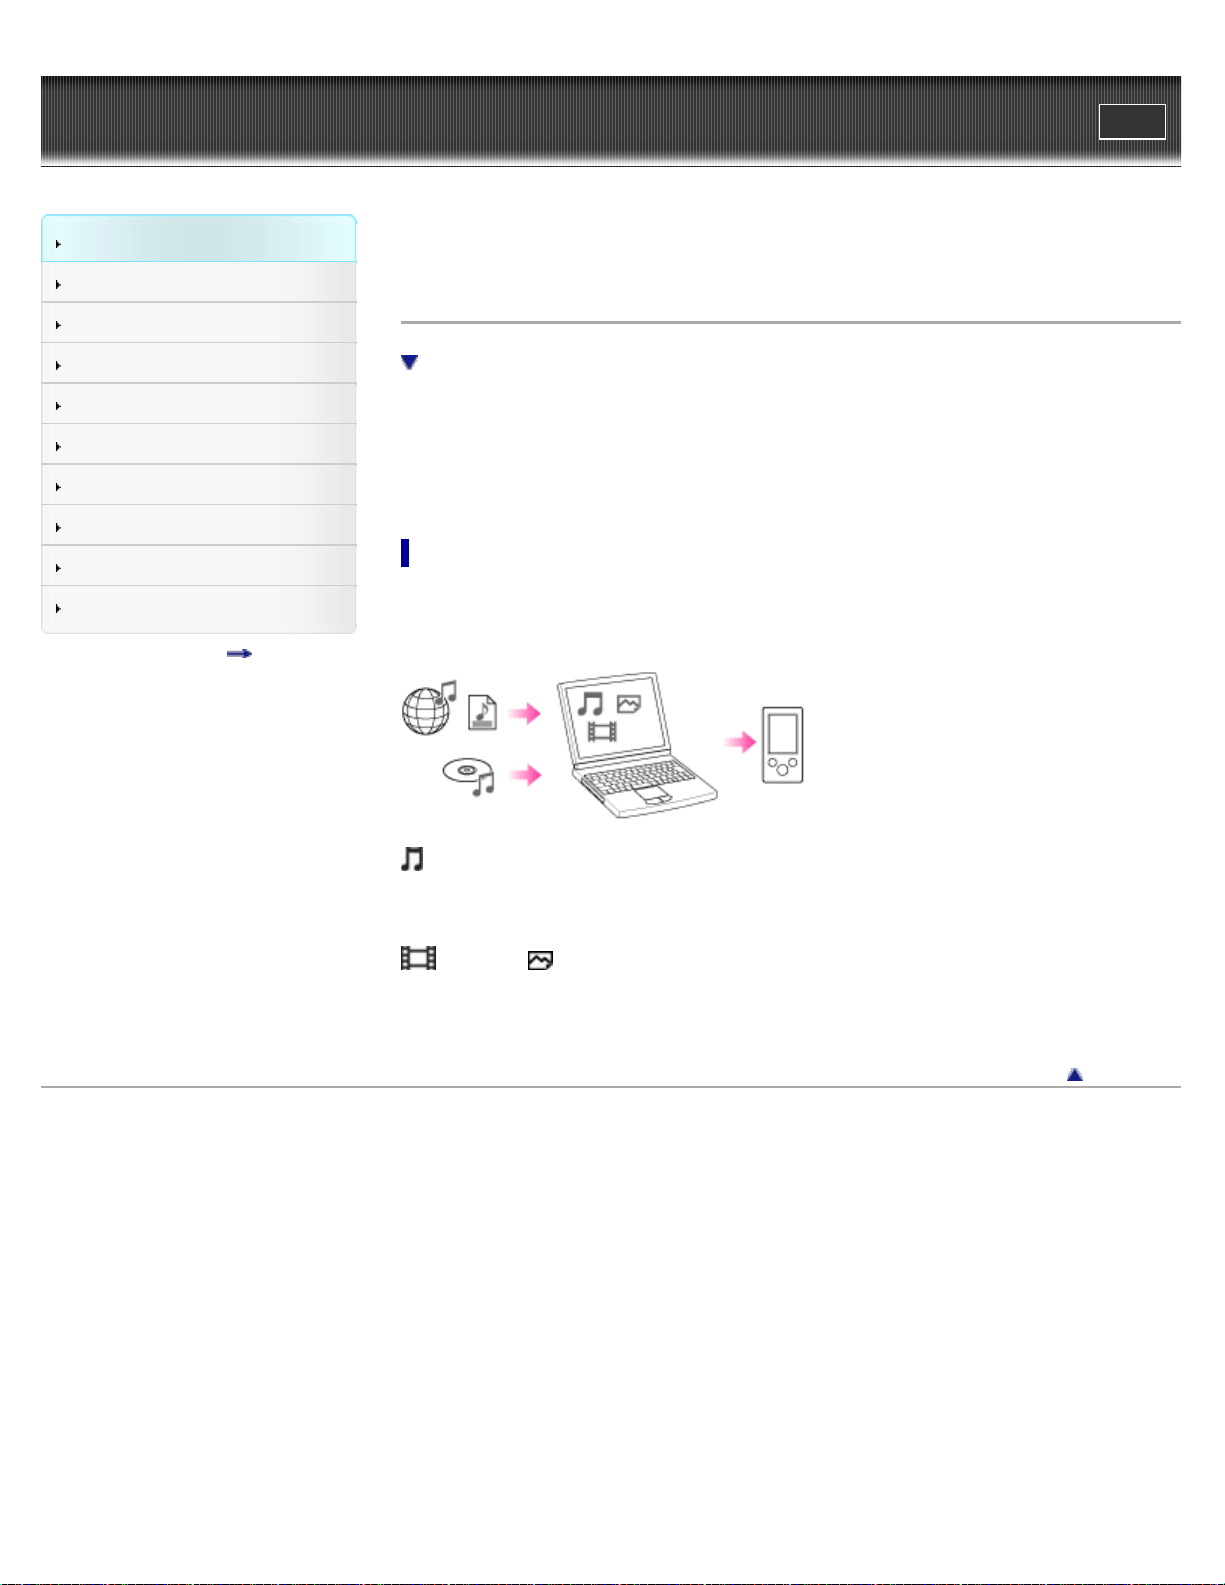
Enjoying music, videos and photos transferred from a computer
To enjoy music, videos or photos, use bundled software (Content Transfer) or supported software
(Windows Media Player) to transfer them from a computer to the player. For how to install the
bundled software, refer to “Quick Start Guide.”
Music
There are several ways to transfer music to the player. See [Details] for how to transfer your
favorite songs to the player. After transferring, see [Details] for how to play them back.
Videos/ Photos
There are several ways to transfer videos or photos to the player. See [Details] for how to
transfer them to the player. After transferring, see [Details] for how to watch videos, or [Details]
for how to view photos.
Back to top
Copyright 2011 Sony Corporation
20
WALKMAN User Guide
Print
Getting Started
How to Use the Software
Music
Videos/Photos
FM Radio
Timer
Settings
Troubleshooting
Important Information
Specifications
Contents list
Top page > Getting Started > Operation flow of “WALKMAN” > Operation flow to enjoy music
Operation flow to enjoy music
You need to have music files on your computer before transferring them to the player and
playing back. There are various ways to obtain music files, such as importing from CDs,
purchasing at online music stores, downloading from the Internet, and so on.
Be careful that the player can play back music files in supported formats only. Also, copyright
protected music files may not be playable depending on their copyright protection. For details
about supported file formats, see [Details].
Once you have music files on your computer, you are ready to transfer them to the player. You
can transfer music to the player in the following three ways.
Transferring music from CDs using Windows Media Player
You can import music from your CDs, etc., to your computer, and transfer them to the player
using Windows Media Player.
For how to use Windows Media Player, see the following topics.
Windows Media Player [Details]
Importing music from CDs using Windows Media Player [Details]
Transferring music using Windows Media Player [Details]
Transferring music from iTunes, etc., using Content Transfer
If you have already managed music with iTunes, etc., you can transfer them to the player using
Content Transfer.
For how to use Content Transfer, see the following topics.
Content Transfer [Details]
Transferring music using Content Transfer [Details]
Transferring music by drag-and-drop using Windows Explorer
You can directly transfer music stored on your computer by drag-and-drop using Windows
Explorer.
For how to use Windows Explorer, see the following topic.
21

Transferring music using Windows Explorer [Details]
Hint
For detailed information on how to import music, refer to the Help of each software.
For details about supported file formats, see [Details].
The player does not use SonicStage software (SonicStage software, developed by Sony,
manages music on a computer or transfers music to other types of players). For this player,
you can transfer music in the above three ways, not using SonicStage.
ATRAC files managed by SonicStage can be transferred to the player after conversion to
MP3 file format.
The maximum number of files per folder in the [MUSIC] folder is 4,000.
Note
During data transfer between the player and a computer, [Do not disconnect.] appears on
the player’s screen. While [Do not disconnect.] is displayed, do not disconnect the USB
cable. Otherwise, the data being transferred or the data stored in the player may be
damaged.
Do not leave the player connected for extended periods to a laptop computer that is not
connected to AC power, since the player may discharge the computer’s battery.
If you turn on or restart the computer while the player is connected to the computer, the
player may malfunction. In this case, press the RESET button of the player to reset it
[Details]. Disconnect the player from the computer before turning on or restarting the
computer.
Back to top
Copyright 2011 Sony Corporation
22
WALKMAN User Guide
Print
Getting Started
How to Use the Software
Music
Videos/Photos
FM Radio
Timer
Settings
Troubleshooting
Important Information
Specifications
Contents list
Top page > Getting Started > Operation flow of “WALKMAN” > Operation flow to enjoy videos
and photos
Operation flow to enjoy videos and photos
You need to have video/photo episode files on your computer before transferring them to the
player and playing back.
You can import videos from recorded videos or download from the Internet, etc. You can import
photos from a digital camera or download from the Internet, etc.
Be careful that the player can play back files in supported formats only. Also, copyright protected
files may not be playable depending on their copyright protection. For details about supported file
formats, see [Details].
Once you have video/photo files on your computer, you are ready to transfer them to the player.
You can transfer video/photo files to the player in the following three ways.
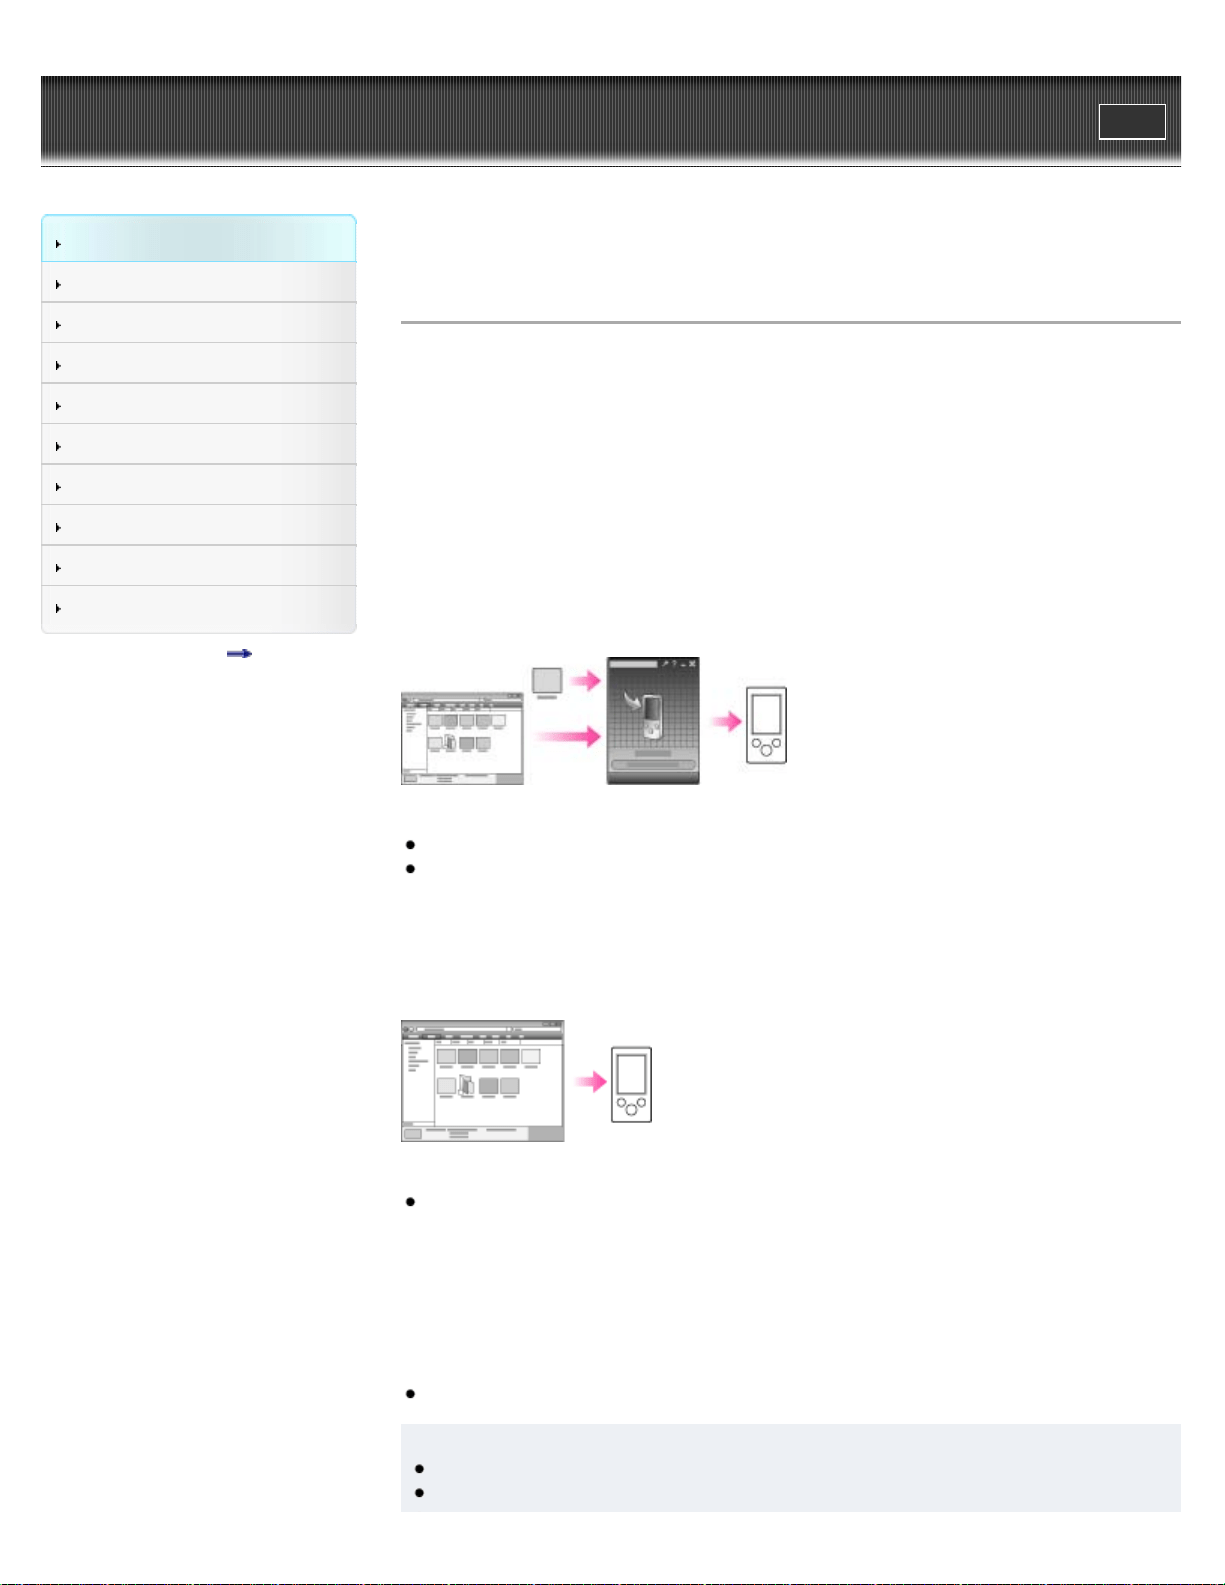
Transferring videos/photos using Content Transfer
You can transfer videos/photos stored on your computer to the player using Content Transfer.
For how to use Content Transfer, see the following topics.
Content Transfer [Details]
Transferring videos/photos using Content Transfer [Details]
Transferring videos/photos by drag-and-drop using Windows
Explorer
You can directly transfer videos/photos stored on your computer by drag-and-drop using
Windows Explorer.
For how to use Windows Explorer, see the following topic.
Transferring videos/photos using Windows Explorer [Details]
Transferring videos/photos using Windows Media Player
You can transfer videos/photos managed with Windows Media Player to the player.
For details about usage or support on Windows Media Player, refer to Windows Media Player
information from the following web site:
http://support.microsoft.com/
Also, see the following topic.
Windows Media Player [Details]
Hint
For detailed information on how to import videos/photos, refer to the Help of each software.
For details about supported file formats, see [Details].
23

WALKMAN User Guide
Print
Getting Started
How to Use the Software
Music
Videos/Photos
FM Radio
Timer
Settings
Troubleshooting
Important Information
Specifications
Contents list
Top page > Getting Started > Power/Charging > Turning the player on and off
Turning the player on and off
To turn on the player
To turn off the player
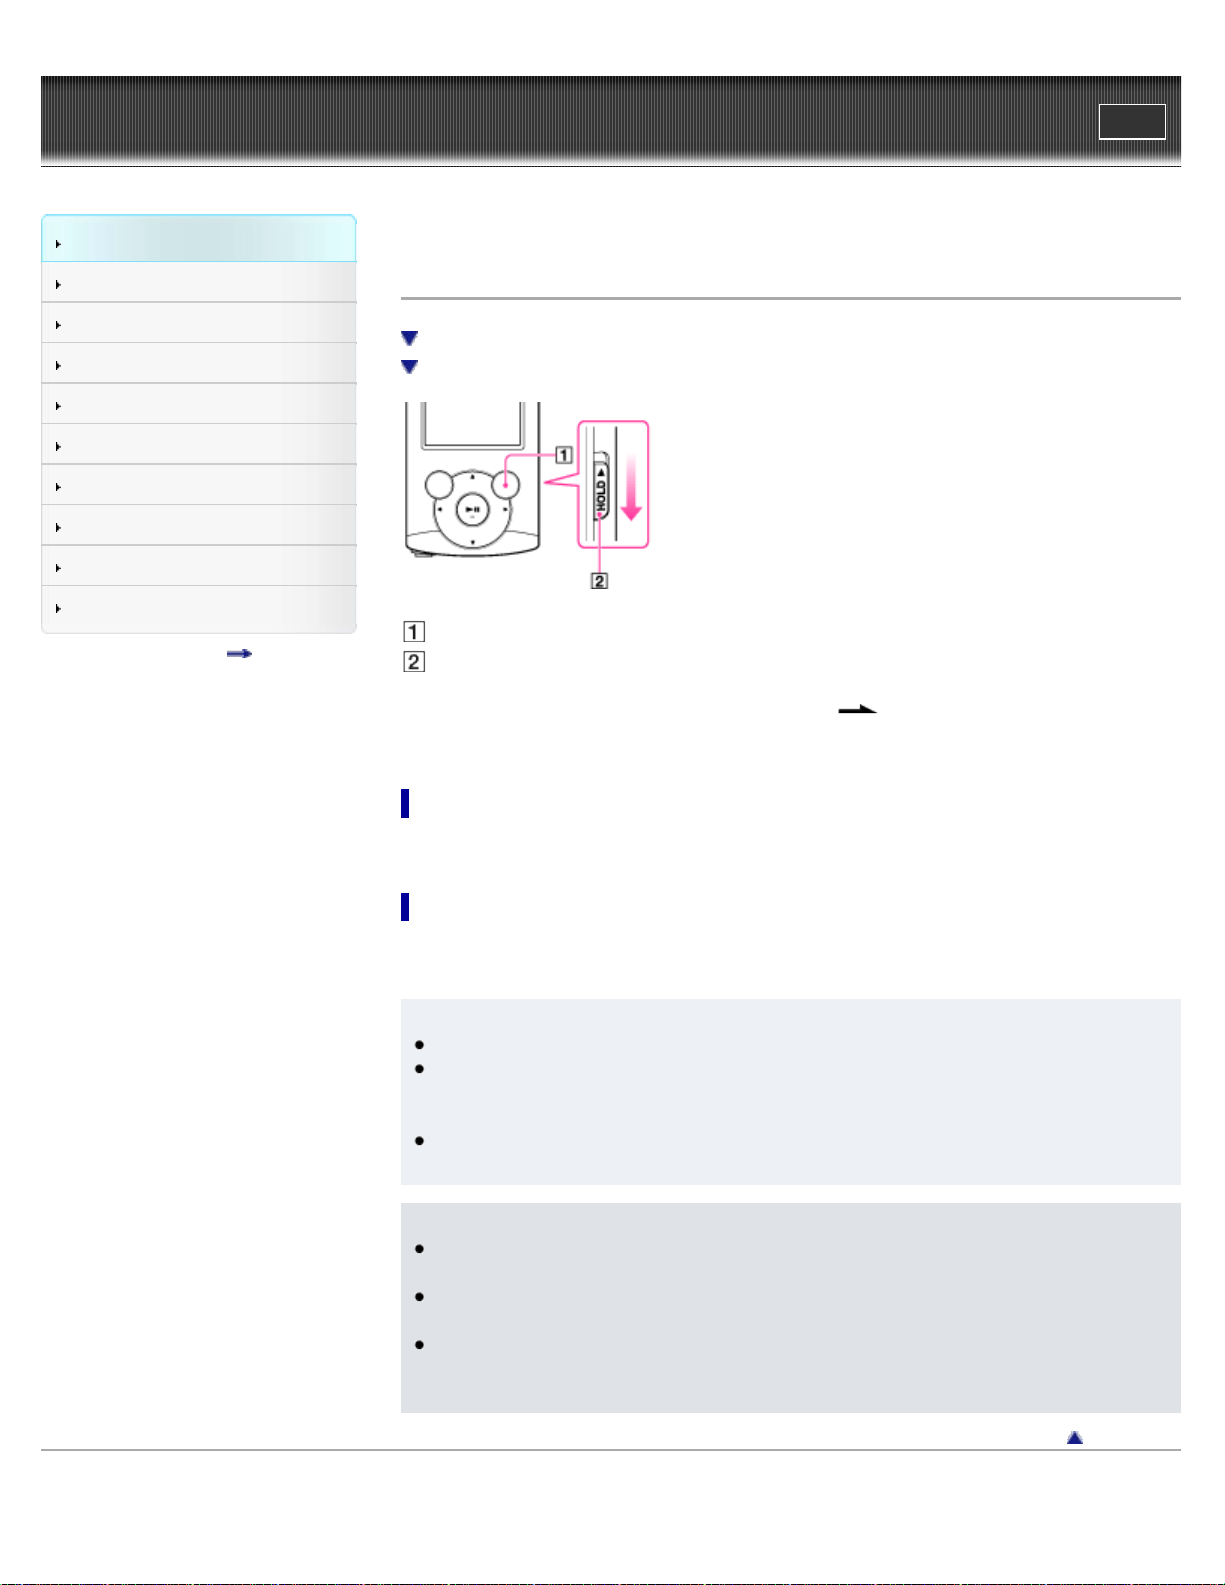
OPTION/PWR OFF button
HOLD switch
If [On hold... Cancel HOLD function to activate controls.] appears on the screen, slide the
HOLD switch in the opposite direction of the arrow
on the right side of the player to
cancel the HOLD function.
To turn on the player
Press any button to turn the player on.
To turn off the player
Press and hold the OPTION/PWR OFF button [Details]. [POWER OFF] appears, the player
enters standby mode, and the screen turns off.
Hint
Set the date and time on the player before using it [Details].
During pause, if there is no operation for about 3 minutes, the player automatically enters
standby mode, and the screen turns off. In standby mode, press any button to turn on the
screen again.
While the player is in standby mode, if there is no operation for about 4 hours, the player
completely turns off automatically.
Note
You cannot operate the player when it is connected to a computer. Disconnect the USB
cable before operating the player.
After connecting to a computer with the USB cable, the resume information of the last
played song, video, photo, etc., is cleared. Reselect the desired content from the list screen.
The player consumes battery power very slightly even when it is in standby mode.
Therefore, the player might unexpectedly turn off completely, depending on the power
remaining in the battery.
Back to top
Copyright 2011 Sony Corporation
25

WALKMAN User Guide
Print
Getting Started
How to Use the Software
Music
Videos/Photos
FM Radio
Timer
Settings
Troubleshooting
Important Information
Specifications
Contents list
Top page > Getting Started > Power/Charging > Charging the battery
Charging the battery
About the battery indicator
The player’s battery is recharged while the player is connected to a running computer.
When you connect the player to your computer, use the USB cable (supplied).
Display
When charging the battery, you can check the battery charging status.
Battery charging status on the display
Status Description
Charging (*1)
Charging is completed (*1).
Blank screen The battery is not being charged (*2).
(*1) Charging time is approx. 2 hours. When charging is completed, disconnect the player from the USB
connector of your computer.
(*2) If the computer enters a power saving mode, such as the Sleep or Hibernation mode, the player’s
screen may turn off. In this case, the player consumes battery power.
Hint
Depending on the computer, changing the settings of the Sleep or Hibernation mode varies.
Refer to the manufacturer.
When you use the player for the first time, or if you have not used the player for a long time,
recharge it fully (until the battery charge indicator displays
).
About the battery indicator
The battery indicator in the information area shows the remaining battery charge.
As the battery power gets lower, the bars of the icon disappear. If [LOW BATTERY. Please
Charge.] appears, you cannot use the player. In this case, charge the battery by connecting to
26

your computer. See [Details] on battery duration.
Note
If you charge the player when it has not been used for a long period, your computer may not
recognize the player, or nothing may appear on the display. Charge the player for about 5
minutes, after which it should start operating normally again.
Charge the battery in an ambient temperature of between 5 ºC to 35 ºC (41 ºF to 95 ºF). If
you try to charge the battery in an ambient temperature outside this range, the
icon
may appear, and charging cannot be performed.
The number of times the battery can be recharged before it is used up is approximately 500
times. This number may vary, depending on the conditions under which you use the player.
The battery indicator on the display is only an estimate. For example, one section of black in
the indicator will not always indicate exactly one-fourth of the battery’s charge.
[Do not disconnect.] appears in the display while the computer accesses the player. During
this time, do not disconnect the USB cable (supplied); otherwise, data being transferred (or
data already in the player) may be damaged.
The control buttons on the player become inoperative while it is connected to a computer.
To prevent battery deterioration, charge the battery at least once every half a year or every
year.
Some USB devices connected to the computer may interfere with proper operation of the
player.
We do not guarantee battery recharging using a personally assembled/modified computer.
If the computer enters a power saving mode, such as the Sleep or Hibernation mode, while
the player is connected via the USB cable, the player’s battery will not be charged. Instead,
the player continues to draw power from the battery, discharging it.
Do not leave the player connected for extended periods to a laptop computer that is not
connected to AC power, since the player may discharge the computer’s battery.
While the player is connected to a computer, do not turn on, restart, wake up from sleep
mode, or shut down the computer. These operations may cause the player to malfunction.
Disconnect the player from the computer before performing these operations.
Heat may build up in the player while charging. This is not a malfunction.
After connecting to a computer with the USB cable, the resume information of the last
played song, video, photo, etc., is cleared. Reselect the desired content from the list screen.
Back to top
Copyright 2011 Sony Corporation
27
WALKMAN User Guide
Print
Getting Started
How to Use the Software
Music
Videos/Photos
FM Radio
Timer
Settings
Troubleshooting
Important Information
Specifications
Contents list
Top page > Getting Started > Power/Charging > About battery life
About battery life
Turn off the player manually
Longer battery life settings
Adjust data format and bit rate
By adjusting the settings or managing the power supply properly, it is possible to save battery
power for longer usage time between charges.
The following hints will yield a longer battery life.
Turn off the player manually
If you press and hold the OPTION/PWR OFF button, the player enters standby mode and the
screen turns off to save battery power. Furthermore, if standby mode continues for more than
about 4 hours, the player turns completely off automatically.
Longer battery life settings
The following settings are effective for extending the battery life of the player.
Reduce the [Brightness] setting value.
Set [Type] of [Screensaver] to [Blank].
Set [Equalizer], [Clear Stereo] and [Dynamic Normalizer] to [None] or [Off].
See [Details] for details on the effect of setting changes, default settings, and battery life
measurement conditions.
Adjust data format and bit rate
Playing time will vary, as battery charge can be affected by the format and bit rate of songs,
videos or photos that are played.
For details on charging time and usage time, see [Details].
Related Topics
Charging time
Back to top
Copyright 2011 Sony Corporation
28

WALKMAN User Guide
Print
Getting Started
How to Use the Software
Music
Videos/Photos
FM Radio
Timer
Settings
Troubleshooting
Important Information
Specifications
Contents list
Top page > Getting Started > Initial Settings > Selecting the display language [Language
Settings]
Selecting the display language [Language Settings]
You can select from a variety of languages for menus and messages.
1. From the Home menu, select [Settings] [Language Settings] desired language
setting.
Language Messages and menus are displayed in
[Deutsch] German
[English] English
[Español] Spanish
[Français] French
[Italiano] Italian
[Polski] Polish
[Português] Portuguese
[Русский] Russian
[Türkçe] Turkish
[
] Korean
[
] Simplified Chinese
[
] Traditional Chinese
Related Topics
How to use the Home menu
Back to top
Copyright 2011 Sony Corporation
29
WALKMAN User Guide
Print
Getting Started
How to Use the Software
Music
Videos/Photos
FM Radio
Timer
Settings
Troubleshooting
Important Information
Specifications
Contents list
Top page > Getting Started > Initial Settings > Setting the current time [Set Date-Time]
Setting the current time [Set Date-Time]
To display the current time
You can set the date and time.
1. From the Home menu, select [Settings] [Common Settings] [Set Date-Time].
2. Press the
/ button to select the year, and then press the / button to change
the value.
3. As in step 2, adjust the settings for month, date, hour, and minutes, and then press the
button to confirm.
To display the current time
Select [Clock Display] on the Home menu.
Press the OPTION/PWR OFF button on the Home menu or the playback screen, and select
[Clock Display] from the option menu.
Hint
You can select the date format from [YYYY/MM/DD], [MM/DD/YYYY], or [DD/MM/YYYY]
[Details]. Furthermore, you can select the time format from either [12-hour] or [24-hour]
[Details].
Note
If battery power is used up because, for example, the player has not been used for a long
time, your settings for date and time may be lost, and “-” will be displayed instead of the
current date and time.
The clock may gain or lose up to 60 seconds per month. In this case, set the clock again.
Related Topics
How to use the Home menu
Back to top
Copyright 2011 Sony Corporation
30
WALKMAN User Guide
Print
Getting Started
How to Use the Software
Music
Videos/Photos
FM Radio
Timer
Settings
Troubleshooting
Important Information
Specifications
Contents list
Top page > Getting Started > Parts and Controls > Parts and controls
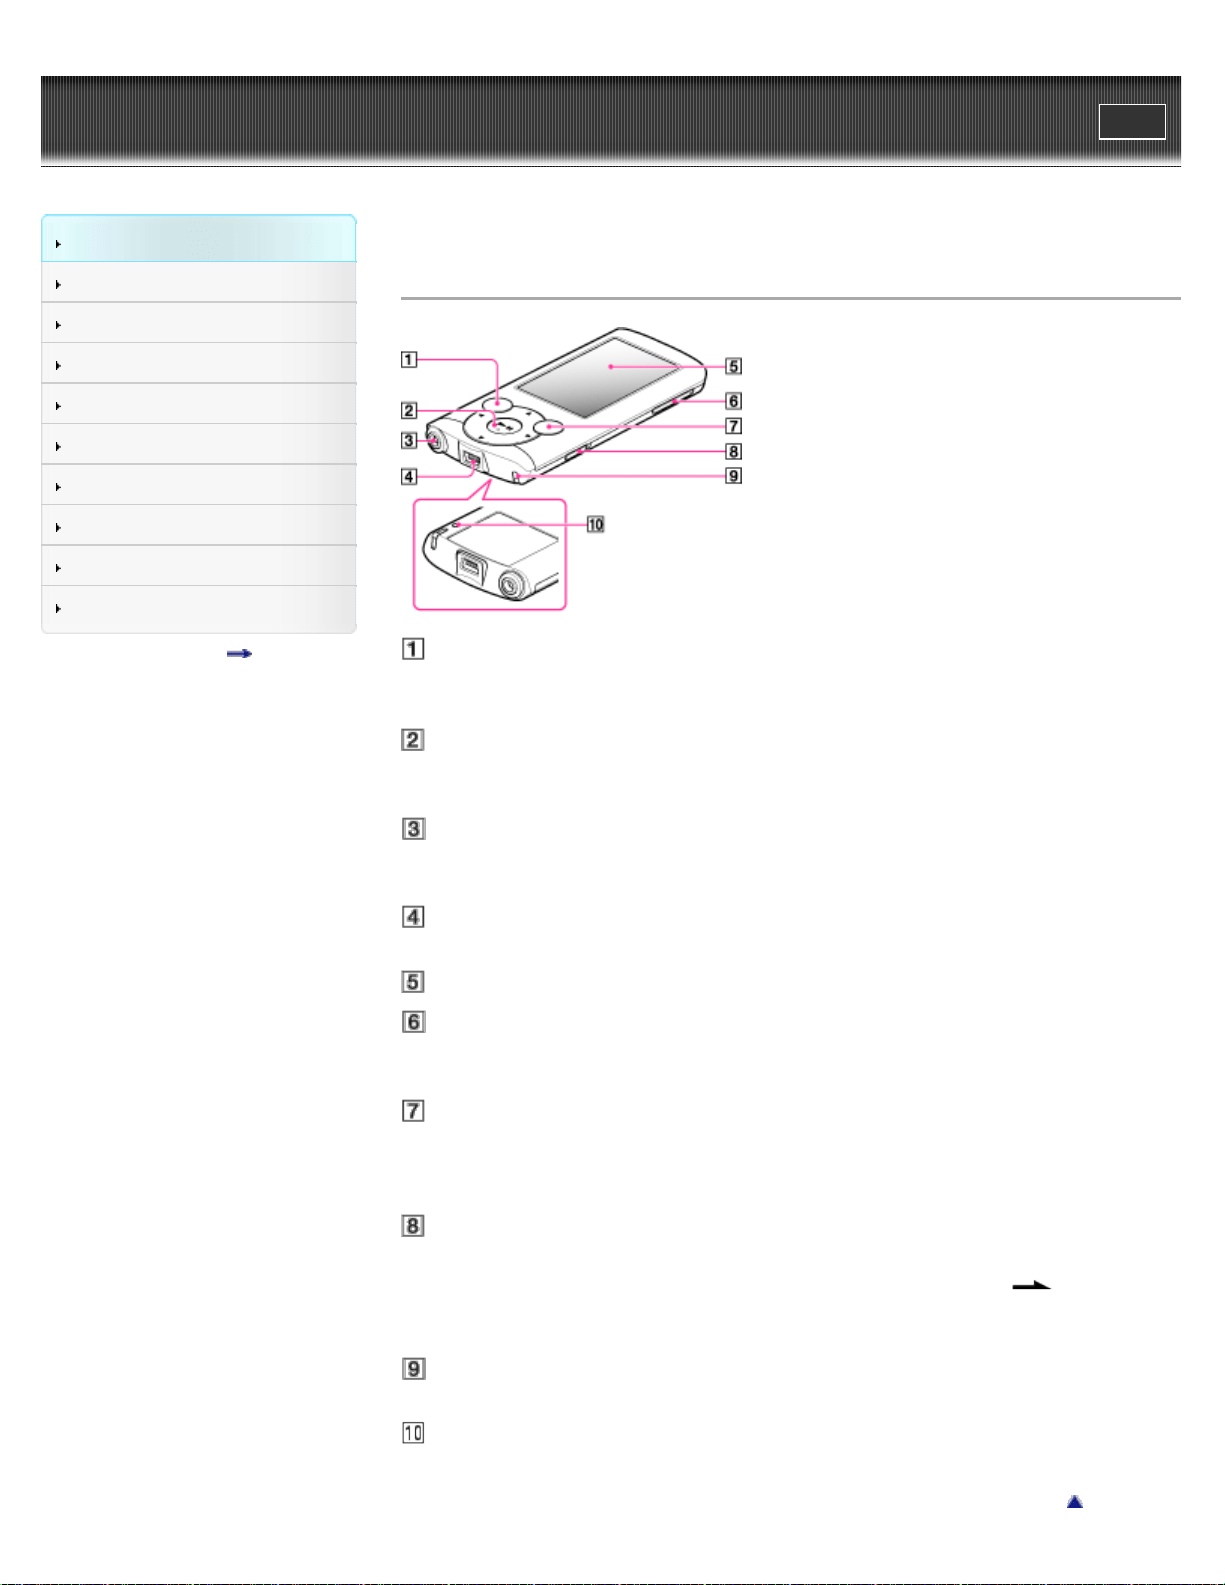
Parts and controls
BACK/HOME button [Details]
Press to go up one list screen level, or to return to the previous menu.
Press and hold the BACK/HOME button to display the Home menu.
5-way button (*1) [Details]
Press to start playback or navigate through the player’s on-screen menus.
(*1) There is a tactile dot. Use it to help with button operations.
Headphone jack
Insert the headphone plug until it clicks into place. If the headphones are connected
improperly, the sound from the headphones will be impaired.
USB connector
Connect the USB cable (supplied).
Display
VOL + (*1)/– button
Press to adjust the volume.
(*1) There is a tactile dot. Use it to help with button operations.
OPTION/PWR OFF button [Details]
Press to display the option menu.
If you press and hold the OPTION/PWR OFF button, the screen turns off and the player
enters standby mode [Details].
HOLD switch
You can protect the player against accidental operation during transportation by setting the
HOLD switch. By sliding the HOLD switch in the direction of the arrow
, all operation
buttons are disabled. If you slide the HOLD switch in the opposite position, the HOLD
function is released.
Strap hole
This is used to attach a strap (not supplied).
RESET button [Details]
Press the RESET button with a small pin, etc., to reset the player.
Back to top
31

Copyright 2011 Sony Corporation
32
WALKMAN User Guide
Print
Getting Started
How to Use the Software
Music
Videos/Photos
FM Radio
Timer
Settings
Troubleshooting
Important Information
Specifications
Contents list
Top page > Getting Started > About the Software > About the software
About the software
Bundled software
Compatible software
You can use several software shown below to manage music, videos and photos on your
computer or transfer them to the player.
Bundled software
Content Transfer
Content Transfer can transfer music, videos or photos from a computer to the player by a simple
drag-and-drop operation. You can use Windows Explorer or iTunes, etc., to drag-and-drop data
to Content Transfer. Content Transfer can also convert a video file of a format not supported by
the player into a playable format. For details on operation, refer to the Help of the software.
Transferable files: Music (MP3, WMA, AAC, WAV), Photo (JPEG), Video (WMV (*1))
(*1) Some WMV files cannot be played back after being transferred by Content Transfer. If you retransfer
them using Windows Media Player, they may become playable.
WALKMAN Guide
The User Guide (this manual) and a useful list of links are available to you.
Compatible software
Windows Media Player
Windows Media Player can import audio data from CDs and transfer data to the player.
Transferable files: Music (MP3, WMA), Video (WMV), Photo (JPEG)
For details on operation, refer to the Help of the software, or visit the following website.
http://support.microsoft.com/
Related Topics
Importing music from CDs using Windows Media Player
Transferring music using Windows Media Player
Transferring music using Content Transfer
Transferring videos/photos using Content Transfer
Back to top
Copyright 2011 Sony Corporation
33
WALKMAN User Guide
Print
Getting Started
How to Use the Software
Music
Videos/Photos
FM Radio
Timer
Settings
Troubleshooting
Important Information
Specifications
Contents list
Top page > Getting Started > Home Menu/Option Menu > About the Home menu
About the Home menu
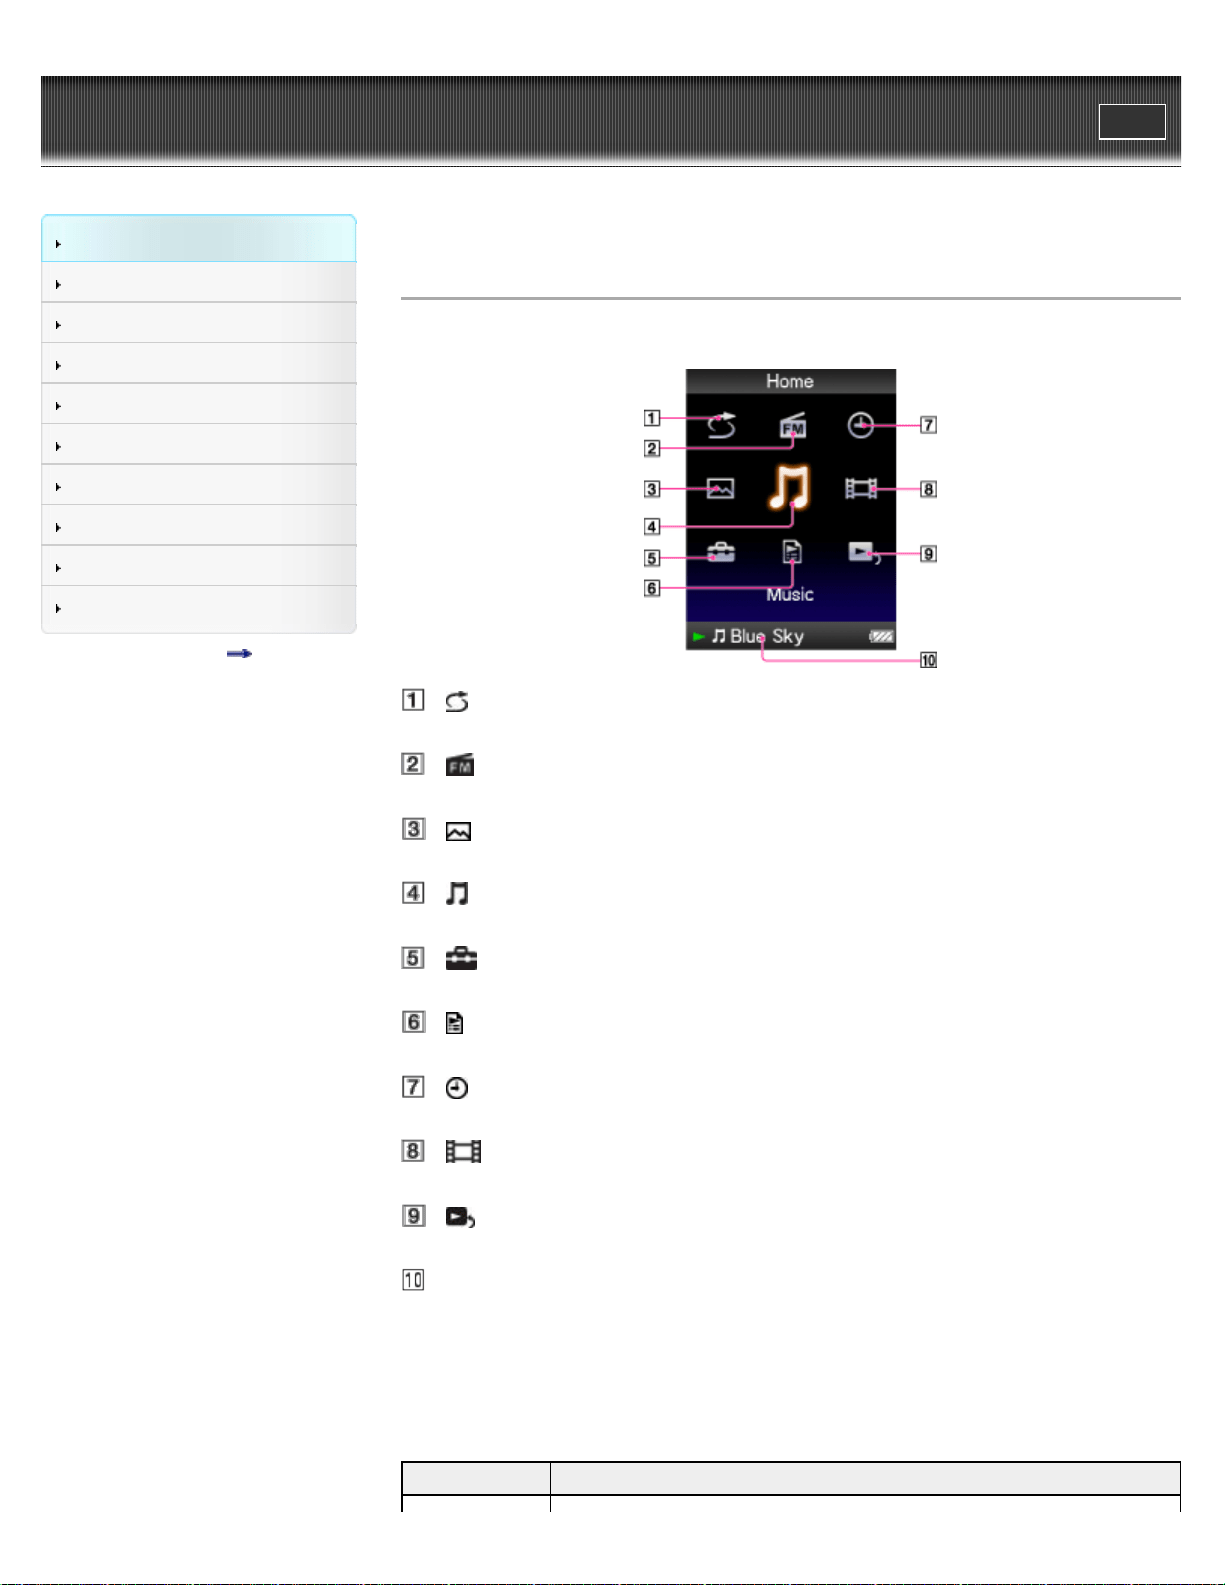
The following list shows the items of the Home menu.
[Shuffle All] [Details]
Listen to all the songs stored on the player in random order.
[FM Radio] [Details]
Listen to FM radio broadcasting.
[Photos] [Details]
View photos transferred to the player.
[Music] [Details]
Listen to songs transferred to the player.
[Settings] [Details]
Set up the player and its applications.
[Playlists] [Details]
Listen to songs in the playlists.
[Clock Display] [Details]
Display the current time.
[Videos] [Details]
Watch videos transferred to the player.
[Now Playing]
Display the playback or display screen of the currently playing content.
Information area [Details]
About the information area
The icons shown in the table below appear in the information area. The icons vary according to
the playback status, setting or screen.
For details about the icons, see each reference page.
Icons Description
34
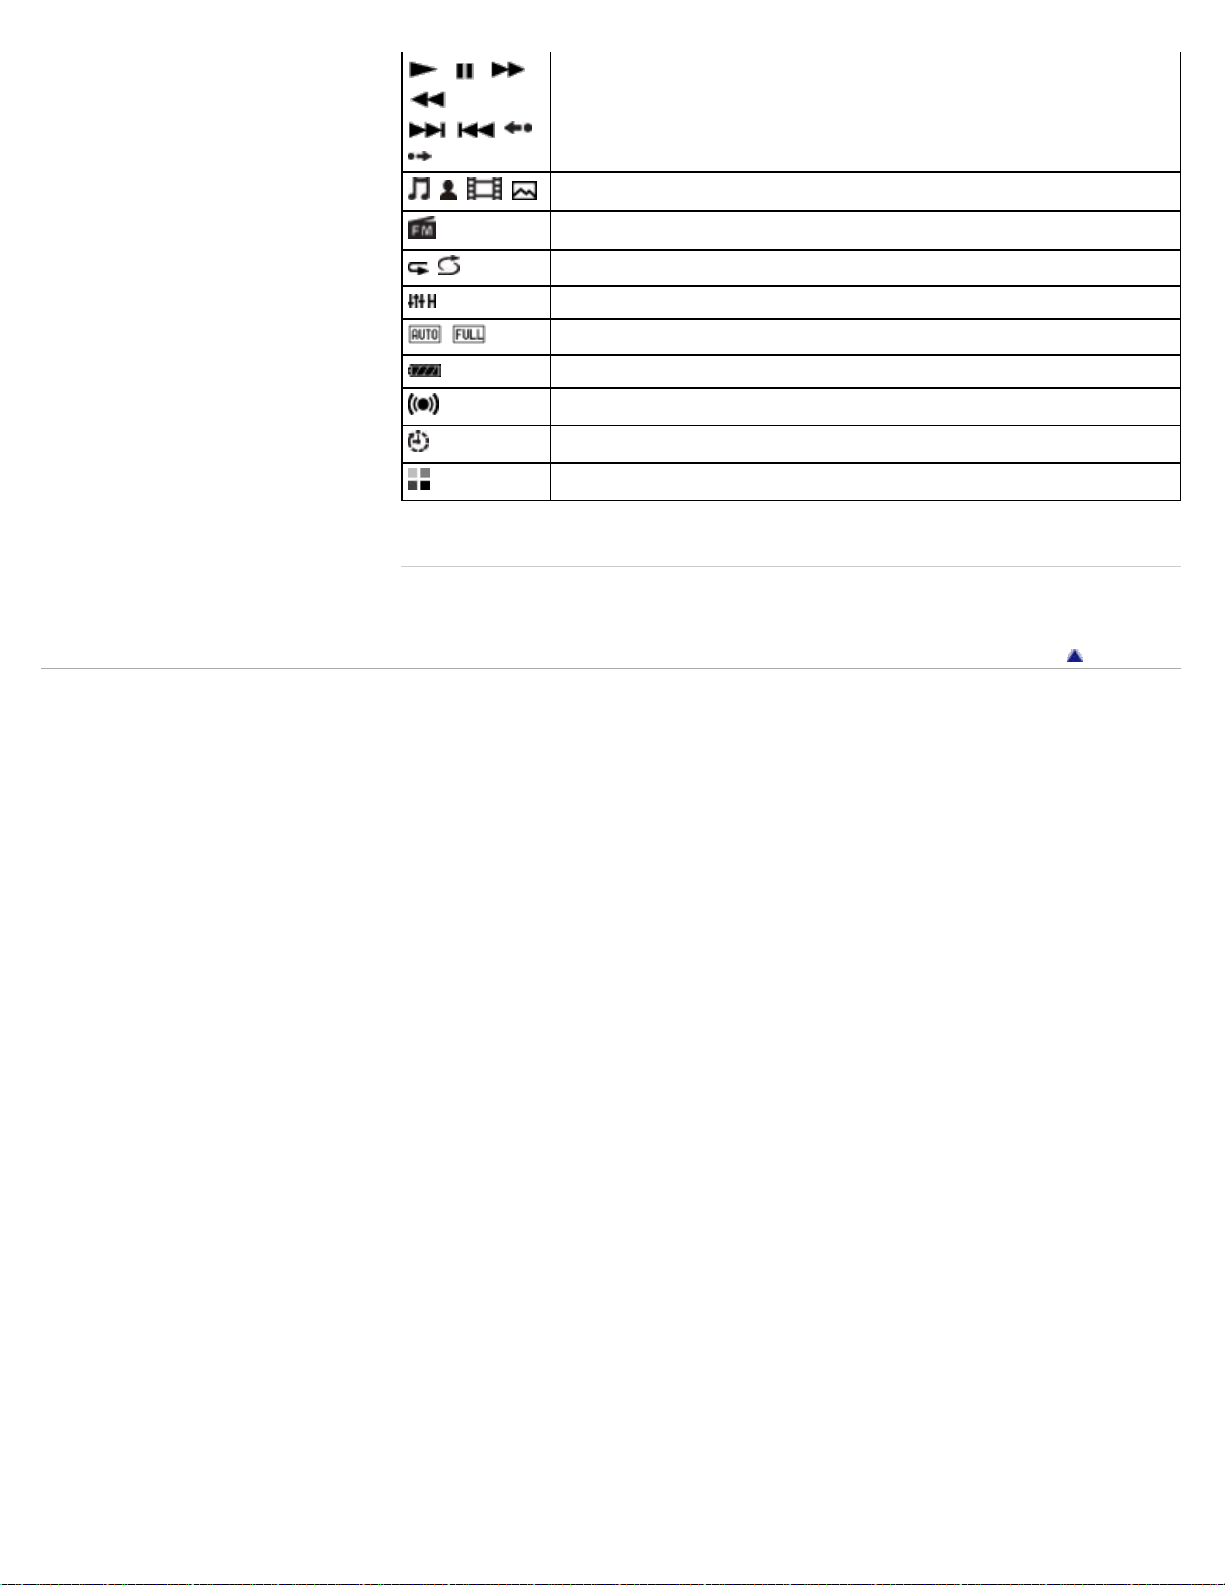
, , ,
,
, , ,
, etc.
Music playback status [Details], video playback status [Details], and
playback status of a slide show [Details]
, , ,
Song name, artist name, video title, or photo title
FM radio
, , etc.
Play mode [Details]
, etc. Equalizer [Details]
,
Zoom setting ([Auto] or [Full]) [Details]
Remaining battery power [Details]
Alarm timer indication [Details]
Sleep timer indication [Details]
Busy status indication
Related Topics
How to use the Home menu
Back to top
Copyright 2011 Sony Corporation
35
WALKMAN User Guide
Print
Getting Started
How to Use the Software
Music
Videos/Photos
FM Radio
Timer
Settings
Troubleshooting
Important Information
Specifications
Contents list
Top page > Getting Started > Home Menu/Option Menu > How to use the Home menu
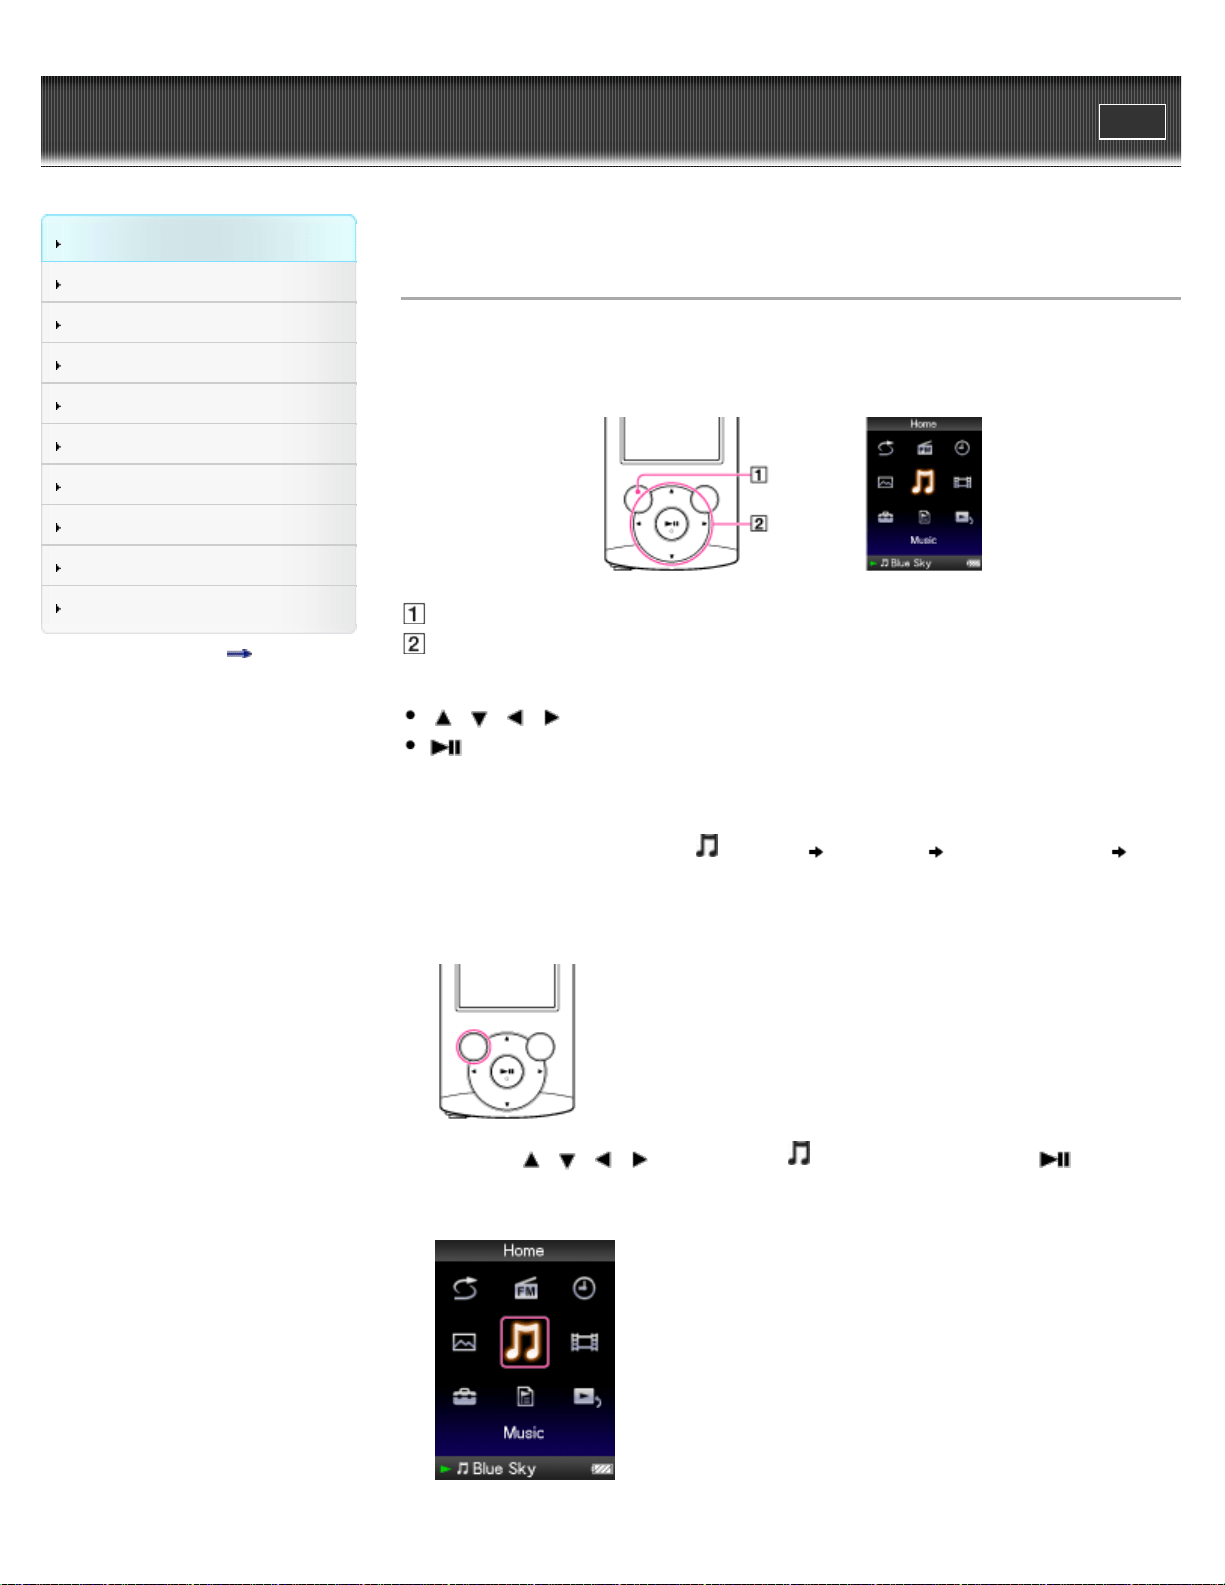
How to use the Home menu
The Home menu is the starting point of each application, such as searching for songs, changing
settings, etc.
You can display the Home menu by pressing and holding the BACK/HOME button of the player.
BACK/HOME button
5-way button
From the Home menu, you can select the desired item on the screen by using the 5-way button.
/ / / button: Selects an item.
button: Confirms an item.
In this manual, operating instructions from the Home menu are described as below.
Example:
From the Home menu, select
[Music] [Album] desired album
desired song.
1. Press and hold the BACK/HOME button.
The Home menu appears.
2. Press the / / / button to select [Music], and then press the button to
confirm.
The [Music] screen appears.
36

3. Press the / / / button to select [Album], and then press the button to
confirm.
The album list appears.
4. Press the / / / button to select an album, and then press the button to
confirm.
The song list for the selected album appears.
5. Press the / / / button to select a song, and then press the button to
confirm.
The music playback screen appears and playback begins.
To return to the Home menu during operation
Press and hold the BACK/HOME button.
To return to the previous screen during operation
Press the BACK/HOME button.
Related Topics
How to use the option menu
About the Home menu
Back to top
Copyright 2011 Sony Corporation
37
WALKMAN User Guide
Print
Getting Started
How to Use the Software
Music
Videos/Photos
FM Radio
Timer
Settings
Troubleshooting
Important Information
Specifications
Contents list
Top page > Getting Started > Home Menu/Option Menu > How to use the option menu
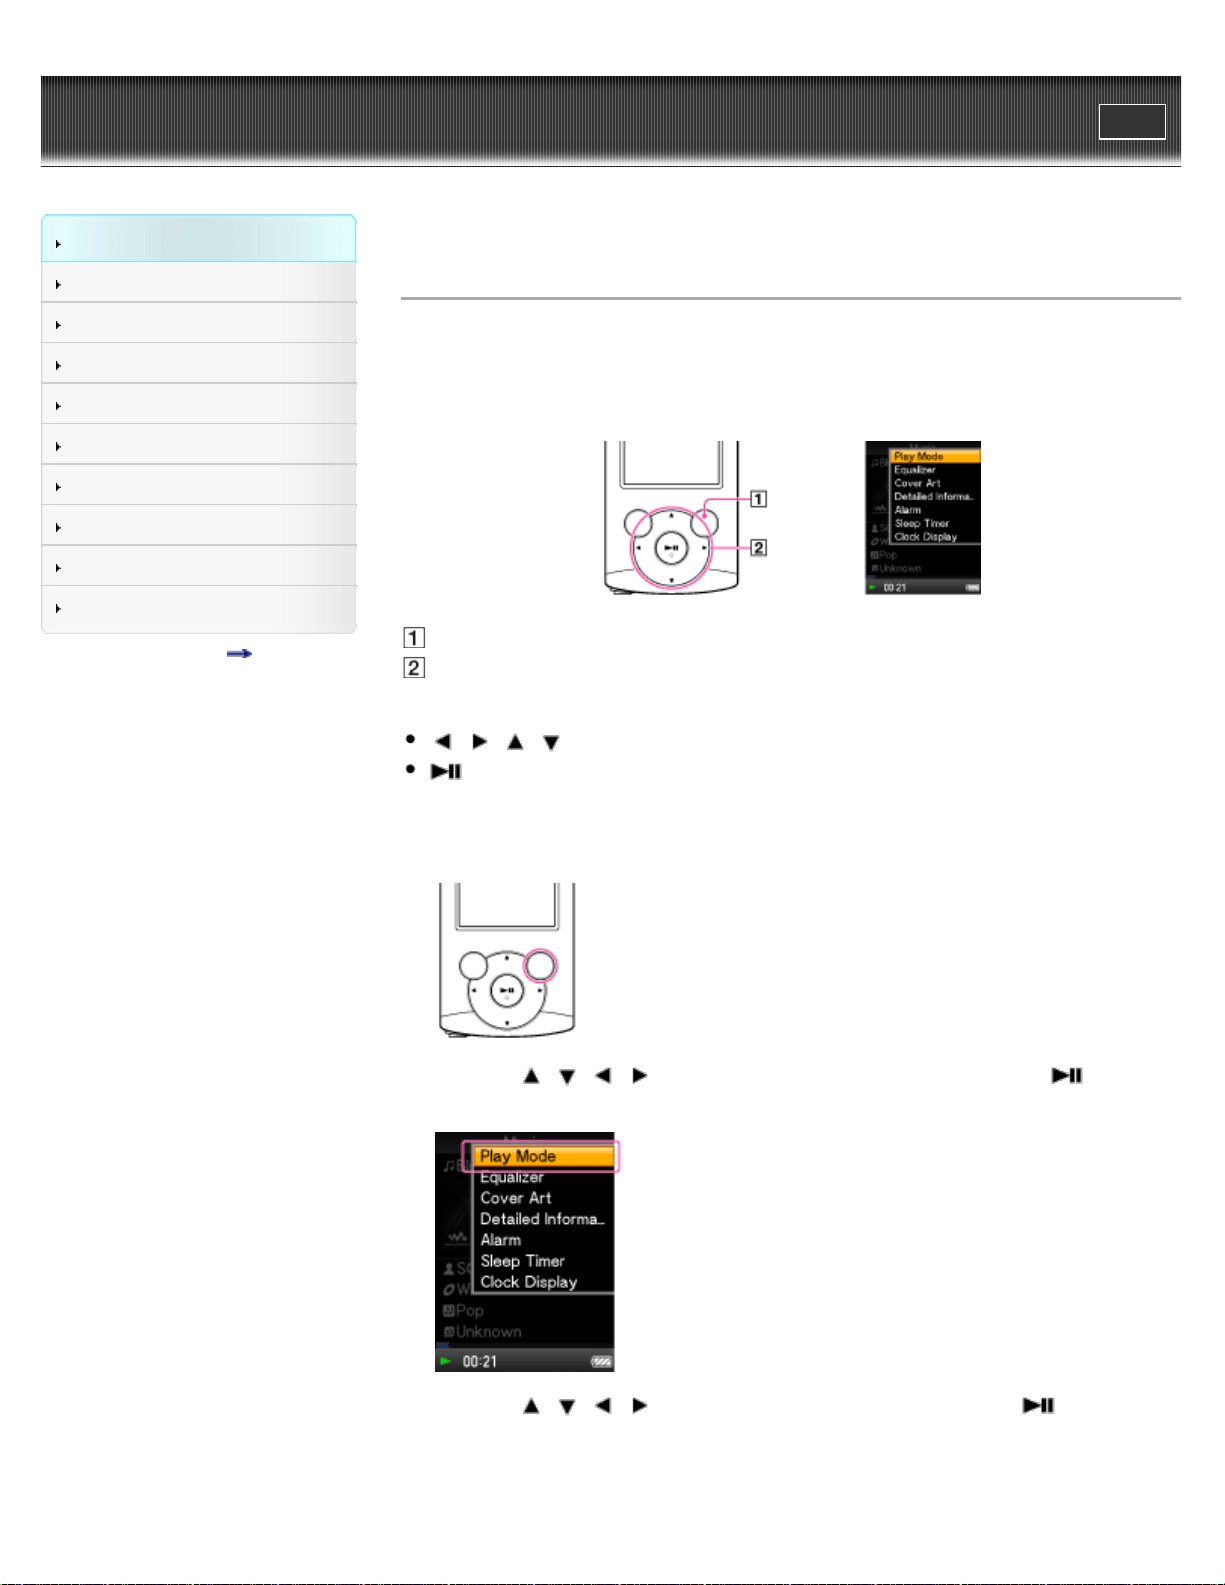
How to use the option menu
The option menu items vary depending on the function, allowing you to change the settings of
each application.
You can display the option menu by pressing the OPTION/PWR OFF button. Press the
OPTION/PWR OFF button once more to dismiss the option menu.
OPTION/PWR OFF button
5-way button
From the option menu, you can select the desired item on the screen by using the 5-way button.
/ / / button: Selects a menu item.
button: Confirms an item.
For example, the operations for setting [Play Mode] option to [Shuffle] are shown below.
1. From the music playback screen, press the OPTION/PWR OFF button.
The option menu appears.
2. Press the / / / button to select [Play Mode], and then press the button to
confirm.
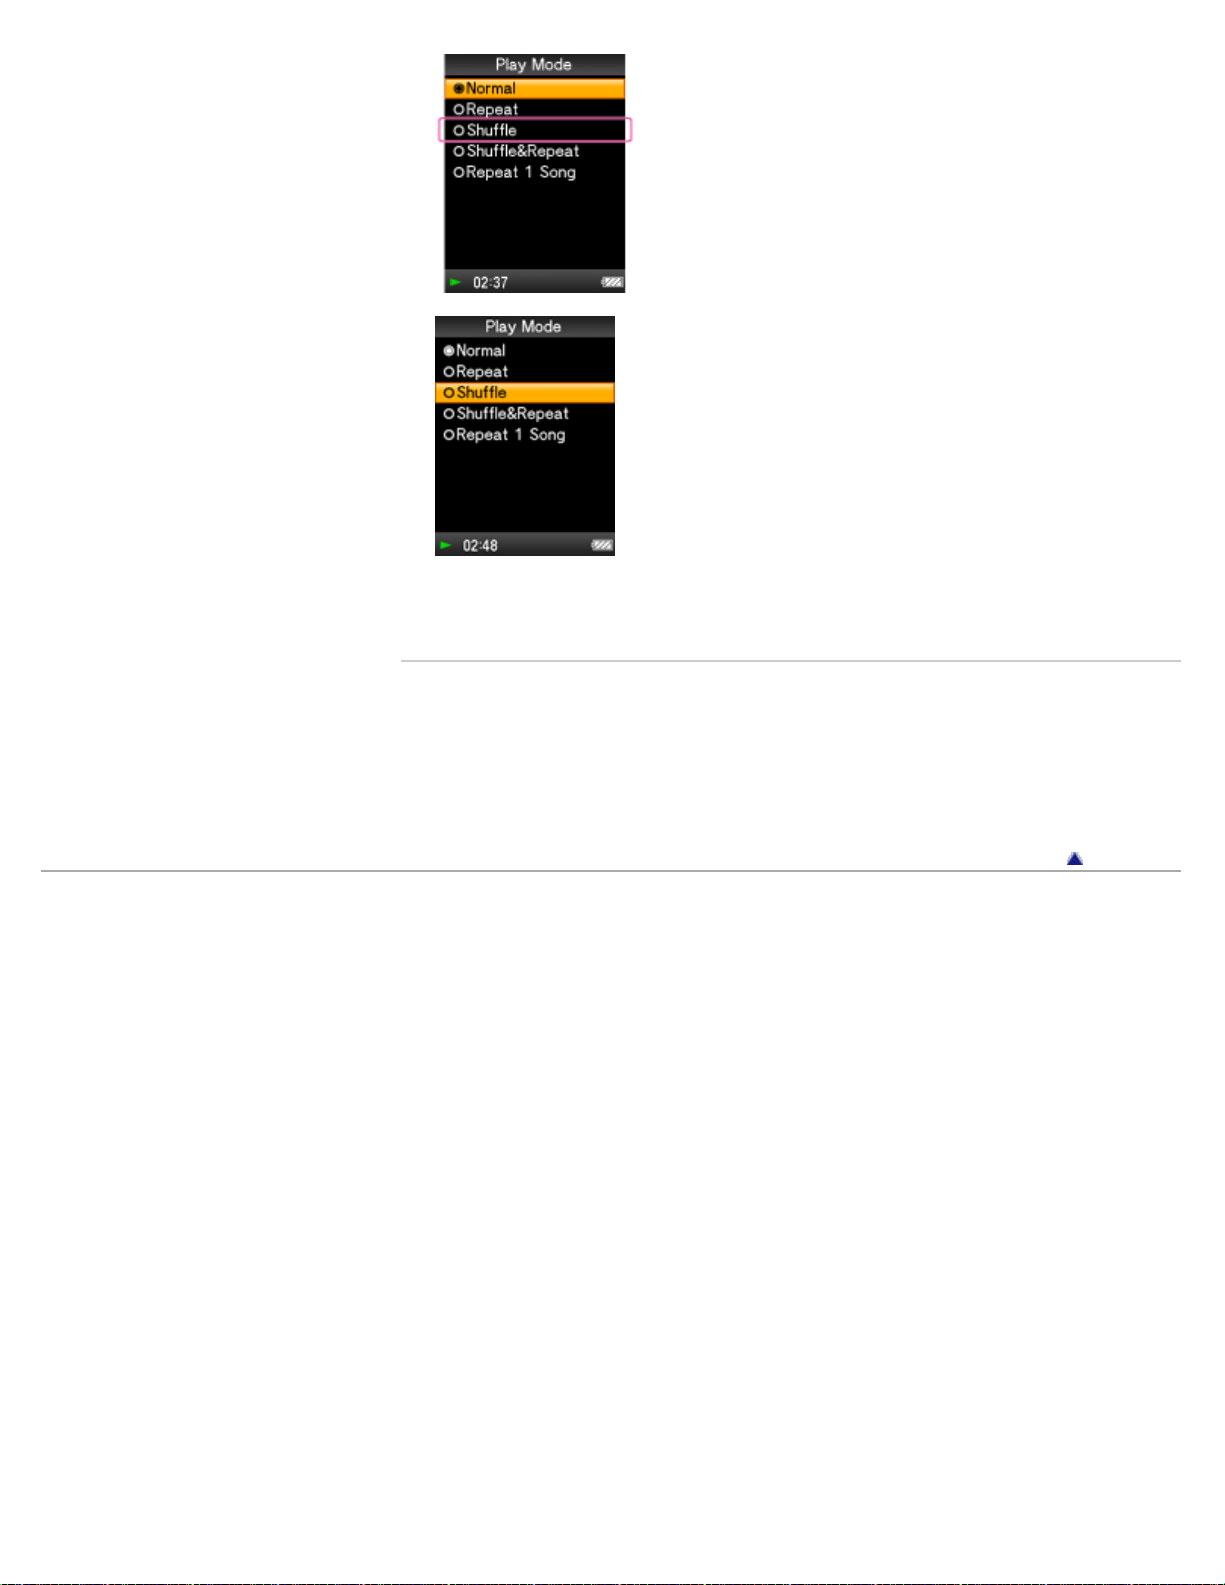
3. Press the / / / button to select [Shuffle], and then press the button to
confirm.
The play mode changes to [Shuffle].
38

WALKMAN User Guide
Print
Getting Started
How to Use the Software
Music
Videos/Photos
FM Radio
Timer
Settings
Troubleshooting
Important Information
Specifications
Contents list
Top page > How to Use the Software > Windows Media Player > Importing music from CDs
using Windows Media Player
Importing music from CDs using Windows Media Player
You can use Windows Media Player to copy (rip) music from your CDs. Follow these instructions
to rip songs from a CD to your computer.
Hint
For details about usage or support on Windows Media Player, refer to Windows Media
Player information from the following web site:
http://support.microsoft.com/
1. Insert an audio CD.
2. Start up Windows Media Player, and then click the [Rip] tab at the top of the window.
When connected to the Internet, Windows Media Player obtains CD information (CD title,
song name or artist name, etc.), and displays it in the window.
3. Click [Start Rip].
Windows Media Player begins to import the CD.
The imported songs are indicated as [Ripped to library]. Wait until all songs have been
imported.
Hint
Imported songs are stored in the [My Music] folder (Windows XP/Windows 7) or [Music]
folder (Windows Vista) of the computer. Click the [Library] tab of the Windows Media Player
window to find them.
Windows Media Player obtains the CD information from a database on the Internet.
However, depending on the CD, information may not be available in the database. If your
CDs’ information is missing, you can add it after importing. For information about adding and
editing CD information, refer to the Help of Windows Media Player.
If you want a song not to be imported, uncheck the checkbox to the left of the song title.
Note
Imported songs are limited to private use only. Use of a song beyond this limitation requires
permission of the copyright holders.
Some files may not be played back on the player due to copyright protection.
The player cannot play the audio files that use the digital rights management technology for
Windows Media (“WM-DRM”). If the audio files cannot be transferred, check on Windows
Media Player information about DRM from the following web site:
http://support.microsoft.com/
40

WALKMAN User Guide
Print
Getting Started
How to Use the Software
Music
Videos/Photos
FM Radio
Timer
Settings
Troubleshooting
Important Information
Specifications
Contents list
Top page > How to Use the Software > Windows Media Player > Transferring music using
Windows Media Player
Transferring music using Windows Media Player
You can use Windows Media Player to transfer music from your computer to the player.
Note
Do not disconnect the USB cable while [Do not disconnect.] appears on the player, as the
data being transferred may be damaged.
If Content Transfer starts automatically after connecting the player to your computer using
the USB cable (supplied), close or ignore Content Transfer as Content Transfer need not be
used. For details on setting automatic start of Content Transfer, refer to the Help of Content
Transfer.
Hint
For details about usage or support on Windows Media Player, refer to Windows Media
Player information from the following web site:
http://support.microsoft.com/
1. Start up Windows Media Player, and then connect the player to your computer using the
USB cable (supplied).
Insert the connector of the USB cable into the player.
The [Device Setup] window appears.
2. Click [Cancel].
Close the auto play window, if it appears, by clicking [Cancel] or the Close icon.
If you click [Finish] instead of [Cancel], the entire library data of Windows Media Player is
automatically copied to the player. If the library data size is larger than the available
storage space on the player, the copy process will not start.
You can open the [Device Setup] window at any time. To open it, right-click [WALKMAN]
on the left side of the Windows Media Player window, and then click [Set Up Sync].
3. Click the [Sync] tab on the Windows Media Player window.
4. Drag-and-drop the desired songs to the Sync List on the right side of the window.
The songs are added to the Sync List.
5. Click [Start Sync] to start synchronization.
When synchronization is complete, a message confirming you can disconnect the player
appears on the Sync List. After completion, close Windows Media Player, and disconnect the
player from the computer.
42

Note
Some files may not be played back on the player due to copyright protection.
The player cannot play the audio files that use the digital rights management technology for
Windows Media (“WM-DRM”). If the audio files cannot be transferred, check on Windows
Media Player information about DRM from the following web site:
http://support.microsoft.com/
Related Topics
About the software
Importing music from CDs using Windows Media Player
Transferring music using Content Transfer
Transferring music using Windows Explorer
Playing music
Back to top
Copyright 2011 Sony Corporation
43
WALKMAN User Guide
Print
Getting Started
How to Use the Software
Music
Videos/Photos
FM Radio
Timer
Settings
Troubleshooting
Important Information
Specifications
Contents list
Top page > How to Use the Software > Content Transfer > Transferring music using Content
Transfer
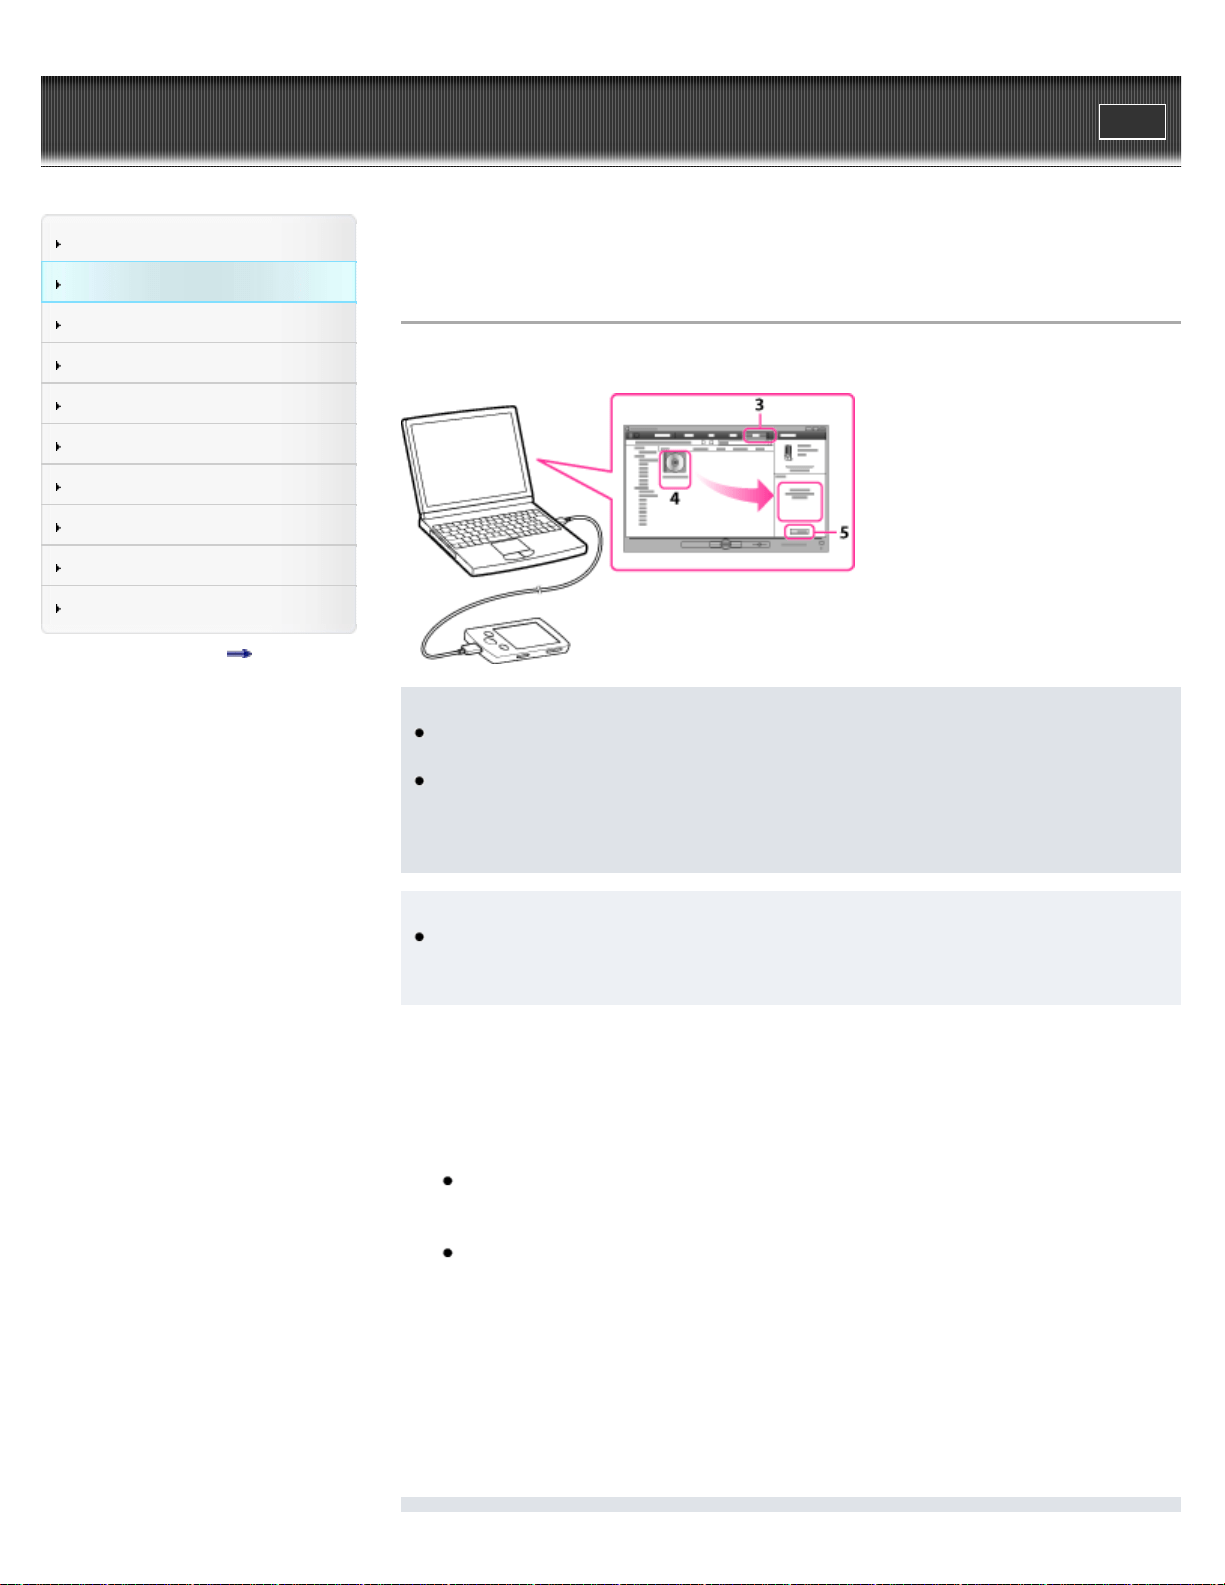
Transferring music using Content Transfer
If you have already managed music with iTunes, etc., you can transfer them to the player using
Content Transfer. You can use iTunes, etc., to drag-and-drop music to Content Transfer.
Note
Do not disconnect the USB cable while [Do not disconnect.] appears on the player, as the
data being transferred may be damaged.
Content Transfer cannot be used for Windows Media Player contents.
Contents with copyright protection cannot be transferred.
Content Transfer supports data transfer from iTunes 10.0 to the player. For details on
restrictions on transferring songs from iTunes, visit the customer support Web sites [Details].
1. Connect the player to your computer using the USB cable (supplied).
Insert the connector of the USB cable into the player.
Content Transfer starts automatically.
For details on setting automatic start and general operation of Content Transfer, refer to
the Help of Content Transfer.
You can also click [All programs] in the [start] menu, and then [Content Transfer] -
[Content Transfer] to start the software.
2. Start up iTunes, etc.
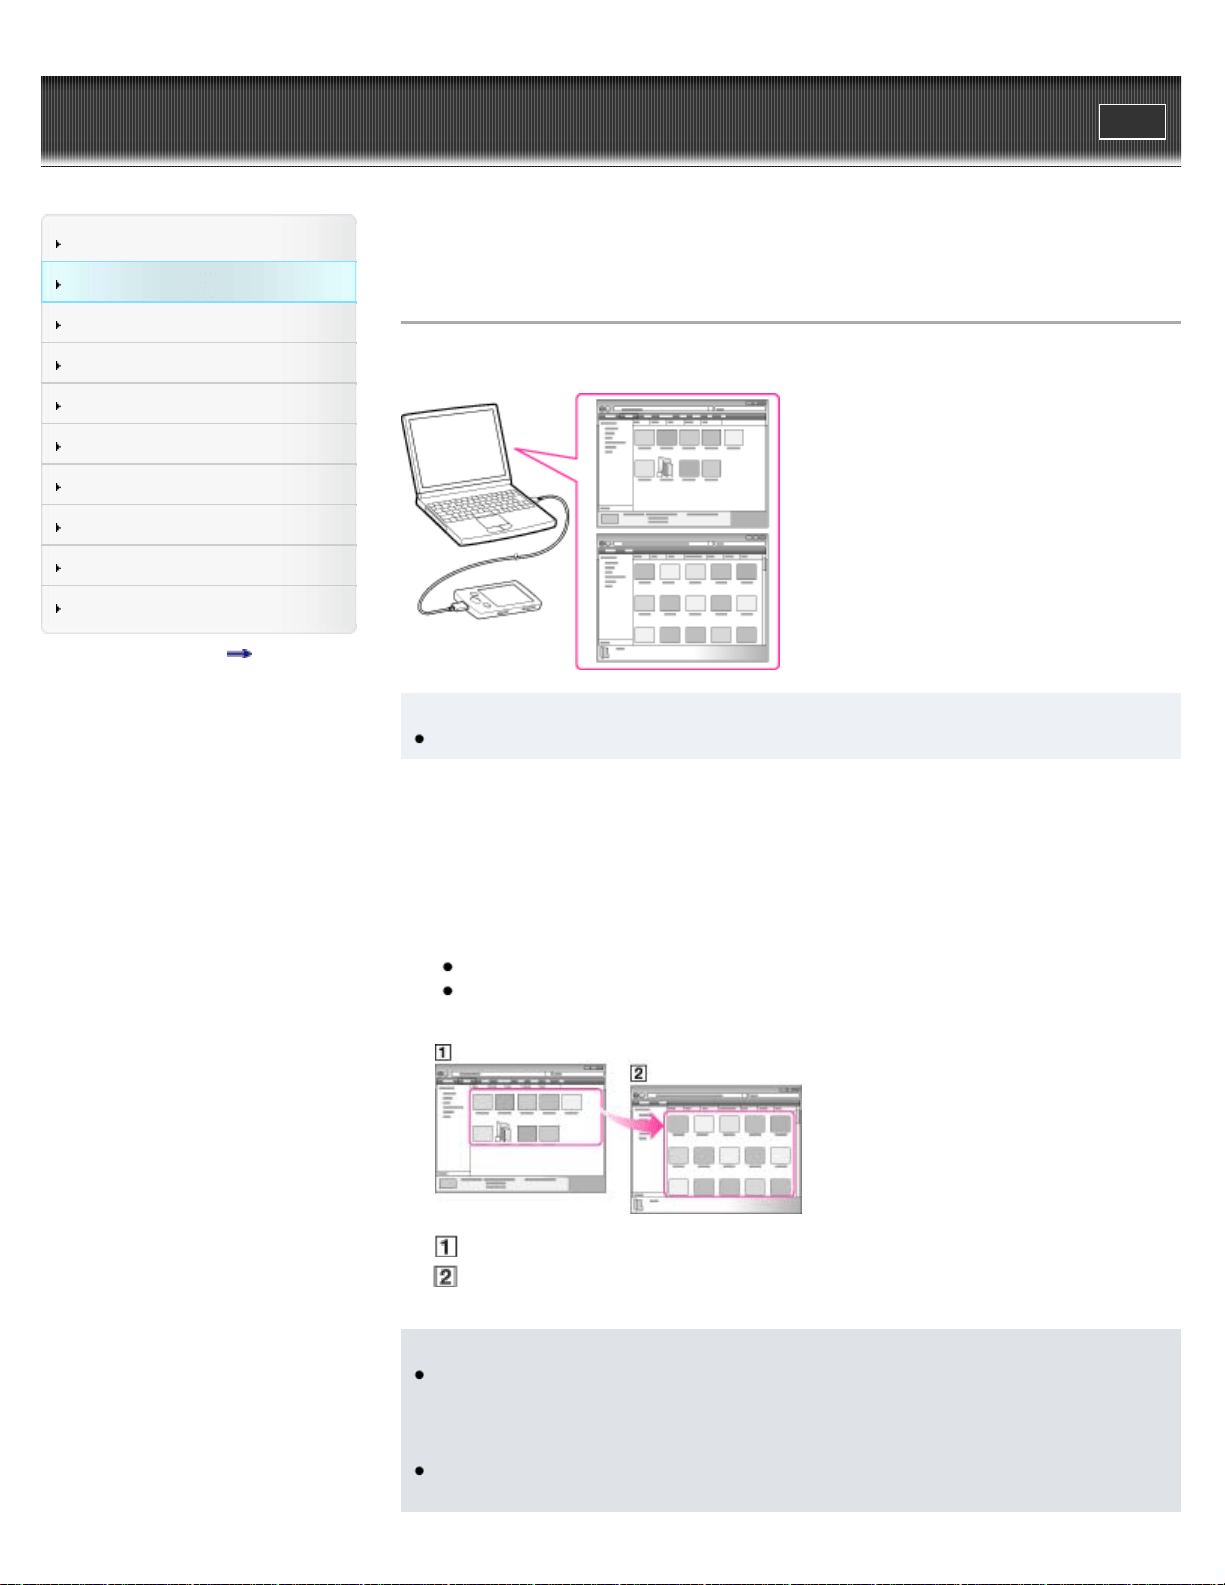
3. Select the desired songs from iTunes, etc. (
), and drag-and-drop them to Content
Transfer (
).
Content Transfer recognizes the type of data by filename extension, and sends it to the
appropriate folder of the player.
Related Topics
About the software
Transferring videos/photos using Content Transfer
44

WALKMAN User Guide
Print
Getting Started
How to Use the Software
Music
Videos/Photos
FM Radio
Timer
Settings
Troubleshooting
Important Information
Specifications
Contents list
Top page > How to Use the Software > Content Transfer > Transferring videos/photos using
Content Transfer
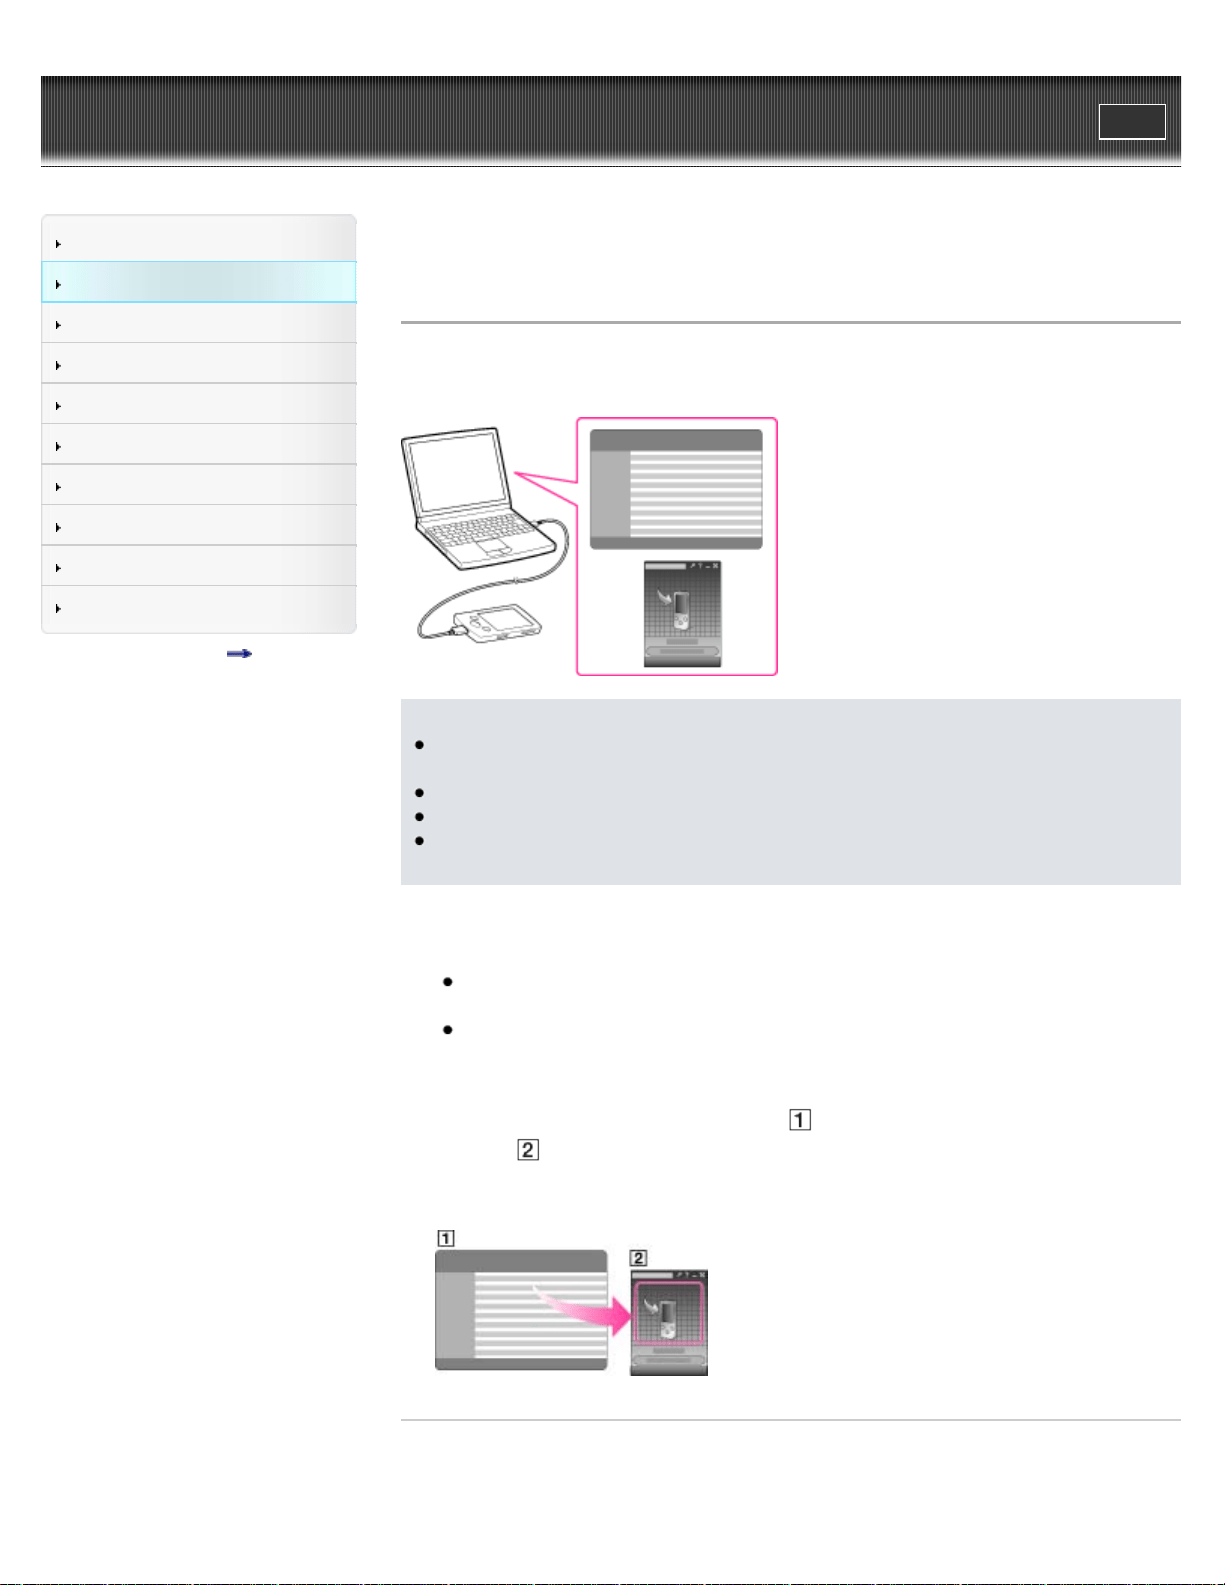
Transferring videos/photos using Content Transfer
You can transfer videos/photos stored on your computer to the player using Content Transfer.
You can transfer videos/photos by drag-and-drop of the desired videos/photos from Windows
Explorer to Content Transfer.
Note
Do not disconnect the USB cable while [Do not disconnect.] appears on the player, as the
data being transferred or the data stored in the player may be damaged.
Contents with copyright protection cannot be transferred.
1. Connect the player to your computer using the USB cable (supplied).
Insert the connector of the USB cable into the player.
Content Transfer starts automatically.
For details on setting automatic start and general operation of Content Transfer, refer to
the Help of Content Transfer.
You can also click [All programs] in the [start] menu, and then [Content Transfer] -
[Content Transfer] to start the software.
2. Select the desired videos/photos from Windows Explorer (
), and drag-and-drop them to
Content Transfer (
).
Content Transfer recognizes the type of data by filename extension, and sends it to the
appropriate folder of the player.
Related Topics
About the software
Transferring music using Content Transfer
Transferring videos/photos using Windows Explorer
Watching videos [Videos]
46

WALKMAN User Guide
Print
Getting Started
How to Use the Software
Music
Videos/Photos
FM Radio
Timer
Settings
Troubleshooting
Important Information
Specifications
Contents list
Top page > How to Use the Software > Windows Explorer (Drag-and-Drop) > Transferring
music using Windows Explorer
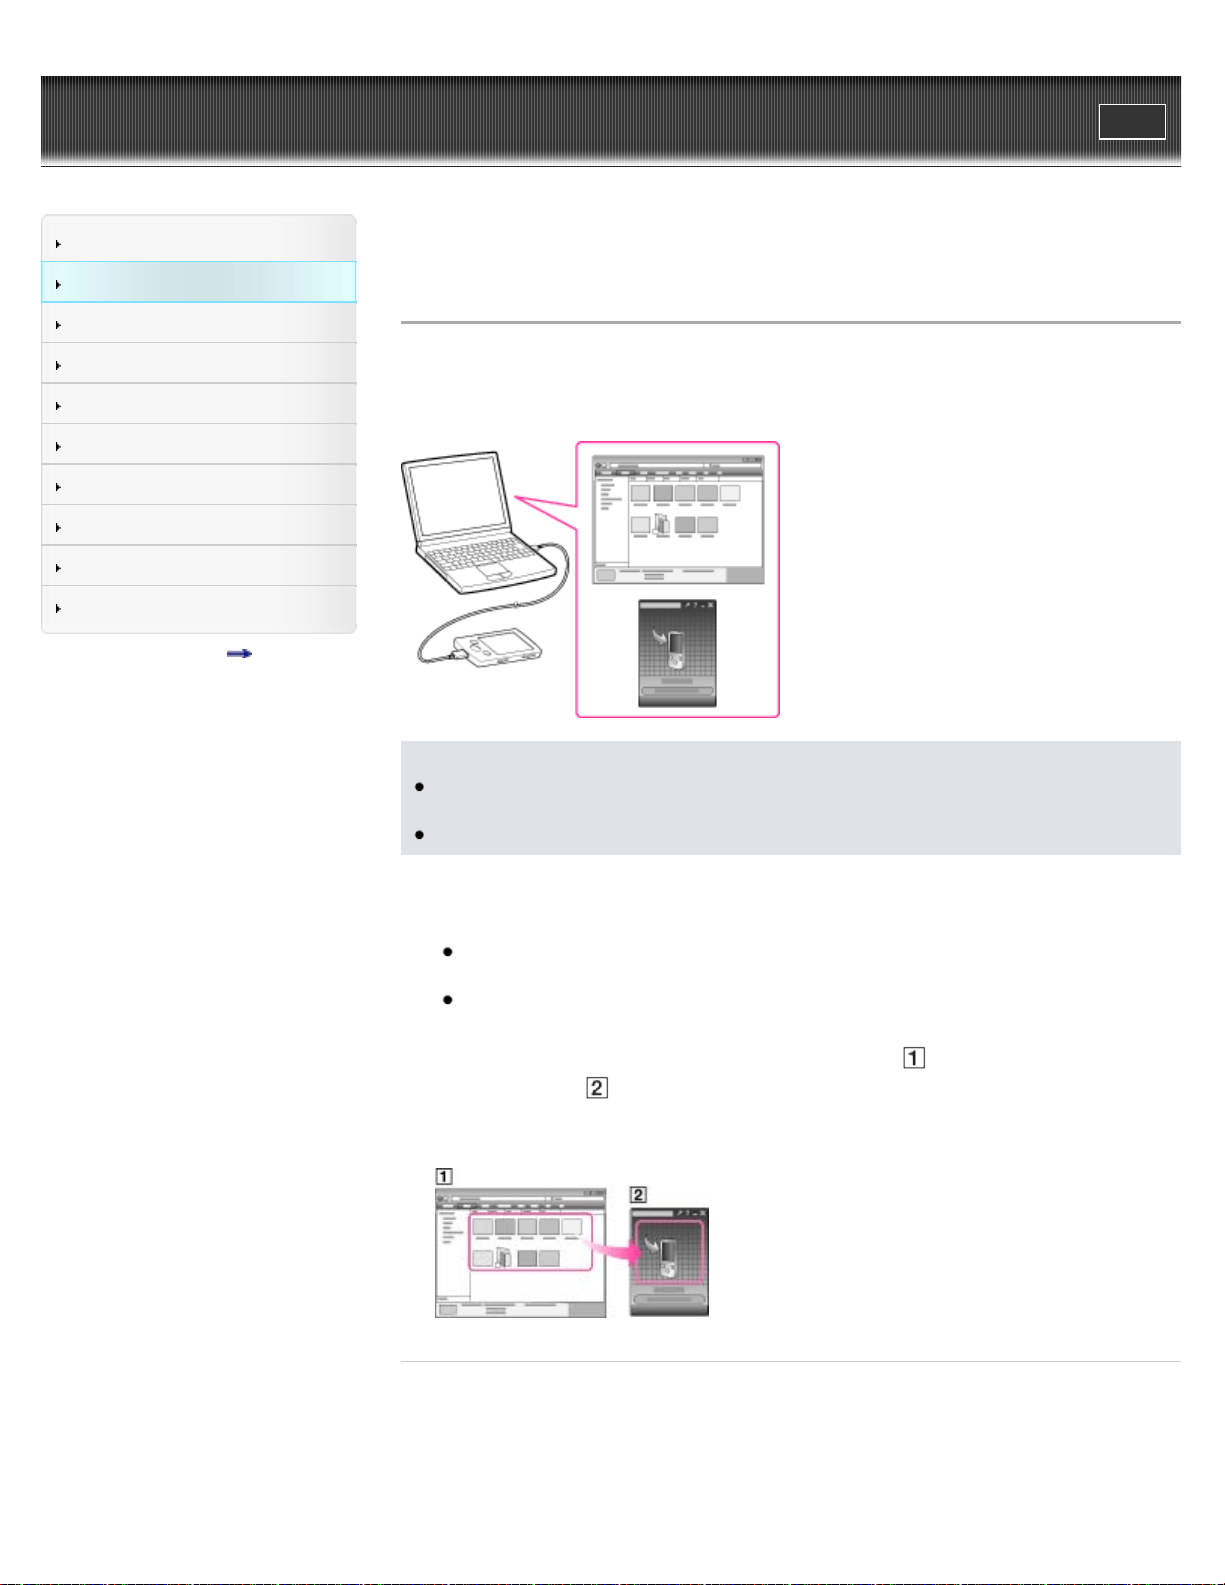
Transferring music using Windows Explorer
You can directly transfer data by drag-and-drop using Windows Explorer on your computer.
1. Connect the player to your computer using the USB cable (supplied).
Insert the connector of the USB cable into the player.
2. Click [start] – [My Computer] or [Computer] – [WALKMAN] – [Storage Media], and then
select the [MUSIC] folder.
Data hierarchy may differ, depending on your computer environment.
3. Drag-and-drop files or folders (
) into the [MUSIC] folder ( ), or one of its subfolders.
Note
Do not disconnect the USB cable while [Do not disconnect.] appears on the player.
Otherwise, data being transferred or stored on the player may be damaged. If the player is
disconnected while files are being transferred, unnecessary files may be left in the player. In
this case, transfer usable files back to the computer and format the player [Details].
Do not change folder names or delete the [MUSIC], [MP_ROOT], [MPE_ROOT], [VIDEO],
[PICTURE] and [PICTURES] folders.
Do not change folder or file names directly under the [MP_ROOT] and [MPE_ROOT]
folders. Otherwise, they will not be displayed on the player.
Some files may not be played back on the player due to copyright protection.
If Content Transfer starts automatically after connecting the player to your computer using
the USB cable (supplied), close or ignore Content Transfer as Content Transfer need not be
used. For details on setting automatic start of Content Transfer, refer to the Help of Content
Transfer.
Related Topics
48

WALKMAN User Guide
Print
Getting Started
How to Use the Software
Music
Videos/Photos
FM Radio
Timer
Settings
Troubleshooting
Important Information
Specifications
Contents list
Top page > How to Use the Software > Windows Explorer (Drag-and-Drop) > Transferring
videos/photos using Windows Explorer
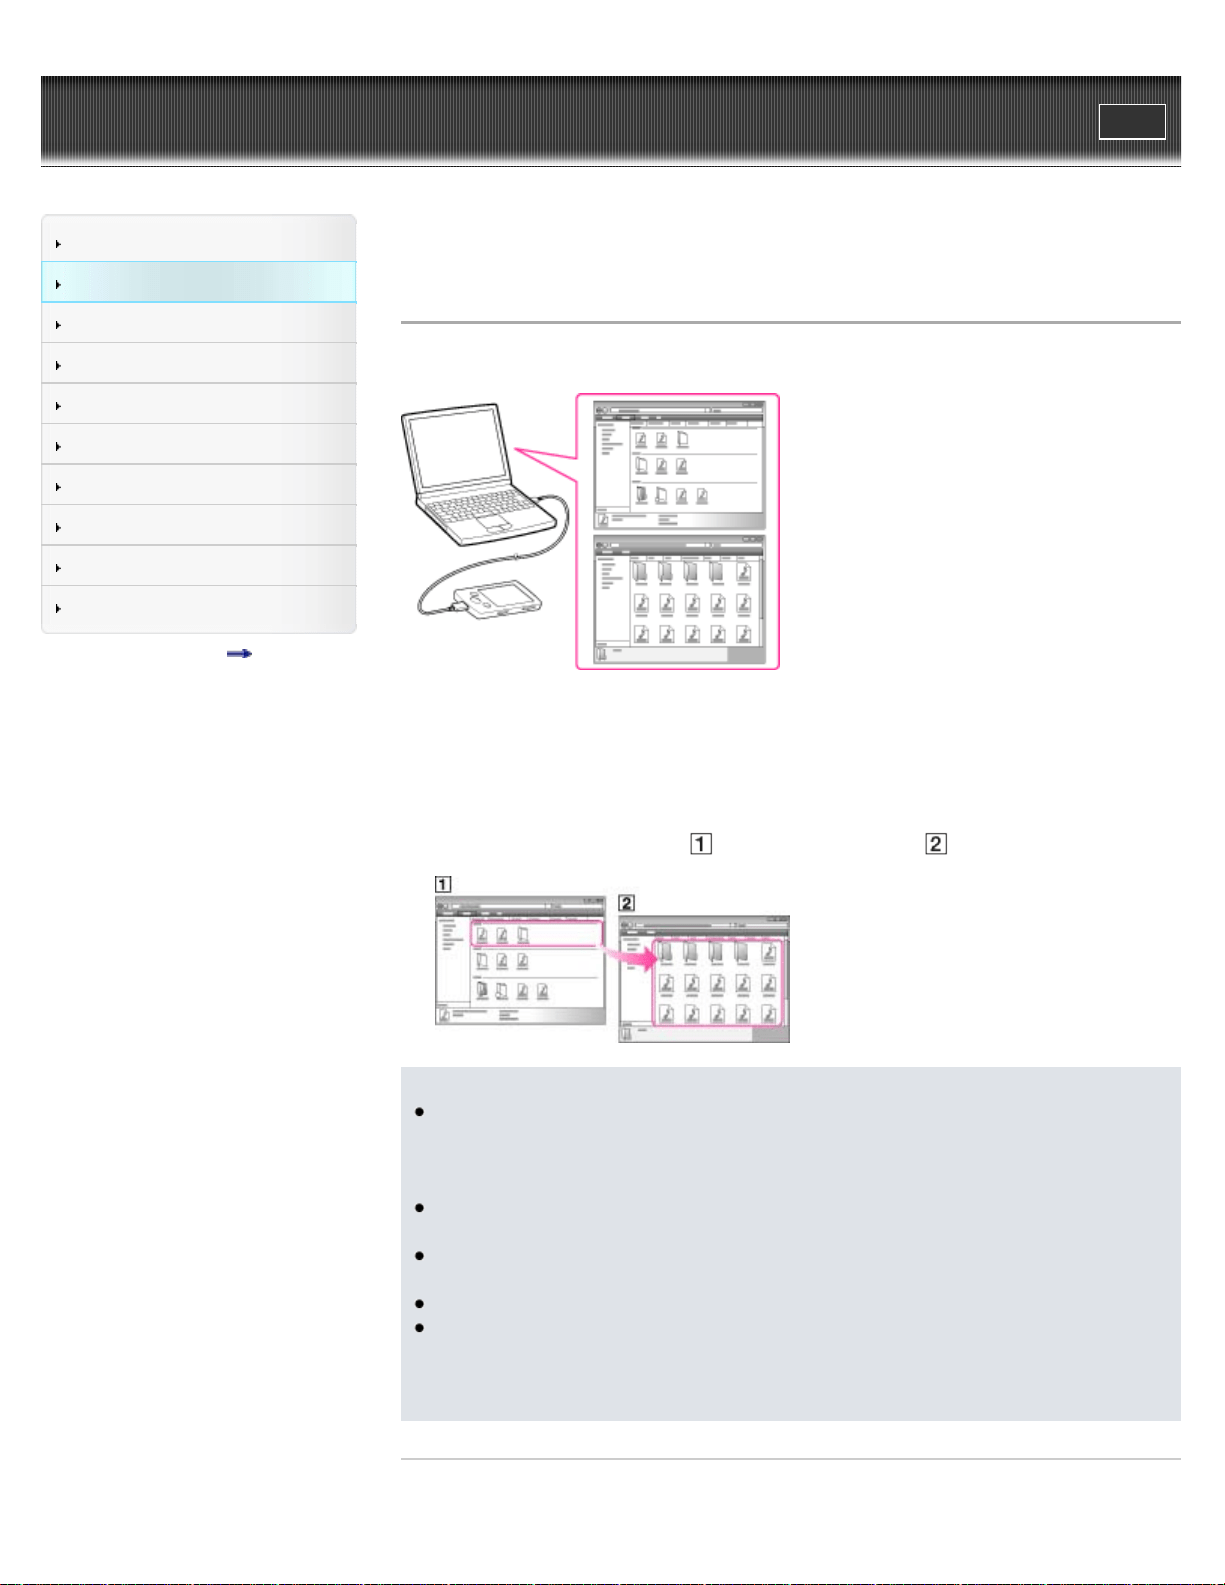
Transferring videos/photos using Windows Explorer
You can directly transfer data by drag-and-drop using Windows Explorer on your computer.
Hint
Some WMV files can be played back only by transferring using Windows Media Player.
1. Connect the player to your computer using the USB cable (supplied).
Insert the connector of the USB cable into the player.
2. Click [start] – [My Computer] or [Computer] – [WALKMAN] – [Storage Media], and then
select the [VIDEO], [PICTURE] or [PICTURES] folder.
Data hierarchy may differ, depending on your computer environment.
3. Drag-and-drop files or folders into the [VIDEO], [PICTURE] or [PICTURES] folder or one of
their subfolders.
Video files or folders: drag and drop into the [VIDEO] folder, or one of its subfolders.
Photo files or folders: drag and drop into the [PICTURE] or [PICTURES] folder, or one of
their subfolders.
Video/photo files or folders in your computer
Video: [VIDEO] folder in your player
Photo: [PICTURE] or [PICTURES] folder in your player
Note
Do not disconnect the USB cable while [Do not disconnect.] appears on the player.
Otherwise, data being transferred or stored on the player may be damaged. If the player is
disconnected while files are being transferred, unnecessary files may be left in the player. In
this case, transfer usable files back to the computer and format the player [Details].
Do not change folder names or delete the [MUSIC], [MP_ROOT], [MPE_ROOT], [VIDEO],
[PICTURE] and [PICTURES] folders.
50

Do not change folder or file names directly under the [MP_ROOT] and [MPE_ROOT]
folders. Otherwise, they will not be displayed on the player.
Some files may not be played back on the player due to copyright protection.
If Content Transfer starts automatically after connecting the player to your computer using
the USB cable (supplied), close or ignore Content Transfer as Content Transfer need not be
used. For details on setting automatic start of Content Transfer, refer to the Help of Content
Transfer.
Related Topics
Transferring videos/photos using Content Transfer
Transferring music using Windows Explorer
Watching videos [Videos]
Viewing photos [Photos]
Back to top
Copyright 2011 Sony Corporation
51
WALKMAN User Guide
Print
Getting Started
How to Use the Software
Music
Videos/Photos
FM Radio
Timer
Settings
Troubleshooting
Important Information
Specifications
Contents list
Top page > Music > Playing Music > Playing music
Playing music
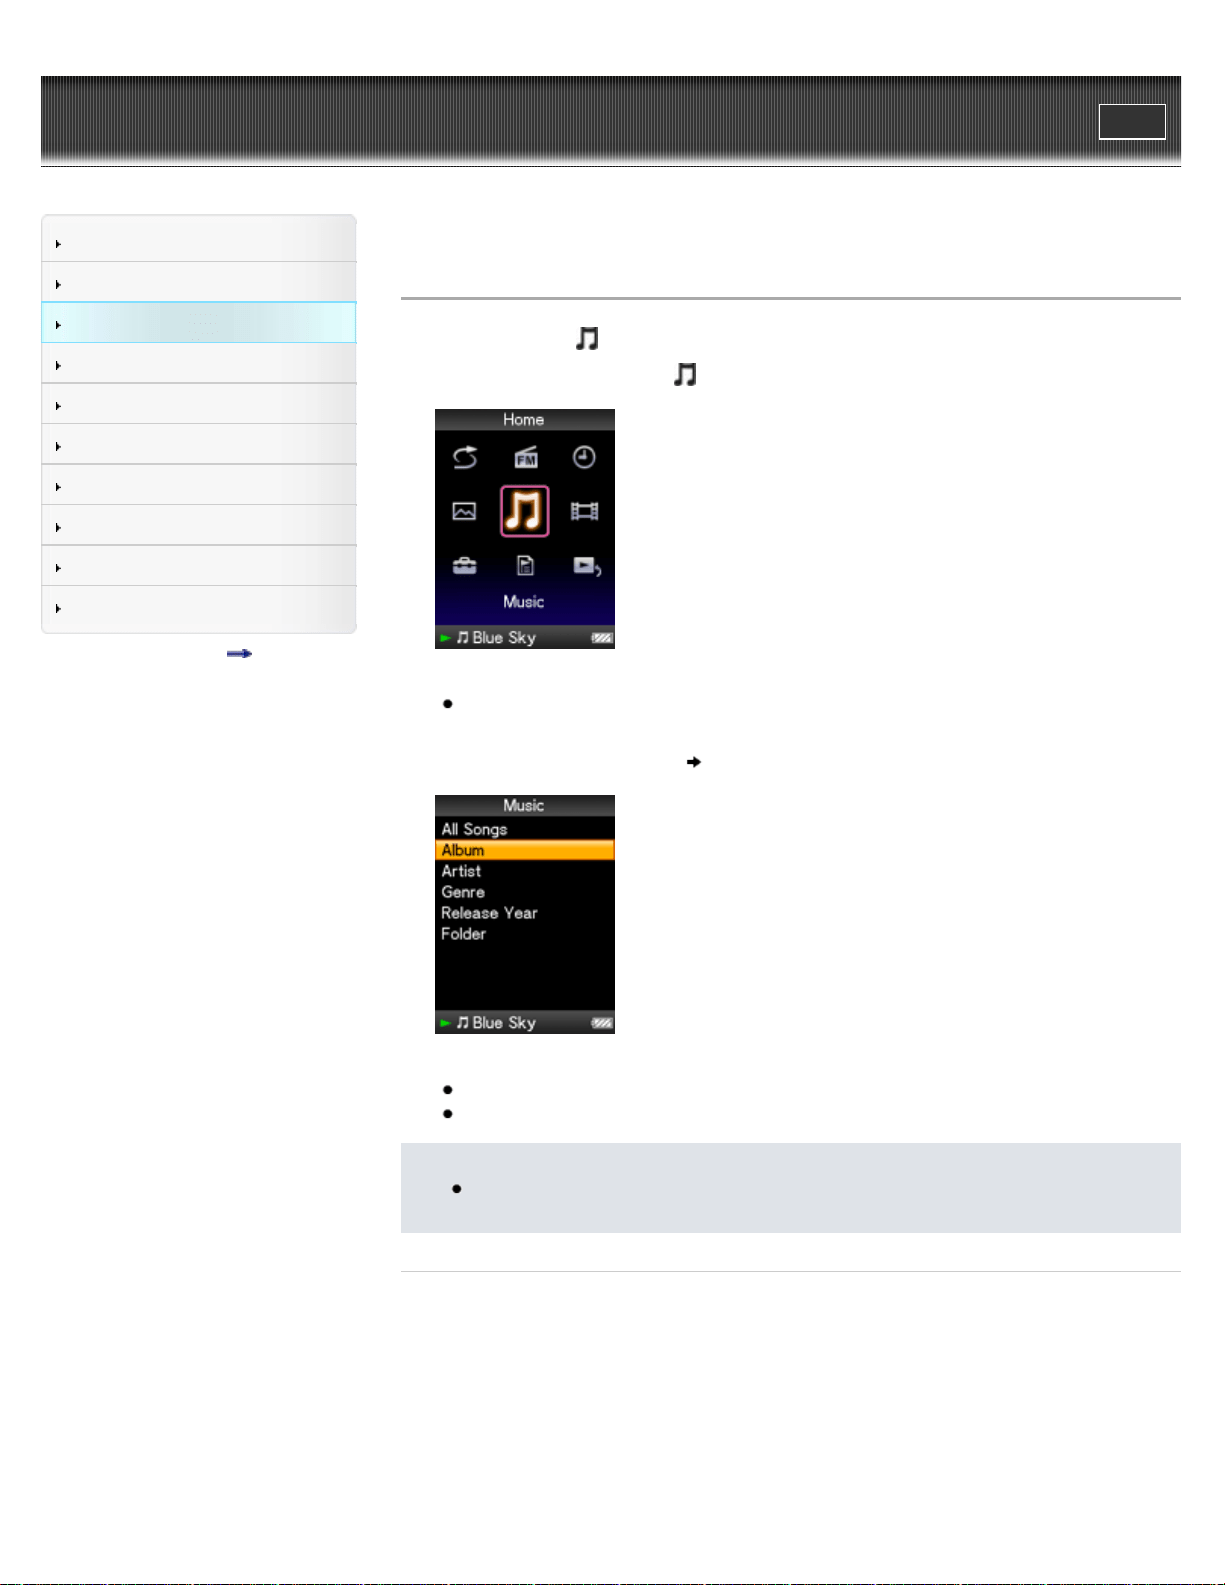
To play music, select [Music] on the Home menu to display the [Music] screen.
1. From the Home menu, select [Music].
The search menu appears.
You can select the desired search method to display the music list screen and search for
songs [Details].
2. Select desired search method
desired song.
The music playback screen appears and song playback begins.
Select items until a song list appears.
For details on how to operate the music playback screen, see [Details].
Note
It may take time to start up the player or display the file/folder list when many files or
folders are stored on the player.
Related Topics
Importing music from CDs using Windows Media Player
Transferring music using Windows Media Player
Transferring music using Content Transfer
Transferring music using Windows Explorer
Browsing and using the music screen
Searching for songs
Playing all songs in random order
52

WALKMAN User Guide
Print
Getting Started
How to Use the Software
Music
Videos/Photos
FM Radio
Timer
Settings
Troubleshooting
Important Information
Specifications
Contents list
Top page > Music > Playing Music > Browsing and using the music screen
Browsing and using the music screen
Music playback screen
Music list screen
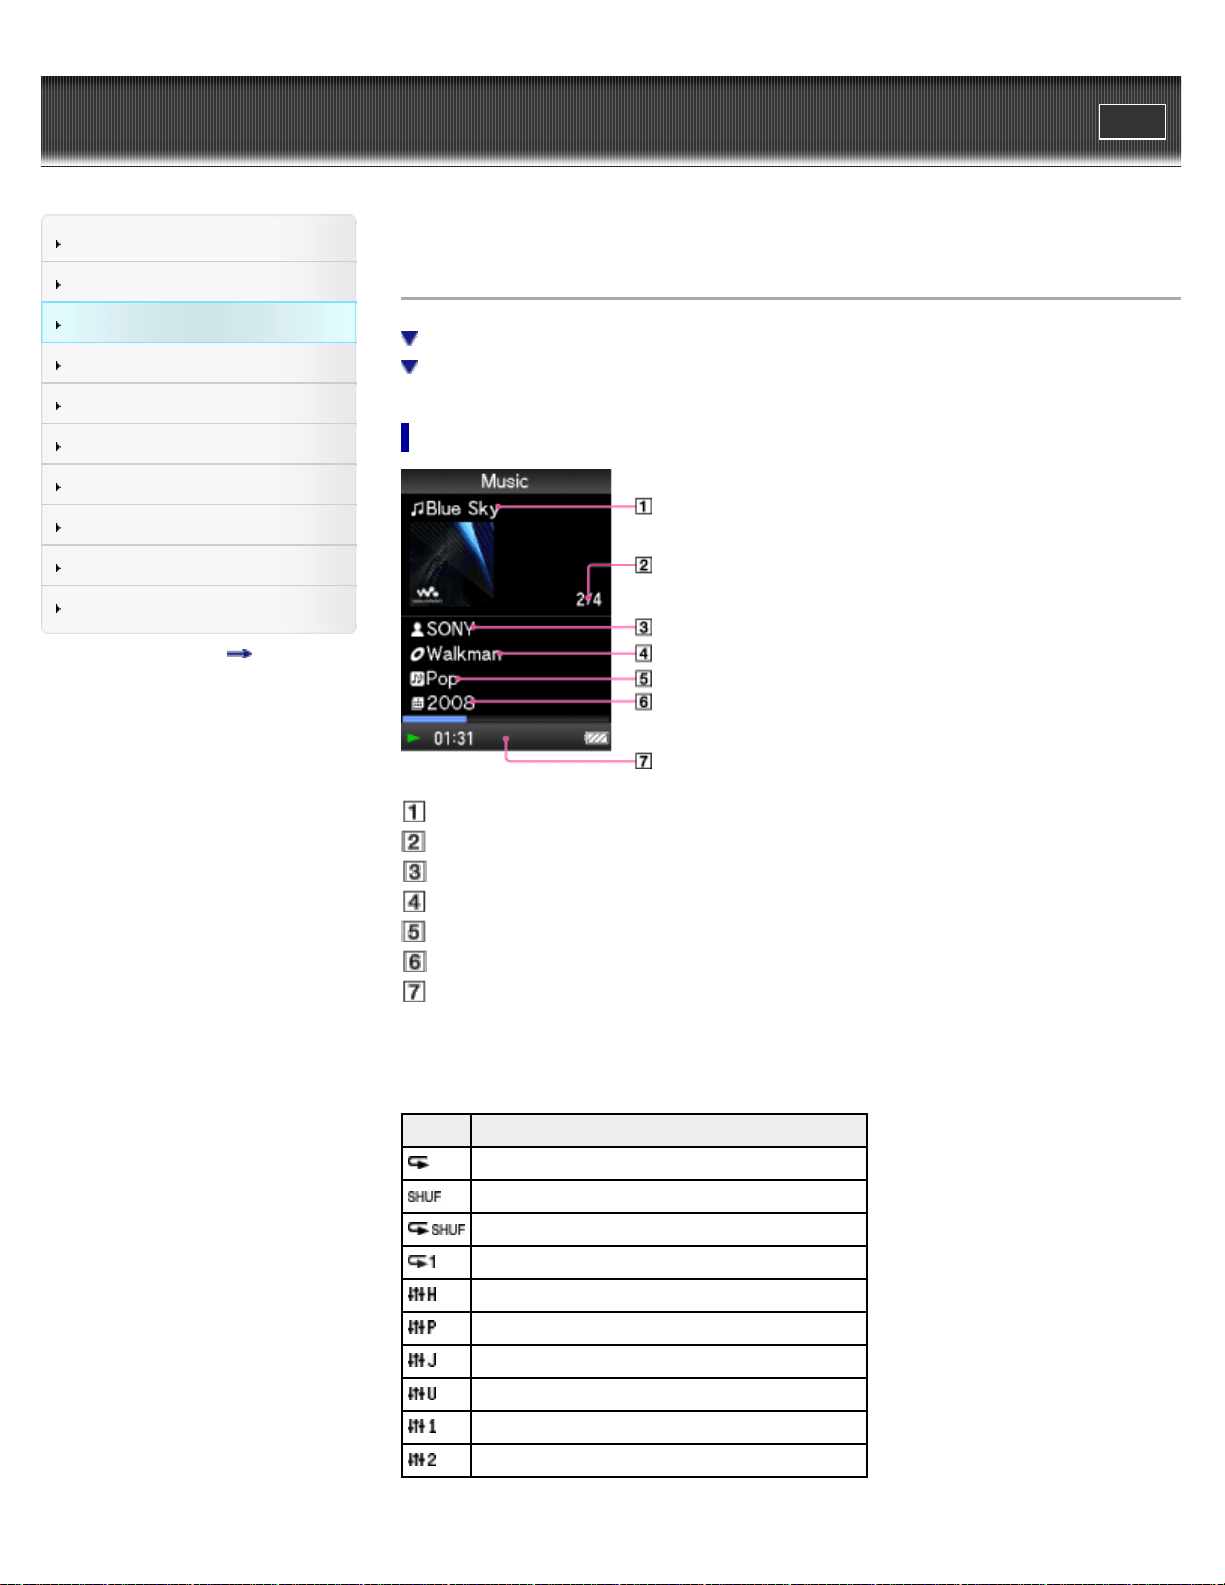
Music playback screen
Song name
Current song number/Total song number to be played (*1)
Artist name
Album title
Genre
Release year
Information area
(*1) These items disappear after a while.
Indication icons of the music playback screen
Icon Description
[Play Mode] is set to [Repeat] [Details].
[Play Mode] is set to [Shuffle] [Details].
[Play Mode] is set to [Shuffle&Repeat] [Details].
[Play Mode] is set to [Repeat 1 Song] [Details].
[Equalizer] is set to [Heavy] [Details].
[Equalizer] is set to [Pop] [Details].
[Equalizer] is set to [Jazz] [Details].
[Equalizer] is set to [Unique] [Details].
[Equalizer] is set to [Custom 1] [Details].
[Equalizer] is set to [Custom 2] [Details].
54
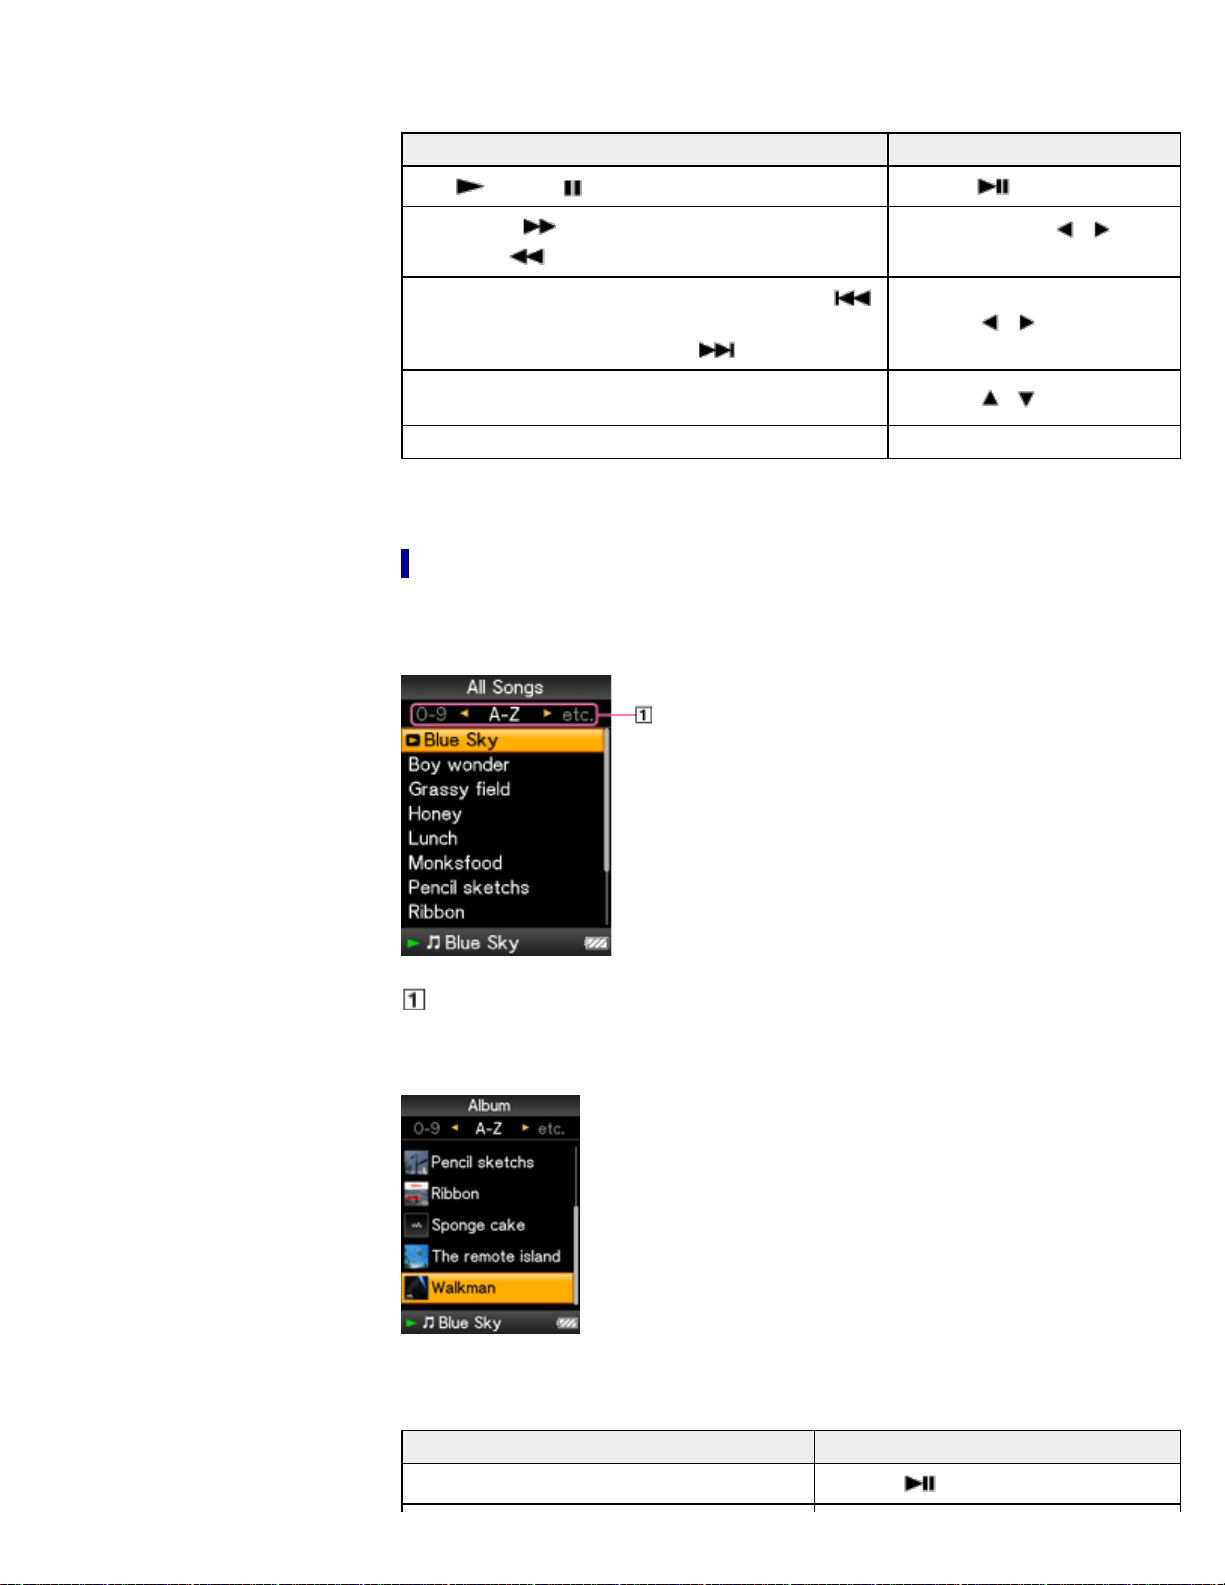
Operations on the music playback screen
To (screen indication) Do this
Play ( )/pause ( ) (*1) Press the button.
Fast forward ( )/
fast rewind (
)
Press and hold the /
button.
Find the beginning of the previous (or current) song (
)/
find the beginning of the next song (
)
Press the / button.
Display the cursor and scroll all through the displayed
items
Press the
/ button.
Return to the list screen Press the BACK/HOME button.
(*1) During pause, if there is no operation for a while, the player automatically enters standby mode.
Music list screen
The following are examples of music list screens.
Song list screen
Index
The initials of song and album, etc., names in the list section appear.
Album list screen
Operations on the music list screen
To Do this
Confirm an item in the list Press the button.
55

Move the cursor up or down
Press the / button.
Press and hold the
/ button to
scroll up or down faster.
Move the cursor left/right when an index is
displayed
Press the
/ button.
Display the previous/next screen of the list when
an index is not displayed
Press the
/ button.
Return to the list screen of the next upper level Press the BACK/HOME button.
Back to top
Copyright 2011 Sony Corporation
56
WALKMAN User Guide
Print
Getting Started
How to Use the Software
Music
Videos/Photos
FM Radio
Timer
Settings
Troubleshooting
Important Information
Specifications
Contents list
Top page > Music > Playing Music > Searching for songs
Searching for songs
When you select [Music] on the Home menu, the search menu appears. You can select the
desired search method on the search menu to search the music list for a desired song.
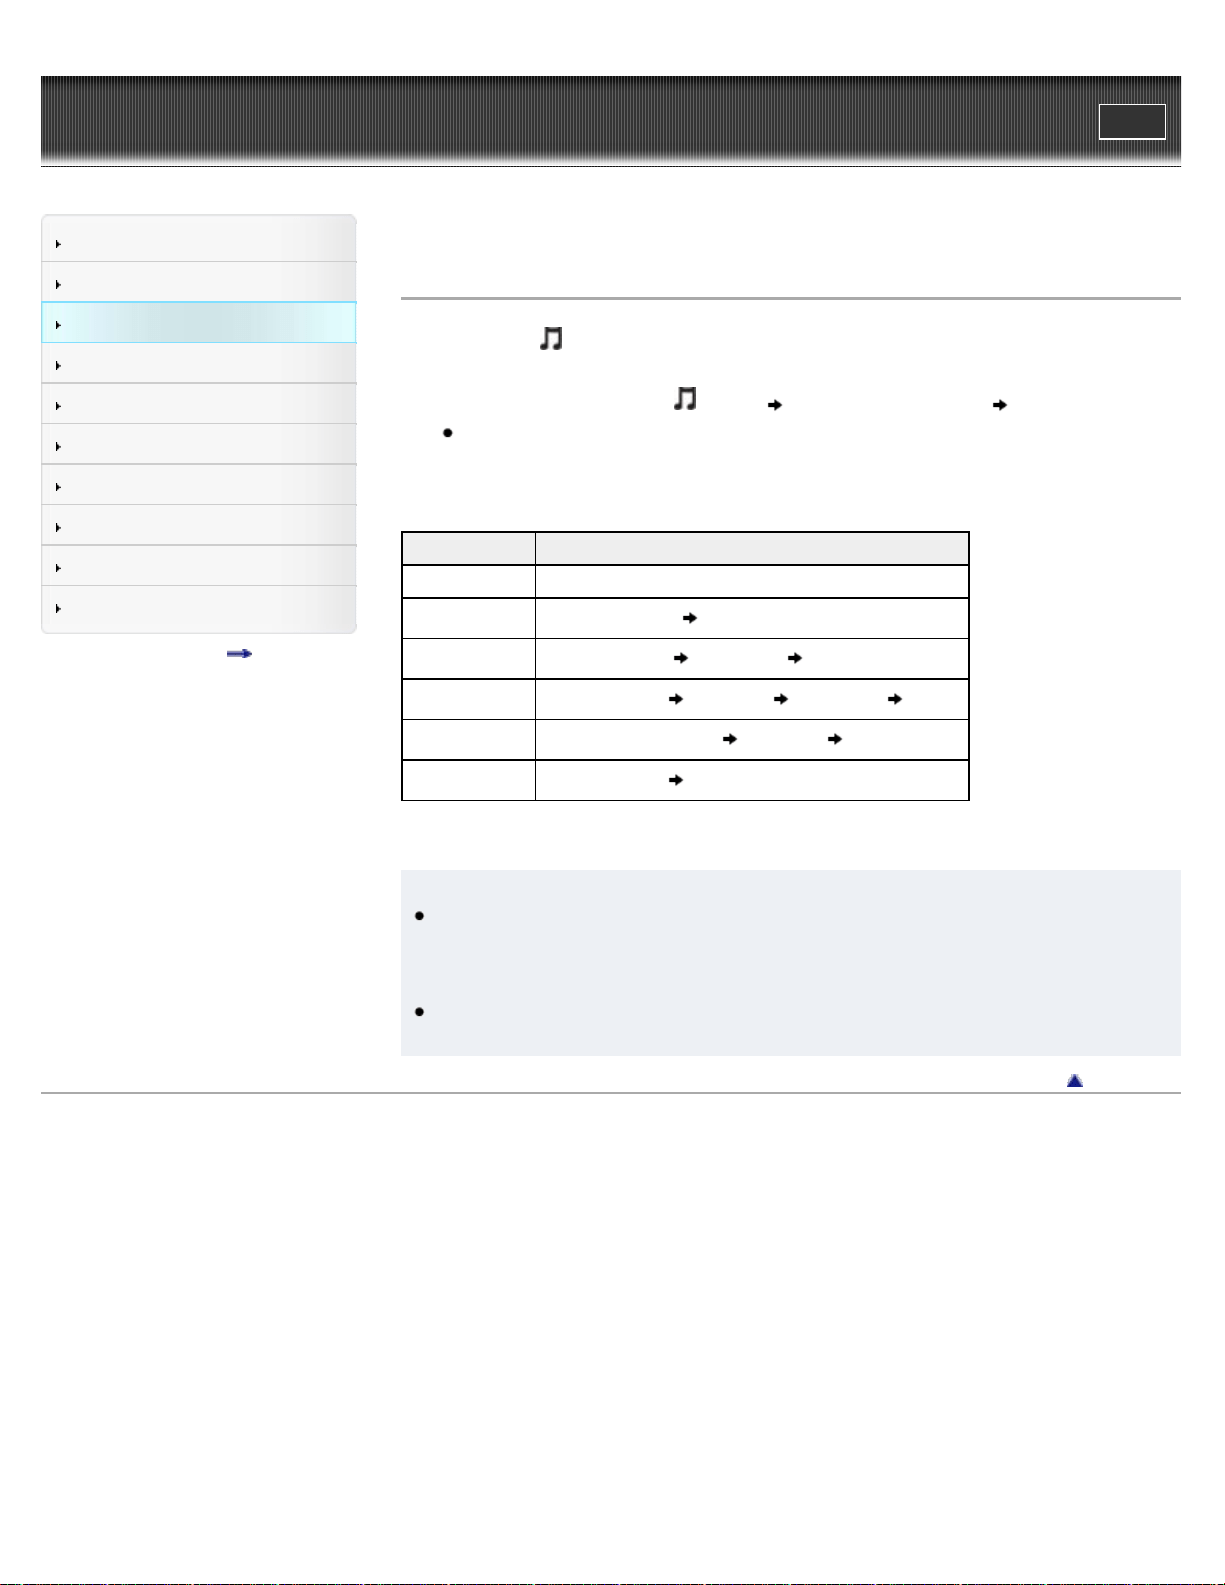
1. From the Home menu, select
[Music] desired search method desired song.
Select items as follows until a song list appears.
Search method
Method Description
[All Songs] Select a song from the all songs list.
[Album] Select an album
song.
[Artist] (*1) Select an artist an album song.
[Genre] Select a genre an artist an album song.
[Release Year] Select a release year an artist song.
[Folder] Select a folder song.
(*1) “The” at the beginning of artist names is ignored when arranging a list.
Hint
[All Songs], [Album], [Artist] and [Genre] lists are arranged in alphanumeric order. The
[Release Year] list is arranged in reverse chronological order. In the [Folder] list, folders are
displayed in name order first, then files are displayed in name order. In this case, upper or
lower case letters are not distinguished.
You can see all the songs of the selected artist, genre or release year. On the [Artist],
[Genre] or [Release Year] list screen, select [All [XXX]].
Back to top
Copyright 2011 Sony Corporation
57
WALKMAN User Guide
Print
Getting Started
How to Use the Software
Music
Videos/Photos
FM Radio
Timer
Settings
Troubleshooting
Important Information
Specifications
Contents list
Top page > Music > Playing Music > Playing the songs in a playlist
Playing the songs in a playlist
You can play lists of songs (playlists).
Playlists are created using Windows Media Player. For information on how to create a playlist,
refer to the Help of Windows Media Player. Cover art images registered to a playlist are not
displayed on the player.
1. From the Home menu, select
[Playlists] desired playlist desired song.
Back to top
Copyright 2011 Sony Corporation
58
WALKMAN User Guide
Print
Getting Started
How to Use the Software
Music
Videos/Photos
FM Radio
Timer
Settings
Troubleshooting
Important Information
Specifications
Contents list
Top page > Music > Playing Music > Playing all songs in random order
Playing all songs in random order
All the songs stored on the player are played in random order.
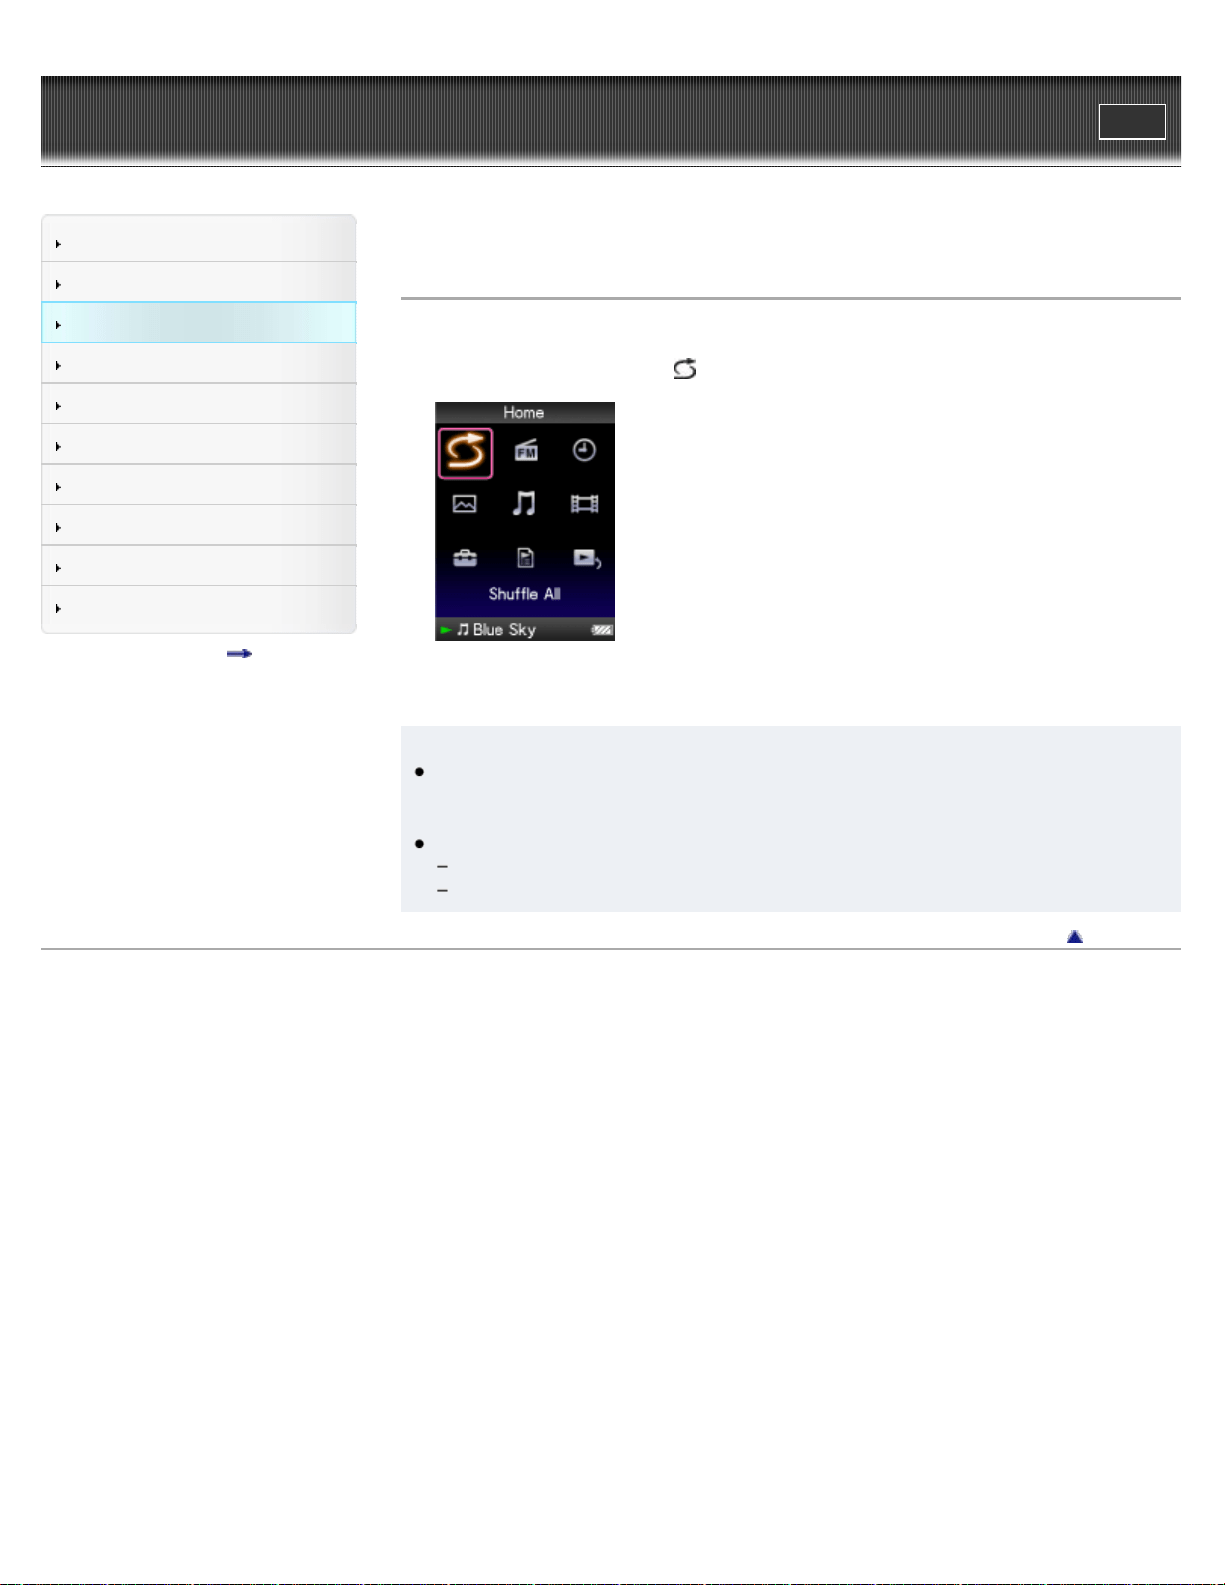
1. From the Home menu, select
[Shuffle All].
All songs are shuffled. Then the music playback screen appears and playback of the songs
begins.
Hint
When you start [Shuffle All] play, the play mode changes to [Shuffle] or [Shuffle&Repeat]
[Details]. Even if you cancel [Shuffle All], the [Shuffle] or [Shuffle&Repeat] setting for the
play mode is retained.
[Shuffle All] play is automatically canceled by any of the following operations:
Starting playback of a song by selecting it from the [Music], etc.
Changing the play mode.
Back to top
Copyright 2011 Sony Corporation
59
WALKMAN User Guide
Print
Getting Started
How to Use the Software
Music
Videos/Photos
FM Radio
Timer
Settings
Troubleshooting
Important Information
Specifications
Contents list
Top page > Music > Playing Music > Deleting songs
Deleting songs
When you delete songs from the player, use the software you used to transfer the songs, or
Windows Explorer.
For details about using the software, see the Help of the software.
Note
You cannot delete songs without connecting the player to a computer.
Back to top
Copyright 2011 Sony Corporation
60
WALKMAN User Guide
Print
Getting Started
How to Use the Software
Music
Videos/Photos
FM Radio
Timer
Settings
Troubleshooting
Important Information
Specifications
Contents list
Top page > Music > Music Option Menu > Using the music option menu
Using the music option menu
Option items appearing on the music playback screen
Option items appearing on the music list screen
Displaying the detailed information screen [Detailed Information]
Displaying the cover art screen [Cover Art]
You can bring up the music option menu by pressing the OPTION/PWR OFF button on the music
list or on the music playback screen. For details on how to use the option menu, see [Details].
The option items shown on the option menu vary depending on the screen from which you bring it
up. See the reference page for settings and usage.
Option items appearing on the music playback screen
Option
items
Description/reference page
[Play Mode] Sets the play mode [Details].
[Equalizer] Customizes the sound quality [Details].
[Cover Art] Displays cover art [Details].
[Detailed
Information]
Displays detailed information of a song, such as playing time, audio format, bit
rate, and file name [Details].
[Alarm] Sets the alarm [Details].
[Sleep Timer] Sets the sleep timer [Details].
[Clock Display] Displays the current time [Details].
Option items appearing on the music list screen
Option items Description/reference page
[Now Playing] Displays the playback or display screen of the currently playing content.
[Go to FM Radio
screen]
The FM Radio screen of the last received broadcast station appears
[Details].
[Detailed Information]
Displays detailed information of a song, such as playing time, audio
format, bit rate, and file name [Details].
[Go to the song
playback screen]
Displays the music playback screen of the song last played.
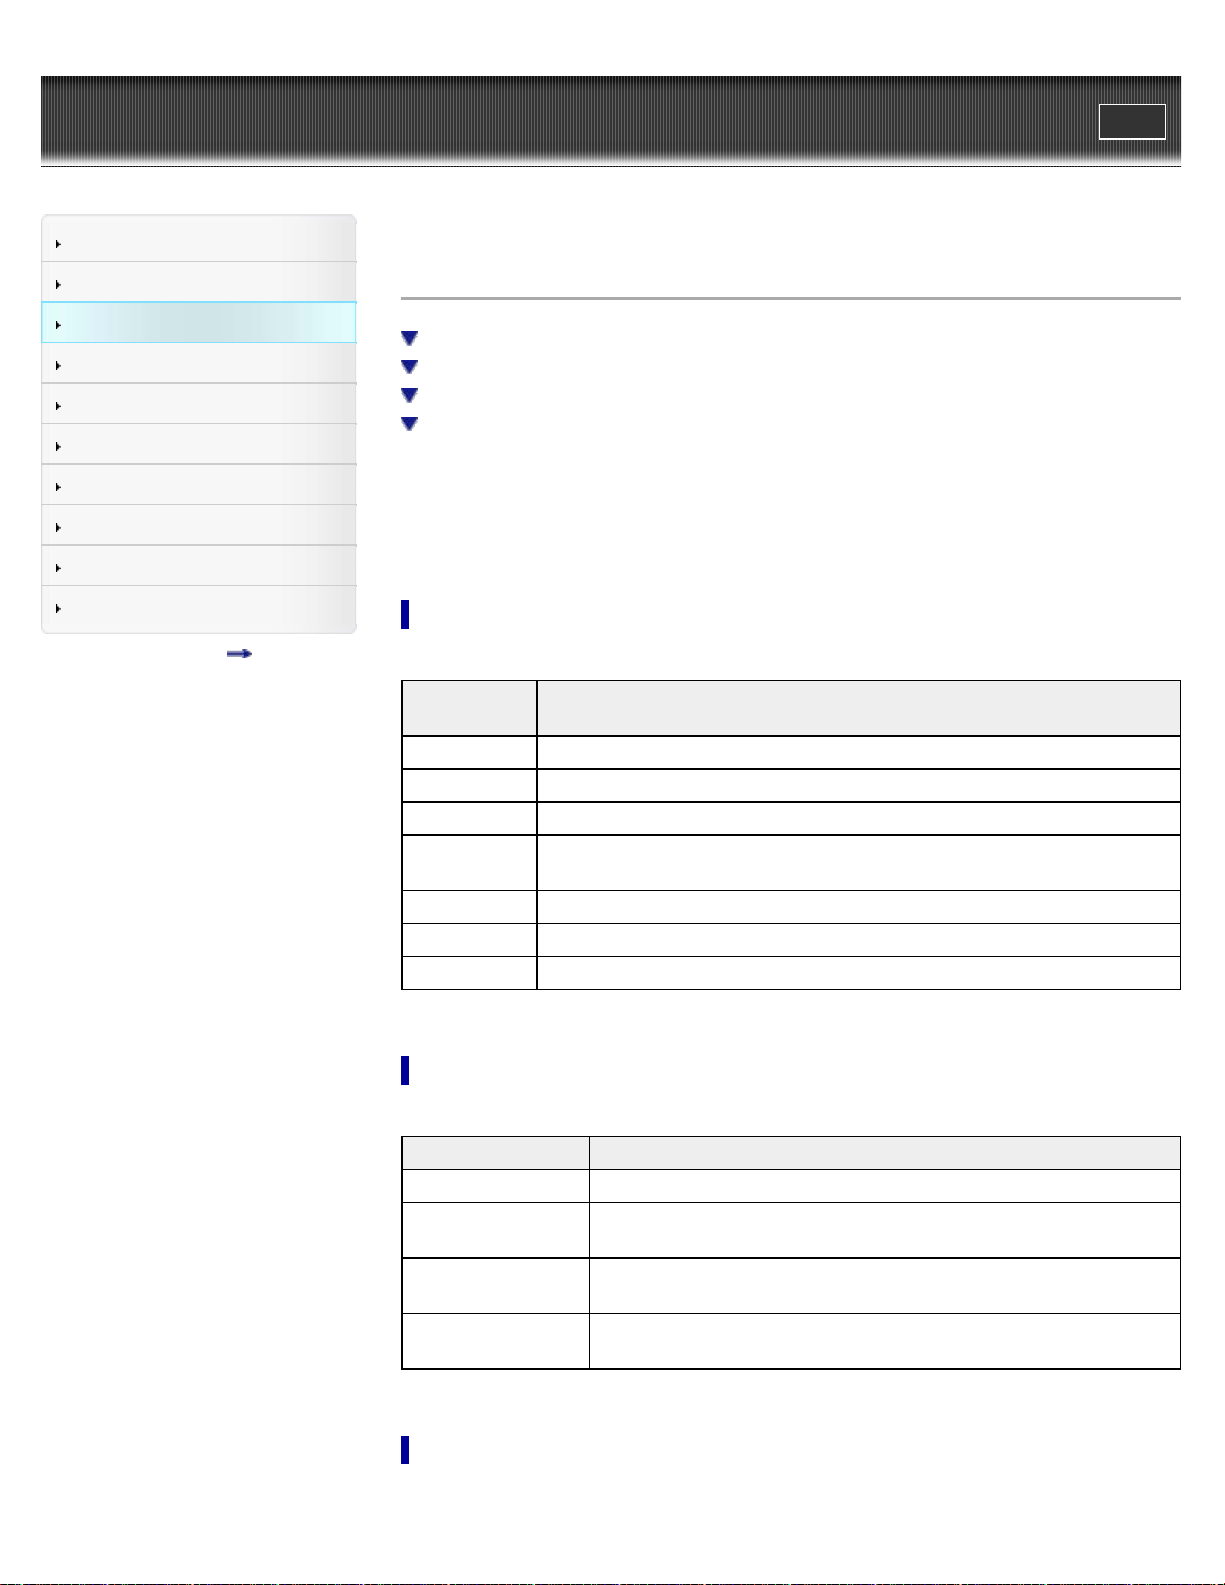
Displaying the detailed information screen [Detailed Information]
1. From the music playback screen, press the OPTION/PWR OFF button to bring up the option
61
menu.
2. Select [Detailed Information].
Detailed information screen
Song name
Playback time
File format
Bit rate
Copyrighted files
While playing back copyright protected songs, [Secured] appears.
Variable bit rate song
While playing back variable bit rate songs, [VBR] is shown.
File name
Hint
When you display this screen from the music playback screen, you can move to the
previous or next song by pressing the
/ button.
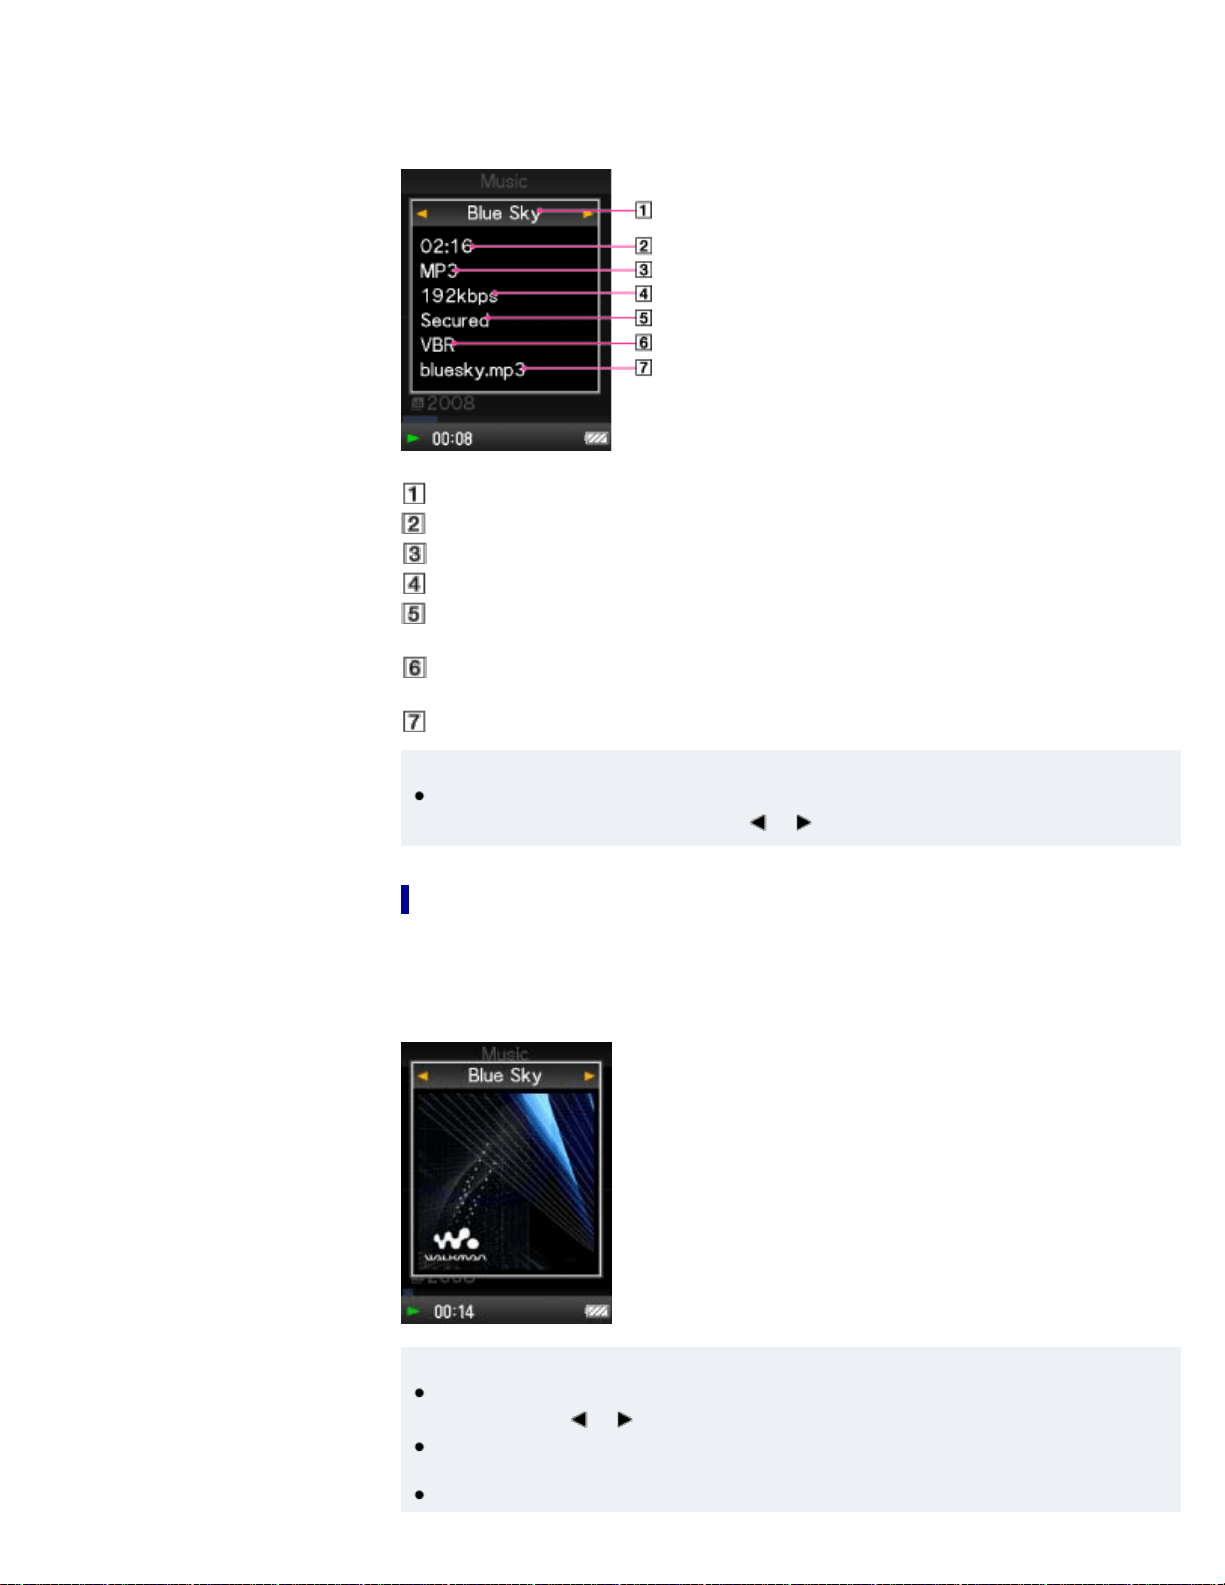
Displaying the cover art screen [Cover Art]
1. From the music playback screen, press the OPTION/PWR OFF button.
2. Select [Cover Art].
Cover art screen
Hint
While the cover art screen is displayed, you can move songs to the previous or the next one
by pressing the / button.
If the songs do not have cover art information, the default picture of the player will be
displayed.
Cover art only appears if cover art information is available. You can set cover art using
62

WALKMAN User Guide
Print
Getting Started
How to Use the Software
Music
Videos/Photos
FM Radio
Timer
Settings
Troubleshooting
Important Information
Specifications
Contents list
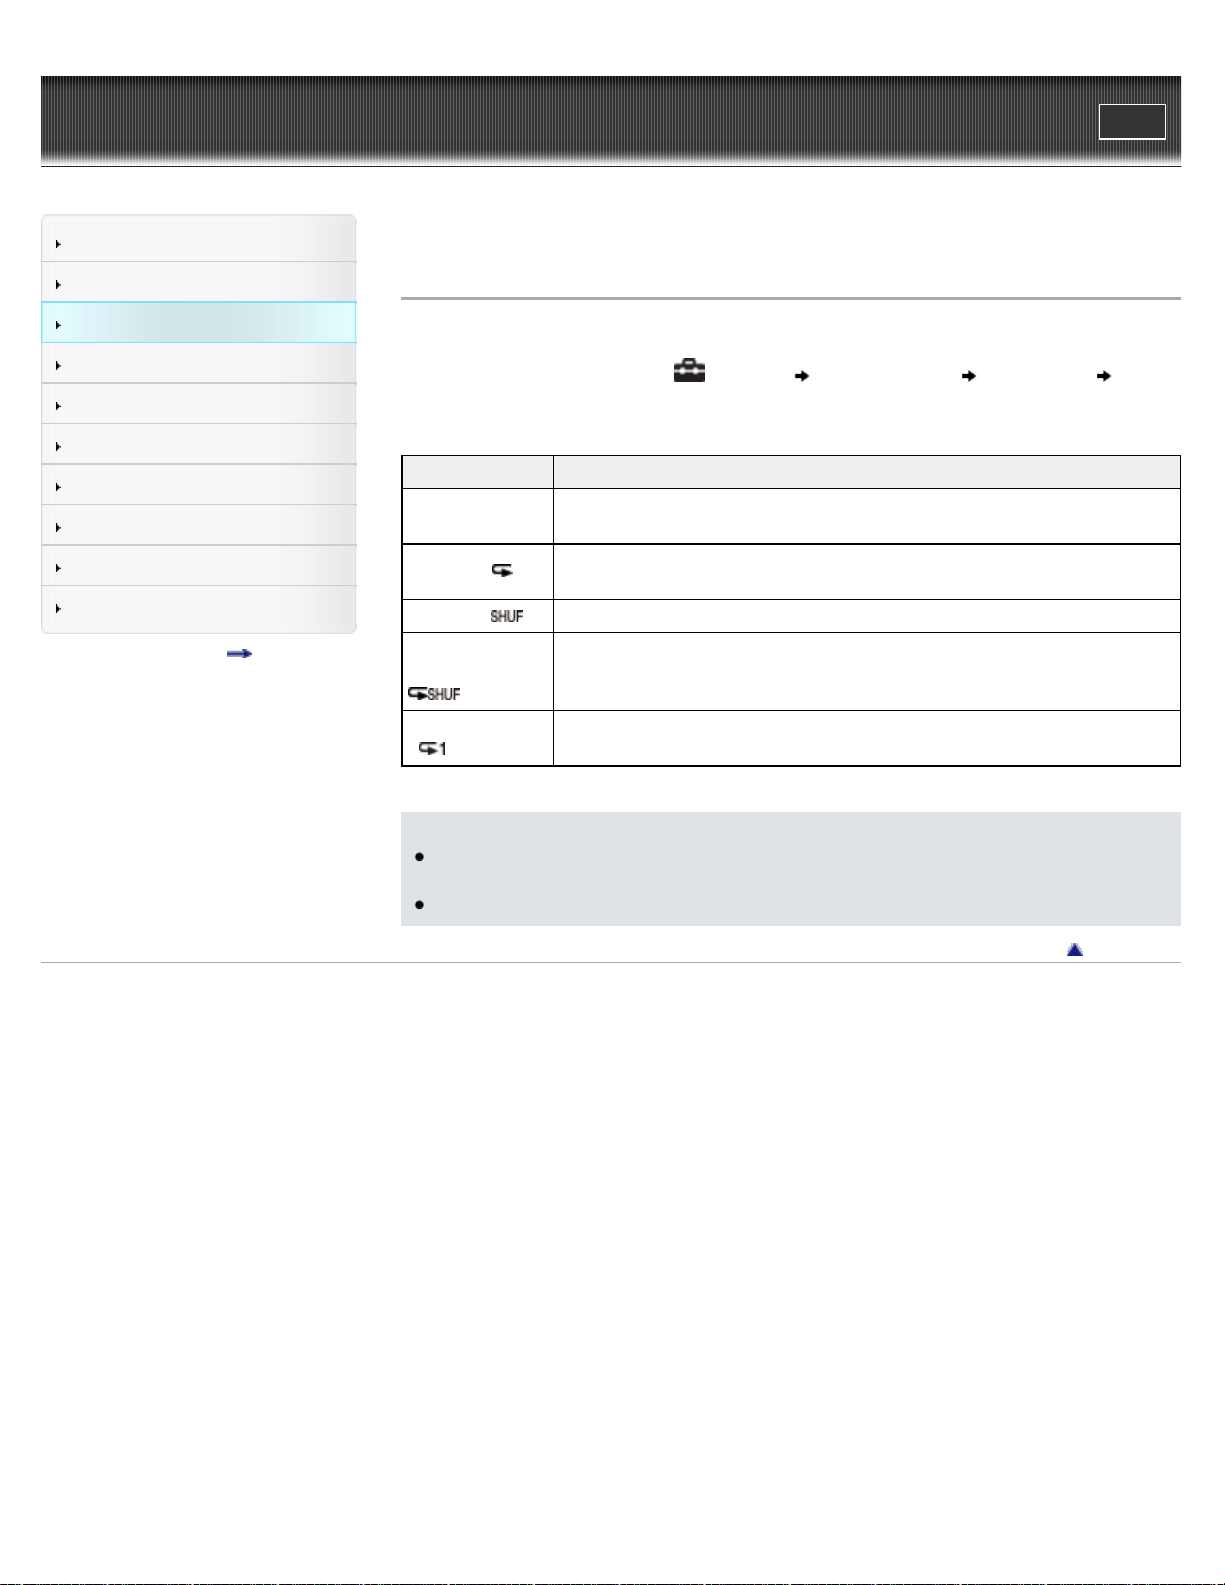
Top page > Music > Music Settings > Setting the play mode [Play Mode]
Setting the play mode [Play Mode]
The player offers a variety of play modes, including random play and selected repeat play.
1. From the Home menu, select [Settings] [Music Settings] [Play Mode]
desired play mode type.
Type - icon Description
[Normal] - No
icon
The songs within the playback range are played back in the song list order.
(Default setting)
[Repeat] -
The songs within the playback range are played back in the song list order
and then repeated.
[Shuffle] -
The songs within the playback range are played back in random order.
[Shuffle&Repeat]
-
The songs within the playback range are played back in random order and
then repeated.
[Repeat 1 Song]
-
The current song or the song selected from a song list is played back
repeatedly.
Note
The player plays back songs only in the lists from which the playback starts (album list, artist
list, etc.).
When you start [Shuffle All] play, the play mode changes to [Shuffle] or [Shuffle&Repeat].
Back to top
Copyright 2011 Sony Corporation
64
WALKMAN User Guide
Print
Getting Started
How to Use the Software
Music
Videos/Photos
FM Radio
Timer
Settings
Troubleshooting
Important Information
Specifications
Contents list
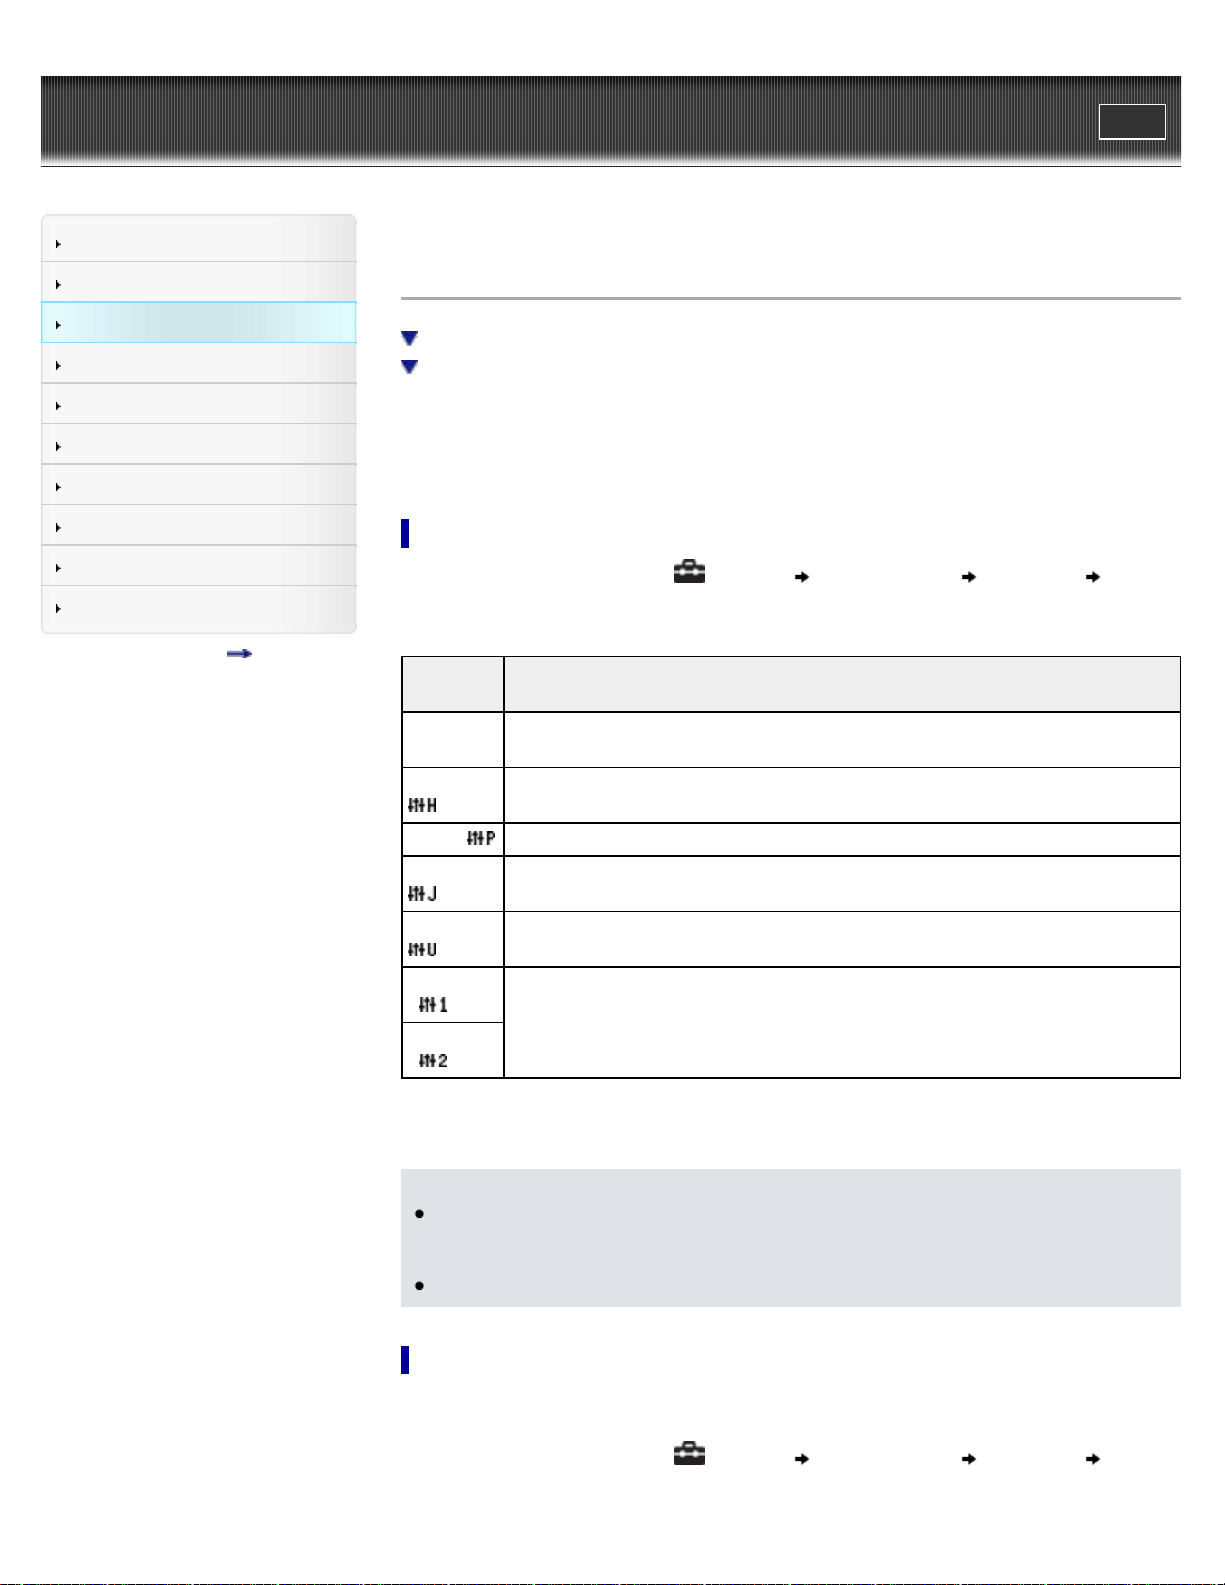
Top page > Music > Music Settings > Setting the sound quality (CLEAR BASS) [Equalizer]
Setting the sound quality (CLEAR BASS) [Equalizer]
Setting the sound quality
Customizing sound quality
You can set the sound quality according to the music genre, etc.
Equalizer settings contain the CLEAR BASS setting. Increasing the CLEAR BASS setting value
allows the player to reproduce dynamic deep bass without distortion, even at a high volume.
Setting the sound quality
1. From the Home menu, select [Settings] [Music Settings] [Equalizer] desired
equalizer type.
Type -
icon
Description
[None] -
No icon
Sound quality setting is not activated. (Default setting) (*1)
[Heavy] -
Emphasizes high and low ranges for a powerful sound.
[Pop] - Stresses the middle range audio, ideal for vocals.
[Jazz] -
Emphasizes high and low ranges for a lively sound.
[Unique] -
Emphasizes high and low ranges, so that even soft sounds can be heard easily.
[Custom 1]
-
User-customizable sound settings for which you can adjust each frequency range
individually. See [Details] for details.
[Custom 2]
-
(*1) The default setting of players sold in the Latin America region is [Custom 1], and CLEAR BASS is set
to level +3.
Note
If your personal settings saved as [Custom 1] and [Custom 2] seem to produce a different
volume level than other settings, you may have to adjust the volume manually to
compensate.
The [Equalizer] setting is not applied while playing a video or FM radio.
Customizing sound quality
You can preset the value of CLEAR BASS (bass) and 5 band Equalizer as [Custom 1] or
[Custom 2].
1. From the Home menu, select
[Settings] [Music Settings] [Equalizer] [Edit]
displayed under [Custom 1] or [Custom 2].
65

2. Press the / button to select CLEAR BASS or the frequency range setting, and press
the
/ button to adjust the setting level, and then press the button to confirm.
The [Equalizer] screen reappears.
CLEAR BASS can be set to any of 4 sound levels, and the 5 frequency ranges can be
set to any of 7 sound levels.
After you have adjusted the setting level, be sure to press the
button to confirm. If
you press the BACK/HOME button before you confirm, the setting will be canceled.
Back to top
Copyright 2011 Sony Corporation
66
WALKMAN User Guide
Print
Getting Started
How to Use the Software
Music
Videos/Photos
FM Radio
Timer
Settings
Troubleshooting
Important Information
Specifications
Contents list
Top page > Music > Music Settings > Listening with Clear Stereo [Clear Stereo]
Listening with Clear Stereo [Clear Stereo]
[Clear Stereo] enables individual left and right digital processing of the sound.
1. From the Home menu, select [Settings] [Music Settings] [Clear Stereo]
desired Clear Stereo type.
Type Description
[On] Activates the [Clear Stereo] function when you use the supplied headphones.
[Off] Disables the [Clear Stereo] function and plays back normal sound. (Default setting)
Note
The [Clear Stereo] setting is not applied while playing a video or FM radio.
The [Clear Stereo] function is designed to obtain maximum effect with the supplied
headphones. The [Clear Stereo] effect may not be obtained with other headphones. When
using other headphones, set [Clear Stereo] to [Off].
Back to top
Copyright 2011 Sony Corporation
67
WALKMAN User Guide
Print
Getting Started
How to Use the Software
Music
Videos/Photos
FM Radio
Timer
Settings
Troubleshooting
Important Information
Specifications
Contents list
Top page > Music > Music Settings > Adjusting the volume level [Dynamic Normalizer]
Adjusting the volume level [Dynamic Normalizer]
You can reduce the volume level between songs. With this setting, when listening to album songs
in the shuffle play mode, the volume level between songs is moderated to minimize differences in
their recording levels.
1. From the Home menu, select
[Settings] [Music Settings] [Dynamic Normalizer]
desired Dynamic Normalizer type.
Type Description
[On] Minimizes the difference in volume level between songs.
[Off]
Plays back songs at their original transferred volume level.
(Default setting)
Note
The [Dynamic Normalizer] setting is not applied while playing a video or FM radio.
Back to top
Copyright 2011 Sony Corporation
68
WALKMAN User Guide
Print
Getting Started
How to Use the Software
Music
Videos/Photos
FM Radio
Timer
Settings
Troubleshooting
Important Information
Specifications
Contents list
Top page > Videos/Photos > Watching Videos > Watching videos [Videos]
Watching videos [Videos]
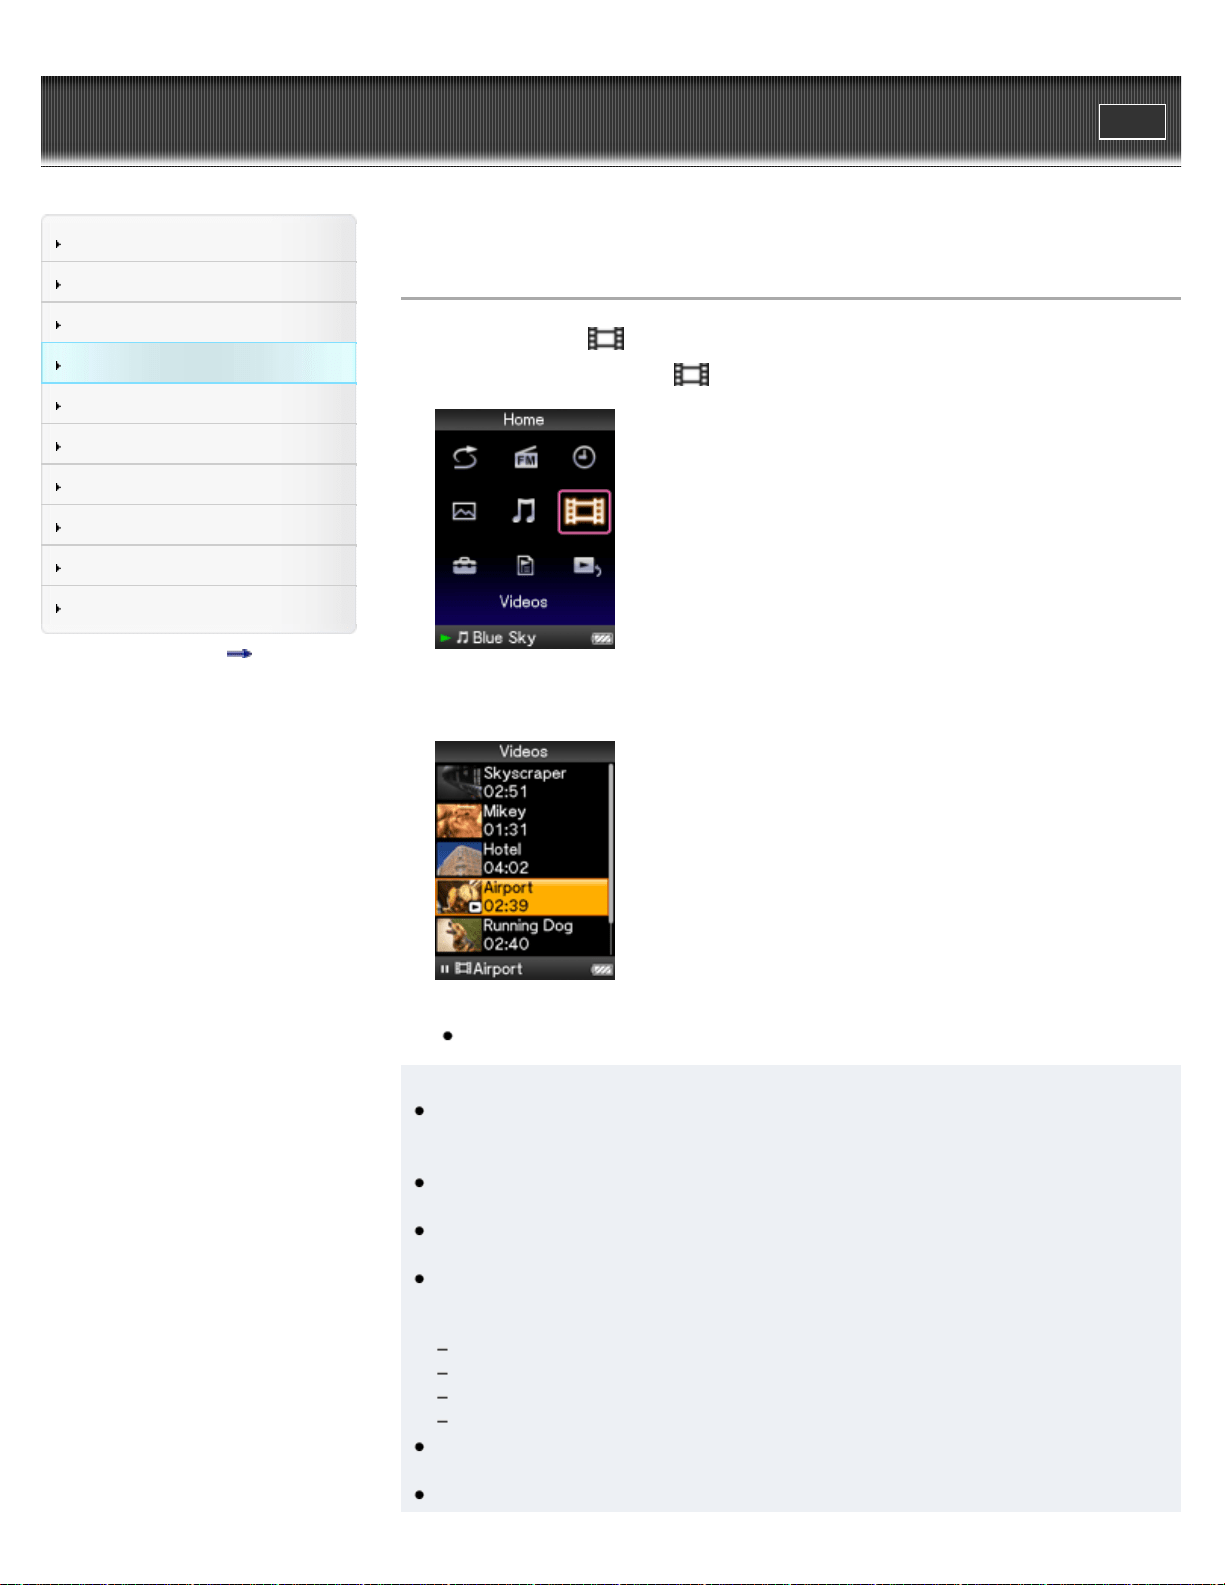
To play a video, select [Videos] on the Home menu to display the [Videos] screen.
1. From the Home menu, select [Videos].
The [Videos] screen appears.
2. Select desired video.
The video playback screen appears and playback of the video begins.
For details on how to operate the video playback screen, see [Details].
Hint
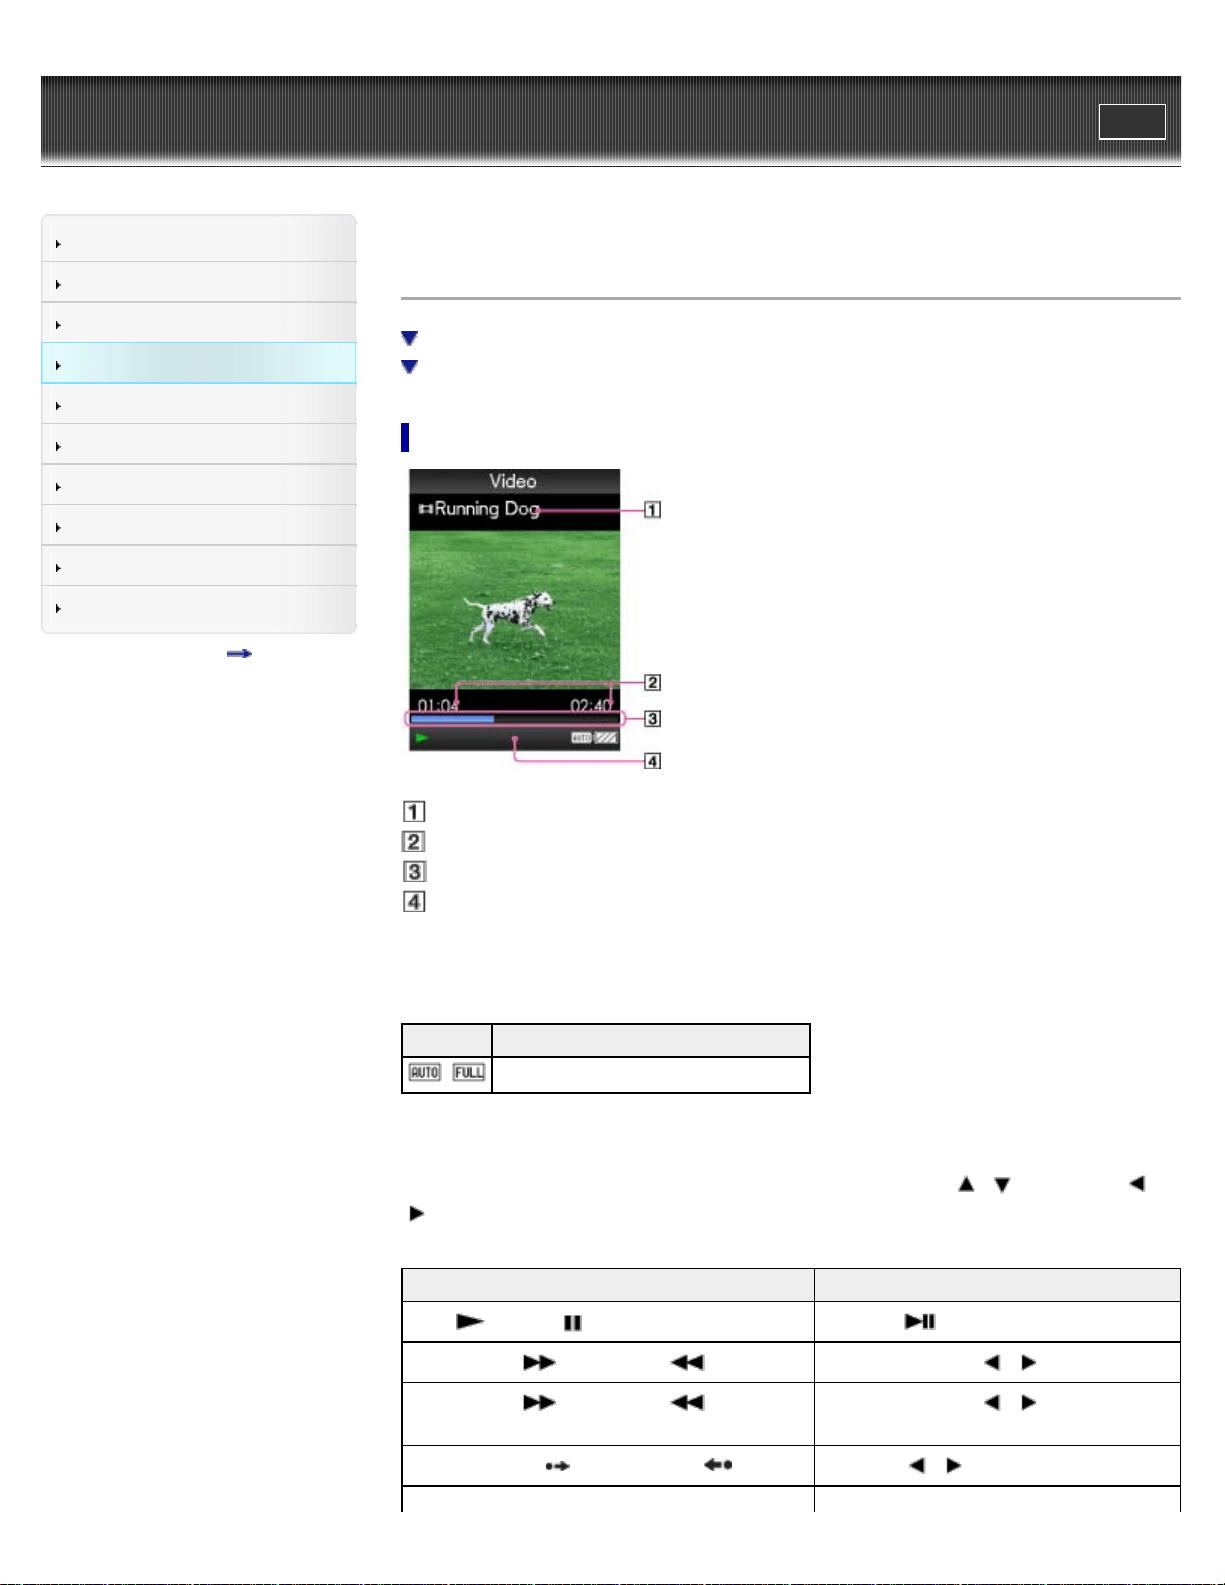
When [Display] is set to [On], detailed information, such as the video title, its playback icon,
elapsed playing time, etc., appears while the video is playing. The information disappears if
this setting is [Off] [Details].
You can play back the most recently played video. Press the OPTION/PWR OFF button on
the video list, and then select [Most Recent Video] from the option menu.
Video files are displayed in the order they are transferred. (The latest data appears at the
top.)
You can set JPEG files as thumbnails of video files. When you display the video list, you
can see the thumbnails (small pictures to display on the list) for the video files on the player.
Use a computer to create a thumbnail, observing the following rules:
The thumbnail image file must be in JPEG format.
The image dimension must be horizontal 160 × vertical 120 dots.
The file name must be the same as the video file, with extension “.jpg”.
The thumbnail and video file must be placed in the same folder of the player.
The maximum video size playable on the player is 240 × 320. For detailed specifications,
see [Details].
Videos are not played back continuously. They are played back one by one.
69

WALKMAN User Guide
Print
Getting Started
How to Use the Software
Music
Videos/Photos
FM Radio
Timer
Settings
Troubleshooting
Important Information
Specifications
Contents list
Top page > Videos/Photos > Watching Videos > Browsing and using the video screen
Browsing and using the video screen
Video playback screen
Video list screen
Video playback screen
Video title
Elapsed time/total time
Progress bar
Information area
These indications disappear after a while.
Indication icons of the video playback screen
Icon Description
,
Zoom setting ([Auto] or [Full]) [Details]
Operations on the video playback screen
While the player is playing back a video in horizontal orientation, the / buttons and /
buttons swap functions.
To (Screen indication) Do this
Play ( )/pause ( ) (*1) Press the button.
Fast forward ( )/fast rewind ( ) Press and hold the / button.
Fast forward ( )/fast rewind ( ) during
pause (*2)
Press and hold the / button during
pause.
Forward slightly ( )/rewind slightly ( ) (*3) Press the / button during pause.
71
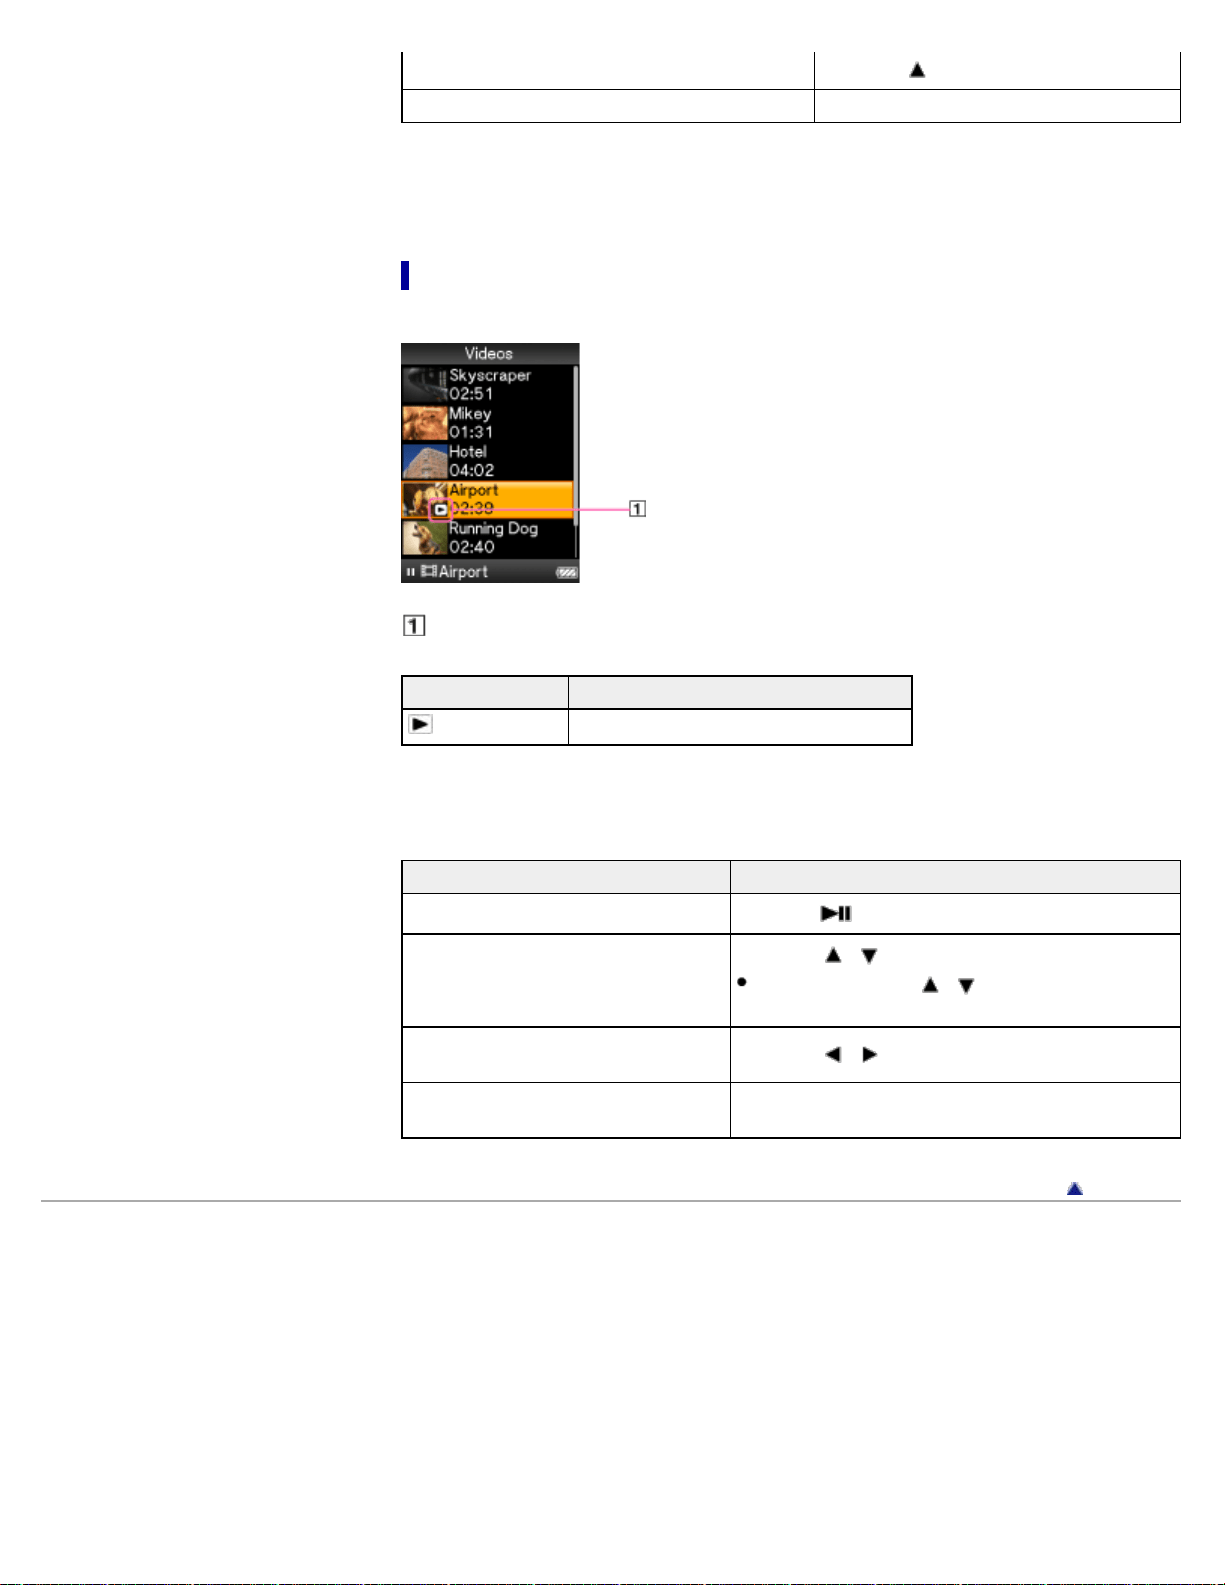
Find the beginning of the current video Press the button.
Return to the list screen Press the BACK/HOME button.
(*1) During pause, if there is no operation for a while, the player automatically enters standby mode.
(*2) The speed of fast forward/fast rewind during pause varies depending on the length of the video.
(*3) The interval of forward/rewind during pause varies depending on the video.
Video list screen
The following is an example of video list screens.
Playback icon
Icon Description
(Playback icon)
Shows that the video is currently playing.
Operations on the video list screen
To Do this
Select an item Press the button.
Move the cursor up or down
Press the / button.
Press and hold the
/ button to scroll up or
down faster.
Display the previous/next screen of the
list
Press the
/ button.
Return to the list screen of the next
upper level
Press the BACK/HOME button.
Back to top
Copyright 2011 Sony Corporation
72

WALKMAN User Guide
Print
Getting Started
How to Use the Software
Music
Videos/Photos
FM Radio
Timer
Settings
Troubleshooting
Important Information
Specifications
Contents list
Top page > Videos/Photos > Watching Videos > Deleting videos
Deleting videos
When you delete videos from the player, use the software you used to transfer the videos, or
Windows Explorer.
For details about using the software, see the Help of the software.
Note
The player itself cannot delete videos without connecting to a computer.
Back to top
Copyright 2011 Sony Corporation
73
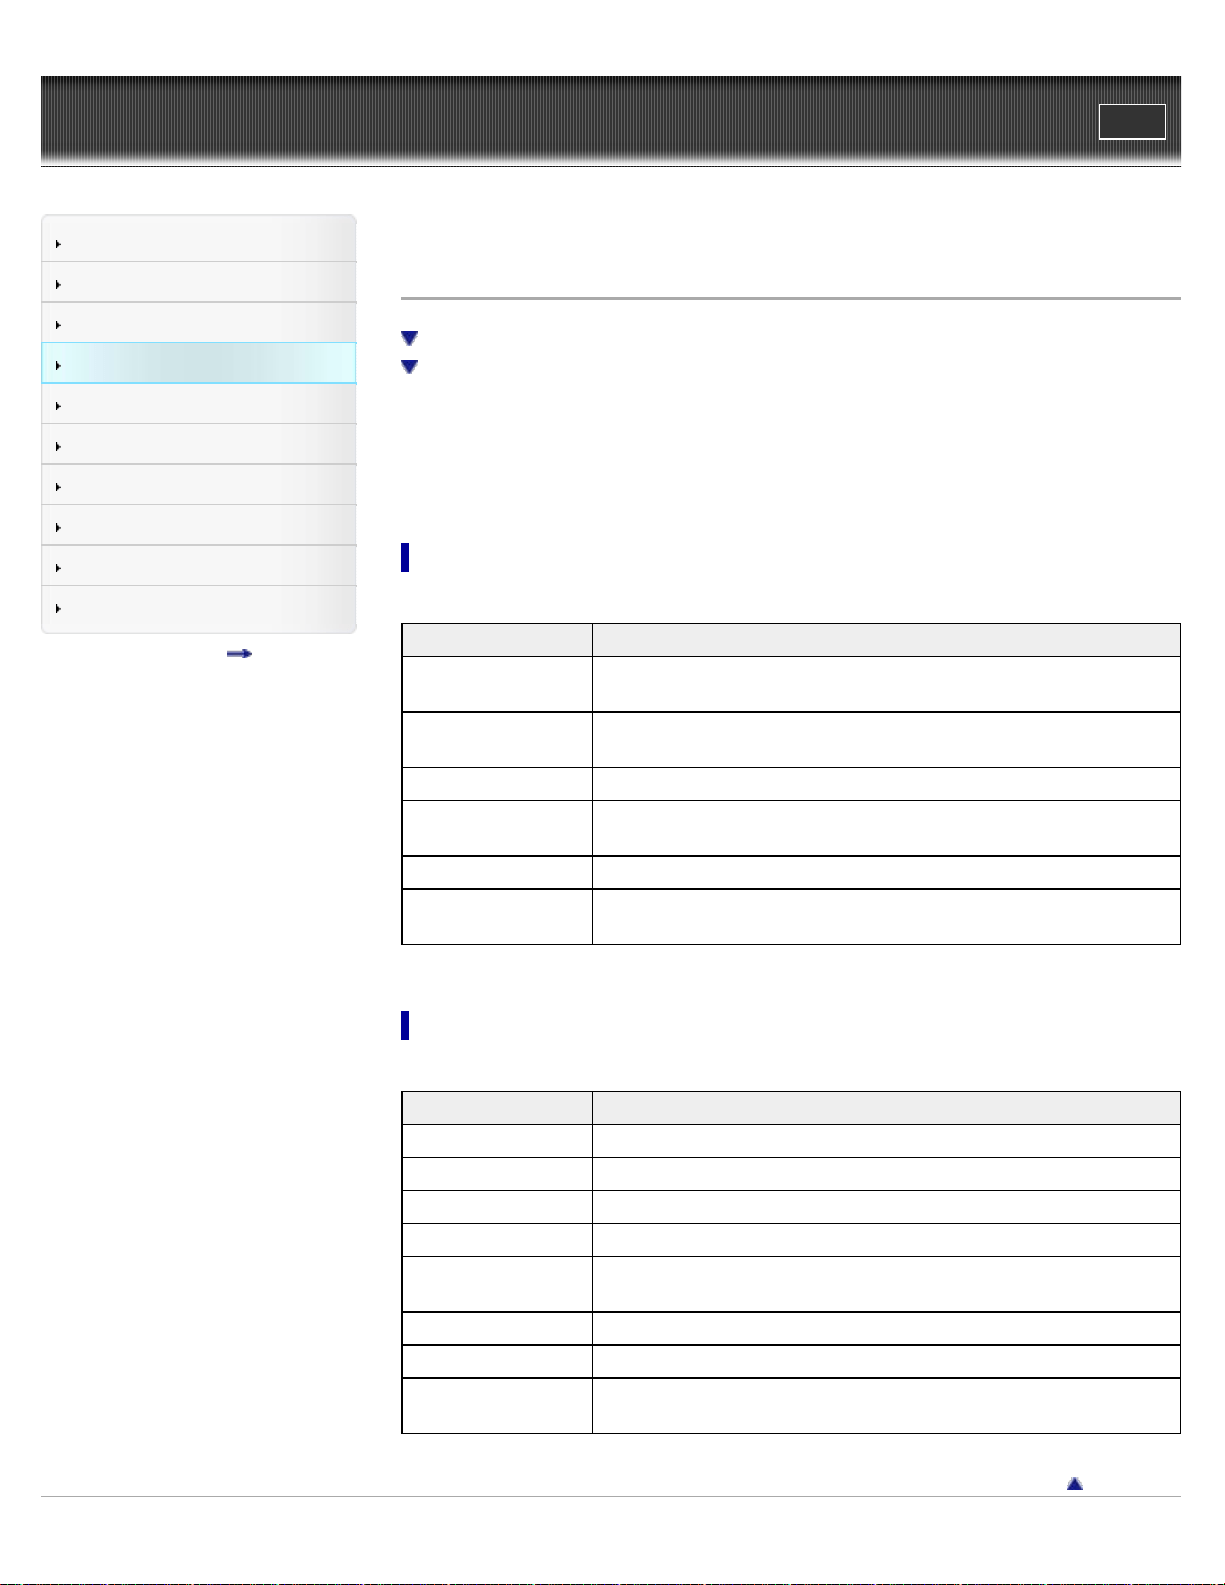
WALKMAN User Guide
Print
Getting Started
How to Use the Software
Music
Videos/Photos
FM Radio
Timer
Settings
Troubleshooting
Important Information
Specifications
Contents list
Top page > Videos/Photos > Video Option Menu > Using the video option menu
Using the video option menu
Option items appearing on the video list screen
Option items appearing on the video playback screen
You can bring up the video option menu by pressing the OPTION/PWR OFF button on the video
list or on the video playback screen. For details on how to use the option menu, see [Details].
The option items shown on the option menu vary depending on the screen from which you bring it
up. See the reference page for settings and usage.
Option items appearing on the video list screen
Option items Description/reference page
[Now Playing]
Displays the playback or display screen of the currently playing
content.
[Go to FM Radio
screen]
The FM Radio screen of the last received broadcast station appears
[Details].
[Play from beginning] Finds the beginning of a video.
[Detailed Information]
Displays file information, such as file size, resolution, video/audio
compression format, and file name, etc.
[Most Recent Video] Starts playback of the most recently played video.
[Go to the song
playback screen]
Displays the music playback screen of the song last played.
Option items appearing on the video playback screen
Option items Description/reference page
[Play from beginning] Finds the beginning of a video.
[Zoom Settings] Sets the zoom function [Details].
[Video Orientation] Sets the video orientation [Details].
[Display] Sets to display/not display video information [Details].
[Detailed Information]
Displays file information, such as file size, resolution, video/audio
compression format, and file name, etc.
[Brightness] Adjusts the brightness of the screen [Details].
[Clock Display] Displays the current time [Details].
[Go to the song
playback screen]
Displays the music playback screen of the song last played.
Back to top
74

Copyright 2011 Sony Corporation
75

WALKMAN User Guide
Print
Getting Started
How to Use the Software
Music
Videos/Photos
FM Radio
Timer
Settings
Troubleshooting
Important Information
Specifications
Contents list
Top page > Videos/Photos > Video Settings > Setting the zoom function [Zoom]
Setting the zoom function [Zoom]
You can zoom in the currently playing video.
1. From the Home menu, select [Settings] [Video Settings] [Zoom Settings]
desired zoom setting type.
Type Description
[Auto]
The video image is resized to fit the display area, maintaining the original aspect ratio.
(Default setting)
When a 16:9 (wide size) video image is displayed, black bands appear on the top and
bottom of the screen.
16:9 source
4:3 source
[Full]
The video image is resized to fill the available display area, maintaining the aspect
ratio.
When a 16:9 (wide size) video image is displayed, the right/left sides of the image are
trimmed to fit.
16:9 source
4:3 source
The dotted line frame represents the original video image size.
The video image is not resized, and appears in the original resolution. If video
resolution is too high, the left, right, top and bottom of the screen will be cut. If video
resolution is too low, black bars will appear on the right, left, top and bottom of the
screen.
76
WALKMAN User Guide
Print
Getting Started
How to Use the Software
Music
Videos/Photos
FM Radio
Timer
Settings
Troubleshooting
Important Information
Specifications
Contents list
Top page > Videos/Photos > Video Settings > Setting the display of the video screen [Display]
Setting the display of the video screen [Display]
You can display or hide detailed information of a video, such as its title, playback icon, and
elapsed playing time, etc., during playback.
1. From the Home menu, select
[Settings] [Video Settings] [Display] desired
display type.
Type Description
[On] Displays the video title, playback status, or the elapsed time, etc.
[Off]
Hides detailed information of the currently playing video and displays it only when you
operate the player. (Default setting)
Note
If [Video Orientation] is set to [Horizontal (right)], the title of the video is not displayed.
Back to top
Copyright 2011 Sony Corporation
78
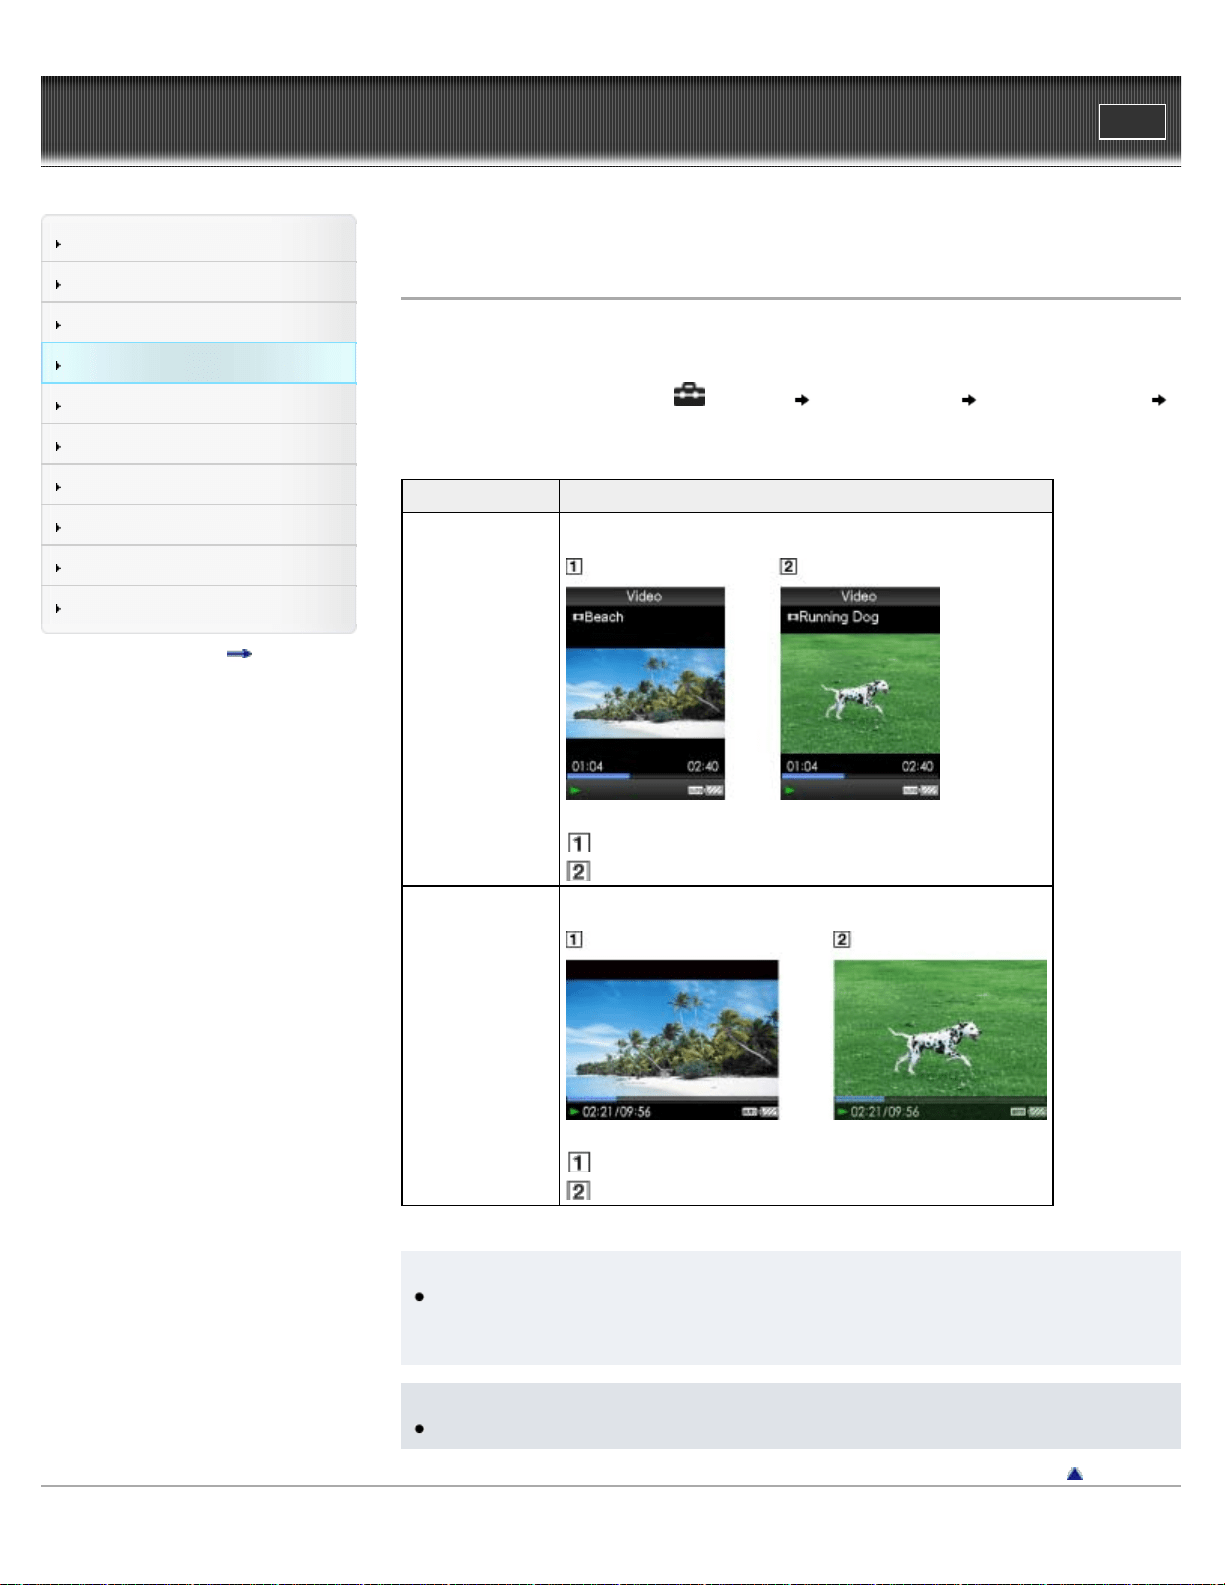
WALKMAN User Guide
Print
Getting Started
How to Use the Software
Music
Videos/Photos
FM Radio
Timer
Settings
Troubleshooting
Important Information
Specifications
Contents list
Top page > Videos/Photos > Video Settings > Setting the video orientation [Video Orientation]
Setting the video orientation [Video Orientation]
You can set the video orientation to [Vertical] or [Horizontal (right)].
The operation of the 5-way button is switched according to the setting of [Video Orientation].
1. From the Home menu, select
[Settings] [Video Settings] [Video Orientation]
desired video orientation type.
Type Description
[Vertical]
Displays at 240 × 180 pixels. (Default setting)
16:9 source
4:3 source
[Horizontal (right)]
Displays at 320 × 240 pixels.
16:9 source
4:3 source
Hint
When [Display] is set to [On], detailed information, such as the video title, its playback icon,
and elapsed playing time, etc., appears. The information disappears if this setting is set to
[Off] [Details].
Note
If [Video Orientation] is set to [Horizontal (right)], the video title is not displayed.
Back to top
Copyright 2011 Sony Corporation
79

80
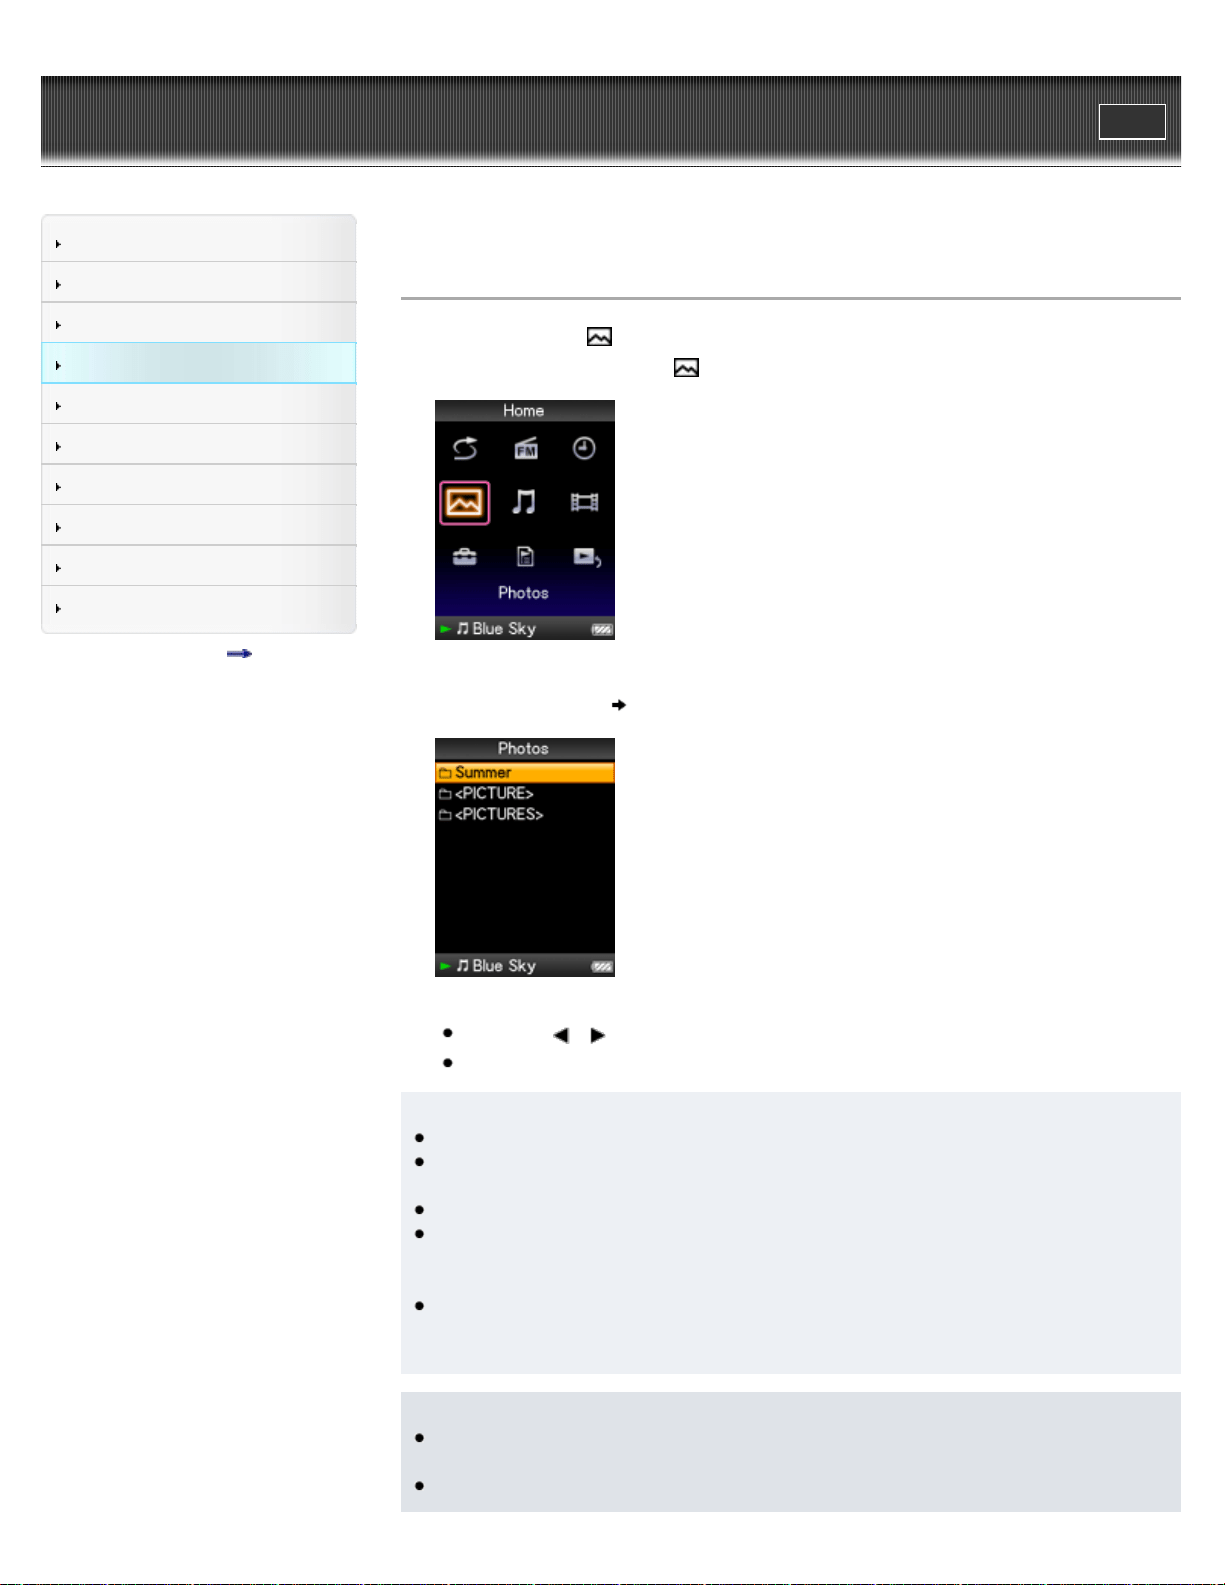
WALKMAN User Guide
Print
Getting Started
How to Use the Software
Music
Videos/Photos
FM Radio
Timer
Settings
Troubleshooting
Important Information
Specifications
Contents list
Top page > Videos/Photos > Viewing Photos > Viewing photos [Photos]
Viewing photos [Photos]
To view photos, select [Photos] on the Home menu to display the [Photos] screen.
1. From the Home menu, select [Photos].
The [Photos] screen appears.
2. Select desired folder
desired photo.
The photo display screen appears.
Press the
/ button to display the previous or next photo.
For details on how to operate the photo display screen, see [Details].
Hint
In the photo folder list, only folders containing photos are displayed in alphabetical order.
Playback of songs continues even while you are searching for photos in the photo folder
lists or photo lists, or when the photo display screen is displayed.
You can display the photos in a selected folder continuously (slide show play) [Details].
You can arrange photos transferred to the player by folder. Select the player (as
[WALKMAN]) using Windows Explorer, and drag and drop a new folder just under the
[PICTURE] or [PICTURES] folder. For details on data hierarchy, see [Details].
Photo files are displayed in alphabetical order. The files under the [PICTURE], [PICTURES]
and [DCIM] folders are displayed in the [PICTURE], [PICTURES] and [DCIM] folders
respectively.
Note
All files with the extension .jpg, including thumbnail files of videos, are recognized as
photos. All folders containing .jpg files are displayed in the photo folder list.
Up to 8,000 photo folders can be displayed in the photo folder list. And, up to 8,000 photos
81

can be displayed in the photo lists, regardless of the number of folders in which they are
contained.
If the size of a photo is too large, or the photo file is damaged,
appears, and the photo
cannot be displayed.
If photos are not compliant with DCF 2.0 (or folder/file name is long., etc.), operation time (to
display photos or slideshow) may take more time.
Related topics
Transferring videos/photos using Content Transfer
Transferring videos/photos using Windows Explorer
Browsing and using the photo screen
Deleting photos
Using the photo option menu
Back to top
Copyright 2011 Sony Corporation
82
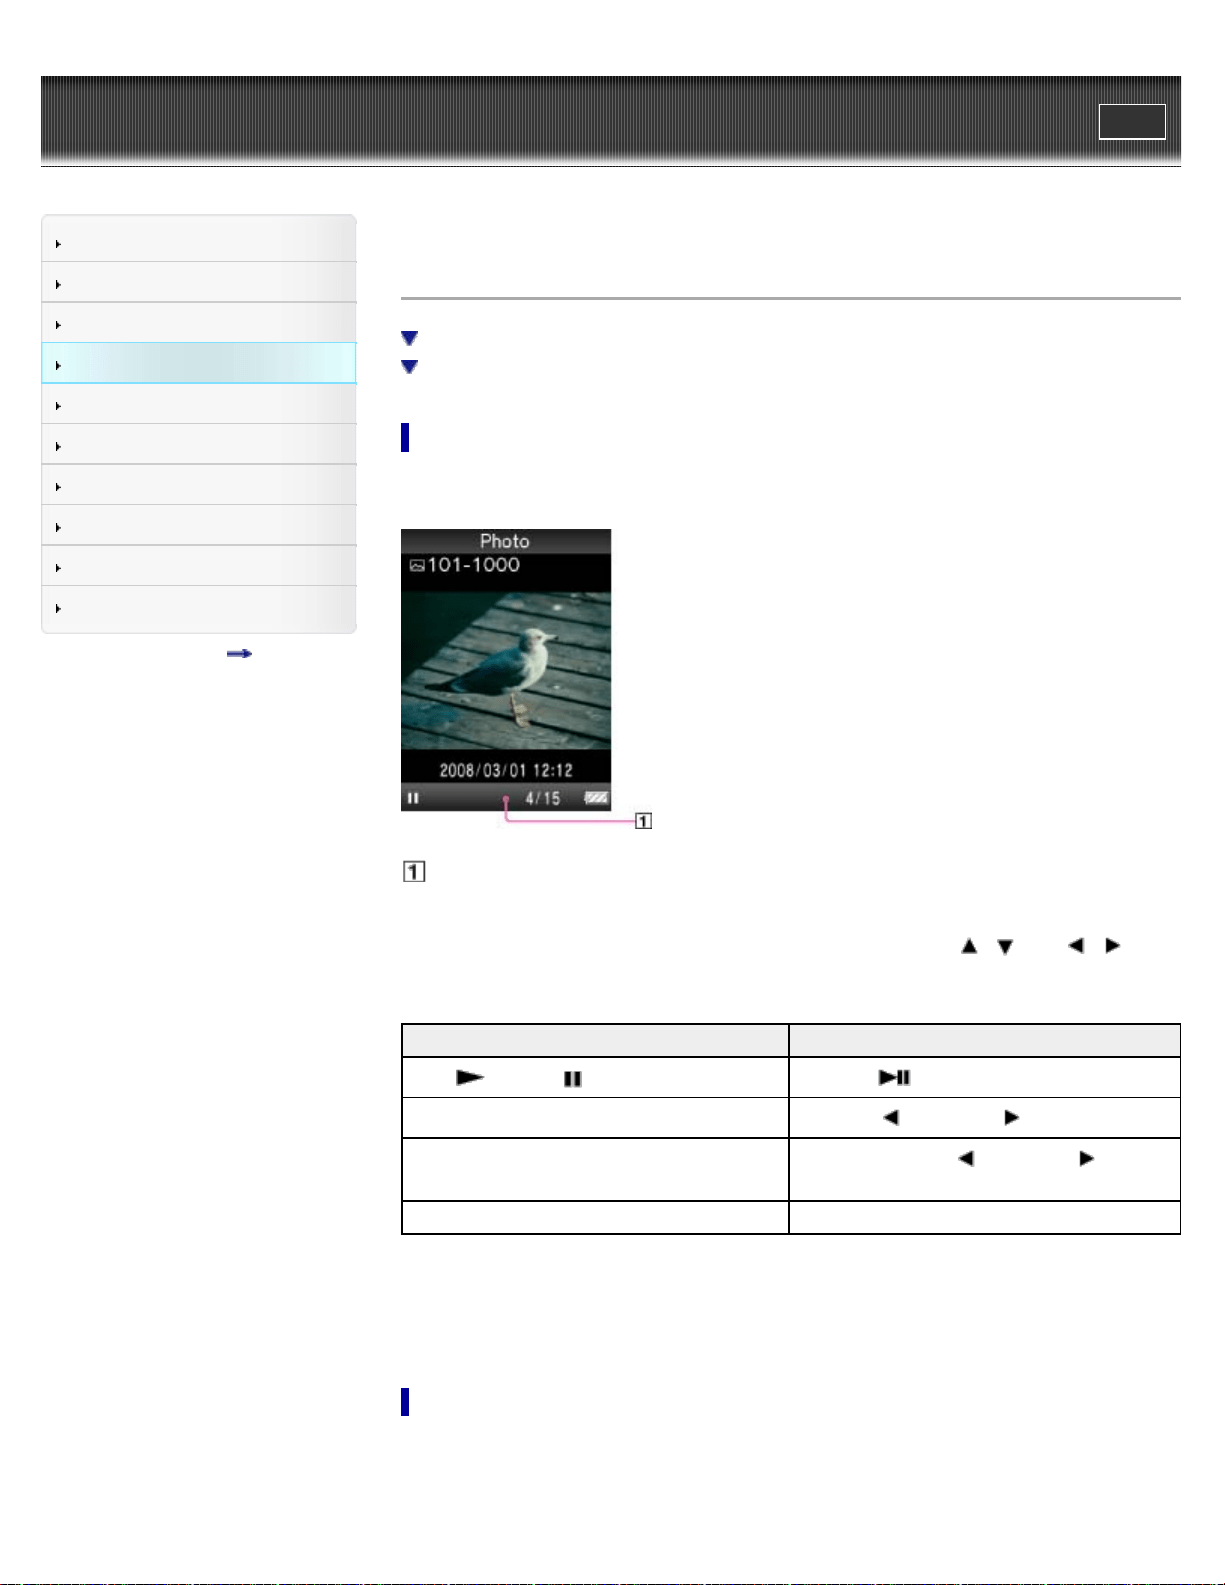
WALKMAN User Guide
Print
Getting Started
How to Use the Software
Music
Videos/Photos
FM Radio
Timer
Settings
Troubleshooting
Important Information
Specifications
Contents list
Top page > Videos/Photos > Viewing Photos > Browsing and using the photo screen
Browsing and using the photo screen
Photo display screen
Photo list screen
Photo display screen
When a photo appears on the screen, information such as the photo’s file name is displayed for a
few seconds.
Information area
Operations on the photo display screen
While the player is playing back a photo in horizontal orientation, the / and /
buttons interchange their functions with each other.
To (Screen indication) Do this
Play ( )/pause ( ) a slide show (*1) Press the button.
Display the next/previous photo Press the (previous)/ (next) button.
Display the following/previous photos
consecutively
Press and hold the (previous)/ (next)
button.
Return to the list screen Press the BACK/HOME button.
(*1) When playing songs while a slide show is paused, the screen goes dark if there is no operation for
more than 30 seconds. When the song playback and a slide show accompanying it are paused, and
there is no operation for more than 3 minutes, the screen turns off and the player enters standby
mode.
Photo list screen
The following are examples of photo list screens.
83
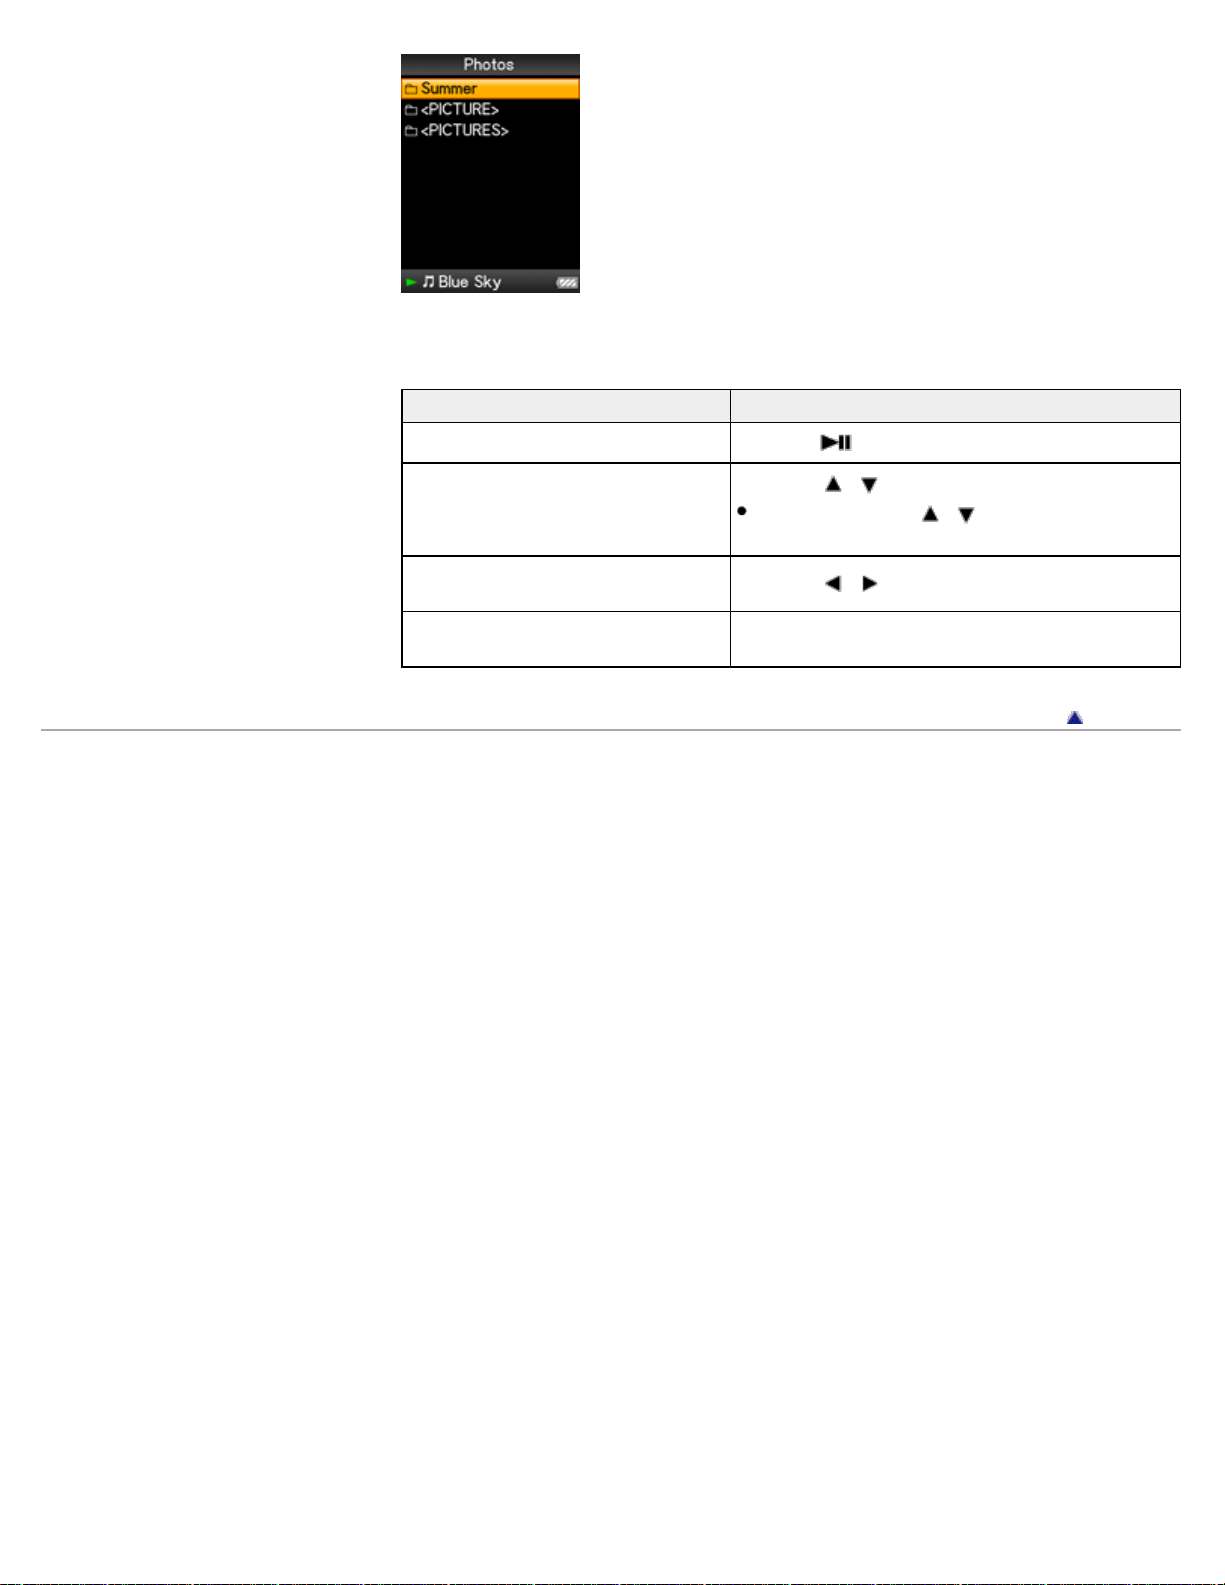
Operations on the photo list screen
To (Screen indication) Do this
Select an item Press the button.
Move the cursor up or down
Press the / button.
Press and hold the
/ button to scroll up or
down faster.
Display the previous/next screen of the
list
Press the
/ button.
Return to the list screen of the next
upper level
Press the BACK/HOME button.
Back to top
Copyright 2011 Sony Corporation
84
WALKMAN User Guide
Print
Getting Started
How to Use the Software
Music
Videos/Photos
FM Radio
Timer
Settings
Troubleshooting
Important Information
Specifications
Contents list
Top page > Videos/Photos > Viewing Photos > Playing a slide show
Playing a slide show
You can display photos in a selected folder in slide show form.
1. From the Home menu, select [Photos].
The photo folder list appears.
2. Press the
/ / / button to select a photo folder, and then press and hold the
button.
A slide show of the photos in the selected folder starts.
Hint
You can start playback of a slide show by any of the following operations:
Press and hold the
button in the photo list.
Press the
button on the photo display screen.
Press the OPTION/PWR OFF button on the photo folder list, or a photo list, and then
select [Begin slide show] from the option menu.
Note
The screen does not turn off automatically or change to a screensaver [Details] while a slide
show is playing.
Back to top
Copyright 2011 Sony Corporation
85
WALKMAN User Guide
Print
Getting Started
How to Use the Software
Music
Videos/Photos
FM Radio
Timer
Settings
Troubleshooting
Important Information
Specifications
Contents list
Top page > Videos/Photos > Viewing Photos > Deleting photos
Deleting photos
When you delete photos from the player, use the software you used to transfer the photos, or
Windows Explorer.
For details about using the software, see the Help of the software.
Note
The player itself cannot delete photos without connecting to a computer.
Back to top
Copyright 2011 Sony Corporation
86
WALKMAN User Guide
Print
Getting Started
How to Use the Software
Music
Videos/Photos
FM Radio
Timer
Settings
Troubleshooting
Important Information
Specifications
Contents list
Top page > Videos/Photos > Photo Option Menu > Using the photo option menu
Using the photo option menu
Option item appearing on the photo folder/photo list screen
Option items appearing on the photo display screen
You can bring up the photo option menu by pressing the OPTION/PWR OFF button on the photo
folder list or photo list, or on the photo display screen. For details on how to use the option menu,
see [Details].
The option items shown on the option menu vary depending on the screen from which you bring it
up. See the reference page for settings and usage.
Option item appearing on the photo folder/photo list screen
Option items Description/reference page
[Now Playing]
Displays the playback or display screen of the currently playing
content.
[Go to FM Radio screen]
The FM Radio screen of the last received broadcast station
appears [Details].
[Begin slide show] Starts a slide show [Details].
[Detailed Information]
Displays file information, such as file size, resolution, and file
name, etc.
[Most Recent Photo] Starts playback of the most recently played photo.
[Go to the song playback
screen]
Displays the music playback screen of the last song played.
Option items appearing on the photo display screen
Option items Description/reference page
[Photo Orientation] Sets the photo orientation [Details].
[Display] Sets to display/not display photo information [Details].
[Detailed Information]
Displays file information, such as file size, resolution, and file
name, etc.
[Slide Show Repeat] Selects the slide show play mode [Details].
[Slide Show Interval] Selects the slide show interval [Details].
[Brightness] Adjusts the brightness of the screen [Details].
[Clock Display] Displays the current time [Details].
[Go to the song playback
screen]
Displays the music playback screen of the last song played.
87


WALKMAN User Guide
Print
Getting Started
How to Use the Software
Music
Videos/Photos
FM Radio
Timer
Settings
Troubleshooting
Important Information
Specifications
Contents list
Top page > Videos/Photos > Photo Settings > Photo orientation [Photo Orientation]
Photo orientation [Photo Orientation]
You can set the photo orientation to [Vertical], [Horizontal (right)], or [Horizontal (left)].
The operation of the 5-way button is switched according to the setting of [Photo Orientation].
1. From the Home menu, select
[Settings] [Photo Settings] [Photo Orientation]
desired photo orientation type.
Type Description
[Vertical]
Displays at 240 × 180 pixels. (Default setting)
[Horizontal (right)] [Horizontal (left)]
Displays at 320 × 240 pixels.
Back to top
Copyright 2011 Sony Corporation
89
WALKMAN User Guide
Print
Getting Started
How to Use the Software
Music
Videos/Photos
FM Radio
Timer
Settings
Troubleshooting
Important Information
Specifications
Contents list
Top page > Videos/Photos > Photo Settings > Setting the display of the photo screen [Display]
Setting the display of the photo screen [Display]
You can display or hide detailed information of a photo, such as an icon that shows playback
status, etc., while displaying a photo.
1. From the Home menu, select
[Settings] [Photo Settings] [Display] desired
display type.
Type Description
[On] Displays the photo title, the shooting date, playback status, photo number, etc.
[Off] Hides the information of the current photo. (Default setting)
Note
If [Photo Orientation] is set to [Horizontal (right)], or [Horizontal (left)] [Details], the photo title
is not displayed, even if [Display] is set to [On].
Back to top
Copyright 2011 Sony Corporation
90
WALKMAN User Guide
Print
Getting Started
How to Use the Software
Music
Videos/Photos
FM Radio
Timer
Settings
Troubleshooting
Important Information
Specifications
Contents list
Top page > Videos/Photos > Photo Settings > Setting the slide show play mode [Slide Show
Repeat]
Setting the slide show play mode [Slide Show Repeat]
You can display photos as a slide show repeatedly.
1. From the Home menu, select [Settings] [Photo Settings] [Slide Show Repeat]
desired setting type.
Type Description
[On] Displays photos in a photo folder continuously and repeatedly.
[Off]
Displays photos in a photo folder continuously, to the last photo, then returns to the
first photo, and playback pauses. (Default setting)
Note
The screen does not turn off automatically or change to a screensaver [Details] while a slide
show is playing.
Back to top
Copyright 2011 Sony Corporation
91
WALKMAN User Guide
Print
Getting Started
How to Use the Software
Music
Videos/Photos
FM Radio
Timer
Settings
Troubleshooting
Important Information
Specifications
Contents list
Top page > Videos/Photos > Photo Settings > Setting the interval of a slide show [Slide Show
Interval]
Setting the interval of a slide show [Slide Show Interval]
You can set the time each photo is displayed.
1. From the Home menu, select [Settings] [Photo Settings] [Slide Show Interval]
desired interval type.
Type Description
[Short] Photos switch to the next photos at a short interval.
[Normal] Photos switch to the next photos at the standard interval. (Default setting)
[Long] Photos switch to the next photos at a long interval.
Note
It may take time to display a large-size photo.
Back to top
Copyright 2011 Sony Corporation
92
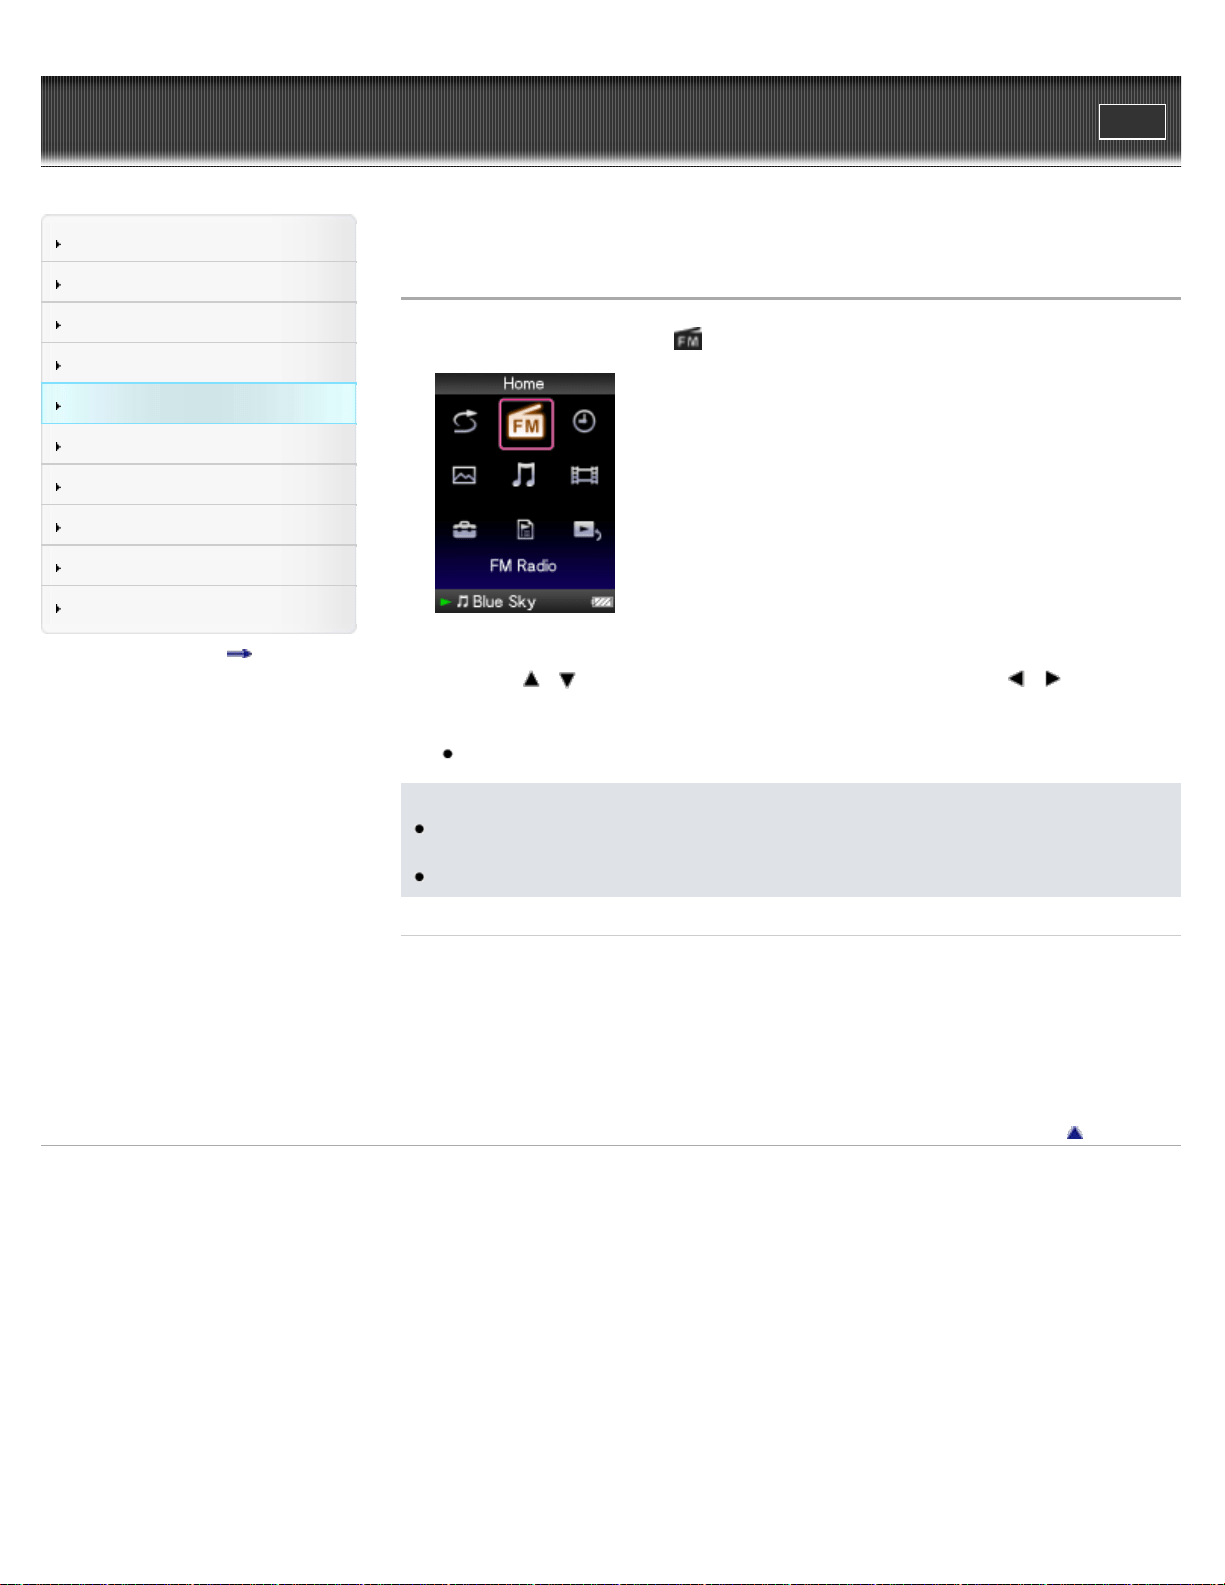
WALKMAN User Guide
Print
Getting Started
How to Use the Software
Music
Videos/Photos
FM Radio
Timer
Settings
Troubleshooting
Important Information
Specifications
Contents list
Top page > FM Radio > Listening to FM Radio > Listening to FM radio [FM Radio]
Listening to FM radio [FM Radio]
1. From the Home menu, select [FM Radio].
The [FM Radio] screen appears.
2. Press the
/ button to select the desired frequency, or press the / button to
select the desired preset number.
The FM radio broadcasting of the selected frequency or preset number is received.
For details on how to operate the FM Radio screen, see [Details].
Note
You cannot select a preset number if no preset station is stored. Preset receivable stations
using [Auto Preset] [Details], or preset the receivable stations manually [Details].
The headphone cord serves as an antenna, so extend it as far as possible.
Related Topics
Browsing and using the FM radio screen
Presetting broadcast stations automatically [Auto Preset]
Presetting broadcast stations manually
Deleting preset broadcast stations [Delete from Preset]
Using the FM radio option menu
Back to top
Copyright 2011 Sony Corporation
93

WALKMAN User Guide
Print
Getting Started
How to Use the Software
Music
Videos/Photos
FM Radio
Timer
Settings
Troubleshooting
Important Information
Specifications
Contents list
Top page > FM Radio > Listening to FM Radio > Browsing and using the FM radio screen
Browsing and using the FM radio screen
Operations on the [FM Radio] screen
Frequency
Preset number
Note
Depending on the country/region in which you have purchased the player, the screen
appearance may differ.
Operations on the [FM Radio] screen
To Do this
Select the previous/next frequency Press the / button.
Select the previous/next receivable station (*1) Press and hold the / button.
Select the previous/next preset number (*2) Press the / button.
Pause/resume the FM reception Press the button.
(*1) If sensitivity is too high, change the [Scan Sensitivity] setting [Details] to [Low].
(*2) You cannot select a Preset number if no preset station is stored. Preset receivable stations using
[Auto Preset] [Details].
Back to top
Copyright 2011 Sony Corporation
94
WALKMAN User Guide
Print
Getting Started
How to Use the Software
Music
Videos/Photos
FM Radio
Timer
Settings
Troubleshooting
Important Information
Specifications
Contents list
Top page > FM Radio > Listening to FM Radio > Presetting broadcast stations automatically
[Auto Preset]
Presetting broadcast stations automatically [Auto Preset]
You can preset (up to 30) receivable broadcast stations in your area automatically by selecting
[Auto Preset]. When you use the FM radio for the first time, or when you move to a new area, we
recommend you preset receivable broadcast stations by selecting [Auto Preset].
1. On the [FM Radio] screen, press the OPTION/PWR OFF button.
The option menu appears.
2. Select [Auto Preset]
[Yes].
Receivable broadcast stations will be preset in order of frequency (low to high).
[Auto Preset completed.] appears when presetting is completed, and the first preset station is
received.
Select [No] to cancel automatic presetting.
Hint
If high sensitivity causes the player to receive many unwanted broadcast stations, change
the [Scan Sensitivity] setting [Details] to [Low].
Note
The [Auto Preset] operation will delete already preset broadcast stations.
Back to top
Copyright 2011 Sony Corporation
95
WALKMAN User Guide
Print
Getting Started
How to Use the Software
Music
Videos/Photos
FM Radio
Timer
Settings
Troubleshooting
Important Information
Specifications
Contents list
Top page > FM Radio > Listening to FM Radio > Presetting broadcast stations manually
Presetting broadcast stations manually
You can manually preset broadcast stations that [Auto Preset] cannot detect [Details].
1. On the [FM Radio] screen, select the desired frequency.
2. Press and hold the
button.
The frequency you select in step 1 is preset and the assigned preset number appears below
the frequency.
Hint
You can preset up to 30 stations.
Note
The preset numbers are stored in order, from low to high frequency.
Back to top
Copyright 2011 Sony Corporation
96
WALKMAN User Guide
Print
Getting Started
How to Use the Software
Music
Videos/Photos
FM Radio
Timer
Settings
Troubleshooting
Important Information
Specifications
Contents list
Top page > FM Radio > Listening to FM Radio > Deleting preset broadcast stations [Delete from
Preset]
Deleting preset broadcast stations [Delete from Preset]
1. On the [FM Radio] screen, select the preset number you intend to delete.
2. Press the OPTION/PWR OFF button to bring up the option menu.
3. Select [Delete from Preset].
The preset broadcast station is deleted, and a message appears.
Back to top
Copyright 2011 Sony Corporation
97
WALKMAN User Guide
Print
Getting Started
How to Use the Software
Music
Videos/Photos
FM Radio
Timer
Settings
Troubleshooting
Important Information
Specifications
Contents list
Top page > FM Radio > FM Radio Option Menu > Using the FM radio option menu
Using the FM radio option menu
You can bring up the FM radio option menu by pressing the OPTION/PWR OFF button on the
[FM Radio] screen. For details on how to use the option menu, see [Details].
The option items shown on the option menu vary depending on the screen from which you bring it
up. See the reference page for settings and usage.
Option items Description/reference page
[Save to Preset ] Presets the currently tuned-in broadcast station [Details].
[Delete from Preset] Deletes a broadcast station from a preset station [Details].
[Auto Preset] Presets broadcast stations automatically [Details].
[Scan Sensitivity] Adjusts the sensitivity of radio reception [Details].
[Mono/Auto] Changes to either monaural or stereo [Details].
[Clock Display] Displays the current time [Details].
[Go to the song playback screen] Displays the music playback screen of the last song played.
Back to top
Copyright 2011 Sony Corporation
98
WALKMAN User Guide
Print
Getting Started
How to Use the Software
Music
Videos/Photos
FM Radio
Timer
Settings
Troubleshooting
Important Information
Specifications
Contents list
Top page > FM Radio > FM Radio Settings > Setting the reception [Scan Sensitivity]
Setting the reception [Scan Sensitivity]
When you select stations using the [Auto Preset] function [Details] or the / button, the FM
receiver may receive unwanted broadcast stations as a result of sensitivity being too high. In this
case, set the reception to [Low]. [High] is set by default.
1. From the Home menu, select
[Settings] [FM Radio Settings] [Scan Sensitivity]
[Low].
To set the reception sensitivity back to the default, select [High].
Back to top
Copyright 2011 Sony Corporation
99
WALKMAN User Guide
Print
Getting Started
How to Use the Software
Music
Videos/Photos
FM Radio
Timer
Settings
Troubleshooting
Important Information
Specifications
Contents list
Top page > FM Radio > FM Radio Settings > Setting monaural/stereo [Mono/Auto]
Setting monaural/stereo [Mono/Auto]
If noise occurs during FM reception, set the receiver to [Mono] for monaural. If you set it to
[Auto], monaural/stereo reception is selected automatically, depending on reception conditions.
[Auto] is set by default.
1. From the Home menu, select
[Settings] [FM Radio Settings] [Mono/Auto]
[Mono].
To return to automatic setting, select [Auto].
Back to top
Copyright 2011 Sony Corporation
100
WALKMAN User Guide
Print
Getting Started
How to Use the Software
Music
Videos/Photos
FM Radio
Timer
Settings
Troubleshooting
Important Information
Specifications
Contents list
Top page > Timer > Setting the Timer > About the timer
About the timer
You can set the timer to play back songs at a specified time (Alarm). You can also set the period
of time after which the player automatically enters standby mode and the screen turns off (Sleep
Timer).
Note
If the [Set Date-Time] setting is not accurate, timer settings cannot be set correctly. Set the
current date and time before setting the timer [Details].
The alarm and sleep timer cannot be set at the same time.
Related topics
Setting the alarm [Alarm]
Setting the sleep timer [Sleep Timer]
Back to top
Copyright 2011 Sony Corporation
101
WALKMAN User Guide
Print
Getting Started
How to Use the Software
Music
Videos/Photos
FM Radio
Timer
Settings
Troubleshooting
Important Information
Specifications
Contents list
Top page > Timer > Setting the Timer > Setting the alarm [Alarm]
Setting the alarm [Alarm]
To cancel the alarm
You can set the alarm timer to play back a selected song at a specified time as an alarm.
1. From the Home menu, select [Music] desired search method desired song.
2. Press the OPTION/PWR OFF button.
The option menu appears.
3. Select [Alarm].
4. Press the
/ button to select the hour, and then press the / button to change
the value.
5. As in step 4, adjust the minute setting.
6. Press the
button to confirm.
The player automatically stops playback of the songs, and the player is automatically turned
off.
At the set time, the player automatically plays back the song last played.
To cancel the alarm
After setting the alarm, press any button to turn on the player.
When [Alarm is now set. Cancel?] appears, select [Yes].
If you select [No], the alarm is not canceled, and the player turns off automatically.
Note
The alarm will not activate if the player is connected to a computer. Disconnect the USB
cable before the set time.
If there is no resume information for the song last played, or if the song file last played is
deleted, the alarm sounds automatically at the set time.
The alarm will automatically stop after 60 minutes.
Do not fall asleep while wearing headphones. If you sleep wearing headphones, the
headphone cord may wind around your neck, which may cause suffocation.
In the following situations, the alarm will be postponed until the process is finished.
Deleting data.
Formatting memory.
The alarm will not sound in the following situation.
Connected to a computer.
Back to top
Copyright 2011 Sony Corporation
102
WALKMAN User Guide
Print
Getting Started
How to Use the Software
Music
Videos/Photos
FM Radio
Timer
Settings
Troubleshooting
Important Information
Specifications
Contents list
Top page > Timer > Setting the Timer > Setting the sleep timer [Sleep Timer]
Setting the sleep timer [Sleep Timer]
To cancel the sleep timer
You can set the period of time after which the player automatically enters standby mode and the
screen turns off (Sleep Timer).
1. On the music playback screen, press the OPTION/PWR OFF button.
The option menu appears.
2. Select [Sleep Timer]
desired sleep timer duration.
Type Description
[30 Min] Turns off the player after 30 minutes.
[60 Min] Turns off the player after 60 minutes.
[90 Min] Turns off the player after 90 minutes.
[120 Min] Turns off the player after 120 minutes.
Hint
After setting the sleep timer,
appears in the information area of the music playback
screen.
To cancel the sleep timer
After setting the sleep timer, press the BACK/HOME button, press and hold the BACK/HOME
button or press the OPTION/PWR OFF button on the music playback screen.
When [Sleep timer is now set. Cancel?] appears, select [Yes].
If you select [No], the sleep timer is not canceled, and the music playback screen reappears.
Note
The sleep timer will not activate if the player is connected to a computer.
After setting the sleep timer, if you turn the player off by pressing and holding the
OPTION/PWR OFF button and then turn the player on again, the sleep timer is canceled.
In the following situations, the sleep timer will be postponed until the process is finished.
Deleting data.
Formatting memory.
The sleep timer will not activate in the following situations.
Connected to a computer.
Using [Auto Preset] function of the FM radio.
Sounding the alarm.
The sleep timer will be canceled in the following situations.
Entering standby mode.
Connecting the player to a computer.
Back to top
Copyright 2011 Sony Corporation
103
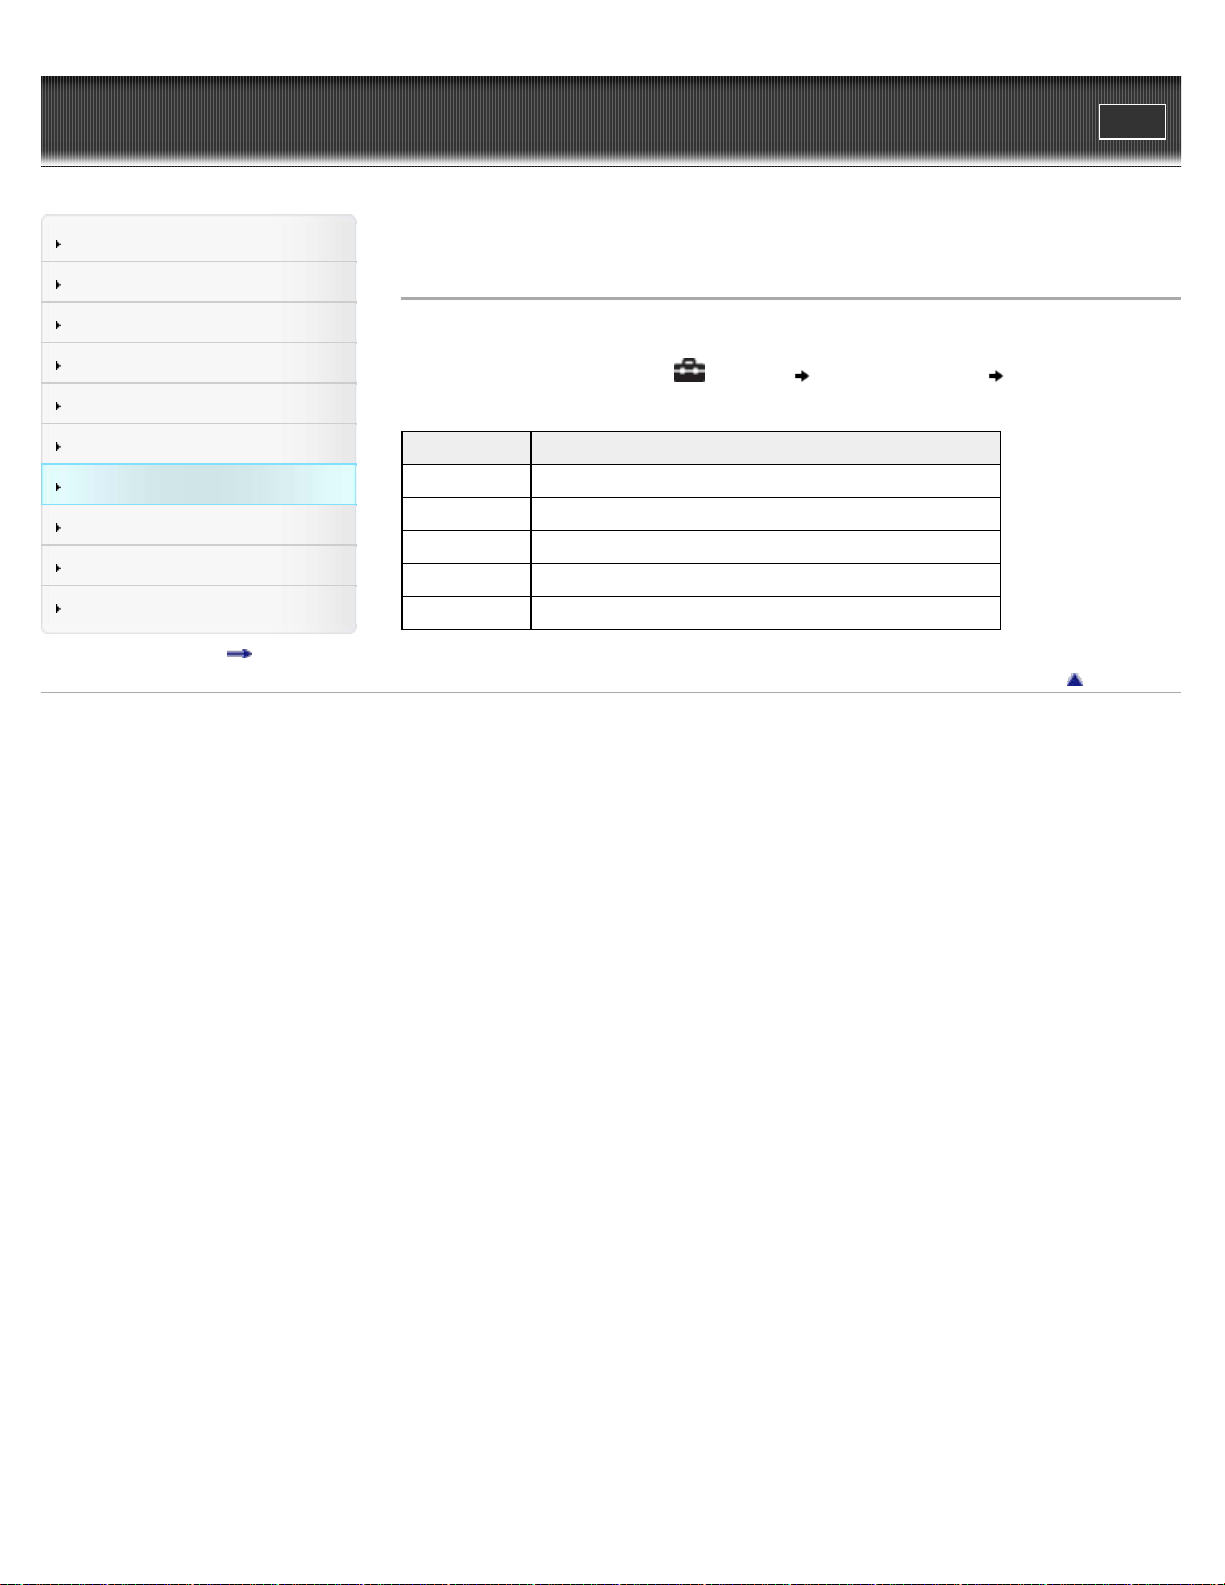
WALKMAN User Guide
Print
Getting Started
How to Use the Software
Music
Videos/Photos
FM Radio
Timer
Settings
Troubleshooting
Important Information
Specifications
Contents list
Top page > Settings > Common Settings > Displaying the player information [Unit Information]
Displaying the player information [Unit Information]
Information such as model name, firmware version, etc., is displayed.
1. From the Home menu, select [Settings] [Common Settings] [Unit Information].
Item Description
[Model:] Displays the model name of the player.
[Firmware:] Displays version information of the player’s firmware.
[Total songs:] Displays the total number of songs stored on the player.
[Total videos:] Displays the total number of videos stored on the player.
[Total photos:] Displays the total number of photos stored on the player.
Back to top
Copyright 2011 Sony Corporation
104
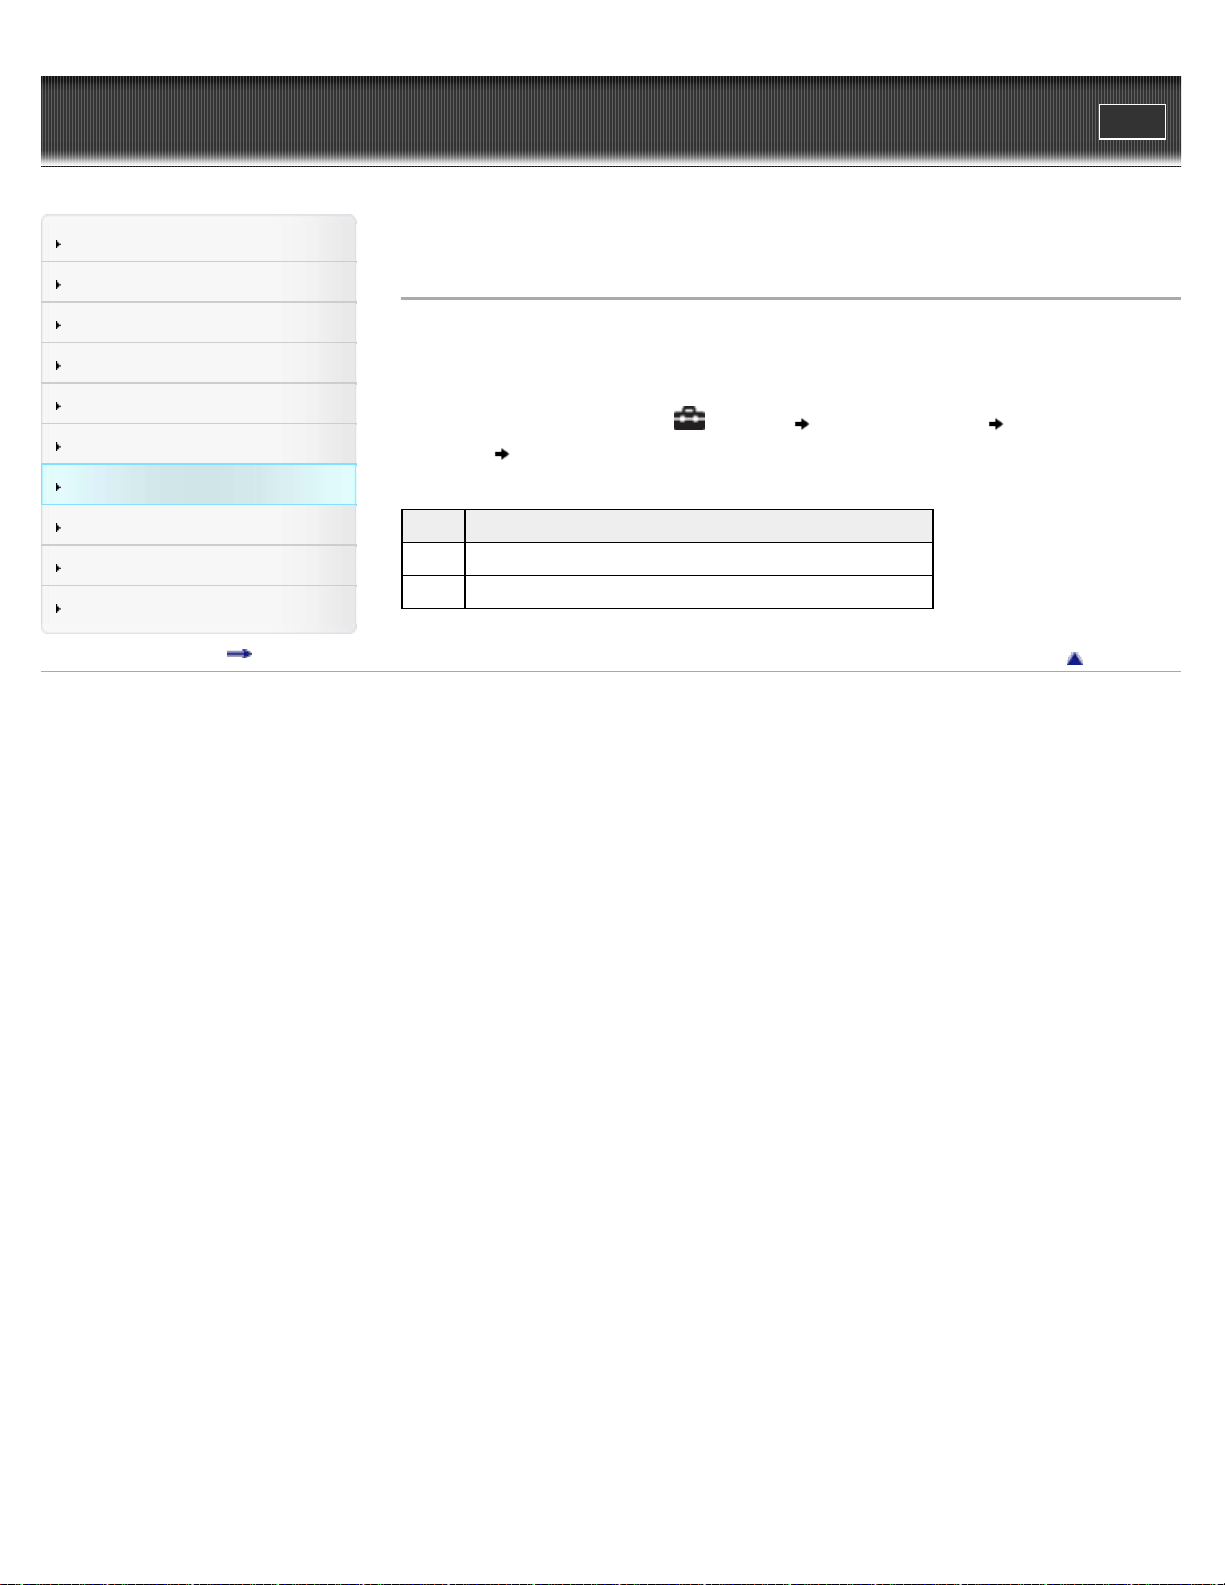
WALKMAN User Guide
Print
Getting Started
How to Use the Software
Music
Videos/Photos
FM Radio
Timer
Settings
Troubleshooting
Important Information
Specifications
Contents list
Top page > Settings > Common Settings > Limiting the volume [AVLS (Volume Limit)]
Limiting the volume [AVLS (Volume Limit)]
You can set [AVLS (Volume Limit)] (Automatic Volume Limiter System) to limit the maximum
volume to prevent auditory issues or distraction. With [AVLS (Volume Limit)], you can listen to
music at a comfortable volume level.
1. From the Home menu, select
[Settings] [Common Settings] [AVLS (Volume
Limit)]
desired setting type.
Type Description
[On] Maintains a moderate volume level.
[Off] Plays back audio at the original volume. (Default setting)
Back to top
Copyright 2011 Sony Corporation
105
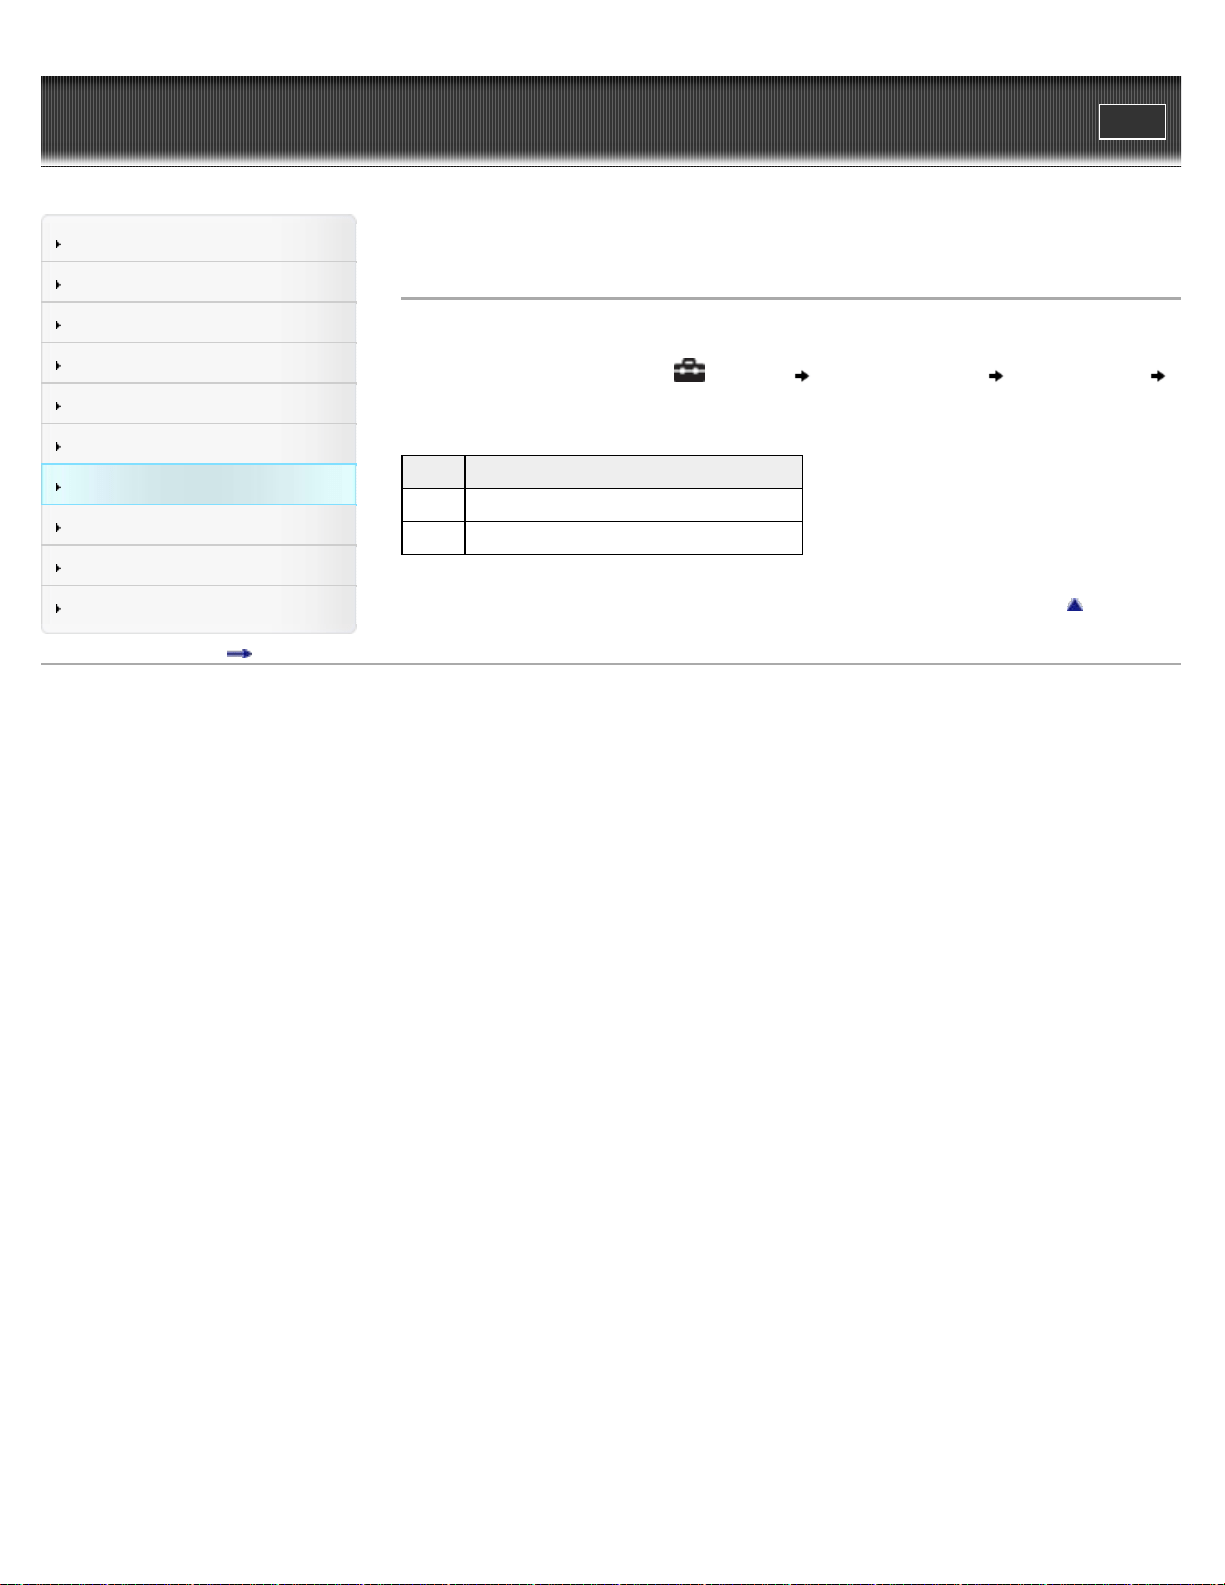
WALKMAN User Guide
Print
Getting Started
How to Use the Software
Music
Videos/Photos
FM Radio
Timer
Settings
Troubleshooting
Important Information
Specifications
Contents list
Top page > Settings > Common Settings > Turning off the beep sound [Beep Settings]
Turning off the beep sound [Beep Settings]
You can turn on or off the operation sounds of the player.
1. From the Home menu, select [Settings] [Common Settings] [Beep Settings]
desired setting type.
Type Description
[On] Produces beep sounds. (Default setting)
[Off] Does not produce beep sounds.
Back to top
Copyright 2011 Sony Corporation
106
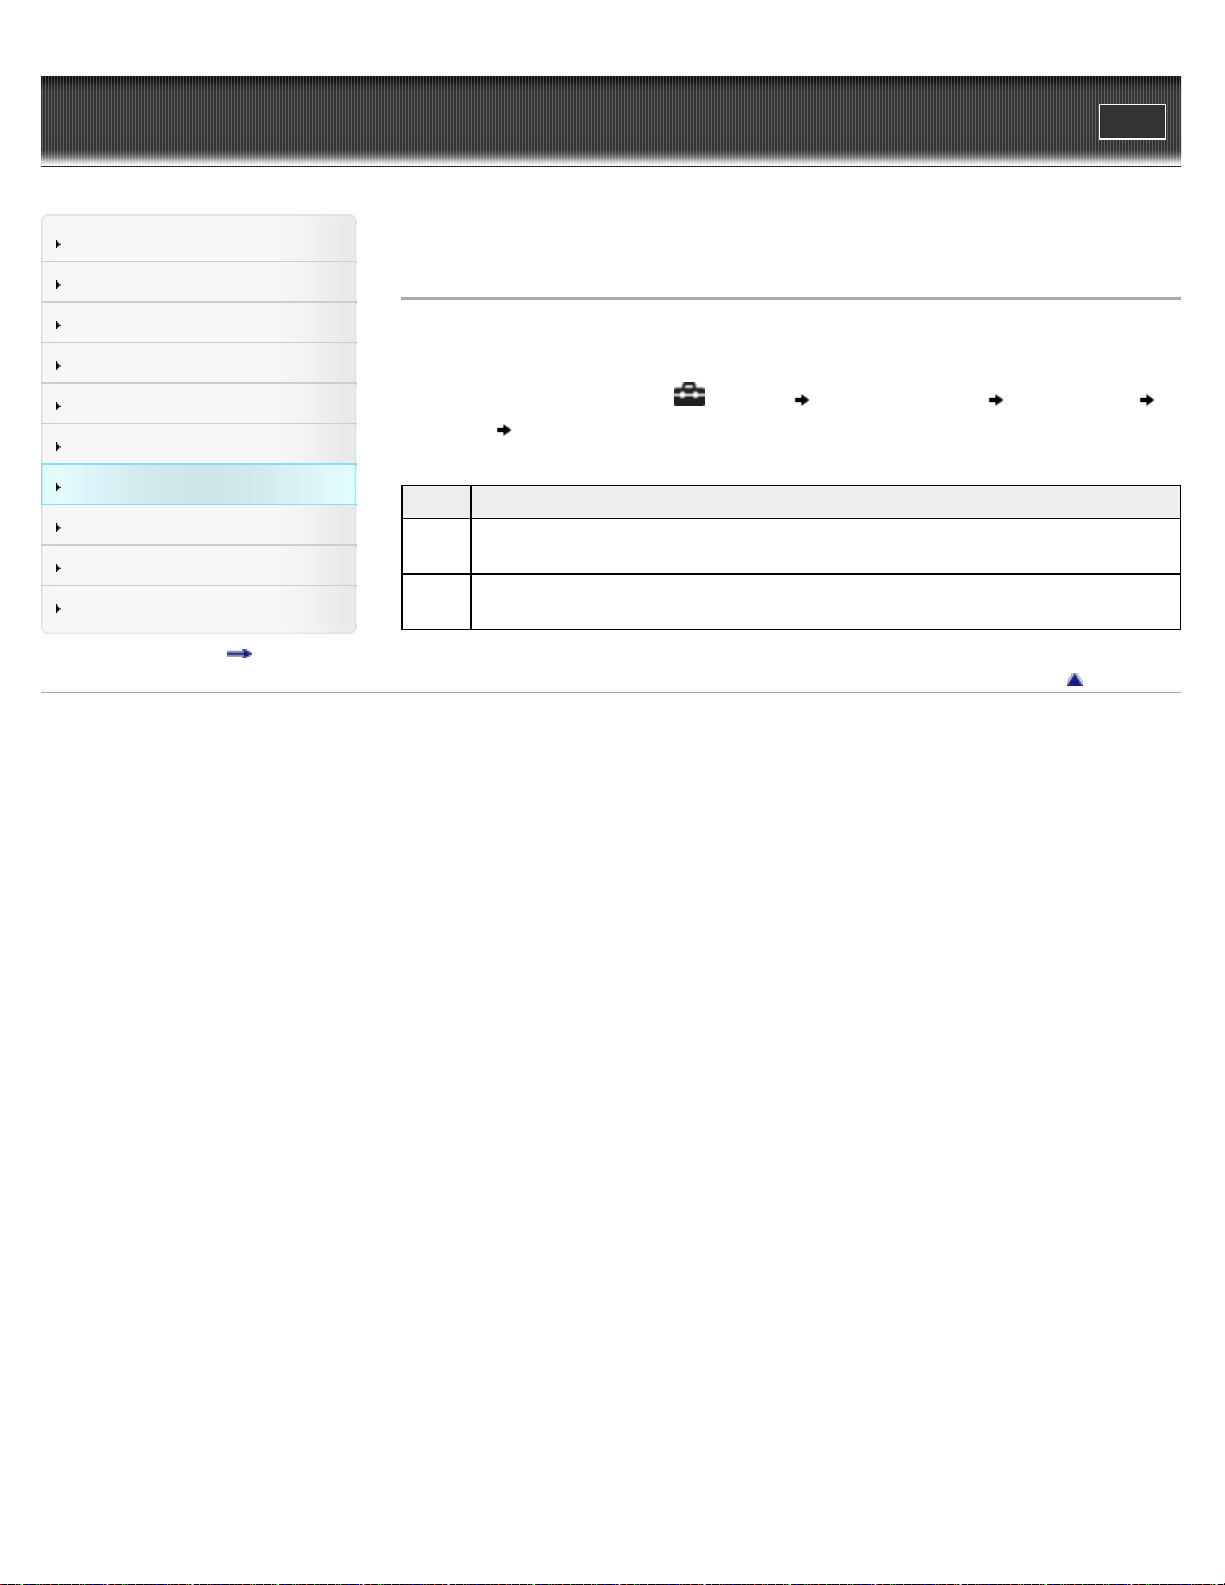
WALKMAN User Guide
Print
Getting Started
How to Use the Software
Music
Videos/Photos
FM Radio
Timer
Settings
Troubleshooting
Important Information
Specifications
Contents list
Top page > Settings > Common Settings > Setting the screensaver type [Screensaver]
Setting the screensaver type [Screensaver]
You can set the screen saver to either [Clock] or [Blank] for when there is no operation for more
than 30 seconds during song playback or FM reception.
1. From the Home menu, select
[Settings] [Common Settings] [Screensaver]
[Type] desired setting type.
Type Description
[Clock]
When there is no operation for more than 30 seconds, a clock appears as a screen
saver.
[Blank]
When there is no operation for more than 30 seconds, the screen goes off. (Default
setting)
Back to top
Copyright 2011 Sony Corporation
107
WALKMAN User Guide
Print
Getting Started
How to Use the Software
Music
Videos/Photos
FM Radio
Timer
Settings
Troubleshooting
Important Information
Specifications
Contents list
Top page > Settings > Common Settings > Adjusting the brightness of the screen [Brightness]
Adjusting the brightness of the screen [Brightness]
You can set the display brightness to one of 5 levels.
1. From the Home menu, select [Settings] [Common Settings] [Brightness].
2. Press the
/ button to select the desired setting, and then press the button to
confirm.
You can adjust to any of 5 levels. The larger the number, the brighter the screen. [3] is set
by default.
Note
After selecting a setting value, be sure to press the
button to confirm. If you press the
BACK/HOME button before confirming, the setting will be canceled.
Hint
If you set the brightness of the screen to a lower level, the battery will last longer [Details].
While the player is connected via the USB cable, the brightness of the screen may be set to
a lower level regardless of the setting.
Back to top
Copyright 2011 Sony Corporation
108
WALKMAN User Guide
Print
Getting Started
How to Use the Software
Music
Videos/Photos
FM Radio
Timer
Settings
Troubleshooting
Important Information
Specifications
Contents list
Top page > Settings > Common Settings > Setting the current time [Set Date-Time]
Setting the current time [Set Date-Time]
To display the current time
You can set the date and time.
1. From the Home menu, select [Settings] [Common Settings] [Set Date-Time].
2. Press the
/ button to select the year, and then press the / button to change
the value.
3. As in step 2, adjust the settings for month, date, hour, and minutes, and then press the
button to confirm.
To display the current time
Select [Clock Display] on the Home menu.
Press the OPTION/PWR OFF button on the Home menu or the playback screen, and select
[Clock Display] from the option menu.
Hint
You can select the date format from [YYYY/MM/DD], [MM/DD/YYYY], or [DD/MM/YYYY]
[Details]. Furthermore, you can select the time format from either [12-hour] or [24-hour]
[Details].
Note
If battery power is used up because, for example, the player has not been used for a long
time, your settings for date and time may be lost, and “-” will be displayed instead of the
current date and time.
The clock may gain or lose up to 60 seconds per month. In this case, set the clock again.
Related Topics
How to use the Home menu
Back to top
Copyright 2011 Sony Corporation
109
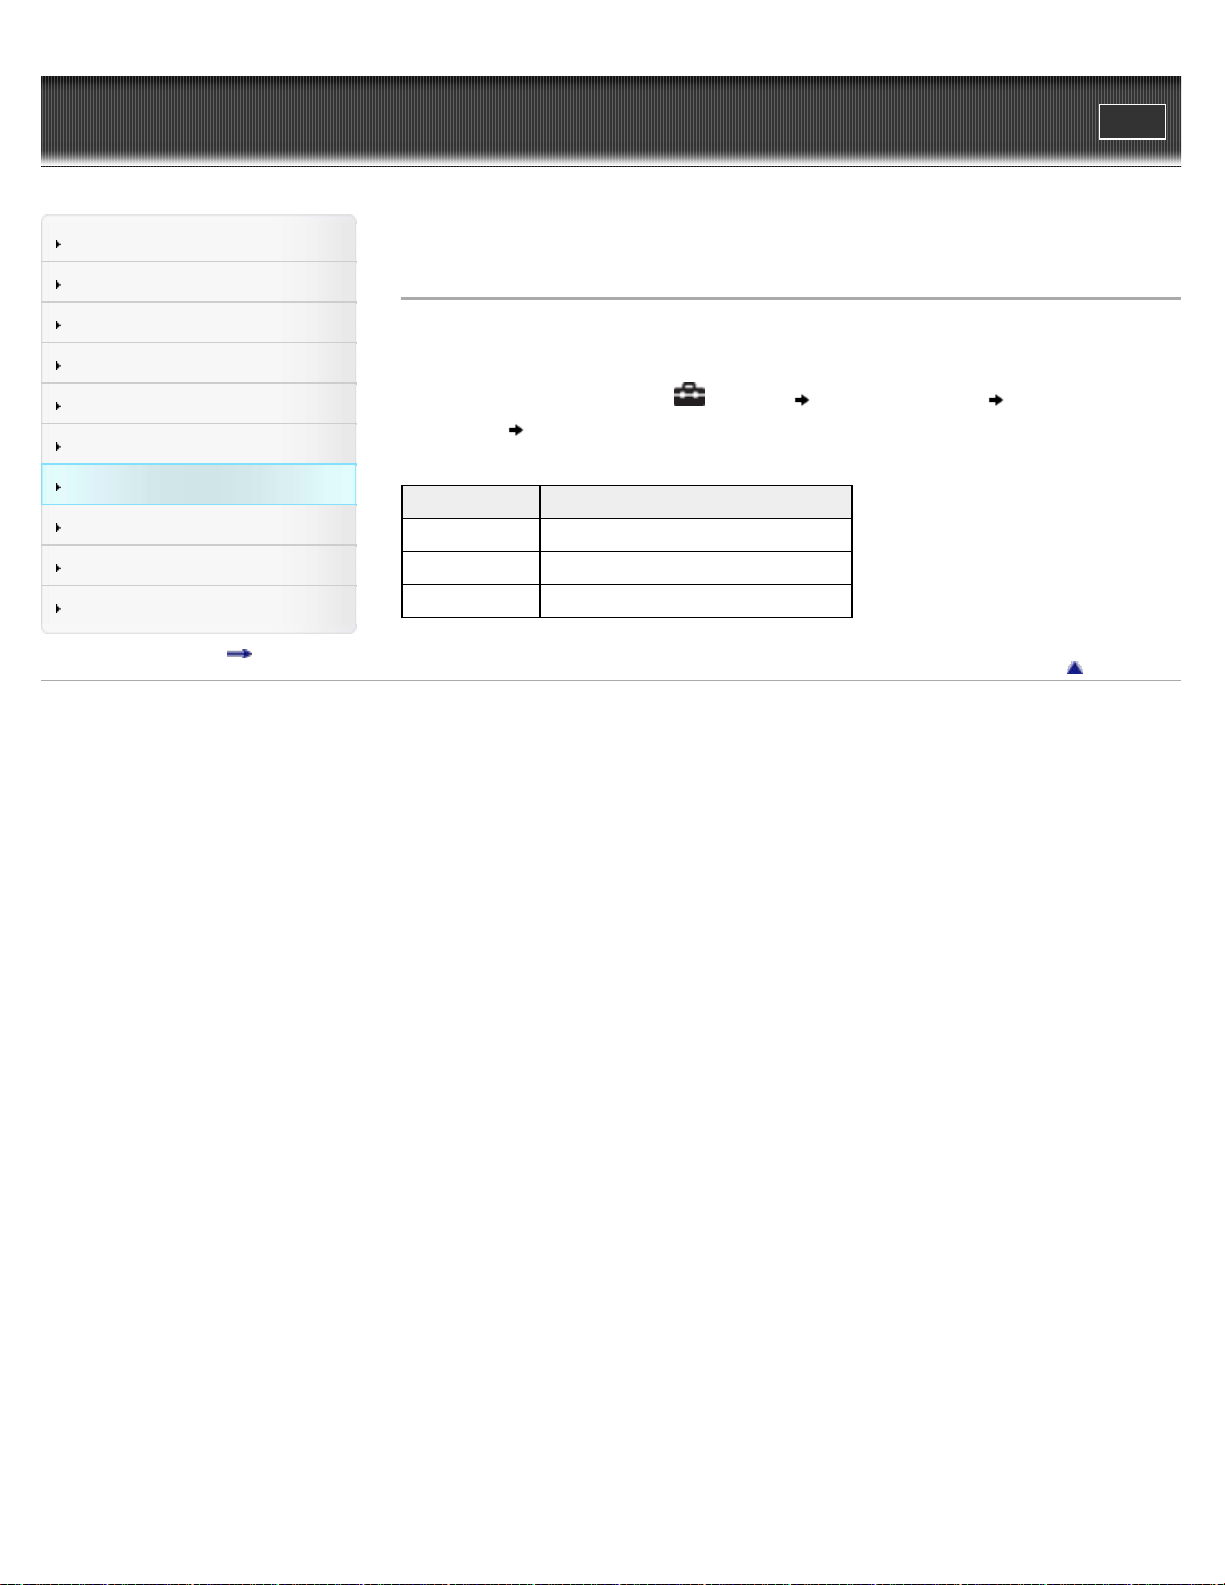
WALKMAN User Guide
Print
Getting Started
How to Use the Software
Music
Videos/Photos
FM Radio
Timer
Settings
Troubleshooting
Important Information
Specifications
Contents list
Top page > Settings > Common Settings > Setting the date format [Date Display Format]
Setting the date format [Date Display Format]
You can set the date format displayed for the current date [Details] as [YYYY/MM/DD],
[MM/DD/YYYY], or [DD/MM/YYYY].
1. From the Home menu, select
[Settings] [Common Settings] [Date Display
Format]
desired format type.
Type Description
[YYYY/MM/DD] Displays the date as year/month/day.
[MM/DD/YYYY] Displays the date as month/day/year.
[DD/MM/YYYY] Displays the date as day/month/year.
Back to top
Copyright 2011 Sony Corporation
110
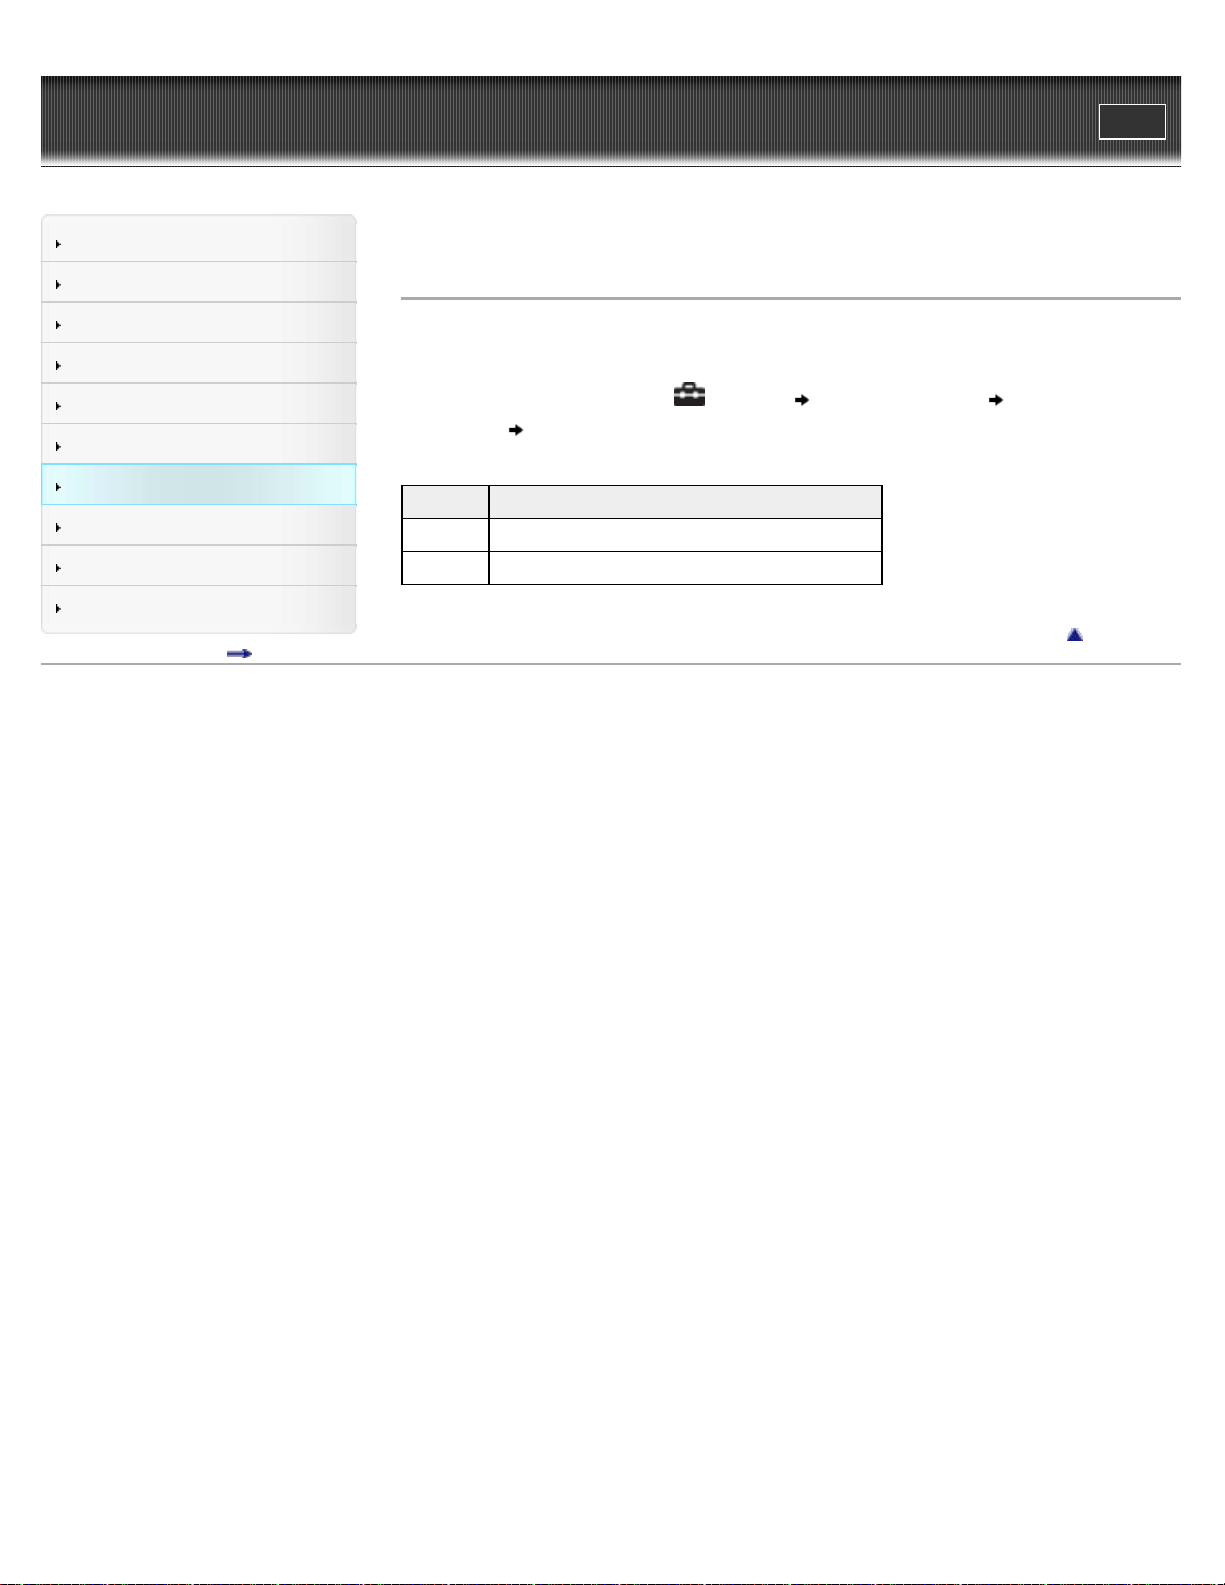
WALKMAN User Guide
Print
Getting Started
How to Use the Software
Music
Videos/Photos
FM Radio
Timer
Settings
Troubleshooting
Important Information
Specifications
Contents list
Top page > Settings > Common Settings > Setting the time format [Time Display Format]
Setting the time format [Time Display Format]
You can select the format to display the current time [Details] from either a [12-hour] or [24-hour]
display.
1. From the Home menu, select
[Settings] [Common Settings] [Time Display
Format]
desired format type.
Type Description
[12-hour] Displays the current time in the 12-hour format.
[24-hour] Displays the current time in the 24-hour format.
Back to top
Copyright 2011 Sony Corporation
111
WALKMAN User Guide
Print
Getting Started
How to Use the Software
Music
Videos/Photos
FM Radio
Timer
Settings
Troubleshooting
Important Information
Specifications
Contents list
Top page > Settings > Common Settings > Returning to the factory settings [Reset all Settings]
Returning to the factory settings [Reset all Settings]
You can reset the player to the default settings. Resetting the player will not delete data such as
music, video, and photos.
Note
This function is only available in the pause mode.
1. From the Home menu, select
[Settings] [Common Settings] [Reset all Settings]
[Yes].
[Restored factory settings.] appears.
To cancel the operation, select [No] on the confirmation screen.
Back to top
Copyright 2011 Sony Corporation
112
WALKMAN User Guide
Print
Getting Started
How to Use the Software
Music
Videos/Photos
FM Radio
Timer
Settings
Troubleshooting
Important Information
Specifications
Contents list
Top page > Settings > Common Settings > Formatting memory [Format]
Formatting memory [Format]
You can format the built-in flash memory of the player.
Note
If the memory is formatted, all data (songs, videos, photos, etc., including sample data
installed at the factory, bundled software installer, and the User Guide) will be erased. Be
sure to verify the data stored in memory prior to formatting, and export any important data
to the hard disk of your computer.
Be sure not to initialize (format) the built-in flash memory of the player using Windows
Explorer. If you have formatted with Windows Explorer, format again using the player.
If you select this function during playback, the player will pause playback before performing
the reset process.
1. From the Home menu, select
[Settings] [Common Settings] [Format].
[All data including songs will be deleted. Proceed?] appears.
2. Select [Yes].
[All data will be deleted. Proceed?] appears.
To cancel the operation, select [No].
3. Select [Yes].
When initialization finishes, [Memory formatted.] appears.
To cancel the operation, select [No].
Back to top
Copyright 2011 Sony Corporation
113
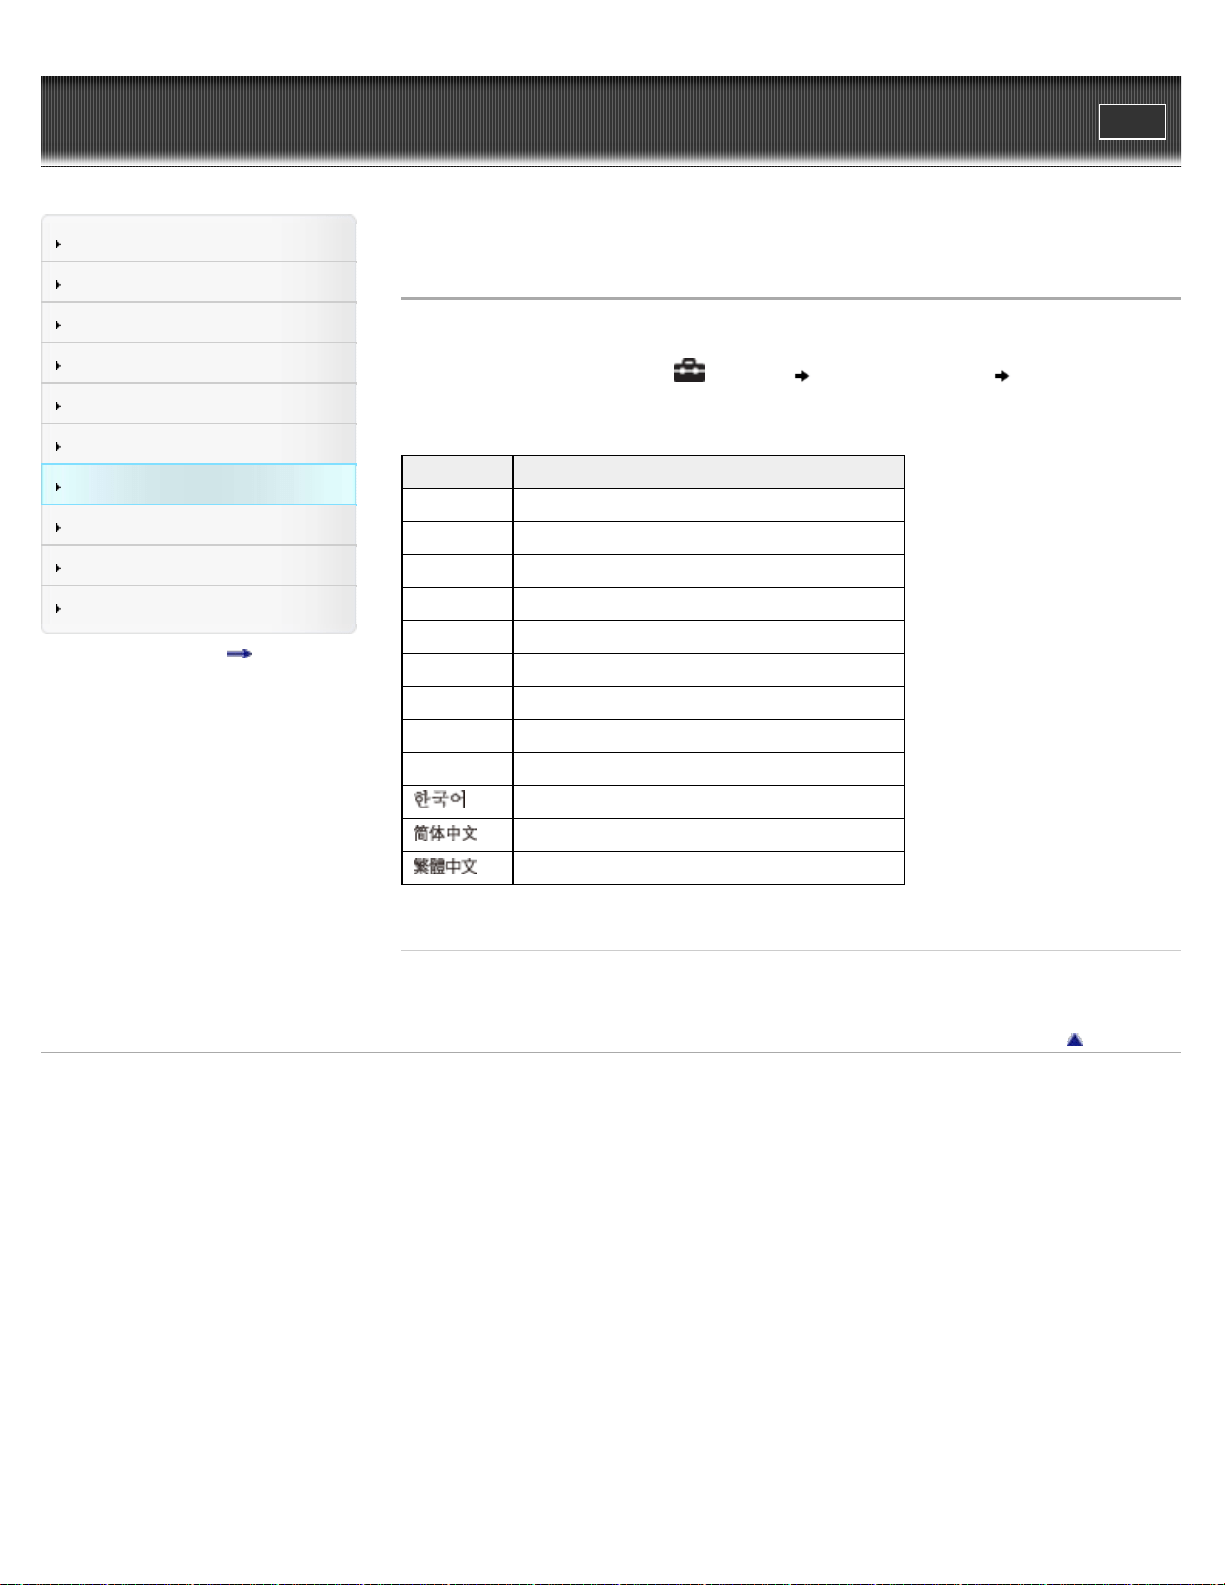
WALKMAN User Guide
Print
Getting Started
How to Use the Software
Music
Videos/Photos
FM Radio
Timer
Settings
Troubleshooting
Important Information
Specifications
Contents list
Top page > Settings > Common Settings > Selecting the display language [Language Settings]
Selecting the display language [Language Settings]
You can select from a variety of languages for menus and messages.
1. From the Home menu, select [Settings] [Language Settings] desired language
setting.
Language Messages and menus are displayed in
[Deutsch] German
[English] English
[Español] Spanish
[Français] French
[Italiano] Italian
[Polski] Polish
[Português] Portuguese
[Русский] Russian
[Türkçe] Turkish
[
] Korean
[
] Simplified Chinese
[
] Traditional Chinese
Related Topics
How to use the Home menu
Back to top
Copyright 2011 Sony Corporation
114
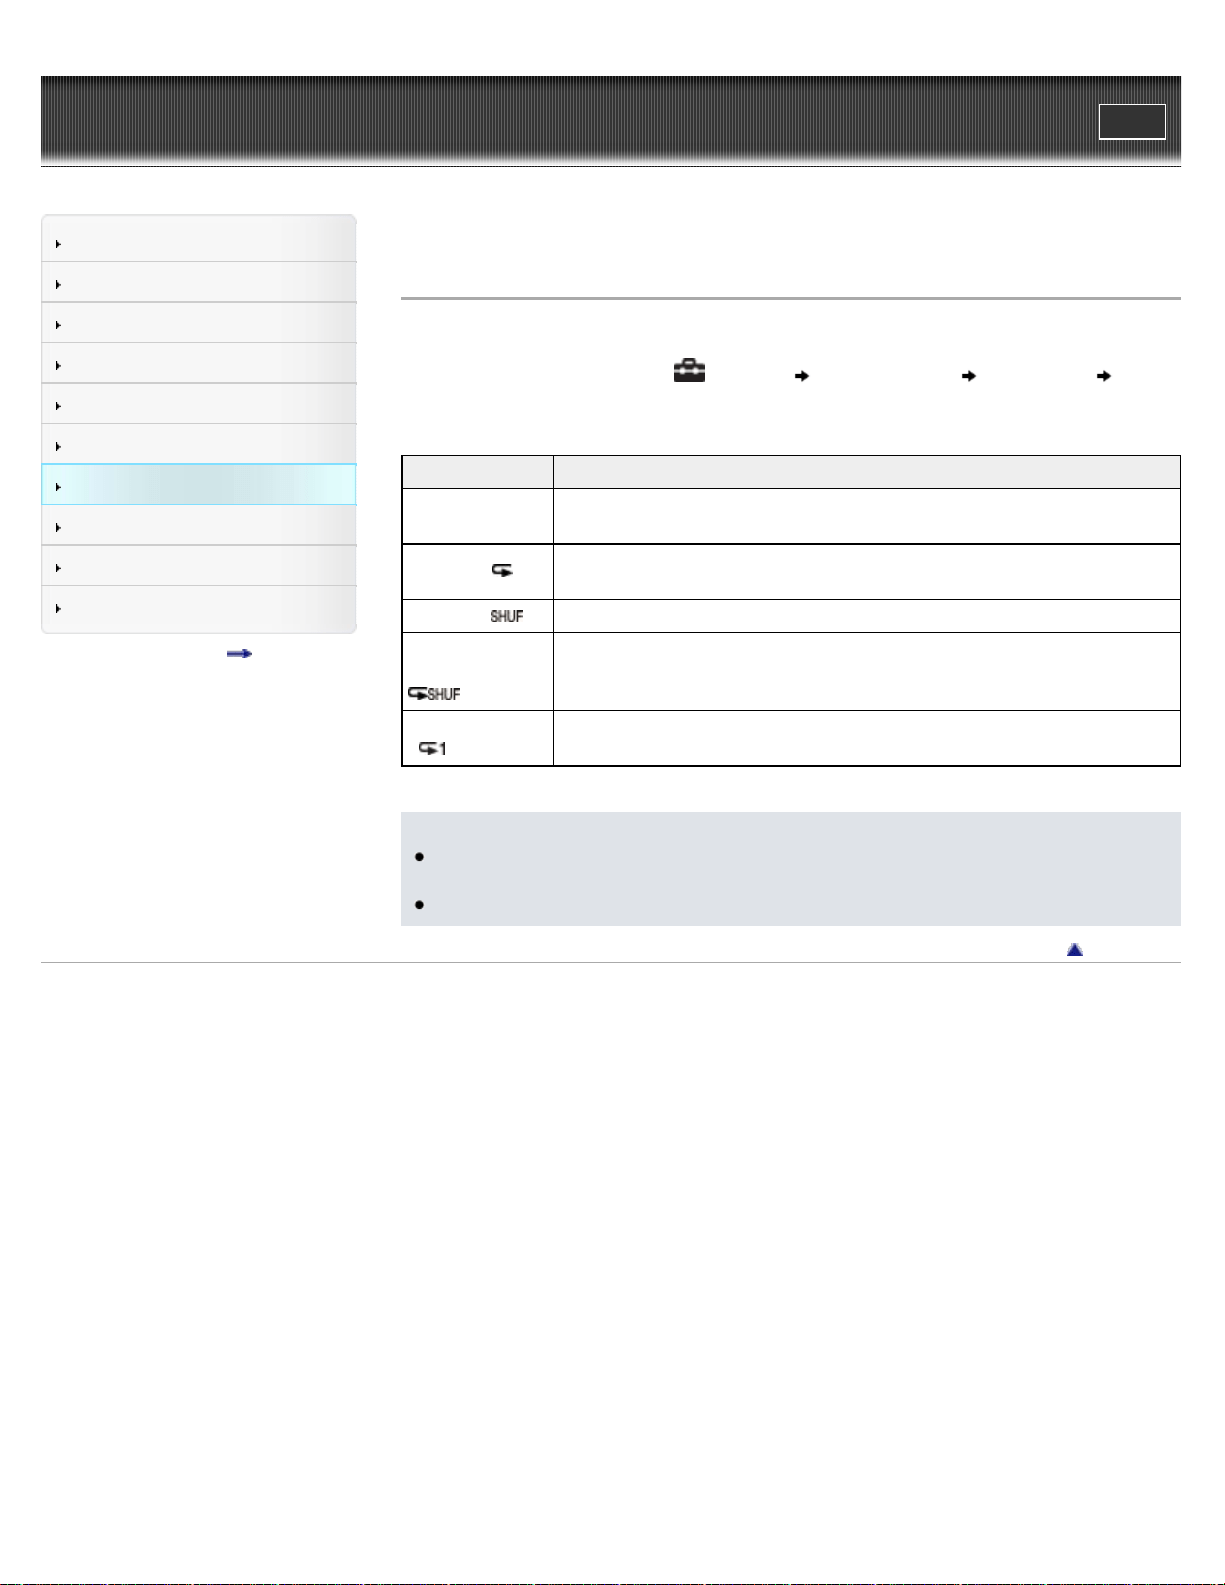
WALKMAN User Guide
Print
Getting Started
How to Use the Software
Music
Videos/Photos
FM Radio
Timer
Settings
Troubleshooting
Important Information
Specifications
Contents list
Top page > Settings > Music Settings > Setting the play mode [Play Mode]
Setting the play mode [Play Mode]
The player offers a variety of play modes, including random play and selected repeat play.
1. From the Home menu, select [Settings] [Music Settings] [Play Mode]
desired play mode type.
Type - icon Description
[Normal] - No
icon
The songs within the playback range are played back in the song list order.
(Default setting)
[Repeat] -
The songs within the playback range are played back in the song list order
and then repeated.
[Shuffle] -
The songs within the playback range are played back in random order.
[Shuffle&Repeat]
-
The songs within the playback range are played back in random order and
then repeated.
[Repeat 1 Song]
-
The current song or the song selected from a song list is played back
repeatedly.
Note
The player plays back songs only in the lists from which the playback starts (album list, artist
list, etc.).
When you start [Shuffle All] play, the play mode changes to [Shuffle] or [Shuffle&Repeat].
Back to top
Copyright 2011 Sony Corporation
115
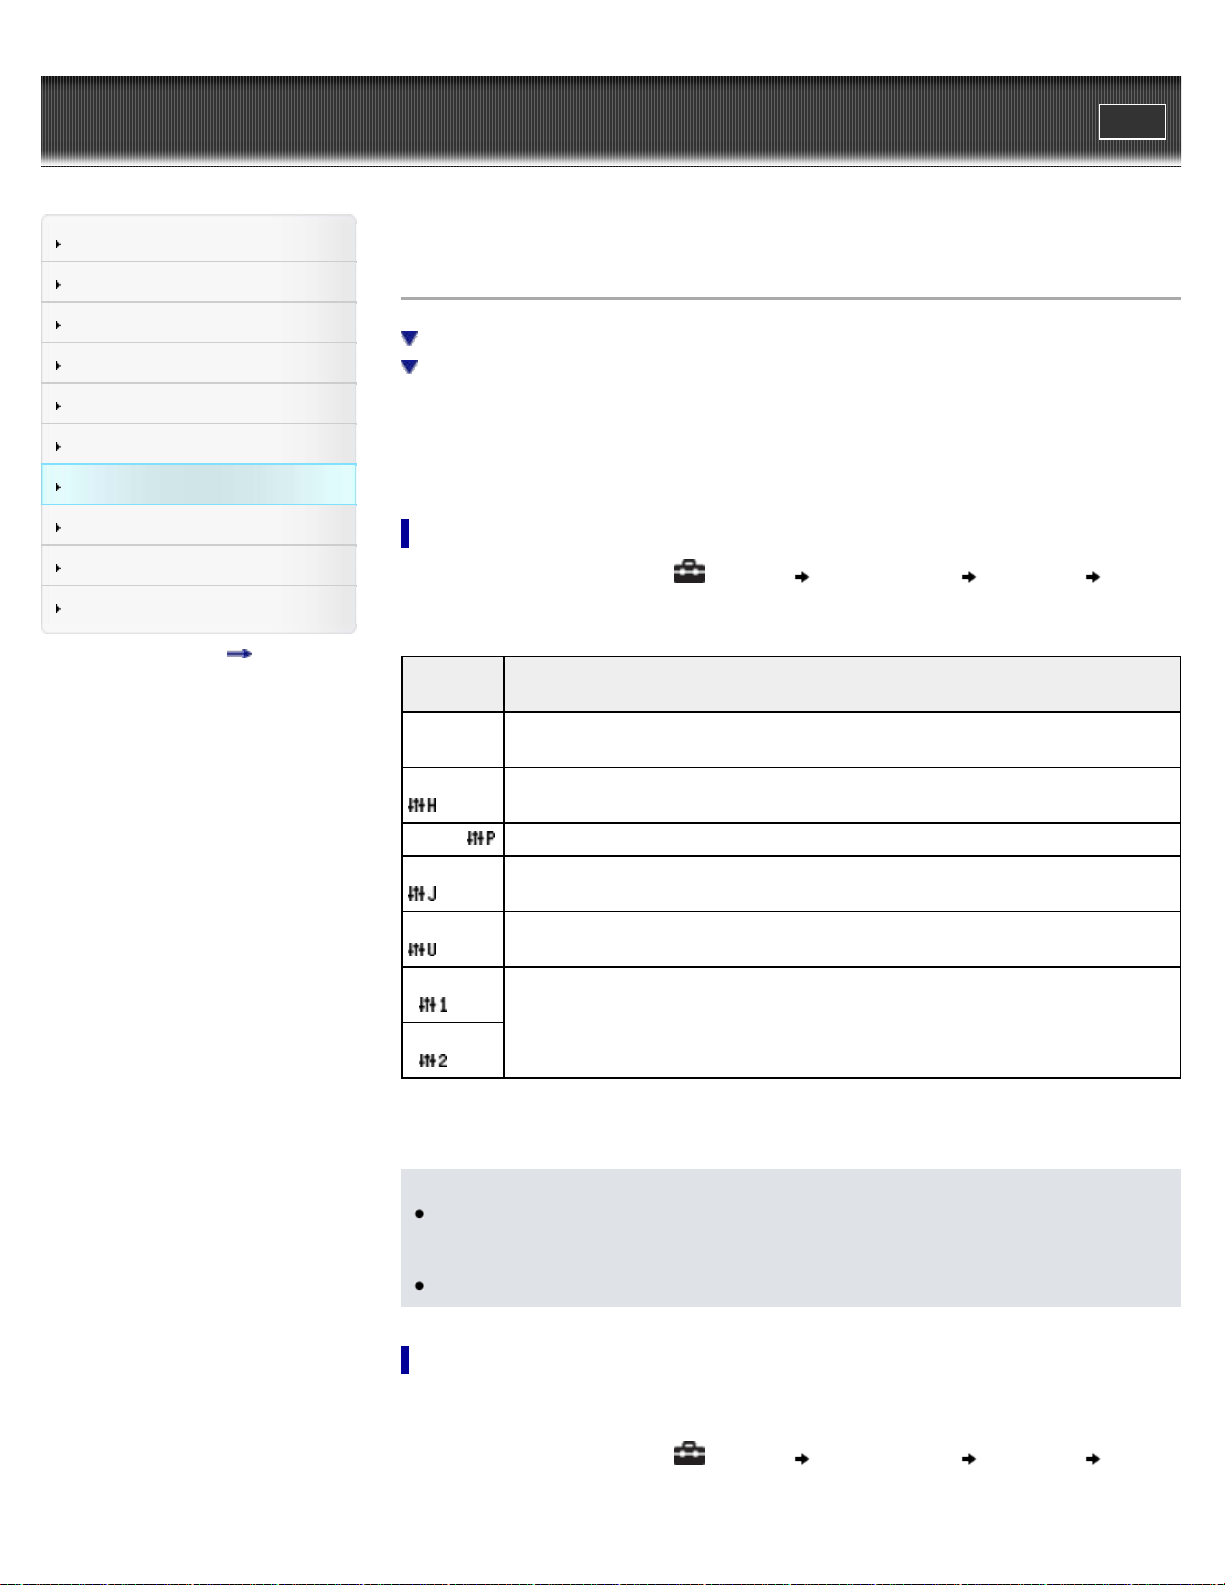
WALKMAN User Guide
Print
Getting Started
How to Use the Software
Music
Videos/Photos
FM Radio
Timer
Settings
Troubleshooting
Important Information
Specifications
Contents list
Top page > Settings > Music Settings > Setting the sound quality (CLEAR BASS) [Equalizer]
Setting the sound quality (CLEAR BASS) [Equalizer]
Setting the sound quality
Customizing sound quality
You can set the sound quality according to the music genre, etc.
Equalizer settings contain the CLEAR BASS setting. Increasing the CLEAR BASS setting value
allows the player to reproduce dynamic deep bass without distortion, even at a high volume.
Setting the sound quality
1. From the Home menu, select [Settings] [Music Settings] [Equalizer] desired
equalizer type.
Type -
icon
Description
[None] -
No icon
Sound quality setting is not activated. (Default setting) (*1)
[Heavy] -
Emphasizes high and low ranges for a powerful sound.
[Pop] - Stresses the middle range audio, ideal for vocals.
[Jazz] -
Emphasizes high and low ranges for a lively sound.
[Unique] -
Emphasizes high and low ranges, so that even soft sounds can be heard easily.
[Custom 1]
-
User-customizable sound settings for which you can adjust each frequency range
individually. See [Details] for details.
[Custom 2]
-
(*1) The default setting of players sold in the Latin America region is [Custom 1], and CLEAR BASS is set
to level +3.
Note
If your personal settings saved as [Custom 1] and [Custom 2] seem to produce a different
volume level than other settings, you may have to adjust the volume manually to
compensate.
The [Equalizer] setting is not applied while playing a video or FM radio.
Customizing sound quality
You can preset the value of CLEAR BASS (bass) and 5 band Equalizer as [Custom 1] or
[Custom 2].
1. From the Home menu, select
[Settings] [Music Settings] [Equalizer] [Edit]
displayed under [Custom 1] or [Custom 2].
116

2. Press the / button to select CLEAR BASS or the frequency range setting, and press
the
/ button to adjust the setting level, and then press the button to confirm.
The [Equalizer] screen reappears.
CLEAR BASS can be set to any of 4 sound levels, and the 5 frequency ranges can be
set to any of 7 sound levels.
After you have adjusted the setting level, be sure to press the
button to confirm. If
you press the BACK/HOME button before you confirm, the setting will be canceled.
Back to top
Copyright 2011 Sony Corporation
117
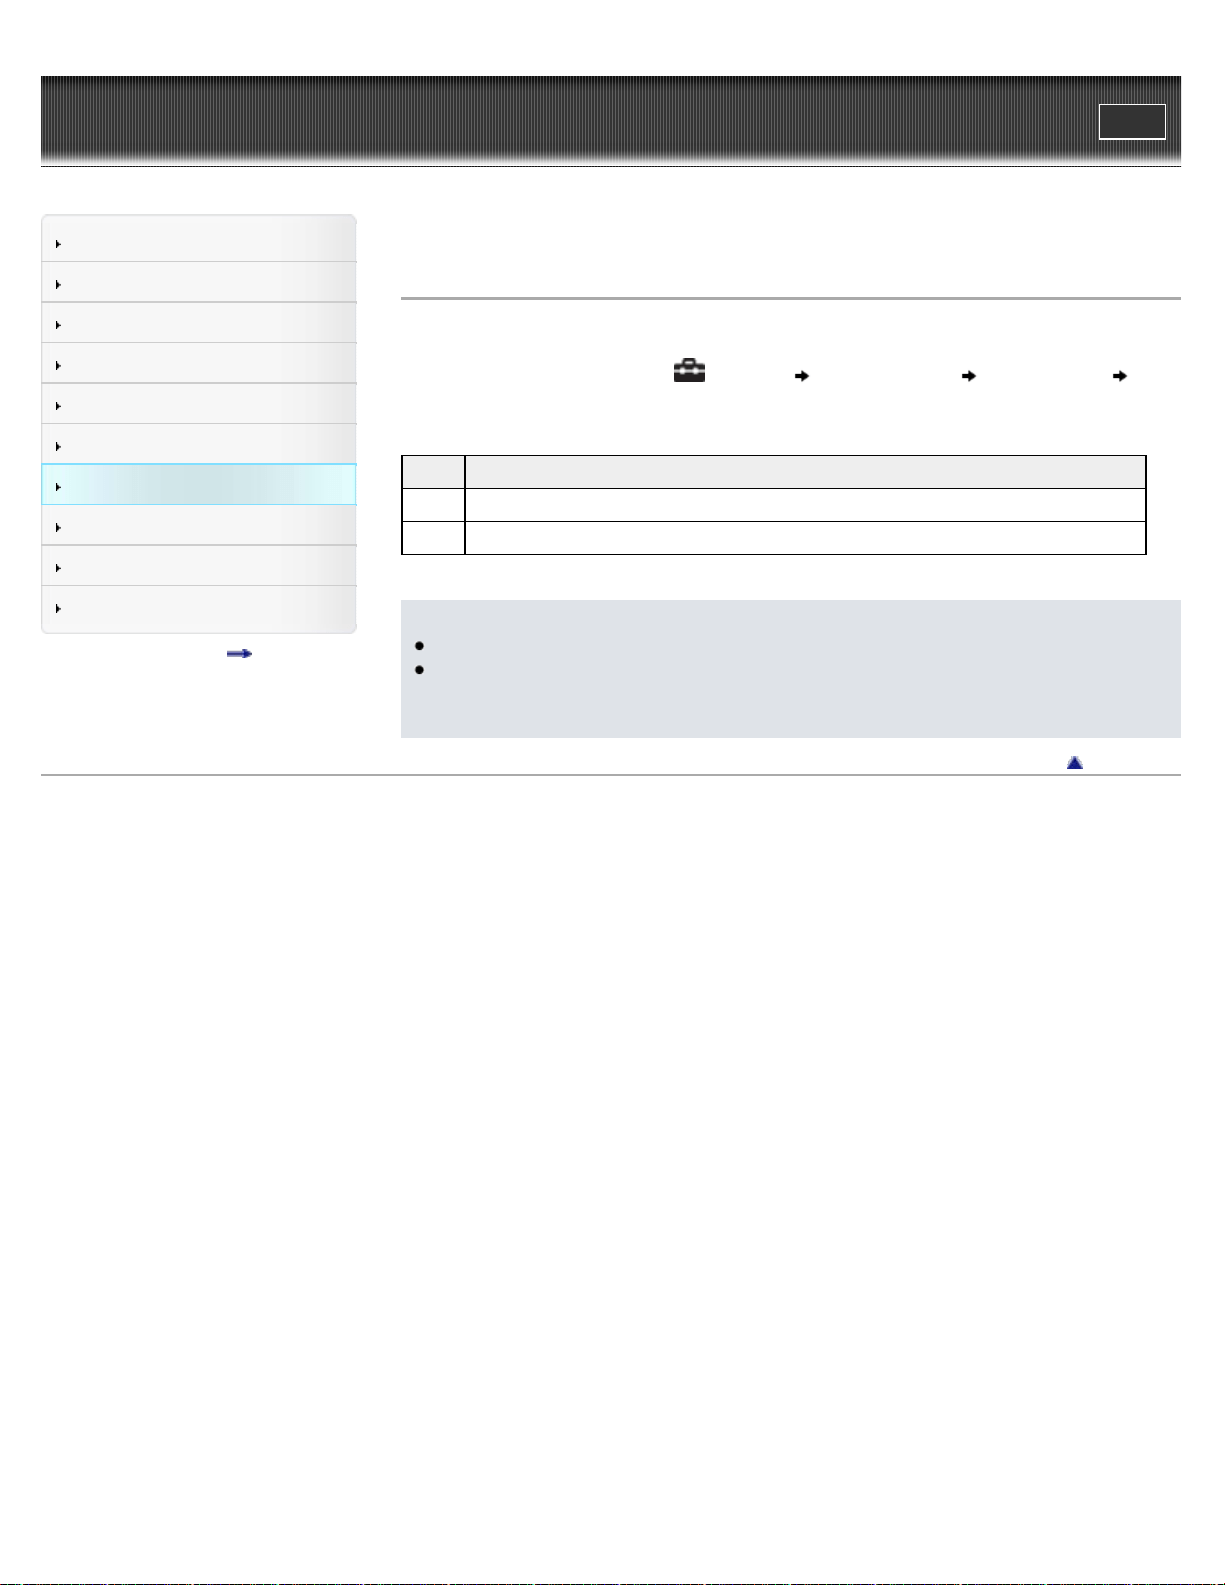
WALKMAN User Guide
Print
Getting Started
How to Use the Software
Music
Videos/Photos
FM Radio
Timer
Settings
Troubleshooting
Important Information
Specifications
Contents list
Top page > Settings > Music Settings > Listening with Clear Stereo [Clear Stereo]
Listening with Clear Stereo [Clear Stereo]
[Clear Stereo] enables individual left and right digital processing of the sound.
1. From the Home menu, select [Settings] [Music Settings] [Clear Stereo]
desired Clear Stereo type.
Type Description
[On] Activates the [Clear Stereo] function when you use the supplied headphones.
[Off] Disables the [Clear Stereo] function and plays back normal sound. (Default setting)
Note
The [Clear Stereo] setting is not applied while playing a video or FM radio.
The [Clear Stereo] function is designed to obtain maximum effect with the supplied
headphones. The [Clear Stereo] effect may not be obtained with other headphones. When
using other headphones, set [Clear Stereo] to [Off].
Back to top
Copyright 2011 Sony Corporation
118
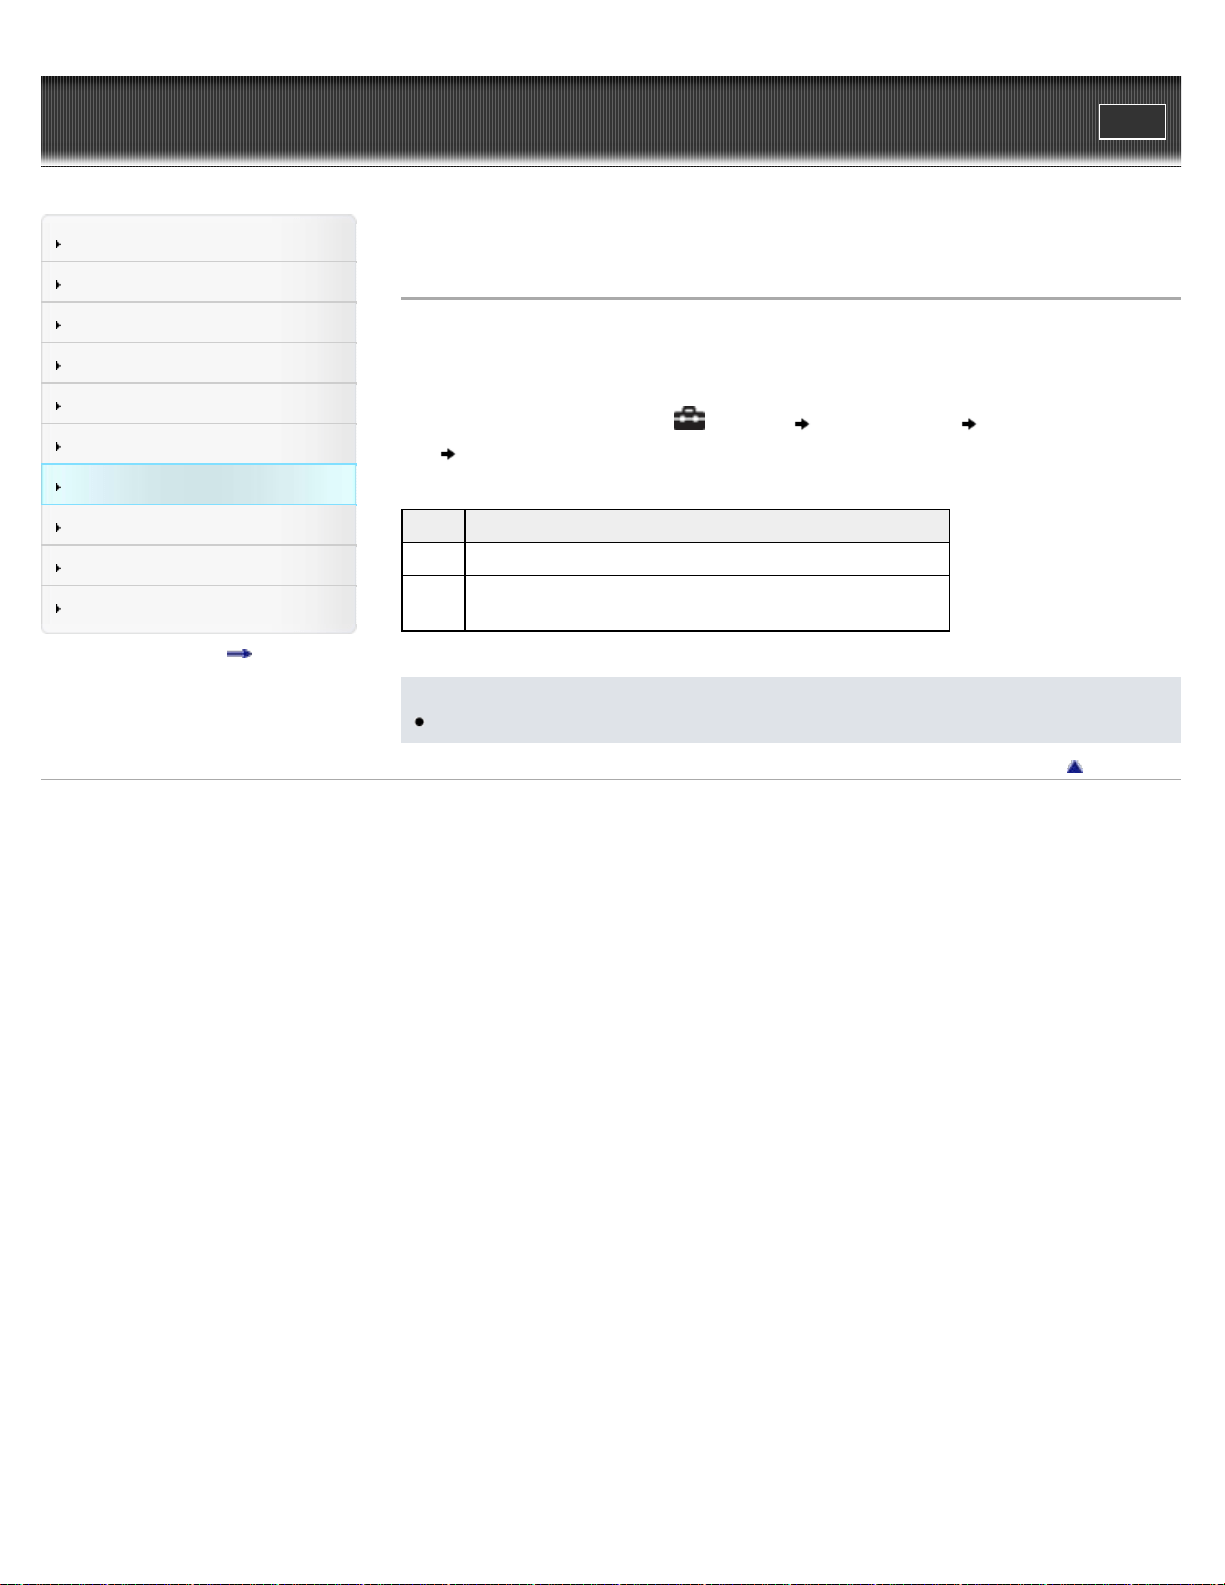
WALKMAN User Guide
Print
Getting Started
How to Use the Software
Music
Videos/Photos
FM Radio
Timer
Settings
Troubleshooting
Important Information
Specifications
Contents list
Top page > Settings > Music Settings > Adjusting the volume level [Dynamic Normalizer]
Adjusting the volume level [Dynamic Normalizer]
You can reduce the volume level between songs. With this setting, when listening to album songs
in the shuffle play mode, the volume level between songs is moderated to minimize differences in
their recording levels.
1. From the Home menu, select
[Settings] [Music Settings] [Dynamic Normalizer]
desired Dynamic Normalizer type.
Type Description
[On] Minimizes the difference in volume level between songs.
[Off]
Plays back songs at their original transferred volume level.
(Default setting)
Note
The [Dynamic Normalizer] setting is not applied while playing a video or FM radio.
Back to top
Copyright 2011 Sony Corporation
119
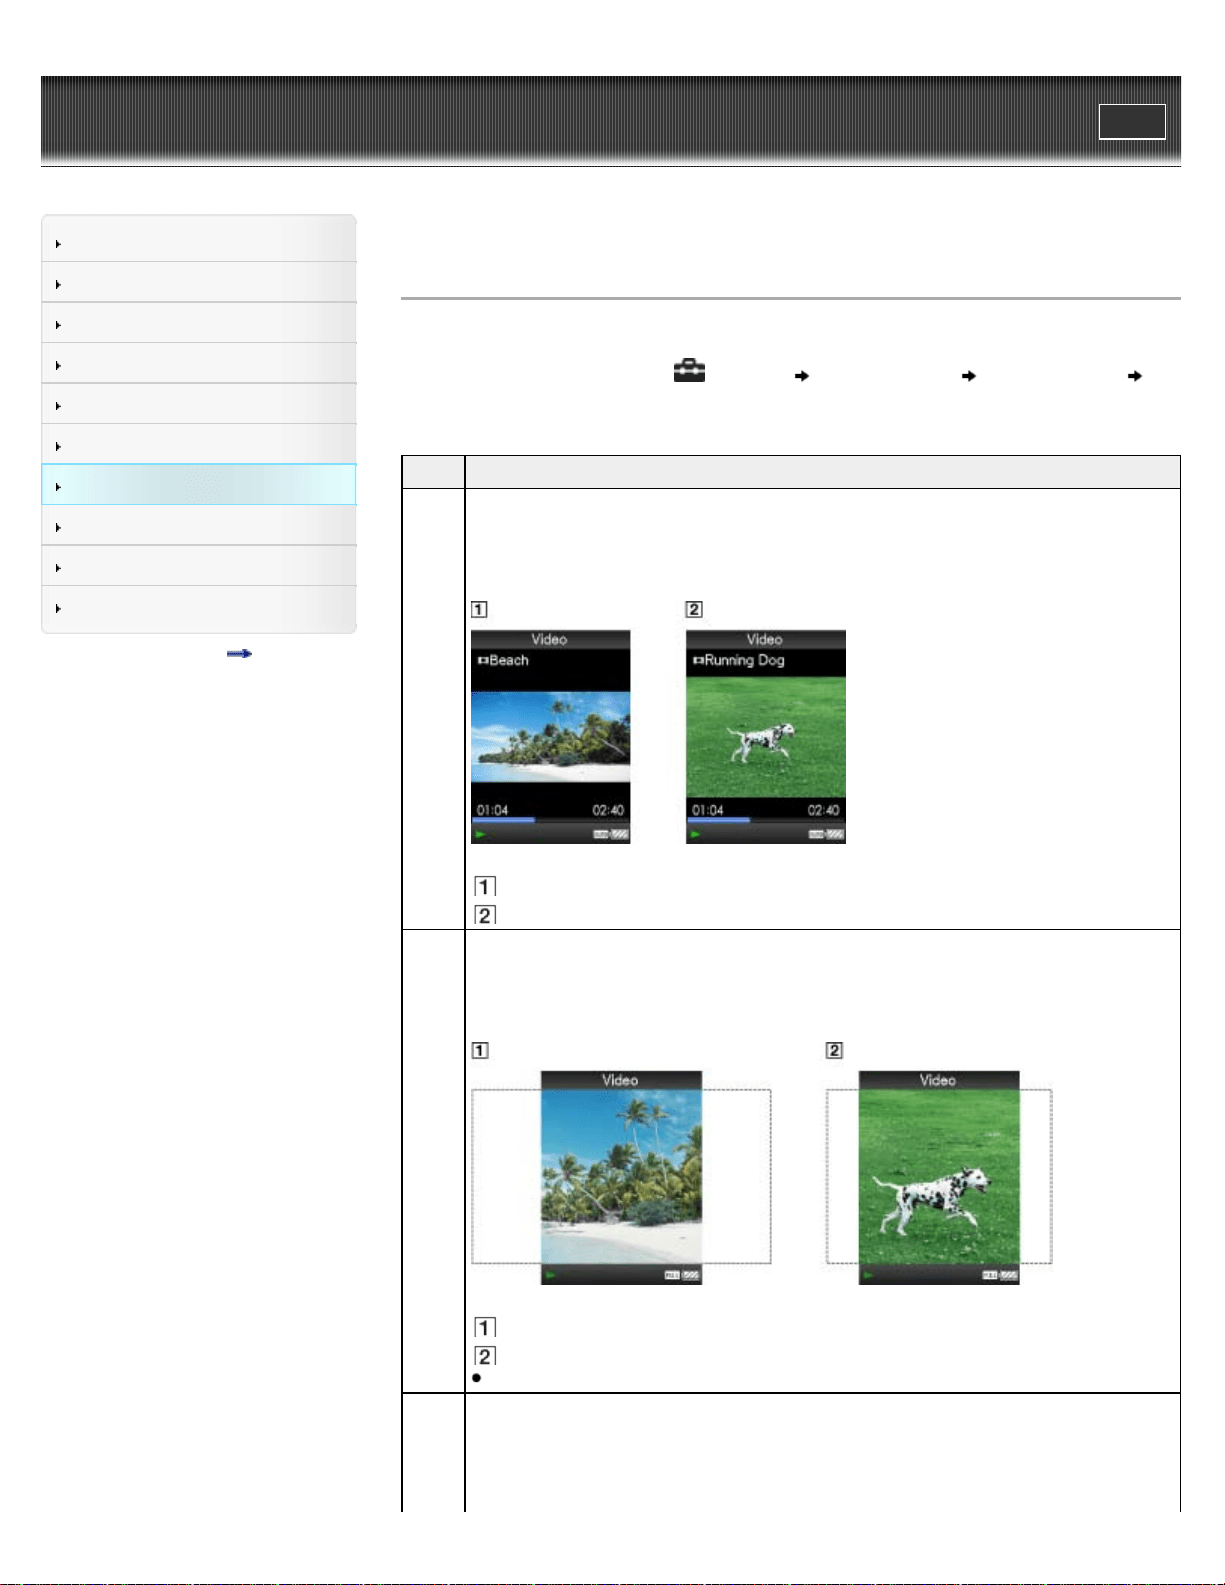
WALKMAN User Guide
Print
Getting Started
How to Use the Software
Music
Videos/Photos
FM Radio
Timer
Settings
Troubleshooting
Important Information
Specifications
Contents list
Top page > Settings > Video Settings > Setting the zoom function [Zoom]
Setting the zoom function [Zoom]
You can zoom in the currently playing video.
1. From the Home menu, select [Settings] [Video Settings] [Zoom Settings]
desired zoom setting type.
Type Description
[Auto]
The video image is resized to fit the display area, maintaining the original aspect ratio.
(Default setting)
When a 16:9 (wide size) video image is displayed, black bands appear on the top and
bottom of the screen.
16:9 source
4:3 source
[Full]
The video image is resized to fill the available display area, maintaining the aspect
ratio.
When a 16:9 (wide size) video image is displayed, the right/left sides of the image are
trimmed to fit.
16:9 source
4:3 source
The dotted line frame represents the original video image size.
The video image is not resized, and appears in the original resolution. If video
resolution is too high, the left, right, top and bottom of the screen will be cut. If video
resolution is too low, black bars will appear on the right, left, top and bottom of the
screen.
120

WALKMAN User Guide
Print
Getting Started
How to Use the Software
Music
Videos/Photos
FM Radio
Timer
Settings
Troubleshooting
Important Information
Specifications
Contents list
Top page > Settings > Video Settings > Setting the display of the video screen [Display]
Setting the display of the video screen [Display]
You can display or hide detailed information of a video, such as its title, playback icon, and
elapsed playing time, etc., during playback.
1. From the Home menu, select
[Settings] [Video Settings] [Display] desired
display type.
Type Description
[On] Displays the video title, playback status, or the elapsed time, etc.
[Off]
Hides detailed information of the currently playing video and displays it only when you
operate the player. (Default setting)
Note
If [Video Orientation] is set to [Horizontal (right)], the title of the video is not displayed.
Back to top
Copyright 2011 Sony Corporation
122

WALKMAN User Guide
Print
Getting Started
How to Use the Software
Music
Videos/Photos
FM Radio
Timer
Settings
Troubleshooting
Important Information
Specifications
Contents list
Top page > Settings > Video Settings > Setting the video orientation [Video Orientation]
Setting the video orientation [Video Orientation]
You can set the video orientation to [Vertical] or [Horizontal (right)].
The operation of the 5-way button is switched according to the setting of [Video Orientation].
1. From the Home menu, select
[Settings] [Video Settings] [Video Orientation]
desired video orientation type.
Type Description
[Vertical]
Displays at 240 × 180 pixels. (Default setting)
16:9 source
4:3 source
[Horizontal (right)]
Displays at 320 × 240 pixels.
16:9 source
4:3 source
Hint
When [Display] is set to [On], detailed information, such as the video title, its playback icon,
and elapsed playing time, etc., appears. The information disappears if this setting is set to
[Off] [Details].
Note
If [Video Orientation] is set to [Horizontal (right)], the video title is not displayed.
Back to top
Copyright 2011 Sony Corporation
123

124
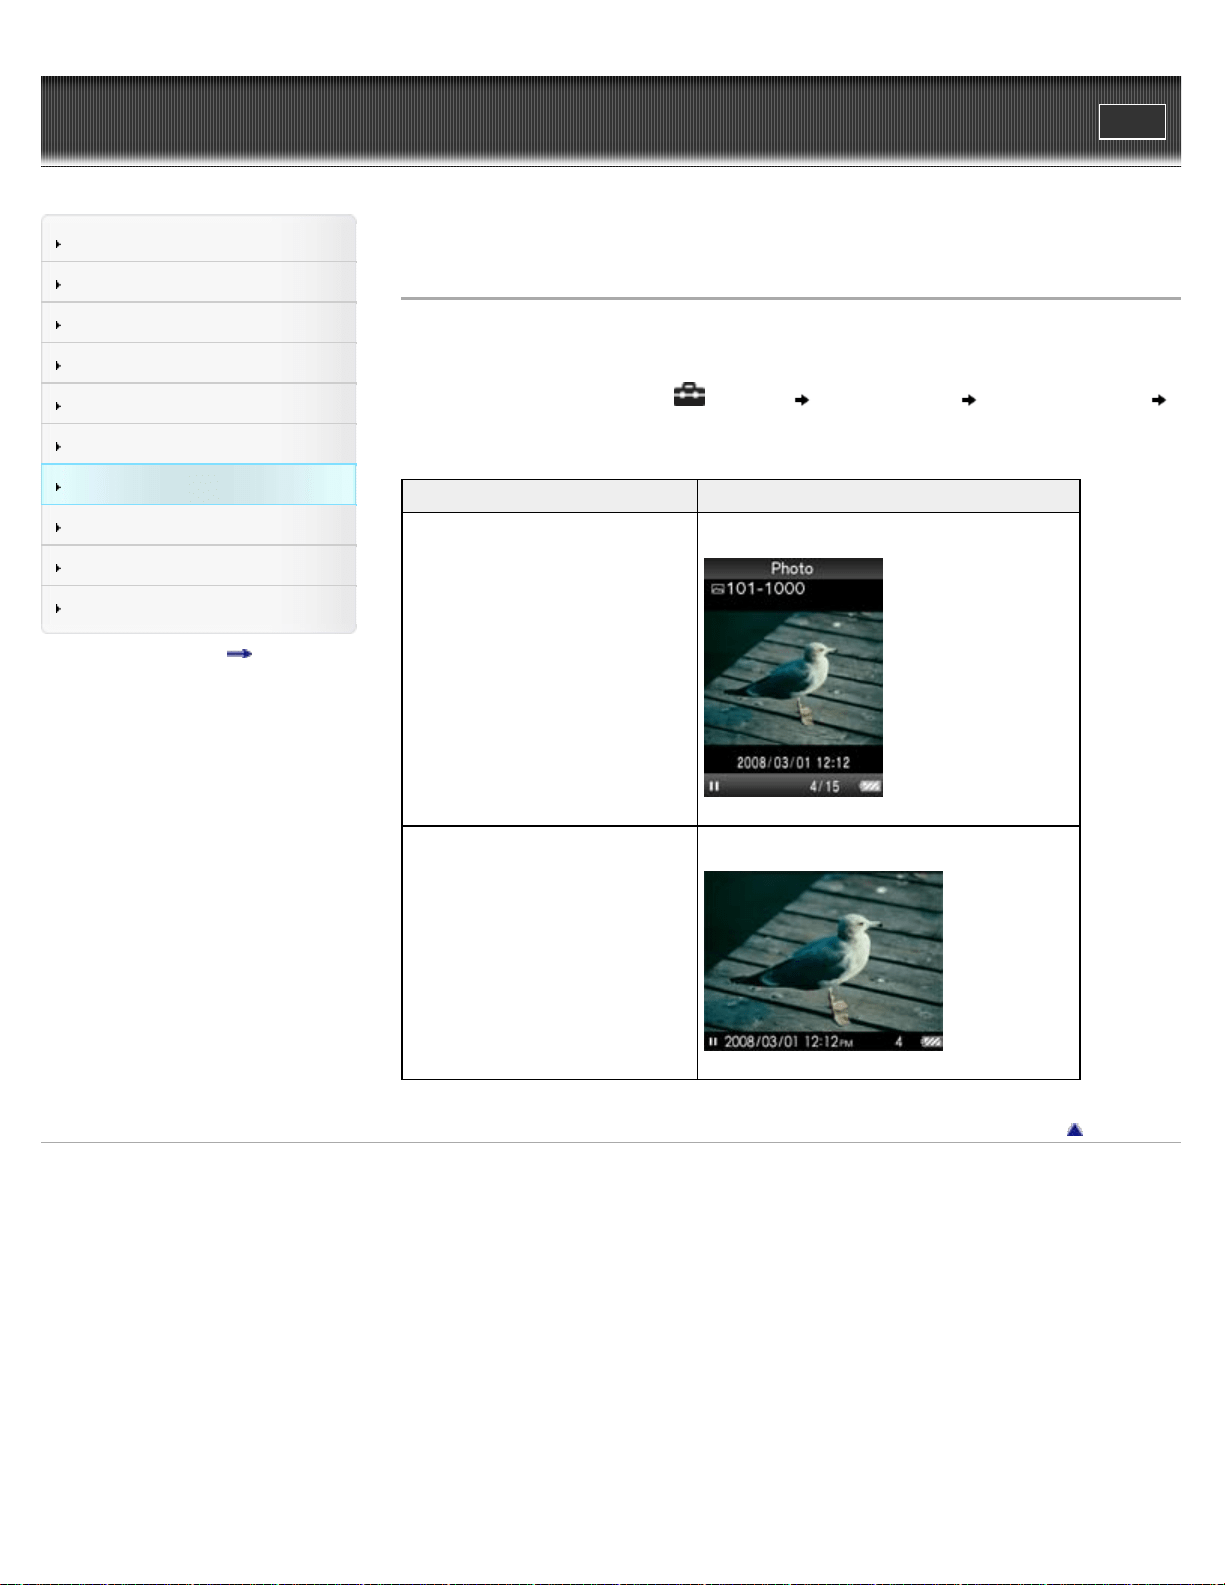
WALKMAN User Guide
Print
Getting Started
How to Use the Software
Music
Videos/Photos
FM Radio
Timer
Settings
Troubleshooting
Important Information
Specifications
Contents list
Top page > Settings > Photo Settings > Photo orientation [Photo Orientation]
Photo orientation [Photo Orientation]
You can set the photo orientation to [Vertical], [Horizontal (right)], or [Horizontal (left)].
The operation of the 5-way button is switched according to the setting of [Photo Orientation].
1. From the Home menu, select
[Settings] [Photo Settings] [Photo Orientation]
desired photo orientation type.
Type Description
[Vertical]
Displays at 240 × 180 pixels. (Default setting)
[Horizontal (right)] [Horizontal (left)]
Displays at 320 × 240 pixels.
Back to top
Copyright 2011 Sony Corporation
125
WALKMAN User Guide
Print
Getting Started
How to Use the Software
Music
Videos/Photos
FM Radio
Timer
Settings
Troubleshooting
Important Information
Specifications
Contents list
Top page > Settings > Photo Settings > Setting the display of the photo screen [Display]
Setting the display of the photo screen [Display]
You can display or hide detailed information of a photo, such as an icon that shows playback
status, etc., while displaying a photo.
1. From the Home menu, select
[Settings] [Photo Settings] [Display] desired
display type.
Type Description
[On] Displays the photo title, the shooting date, playback status, photo number, etc.
[Off] Hides the information of the current photo. (Default setting)
Note
If [Photo Orientation] is set to [Horizontal (right)], or [Horizontal (left)] [Details], the photo title
is not displayed, even if [Display] is set to [On].
Back to top
Copyright 2011 Sony Corporation
126

WALKMAN User Guide
Print
Getting Started
How to Use the Software
Music
Videos/Photos
FM Radio
Timer
Settings
Troubleshooting
Important Information
Specifications
Contents list
Top page > Settings > Photo Settings > Setting the slide show play mode [Slide Show Repeat]
Setting the slide show play mode [Slide Show Repeat]
You can display photos as a slide show repeatedly.
1. From the Home menu, select [Settings] [Photo Settings] [Slide Show Repeat]
desired setting type.
Type Description
[On] Displays photos in a photo folder continuously and repeatedly.
[Off]
Displays photos in a photo folder continuously, to the last photo, then returns to the
first photo, and playback pauses. (Default setting)
Note
The screen does not turn off automatically or change to a screensaver [Details] while a slide
show is playing.
Back to top
Copyright 2011 Sony Corporation
127
WALKMAN User Guide
Print
Getting Started
How to Use the Software
Music
Videos/Photos
FM Radio
Timer
Settings
Troubleshooting
Important Information
Specifications
Contents list
Top page > Settings > Photo Settings > Setting the interval of a slide show [Slide Show Interval]
Setting the interval of a slide show [Slide Show Interval]
You can set the time each photo is displayed.
1. From the Home menu, select [Settings] [Photo Settings] [Slide Show Interval]
desired interval type.
Type Description
[Short] Photos switch to the next photos at a short interval.
[Normal] Photos switch to the next photos at the standard interval. (Default setting)
[Long] Photos switch to the next photos at a long interval.
Note
It may take time to display a large-size photo.
Back to top
Copyright 2011 Sony Corporation
128
WALKMAN User Guide
Print
Getting Started
How to Use the Software
Music
Videos/Photos
FM Radio
Timer
Settings
Troubleshooting
Important Information
Specifications
Contents list
Top page > Settings > FM Radio Settings > Setting the reception [Scan Sensitivity]
Setting the reception [Scan Sensitivity]
When you select stations using the [Auto Preset] function [Details] or the / button, the FM
receiver may receive unwanted broadcast stations as a result of sensitivity being too high. In this
case, set the reception to [Low]. [High] is set by default.
1. From the Home menu, select
[Settings] [FM Radio Settings] [Scan Sensitivity]
[Low].
To set the reception sensitivity back to the default, select [High].
Back to top
Copyright 2011 Sony Corporation
129

WALKMAN User Guide
Print
Getting Started
How to Use the Software
Music
Videos/Photos
FM Radio
Timer
Settings
Troubleshooting
Important Information
Specifications
Contents list
Top page > Settings > FM Radio Settings > Setting monaural/stereo [Mono/Auto]
Setting monaural/stereo [Mono/Auto]
If noise occurs during FM reception, set the receiver to [Mono] for monaural. If you set it to
[Auto], monaural/stereo reception is selected automatically, depending on reception conditions.
[Auto] is set by default.
1. From the Home menu, select
[Settings] [FM Radio Settings] [Mono/Auto]
[Mono].
To return to automatic setting, select [Auto].
Back to top
Copyright 2011 Sony Corporation
130
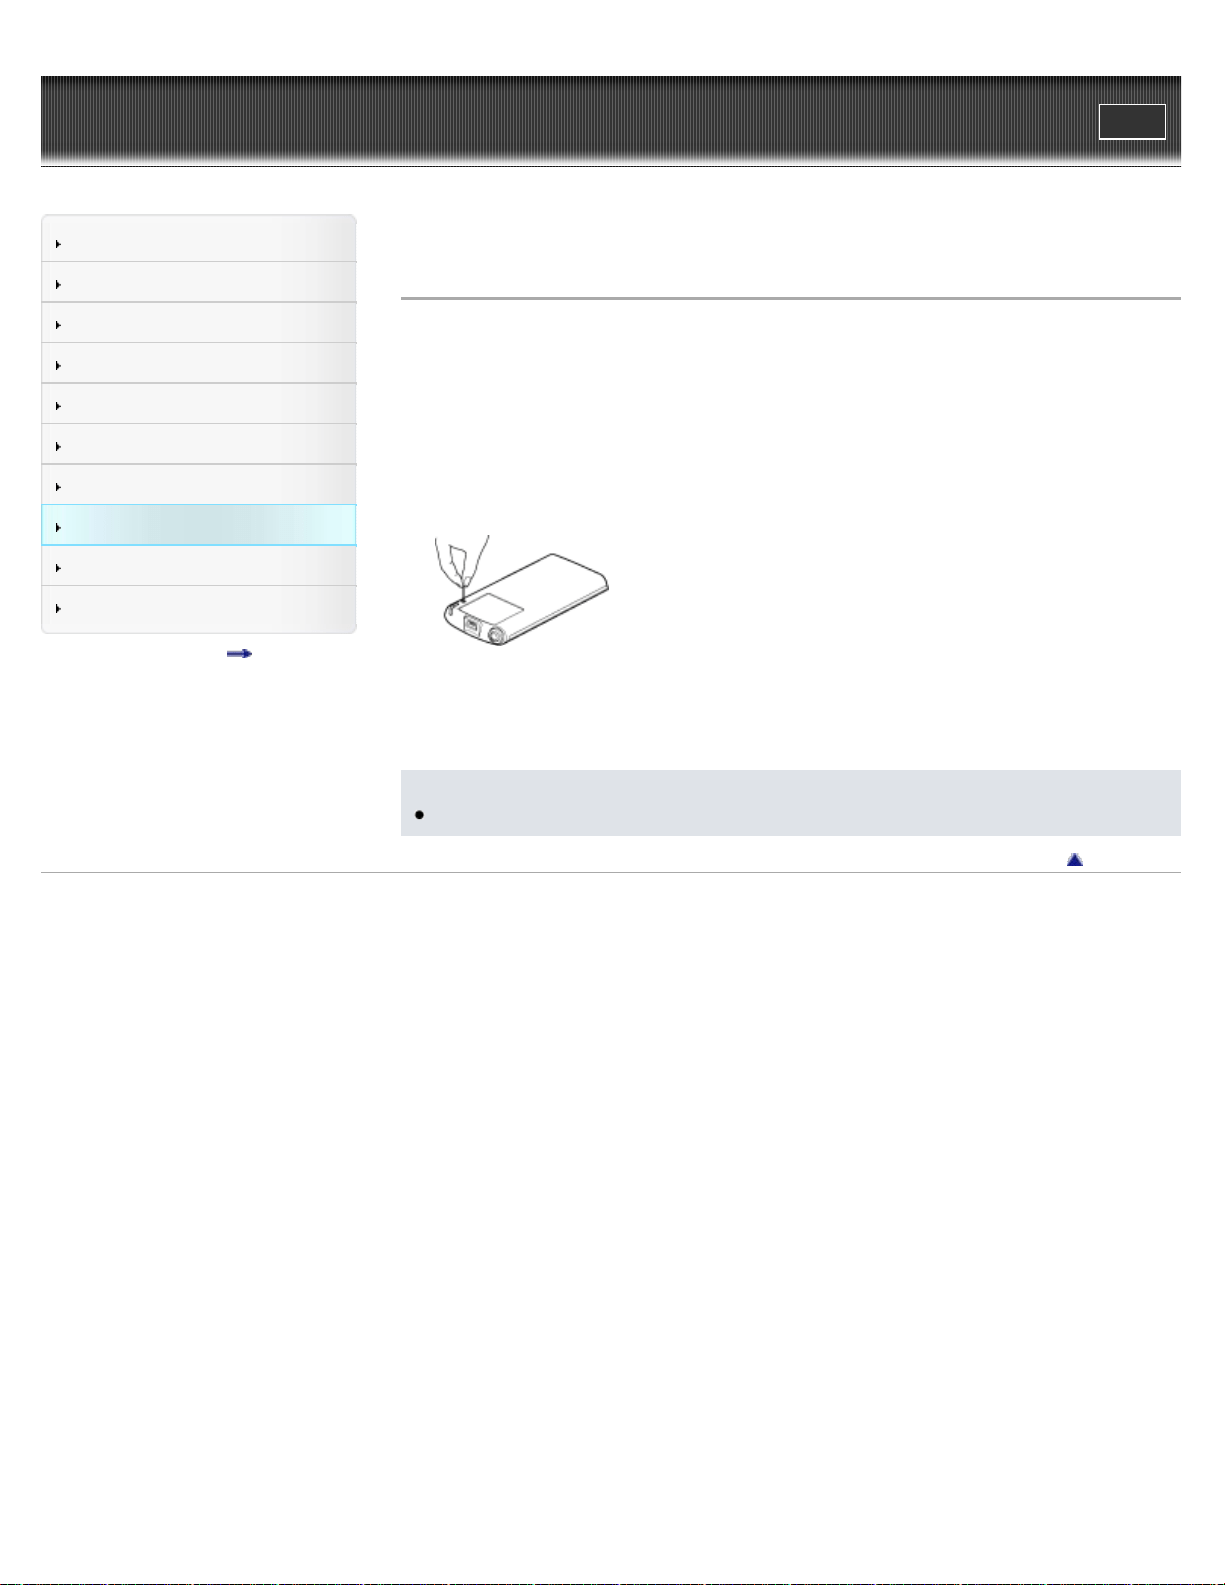
WALKMAN User Guide
Print
Getting Started
How to Use the Software
Music
Videos/Photos
FM Radio
Timer
Settings
Troubleshooting
Important Information
Specifications
Contents list
Top page > Troubleshooting > To Deal with a Trouble > What can I do to solve a problem?
What can I do to solve a problem?
If the player does not function as expected, try the following steps to resolve the issue.
1. Find the symptoms of the issue in this manual, and try any corrective actions listed.
2. Connect the player to your computer to charge the battery.
You may be able to resolve some issues by charging the battery [Details].
3. Press the RESET button with a small pin, etc.
If you press the RESET button while operating the player, stored data and player settings
may be lost.
4. Check information on the issue in the Help of each software.
5. Look up information on the issue on one of the customer support Web sites [Details].
6. If the approaches listed above fail to resolve the issue, consult your nearest Sony dealer.
Note
No data will be deleted and no settings will be changed by resetting the player.
Back to top
Copyright 2011 Sony Corporation
131

WALKMAN User Guide
Print
Getting Started
How to Use the Software
Music
Videos/Photos
FM Radio
Timer
Settings
Troubleshooting
Important Information
Specifications
Contents list
Top page > Troubleshooting > To Deal with a Trouble > Customer support Web site
Customer support Web site
If you have any questions or issues with this product, or would like information on compatible
items with this product, visit the following Web sites.
For customers in the USA:
http://www.sony.com/walkmansupport
For customers in Canada:
http://www.sony.ca/ElectronicsSupport/
For customers in Europe:
http://support.sony-europe.com/DNA
For customers in Latin America:
http://www.sony-latin.com/index.crp
For customers in other countries/regions:
http://www.sony-asia.com/support
For customers who purchased the overseas models:
http://www.sony.co.jp/overseas/support/
Back to top
Copyright 2011 Sony Corporation
132

WALKMAN User Guide
Print
Getting Started
How to Use the Software
Music
Videos/Photos
FM Radio
Timer
Settings
Troubleshooting
Important Information
Specifications
Contents list
Top page > Troubleshooting > Possible Causes of Symptoms > Table of contents for symptoms
and possible causes
Table of contents for symptoms and possible causes
The following topics show possible causes and remedies for symptoms. See an appropriate topic
according to your problem.
Operation
Display
Power
Connection to a computer
FM Radio
Other
Messages
Back to top
Copyright 2011 Sony Corporation
133
WALKMAN User Guide
Print
Getting Started
How to Use the Software
Music
Videos/Photos
FM Radio
Timer
Settings
Troubleshooting
Important Information
Specifications
Contents list
Top page > Troubleshooting > Possible Causes of Symptoms > Operation
Operation
There is no sound.
The volume level is set to zero.
Turn the volume up.
The headphone plug is not connected properly.
If the headphones are connected improperly, the sound from the headphones will be
impaired. Insert the headphone plug until it clicks into place [Details].
The headphone plug is dirty.
Clean the headphone plug with a soft dry cloth.
No songs or videos are stored on the player.
Follow the instructions in the displayed message, and transfer songs or videos from the
computer.
After prescribing the remedies above, if the problem still persists, press the RESET button of
the player [Details].
Data cannot be played.
The battery is consumed.
Charge the battery fully [Details].
If the player does not react, even after charging the battery, press the RESET button to
reset the player [Details].
No data is stored on the player.
Follow the instructions in the message, and transfer data from the computer.
After transferring by drag-and-drop in Windows Explorer, data hierarchy levels do not
correspond to the player.
Place the data in the correct place by drag-and-drop [Details].
Transferred files are not in a playable format.
For information on the playable formats, see [Details]. Some files may not be played back,
depending on certain file specifications.
You are placing audio MP4 files in a video folder by drag-and-drop.
Place them in the [MUSIC] folder by drag-and-drop.
The data may be damaged.
Damaged data within a file may be recognized as a non-playable format. Delete the
damaged data, and then transfer the non-damaged data from your computer again.
Data cannot be deleted on the player.
You cannot delete songs, videos or photos on the player.
Delete them using the software you used to transfer the data, or Windows Explorer.
134

Transferred data is not displayed in its list.
Videos and photos in unsupported format may not be recognized by the player and may not
appear in a list [Details].
If you rename a video file that is transferred from a computer to the player, or move it to
another folder, it may not be recognized by the player and may not appear in a video list.
The maximum number of files that can be displayed has been reached. The maximum
number of files is 1,000 files for videos, and 8,000 files for photos. Also, the maximum
number of folders is 8,000 folders for photos in the photo folder list.
Delete unnecessary data.
Data was placed in the wrong location by drag-and-drop.
Place the data in the correct place by drag-and-drop [Details].
Available capacity is insufficient.
Delete unnecessary data to increase free space on the player.
After transferring by drag-and-drop in Windows Explorer, data hierarchy levels do not
correspond to the player [Details].
The built-in flash memory of the player was formatted using Windows Explorer.
Format the built-in flash memory on the player [Details].
The USB cable (supplied) was disconnected from the player while data was being transferred.
Transfer usable files back to your computer and format the built-in flash memory on the
player [Details].
When [All Songs] or [Album] is selected, all the songs will appear, but
some songs do not appear when [Folder] is selected.
The audio files are not in folders under the [MUSIC] folder.
Place them in folders under the [MUSIC] folder by drag-and-drop.
Songs are played back within a limited playback range only, such as
within one album.
The player plays back songs only in the lists from which playback starts (album list, artist list,
etc.) [Details].
Noise is generated.
A device emitting radio signals, such as a mobile phone is being used near the player.
When using devices such as mobile phones, keep them away from the player.
Music data imported from CDs, etc., is damaged.
Delete the data, then import and transfer it again. When importing data to your computer,
close any other applications to avoid data damage.
Transferred files are not in a playable format. For details, see [Details].
Some songs may not be played back, depending on certain file specifications.
The headphone plug is dirty.
Clean the headphone plug with a soft dry cloth.
The player does not respond to any button operations.
The HOLD switch is set to the HOLD position.
Slide the HOLD switch on the right side to the opposite position [Details].
The player contains moisture condensation.
Wait a few hours to let the player dry out.
135

The remaining battery power is low or insufficient.
Charge the battery by connecting the player to a running computer [Details].
If you charge the battery and nothing changes, press the RESET button to reset the player
[Details].
The player is connected to the computer via USB connection.
Disconnect the USB connection, then operate the player.
Playback does not stop.
With this player, there is no difference between stopping and pausing. When you press the
button, appears and playback pauses/stops.
Transferred data cannot be found.
If a lot of data is stored on the player, some data may not be displayed.
The built-in flash memory of the player was formatted using Windows Explorer.
Format the built-in flash memory on the player [Details].
The supplied USB cable was disconnected from the player while data was being transferred.
Transfer usable files back to your computer and format the built-in flash memory on the
player [Details].
After drag-and-drop in Windows Explorer, data hierarchy levels do not correspond to the
player [Details].
Transferred files are not in a playable format. For details, see [Details].
Songs or videos may not be played back, depending on the file format [Details].
Photos may not be displayed, depending on the file size or the file format [Details].
There is insufficient volume.
[AVLS (Volume Limit)] is enabled.
Disable [AVLS (Volume Limit)] [Details].
There is no sound from the right channel of the headphones. Or the right
channel sound is heard from both sides of the headphones.
The headphone plug is not fully inserted.
If the headphones are not connected correctly, sound will not be output properly. Insert the
headphone plug into the jack until it clicks [Details].
Playback has stopped suddenly.
The remaining battery power is insufficient.
Charge the battery by connecting the player to a running computer [Details].
The songs or video files that cannot be played are played.
Play back another song or video file.
Thumbnails (such as cover art) are not displayed.
Songs of a file format supported by the player do not have cover art information. Thumbnails
are displayed only when songs have cover art information and whose file format is supported
by the player.
Transfer again using Windows Media Player 11, or another transfer capable software.
136

Thumbnail name does not match its video, or the video is not in the correct location.
Place a JPEG file of the same name as the video into the folder under the [VIDEO] folder.
If photos do not have thumbnails that comply with Exif file format, the thumbnails cannot be
displayed.
If you have transferred a song without cover art to the player, you cannot attach cover art to
the song even if you transfer it once more along with its cover art.
Delete the song from the player, then transfer it to the player again along with its cover art.
Cover art is not displayed.
Cover art information is not included with the data.
The cover art only appears if cover art information is included.
You can set cover art using Windows Media Player 11, or another transfer capable
software for setting cover art. For details on operation, refer to the Help or maker of the
software.
Some cover art may not be displayed depending on its file format.
Cannot format the player.
The remaining battery is low or insufficient.
Charge the battery by connecting the player to a running computer [Details].
The player’s power turned off, and then on again.
If a malfunction occurs, the player turns off, and then on again automatically.
The player does not work properly.
The computer was started or restarted with the player connected to it.
Reset the player by pressing the RESET button of the player [Details]. Disconnect the
player when you start or restart the computer.
Back to top
Copyright 2011 Sony Corporation
137
WALKMAN User Guide
Print
Getting Started
How to Use the Software
Music
Videos/Photos
FM Radio
Timer
Settings
Troubleshooting
Important Information
Specifications
Contents list
Top page > Troubleshooting > Possible Causes of Symptoms > Display
Display
“ ” appears for a title.
Characters that cannot be displayed on the player are included in the title.
Rename the title with appropriate characters, using the software you used to transfer, or
Windows Explorer.
[Unknown] is displayed for an album or artist name, etc.
Information such as album or artist name, etc., is not contained in the data.
Garbled characters are displayed.
The wrong language is selected.
Select the correct language from [Language Settings] [Details], and then transfer data to
the player again.
The screen darkens while displaying a photo.
There has been no operation attempted for more than 30 seconds [Details].
Press any button.
The screen turns off.
No operation performed for more than 3 minutes with the player in pause mode.
Press any button.
No operation performed for more than 30 seconds with [Screensaver] set to [Blank] [Details].
Press any button.
Set [Screensaver] to other than [Blank].
A message appears.
See “Messages” [Details].
Back to top
Copyright 2011 Sony Corporation
138
WALKMAN User Guide
Print
Getting Started
How to Use the Software
Music
Videos/Photos
FM Radio
Timer
Settings
Troubleshooting
Important Information
Specifications
Contents list
Top page > Troubleshooting > Possible Causes of Symptoms > Power
Power
Battery life is short.
The operating temperature is below 5 °C (41 ºF).
Battery life becomes shorter as a result of the battery characteristics. This is not a
malfunction.
Battery charging time is not sufficient.
Charge the battery until
appears.
By adjusting the settings or managing the power supply properly, it is possible to save the
battery power and use the player for a longer time [Details].
You have not used the player for more than a year.
Depending on the conditions under which your player is used, the battery may have been
deteriorated. Consult your nearest Sony dealer.
The efficiency of the battery will improve by repeatedly charging and discharging it.
When usable battery life becomes half the usual time, even after charging the battery fully,
the battery should be replaced.
Consult your nearest Sony dealer.
The player cannot charge the battery.
The USB cable is not connected to a USB connector on your computer properly.
Disconnect the USB cable, and then reconnect it.
Use the supplied USB cable.
The battery is charged in an ambient temperature out of the range of 5 °C (41 ºF) to 35 °C (95
ºF).
You cannot charge the battery when
icon appears. Charge the battery in an ambient
temperature of 5 °C (41 ºF) to 35 °C (95 ºF).
The computer is not on.
Turn on the computer.
Your computer has entered Sleep or Hibernation status.
Release the computer from Sleep or Hibernation status.
A USB hub is being used.
Connecting the player via a USB hub may not work. Connect the player to your computer
using the USB cable (supplied).
The operating system installed on the computer is not supported by the player.
To charge the player, connect the player to a computer with the operating system that is
supported by the player [Details].
You have not used the player for more than a year.
Depending on the conditions under which your player is used, the battery may have been
deteriorated. Consult your nearest Sony dealer.
After prescribing the remedies above, if the problem still persists, press the RESET button of
the player [Details] and reconnect it to the computer by using the USB cable (supplied).
139

The player turns off automatically.
To avoid unnecessary battery consumption, the player automatically turns off.
Press any button to turn the player on.
Charging completes very quickly.
If the battery is already almost fully charged when charging begins, little time is needed to
reach full charge.
Back to top
Copyright 2011 Sony Corporation
140
WALKMAN User Guide
Print
Getting Started
How to Use the Software
Music
Videos/Photos
FM Radio
Timer
Settings
Troubleshooting
Important Information
Specifications
Contents list
Top page > Troubleshooting > Possible Causes of Symptoms > Connection to a computer
Connection to a computer
Cannot install the software.
Your computer is installed with an operating system that is not supported by the player.
Check the operating system of your computer [Details].
Other software is running on Windows.
If another software is running, it may interfere with installation. Particularly, be sure to stop
security software as it can put a heavy load on the computer.
There is not enough free space for the hard drive.
Check the required hard drive space for installing the application, and delete unnecessary
files.
Your account has no administrator privileges, or you have not logged in as the computer’s
administrator.
To install the software, log in with an account with administrator privileges or log in as the
computer’s administrator.
A message dialog is covered from your site by the install screen.
Press and hold the [Alt] key and press the [Tab] key several times until the message dialog
appears. Then follow the message.
The progress bar on the install screen does not proceed. Or, the access
lamp of the hard drive does not light for several minutes.
Wait until the installation is completed, because it is progressing properly. The installation may
take 30 minutes or more depending on the computer.
[Connected USB. The Timer and Alarm will become invalid.] or
[Connected USB (MTP) The Timer and Alarm will become invalid.] does
not appear when connected to the computer with the USB cable
(supplied) (The computer does not recognize the player).
The remaining battery power is insufficient.
Charge the battery by connecting the player to a running computer for at least 5 minutes.
The USB cable is not connected to a USB connector on your computer properly.
Disconnect the USB cable, and then reconnect it.
Use the supplied USB cable.
A USB hub is being used.
Connecting the player via a USB hub may not work. Connect the player directly to your
computer using the USB cable (supplied).
The USB connector on your computer may have a problem.
Connect the player to another USB connector on your computer.
When you use the player for the first time, or when the battery is low, it may take the player
about 30 seconds to display the message after connected to a computer. This is not a
malfunction.
141

The software authentication may be performed and it may take rather a long time. Wait for a
while.
The software installation has been failed.
Reinstall the software by using the installer. The imported data will remain untouched.
The computer is running another software other than the one used for transferring.
Disconnect the USB cable, wait a few minutes, and reconnect it. If the problem persists,
disconnect the USB cable, restart the computer, and then reconnect the USB cable.
[Connected USB. The Timer and Alarm will become invalid.] or [Connected USB (MTP) The
Timer and Alarm will become invalid.] may not appear on the player, depending on the
software environment that is running on your computer.
Activate Windows Media Player, or Windows Explorer.
After prescribing the remedies above, if the problem still persists, press the RESET button of
the player and reconnect it to the computer by using the USB cable (supplied).
Data cannot be transferred to the player from your computer.
Transferring may be stopped due to noise, such as static electricity, etc. This happens to
protect data information.
Disconnect the player, then reconnect it.
If you transfer files by drag-and-drop on a computer that does not have Windows Media
Player 11 installed, only a limited amount of files (AAC, video files, etc.) may be transferrable
by drag-and-drop.
Install Windows Media Player 11 from the Windows Media Player download site, then
transfer files by drag-and-drop again. Before installing Windows Media Player 11 on your
computer, make sure to check whether your software or service corresponds to Windows
Media Player 11. For details on usage, or support on Windows Media Player, visit the
following web site:
http://support.microsoft.com/
The USB cable is not connected to a USB connector on your computer properly.
Disconnect the USB cable, and then reconnect it.
There is not enough free space in the built-in flash memory.
Delete any unnecessary data to increase free space.
For details on the maximum recordable number of files and folders, see [Details].
Songs with a limited playing period or playing count may not be transferred due to restrictions
set by copyright holders. For details on the settings of each audio file, contact the distributor.
Abnormal data exists on the player.
Transfer usable files back to your computer and format the built-in flash memory on the
player [Details].
You may not be using the supported software to transfer data to the player.
Install the supported software and use it to transfer data.
The data may be damaged.
Delete the data that cannot be transferred from your computer, then import it to your
computer again. When importing data to your computer or transferring data to the player,
close any other applications to avoid data damage.
You may be attempting to transfer a file that is not in a playable format.
For information on the supported file format, see [Details]. You may not transfer a file
depending on the file specification.
Transferable limit of files and folders has been exceeded.
Delete unnecessary data.
You are trying to transfer .m4a, .mp4, .3gp or .m4v files on a computer that already has
Windows Media Player 10 installed.
142

If you are using Windows XP or Windows Vista, install Windows Media Player 11 from the
Windows Media Player download site.
If you transfer data using an appropriate software for transferring, but the transfer is not made,
refer to the manufacturer.
The player cannot play the audio files that use the digital rights management technology for
Windows Media (“WM-DRM”).
The transfer takes too long time.
You are transferring a large file.
It may take a long time to transfer a large file.
Only a small amount of data can be transferred to the player.
There is not enough free space in the built-in flash memory.
Delete any unnecessary data to increase free space.
Data that cannot be played on the player is stored on the player.
If data other than song, video, or photo data is stored on the player, less data can be
transferred. Transfer back data that cannot be played on the player to the computer to
increase the available space.
The player becomes unstable while it is connected to the computer.
A USB hub or USB extension cable is being used.
Connecting the player via a USB hub or extension cable may not work. Connect the player
directly to your computer using the USB cable (supplied).
Folders cannot be renamed or deleted.
You cannot delete or rename the [MUSIC], [MP_ROOT], [MPE_ROOT], [VIDEO], [DCIM],
[PICTURE] and [PICTURES] folders.
Back to top
Copyright 2011 Sony Corporation
143
WALKMAN User Guide
Print
Getting Started
How to Use the Software
Music
Videos/Photos
FM Radio
Timer
Settings
Troubleshooting
Important Information
Specifications
Contents list
Top page > Troubleshooting > Possible Causes of Symptoms > FM Radio
FM Radio
FM broadcasts are unclear.
The received station is not fully tuned in.
Tune the station in manually using the
/ button [Details].
Reception is weak and sound quality is poor.
The radio signal is weak.
Listen to the FM broadcast near a window since the signal may be weak inside buildings or
in vehicles.
The headphone cord is not fully extended.
The headphone cord functions as an antenna. Extend the headphone cord as far as
possible.
Setting the receiver to monaural may reduce noise.
Set the [Mono/Auto] option to [Mono] [Details].
FM broadcasts are affected by interference.
A device emitting radio signals, such as a mobile phone, is being used near the player.
When using devices such as mobile phones, keep them away from the player.
FM broadcasts cannot be heard.
The headphones are not connected.
The headphone cord functions as an antenna. When a peripheral device (not supplied) is
connected to the USB connector and the headphones cannot be connected, FM broadcast
reception is unavailable.
Back to top
Copyright 2011 Sony Corporation
144
WALKMAN User Guide
Print
Getting Started
How to Use the Software
Music
Videos/Photos
FM Radio
Timer
Settings
Troubleshooting
Important Information
Specifications
Contents list
Top page > Troubleshooting > Possible Causes of Symptoms > Other
Other
There is no beep sound when the player is operated.
[Beep Settings] is set to [Off].
Set [Beep Settings] to [On] [Details].
The beep does not sound when the player is connected to the cradle (not supplied), or
another device.
The player gets warm.
The player may become warm when the battery is being charged and just after charging. The
player also may get warm when a large amount of data is transferred. This behavior is normal
and not cause for a concern. Set the player aside for a while to allow it to cool down.
The date and time have been reset.
If you left the player for a while with the battery used up, the date and time may be reset. This
is not a malfunction. Charge the battery until
appears on the screen, and set the date
and time again [Details].
Noise is generated when plugging or unplugging the headphones.
Take off the headphones when plugging or unplugging the headphones. If you plug or unplug
the headphones while playing a song, you may hear noise from the headphones. This is not a
malfunction.
The alarm does not function.
When setting the alarm, the setting was stopped halfway or the player was turned off without
confirming the setting of the hour and minutes.
The alarm does not function while the player is connected to a computer.
Disconnect the USB cable.
The remaining battery power is low or insufficient.
Charge the battery by connecting the player to a running computer [Details].
The alarm does not go off.
The alarm will not sound in the following situations.
Connected to a computer.
The alarm is delayed.
In the following situations, the alarm will be postponed until the process is finished.
Deleting data.
145

Formatting memory.
The sleep timer does not work.
The sleep timer will not activate in the following situations.
Connected to a computer.
Using [Auto Preset] function of the FM radio.
Sounding the alarm.
The sleep timer will be canceled in the following situations.
Entering standby mode.
Connecting the player to a computer.
The sleep timer is delayed.
In the following situations, the sleep timer will be postponed until the process is finished.
Deleting data.
Formatting memory.
Back to top
Copyright 2011 Sony Corporation
146
WALKMAN User Guide
Print
Getting Started
How to Use the Software
Music
Videos/Photos
FM Radio
Timer
Settings
Troubleshooting
Important Information
Specifications
Contents list
Top page > Troubleshooting > Possible Causes of Symptoms > Messages
Messages
Follow the instructions below if a message appears in the display.
[All group numbers have been used.]
The total number of songs registered in the playlists has reached 27,000.
Songs exceeding the limit are stored in [Others].
If you cannot find a song, search for it in the [Others] list first.
If you do not want to store songs that exceed the limit in the [Others] list, delete
unnecessary songs from the player using the software you used to transfer the songs, or
Windows Explorer.
If the total number of playlists registered to the player exceeds 27,000, playlists exceeding
this number cannot be displayed. Decrease the number of playlists (by deleting them)
using the software you used to transfer the playlists.
[Cannot play; file format is not supported.]
You are trying to play a file that cannot be played on the player.
You cannot play a song in an unsupported format file [Details].
[Cannot save more than 30 Preset stations.]
30 broadcast stations are already preset.
Delete unnecessary stations first [Details], then preset the stations you want within the limit
number.
[Do not disconnect.]
The player is connected to a computer or other external devices to transfer data.
This is not an error message. Do not disconnect the USB cable until transferring
completes.
[Firmware update failed.]
Updating the firmware failed to complete.
Follow the instructions displayed on your computer to retry updating the firmware.
[LOW BATTERY. Please Charge.]
The player’s battery is running low.
Charge the battery [Details].
[Not enough free space in memory. Delete files to ensure free space.]
The player’s available capacity is insufficient.
147

Connect the player to your computer using the supplied USB cable, and then delete any
unnecessary data from the player using another software used for transferring, or Windows
Explorer.
[On hold... Cancel HOLD function to activate controls.]
The player cannot be operated because the HOLD switch is set to the HOLD position.
To operate the player, slide the HOLD switch in the opposite position [Details].
[The device’s memory was not formatted correctly. Please re-format
using Settings menu.]
The built-in flash memory was not formatted properly.
The built-in flash memory was formatted on a computer.
Select [Settings]- [Common Settings]- [Format] to format the built-in flash memory again
[Details].
Back to top
Copyright 2011 Sony Corporation
148
WALKMAN User Guide
Print
Getting Started
How to Use the Software
Music
Videos/Photos
FM Radio
Timer
Settings
Troubleshooting
Important Information
Specifications
Contents list
Top page > Important Information > Precautions > Important product information
Important product information
The following FCC statement applies only to the version of this model manufactured for sale in
the USA. Other versions may not comply with FCC technical regulations.
NOTE:
This equipment has been tested and found to comply with the limits for a Class B digital device,
pursuant to Part 15 of the FCC Rules. These limits are designed to provide reasonable
protection against harmful interference in a residential installation. This equipment generates,
uses and can radiate radio frequency energy and, if not installed and used in accordance with
the instructions, may cause harmful interference to radio communications.
However, there is no guarantee that interference will not occur in a particular installation. If this
equipment does cause harmful interference to radio or television reception, which can be
determined by turning the equipment off and on, the user is encouraged to try to correct the
interference by one or more of the following measures:
Reorient or relocate the receiving antenna.
Increase the separation between the equipment and receiver.
Connect the equipment into an outlet on a circuit different from that to which the receiver is
connected.
Consult the dealer or an experienced radio/TV technician for help.
You are cautioned that any changes or modifications not expressly approved in this manual
could void your authority to operate this equipment.
If you have any questions about this product:
Visit: www.sony.com/walkmansupport
Contact: Sony Customer Information Service Center at 1-(866)-456-7669
Write: Sony Customer Information Service Center 12451 Gateway Blvd., Fort Myers, FL 33913
Declaration of Conformity
Trade Name:
SONY
Model No.:
NWZ-E363/E364
Responsible Party:
Sony Electronics Inc.
Address:.
16530 Via Esprillo, San Diego, CA 92127 U.S.A
Telephone Number:
858-942-2230
This device complies with Part 15 of the FCC Rules. Operation is subject to the following two
conditions: (1) this device may not cause harmful interference, and (2) this device must accept
any interference received, including interference that may cause undesired operation.
Notice for customers: the following information is only applicable
to equipment sold in countries applying EU directives
The manufacturer of this product is Sony Corporation, 1-7-1 Konan Minato-ku Tokyo, 108-0075
Japan. The Authorized Representative for EMC and product safety is Sony Deutschland GmbH,
Hedelfinger Strasse 61, 70327 Stuttgart, Germany. For any service or guarantee matters please
refer to the addresses given in separate service or guarantee documents.
149
For users in France
At high volume, prolonged listening to the personal audio player can damage the
user’s hearing.
Disposal of Old Electrical & Electronic Equipment (Applicable in
the European Union and other European countries with separate
collection systems)
This symbol on the product or on its packaging indicates that this product shall not be treated as
household waste. Instead it shall be handed over to the applicable collection point for the
recycling of electrical and electronic equipment. By ensuring this product is disposed of correctly,
you will help prevent potential negative consequences for the environment and human health,
which could otherwise be caused by inappropriate waste handling of this product. The recycling
of materials will help to conserve natural resources. For more detailed information about
recycling of this product, please contact your local Civic Office, your household waste disposal
service or the shop where you purchased the product.
Applicable accessories: Headphones
Disposal of waste batteries (applicable in the European Union
and other European countries with separate collection systems)
This symbol on the battery or on the packaging indicates that the battery provided with this
product shall not be treated as household waste.
On certain batteries this symbol might be used in combination with a chemical symbol. The
chemical symbols for mercury (Hg) or lead (Pb) are added if the battery contains more than
0.0005% mercury or 0.004% lead.
By ensuring these batteries are disposed of correctly, you will help prevent potentially negative
consequences for the environment and human health which could otherwise be caused by
inappropriate waste handling of the battery. The recycling of the materials will help to conserve
natural resources.
In case of products that for safety, performance or data integrity reasons require a permanent
connection with an incorporated battery, this battery should be replaced by qualified service staff
only.
To ensure that the battery will be treated properly, hand over the product at end-of-life to the
applicable collection point for the recycling of electrical and electronic equipment.
For all other batteries, please view the section on how to remove the battery from the product
safely. Hand the battery over to the applicable collection point for the recycling of waste
batteries.
For more detailed information about recycling of this product or battery, please contact your local
Civic Office, your household waste disposal service or the shop where you purchased the
product.
Back to top
Copyright 2011 Sony Corporation
150
WALKMAN User Guide
Print
Getting Started
How to Use the Software
Music
Videos/Photos
FM Radio
Timer
Settings
Troubleshooting
Important Information
Specifications
Contents list
Top page > Important Information > Precautions > Warning
Warning
The following descriptions are important for using the player. Be sure to follow the instructions
below.
Be sure not to short-circuit the terminals of the player with metallic objects.
Do not pour water or put any foreign object in the player. Doing so may cause fire or electric
shock.
If this occurs, turn off the player immediately, disconnect the USB cable from the player, and
consult your nearest Sony dealer or Sony Service Center.
Do not place the player in fire.
Do not take apart or remodel the player. Doing so can result in electric shock. Consult your
nearest Sony dealer or Sony Service Center for exchange of rechargeable batteries, internal
checks or repair.
Do not put any heavy object on top of the player or apply a strong shock to the player. It may
cause a malfunction or damage.
Back to top
Copyright 2011 Sony Corporation
151
WALKMAN User Guide
Print
Getting Started
How to Use the Software
Music
Videos/Photos
FM Radio
Timer
Settings
Troubleshooting
Important Information
Specifications
Contents list
Top page > Important Information > Precautions > Caution
Caution
Notes on use
Notes on usage environment
Notes on handling the player
Notes on protecting the player from getting wet
Notes on use
The following descriptions are important for using the player. Be sure to follow the instructions
below.
Do not touch the rechargeable battery with bare hands if it is leaking. Since battery liquid may
remain in the player, consult your nearest Sony dealer if the battery has leaked. If the liquid
gets into your eyes, do not rub your eyes as it may lead to blindness. Wash out your eyes
with clean water, and consult a doctor.
Also, if the liquid gets on to your body or clothes, wash it off immediately. If you do not, it may
cause burns or injury. If you get burned or injured by the liquid from the battery, consult a
doctor.
If the player causes interference to radio or television reception, turn the player off and move
it away from the radio or television.
In particularly dry air conditions, mild tingling may be felt on your ears. This is a result of
static electricity accumulated in the body, and not a malfunction of the player.
The effect can be minimized by wearing clothes made from natural materials.
When using a strap (not supplied), be careful to avoid catching it on objects you pass by.
Furthermore be careful not to swing the player by the strap to avoid bumping people.
Refrain from using the player according to the in-flight announcements during take off or
landing in an aircraft.
If you see lightning or hear thunder, take off the headphones immediately and refrain from
using the player.
If you experience an allergic reaction to the supplied headphones, stop using them at once
and contact a doctor.
Notes on usage environment
Never use the player where it will be subjected to extremes of light, temperature, moisture or
vibration. Also, never leave the player exposed to high temperature, such as in a car parked
in the sun or under direct sunlight. The player may become discolored, distorted or damaged.
Do not leave the player in a place subject to excessive dust.
Do not leave the player on an unstable surface or in an inclined position.
Notes on handling the player
When you unplug the headphones from the player, make sure to hold the headphone plug to
unplug it. Pulling the headphone cord itself may cause damage to the headphone cord.
Do not apply strong force to the surface of the LCD. This may cause a distortion in colors or
brightness, or cause a malfunction of the LCD.
When using the player, remember to follow the precautions below in order to avoid warping
the cabinet or causing the player to malfunction.
Make sure not to sit down with the player in your back pocket.
152
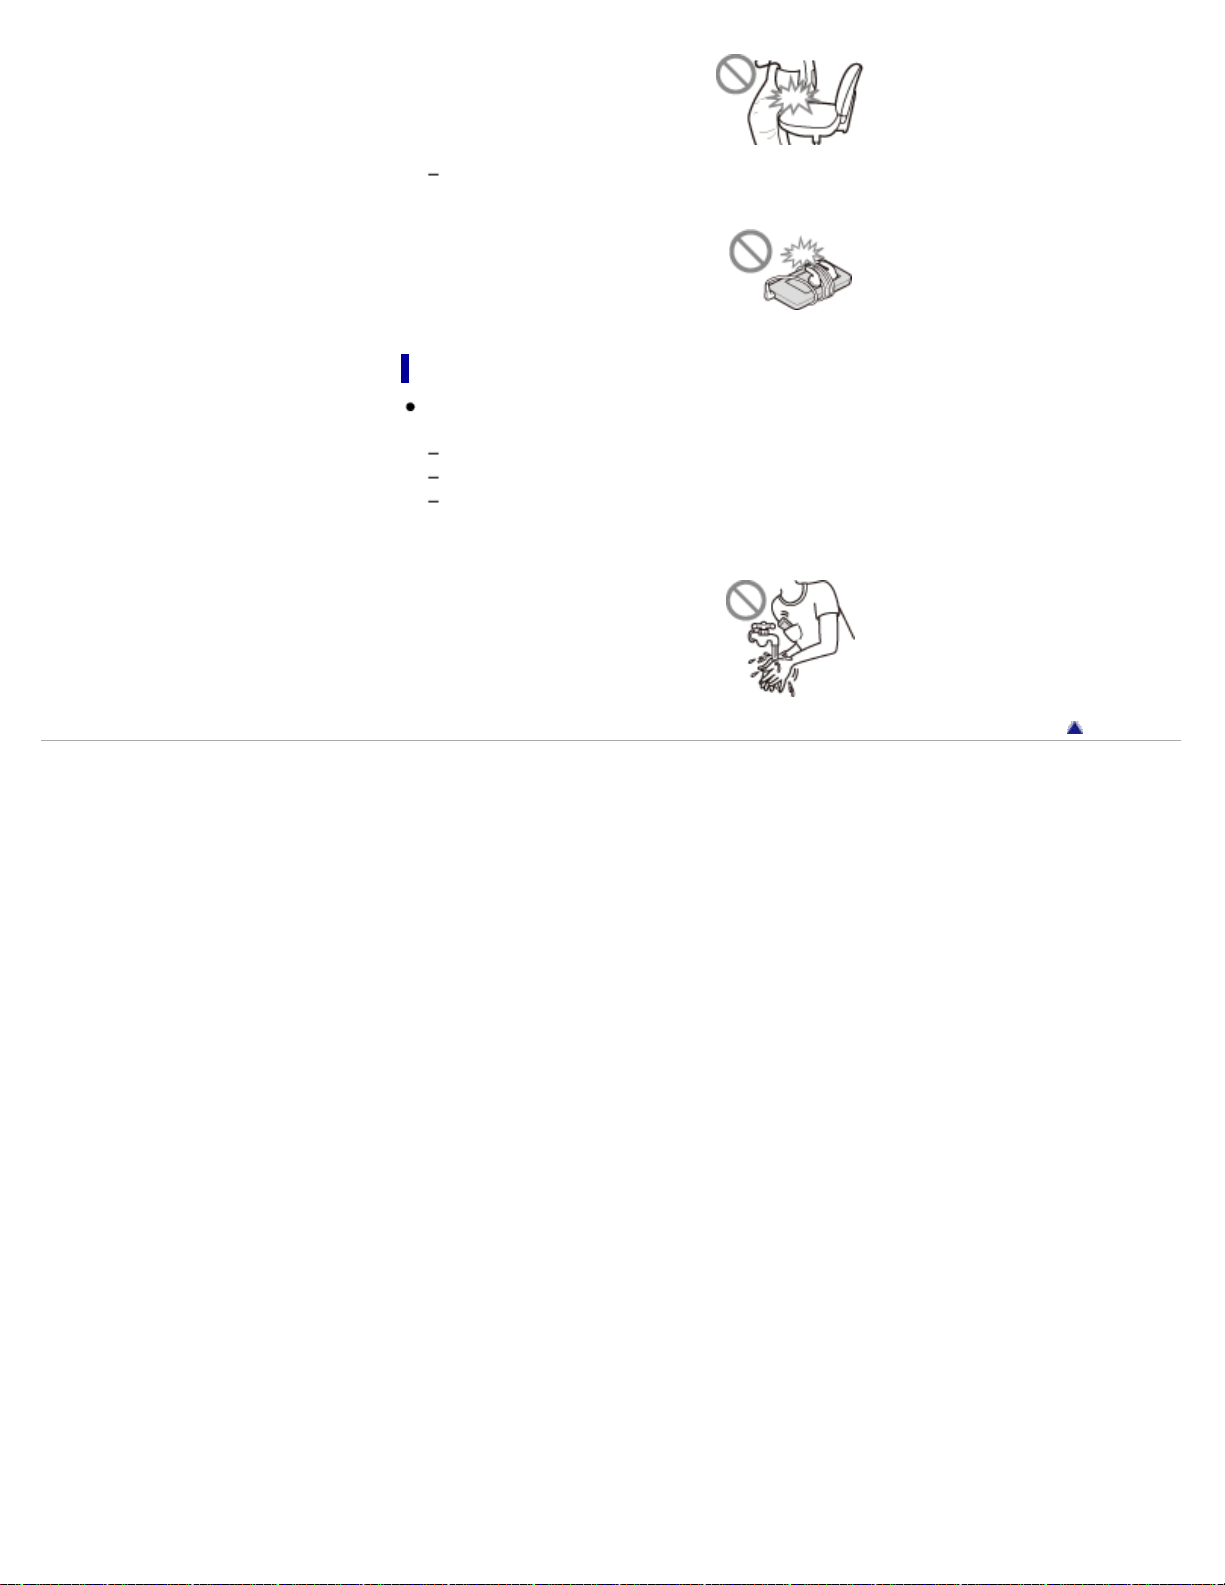
Make sure not to put the player into a bag with the headphones/earphones cord wrapped
around it and then subject the bag to strong impact.
Notes on protecting the player from getting wet
Do not expose the player to water. The player is not waterproof. Remember to follow the
precautions below.
Be careful not to drop the player into a sink or other container filled with water.
Do not use the player in humid locations or bad weather, such as in the rain or snow.
Do not get the player wet.
If you touch the player with wet hands, or put the player in a damp article of clothing, the
player may get wet and this may cause a malfunction of the player.
Back to top
Copyright 2011 Sony Corporation
153
WALKMAN User Guide
Print
Getting Started
How to Use the Software
Music
Videos/Photos
FM Radio
Timer
Settings
Troubleshooting
Important Information
Specifications
Contents list
Top page > Important Information > Precautions > Notice for users
Notice for users
The recorded song is limited to private use only. Use of the song beyond this limit requires
permission of the copyright holders.
Sony is not responsible for incomplete recording/downloading or damaged data due to
problems of the player or computer.
Depending on the type of the text and characters, the text shown on the player may not be
displayed properly on device. This is due to:
The capacity of the connected player.
The player is not functioning normally.
Content information is written in language or character that are not supported by the player.
Heat may build up in the player while charging if it is used for an extended period of time.
Note that condensation may form temporarily in cases such as when the player is moved
quickly from a low-temperature environment to a high temperature environment, or used in a
room that has a heater just turned on. Condensation creates a phenomenon where moisture
in the air adheres to surfaces such as metal panels, etc., and then changes to liquid.
If condensation forms in the player, leave it turned off until the condensation disappears. If
you use the player with condensation present, a malfunction may result.
If you use the player in a cold location, images may appear with black bands around them.
This is not a malfunction of the player.
About sample data (*1)
The player is pre-installed with sample data.
If you delete the sample data, you cannot restore it, and we will not supply any replacement data.
(*1) In some countries/regions some sample data is not installed.
Back to top
Copyright 2011 Sony Corporation
154
WALKMAN User Guide
Print
Getting Started
How to Use the Software
Music
Videos/Photos
FM Radio
Timer
Settings
Troubleshooting
Important Information
Specifications
Contents list
Top page > Important Information > Precautions > Notes on the headphones
Notes on the headphones
Road safety
Avoid listening with your headphones in situations where hearing must not be impaired.
Preventing hearing damage
Avoid using the headphones at a high volume. Hearing experts advise against continuous, loud
and extended play. If you experience a ringing in your ears, reduce the volume or discontinue
use.
Do not turn the volume up high all at once, especially when using headphones. Turn up the
volume gradually to avoid excessive levels hurting your ears.
Caring for others
Keep the volume at a moderate level. This will allow you to hear outside sounds and to be
considerate to the people around you.
Back to top
Copyright 2011 Sony Corporation
155
WALKMAN User Guide
Print
Getting Started
How to Use the Software
Music
Videos/Photos
FM Radio
Timer
Settings
Troubleshooting
Important Information
Specifications
Contents list
Top page > Important Information > Precautions > Notes on the software
Notes on the software
Copyright laws prohibit reproducing the software or the manual accompanying it in whole or in
part, or renting the software without the permission of the copyright holder.
In no event will Sony be liable for any financial damage, or loss of profits, including claims
made by third parties, arising out of the use of the software supplied with this player.
The software provided with this player cannot be used with equipment other than that to
which it is so designated.
Please note that, due to continued efforts to improve quality, the software specifications may
be changed without notice.
Operation of this player with software other than that provided is not covered by the warranty.
The ability to display the languages on supplied software will depend on the installed OS on
your computer. For better results, please ensure that the installed OS is compatible with the
desired language you want to display.
We do not guarantee all the languages will be able to be displayed properly on the supplied
software.
User-created characters and some special characters may not be displayed.
The explanations in this manual assume that you are familiar with the basic operations of
Windows.
For details on the use of your computer and operating system, please refer to the respective
manuals.
Back to top
Copyright 2011 Sony Corporation
156
WALKMAN User Guide
Print
Getting Started
How to Use the Software
Music
Videos/Photos
FM Radio
Timer
Settings
Troubleshooting
Important Information
Specifications
Contents list
Top page > Important Information > Cleaning > Notes on cleaning
Notes on cleaning
Clean the player’s case with a soft cloth, such as a cleaning cloth for eyeglasses.
If the player’s case should become very dirty, clean it with a soft cloth slightly moistened with
water or a mild detergent solution.
Do not use any type of abrasive pad, scouring powder, or solvent, such as alcohol or
benzene, as it may mar the finish of the case.
Be careful not to let water get into the player from the opening near the connector.
Clean the headphone plug periodically.
Back to top
Copyright 2011 Sony Corporation
157

WALKMAN User Guide
Print
Getting Started
How to Use the Software
Music
Videos/Photos
FM Radio
Timer
Settings
Troubleshooting
Important Information
Specifications
Contents list
Top page > Important Information > Storing Data > Storing data
Storing data
You can store computer data into the built-in flash memory of the player by transferring the data
from your computer using Windows Explorer, or other transfer-capable software. If the player is
connected to the computer, the built-in flash memory appears in Windows Explorer as
[WALKMAN].
Note
Do not use the bundled software while using Windows Explorer to interact with the built-in
flash memory of the player.
Do not disconnect the USB cable (supplied) while [Do not disconnect.] appears during data
transfer. Otherwise, the data being transferred or the data stored in the player may be
damaged.
Do not format the built-in flash memory using Windows Explorer. If you want to format the
built-in flash memory, format it on the player [Details].
Do not rename the [MUSIC], [MP_ROOT], [MPE_ROOT], [VIDEO], [PICTURE] and
[PICTURES] folders, or delete them.
Do not rename files and folders directly under the [MP_ROOT] or [MPE_ROOT] folder.
Otherwise, they will not be displayed on the player.
Back to top
Copyright 2011 Sony Corporation
158
WALKMAN User Guide
Print
Getting Started
How to Use the Software
Music
Videos/Photos
FM Radio
Timer
Settings
Troubleshooting
Important Information
Specifications
Contents list
Top page > Important Information > Upgrading the Player’s Firmware > Upgrading the player’s
firmware
Upgrading the player’s firmware
You can update the player’s firmware. Installing the latest player’s firmware allows you to add
new features to the player. For details on the latest firmware information and how to install it, visit
the customer support Web sites [Details].
1. Download the update program to your computer from the Web site.
2. Connect the player to your computer, and then start the update program.
3. Follow the on-screen instructions to update the player’s firmware.
Firmware update is complete.
Hint
Version information for the player’s firmware can be displayed by selecting
[Settings]
[Common Settings] [Unit Information] from the Home menu [Details].
Back to top
Copyright 2011 Sony Corporation
159
WALKMAN User Guide
Print
Getting Started
How to Use the Software
Music
Videos/Photos
FM Radio
Timer
Settings
Troubleshooting
Important Information
Specifications
Contents list
Top page > Important Information > License and Trademark Notice > License and trademark
notice
License and trademark notice
Important information on software
“WALKMAN” and “WALKMAN” logo are registered trademarks of Sony Corporation.
and are trademarks of Sony Corporation.
ZAPPIN and its logo are trademarks of Sony Corporation.
Microsoft, Windows, Windows Vista and Windows Media are either trademarks or registered
trademarks of Microsoft Corporation in the United States and/or other countries.
MPEG Layer-3 audio coding technology and patents licensed from Fraunhofer IIS and
Thomson.
IBM and PC/AT are registered trademarks of International Business Machines Corporation.
Apple, Macintosh and iTunes are trademarks of Apple Inc., registered in the U.S. and other
countries.
Pentium is a trademark or a registered trademark of Intel Corporation.
This software is based in part on the work of the Independent JPEG Group.
All other trademarks and registered trademarks are trademarks or registered trademarks of
their respective holders. In this manual, TM and ® marks are not specified.
This product contains technology subject to certain intellectual property rights of Microsoft. Use
or distribution of this technology outside of this product is prohibited without the appropriate
license(s) from Microsoft.
Program ©2011 Sony Corporation
Documentation ©2011 Sony Corporation
Information on Expat
Copyright ©1998, 1999, 2000 Thai Open Source Software Center Ltd and Clark Cooper.
Copyright ©2001, 2002, 2003, 2004, 2005, 2006 Expat maintainers.
Permission is hereby granted, free of charge, to any person obtaining a copy of this software and
associated documentation files (the “Software”), to deal in the Software without restriction,
including without limitation the rights to use, copy, modify, merge, publish, distribute, sublicense,
and/or sell copies of the Software, and to permit persons to whom the Software is furnished to
do so, subject to the following conditions:
The above copyright notice and this permission notice shall be included in all copies or
substantial portions of the Software.
THE SOFTWARE IS PROVIDED “AS IS”, WITHOUT WARRANTY OF ANY KIND, EXPRESS OR
IMPLIED, INCLUDING BUT NOT LIMITED TO THE WARRANTIES OF MERCHANTABILITY,
FITNESS FOR A PARTICULAR PURPOSE AND NONINFRINGEMENT.
IN NO EVENT SHALL THE AUTHORS OR COPYRIGHT HOLDERS BE LIABLE FOR ANY
CLAIM, DAMAGES OR OTHER LIABILITY, WHETHER IN AN ACTION OF CONTRACT, TORT
OR OTHERWISE, ARISING FROM, OUT OF OR IN CONNECTION WITH THE SOFTWARE OR
THE USE OR OTHER DEALINGS IN THE SOFTWARE.
Information on ncurses
Copyright (c) 1998-2004,2006 Free Software Foundation, Inc.
160

Permission is hereby granted, free of charge, to any person obtaining a copy of this software and
associated documentation files (the “Software”), to deal in the Software without restriction,
including without limitation the rights to use, copy, modify, merge, publish, distribute, distribute
with modifications, sublicense, and/or sell copies of the Software, and to permit persons to whom
the Software is furnished to do so, subject to the following conditions:
The above copyright notice and this permission notice shall be included in all copies or
substantial portions of the Software.
THE SOFTWARE IS PROVIDED “AS IS”, WITHOUT WARRANTY OF ANY KIND, EXPRESS OR
IMPLIED, INCLUDING BUT NOT LIMITED TO THE WARRANTIES OF MERCHANTABILITY,
FITNESS FOR A PARTICULAR PURPOSE AND NONINFRINGEMENT. IN NO EVENT SHALL
THE ABOVE COPYRIGHT HOLDERS BE LIABLE FOR ANY CLAIM, DAMAGES OR OTHER
LIABILITY, WHETHER IN AN ACTION OF CONTRACT, TORT OR OTHERWISE, ARISING
FROM, OUT OF OR IN CONNECTION WITH THE SOFTWARE OR THE USE OR OTHER
DEALINGS IN THE SOFTWARE.
Except as contained in this notice, the name(s) of the above copyright holders shall not be used
in advertising or otherwise to promote the sale, use or other dealings in this Software without
prior written authorization.
Information on netkit-ftp
Copyright (c) 1985, 1989 Regents of the University of California.
All rights reserved.
Redistribution and use in source and binary forms, with or without modification, are permitted
provided that the following conditions are met:
1. Redistributions of source code must retain the above copyright notice, this list of conditions
and the following disclaimer.
2. Redistributions in binary form must reproduce the above copyright notice, this list of conditions
and the following disclaimer in the documentation and/or other materials provided with the
distribution.
3. All advertising materials mentioning features or use of this software must display the following
acknowledgement:
This product includes software developed by the University of California, Berkeley and its
contributors.
4. Neither the name of the University nor the names of its contributors may be used to endorse
or promote products derived from this software without specific prior written permission.
THIS SOFTWARE IS PROVIDED BY THE REGENTS AND CONTRIBUTORS “AS IS” AND ANY
EXPRESS OR IMPLIED WARRANTIES, INCLUDING, BUT NOT LIMITED TO, THE IMPLIED
WARRANTIES OF MERCHANTABILITY AND FITNESS FOR A PARTICULAR PURPOSE ARE
DISCLAIMED. IN NO EVENT SHALL THE REGENTS OR CONTRIBUTORS BE LIABLE FOR
ANY DIRECT, INDIRECT, INCIDENTAL, SPECIAL, EXEMPLARY, OR CONSEQUENTIAL
DAMAGES (INCLUDING, BUT NOT LIMITED TO, PROCUREMENT OF SUBSTITUTE GOODS
OR SERVICES; LOSS OF USE, DATA, OR PROFITS; OR BUSINESS INTERRUPTION)
HOWEVER CAUSED AND ON ANY THEORY OF LIABILITY, WHETHER IN CONTRACT,
STRICT LIABILITY, OR TORT (INCLUDING NEGLIGENCE OR OTHERWISE) ARISING IN ANY
WAY OUT OF THE USE OF THIS SOFTWARE, EVEN IF ADVISED OF THE POSSIBILITY OF
SUCH DAMAGE.
Information on strace
Copyright (c) 1991, 1992 Paul Kranenburg <[email protected]>
Copyright (c) 1993 Branko Lankester <[email protected]>
Copyright (c) 1993 Ulrich Pegelow <[email protected]-muenster.de>
Copyright (c) 1995, 1996 Michael Elizabeth Chastain <[email protected]>
Copyright (c) 1993, 1994, 1995, 1996 Rick Sladkey <[email protected]>
Copyright (c) 1998-2001 Wichert Akkerman <[email protected]>
All rights reserved.
161

Redistribution and use in source and binary forms, with or without modification, are permitted
provided that the following conditions are met:
1. Redistributions of source code must retain the above copyright notice, this list of conditions
and the following disclaimer.
2. Redistributions in binary form must reproduce the above copyright notice, this list of conditions
and the following disclaimer in the documentation and/or other materials provided with the
distribution.
3. The name of the author may not be used to endorse or promote products derived from this
software without specific prior written permission.
THIS SOFTWARE IS PROVIDED BY THE AUTHOR “AS IS” AND ANY EXPRESS OR IMPLIED
WARRANTIES, INCLUDING, BUT NOT LIMITED TO, THE IMPLIED WARRANTIES OF
MERCHANTABILITY AND FITNESS FOR A PARTICULAR PURPOSE ARE DISCLAIMED.
IN NO EVENT SHALL THE AUTHOR BE LIABLE FOR ANY DIRECT, INDIRECT, INCIDENTAL,
SPECIAL, EXEMPLARY, OR CONSEQUENTIAL DAMAGES (INCLUDING, BUT NOT LIMITED
TO, PROCUREMENT OF SUBSTITUTE GOODS OR SERVICES; LOSS OF USE, DATA, OR
PROFITS; OR BUSINESS INTERRUPTION) HOWEVER CAUSED AND ON ANY THEORY OF
LIABILITY, WHETHER IN CONTRACT, STRICT LIABILITY, OR TORT (INCLUDING
NEGLIGENCE OR OTHERWISE) ARISING IN ANY WAY OUT OF THE USE OF THIS
SOFTWARE, EVEN IF ADVISED OF THE POSSIBILITY OF SUCH DAMAGE.
Important information on software
Included with this product is software, of which permission for use is obtained either directly or
indirectly by Sony Corporation (hereafter Sony) through a third party. Make sure to read this
important information on software.
Information on software applicable to GNU GPL/LGPL
Included with this product is software (refer to the following “Package List”) which is subject to the
following GNU General Public License (hereafter GPL) or GNU Lesser General Public License
(hereafter LGPL). Users have the right to obtain, modify and redistribute the source code of
software in accordance with the attached GPL/LGPL.
Sony provides these source codes on the following web site. Please visit the following web site
to obtain the source codes.
http://www.sony.net/Products/Linux/
Please do not make direct requests for the contents of the source codes.
Back to top
Copyright 2011 Sony Corporation
162
WALKMAN User Guide
Print
Getting Started
How to Use the Software
Music
Videos/Photos
FM Radio
Timer
Settings
Troubleshooting
Important Information
Specifications
Contents list
Top page > Specifications > Specifications > Specifications
Specifications
Supported file format
Music
Audio Formats
(Codec)
MP3
Media File format: MP3 (MPEG-1 Layer3) file format
File extension: .mp3
Bit rate: 32 to 320 kbps (Supports variable bit rate
(VBR))
Sampling frequency (*1): 32, 44.1, 48 kHz
WMA
Media File format: ASF file format
File extension: .wma
Bit rate: 32 to 192 kbps (Supports variable bit rate
(VBR))
Sampling frequency (*1): 44.1 kHz
* WM-DRM not supported
AAC-LC (*2)
Media File format: MP4 file format
File extension: .mp4, .m4a
Bit rate: 16 to 320 kbps (Supports variable bit rate
(VBR)) (*3)
Sampling frequency (*1): 8, 11.025, 12, 16, 22.05,
24, 32, 44.1, 48 kHz
Linear PCM
Media File format: Wave-Riff file format
File extension: .wav
Bit rate: 1,411 kbps
Sampling frequency (*1): 44.1 kHz
Video
Video Formats
(Codec)
Frame rate: Max. 30 fps
Resolution: Max. QVGA (240 × 320)
Windows Media
Video 9 (*4)
Media File format: ASF file format
File extension: .wmv
Profile: Main Profile, Simple Profile
Bit rate: Max. 768 kbps
* WM-DRM not supported
Audio Formats
(Codec)
WMA
(for Windows Media
Video 9)
Bit rate: 32 to 192 kbps (Supports variable bit rate
(VBR))
Sampling frequency (*1): 44.1 kHz
File size Max. 2 GB
The number of
files
Max. 1,000
Photo (*5)
Photo Format
(Codec)
JPEG
Media File format: Compatible with Exif 2.21 file
format
File extension: .jpg
Profile: Baseline Profile
Number of pixels: Max. 4,000 × 4,000 pixels
(16,000,000 pixels)
163
The number of
files
Max. 8,000
(*1) Sampling frequency may not correspond to all encoders.
(*2) Copyright protected AAC-LC files cannot be played back.
(*3) Non-standard bit rates or non-guaranteed bit rates are included depending on the sampling
frequency.
(*4) Some WMV files can be played back only by transferring using Windows Media Player 11.
(*5) Some photo files cannot be played back, depending on their file formats.
Maximum recordable number of songs and time (Approx.)
The approximate times are based on the case in which you transfer or record only 4 minute
songs (not including videos and photos) in the MP3 format. Other playable audio file format song
numbers and times may differ from MP3 format.
NWZ-E363 NWZ-E364
Bit rate Number Time Number Time
48 kbps 2,600 173 hr. 20 min. 5,300 353 hr. 20 min.
64 kbps 1,950 130 hr. 00 min. 4,050 270 hr. 00 min.
128 kbps 990 66 hr. 00 min. 2,000 133 hr. 20 min.
256 kbps 500 33 hr. 20 min. 1,000 66 hr. 40 min.
320 kbps 400 26 hr. 40 min. 810 54 hr. 00 min.
Maximum recordable time of videos (Approx.)
The approximate recordable times are estimated in the case where only videos are transferred.
The time may differ, depending on the conditions under which the player is used.
NWZ-E363 NWZ-E364
Bit rate Time Time
Video Format: 384 kbps
Audio Format: 128 kbps
15 hr. 00 min. 30 hr. 20 min.
Video Format: 768 kbps
Audio Format: 128 kbps
8 hr. 20 min. 17 hr. 20 min.
Maximum recordable number of photos that can be transferred
(Approx.)
Max. 8,000
Recordable number of photos may be less depending on file sizes.
Capacity (User available capacity) (*1)
NWZ-E363: 4 GB (Approx. 3.6 GB = 3,865,470,566 bytes)
NWZ-E364: 8 GB (Approx. 7.3 GB = 7,838,315,315 bytes)
(*1) Available storage capacity of the player may vary.
A portion of the memory is used for data management functions.
Output (headphones)
Frequency response
20 to 20,000 Hz (when playing data file, single signal measurement)
FM radio
FM Frequency range
87.5 to 108.0 MHz
The frequency is changed by 0.1 MHz.
164
IF (FM)
Not applicable
Antenna
Headphone cord antenna
Interface
Headphone: Stereo mini-jack
USB I/F: mini-B
Hi-Speed USB (USB 2.0 compliant)
Operating temperature
5 °C to 35 °C (41 ºF to 95 ºF)
Power source
Built-in rechargeable lithium-ion battery
USB power (from a computer via a USB connector of the player)
Charging time
USB-based charging
Approx. 2 hours (full charge), Approx. 45 minutes (approx. 80%)
Battery life (continuous playback)
Actual battery life may vary depending on settings. The estimated battery usage hours shown
below are based on typical usage conditions with “Basic setting of battery life measurement” as
shown in the table below.
Note
Even if the player is turned off for an extended period, a small amount of battery power is
still consumed.
Battery life may vary depending on volume setting, conditions of use, and ambient
temperature.
Music
Playback at MP3 128 kbps Approx. 30 hours
Video
Playback at WMV9 384 kbps Approx. 4 hours
FM radio
Receiving FM broadcasting Approx. 13 hours
Player settings which affect battery life
Setting
Basic setting of battery life measurement
(Default setting)
[Common
Settings]
[Brightness] (*1) [Details] [3]
[Type] of [Screensaver]
(*2) [Details]
[Blank]
[Music
Settings]
[Equalizer] (*3) [Details] [None] (*4)
[Clear Stereo] (*3)
[Details]
[Off]
[Dynamic Normalizer] (*3)
165

[Details]
[Off]
(*1) When [Brightness] is set to [5], battery life may shorten by about 30%.
(*2) When [Type] of [Screensaver] is set to [Clock], battery life may shorten by about 20%.
(*3) When [Equalizer] is set to [Custom 1], [Clear Stereo] is set to [On], and [Dynamic Normalizer] is set
to [On], battery life may shorten by about 50%.
(*4) The default setting of players sold in the Latin America region is [Custom 1], and CLEAR BASS is set
to level +3.
Display
2-inch, TFT color display with white LED-backlight, QVGA (240 × 320 pixels), 262,144 colors
Dimensions (w/h/d, projecting parts not included)
45 × 87.5 × 9.8 mm (1 13/16 × 3 1/2 × 13/32 inches)
Dimensions (w/h/d)
45 × 87.5 × 9.9 mm (1 13/16 × 3 1/2 × 13/32 inches)
Mass
Approx. 55 g (2.0 oz)
Design and specifications are subject to change without notice.
Back to top
Copyright 2011 Sony Corporation
166
WALKMAN User Guide
Print
Getting Started
How to Use the Software
Music
Videos/Photos
FM Radio
Timer
Settings
Troubleshooting
Important Information
Specifications
Contents list
Top page > Specifications > Specifications > Supplied items
Supplied items
Headphones (1)
USB cable (1)
Quick Start Guide
Software
The software is stored in the built-in flash memory of the player, and includes the following
items. For details on how to install, refer to “Quick Start Guide.”
Content Transfer
WALKMAN Guide
User Guide, etc.
Design and specifications are subject to change without notice.
Back to top
Copyright 2011 Sony Corporation
167
WALKMAN User Guide
Print
Getting Started
How to Use the Software
Music
Videos/Photos
FM Radio
Timer
Settings
Troubleshooting
Important Information
Specifications
Contents list
Top page > Specifications > Specifications > System requirements
System requirements
Computer
IBM PC/AT compatible computer preinstalled with the following Windows operating systems
(*1):
Windows XP Home Edition (*2) (Service Pack 3 or later)
Windows XP Professional (*2) (Service Pack 3 or later)
Windows Vista Home Basic (Service Pack 1 or later)
Windows Vista Home Premium (Service Pack 1 or later)
Windows Vista Business (Service Pack 1 or later)
Windows Vista Ultimate (Service Pack 1 or later)
Windows 7 Home Basic
Windows 7 Home Premium
Windows 7 Professional
Windows 7 Ultimate
Not supported by OSs other than above.
(*1) Excluding OS Versions not supported by Microsoft.
(*2) Excluding 64-bit OS versions.
CPU: Pentium III 450 MHz or higher for Windows XP, Pentium III 800 MHz or higher for
Windows Vista, Pentium III 1 GHz or higher for Windows 7
RAM: 256 MB or more for Windows XP, 512 MB or more for Windows Vista, 1 GB or more for
Windows 7 32-bit versions, 2 GB or more for Windows 7 64-bit versions
Hard Disk Drive: 600 MB or more of available space
Display:
Screen Resolution: 800 × 600 pixels (or higher) (recommended 1,024 × 768 or higher)
Colors: 8 bit or higher (16 bit recommended)
USB connector (Hi-Speed USB is recommended)
Internet Explorer 7 or later
Windows Media Player 11 for Windows XP and Windows Vista, Windows Media Player 12 for
Windows 7
Broadband Internet connection is required to use Electronic Music Distribution (EMD) or to
visit the web site.
We do not guarantee operation for all computers even if they meet the above System
Requirements.
Not supported by the following environments:
Personally constructed computers or operating systems
An environment that is an upgrade of the original manufacturer-installed operating system
Multi-boot environment
Multi-monitor environment
Macintosh
Design and specifications are subject to change without notice.
Back to top
Copyright 2011 Sony Corporation
168

WALKMAN User Guide
Print
Getting Started
How to Use the Software
Music
Videos/Photos
FM Radio
Timer
Settings
Troubleshooting
Important Information
Specifications
Contents list
Top page > Specifications > What are Format and Bit Rate > What is audio format?
What is audio format?
What is copyright protection?
What is bit rate?
What is the relationship between bit rate, sound quality, and storage size?
Audio format refers to the method used to import audio data from the Internet or audio CDs to a
computer, to save as an audio file.
Common formats include MP3 and WMA, etc.
MP3: MP3 (MPEG-1 Audio Layer3) is a common audio compression technology developed by
the MPEG working group of the ISO (International Organization for Standardization).
MP3 can compress audio files to about 1/10 the size of standard CD audio files.
WMA: WMA (Windows Media Audio) is a common audio compression technology developed by
Microsoft Corporation. The WMA format produces the same sound quality as that of the MP3
format with a smaller file size.
AAC: AAC (Advanced Audio Coding) is a common audio compression technology developed by
the MPEG working group of the ISO (International Organization for Standardization). The AAC
format produces the same sound quality as that of the MP3 format, with a smaller file size.
Linear PCM: Linear PCM is an audio recording format without digital compression. You can
achieve CD sound quality by recording with this format.
Hint
For details on supported file formats and bit rates, see [Details].
What is copyright protection?
Certain music files or video files, etc., that you purchase from a music download service site, etc.,
may have access control technologies applied, such as encryption, to limit usage and duplication
of the material, in accordance with copyright laws.
The player cannot play the audio files that use the digital rights management technology for
Windows Media (“WM-DRM”).
What is bit rate?
Bit rate refers to the amount of data used to store each second of audio, expressed in kbps (kilo
bits per second), such as 64 kbps. Generally, higher bit rates provide better sound quality, but
require more storage space for the same length of audio.
What is the relationship between bit rate, sound quality, and
storage size?
Generally, higher bit rates provide better sound quality, but require more storage space for the
same length of audio, so you can store fewer songs on the player.
Lower bit rates enable you to store more songs, but at a lower sound quality.
169


WALKMAN User Guide
Print
Getting Started
How to Use the Software
Music
Videos/Photos
FM Radio
Timer
Settings
Troubleshooting
Important Information
Specifications
Contents list
Top page > Specifications > What are Format and Bit Rate > What is video format?
What is video format?
Video format refers to the method used when importing video and audio data to a computer and
saving it as a video file.
WMV: WMV (Windows Media Video) is a video compression format developed by Microsoft
Corporation. It was built upon MPEG-4, achieves a high compression rate, and supports copy
control by DRM.
Hint
For details on supported file formats and bit rates, see [Details].
Back to top
Copyright 2011 Sony Corporation
171
WALKMAN User Guide
Print
Getting Started
How to Use the Software
Music
Videos/Photos
FM Radio
Timer
Settings
Troubleshooting
Important Information
Specifications
Contents list
Top page > Specifications > What are Format and Bit Rate > What is photo format?
What is photo format?
Photo format refers to the method used to import images to a computer to save as image files.
JPEG is one example of a commonly used format.
JPEG: JPEG (Joint Photographic Experts Group) is a common image compression format
developed by the JPEG. JPEG can compress an image file to between 1/10 and 1/100 the size
of original image files.
Hint
For details on supported file formats and bit rates, see [Details].
Back to top
Copyright 2011 Sony Corporation
172