Loading ...
2
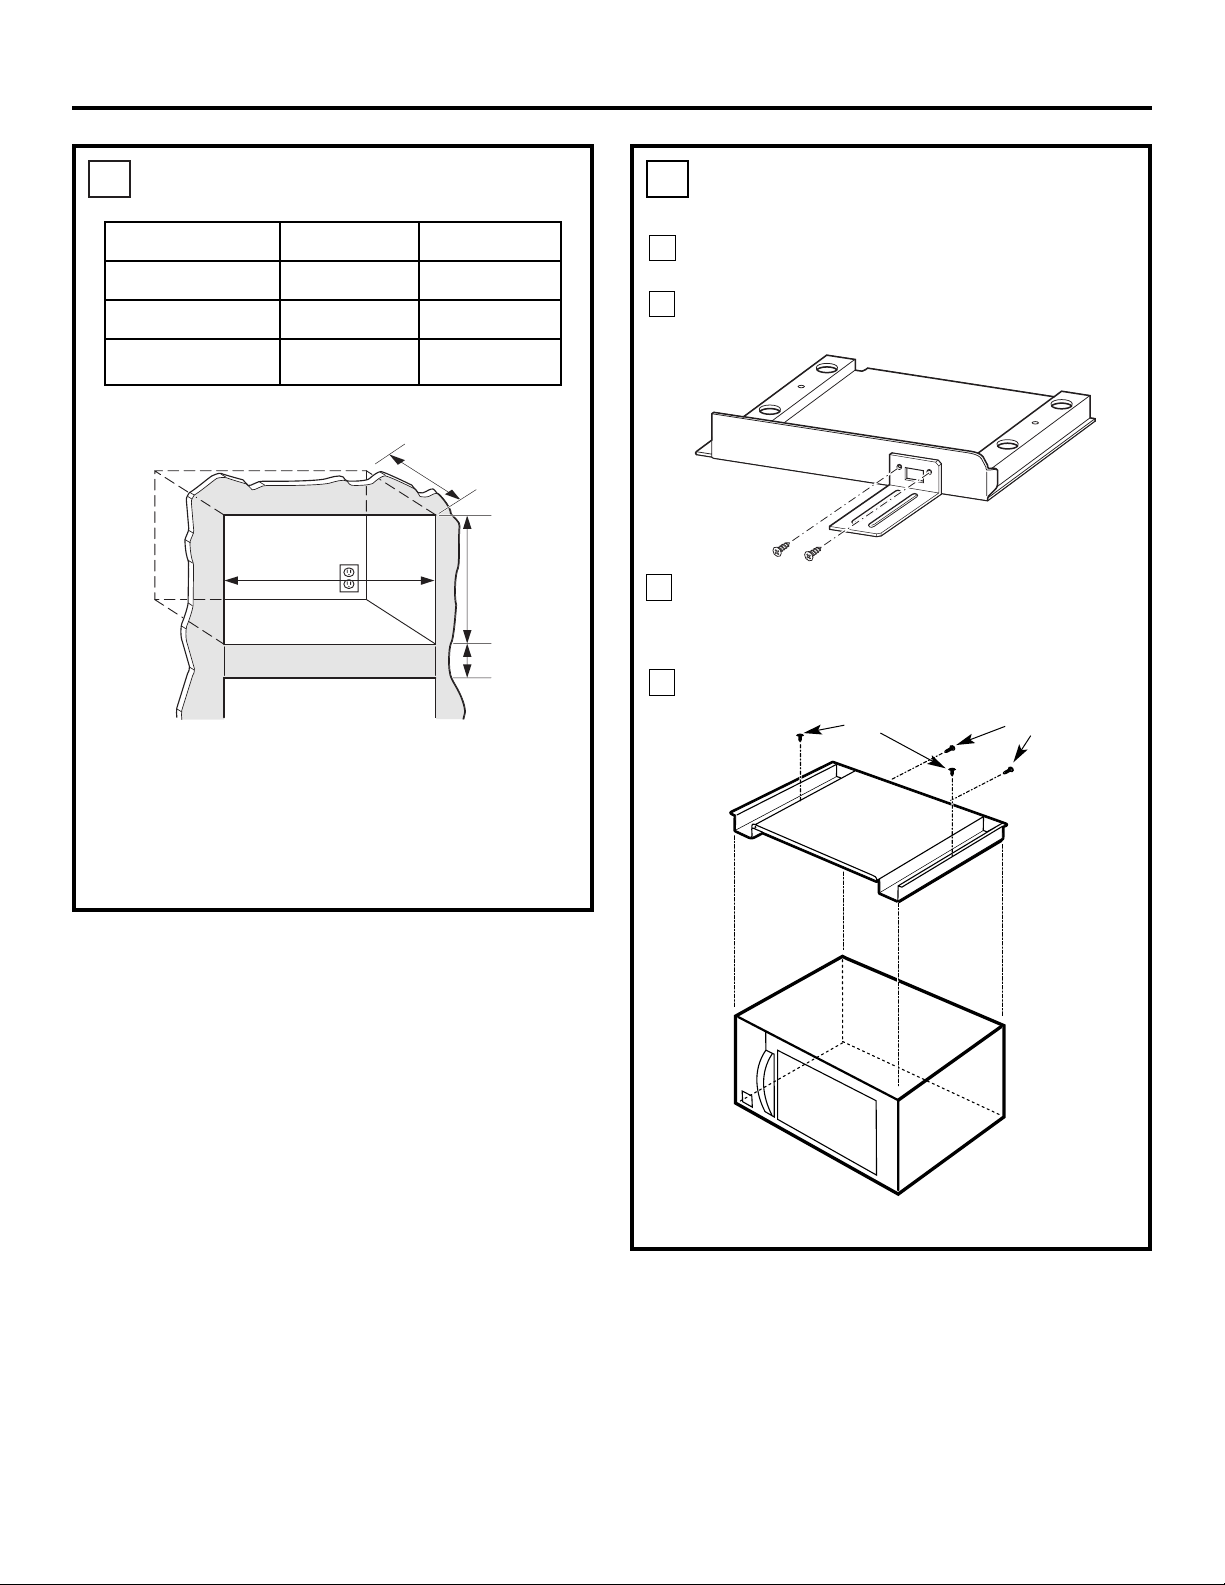
CUTOUT DIMENSIONS
1
.
* Min. depth with receptacle outside cabinet 19
1
⁄2″
Min. depth with receptacle inside cabinet 22″
Installation Instructions
Models 27″ 30″
Height 16
3
⁄4″ 16
3
⁄4″
Width 25
1
⁄2″ 25
1
⁄2″
Depth (min.)* 19
1
⁄2″ or 22″ 19
1
⁄2″ or 22″
On 27″ models, allow 1″ at the top,
11
⁄16″ on the sides
and 1
3
⁄8″ at the bottom for overlap of the Trim Frame
over the edges of the cutout.
On 30″ models, allow 1″ at the top, 2
3
⁄16″ on the sides
and 1
3
⁄8″ at the bottom for overlap of the Trim Frame
over the edges of the cutout.
Depth
Height
3″ Min.
Width
INSTALL BOTTOM BRACKET
AND BOTTOM DUCT
2
.
Disconnect the microwave oven before proceeding
with the installation.
Fasten the bottom bracket to the bottom duct by
using two
1
⁄2″ screws.
Remove any loose items inside the microwave
oven, including the turntable and turntable
support. Carefully turn the microwave upside
down.
Install bottom duct with four
1
⁄2″ screws as shown.
A
C
B
D
Front
Rear
1
⁄2″ Screws (2)
Screws
Screws
Microwave Oven Upside Down
Loading ...
Loading ...