Loading ...
Loading ...
Loading ...
15
Mounting
Before beginning installation:
• Check that the product purchased is of a suitable size for
the chosen installation area.
• Remove the charcoal (*) filter/s if supplied (see also rela-
tive paragraph). This/these is/are to be mounted only if
you want lo use the hood in the filtering version.
• Check (for transport reasons) that there is no other sup-
plied material inside the hood (e.g. packets with screws
(*), guarantees (*), etc.), eventually removing them and
keeping them.
Expansion wall plugs are provided to secure the hood to most
types of walls/ceilings. However, a qualified technician must
verify suitability of the materials in accordance with the type of
wall/ceiling. The wall/ceiling must be strong enough to take
the weight of the hood.
Do not tile, grout or silicone this appliance to the wall.
Surface mounting only.
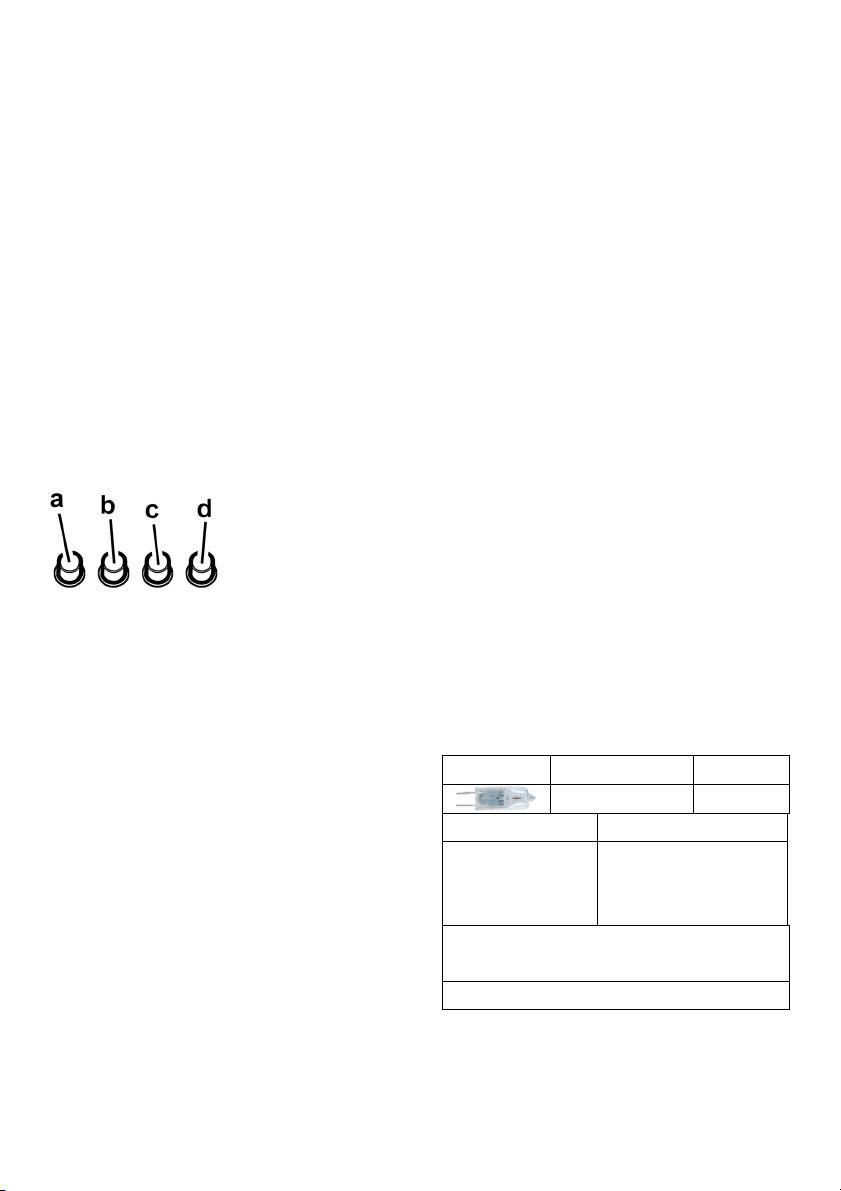
Operation
The hood is fitted with a control panel with aspiration speed
selection control and a light switch to control cooking area
lights.
a. ON/OFF light switch
b. Speed 1/OFF switch
c. 2-speed selection
d. 3-speed selection
Maintenance
Cleaning
Clean using ONLY the cloth dampened with neutral liquid
detergent. DO NOT CLEAN WITH TOOLS OR INSTRU-
MENTS. Do not use abrasive products. DO NOT USE AL-
COHOL!
Grease filter
Fig. 10-21
Traps cooking grease particles.
The grease filter must be cleaned once a month using non
aggressive detergents, either by hand or in the dishwasher,
which must be set to a low temperature and a short cycle.
When washed in a dishwasher, the grease filter may discolor
slightly, but this does not affect its filtering capacity.
To remove the grease filter, pull the spring release handle.
Charcoal filter (filter version only)
Fig. 20
It absorbs unpleasant odors caused by cooking.
The activated charcoal filter can be one of these types:
• Washable activated charcoal filter.
• NON-washable activated charcoal filter.
Washable activated charcoal filter
The charcoal filter can be washed once every two months
using hot water and a suitable detergent, or in a dishwasher at
65°C (if the dishwasher is used, select the full cycle function
and leave dishes out).
Eliminate excess water without damaging the filter, then re-
move the mattress located inside the plastic frame and put it
in the oven for 10 minutes at 100° C to dry completely. Repla-
ce the mattress every 3 years and when the cloth is damaged.
NON-washable activated charcoal filter
The saturation of the charcoal filter occurs after more or less
prolonged use, depending on the type of cooking and the
regularity of cleaning of the grease filter.
In any case it is necessary to replace the cartridge at least
every four months.
The charcoal filter may NOT be washed or regenerated.
Assembly
Hook the charcoal filter at the back on the metal tongue of the
hood first, then on the front with the two knobs.
Disassembly
Remove the charcoal filter by turning the knobs fixing it to the
hood by 90°.
Replacing lamps
Fig. 21
Disconnect the appliance from the electricity.
Warning! Prior to touching the light bulbs ensure they are
cooled down.
Replace the old light bulb with the one of the same type as
specified in the feature label or near the light lamp on the ho-
od.
1. Using a flat head screwdriver or equivalent tool, carefully
pry loose the light cover.
2. Remove the damaged light and replace it with a new one
(see the table below):
Lamp Power (W) Socket
20 G4
Voltage (V) Dimension (mm)
12
10 (Diameter)
22 (Light Center
Length)
ILCOS D Code
(according IEC 61231)
HSGST/C/UB-20-12-G4-10/22
3. Reinstall the light cover. (it will snap shut).
If the lights do not work, make sure that the lamps are fitted
properly into their housings before you call for technical assi-
stance.
Loading ...
Loading ...
Loading ...