1
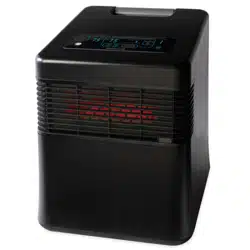
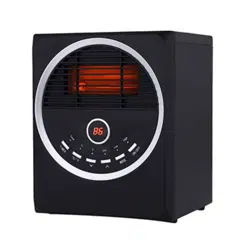
CABINET INFRARED HEATER USER MANUAL
MODEL: GD9215BCP-4BJ
Thank you for choosing Trustech cabinet infrared heater!
This user manual will provide you with valuable information necessary for the proper care and
maintenance of your new product. Please take a few moments to thoroughly read it and start enjoying
your warm winter!
Always here to help you
For any questions or help, please email us: Support@trustechproducts.com

2
2
INTRODUCTION
Please take a few minutes to read this manual carefully.
Proper maintenance and operation of this machine can provide better service.
WARNINGS
Read ALL instructions before using this unit.
CAUTION: Risk of Electric Shock. DO NOT open or try to repair the heater yourself.
This heater may get hot when in use. To avoid burns, DO NOT let bare skin touch hot surfaces. If
provided, use handles when moving this heater.
Keep combustible materials, such as furniture, pillows, bedding, paper, clothes, and curtains at least 3 ft
from the front of the heater and keep them away from the sides, top, and rear. DO NOT place towels or
other objects on the heater.
Extreme caution is necessary when any heater is used by or near children or the disabled, or when the
heater is left operating and unattended.
DO NOT operate any heater with a damaged cord or after the heater malfunctions, has been dropped or
damaged in any manner. Return heater to authorized service facility for examination, electrical or
mechanical adjustment, or repair.
This heater is not intended for use in bathrooms, laundry areas and similar indoor locations. NEVER
locate heater where it may fall into a bathtub or other water container. To protect against electrical
hazards, DO NOT immerse in water or other liquids.
DO NOT touch the control panel or plug with a wet hand.
DO NOT run cord under carpeting. DO NOT cover cord with throw rugs, runners, or similar coverings.
Arrange cord away from traffic area and where it will not be tripped over.
DO NOT insert or allow foreign objects to enter any ventilation or exhaust opening as this may cause an
electric shock or fire, or damage the heater.
To prevent a possible fire, DO NOT block the air intakes or exhaust in any manner. DO NOT use on soft
surfaces, like a bed, where openings may become blocked.
A heater has hot and arcing or sparking parts inside. DO NOT use in areas where gasoline, paint,
explosive and/or flammable liquids are used or stored. Keep unit away from heated surfaces and open
flames.
Always plug heaters directly into a wall outlet/receptacle. Never use with an extension cord or
relocatable power tap (outlet/power strip).
To avoid fire or shock hazard, plug the unit directly into a 120 V AC electrical outlet.
To disconnect heater, turn controls to OFF, then remove plug from outlet. Pull firmly on the plug, DO
NOT unplug by pulling on the cord.
Always unplug the unit before moving or cleaning, or whenever the heater is not in use.
Use only for intended household use as described in this manual. Any other use not recommended by
the manufacturer may cause fire, electric shock, or injury to persons. The use of attachments not
recommended or sold by unauthorized dealers may cause hazards.
Always use on a dry, level surface. Use on floor only.
DO NOT use outdoors.
3
3
WARNING: To reduce the risk of fire or electric shock, DO NOT use this unit with any solid-state speed
control device.
DO NOT attempt to repair or adjust any electrical or mechanical functions on this unit. Doing so will void
your warranty. The inside of the unit contains no user serviceable parts. Qualified personnel should
perform all servicing only.
Connect to properly grounded outlets only.
Save these instructions.
SPECIFICATION
Voltage Rating
120 V (60Hz)
Power Consumption
1500W
Unit Size
10.15n. (D)
×
11.02 in. (W)
×
14.52 in. (H)
Unit Weight
11lb
SAFETY FEATURES
Tip-Over Safety Feature
This heater is equipped with a tip-over safety feature. Once the heater is tipped over, an internal switch will
automatically shut the heater off. Once the heater is restored an upright position, the heater will reset. To
continue operation, turn on the heater using the supplied remote control or the control panel on the heater.
Overheat Safety Feature
This heater is equipped with a overheat safety feature. When the heaters internal components reach a
certain temperature that could cause overheat and possible fire, the heater will automatically shut off.
4
4
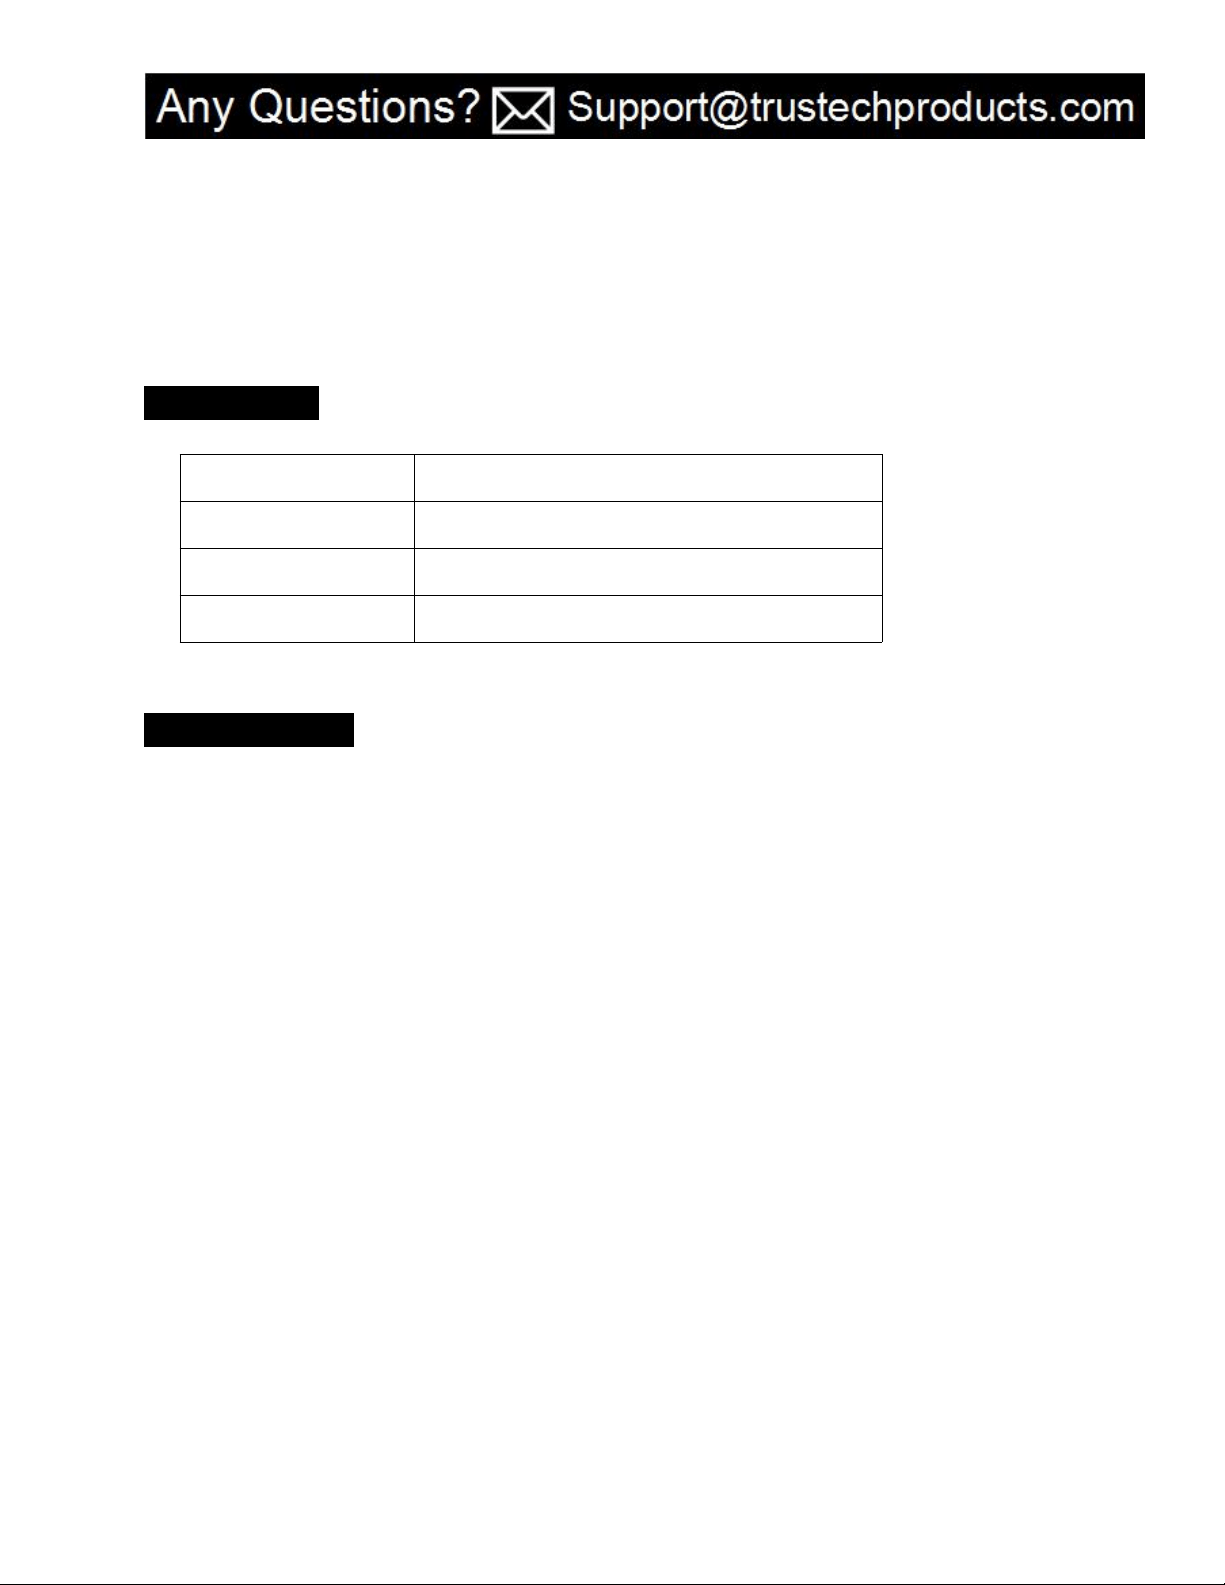
WARNING: This heater has a voltage rating of 120
volts. The cord has a plug as shown in A. An adapter
as shown in C is available for connecting three-blade
grounding-type plugs to two-slot receptacles. The
grounding lug extending from the adapter must be
connected to a permanent ground such as a properly
grounded outlet box. The adapter should not be used
if a three-slot grounded receptacle is available.
DO NOT DEFEAT THE SAFETY PURPOSE OF THE
GROUNDED PLUG.
WARNING: It is normal for the power cord to feel warm to the touch; however, a loose fit between the
outlet and the plug may cause overheating of the plug. If this occurs, try inserting the plug into a different
outlet. Contact a qualified electrician to inspect the original outlet for damage.
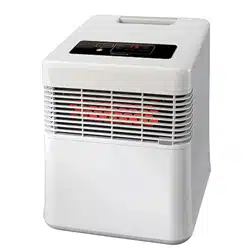
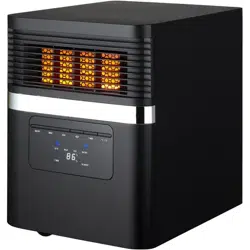
PRODUCT DIAGRAM
Air Outlet
Remote Control
Air Intake
Cord Clamp
Power Switch
Control panel
Decorative ring
Four Castors
5
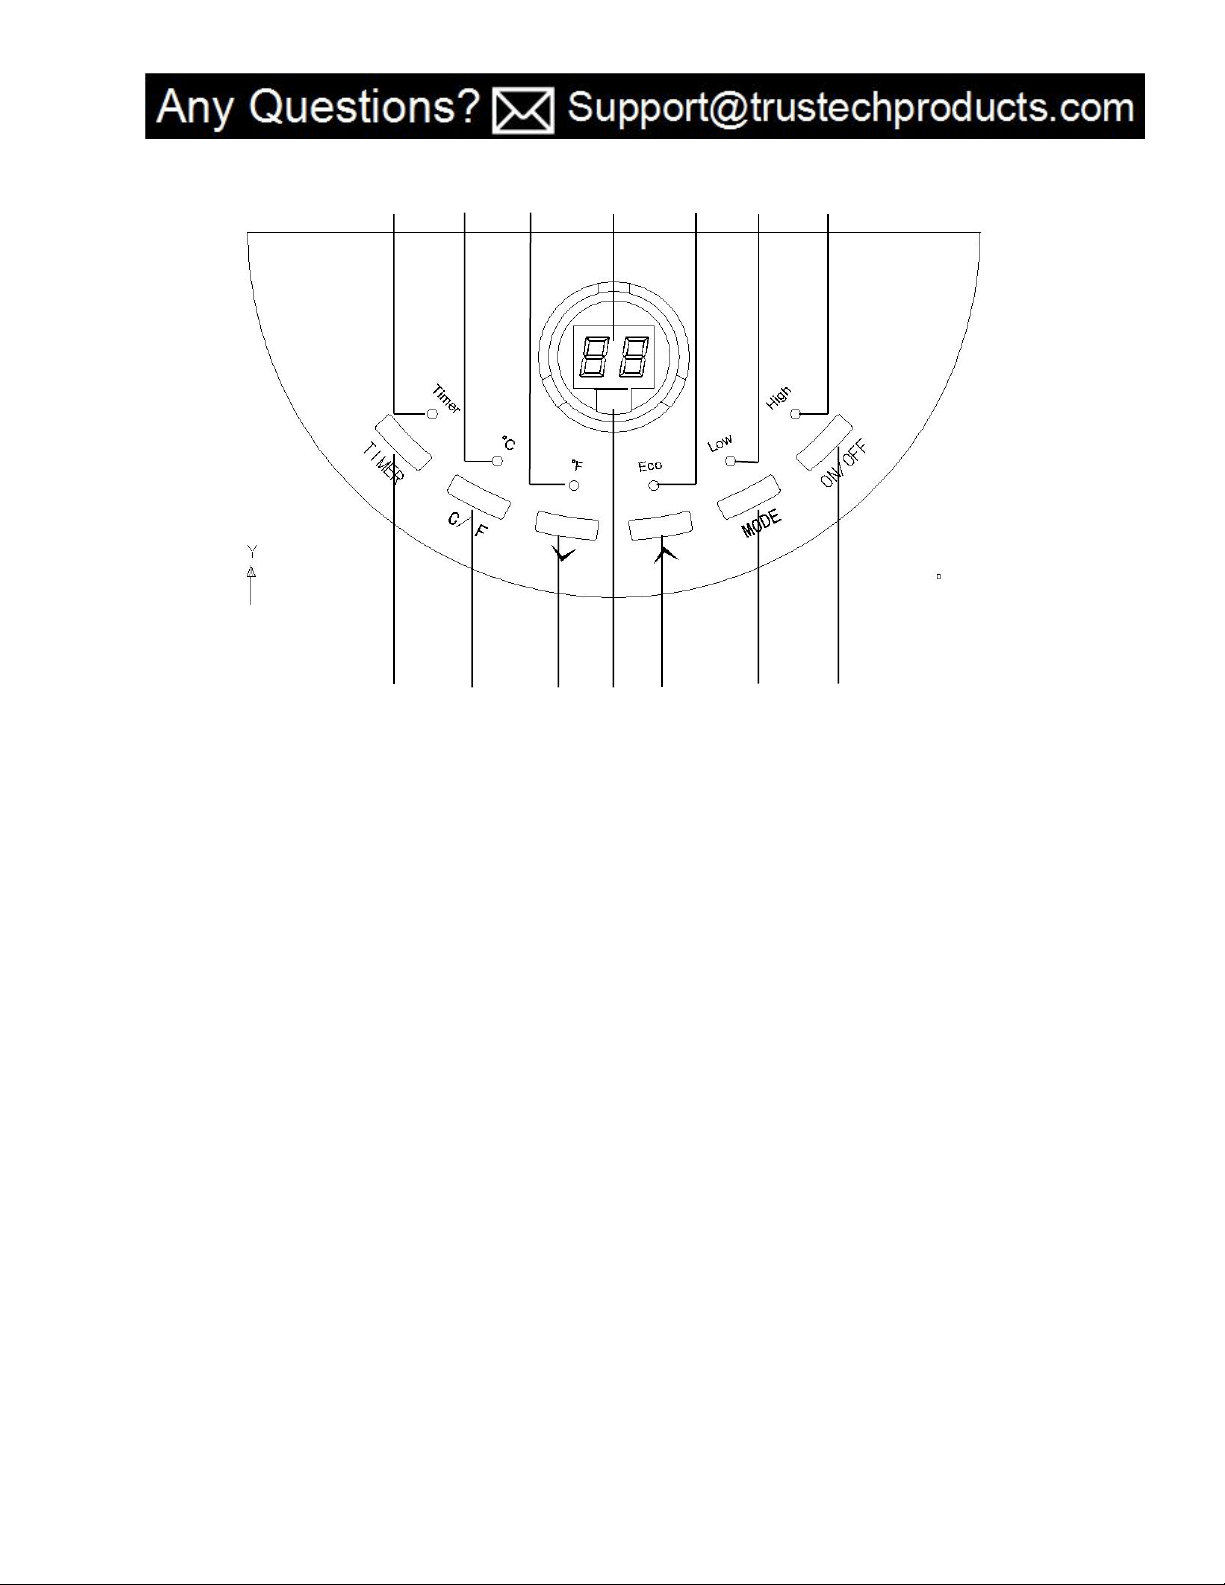
5
1. ON/OFF button: Powers the display on and off.
2. Mode button
:
To select between High
、
Low and Eco modes.
3. Temp up button: To increase the desired temperature.
4. Signal receiving window: For receiving the remote control signal.
5. Temp down button: To decrease the desired temperature.
6.
℃
/
℉
Button : Alternates between Fahrenheit and Celsius.
7. Timer button:Used to engage timer mode and to set hour value for the timer.
8. Timer indication light
:
Will be lit when the Timer mode is engaged.
9. Celsius indicator light: Will be lit when the temperature displayed is in Celsius.
10. Fahrenheit indicator light: Will be lit when the temperature displayed is in Fahrenheit.
11. Digital display
:
Indicate set room temperature or time or
‘
OF
’
when turning on the power switch.
12. Energy-saving mode indicator: Will be lit when energy-saving mode is engaged.
13. Low Mode indicator light: Will be lit when Low Heat mode is engaged.
14. High Mode indicator light: Will be lit when High Heat mode is engaged.
Control Panel
5
3
2
1
6
11
4
14
8
9
12
13
7
10
6
6
PREPARATION
Place the heater on a firm, level surface and plug into a grounded 120V 60Hz power outlet. and turn on the
power switch in the rear of the unit. Only operate heater in upright position with caster wheels attached.
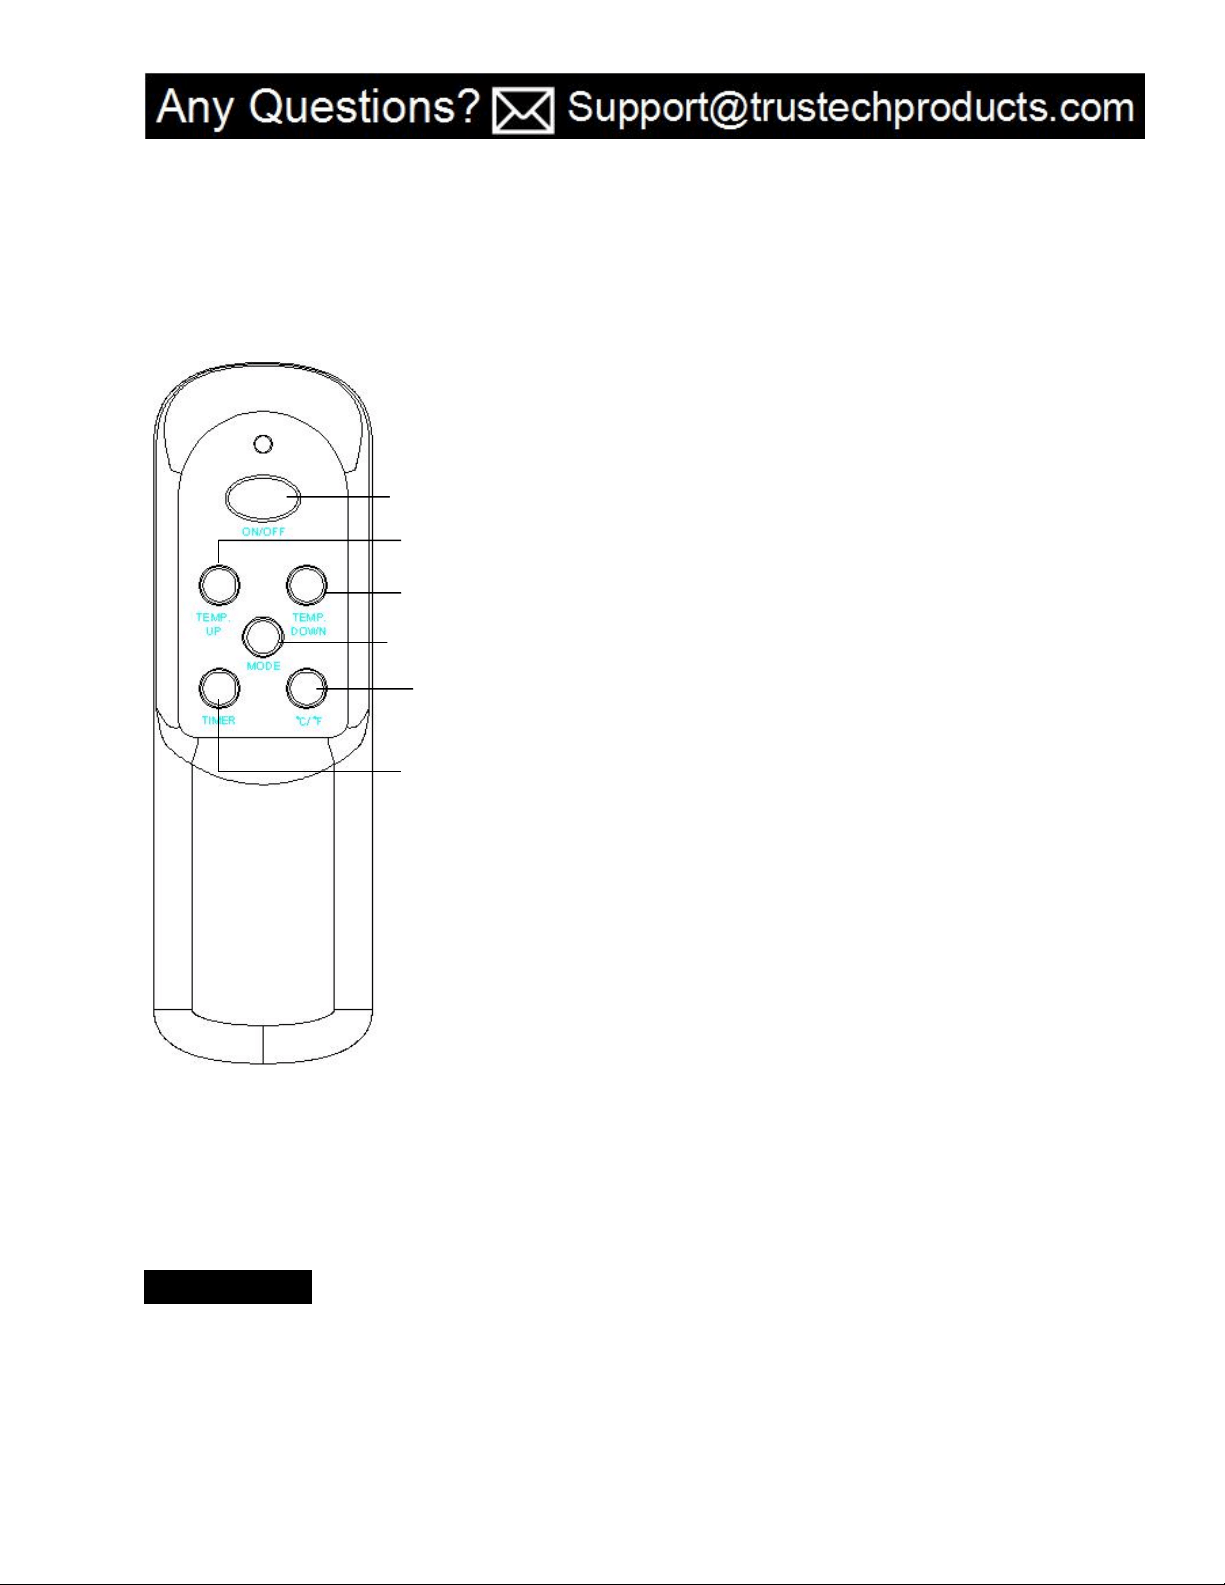
Insert 2 AAA batteries into the remote control before using (Batteries Not Included)
Remote Control
℃/℉ button: Button for alternating between Fahrenheit and Celsius
ON/OFF button: Used for power-on or power-off
Temp up button: to make set temperature rise
Temp down button: to make set temperature decline
Timer button: Used for setting timer and adjust time value of timing
Mode button
:
Used for mode selection
7
7
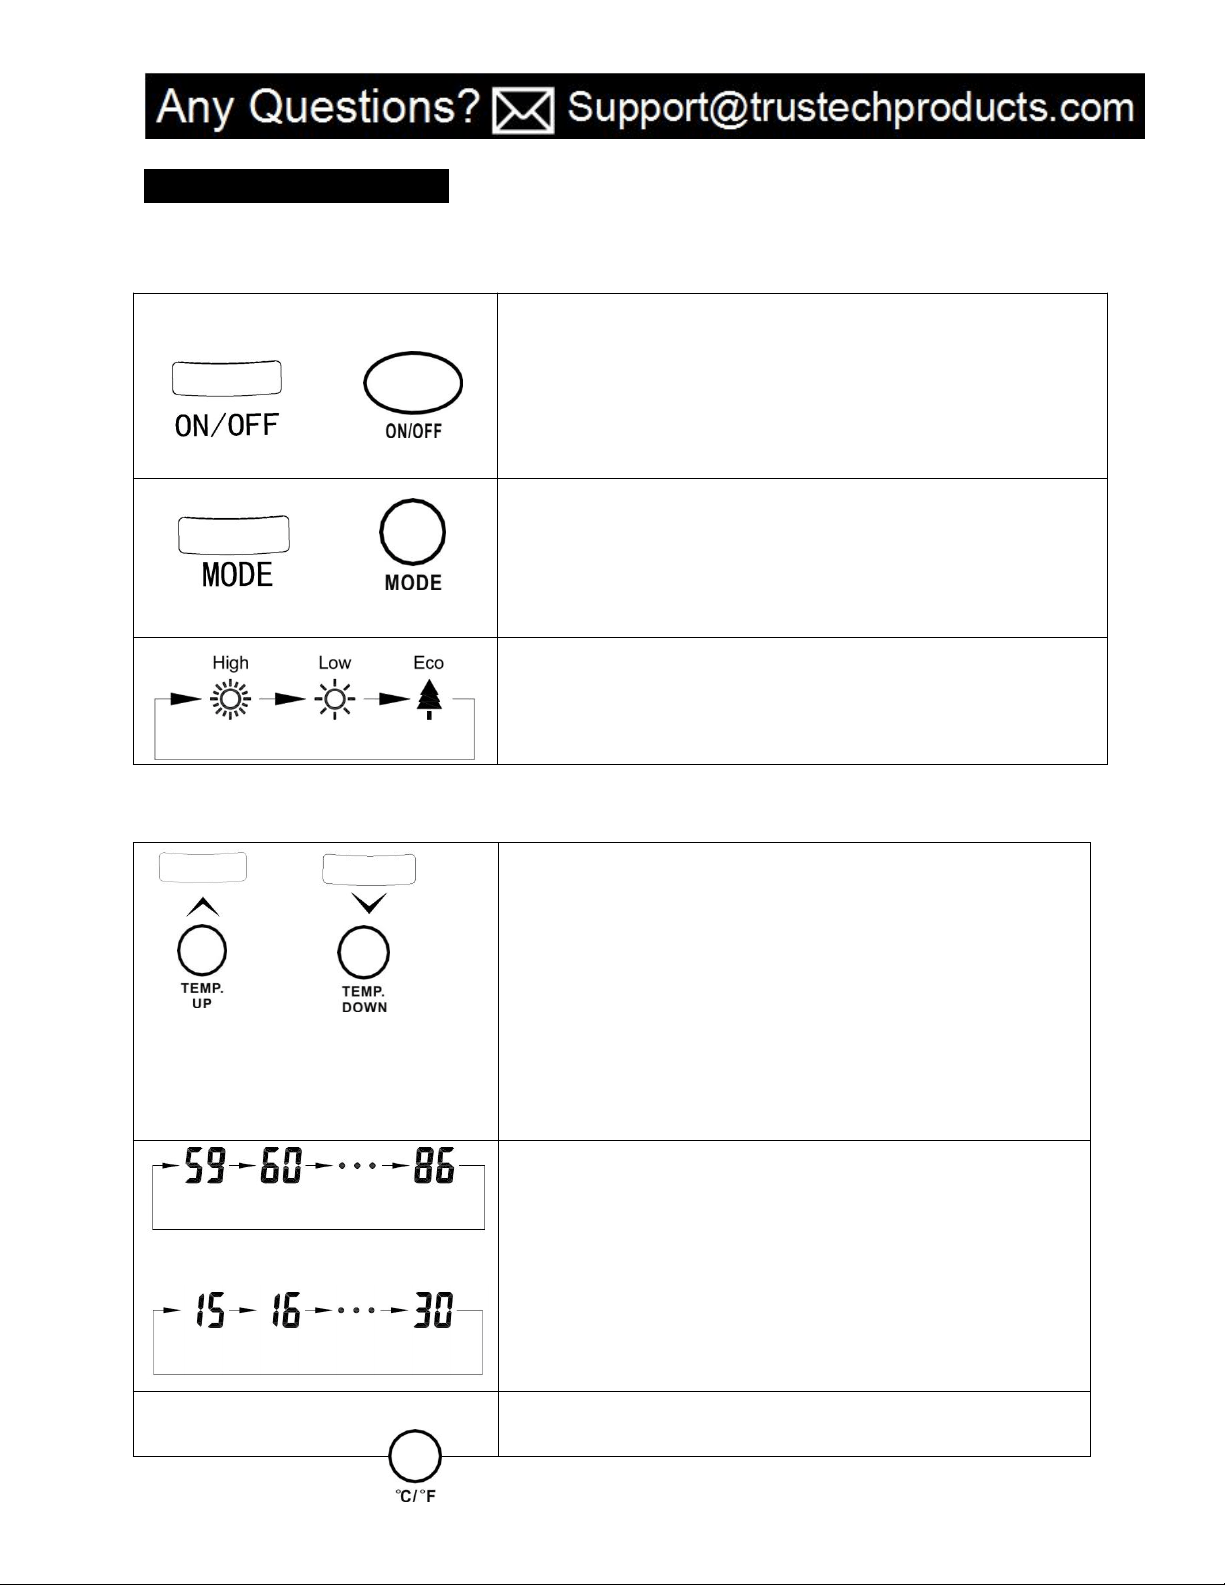
OPERATING INSTRUCTION
1. Start and select working mode
Or
Turn the heater on by pressing the ON/OFF button on the control
panel or by pressing the Power button on the supplied remote
control.
Once power is off, heating element will stop working at first. Fan
will prolong working for 3 min to emit plenty of heat inside. This
mark will indicate running during the 3 min.
Or
Select a heat Mode
Press the MODE button to toggle between the three heat modes.
High Mode uses 1500W; Low Mode uses 750W. ECO mode is an
Economic Energy Saving Function. When ECO mode is chosen, the
heater will manage itself from less to more heating power (watts)
in an attempt to maintain a constant warm 68℉(20℃).
2. Setting Desired Temperature
Or Or
Or
Adjust the desired temperature by pressing the Up/Down arrows
on the control panel or remote control.
Or
Desired temperature options vary from 59℉ to 86℉,or from
15
℃
to 30
℃
. Once you have chosen the desired temperature,
the heater will remain on until the room temperature increases
to the temperature on the digital display. The heater will cycle
on and off to maintain the desired room temperature.
Press ℃/℉ button to change the display temperature between
Fahrenheit and Celsius.

8
8
Or
The Fahrenheit indicator LED will light , when the temperature
is displayed in Fahrenheit.
The Celsius LED will light, when the temperature is displayed in
Celsius.
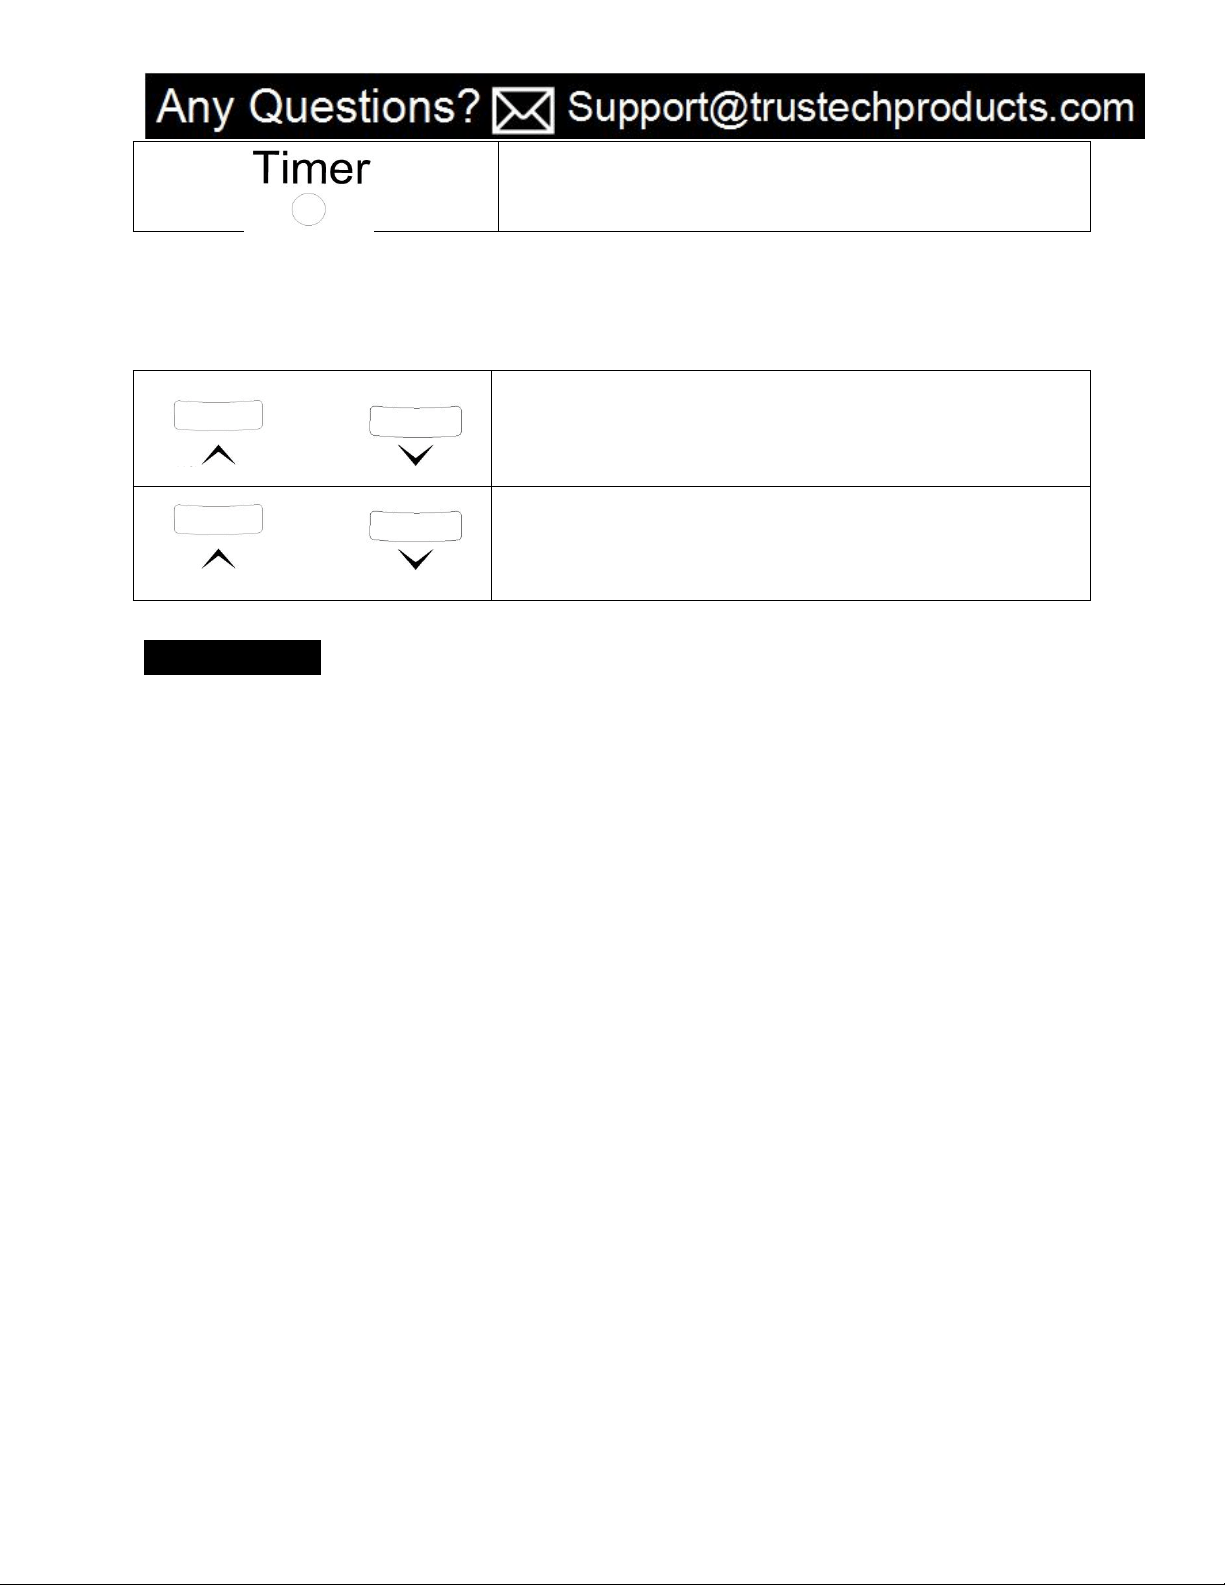
3. Setting the POWER OFF TIMER Function
Note: The Power-Off-Timer Function will allow for the heater to power OFF after a certain set time, and can
only be set while the heater
’
s display is in the
“
On
”
position.
Or
Turn the heater to the
“
On
”
position .Press the Timer button
on the heater’s control panel or the remote.
The digital display changes from the “temperature” to the
“
hours
”
option for the timer. Continue to press the timer
button to change the number of hours you would like the heater
to run before powering itself off .The hour options for the timer
are from 0 to 12 hrs. (in 1 hr increments).
The selected hour increments will flash for a few seconds, then
revert back to the set desired temperature .The Timer indicator
light will remain lit as long as the Timer is set. The heater will
power OFF when the internal heater clock counts down the hour
increments you set.
和 3 重复
4. Setting the POWER-ON-TIMER Function
(Note: The Power-ON-Timer Function will allow for the heater to power ON after a certain set time, and can
only be set while the heater
’
s display is in the
“
Off
”
position.
Or
Turn the heater to the “OFF” position .Press the Timer button on
the heater
’
s control panel or the remote.
The digital display shows the
“
hours
”
option for the timer.
Continue to press the timer button to change the number of
hours you would like the heater’s internal clock to count down
before powering itself on. The hour options for the timer are
from 0 to 12 hrs. (in 1 hr increments).
9
9
The Timer indicator light will remain lit as long as the Timer is
set. The heater will power itself ON when the internal heater
clock counts down the hour increments you set.
5. Setting electro lock
The Electro Lock can help avoid the heater from being accidentally engaged by children. The locking
mechanism can be set in both the ON and OFF modes.
And
Press Temp Up and Temp Down buttons at the same time for 3
seconds. Locking is complete when you hear a beep. When
locked, the functions of the control panel and remote will be
locked for use.
And
When you need to unlock it, press Temp Up and Temp Down
buttons at the same time for 3 seconds. You will hear a beep .The
control panel and remote control will become functional again.
MAINTENANCE
1. Turn off the power switch in the rear of the unit.
2. Unplug the unit and let it cool completely.
3. To keep the heater clean, the outer shell may be cleaned with a soft, damp cloth. You may use a
mild detergent if necessary. After cleaning, dry the unit with a soft cloth. CAUTION: DO NOT let
liquid enter the heater.
4. DO NOT use alcohol, gasoline, abrasive powders, furniture polish, or rough brushes to clean the
heater. This may cause damage or deterioration to the surface of the heater.
5. DO NOT immerse the heater in water.
6. Wait until the unit is completely dry before use.
7. Air filter needs cleaning after used 3 months of use. Please take off the filter with the 2 steps in the
drawing below. Flush and clean the filter with water, Then, dry it out and re-assemble.

10
10
8. If you do not use the heater for a long time, please take out the remote batteries (to prevent
corrosion ) as shown below. Store the remote in a safe place.
TROUBLESHOOTING
If the heater will not operate, please check the following before seeking repair advice:
1. Check if the power cord is plugged into an electrical outlet, if not, plug in.
PUSH
lid
Battery

11
11
2. Check if electricity to the main power switch (in the back) is working.
3.
Check to see if the battery on the remote is placed correctly, undamaged
.
NOTE: For the heater to function properly, the desired temperature on the heater must be set a few degrees
higher than the temperature in the room. If the seems to not be heating, increase the desired temperature
on the heater to engage the heat elements.
STORAGE
Store the heater in a cool, dry location when not in use. To prevent dust and dirt build-up, use the original
packaging to repack the unit.
WARRANTY
TRUSTECH warrants this product against defects in materials and/or workmanship under normal use for a
period of ONE (1) YEAR from the date of purchase by the original purchaser (“Warranty Period”). If a
defect arises and a valid claim is received within the Warranty Period, at its option, TRUSTECH will either 1)
repair the defect at no charge, using new or refurbished replacement parts, or 2) replace the product with a
new product that is at least functionally equivalent to the original product, or provide a store credit in the
amount of the purchase price of the original product. A replacement product or part, including a user-
installable part installed in accordance with instructions provided by TRUSTECH, assumes the remaining
warranty of the original product. When a product or part is exchanged, any replacement item becomes your
property and the replaced item becomes TRUSTECH’ s property. When a store credit is given, the original
product must be returned to TRUSTECH and becomes TRUSTECH
’
s property. To obtain warranty service, e-
mail TRUSTECH Limited Warranty Service at Support@trustechproducts.com. Please be prepared to describe
the product that needs service and the nature of the problem.
This warranty does not apply to:
a. damage caused by failure to follow instructions relating to product’ use or the installation of
components;
b. damage caused by accident, abuse, misuse, fire, floods, earthquake or other external causes;
c. damage caused by service performed by anyone who is not a representative of AIR CHOICE;
d.
accessories used in conjunction with a covered product
e.
a product or part that has been modified to alter functionality or capability;
f. items intended to be periodically replaced by the purchaser during the normal life of the product
including, without limitation, batteries or light bulbs;
g. any product sold “as is” including, without limitation, floor demonstration models and refurbished
items; or
h.
a product that is used commercially or for a commercial purpose.

12
12
CONTACT US
Thank you for choosing TRUSTECH product.
For any customer product questions or honor your warranty, please write to
Support@trustechproducts.com. Our usual response time is within 12 hours!