
ZZZOJFRP
2ZQHUV0DQXDO
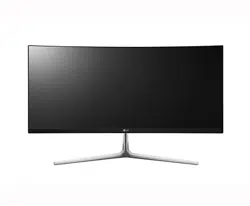
,36/('021,725
/('021,725
805
8%5
3OHDVHUHDGWKHVDIHW\LQIRUPDWLRQFDUHIXOO\EHIRUHXVLQJWKH
SURGXFW
,36/('0RQLWRU/('0RQLWRU0RGHO/LVW
(1*/,6+
5805
58%5

(1*
(1*/,6+
&RQWHQWV
&217(176
&86720,=,1*6(77,1*6
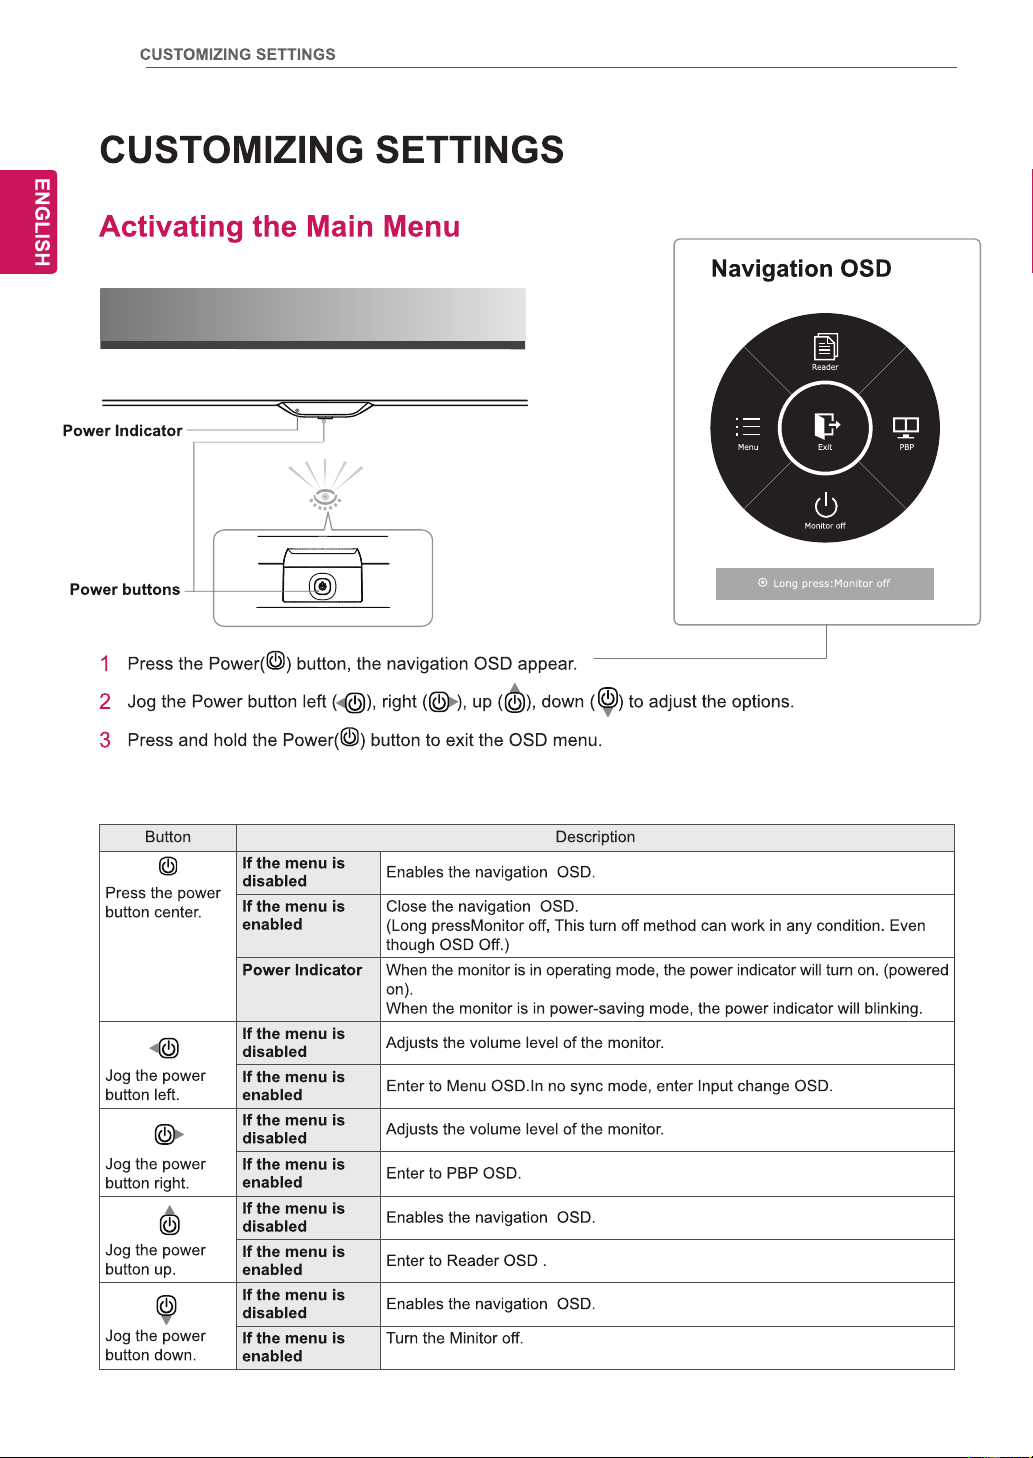
$FWLYDWLQJWKH0DLQ0HQX
&XVWRPL]LQJVHWWLQJV
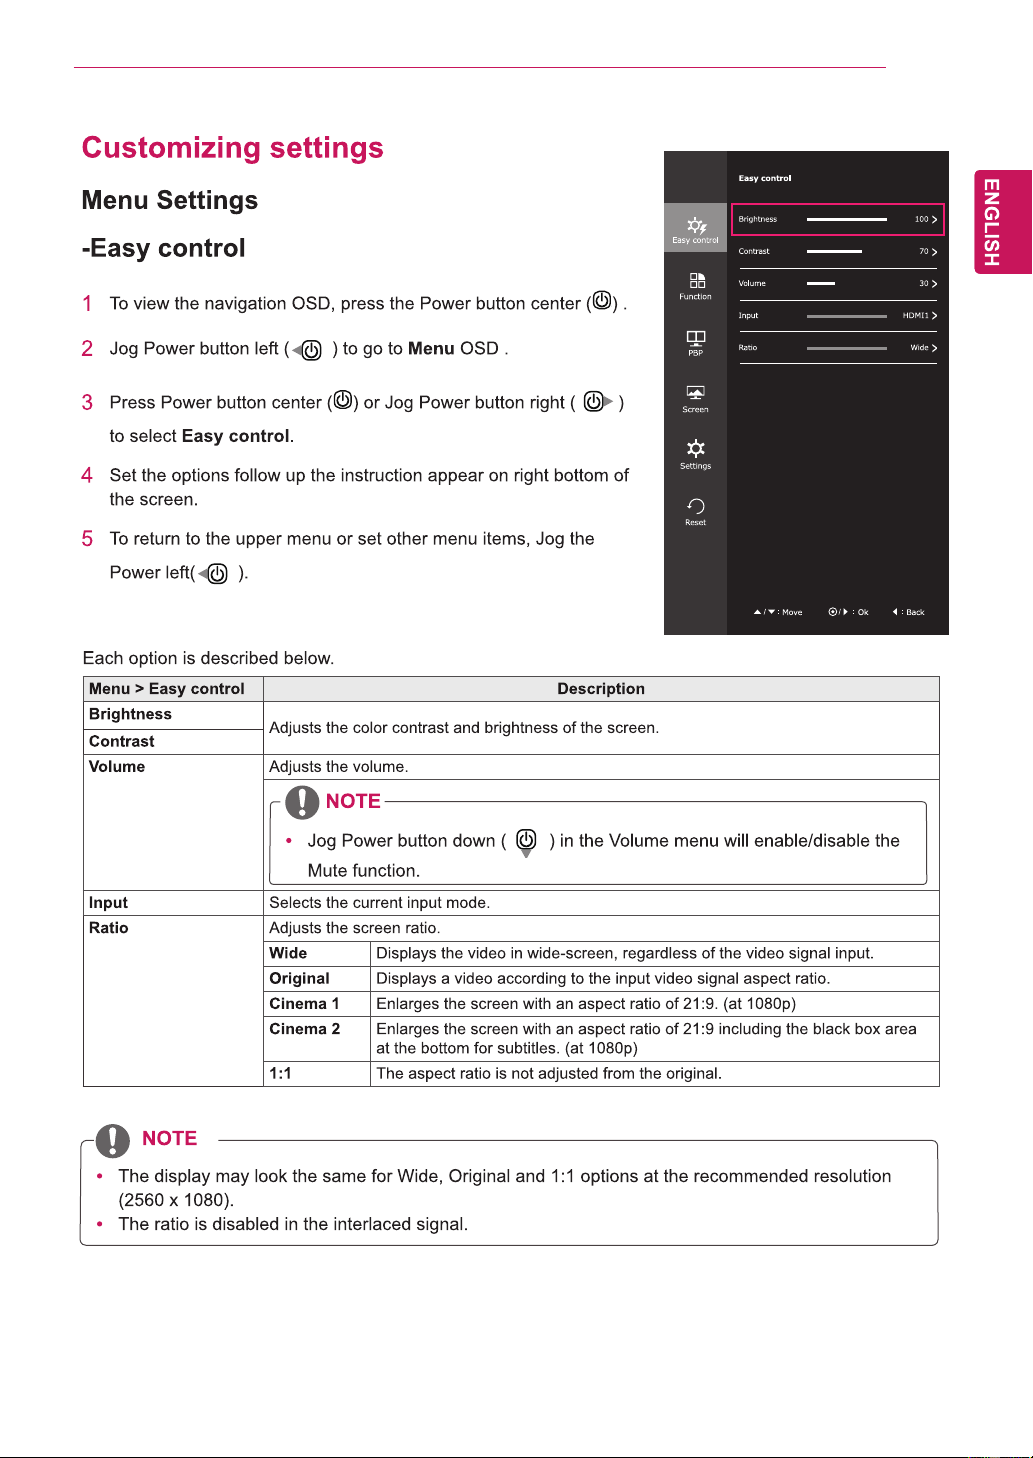
0HQX6HWWLQJV
(DV\FRQWURO
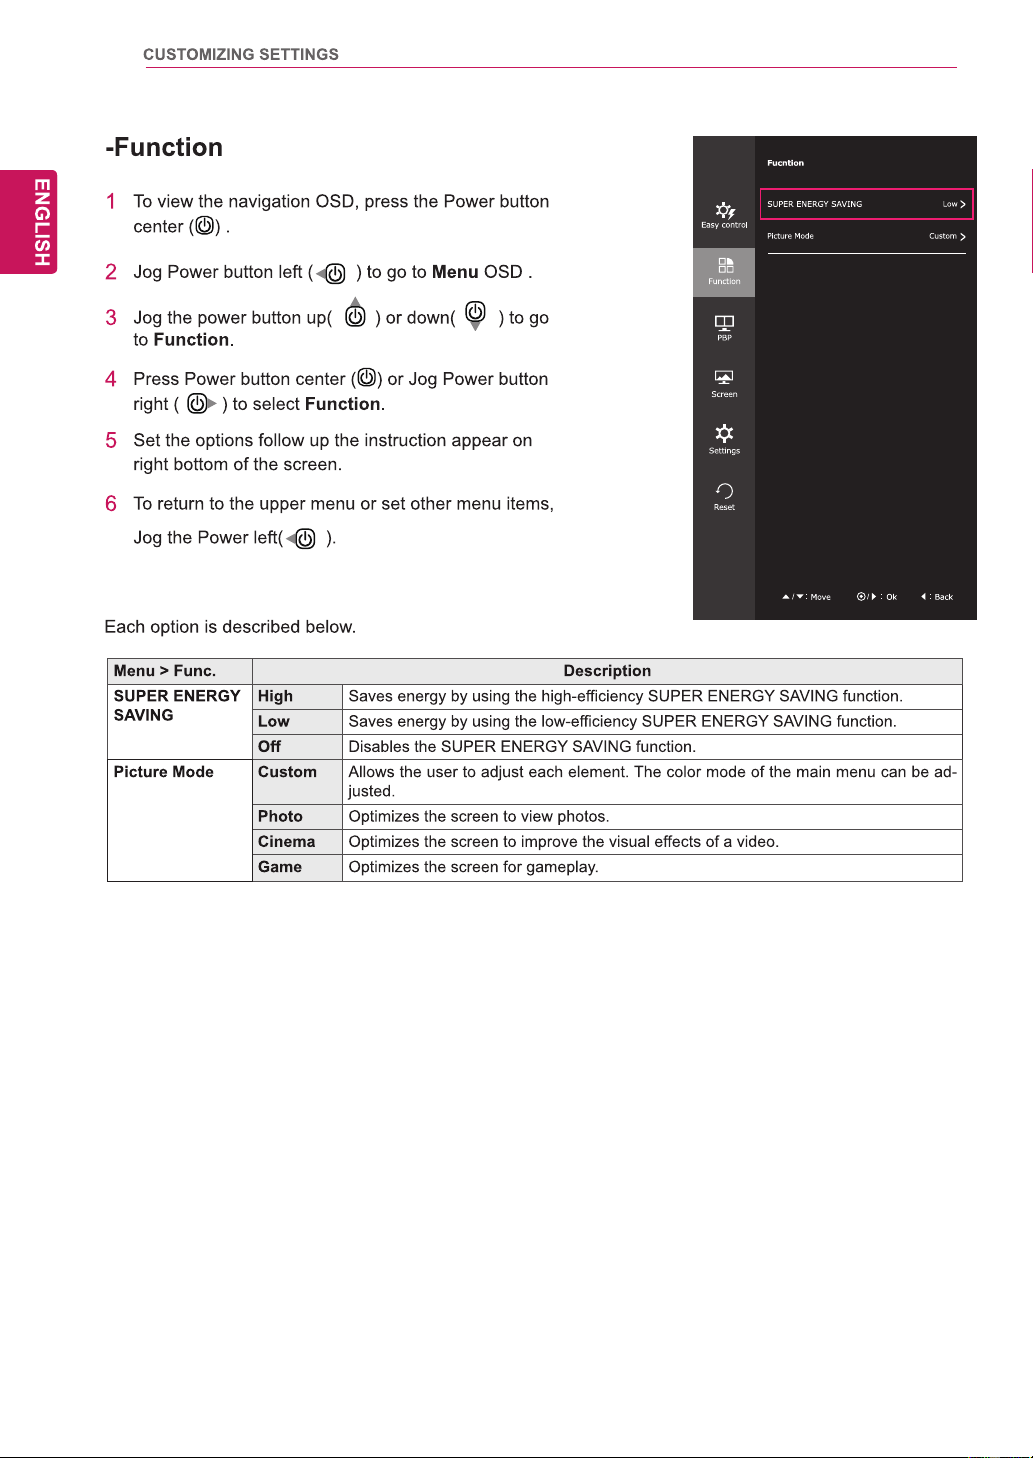
)XQFWLRQ
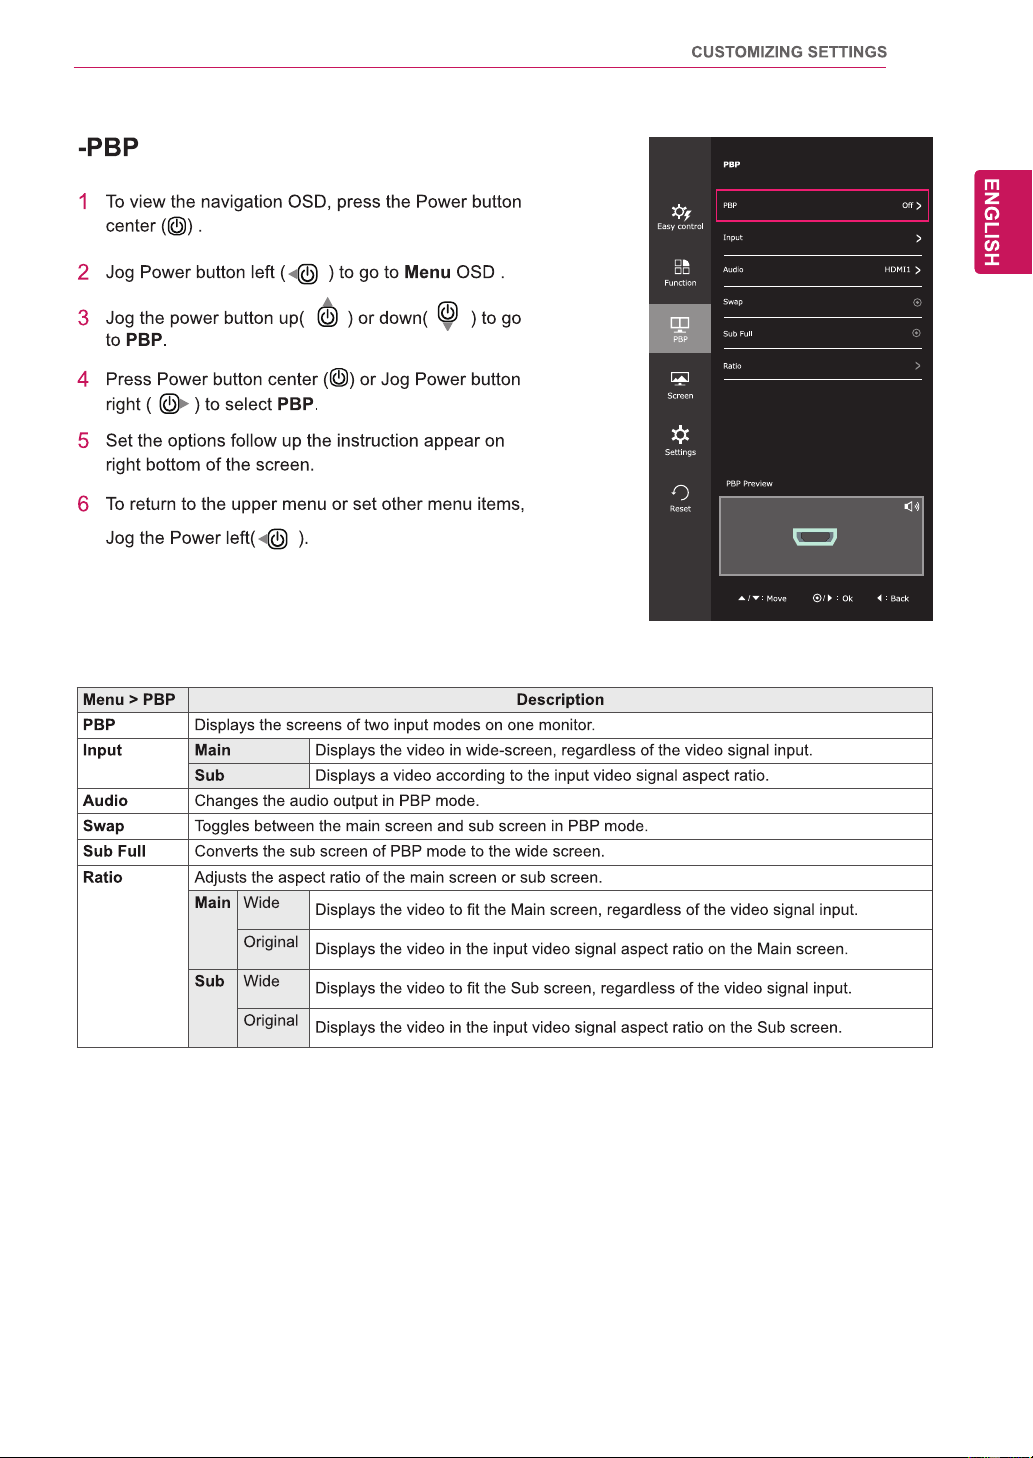
3%3
6FUHHQ
6HWWLQJV
5HVHW
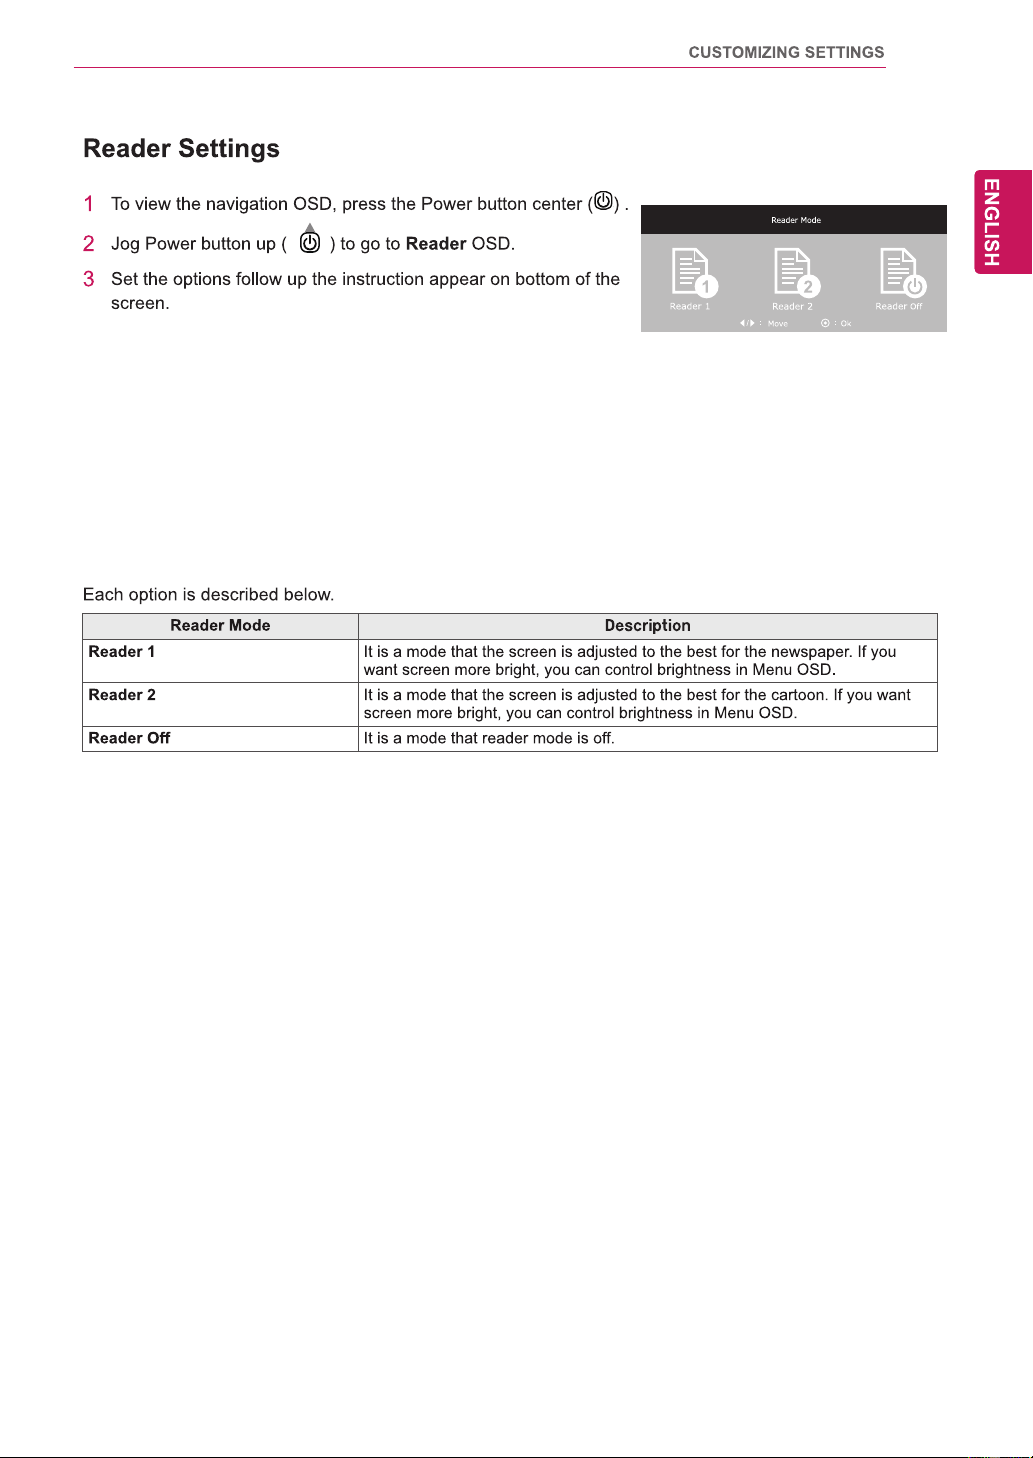
5HDGHU6HWWLQJV
7528%/(6+227,1*
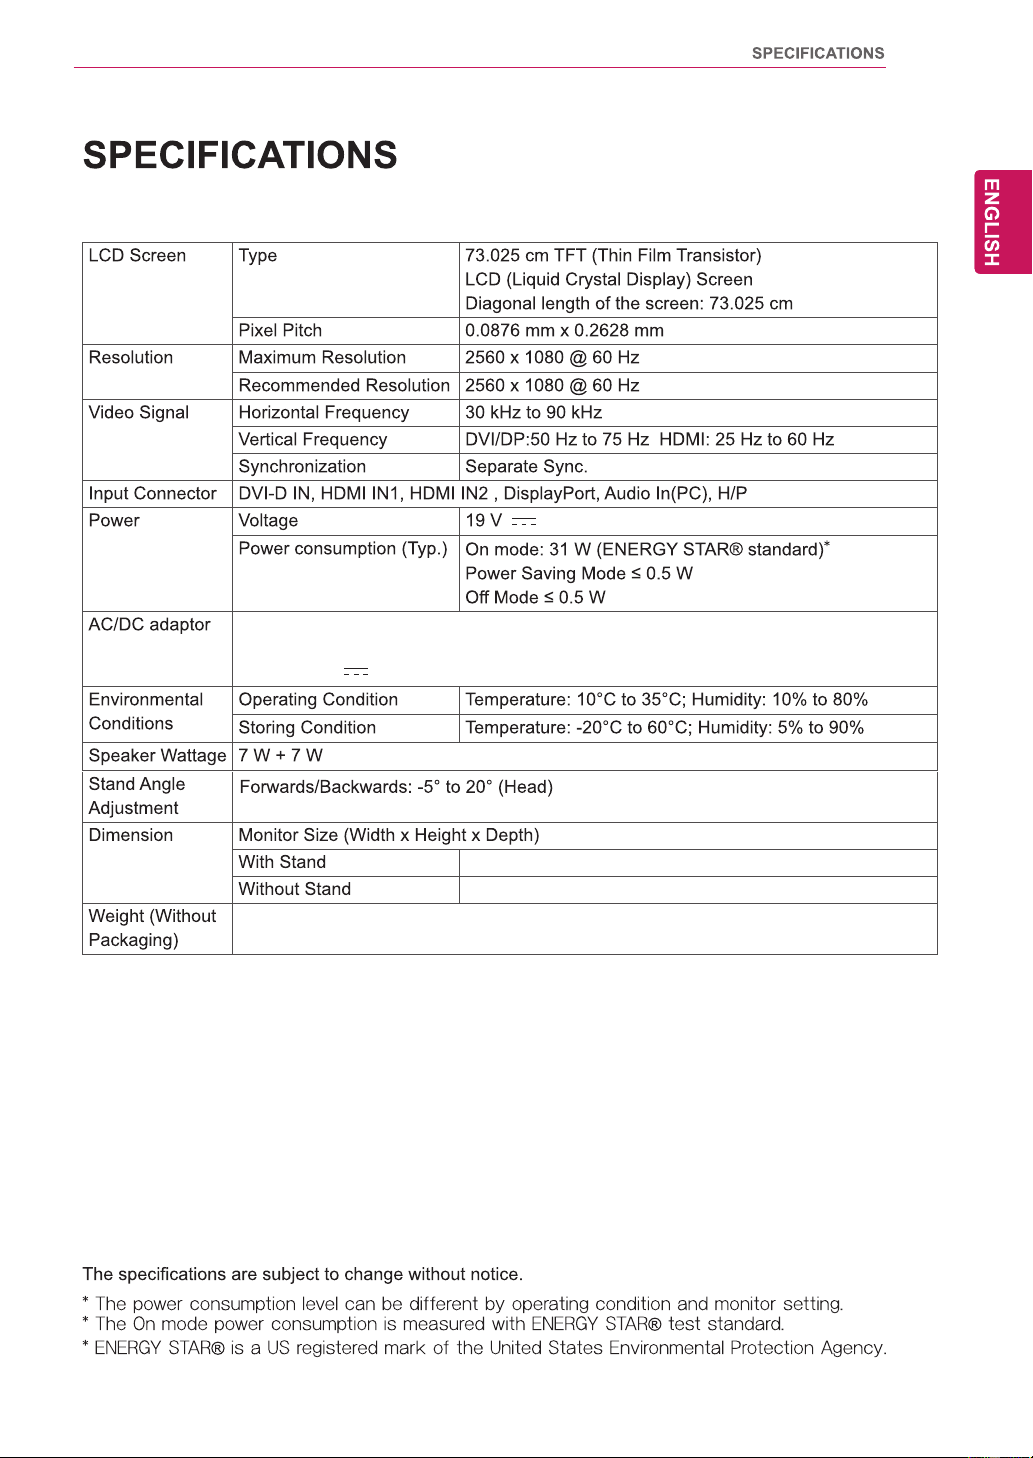
63(&,),&$7,216
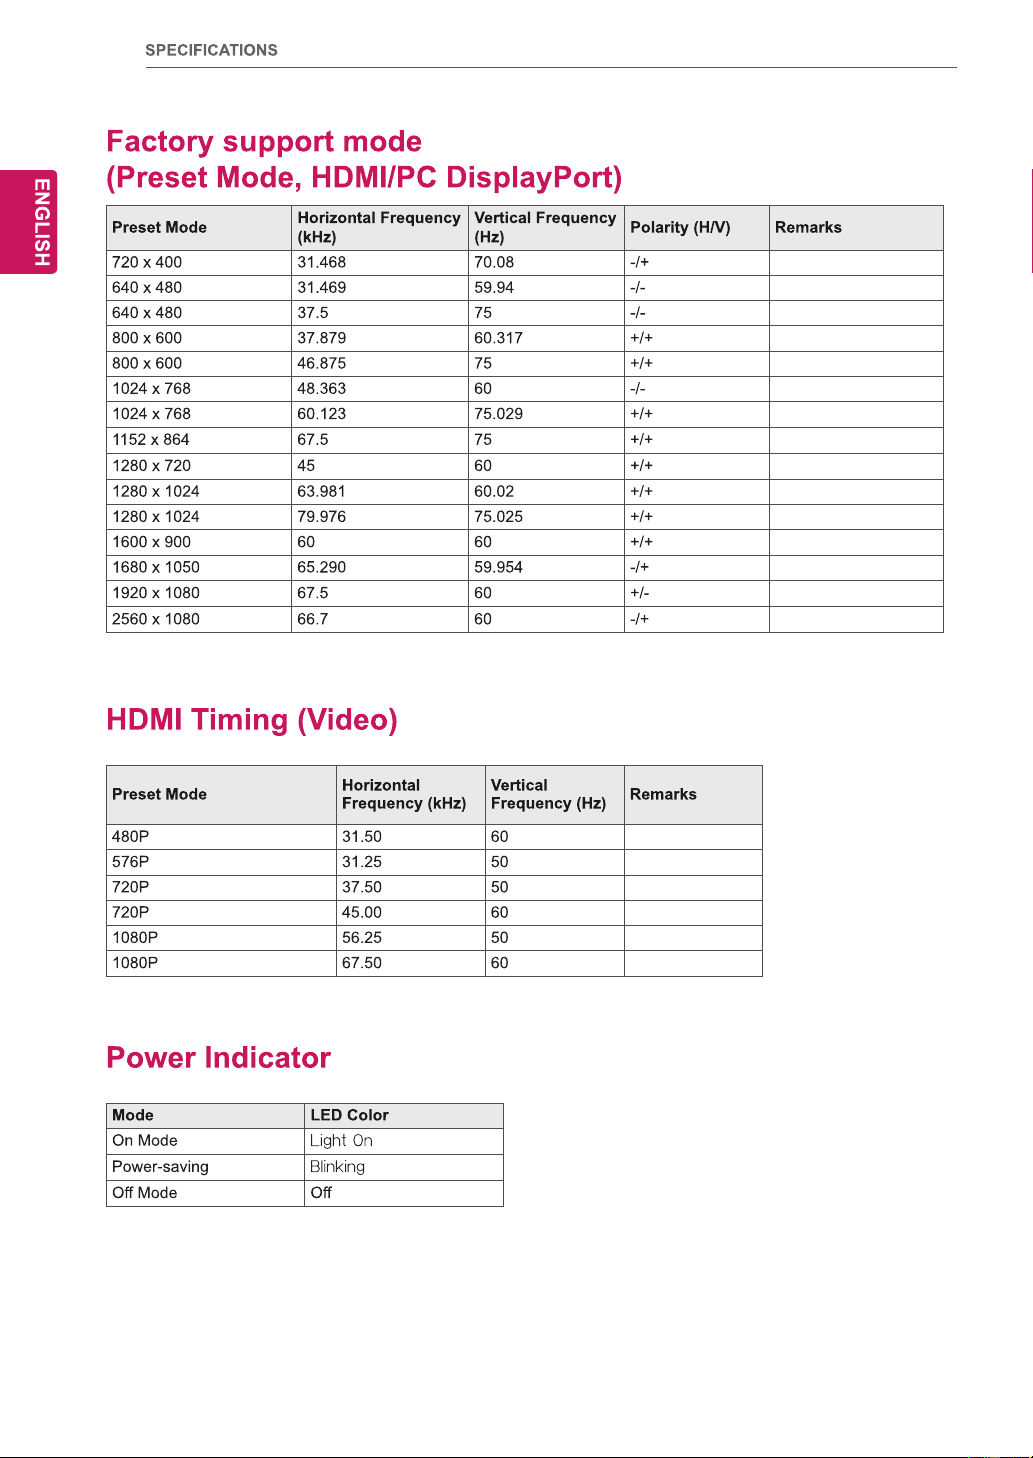
)DFWRU\VXSSRUWPRGH
3UHVHW0RGH+'0,3&
'LVSOD\3RUW
+'0,7LPLQJ9LGHR
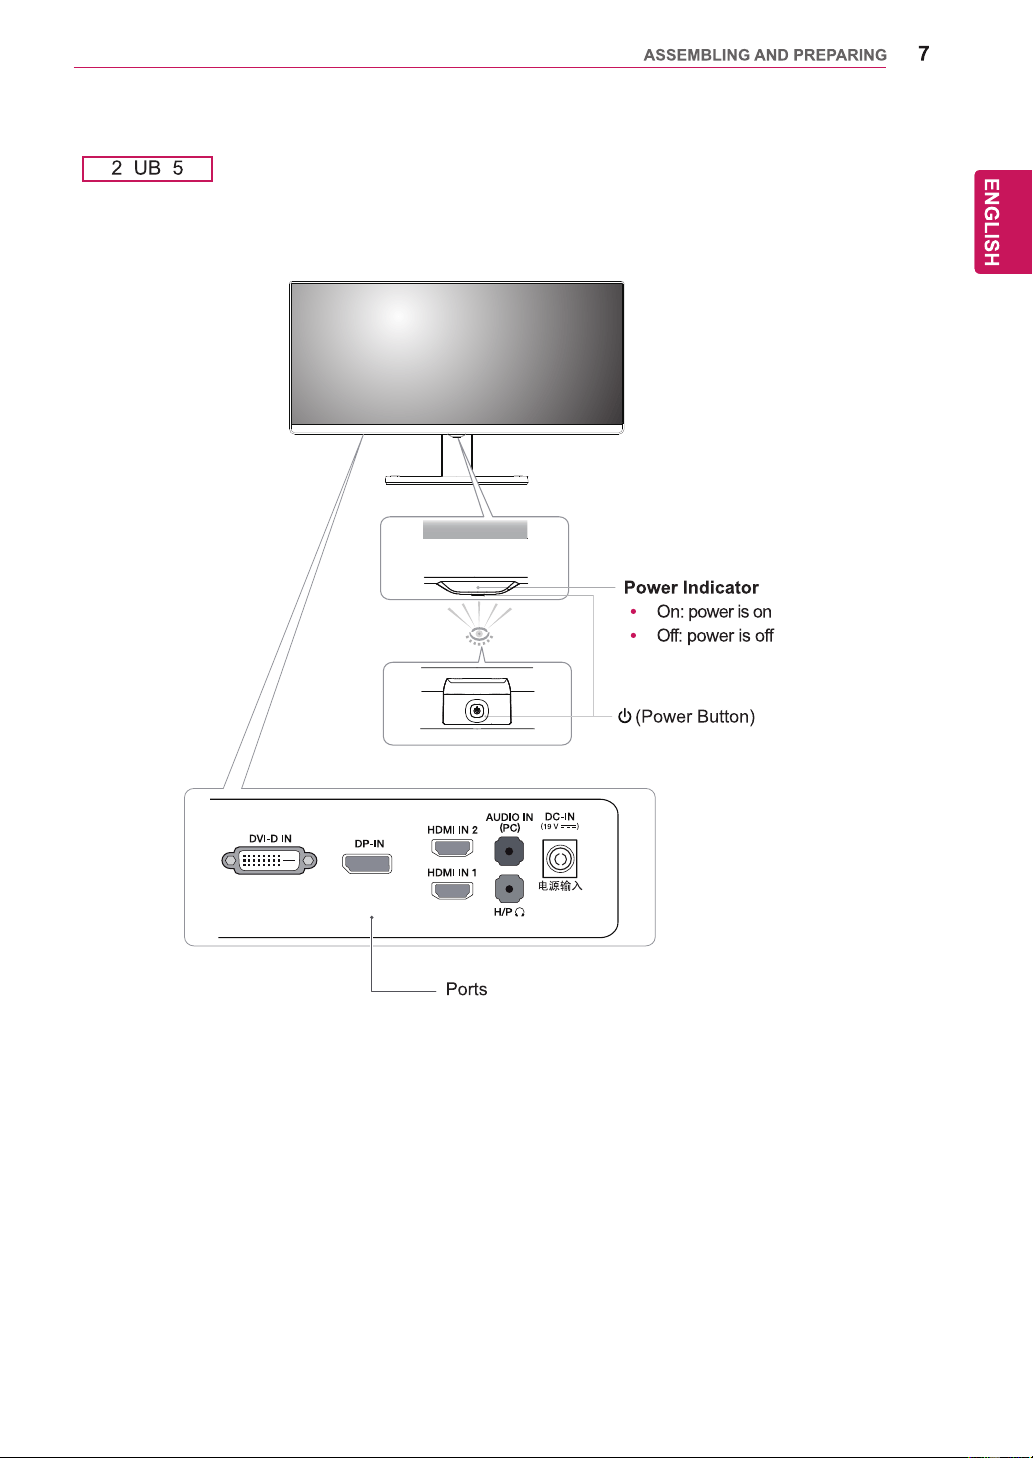
6 3RZHU,QGLFDWRU
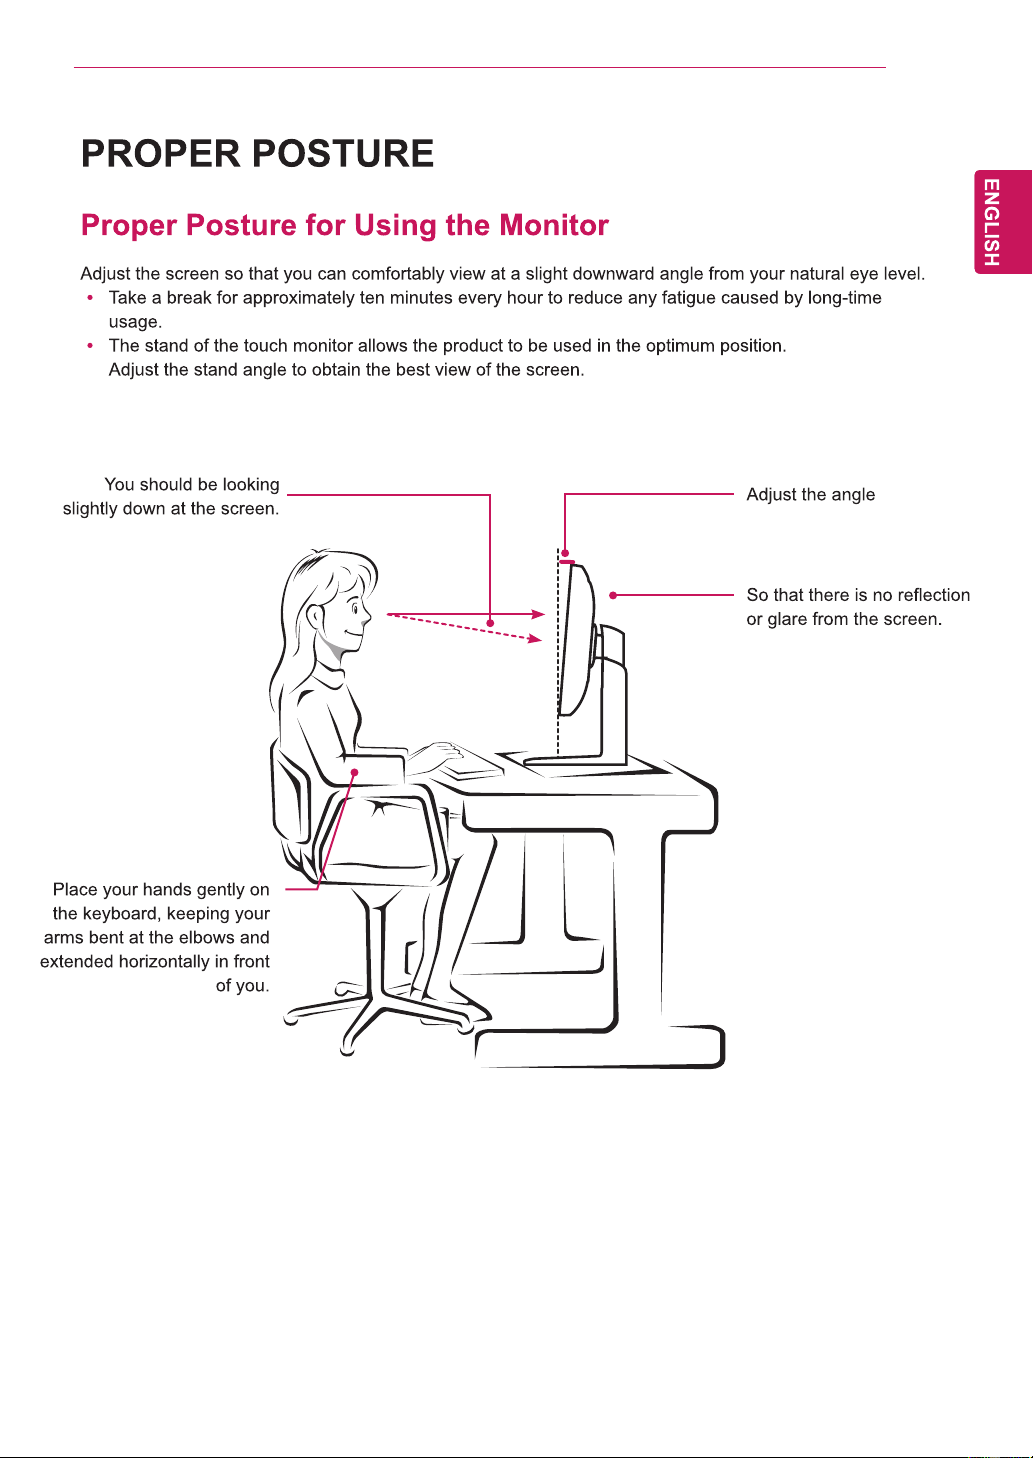
3523(5326785(
3URSHU3RVWXUHIRU8VLQJWKH0RQLWRU
/,&(16(
$66(0%/,1*$1'
35(3$5,1*
3URGXFW&RPSRQHQWV
&RPSRQHQWDQG%XWWRQ'HVFULSWLRQ
0RYLQJDQG/LIWLQJWKH0RQLWRU
,QVWDOOLQJWKH0RQLWRU
$VVHPEOLQJWKHVWDQGEDVH
8VLQJWKHFDEOHKROGHU
'HWDFKLQJWKHVWDQGEDVH
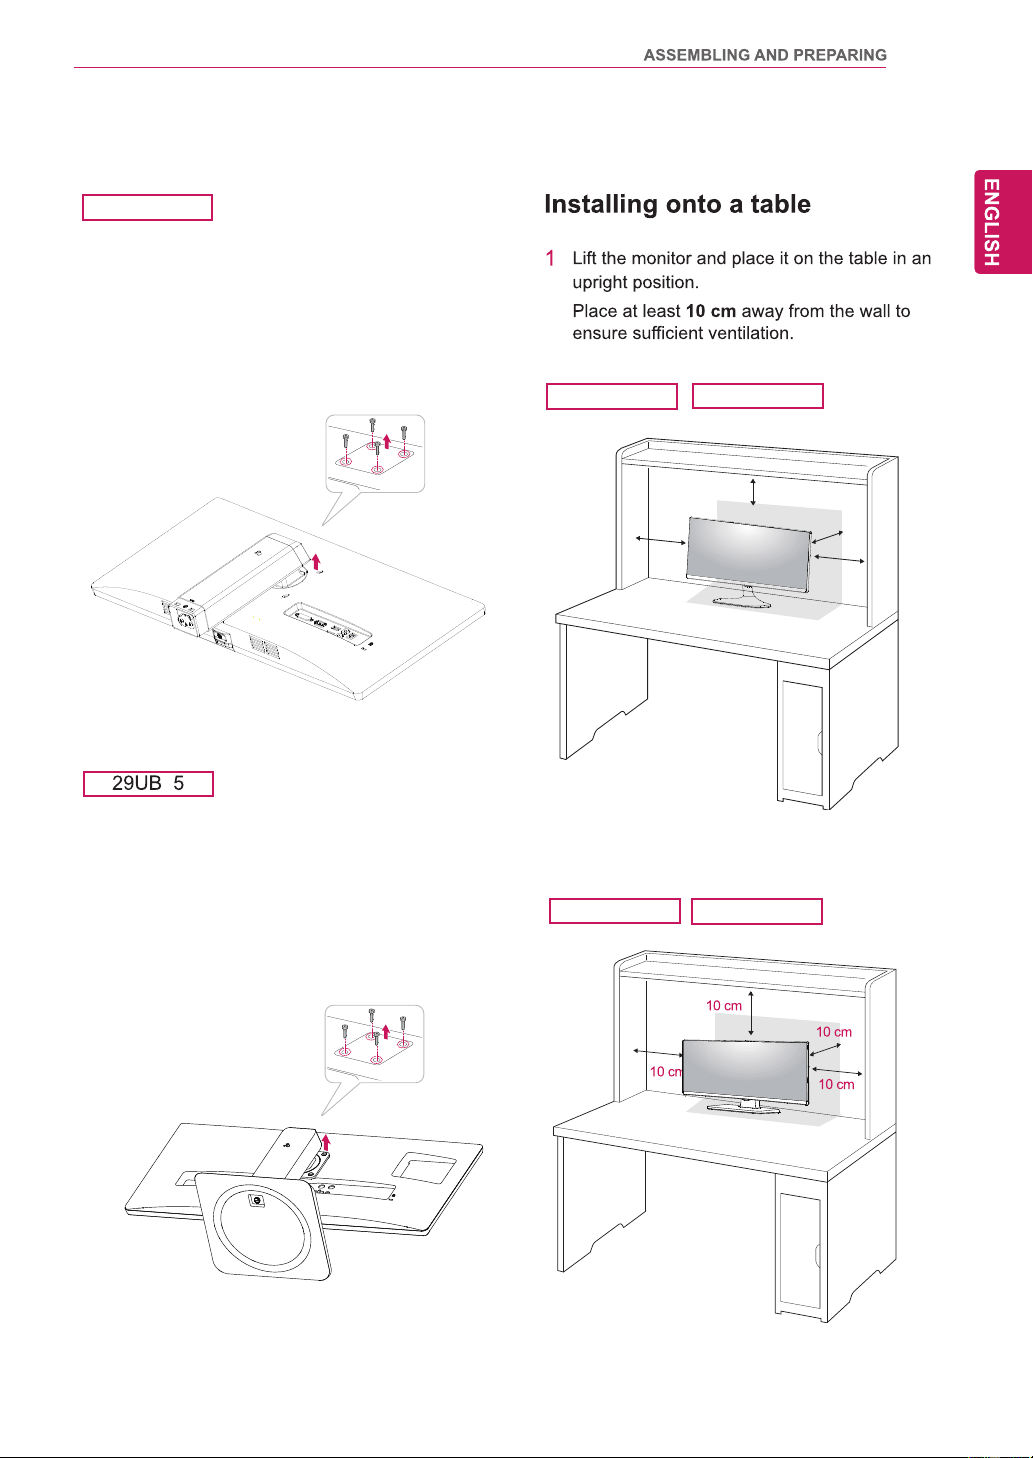
,QVWDOOLQJRQWRDWDEOH
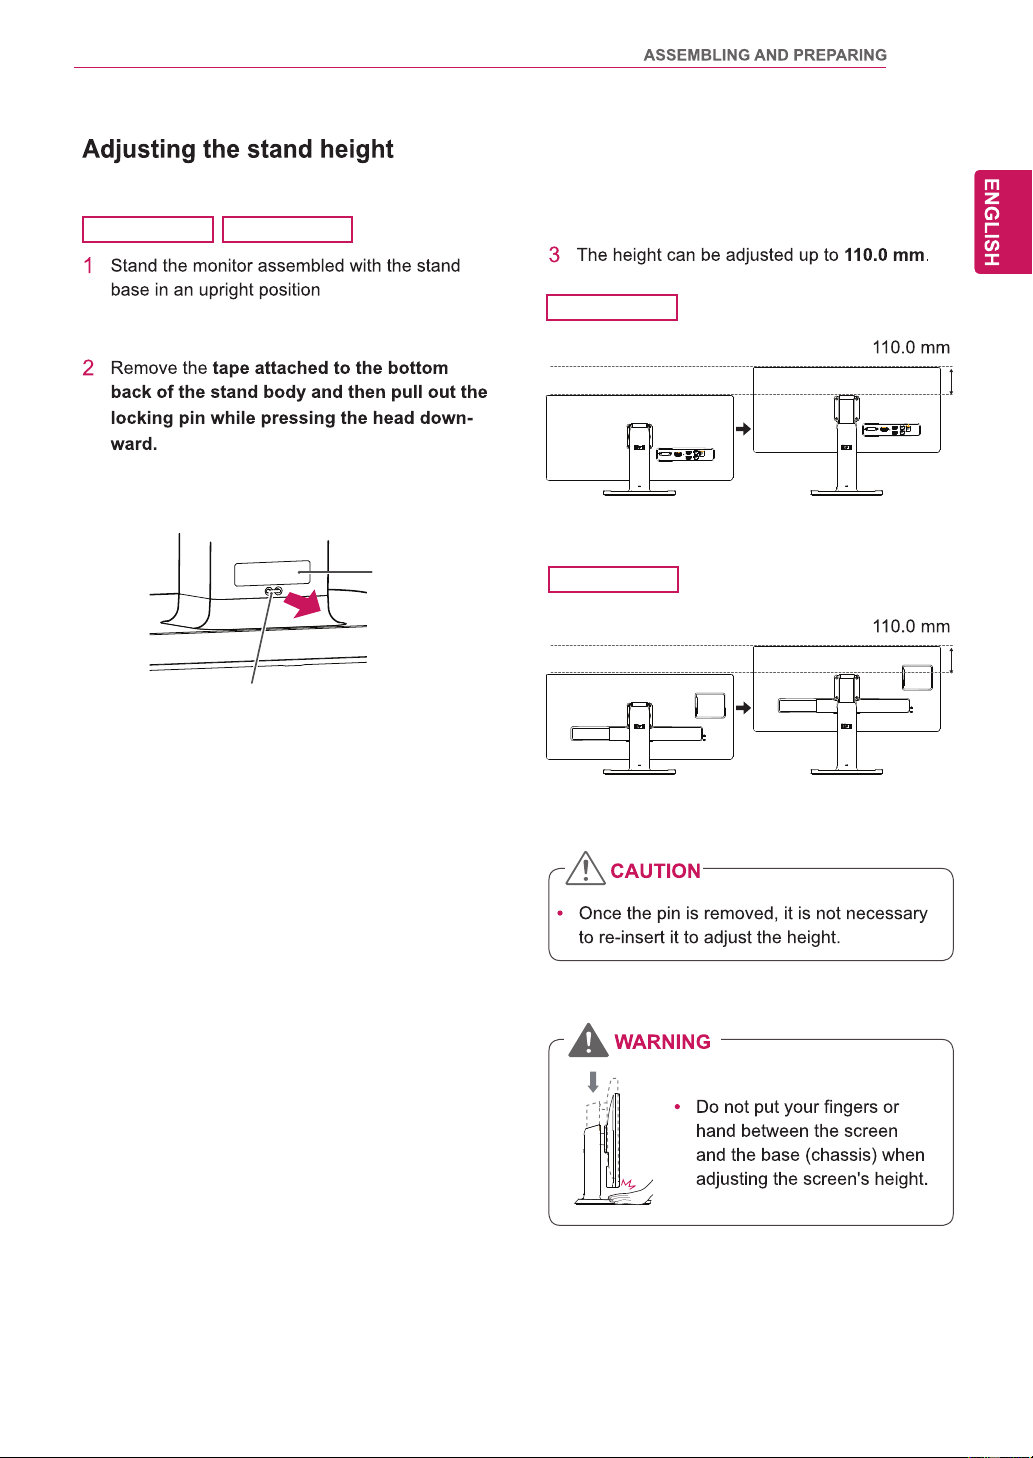
$GMXVWLQJWKHVWDQGKHLJKW
$GMXVWLQJWKHDQJOH
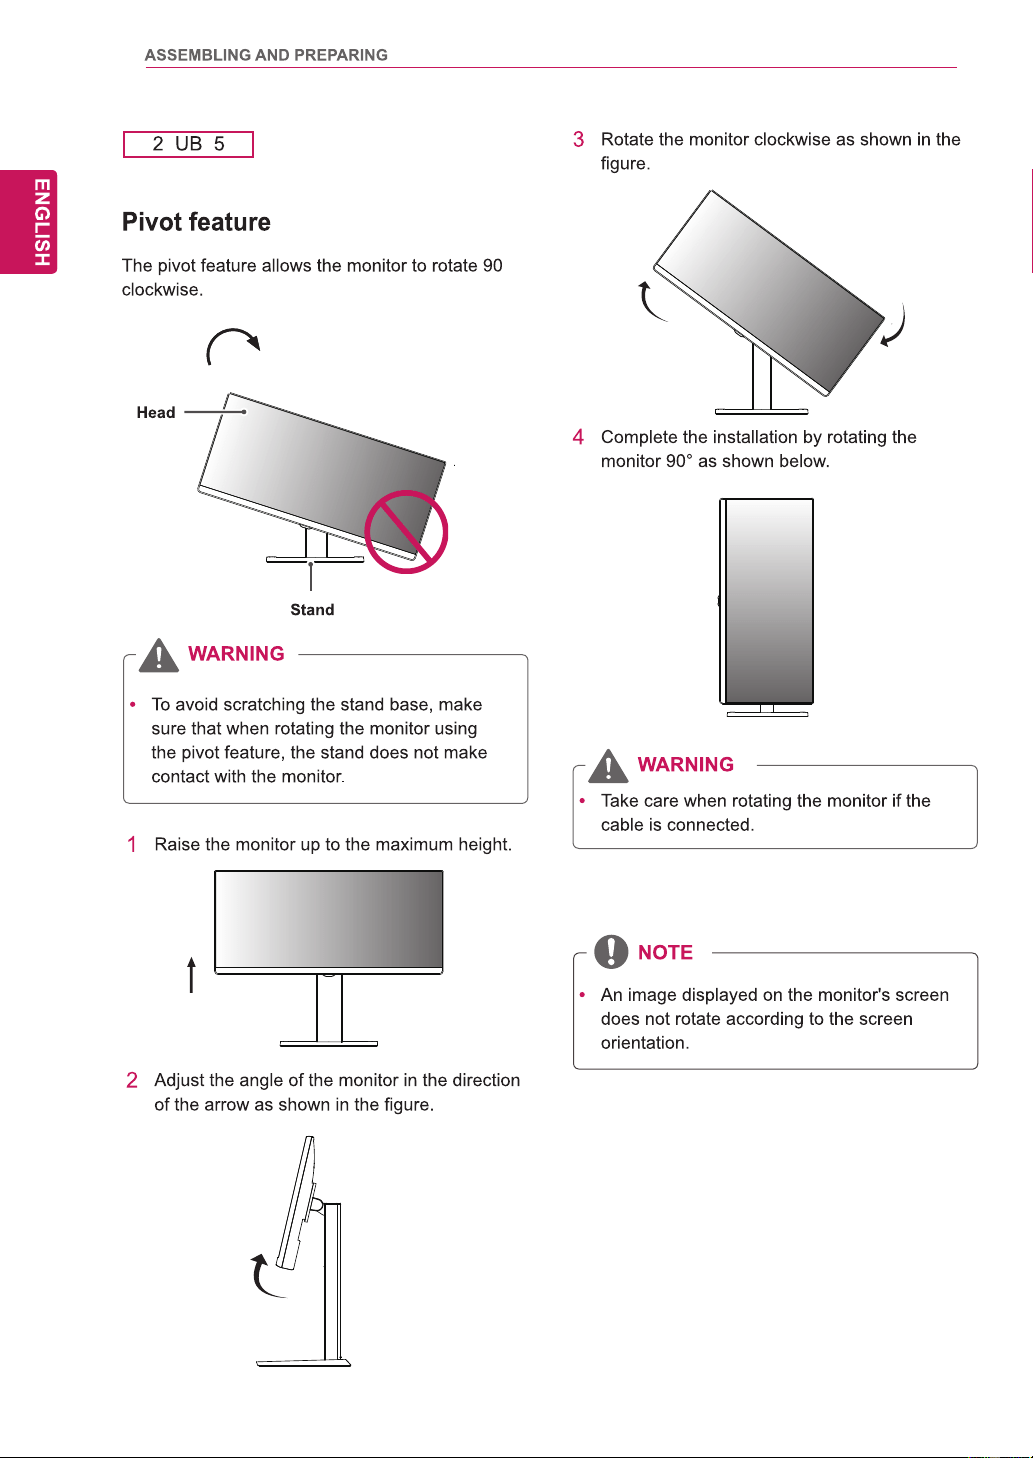
3LYRWIHDWXUH
8VLQJWKH.HQVLQJWRQORFN
,QVWDOOLQJWKHZDOOPRXQWSODWH
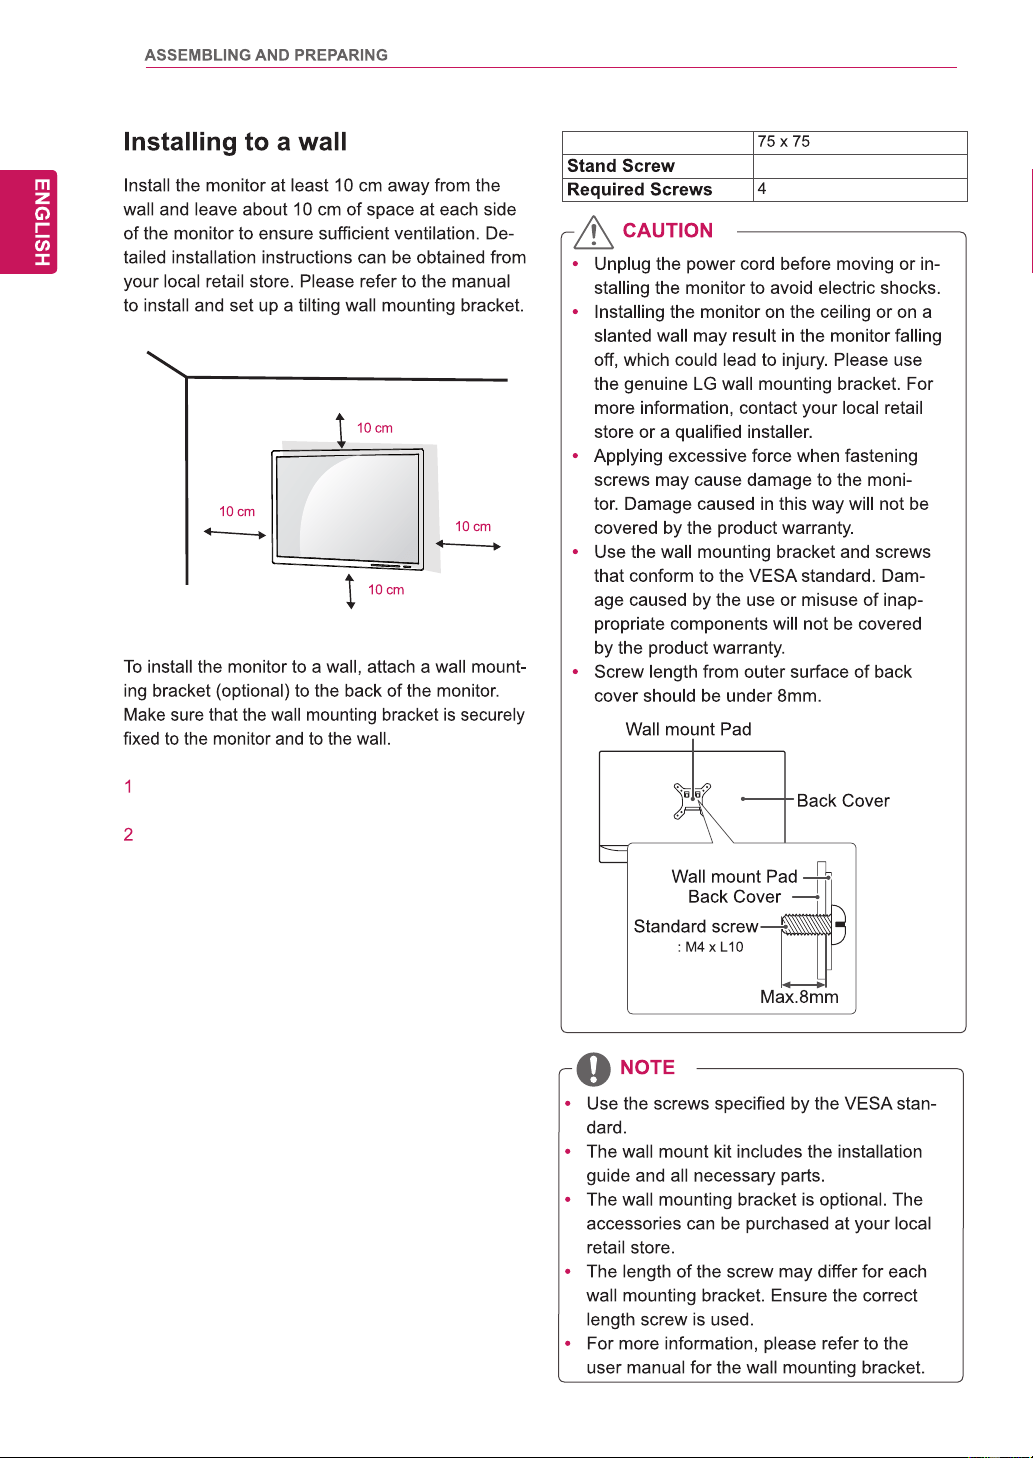
,QVWDOOLQJWRDZDOO
86,1*7+(021,725
&RQQHFWLQJWRD3&
'LVSOD\3RUWFRQQHFWLRQ
+'0,FRQQHFWLRQ
&RQQHFWLQJWR$9'HYLFHV
+'0,FRQQHFWLRQ
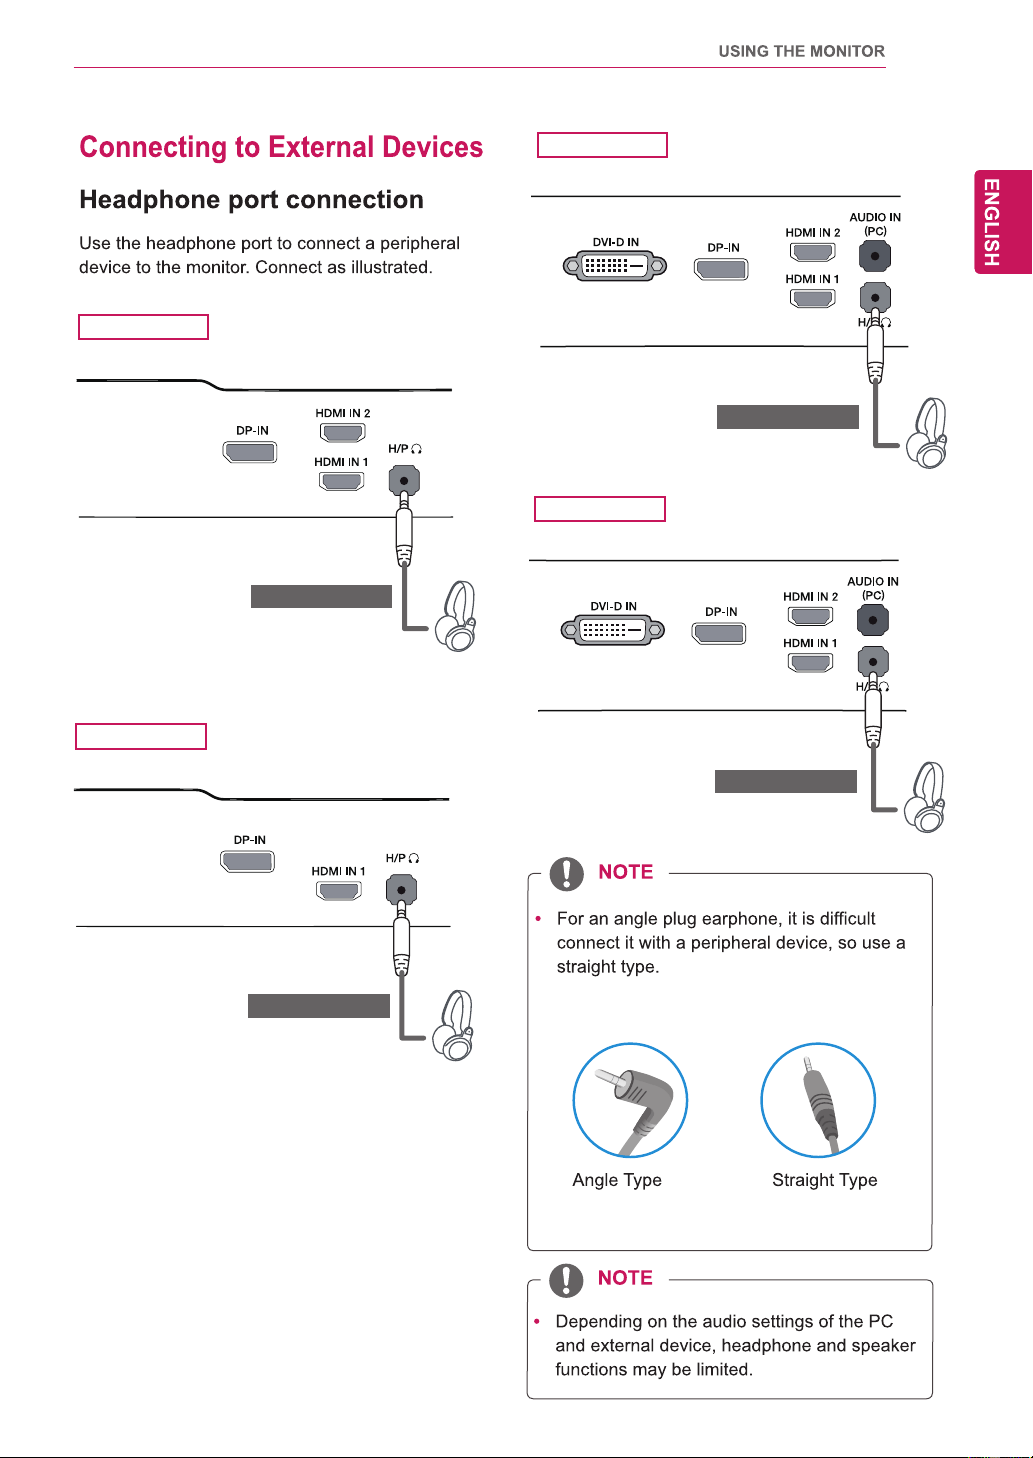
&RQQHFWLQJWR([WHUQDO'HYLFHV
+HDGSKRQHSRUWFRQQHFWLRQ
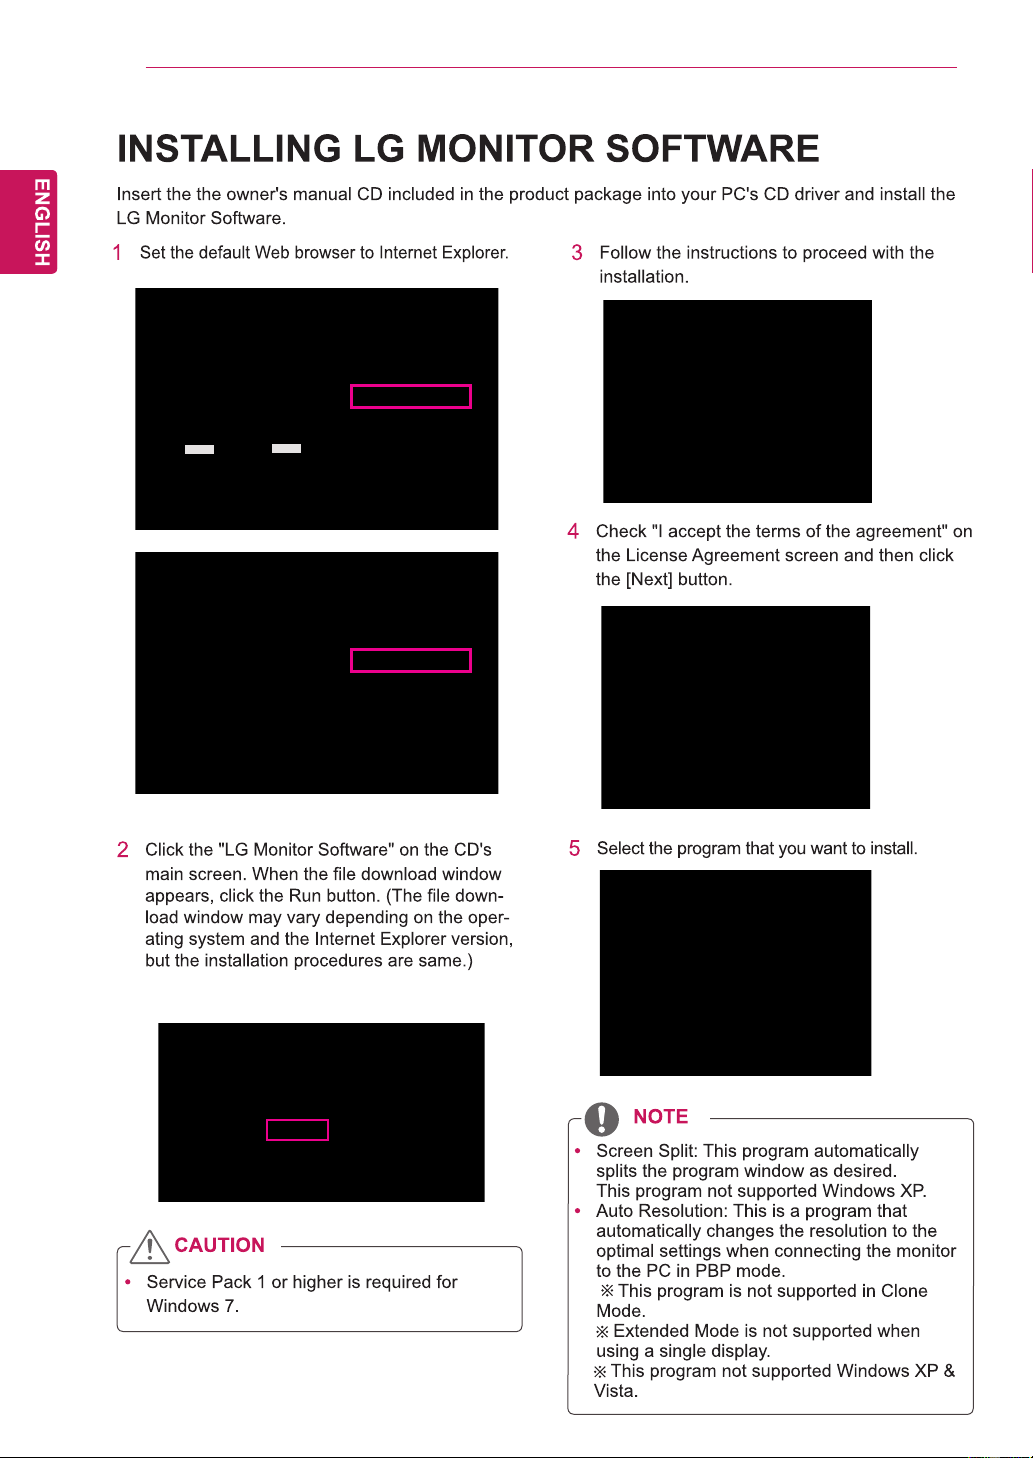
,167$//,1*/*021,725
62)7:$5(

(1*
(1*/,6+
/,&(16(
/,&(16(
(DFKPRGHOKDVGLIIHUHQWOLFHQVHV9LVLWZZZOJFRPIRUPRUHLQIRUPDWLRQRQWKHOLFHQVH
7KHWHUPV+'0,DQG+'0,+LJK'HILQLWLRQ0XOWLPHGLD,QWHUIDFHDQGWKH
+'0,ORJRDUHWUDGHPDUNVRUUHJLVWHUHGWUDGHPDUNVRI+'0,/LFHQVLQJ//&
LQWKH8QLWHG6WDWHVDQGRWKHUFRXQWULHV
9(6$9(6$ORJR'LVSOD\3RUW&RPSOLDQFH/RJRDQG'LVSOD\3RUW
&RPSOLDQFH/RJRIRUGXDOPRGHVRXUFHDUHDOOUHJLVWHUHGWUDGHPDUNVRIWKH
9LGHR(OHFWURQLFV6WDQGDUGV$VVRFLDWLRQ
Stand Base
Stand Body
Screw Cover
Screws
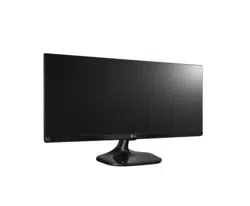
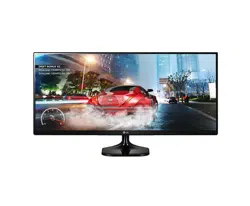
29UM55
29UB55
Stand Base
One Screw
Cable Holder
25UB55
25UM55
Stand Base
Stand Body
Screw Cover
Screws
Power Indicator
On: power is on
Off: power is off
(Power Button)
25UM55
Power Indicator
On: power is on
Off: power is off
(Power Button)
29UM55
Ports
5 5
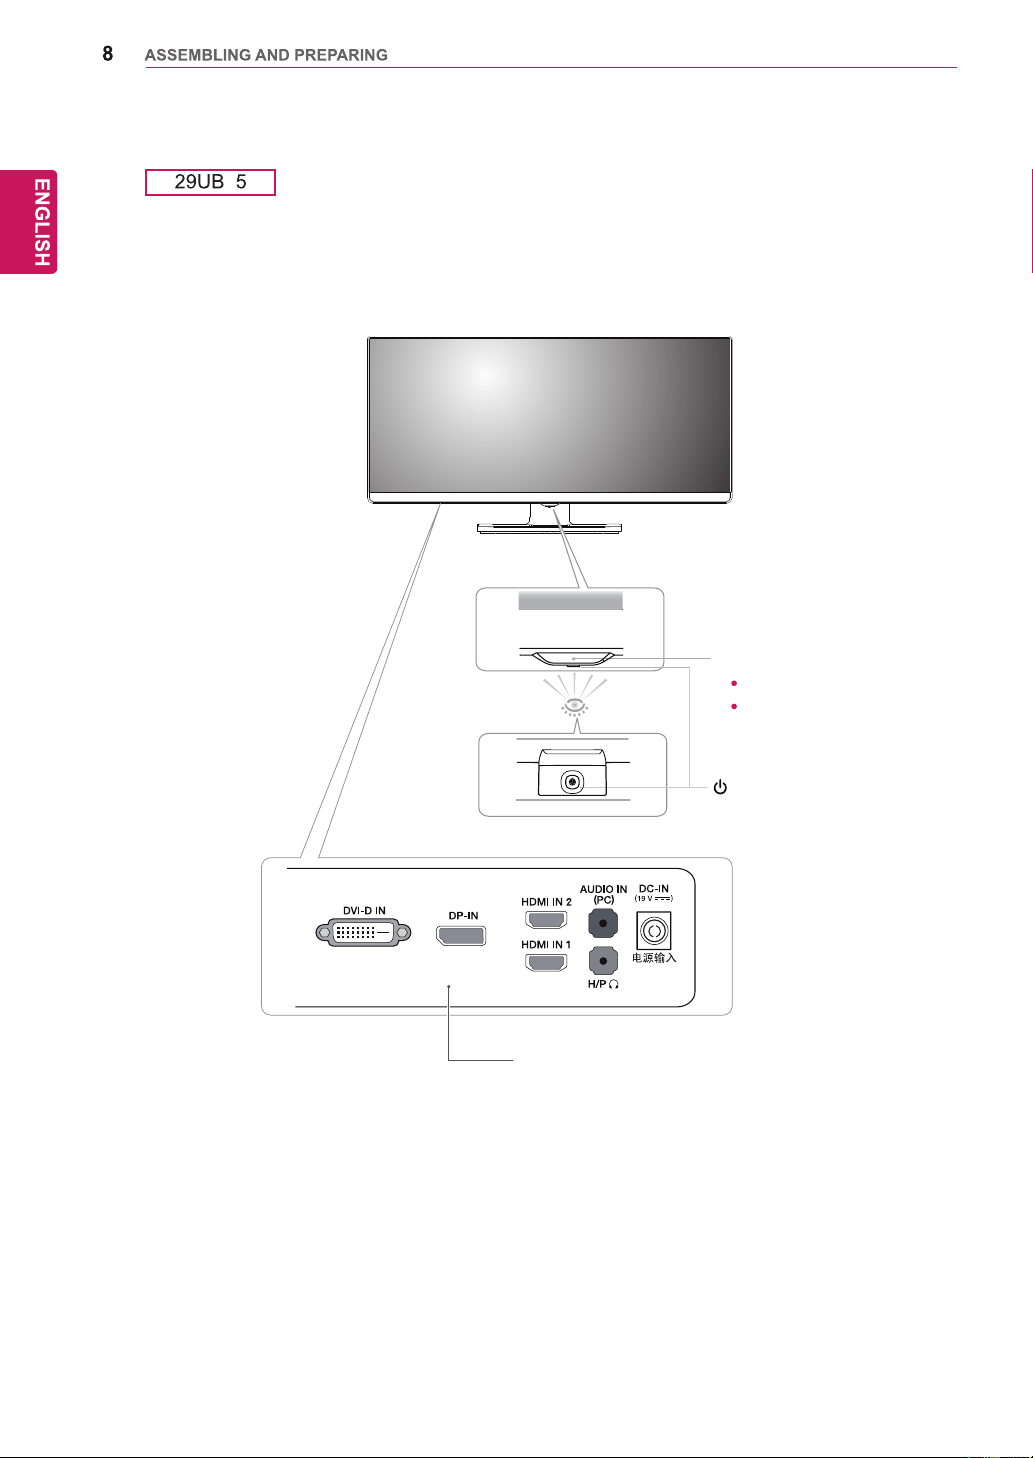
5
Power Indicator
O
n: power is on
Off: power is off
Ports
(Power Button)
25UM55
25UB55
29UM55
29UB55
10
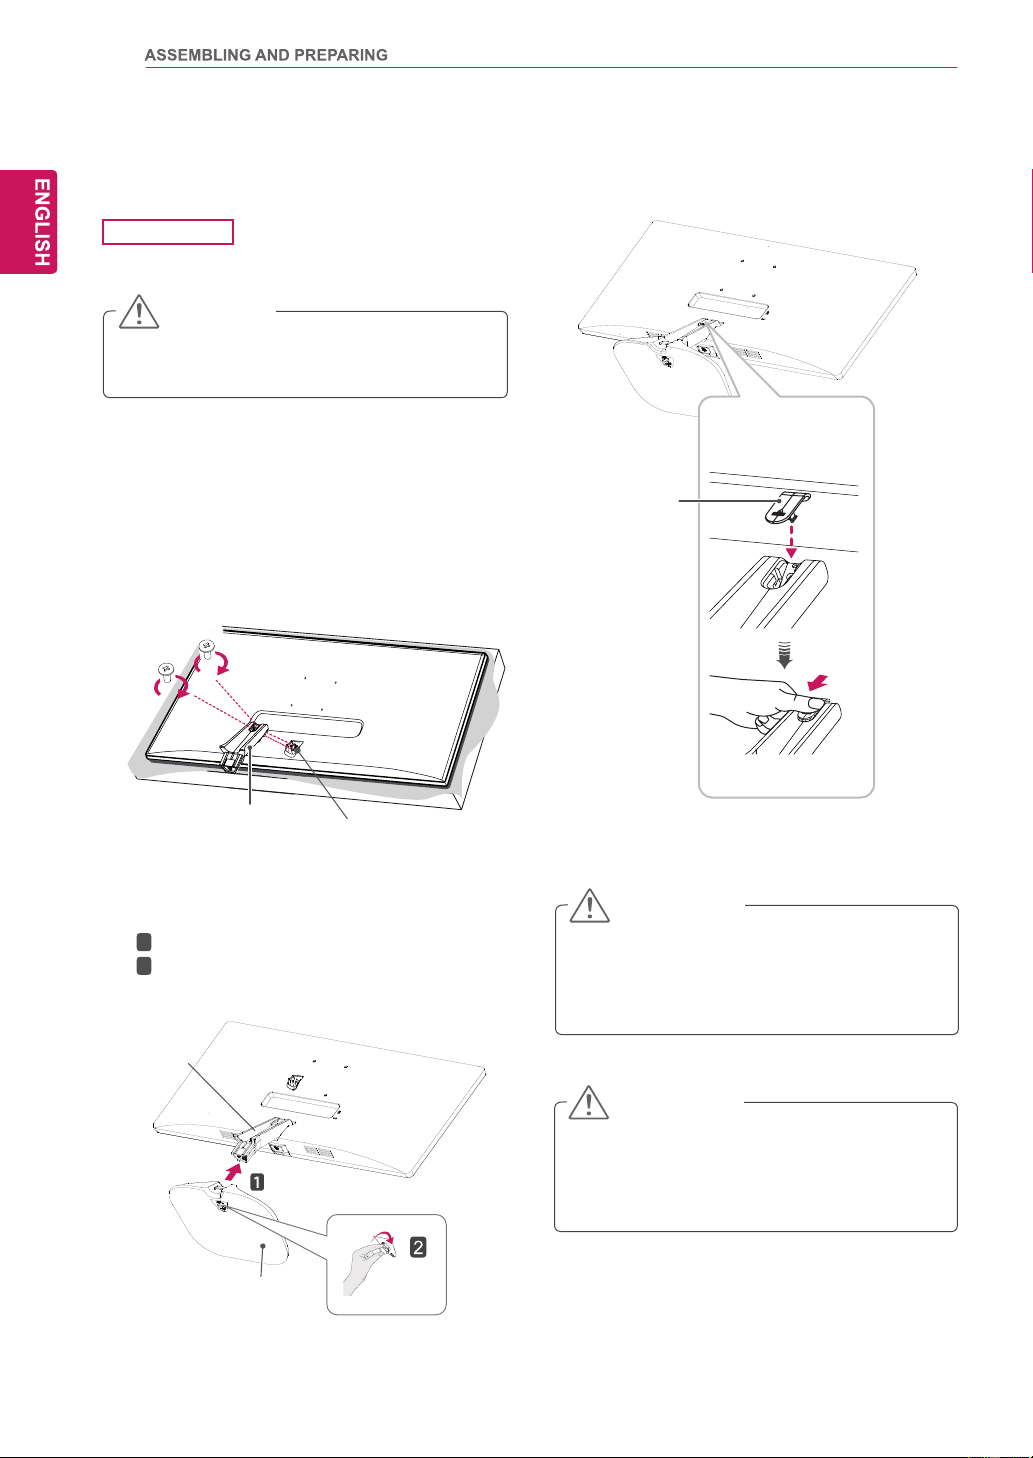
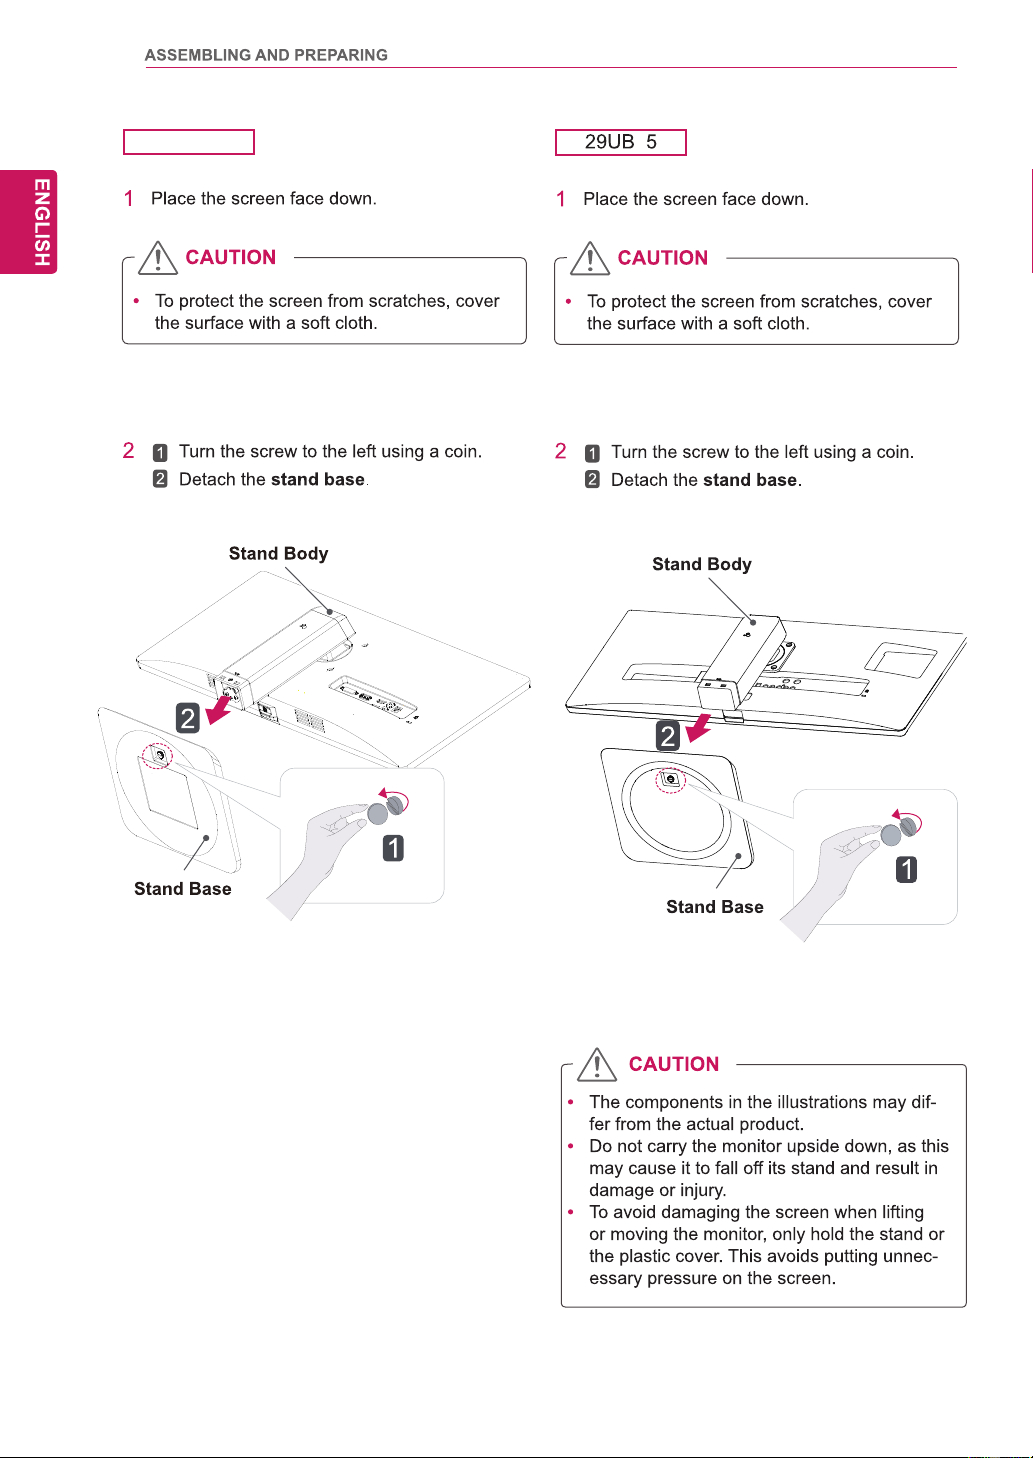
Installing the Monitor
Assembling the stand base
To protect the screen from scratches, cover
the surface with a soft cloth.
CAUTION
1
Place the screen face down.
25UM55
Applying excessive force when tightening
the screws may cause damage to the moni-
tor. Damage caused in this way will not be
covered by the product warranty.
CAUTION
4
Attach the screw cover.
It may hurt your foot off the stand, so be
careful.
CAUTION
Tighten two screws into the back of the stand
body .
3
1
Attach the Stand Base to Stand Body.
2
Tighten the screw to the right.
2
Check the direction of the stand body
(front,back) and then mount the stand body
onto the stand hinge.
Stand Body
Screws
Stand Hinge
Stand Body
Stand Base
Screw Cover
To protect the screen from scratches, cover
the surface with a soft cloth.
CAUTION
1
Place the screen face down.
29UM55
4
Attach the screw cover.
Screw Cover
Tighten two screws into the back of the stand
body .
Stand Body
Stand Hinge
Screws
3
1
Attach the Stand Base to Stand Body.
2
Tighten the screw to the right.
Stand Body
Stand Base
2
Check the direction of the stand body
(front,back) and then mount the stand body
onto the stand hinge.
11
12
5 B5
Check the position (at the front and rear) of
thestand body , then mount the stand base on
the stand body as shown in the figure.
Stand Body
Stand Base
B5
2
Check the position (at the front and rear) of
the stand body, then mount the stand base on
the stand body as shown in the figure.
3
Using a coin, turn the screw clockwise to se-
cure the stand base.
Using a coin, turn the screw clockwise to se-
cure the stand base.
13
29UM55
29UB55
Fix the Knob (Cable holder) to the
Hole(Stand body).
1
2
3
Use one screw to fix the Cable Holder and
monitor set.
Close the Cable holder.
25UM55
25UB55
Fix the Knob (Cable holder) to the
Hole(Stand body).
1
2
3
Use one screw to fix the Cable Holder and
monitor set.
Close the Cable holder.
14
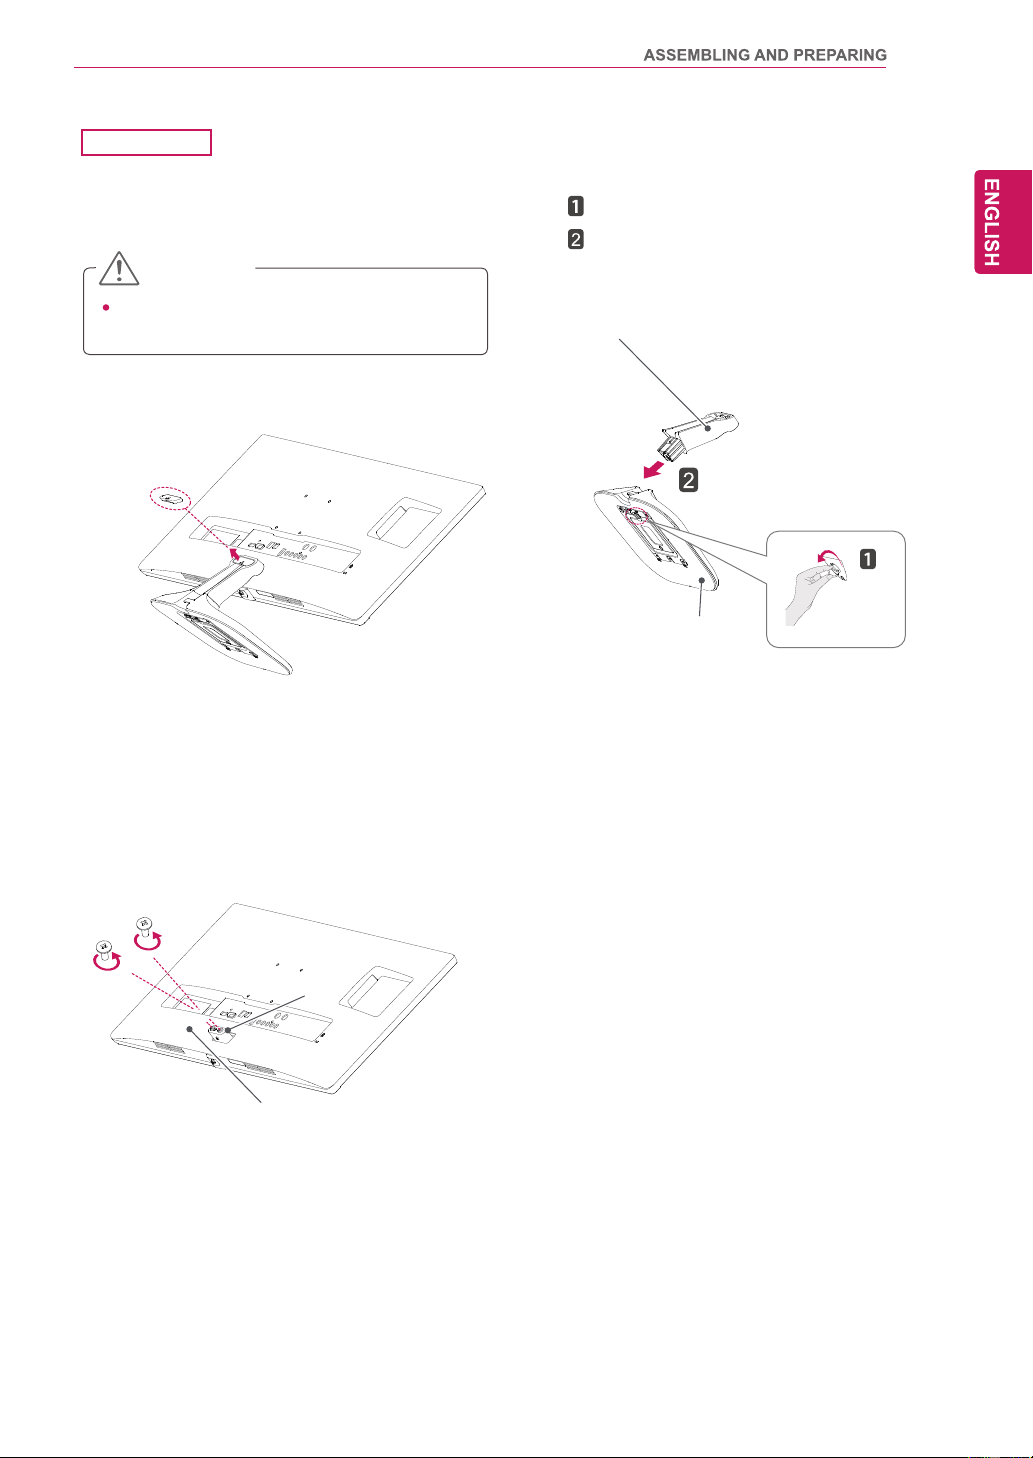
Detaching the stand base
Turn the screw to the left.
Pull out the Stand Base.
Illustrations in this document represent typi-
cal procedures, so they may look different
from the actual product.
Do not carry the monitor upside down by just
holding the stand base. This may cause the
monitor to fall off the stand and could result
in personal injury.
When lifting or moving the monitor, do not
touch the monitor screen. Applying force or
pressure may damage the monitor screen.
Instead, hold the stand body or the plastic
frame of the product.
CAUTION
1
Place the screen face down.
CAUTION
To protect the screen from scratc
hes, cover
the surface with a soft cloth.
2
Remove the screw cover.
25UM55
4
3
Remove the two screws on the back of stand
body.
As shown in the illustration, disconnect the
stand body from the
stand hinge.
Screw Cover
Stand Body
Stand Base
Screws
Stand Body
15
2
To protect the screen from scratc
hes,
Turn the screw to the left.
Pull out the Stand Base.
cover
the surface with a soft cloth.
CAUTION
1
Place the screen face down.
29UM55
4
3
R
Remove the screw cover.
Screw cover
emove the two screws on the back of stand
body.
As shown in the illustration, disconnect the
stand body from the
stand hinge.
Stand Hinge
Stand Body
Stand Body
Stand Base
16
5
25UB55
17
Detaching the stand body
1
Place the monitor's screen face down.To
protect the screen from scratches, cover the
surface with a soft cloth.
2
Using a screwdriver, remove the four screws
and detach the stand from the monitor.
5
1
Place the monitor's screen face down.To
protect the screen from scratches, cover the
surface with a soft cloth.
2
Using a screwdriver, remove the four screws
and detach the stand from the monitor.
25UM55
10 cm
10 cm
10 cm
10 cm
29UM55
25UB55
29UB55
25UB55
18
25UM55
29UM55
25UB55
29UB55
19
25UB55
Stand Body
Tape
Locking Pin
29UB55
25UB55
29UB55
20
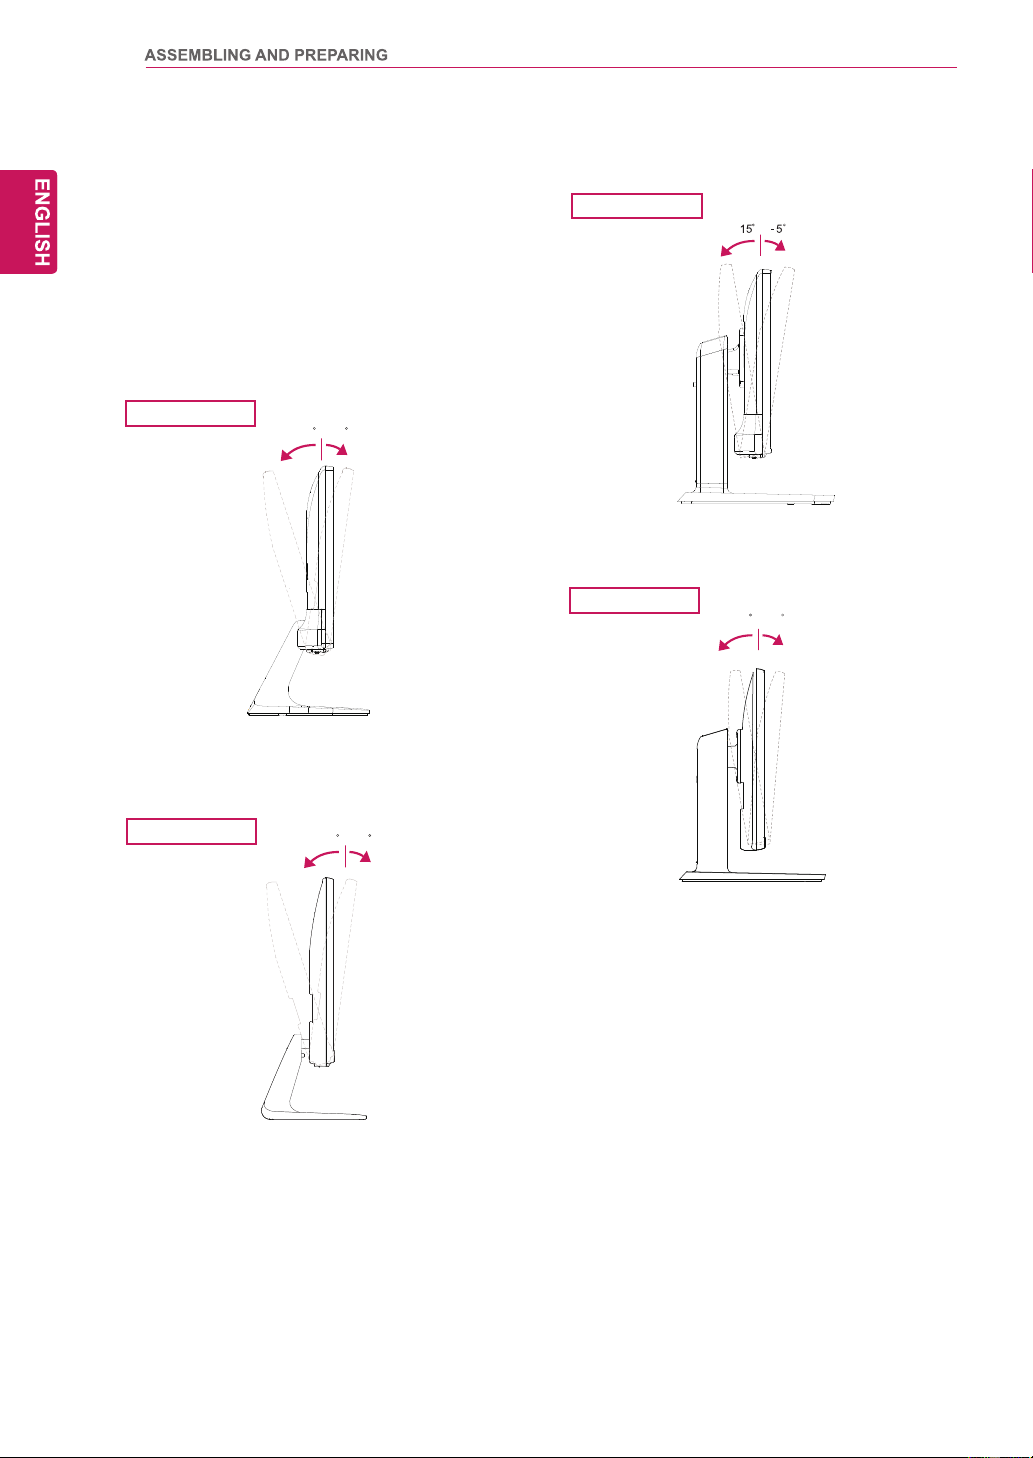
Adjusting the angle
1
Place the monitor in an upright position, mount-
ed on the stand base.
2
Adjust the angle of the screen. The angle of the
screen can be adjusted forwards or backwards
for a comfortable viewing experience.
Front Side
Rear Side
Front Side
Rear Side
29UM55
29UB55
-520
-520
25UM55
Front Side
Rear Side
02 5-
25UB55
Front Side
Rear Side
21
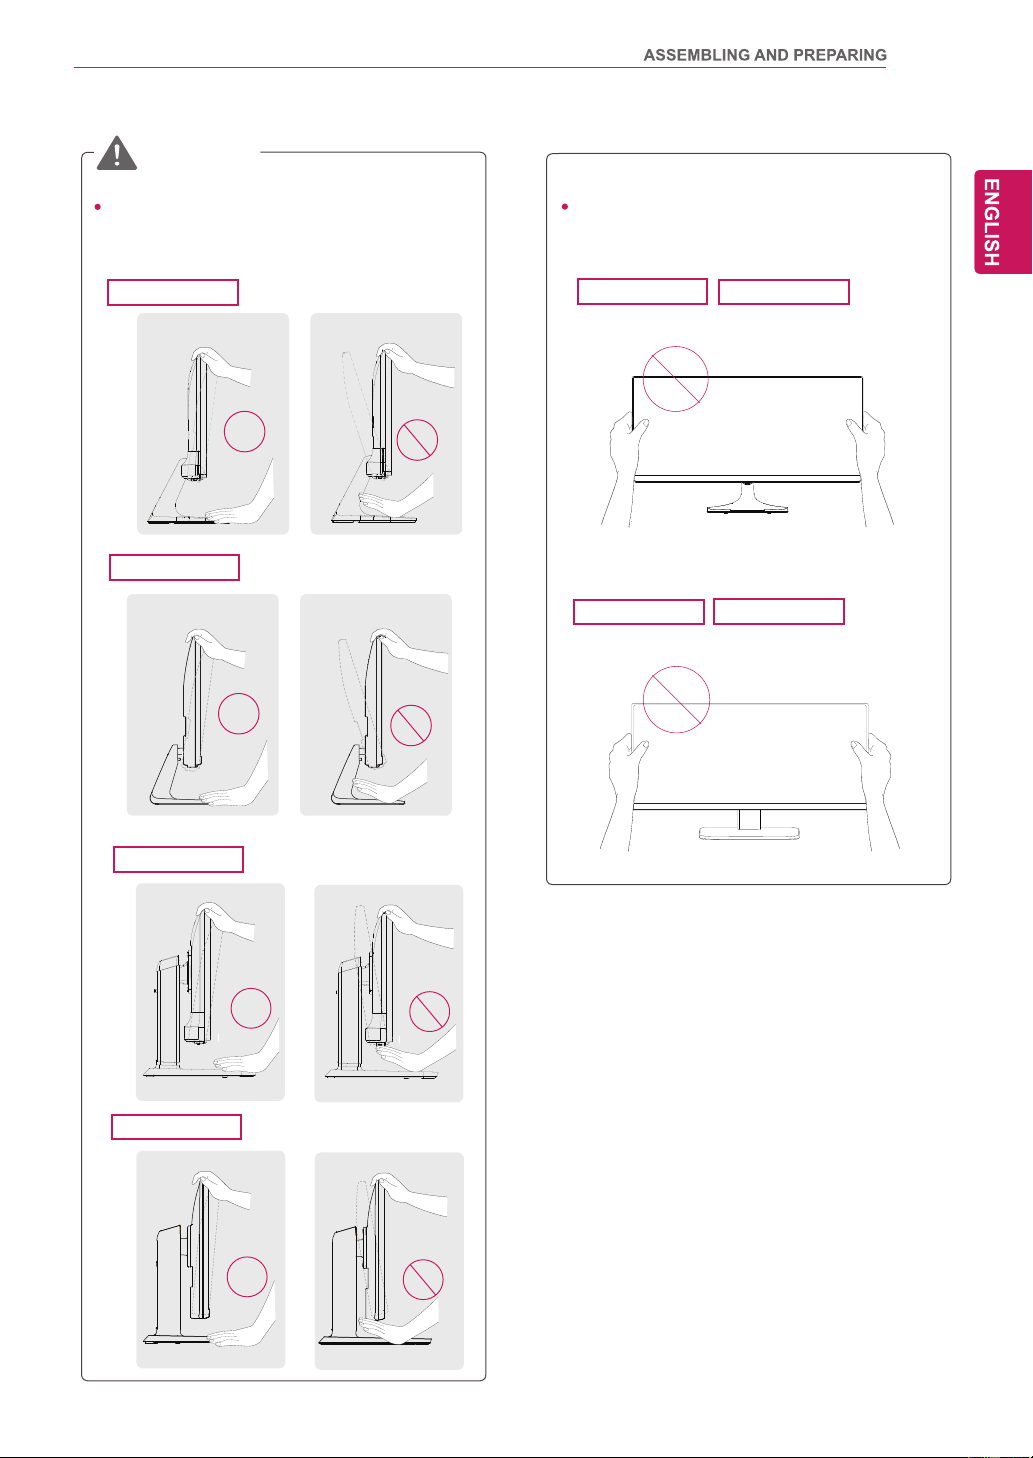
To avoid injury to the fingers when adjusting
the screen, do not hold the lower part of the
monitor's frame as illustrated below.
WARNING
29UB55
29UM55
Be careful not to touch or press the screen
area when adjusting the angle of the monitor.
29UM55
29UB55
25UM55
25UB55
25UM55
25UB55
22
5 5

23
29UM55
29UB55
25UM55
25UB55
24
If you use screw longer than standard, the
monitor might be damaged internally.
If you use improper screw, the product might be
damaged and drop from mounted position.
In this case, LG Electronics is not responsible
for it.
Wall Mount (A x B)
M4 x 10 mm
25
USING THE MONITOR
Connecting to a PC
This monitor supports the *Plug and Play
feature.
*Plug and Play: A feature that allows you to
add a device to your computer without having
to reconfigure anything or install any manual
drivers.
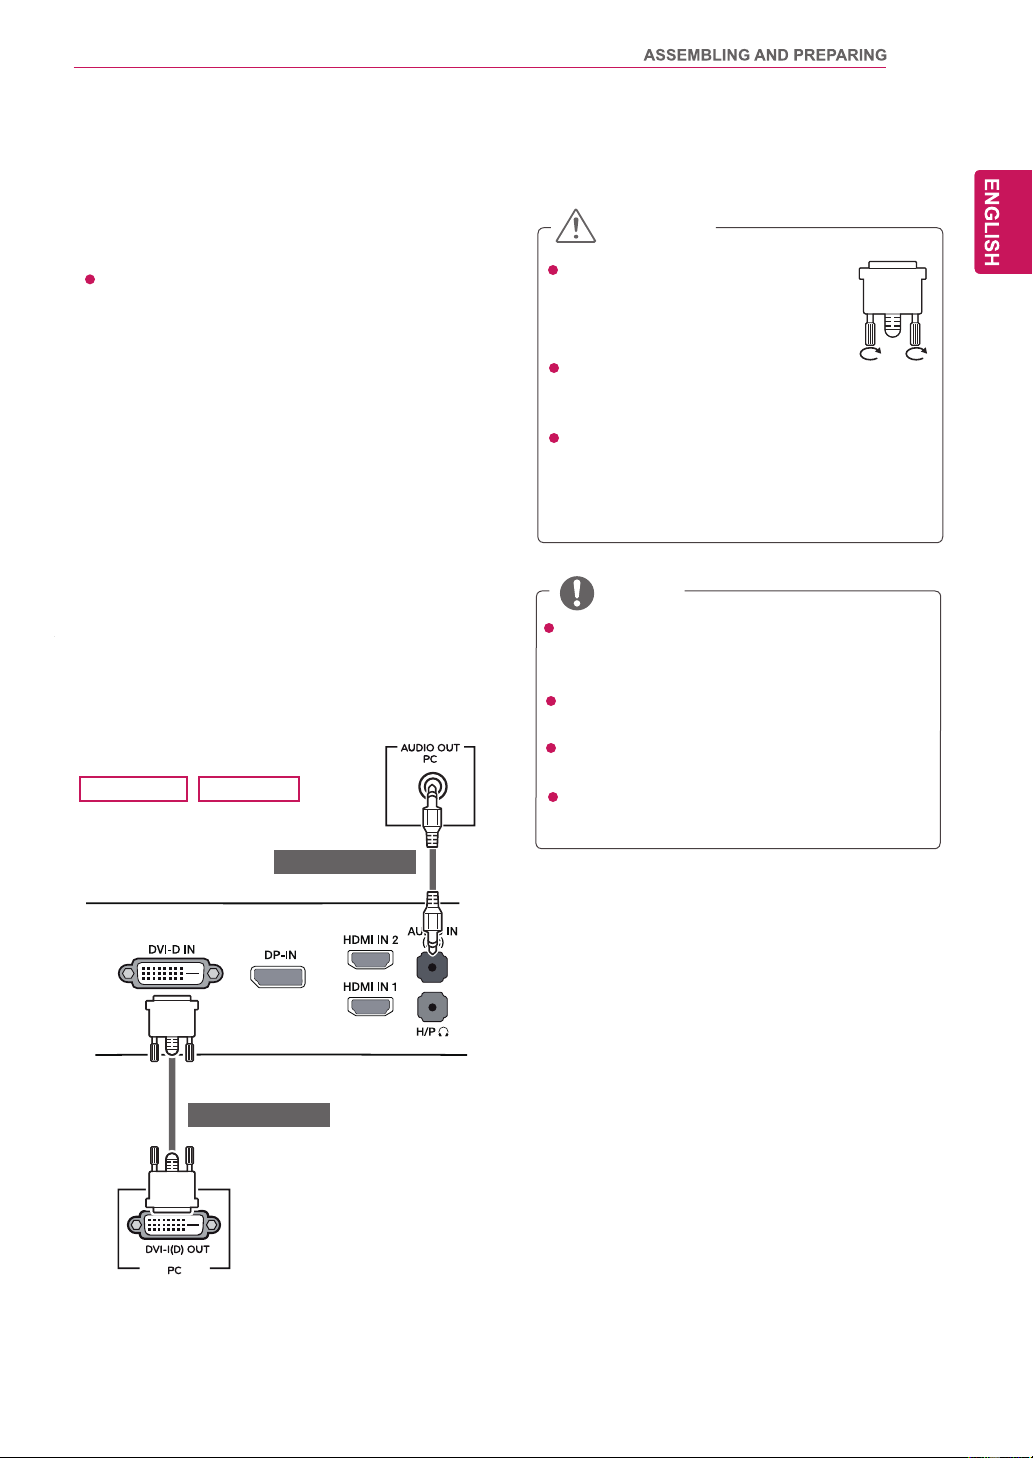
DVI connection
T
ransmits digital video signals to the monitor
. Con-
nect the monitor using the DVI cable as illustrated
below
.
Press the menu button and then select the input
option from the input menu.
T
o hear the sound in DVI input mode, connect the
PC's AUDIO OUT port to the monitor's AUDIO IN
(PC) port using the audio cable that came with the
product.
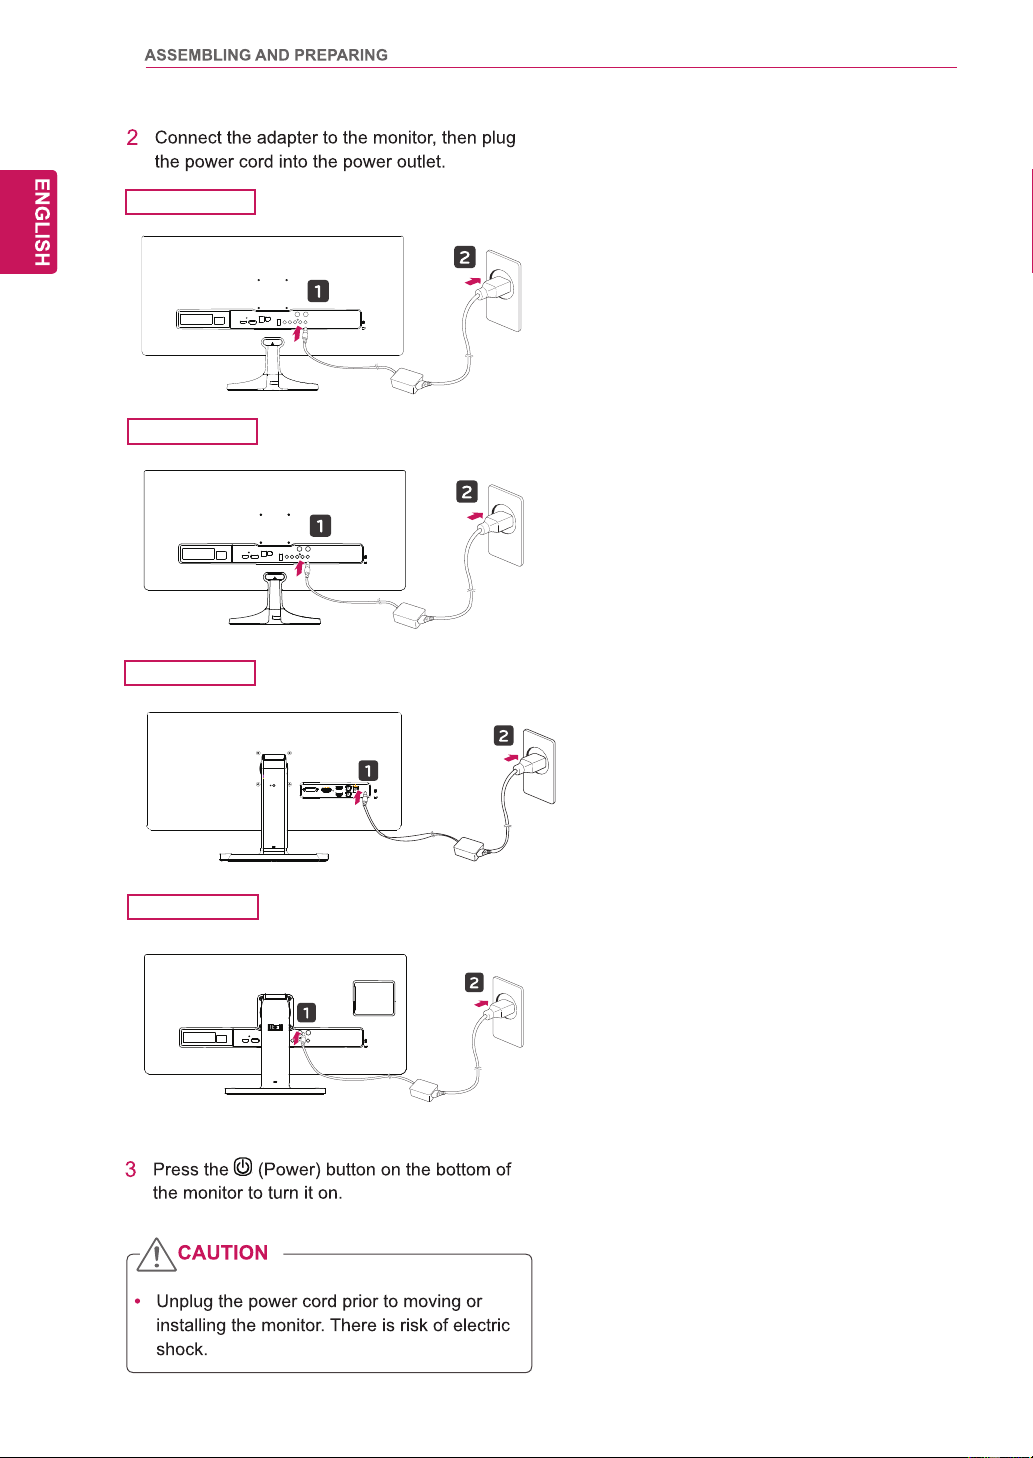
Connect the input signal cable and
turn in the direction of the arrow.
To prevent disconnection secure
the cable tightly.
Do not press on the screen for a
prolonged period of time.This may cause
image distortion.
Do not display a still image on the screen
for a prolonged period of time. This may
cause image retention.If possible,use the
screen saver.
CAUTION
When connecting the power cord to the out-
let, use a grounded (3-hole) multi-socket or a
grounded power outlet.
T
h
e
monitor may flicker when turned on in an
area of low temperature. This is normal.
Sometimes red, green, or blue spots may ap-
pear on the screen.This is normal.
Using a DVI to HDMI cable may cause com-
patibility issues.
NOTE
25UB55
(sold separately)
(sold separately)
29UB55
26
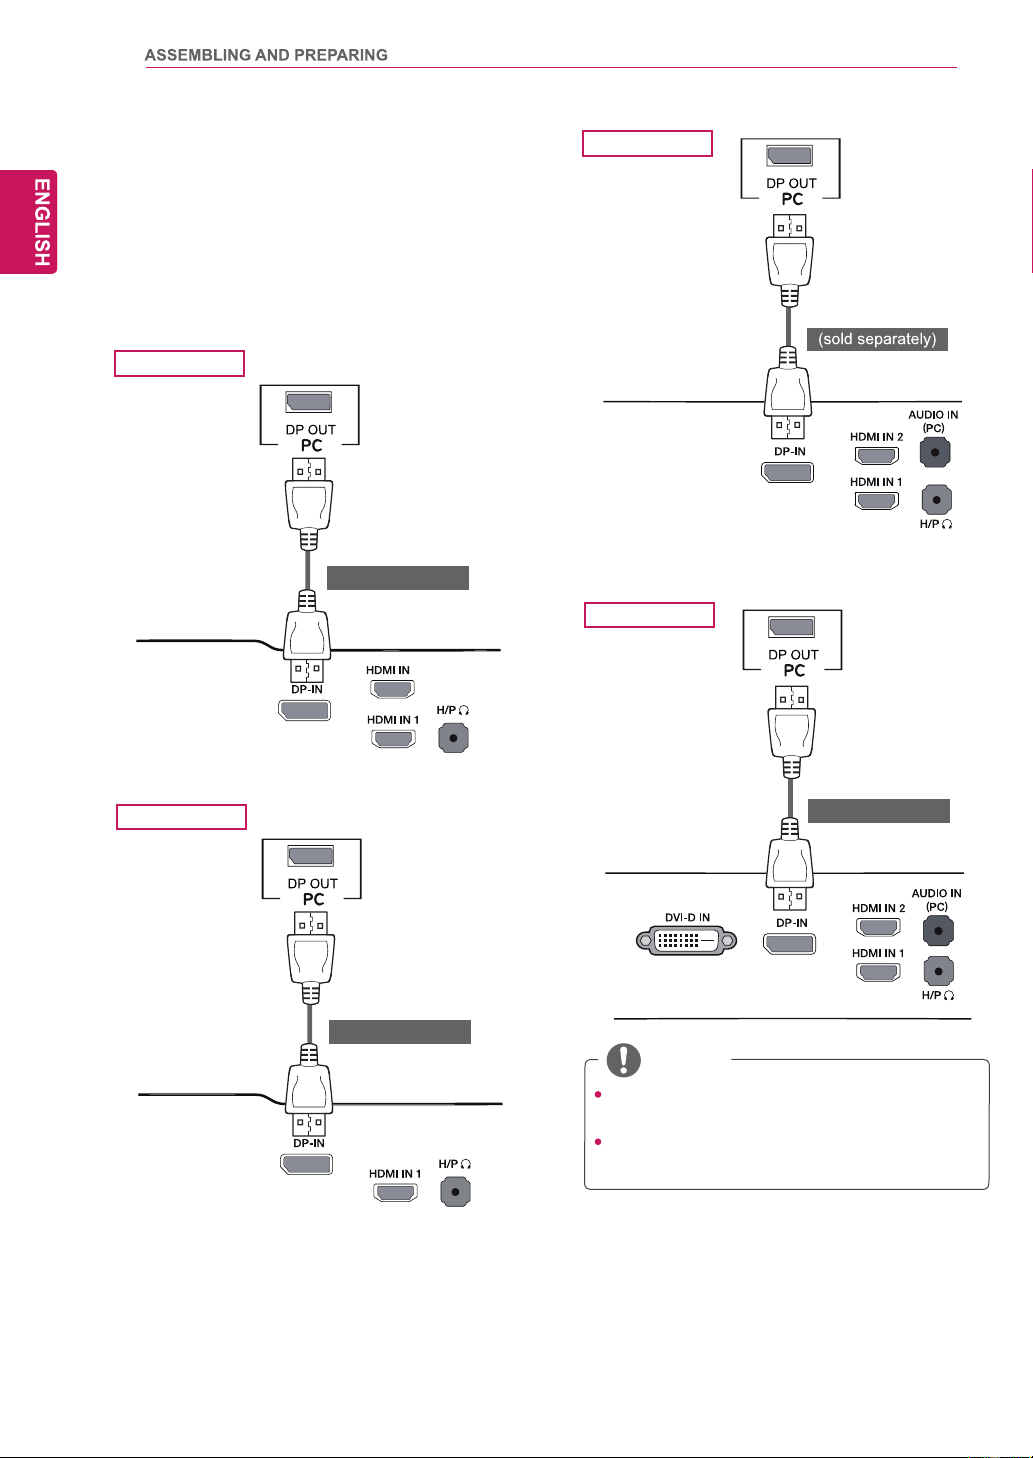
There may be no video or audio output de-
pending on the DP version of the PC.
The DisplayPort cable may not be available
in some areas.
DisplayPort connection
T
ransmits the digital video and audio signals from
your PC to the monitor
. Connect your PC to the
monitor using the display port cable as illustrated
below
.
Press the menu button and then select the input
option from the input menu.
NOTE
29UM55
29UB55
(sold separately)
(sold separately)
25UM55
(sold separately)
2
25UB55
27
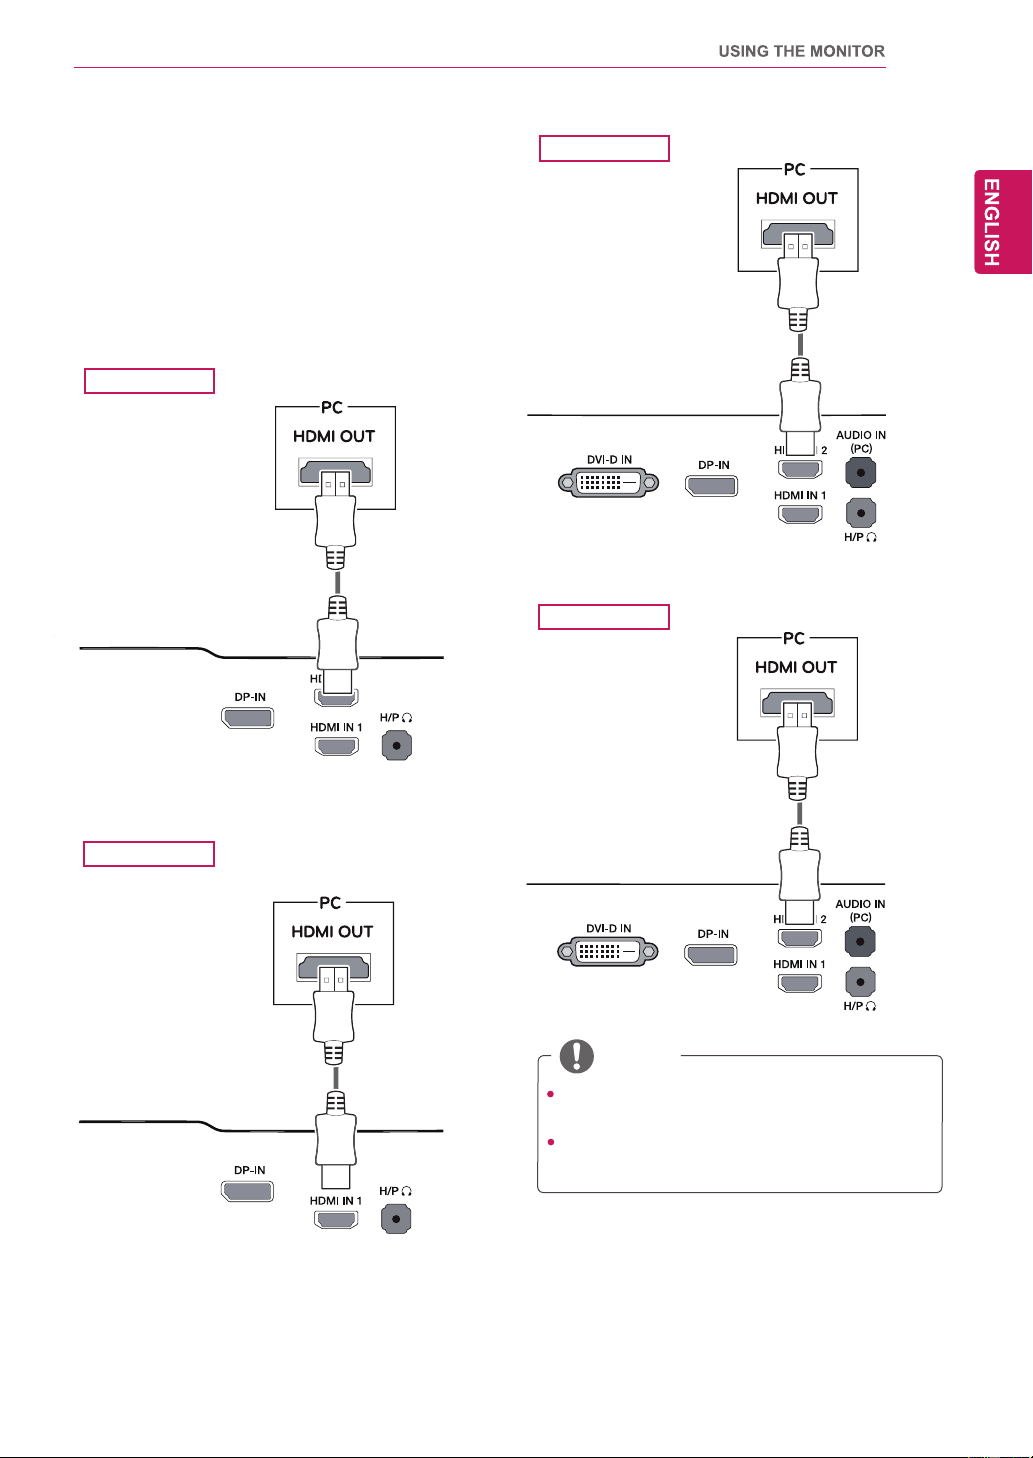
HDMI connection
T
ransmits the digital video and audio signals from
your PC and
A/V devices to the monitor
.Connect
your PC and
A
V device to the monitor with the
HDMI cable as illustrated below.
Press the menu button and then select the input
option from the input menu.
HDMI PC may cause device compatibility
issues.
Using a DVI to HDMI cable may cause com-
patibility issues.
NOTE
29UB55
29UM55
25UM55
2
25UB55
28
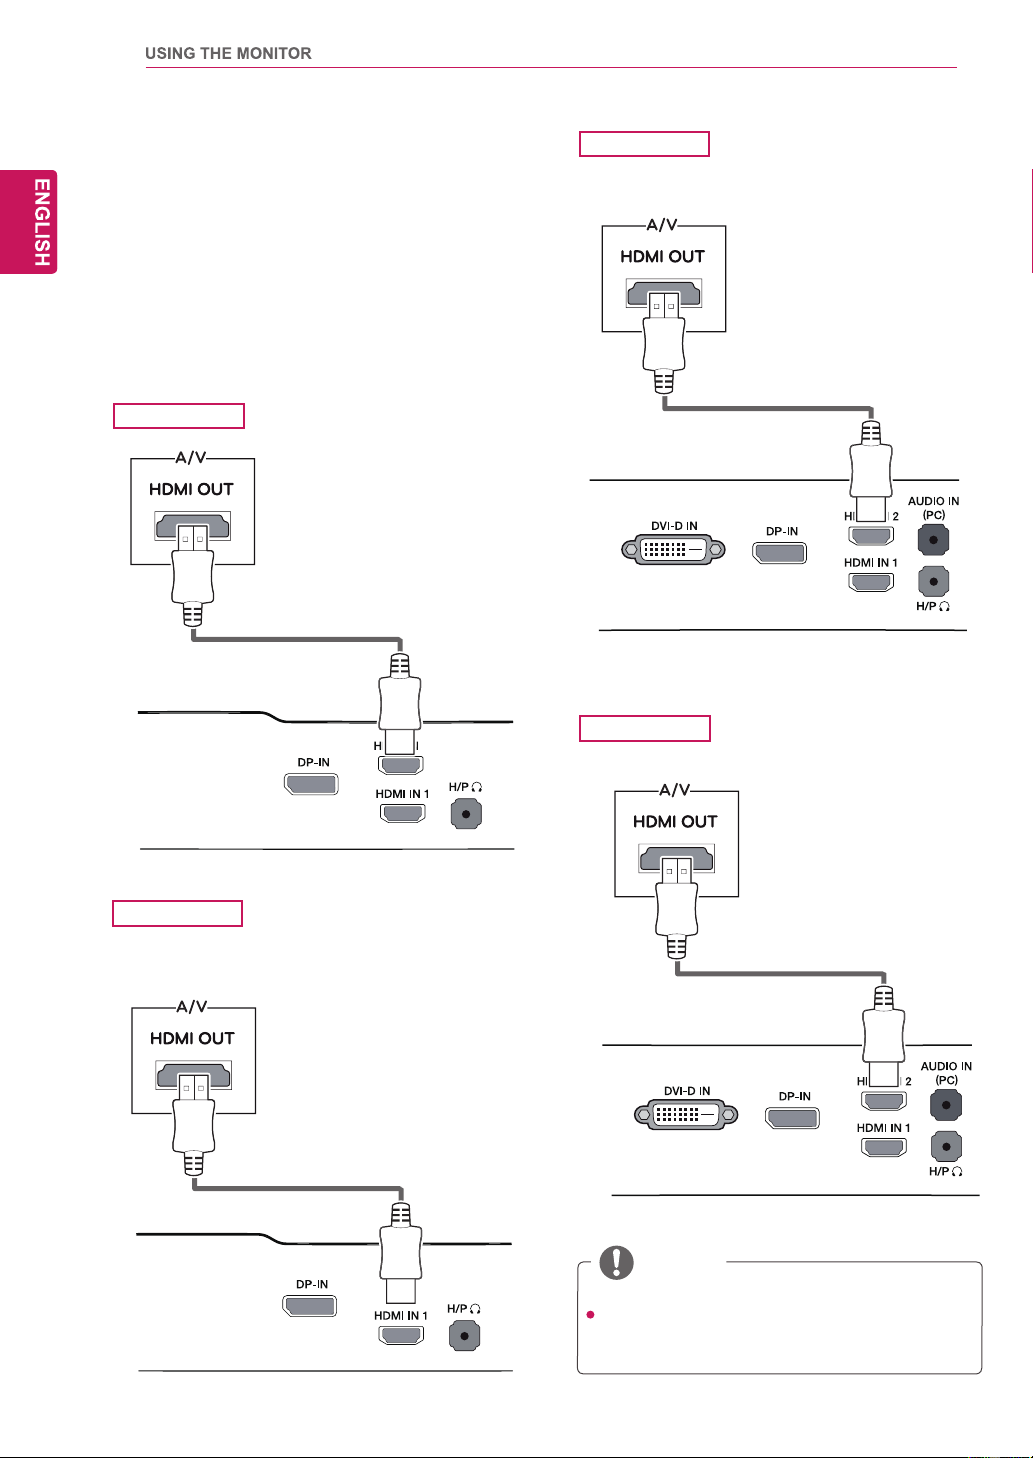
Connecting to AV Devices
HDMI connection
Transmits the digital video and audio signals from
your PC and A/V devices to the monitor. Connect
your PC and AV device to the monitor with the
HDMI cable as illustrated below.
Press the menu button and then select the input
option from the input menu.
Using a DVI to HDMI cable may cause com-
patibility issues.
NOTE
29UM55
25UB55
25UM55
2
29UB55
29
29UM55
(sold separately)
29UB55
(sold separately)
25UM55
(sold separately)
25UB55
(sold separately)
30
25UM55
29UB55
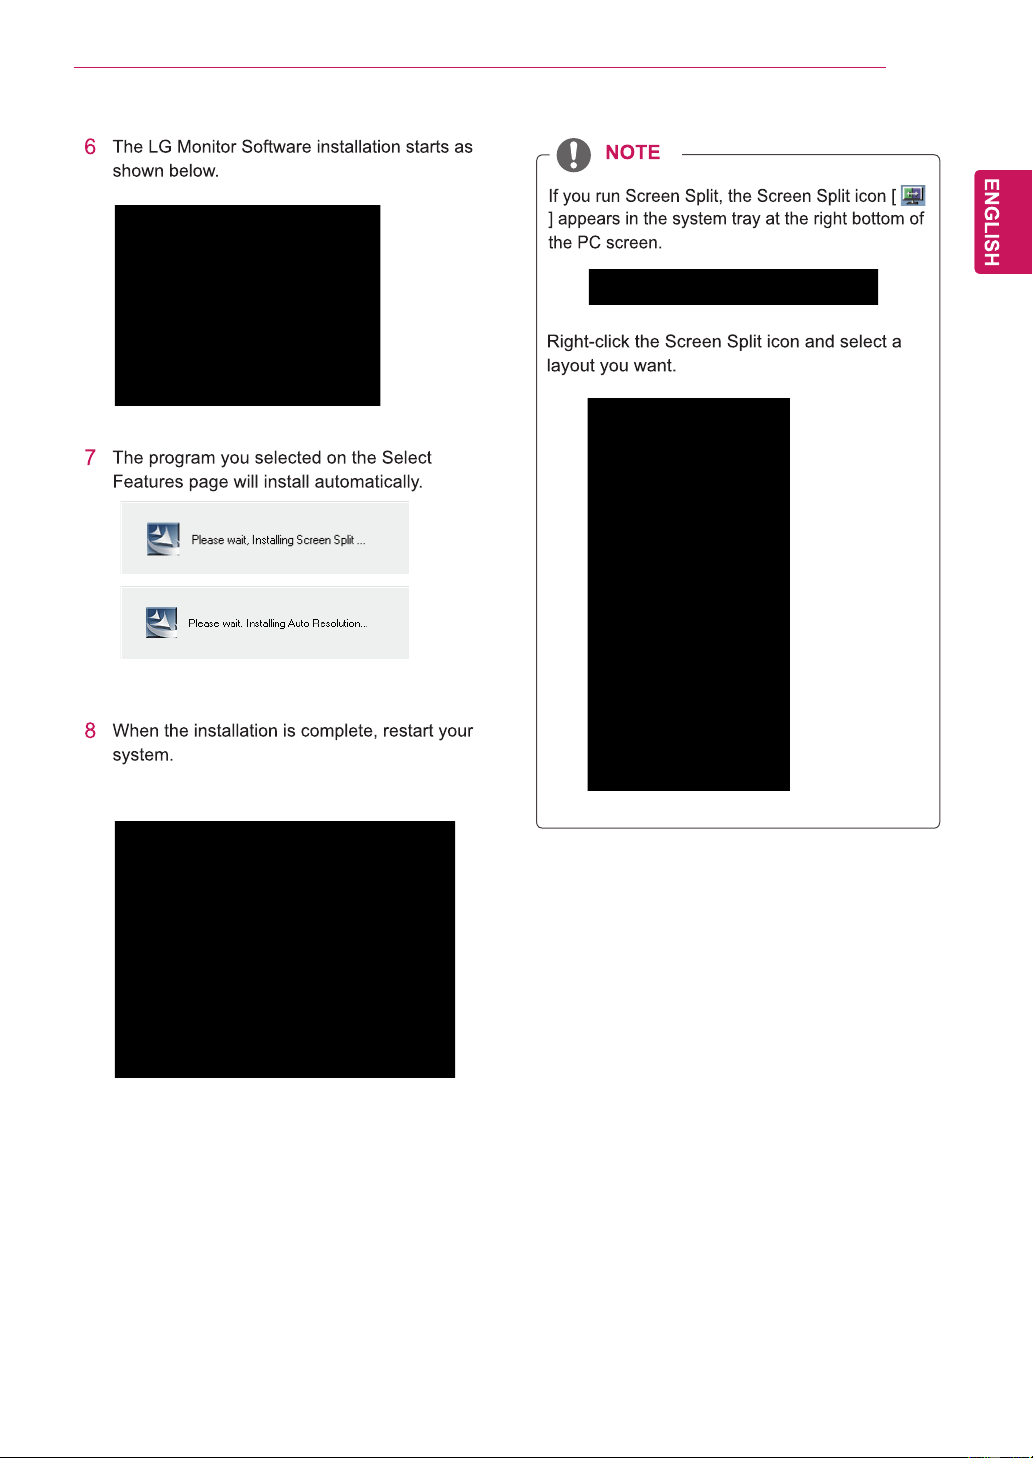
,167$//,1*/*0RQLWRU6RIWZDUH
31
,167$//,1*/*0RQLWRU6RIWZDUH
32
33
34
35
HDMI1
36
R
R G G B B
C C M M Y
Y
37
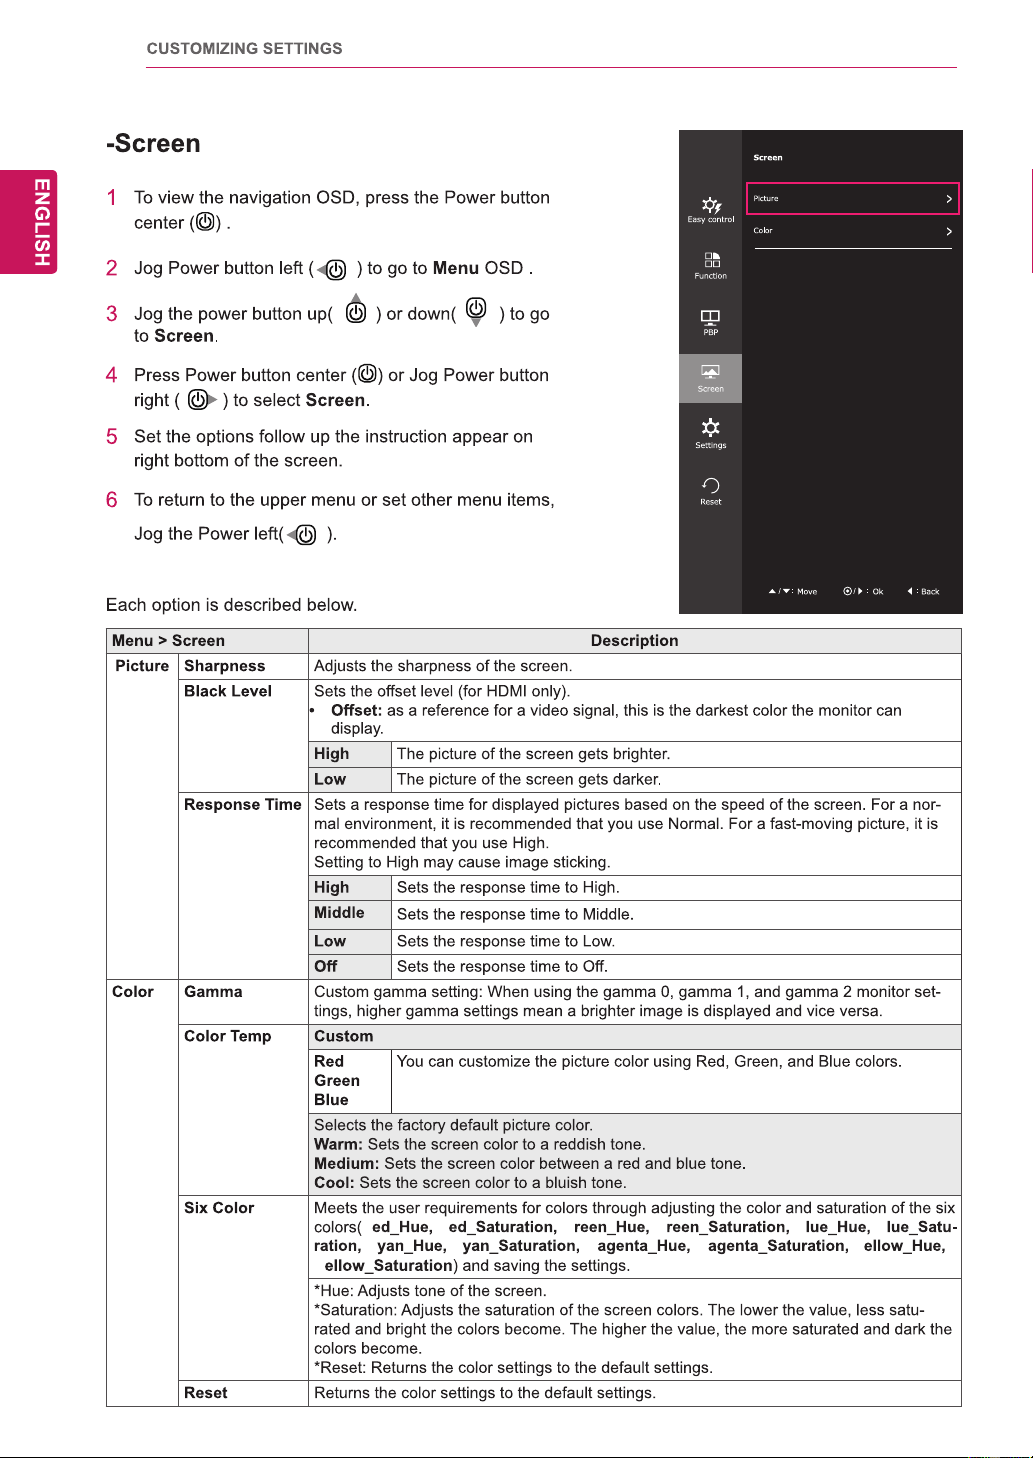
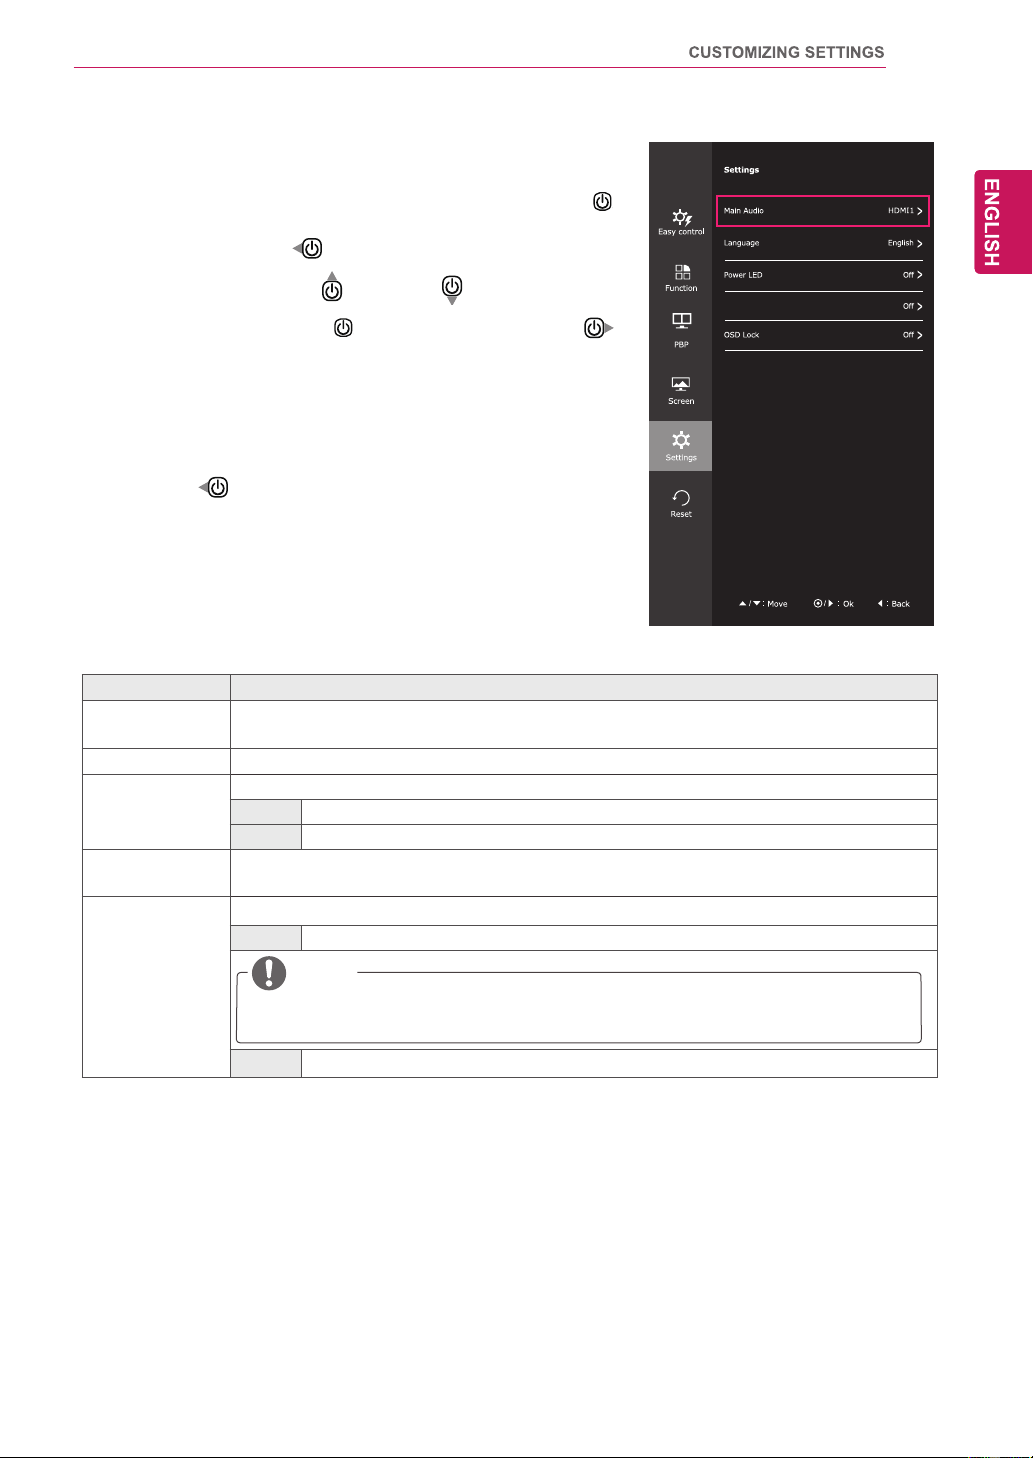
-Settings
1
) .
2
Jog Power button left ( ) to go to Menu OSD .
3
Jog the power button up( ) or down( ) to go to Settings.
4
Press Power button center ( ) or Jog Power button right (
)
to select Settings.
5
Set the options follow up the instruction appear on right bottom of
the screen.
6
To return to the upper menu or set other menu items, Jog the
Power left(
).
Each option is described below.
Menu > Settings Description
Main Audio Main audio have three options.HDMI1, HDMI2, DisplayPort.(29UM55)
Main audio have four options.HDMI1, HDMI2, DisplayPort, Audio-In.(29UB55)
Language Sets
The monitor will automatically switch to standby mode after a certain period.
the menu screen to the desired language.
Power LED
Automatic
Standby
Turns the power indicator on the front side of the monitor on/off.
On The power indicator is automatically turned on.
Off The power indicator is turned off.
OSD Lock Prevents incorrect key input.
On Key input is disabled.
NOTE
All functions except for the OSD Lock mode and the Exit button for Brightness, Contrast,
Volume, Input, and Settings are disabled.
Off Key input is enabled.
Automatic Standby
To view the navigation OSD, press the Power button center(

38
39
40
41
42
25UM55
1.6 A
43
25UB55
1.6 A
44
70.3 cm x 41.4 cm x 21.3 cm
70.3 cm x 32.8 cm x 6.4 cm
5
29UM55
ADS-45SN-19-3 19040G type, SHENZHEN HONOR ELECTRONIC CO.,LTD
Or LCAP21B, type, LIEN CHANG ELECTRONIC ENTERPRISE production.
Output: 19 V 2.1 A
2.0 A
45
29UB55
ADS-45SN-19-3 19040G type, SHENZHEN HONOR ELECTRONIC CO.,LTD
Or LCAP21B, type, LIEN CHANG ELECTRONIC ENTERPRISE production.
Output: 19 V 2.1 A
2.0 A
6.5 kg
70.3 cm x 37.7 cm x 25.9 cm
70.3 cm x 32.8 cm x 4.3 cm
46
47

Declaration of Conformity
Trade Name: LG
Model : 25UM55D, 25UB55D
29UM55D, 29UB55D
Responsible Party: LG Electronics Inc.
Address : 1000 Sylvan Ave. Englewood Cliffs
NJ 07632 U.S.A
TEL: 201-266-2534
*above information is only for USA FCC Regulatory