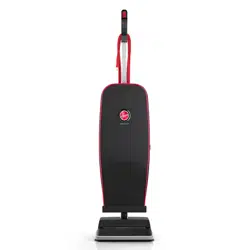
USER MANUAL Upright Vacuum
What’s in the Box?
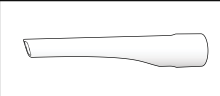
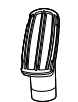
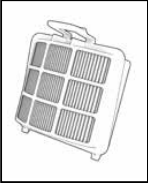
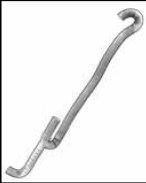
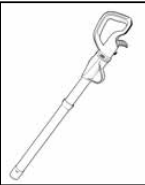
Available Tools and Accessories
CAUTION: Not to be used for grooming a pet.
- Crevice Tool: Great for cleaning in tight spaces and hard-to-reach corners.
- Dusting Brush: Delicate bristles that gently clean fine dust.
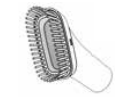
- Pet Upholstery Tool: Use Upholstery Tool to clean upholstered furniture and carpeted stairs.
- Hose Clip: Attaches to vacuum keeping hose in place. (Varies by Model)

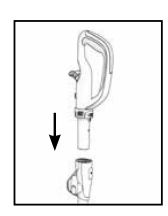
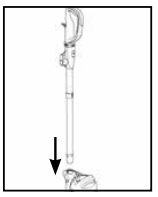
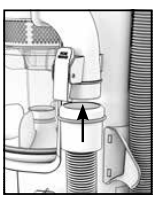
Assembly
WARNING: Fully Assemble Before Operating
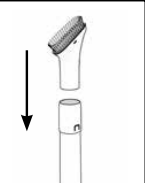
- Insert handle into wand until it clicks in place.
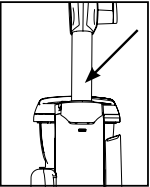
- Insert wand into the spine until it clicks in place.
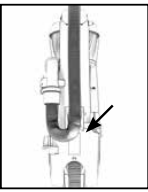
- Insert hose into canister until it clicks in place.
- Place hose clip on the back of the vacuum and slide down to lock.
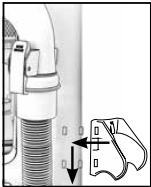
- Place hose on hose clip
- Place tools onboard. Note: Nest crevice tool inside dusting brush in order to store all tools onboard.
Tip: Make sure all pieces click into place.
Tip: Wrap cord around hooks for convenient storage. Attach the plug end to the cord.
Tip: To unwrap cord quickly, rotate cord hook 180 degrees
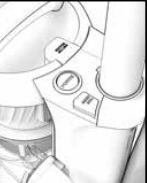
User Controls
- Power the unit ON/OFF.*
- Brush Roll ON/OFF.* ON: Carpets OFF: Hard Floors
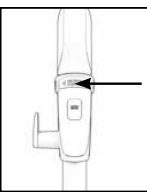
- Suction Control Valve* If unit is difficult to push, twist open the Suction Control Valve on the handle.
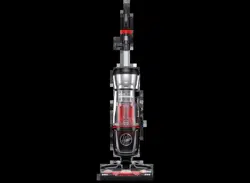
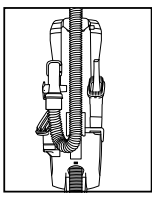
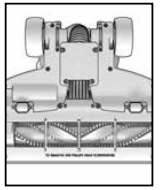
Getting to Know Your HOOVER® MAXLIFE Pro Pet Swivel
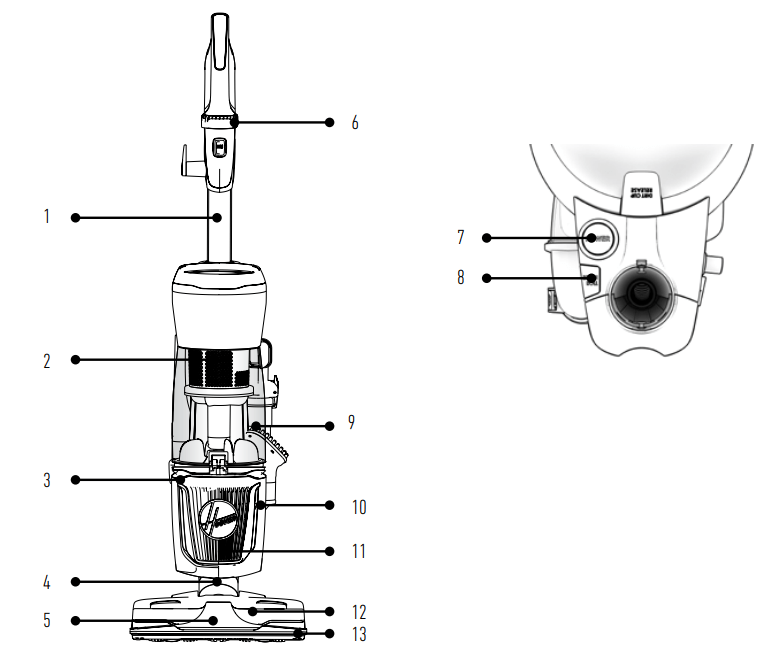
1. Quick Release Cleaning Wand and Hose
2. Multi-Cyclonic Technology
3. Pre-Motor Filter Assembly (AH44010)
4. Swivel Steering
5. WindTunnel® Technology
6. Suction Control Valve
7. Power ON/OFF
8. Multi-Floor Brush Roll ON/OFF
9. XL Capacity Dirt Cup
10. Sealed Allergen System
11. Odor Absorbing Filter with HEPA Media (440012453)
12. Advanced Action™ Brush Roll
13. ScatterGuard™ Technology with Hard Floor Wiper
Using Your HOOVER® MAXLIFE Pro Pet Swivel
CAUTION: Not to be used for grooming a pet.
Upright Mode
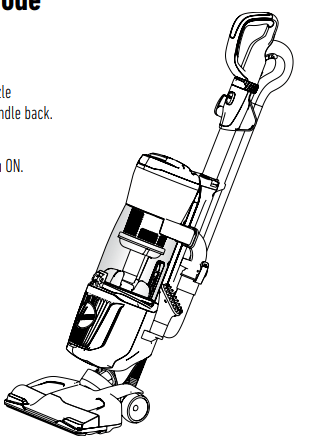
- Step on the nozzle and pull the handle back.
- Turn the vacuum ON.
Above Floor Mode
CAUTION: Use extra care when cleaning on stairs. To avoid personal injury or damage, and to prevent the cleaner from falling, always place cleaner at the bottom of the stairs or on the floor. Do not place cleaner on stairs or furniture, as it may result in injury or damage. When using tools, always ensure handle is in the upright position.
- Make sure the vacuum is in the upright position.
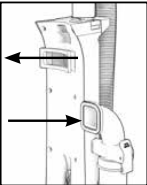
- Press the wand or handle release and pull the wand or handle out of the vacuum.
- Attach the cleaning accessory to the end of the wand or handle.
- Turn the vacuum ON.
Maintenance
This product contains no servicable parts.
If appliance is not working as it should, has been dropped, damaged, left outdoors, or dropped into water, call customer service prior to continuing use. Cord Storage: Wrap cord around hooks for convenient storage. Attach the plug end to the cord.
NOTICE: A Thermal Protector has been designed into your cleaner to protect it from overheating. When the Thermal Protector activates, the cleaner will stop running. If this happens proceed as follows:
- Turn cleaner OFF and unplug it.
- Empty the dirt cup.
- Inspect the nozzle inlet, hose connector, hose, dirt cup inlet, cyclonic filter rinsable filter and exhaust filter for any obstructions. Clear obstructions if present.
- When cleaner is de-energized and motor cools for 30 minutes, the thermal protector will deactivate and cleaning may continue. If the thermal protector continues to activate after following the above steps, your cleaner needs servicing
WARNING: To reduce the risk of personal injury, unplug before cleaning or servicing.
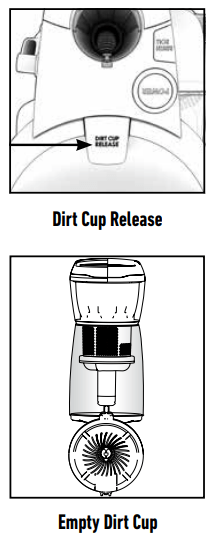
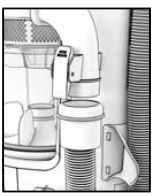
Emptying the Dirt Cup
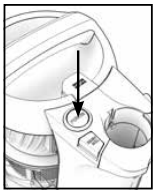
- Remove the dirt cup by pressing the dirt cup release button.
- Hold the dirt cup over your trash can and press the dirt cup trap door release to empty the dirt cup.
TIP: Empty the dirt cup after every use to maintain optimal performance.
Cleaning the Filters
Pre-Motor Filter
WARNING: To reduce the risk of personal injury, unplug before cleaning or servicing.
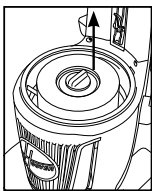
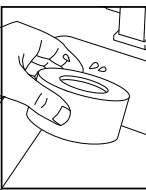
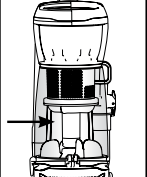
1. Remove the dirt cup to locate the filter.
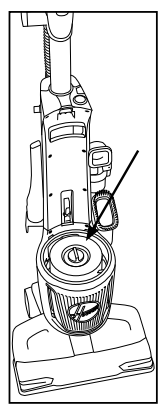
2. Use the PULL tab to remove the filter.
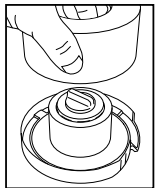
3. Separate the foam filter from the filter frame.
4. Rinse foam filter and filter frame under running water until all debris is clear.
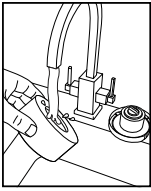
5. Gently squeeze filter to remove excess moisture.
6. Let foam filter and frame air dry separately for at least 24 hours prior to reassembling and reinstalling back into the vacuum to ensure the filters dry completely.
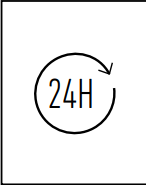
TIP: Replace filters when heavily discolored. Set filter frame on its side when drying to allow excess moisture to drain off.
Exhaust Filter
WARNING: To reduce the risk of personal injury, unplug before cleaning or servicing
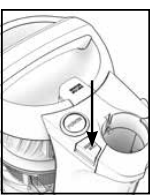
1. Remove exhaust cover by releasing bottom latch.
2. Locate exhaust filter.

3. Pull down on tab to remove filter.
4. Tap the filter on the side of a trash can to remove excess dirt and replace filter and filter cover.
TIP: DO NOT RINSE THE EXHAUST FILTER. Replace filters when heavily discolored. Do not use your vacuum without all of the filters in place.
Cleaning & Maintaining the Brush Roll
CAUTION: To reduce the risk of injury from moving parts, unplug before servicing
LUBRICATION: The motor and brush roll are equipped with bearings which contain sufficient lubrication for their lifetime. The addition of lubrication could cause damage. Do not add lubricant to motor or brush roll.
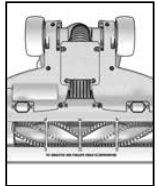
1. To access the brush roll, unscrew the nozzle guard from the nozzle.
2. Remove the brush roll by pulling it up and out from the vacuum belt.
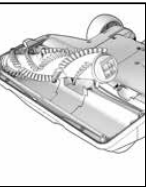
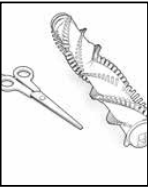
3. Remove any hair or blockages.
4. Replace brush roll and nozzle guard. Secure with screws.
TIP: Rotate brush roll manually to ensure the belt is properly installed. Vacuum is equipped with an automatic brush roll shutoff in the event of overload or jam. Check for obstructions in the brush roll area and remove any obstructions. When obstructions are cleared, resume cleaning as normal.
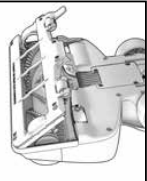
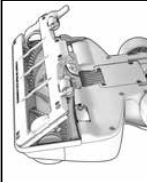
Removing System Clogs
WARNING: To reduce the risk of personal injury, unplug before cleaning or servicing
1. Nozzle Inlet
2. Hose Connector
3. Dirt Cup Inlet
4. Cyclonic Separator
5. Pre-Motor Filter

6. Exhaust Filter
7. Hose
8. Wand
Troubleshooting
WARNING: To reduce the risk of personal injury, unplug before cleaning or servicing
This product contains no servicable parts.
If appliance is not working as it should, has been dropped, damaged, left outdoors, or dropped into water, call customer service prior to continuing use.
1. My vacuum will not turn ON
Possible Solution
- Always be sure to plug it in firmly.
- The Thermal Protector may have been activated - unplug your vacuum and let cool for 30 minutes. If this does not work, there may be no voltage in the wall plug.
- Check the fuse or breaker in your home. If there is a blown fuse or tripped breaker, replace the fuse in your home or reset the breaker.
2. My vacuum is hard to push
Possible Solution
- Open the Suction Control Valve near the handle by twisting the valve clockwise.
3. My vacuum is losing suction
Possible Solution
- Be sure to empty the dirt cup if it is full. Check that the dirt cup is properly assembled and installed onto the appliance.
- The vacuum has a suction control valve located below the handle. Adjust suction by closing valve to increase suction or opening valve to decrease suction.
- You may have a clogged filter. Refer to the Maintenance section in this manual for directions on removing clogs.
- Your filter may be dirty. Pre-motor filters should be rinsed every 4-6 uses. Refer to the Maintenance section for directions on how to clean filters.
- If problem persists, you may have a clog in the system. Refer to the Maintenance section on how to remove a clog in your system.
4. My brush roll is not spinning
Possible Solution
- Unplug and remove any hair or other blockages around the brush roll.
- Clean filters. Refer to the Maintenance section for directions on how to clean filters.
- Check for clogs in the system. Refer to the Maintenance section for directions on how to remove clogs.
- Resume normal operation.
IMPORTANT SAFETY INSTRUCTIONS
READ ALL SAFETY WARNINGS AND INSTRUCTIONS BEFORE USING THIS PRODUCT.
WARNING: When using an electrical product, basic precautions should always be followed to avoid electric shock, fire, and/or serious injury, including the following:
- Fully assemble before operating.
- Operate cleaner only at voltage specified on data plate on back of cleaner.
- Do not leave product when plugged in. Unplug from outlet when not in use and before servicing.
- Do not use outdoors or on wet surfaces.
- Do not allow to be used as a toy. Not intended for use by children age 12 and under. Close supervision is necessary when used by or near children. To avoid injury or damage, keep children away from product, and do not allow children to place fingers or other objects into any openings.
- Use only as described in this user’s manual. Use only HOOVER® recommended attachments. (See page 8 for attachment and accessory compatibility)
- Do not use product with damaged cord or plug. If product is not working as it should, has been dropped, damaged, left outdoors, or dropped into water, call customer service prior to continuing use.
- Do not pull or carry by cord, use cord as a handle, close a door on cord, or pull cord around sharp edges or corners. Do not run appliance over cord. Keep cord away from heated surfaces.
- Do not unplug by pulling on cord. To unplug, grasp the plug, not the cord.
- Do not handle plug or appliance with wet hands.
- Do not put any object into openings. Do not use with any opening blocked; keep free of dust, lint, hair, and anything that may reduce air flow.
- Keep hair, loose clothing, fingers, and all parts of body away from openings and moving parts. Brush roll continues to rotate when in the upright position.
- Turn off all controls before unplugging.
- Use extra care when cleaning on stairs. To avoid personal injury or damage, and to prevent the cleaner from falling, always place cleaner at bottom of stairs or on floor. Do not place cleaner on stairs or furniture, as it may result in injury or damage.
- Do not use to pick up flammable or combustible liquids, such as gasoline, or fine wood sandings, or use in areas where they may be present.
- Unplug before connecting Turbo Tool.
- Do not pick up anything that is burning or smoking, such as cigarettes, matches, or hot ashes.
- Do not use without separator, filters, or dirt cup in place.
CAUTION: TO REDUCE THE RISK OF DAMAGE:
- Avoid picking up hard, sharp objects with this product, as they may cause damage.
- Store appropriately indoors in a dry place. Do not expose machine to freezing temperatures.
- Brush roll continues to turn while product is turned on and handle is in upright position. To avoid damage to carpet, rugs, and flooring, avoid tipping cleaner or setting it on furniture, fringed area rugs, or carpeted stairs during tool use.
- Do not use sharp objects to clean out hose as they can cause damage.
- With brush roll on, do not allow cleaner to sit in one location for an extended period of time, as damage to floor can result.
WARNING: TO REDUCE THE RISK OF ELECTRIC SHOCK, THIS APPLIANCE HAS A POLARIZED PLUG (ONE BLADE IS WIDER THAN THE OTHER). THIS PLUG WILL FIT IN A POLARIZED OUTLET ONLY ONE WAY. IF THE PLUG DOES NOT FIT FULLY IN THE OUTLET, REVERSE THE PLUG. IF IT STILL DOES NOT FIT, CONTACT A QUALIFIED ELECTRICIAN TO INSTALL THE PROPER OUTLET. DO NOT CHANGE THE PLUG IN ANY WAY.