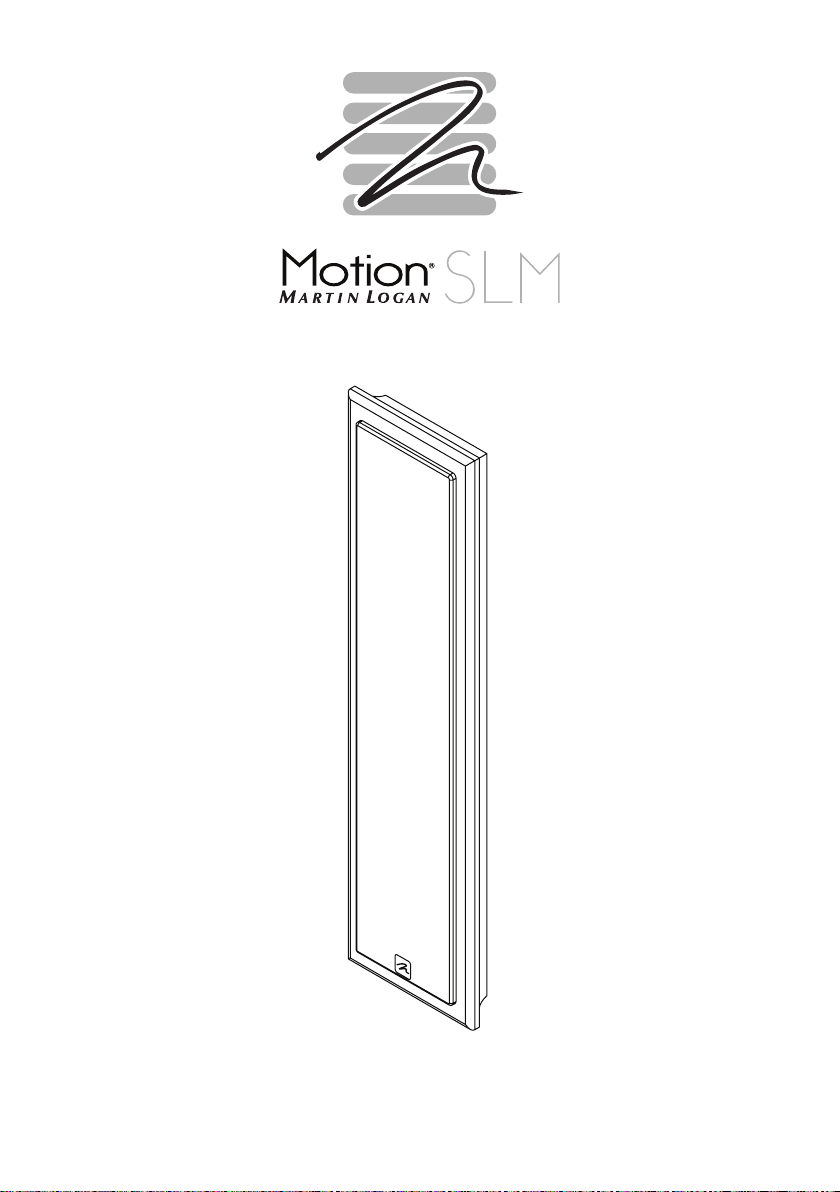
u s e r ’ s m a n u a l
2
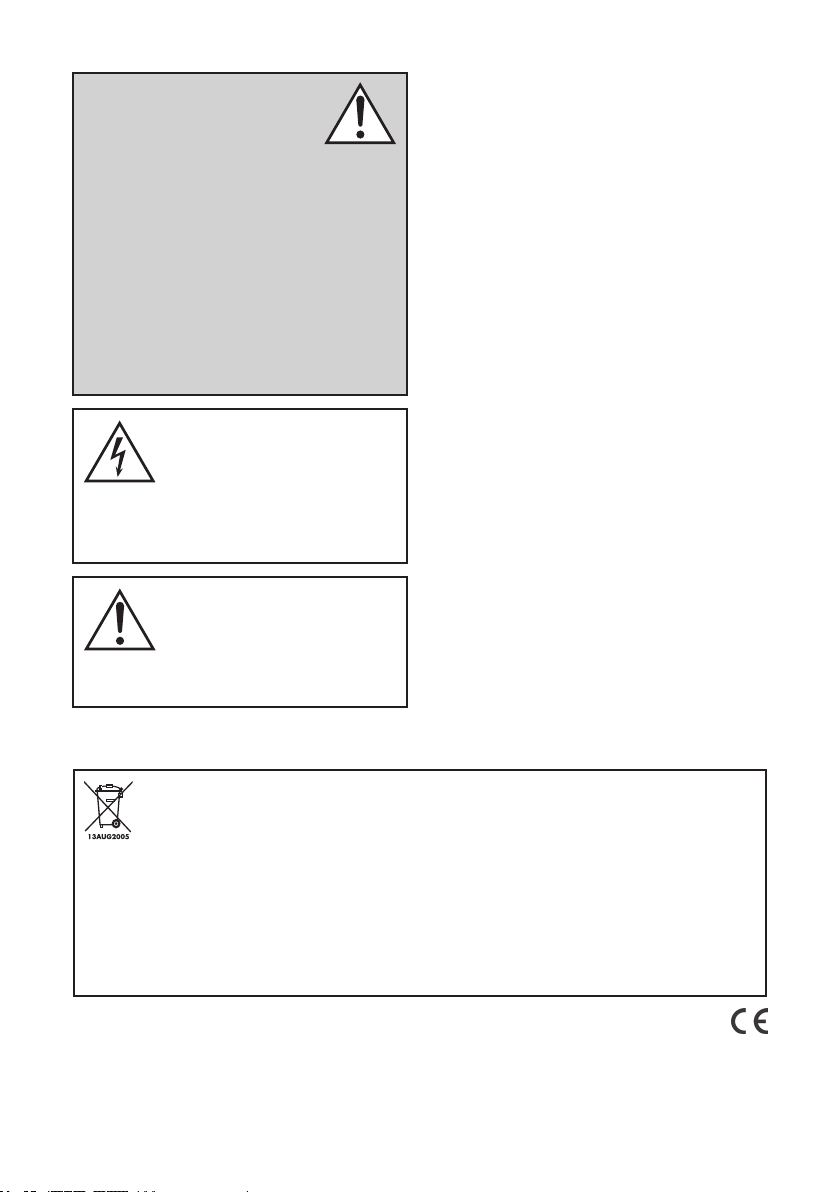
The lightning bolt flash with arrowhead
symbol, within an equilateral triangle,
is intended to alert the user to the pres-
ence of potentially “dangerous voltage” within the
product’s enclosure that may be sufficient to consti-
tute a risk of electric shock.
In accordance with the European Union WEEE
(Waste Electrical and Electronic Equipment)
directive effective August 13, 2005, we
would like to notify you that this product may contain
regulated materials which upon disposal, according to
the WEEE directive, require special reuse and recycling
processing. For this reason Martin Logan has arranged
with our distributors in European Union member nations to
collect and recycle this product at no cost to you.
To find your local distributor please contact the dealer
from whom you purchased this product, email info@
martinlogan.com or visit the distributor locator at www.
martinlogan.com.
Please note, only this product itself falls under the WEEE
directive. When disposing of packaging and other
related shipping materials we encourage you to recycle
these items through the normal channels.
The exclamation point within an equi-
lateral triangle is intended to alert the
user to the presence of important oper-
ating and maintenance (servicing) instructions in the
literature accompanying the appliance.
WARNING!
• Refer servicing to a qualified
technician.
• To prevent fire or shock hazard,
do not expose this module to moisture.
• Turn amplifier off should any abnormal
conditions occur.
• Do not drive speaker beyond its rated power.
• To prevent injury, this apparatus must be
securely attached to the wall in accor-
dance with the installation instructions.
Connection . 4
Installation. 4
Break In . . . . . . . . . . . . . . . . . . . . . . . . . .4
Installing On A Wall . . . . . . . . . . . . . . . . . .4
Installing the Horizontal Stand . . . . . . . . . . .5
Installing the Vertical Stand . . . . . . . . . . . . .5
Removing the Logo Badge . . . . . . . . . . . . . .6
Frequently.Asked.Questions. 6
Troubleshooting . 6
Contacting.Customer.Service . 7
General.Information. 7
Warranty Information . . . . . . . . . . . . . . . . .7
Serial Number . . . . . . . . . . . . . . . . . . . . . .7
Service . . . . . . . . . . . . . . . . . . . . . . . . . .7
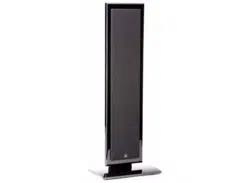
Specifications . 8
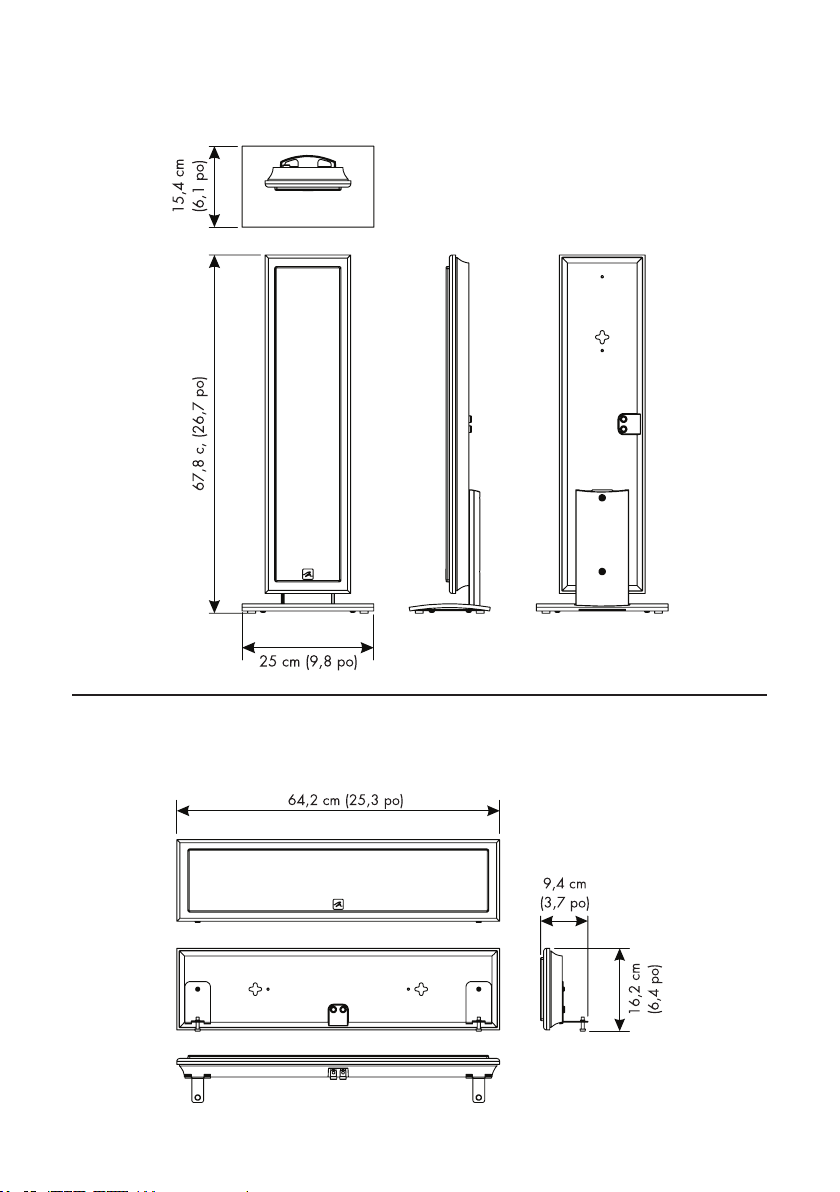
Dimensional.Drawings. 9
With Vertical Stand . . . . . . . . . . . . . . . . . .9
With Horizontal Stand . . . . . . . . . . . . . . . .9
With Wall Bracket . . . . . . . . . . . . . . . . . .10
Serial Number:_____________________________
Record your serial number here for easy reference.
You will need this information when filling out your
warranty registration. The serial number is located
near the binding posts and on the product carton.

3
x1 x4
x2
4
Note:.This speaker is not magnetically shielded
and therefore should not be placed directly beside
or atop a CRT television.
BREAK IN
Allow approximately 72 hours of break-in at 90
dB (moderate listening levels) before any critical
listening.
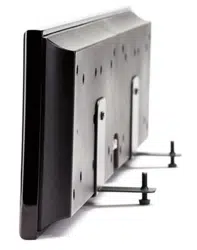
INSTALLING ON A WALL
Note: This speaker is mountable in either a hori-
zontal or vertical orientation.
Note: These instructions assume the mounting
surface is standard wood frame and sheet rock
construction. If you wish to mount to another type
of surface, consult a bonded contractor.
Required.tools.(not.included):
• Ruler
• Level
• Electric drill and 1/4” and 1/8” drill bits
• Phillips screwdriver
Required.hardware.(included):
• (1) Installation template
• (1) Wall bracket
• (2) 1.5-inch Phillips screws
• (2) Sheet rock anchors
• (4) 10mm circular pads
1 Locate mounting location using a level and the
installation template.
2 Mark the pilot hole locations.
3 Drill the pilot holes using a 1/8-inch drill bit. If
a pilot hole DOES NOT hit a stud, widen that
pilot hole using a 1/4-inch drill bit and install
a wall anchor at that location (fig. 3).
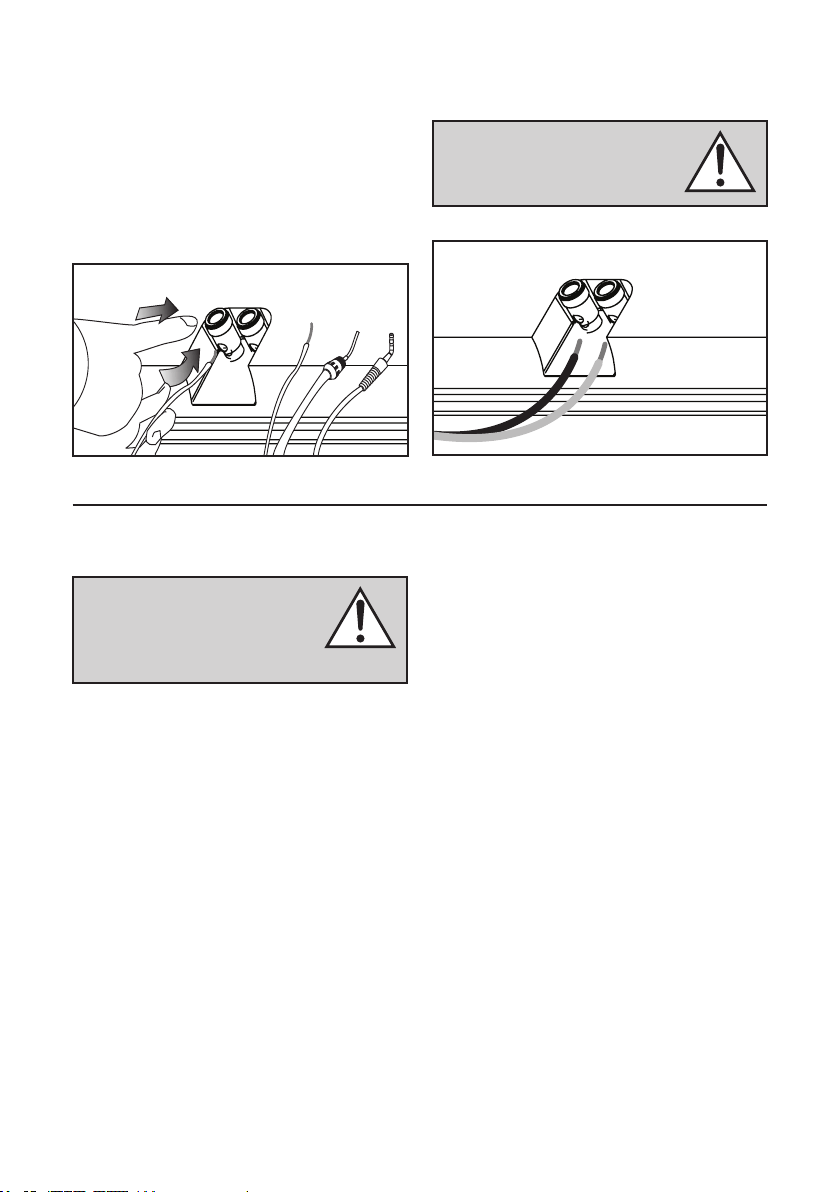
ConneCtion
WARNING! Turn your amplifier
off before making or breaking any
signal connections!
These speakers are designed with easy-to-use push-
style binding posts that accept bare wire or pins
(fig. 2). Assign the same color to the (+) and (–) ter-
minals on both the speaker and the amplifier. Make
certain that all connections are tight.
Fig. 3
installation
WARNING! Installation other
than that described in the body of
this document requires specific
documentation from MartinLogan.
Fig. 2
5
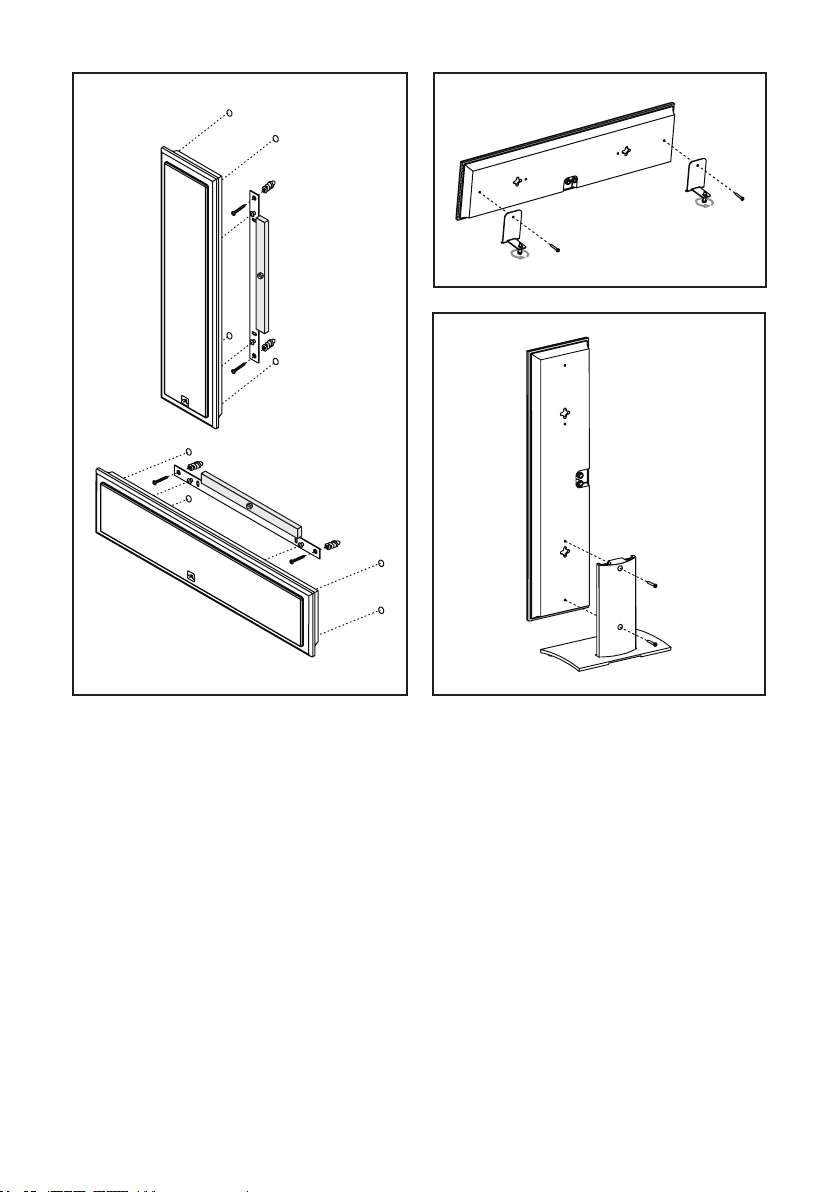
4 Using the 1.5-inch Phillips screws, mount the
wall bracket(s) as shown (fig. 3).
5 Attach the 4 pads to the back of the speaker (fig 3).
6 Hang the speaker, guiding the wall mount bolts
into the keyholes.
INSTALLING THE HORIZONTAL STANDS
Required.tools.(not.included):
• Phillips screwdriver
Required.hardware.(included):
• (2) #8 - 3/4-inch Phillips screws
• (2) Horizontal stands
1 Using a Phillips screwdriver and a #8 x 3/4-
inch screw, attach both horizontal stands to the
back of the speaker (fig. 4).
2 Turn the bolts in the horizontal stands to level
the speaker or to adjust the angle (fig 4).
INSTALLING THE VERTICAL STAND
Required.tools.(not.included):
• Phillips screwdriver
Required.hardware.(included):
• (2) #8 - 3/4-inch Phillips screws
• (1) Vertical stand
Fig. 3 Fig. 4
Fig. 5

6
How do I clean my speakers?
Use a dust free cloth (such as a micro fiber cloth)
or a soft brush to remove dust from your speakers..
Do.not.spray.any.kind.of.cleaning.agent.on.or.in.
close.proximity.to.the.drivers
Could you suggest a list of suitable elec-
tronics and cables ideal for MartinLogan
speakers?
We have no favorites and use electronics and
cables quite interchangeably. We would suggest
listening to a number of brands—and above all
else—trust your ears. Dealers are always the best
source for information when purchasing additional
audio equipment.
Is there likely to be any interaction
between my speakers and the televi-
sion in my A/V system?
Yes. These speakers are not shielded and should
be kept at least 2 feet away from a CRT television.
Will exposure to sunlight affect the life
or performance of my speakers?
We recommend against placing any loudspeaker
in direct sunlight. Ultraviolet (UV) rays from the sun
can cause deterioration of cabinet, speaker cones,
etc. Small exposures to UV will not cause a prob-
lem. Filtering of UV rays through glass will greatly
reduce the negative effects.
Frequently asked questions
No Output
• Check that all system components are turned
on and source material is playing.
• Check speaker wires and connections.
• Check all interconnecting cables.
• If you are unable to resolve your problem,
please contact your dealer or MartinLogan cus-
tomer service (see below).
troubleshooting
1 Using a Phillips screwdriver and two #8 x
3/4-inch screws, attach the vertical stand to
the back of the speaker (fig. 5).
MOVING THE LOGO BADGE
The logo badge is attached magnetically. Using
your fingers, pull it away from the grille cover and
reattach it at the desired position.

7
MartinLogan customer service is available
Monday–Friday between the hours of 8am–5pm
(central time) by calling (785) 749-0133 or by
emailing [email protected].
ContaCting Customer serviCe
WARRANTY INFORMATION
Your speakers are provided with an automatic
Limited 90 Day Warranty coverage. You have
the option, at no additional charge, to receive a
Limited 5 Year Warranty coverage. To obtain the
Limited 5 Year Warranty coverage you need to
complete and return the Certificate of Registration
to MartinLogan within 30 days of purchase. For
your convenience MartinLogan also offers online
warranty registration at www.martinlogan.com.
MartinLogan may not honor warranty service
claims unless we have a completed Warranty
Registration card on file! If you did not receive a
Certificate of Registration with your new speakers
you cannot be assured of having received new
units. If this is the case, please contact your autho-
rized MartinLogan dealer.
SERIAL NUMBER
The serial number is located on back of the speak-
er, directly beneath the binding posts. The serial
number may also be found on the product carton.
SERVICE
Should you use your MartinLogan product in a
country other than the one in which it was originally
purchased, we ask that you note the following:
1 The appointed MartinLogan distributor for any
given country is responsible for warranty servicing
only on units distributed by or through it in that coun-
try in accordance with its applicable warranty.
2 Should a MartinLogan product require ser-
vicing in a country other than the one in which
it was originally purchased, the end user may
seek to have repairs performed by the nearest
MartinLogan distributor, subject to that distribu-
tor’s local servicing policies, but all cost of repairs
(parts, labor, transportation) must be borne by the
owner of the MartinLogan product.
3 If, after owning your speaker for six months, you
relocate to a country other than the one in which
you purchased your speaker, your warranty may be
transferable. Contact MartinLogan for details.
general inFormation

8
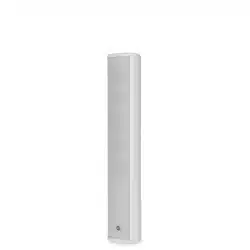
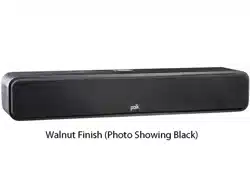
speCiFiCations*
Frequency.Response
Dispersion.
Sensitivity
Impedance
Crossover.Frequency
High.Frequency.Driver.
Low.Frequency.Drivers.
Cabinet.
Components
Recommended.Amplifier.Power
Binding.Post.Inputs
Weight
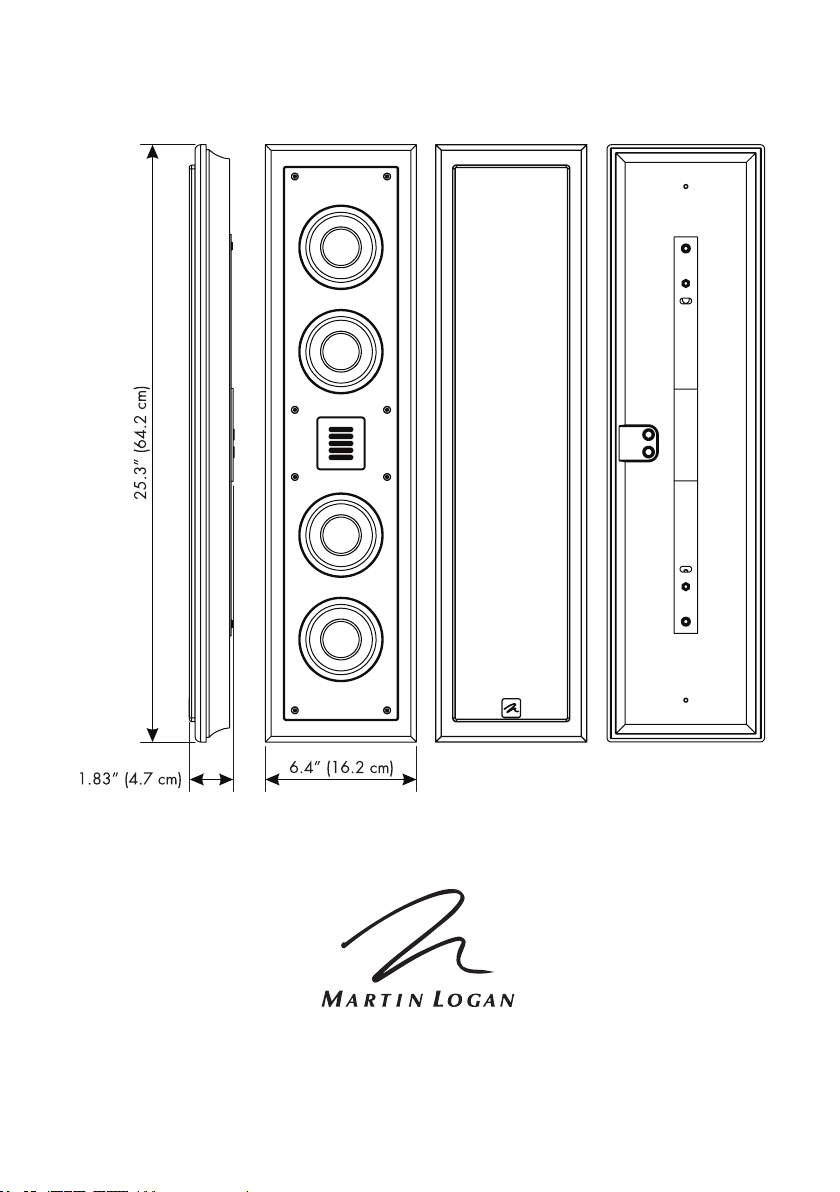
Dimensions.with.wall.bracket.(HxWxD)
MARTINLOGAN.MOTION.SLM
110–22,000 Hz ± 3 dB
80° x 80°
94 dB @ 2.83 volts/ meter
4 Ohms. Compatible with 4, 6 or 8 Ohm rated
amplifiers.
2,600 Hz
1” x 1.4” (2.6cm x 3.6cm) Folded Motion
Transducer with 5.25” x 1.75” (13.3cm x 4.4cm)
diaphragm.
Two 4” (10.2cm) paper cone. Two 4” (10.2cm)
paper cone passive radiators.
Sealed
Custom air core coil inductors. Polyester film
capacitors in series and low DF electrolytic
capacitors in parallel. Overall system thermal/cur-
rent protection.
20–140 watts
Push style
6.5 lbs. (3 kg)
25.3” x 6.4” x 1.83” (64.2cm x 16.2cm x 4.75cm)
*Specifications are subject to change without notice.
9
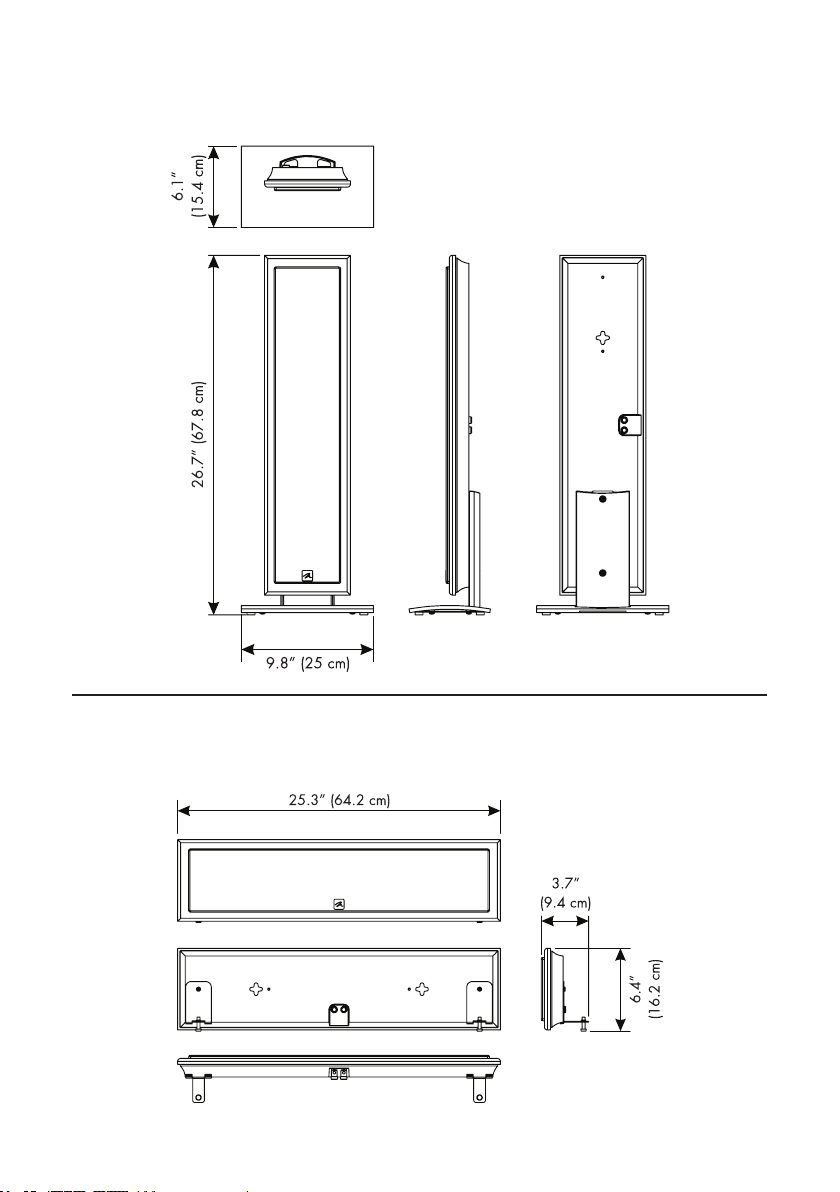
dimensional drawings
MARTINLOGAN MOTION SLM: WITH VERTICAL STAND
dimensional drawings
MARTINLOGAN MOTION SLM: WITH HORIZONTAL STAND
L a w r e n c e , K a n s a s , U S A t e l 7 8 5 . 7 4 9 . 0 1 3 3 f a x 7 8 5 . 7 4 9 . 5 3 2 0 w w w . m a r t i n l o g a n . c o m
Rev. #082511©2011 MartinLogan Ltd. All rights reserved.
®
P/N: 9500078
dimensional drawings
MARTINLOGAN MOTION SLM: WITH WALL BRACKET

g u i d e d e l ’ u t i l i s a t e u r
12
Raccordement. 14
Installation. 14
Rodage . . . . . . . . . . . . . . . . . . . . . . . . .14
Installation Sur Un Mur . . . . . . . . . . . . . . .14
Installation des Supports Horizontaux . . . . . .15
Installation des Supports Verticaux . . . . . . . .16
Enlever Le Logo . . . . . . . . . . . . . . . . . . . .16
Foire.Aux.Questions. 16
Dépannage............................16
Communiquer.Avec.Le.Service.à.La.Clientèle. 17
Renseignements.Généraux. 17
Renseignements Sur La Garantie . . . . . . . . .17
Numéro de Série . . . . . . . . . . . . . . . . . . .17
Service . . . . . . . . . . . . . . . . . . . . . . . . .17
Spécifications. 18
Plans.Dimensionnels . 19
Avec Support Verticaux . . . . . . . . . . . . . . .19
Avec Support Hoizontaux . . . . . . . . . . . . .19
Avecn Support Mural . . . . . . . . . . . . . . . .20
Numéro de Série :__________________________
Veuillez inscrire votre numéro de série ici pour pou-
voir vous y référer facilement. Vous aurez besoin
de ce renseignement lorsque vous remplirez votre
enregistrement à la garantie. Le numéro de série
est situé près des bornes de raccordement et sur
l’emballage du produit.
Le symbole de l’éclair avec une pointe en
forme de flèche, dans un triangle équi-
latéral, avertit l’utilisateur de la présence
d’une « tension dangereuse » potentielle près du produit
qui peut être suffisante pour constituer un risque de
décharge électrique.
En vertu de la directive WEEE de l’Union euro-
péenne (directive sur les déchets électriques
et électroniques) entrée en vigueur le 13 août
2005, nous vous avisons que ce produit pourrait contenir
des matériaux réglementés dont l’élimination doit faire l’objet
de procédures de réutilisation et de recyclage particulières.
À cette fin, MartinLogan a demandé à ses distributeurs dans
les pays membres de l’Union européenne de reprendre et
de recycler ce produit gratuitement.
Pour trouver le distributeur le plus près, communiquez avec le
revendeur du produit, envoyez un courriel à info@martinlo-
gan.com ou consultez le site Web martinlogan.com.
Notez que seul le produit est régi par la directive
WEEE. Nous vous encourageons à recycler les matéri-
aux d’emballage et autres matériaux d’expédition selon
les procédures normales.
Le point d’exclamation dans un trian-
gle équilatéral avertit l’utilisateur de la
présence de directives importantes en
matière de fonctionnement et d’entretien (service)
dans les documents qui accompagnent l’appareil.
AVERTISSEMENT!
• Pour les réparations, faites appel à
un technicien compétent.
• Pour éviter les risques d’incendie
ou de décharge électrique, n’exposez pas ce
module aux vapeurs d’eau ni à l’humidité.
• Veuillez éteindre l’amplificateur en cas de
conditions anormales.
• Ne poussez pas l’enceinte au-delà de sa puis-
sance nominale.
• Pour éviter les blessures, cet appareil doit
être bien fixé au mur, conformément aux
instructions d’installation.

13
x1 x4
x2
14
Remarque.: cette enceinte n’est pas dotée d’une
protection magnétique; par conséquent, vous ne
devez pas la placer directement à côté ou au-
dessus d’une télévision dotée d’un écran à tube
cathodique (CRT).
RODAGE
Un rodage d’environ 72 heures à 90 dB (niveaux
d’écoute moyens) est nécessaire avant toute écoute
critique.
INSTALLATION SUR UN MUR
Remarque.: cette enceinte peut être montée en
position horizontale ou verticale.
Remarque.:.ces instructions supposent que la sur-
face de montage est un cadre en bois standard
et une construction en gyproc. Si vous souhaitez
utiliser une autre surface de montage, consultez un
entrepreneur cautionné.
Outils.requis.(non.compris).:
• Règle
• Niveau
• Perceuse électrique et trépans de 1/4 po et
1/8 po
• Tournevis Phillips
Matériel.nécessaire.(compris).:.
• (1) gabarit d’installation
• (1) support muraux
• (2) vis à tôle Phillips 1,5 po
• (2) ancrages à gyproc
• (4) Coussinets circulaires de 10 mm
1 Déterminez l’emplacement de montage à
l’aide d’un niveau et du gabarit d’installation.
2 Marquez l’emplacement des trous de guidage.
3 Percez les trous de guidage à l’aide d’un trépan
installation
raCCordement
AVERTISSEMENT! Éteignez
l’amplificateur avant de faire des
raccordements ou d’interrompre
tout raccordement de signal!
Ces enceintes sont dotées de bornes de raccor-
dement facile à utiliser de style bouton-poussoir
qui acceptent les fils nus ou les broches (fig. 1).
Attribuez la même couleur aux bornes (+) et (-) sur
l’enceinte et l’amplificateur. Assurez-vous que tous
les raccords sont bien faits.
AVERTISSEMENT! Une installa-
tion autre que celle décrite dans le
présent document exige des docu-
ments particuliers de MartinLogan.
Fig. 3
Fig. 2

15
de 1/8 po. Si le trou de guidage NE TOUCHE
PAS un montant, élargissez le trou de guidage à
l’aide d’un trépan de 1/4 po, puis installez un
ancrage mural à cet endroit (fig. 3).
4 À l’aide de vis Phillips de 1,5 po, montez le
ou les supports muraux, tel qu’indiqué (fig. 3).
5 Fixez les 4 coussinets à l’arrière de l’enceinte
(fig. 3)
6 Suspendez l’enceinte, en guidant le boulon de
montage mural dans le trou de serrure.
INSTALLATION DES SUPPORTS HORIZONTAUX
Outils.requis.(non.compris).:
• Tournevis Phillips
Matériel.nécessaire.(compris).:.
• #8 – vis Phillips de 3/4 po
• Supports horizontaux
1 Using a Phillips screwdriver and a #8 x 3/4-
inch screw, attach both horizontal stands to the
back of the speaker (fig. 4).
2 À l’aide d’un tournevis Phillips et d’une vis #8
x 3/4 po, fixez les supports horizontaux sur la
partie arrière de l’enceinte (fig. 4).
Fig. 4
Fig. 5
Fig. 3

16
INSTALLATION DES SUPPORTS VERTICAUX
Outils.requis.(non.compris).:
• Tournevis Phillips
Matériel.nécessaire.(compris).:.
• (2) #8 - 3/4-inch Phillips screws
• (1) Vertical stand
1 À l’aide d’un tournevis Phillips et de vis #8 x
3/4 po, fixez le support vertical sur la partie
arrière de l’enceinte (fig. 5).
DÉPLACER LE BADGE DU LOGO
Le badge du logo est fixé magnétiquement. Avec
vos doigts, retirez-le du couvercle de la grille et
fixez-le à l’emplacement souhaité.
Comment nettoyer les enceintes?
Utilisez un linge exempt de poussière (comme un
linge en microfibres) ou une brosse à poils doux
pour enlever la poussière sur les enceintes. Ne.
vaporisez.pas.de.produits.nettoyants.sur.les.
haut-parleurs.ou.à.proximité.de.ceux-ci
Pouvez-vous me proposer une liste
d’appareils électroniques et de
câbles qui conviennent aux enceintes
MartinLogan?
Nous n’avons aucun produit préféré et nous utili-
sons les appareils électroniques et les câbles de
façon assez interchangeable. Nous vous proposons
d’écouter plusieurs marques et surtout, de faire confi-
ance à votre ouïe. Les revendeurs sont toujours la
meilleure source de renseignements lorsque vous
achetez de l’équipement audio supplémentaire.
Peut-il y avoir une interaction entre mes
enceintes et la télévision dans mon sys-
tème A/V?
Oui. Ces enceintes ne sont pas protégées et doivent
être placées à au moins deux pieds d’une télévision
dotée d’un écran à tube cathodique (CRT).
Est-ce que l’exposition à la lumière
solaire nuira au rendement ou à la
durée de vie de mes enceintes?
Nous recommandons de ne pas exposer les
enceintes directement à la lumière solaire. Les ray-
ons ultraviolets (UV) du soleil peuvent entraîner la
détérioration du boîtier, des cônes de l’enceinte,
etc. Les expositions de courte durée aux rayons UV
ne posent pas de problème. La filtration des ray-
ons UV par le verre diminuera grandement leurs
effets négatifs.
Foire aux questions
Aucun signal de sortie
• Vérifiez que toutes les composantes du système
sont allumées et que le matériel source est lu.
• Vérifiez les câbles de l’enceinte et les raccords.
• Vérifiez tous les câbles interconnectés.
• Si vous n’est pas capable de résoudre votre
problème, veuillez communiquer avec votre
revendeur ou le service à la clientèle de
MartinLogan (voir ci-dessous).
dépannage

17
Le service à la clientèle de MartinLogan est dis-
ponible du lundi au vendredi, de 8 h à 17 h
(heure normale du Centre) en composant le (785)
749-0133 ou en envoyant un courriel à l’adresse
Communiquer aveC le serviCe à la Clientèle
RENSEIGNEMENTS SUR LA GARANTIE
Vos enceintes sont vendues avec une garan-
tie limitée automatique de 90 jours. Vous avez la
possibilité d’obtenir, sans frais supplémentaires,
une garantie limitée de cinq ans. Pour obtenir
la garantie limitée de cinq ans, vous devez rem-
plir et retourner le certificat d’enregistrement à
MartinLogan dans les 30 jours qui suivent la date
d’achat. Pour plus de commodité, MartinLogan
permet également l’enregistrement en ligne à la
garantie à l’adresse www.martinlogan.com.
MartinLogan pourrait ne pas honorer les réclama-
tions de service au titre de la garantie à moins
d’avoir une carte d’enregistrement à la garan-
tie dûment remplie dans ses dossiers! Si vous
n’avez pas reçu de certificat d’enregistrement à
la garantie avec vos nouvelles enceintes, il vous
est impossible de savoir si vous avez reçu des
enceintes neuves. Le cas échéant, communiquez
avec votre revendeur MartinLogan.
NUMÉRO DE SÉRIE
Un numéro de série est situé derrière l’enceinte,
directement sous les bornes de raccordement.
Le numéro de série est également inscrit sur
l’emballage du produit.
SERVICE
Si vous utilisez votre produit MartinLogan dans un
pays autre que celui où il a été acheté à l’origine,
nous vous demandons de noter ce qui suit :
1 Le distributeur MartinLogan désigné pour tout
pays donné est responsable du service au titre de
la garantie uniquement pour les appareils distribués
par ce pays ou par l’entremise de celui-ci conformé-
ment à sa garantie applicable.
2 Si un produit MartinLogan doit faire l’objet de
réparations (service) dans un pays autre que celui
où il a été acheté à l’origine, l’utilisateur final
peut faire réparer le produit chez le distributeur
MartinLogan le plus proche, sous réserve des poli-
tiques de service locales de ce distributeur, mais
tous les coûts des réparations (pièces, main-d’œuvre
et transport) seront assumés par le propriétaire du
produit MartinLogan.
3 Si, après avoir possédé l’enceinte pendant six
mois, vous déménagez dans un pays autre que
celui où vous avez acheté l’enceinte, votre garan-
tie peut être transférable. Communiquez avec
MartinLogan pour obtenir tous les détails.
renseignements généraux

18
spéCiFiCations*
Réponse.de.Fréquence.
Dispersion.
Sensibilité
Impédance
Fréquence.de.Raccord
Haut-parleur.Paute.Fréquence
Haut-parleurs.de.Basse.Fréquence
Boîtier.
Composantes.
Puissance.d’Amplificateur.Recommandée.
Bornes.de.Raccordement
Poids.
Dimensions.avec.support.mural.(HxLxP)
MARTINLOGAN.MOTION.SLM
110–22 000 Hz ± 3 dB
80° x 80°
94 dB à 2,83 volts/mètre
4 Ohms. Compatible avec des amplificateurs clas-
sés 4, 6 ou 8 Ohms.
2600 Hz
1 po x 1,4 po (2,6 cm x 3,6 cm)
Transducteur motion plié avec diaphragme de
5,25 po x 1,75 po (13,3 cm x 4,4 cm).
Deux cônes en papier de 4 po (10,2 cm). Deux
radiateurs passifs en cône en papier de 4 po
(10,2 cm).
Scellé
Inducteurs à bobine d’air sur mesure.
Condensateurs à pellicule polyester en série et
condensateurs DF électrolytiques bas en parallèle.
Protection thermique/courant générale du système.
20–140 watts
Style poussoir
6,5 lbs. (3 kg)
25,3 po x 6,4 po x 1,83 po
(64,2 cm x 16,2 cm x 4,7 cm)
*Les spécifications peuvent changer sans préavis.
19
plans dimensionnels
MARTINLOGAN MOTION SLM: AVEC SUPPORT VERTICAUX
plans dimensionnels
MARTINLOGAN MOTION SLM: AVEC SUPPORT HORIZONTAUX

L a w r e n c e , K a n s a s , U S A t é l . 7 8 5 . 7 4 9 . 0 1 3 3 t é l é c . 7 8 5 . 7 4 9 . 5 3 2 0 w w w . m a r t i n l o g a n . c o m
Rev. #082511©2011 MartinLogan Ltd. Tous droits réservés.
®
P/N: 9500078
plans dimensionnels
MARTINLOGAN MOTION SLM: AVEC SUPPORT MURAL