Loading ...
Loading ...
Loading ...

USA
6
AFTER SALES SUPPORT
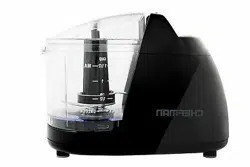
Operating Instructions
BEFORE FIRST USE
1. Remove product parts from packaging and disassemble. To remove the container
bowl from the base, turn container bowl counterclockwise. NOTE: Container bowl
may be slightly difficult to remove when product is new. To aid removal, place
the base onto its side on a soft surface and then turn container bowl firmly to
remove.
2. Thoroughly wash the cover, the container bowl, and the blades in warm, soapy
water. Rinse and let dry.
ASSEMBLY
1. Ensure the product is unplugged from the electrical outlet.
2. Place the base on a flat, level, stable surface.
3. Insert the container bowl over the metal shaft and turn the container bowl
clockwise until the safety latches of the container bowl lock into base
(preventing the container bowl from detaching).
4. Attach the blades by holding the plastic shaft end (end opposite of the blades)
and inserting the blade shaft over the center column of the container bowl
until secure.
5. Attach the cover after inserting the food into the container bowl.
IMPORTANT NOTE: The cover must be securely locked into its position before
the food processor will operate. When properly locked, the arrow inscribed
on the cover handle must align with the arrow inscribed on the base
(near the On/Pulse button).
TO USE
NOTICE: Do not process raw meat, cheese, coffee beans, or whole squares of
chocolate in this product, as product damage could result.
1. Cut the food into small pieces, as needed. NOTE: Hard vegetables, such as
raw carrots, may require splitting and/or quartering in order to allow smooth
operation and movement of the blades.
2. Place the food into the container bowl. Do not fill past the maximum capacity
of 1 cup.
3. Attach and gently secure the cover onto the container bowl (reference the
"Assembly" section).
4. Plug the product into a standard 110-120 volt AC electrical outlet.
Loading ...
Loading ...
Loading ...