
Loading ...
Loading ...
Loading ...
7
We value your experience using Sunny Health and Fitness products. For assistance with parts or
(877-907-8669).
15
16
10
11
11
11
18
18
19
19
19
13
98
61
14
50
14
50
13
98
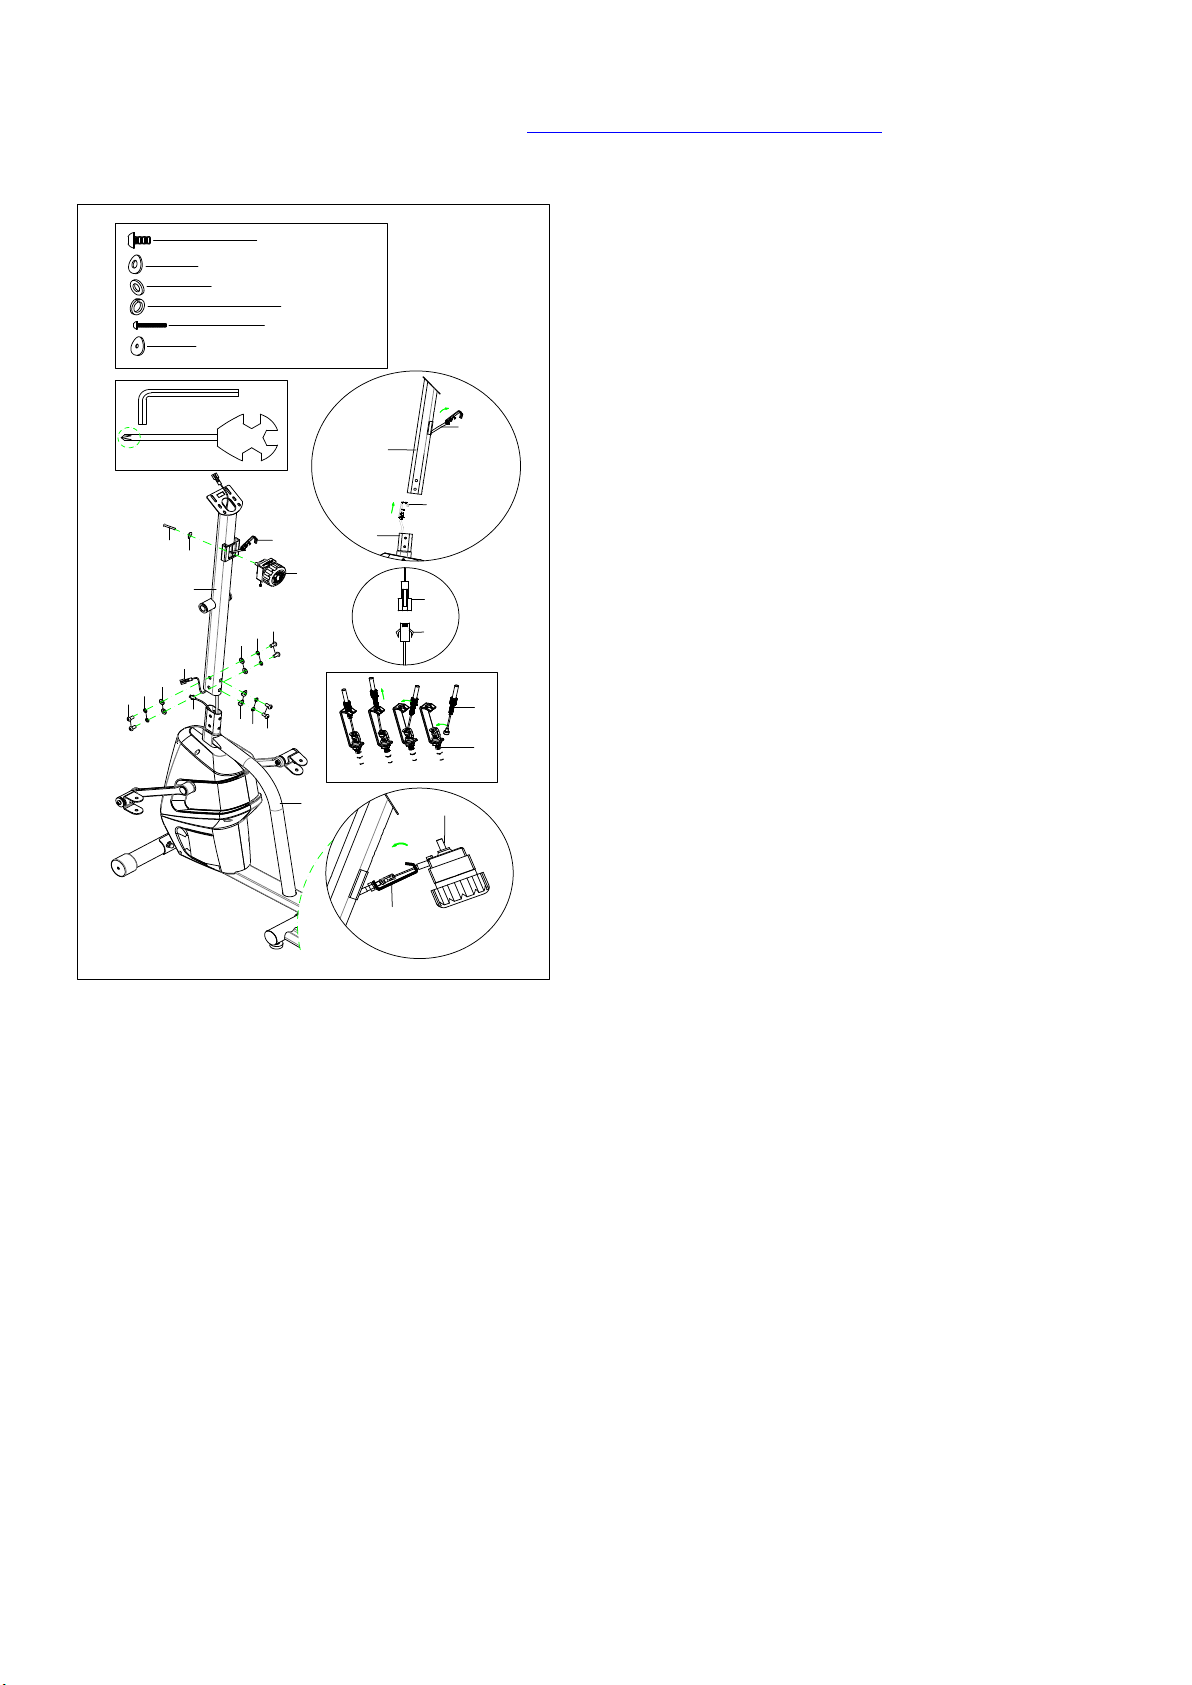
#10 d8*Φ 20*2*R16 2PCS
#19 M8*18 6PCS
#18 d8*Φ 16*1.5 4PCS
#102 S5 1PC
#104 S13-14-15 1PC
#16 M5*40 1PC
#15 d5*Ф 20*1*R15 1PC
#11 d8 6PCS
17
17
50
61
50
50
14
A
B
C
D
STEP 2:
Remove 6 Bolts (No. 19), 2 Arc Washers (No.
10), 6 Spring Washers (No. 11), and 4
Washers (No. 18) from Main Frame (No. 61)
using Allen Wrench (No. 102).
Pull the Lower Tension Wire (No. 50) out from
the top hole of Main Frame (No. 61), run it
through the bottom hole of the Handlebar Post
(No. 17) and go out through the side hole on
the Handlebar Post (No. 17) as shown in
picture A.
Connect the link wire of Sensor (No. 98) with
Trunk Wire (No. 13) as shown in picture B.
Attach Handlebar Post (No. 17) to Main
Frame (No. 61) using 6 Bolts (No. 19), 6
Spring Washers (No. 11), 2 Arc Washers
(No. 10), and 4 Washers (No. 18) that were
removed. Tighten and secure with Allen
Wrench (No. 102).
Note: Be careful not to pinch the wires when
assembling the Handlebar Post (No. 17).
Remove 1 Bolt (No. 16) and 1 Arc Washer
(No. 15) from Tension Control Knob (No. 14)
using Spanner (No. 104).
Set the Tension Control Knob (No. 14) at
level 8 (highest resistance) to ensure the wire
is at the longest. Connect Tension Control
Knob (No. 14) with Lower Tension Wire (No.
50) as shown in picture C, then insert the
Lower Tension Wire (No. 50) into Handlebar
Post (No. 17).
Note: When inserting the Lower Tension Wire
(No. 50) into Handlebar Post (No. 17), the
direction should be correct as shown in picture
D.
Attach Tension Control Knob (No. 14) to
Handlebar Post (No. 17) using 1 Bolt (No. 16)
and 1 Arc Washer (No. 15) that were removed.
Tighten and secure with Spanner (No. 104).
Loading ...
Loading ...
Loading ...