Loading ...
Loading ...
Loading ...

6
-Limitthenumberofpipebends.
-Useamaterialapprovedbystandardsand
regulations.
-Avoidanysuddenchangesinpipesection
(recommendedconstantdiameter:Ø150mm
/Ø200mmorequalsurfacearea).
- Before installing the appliance, in order
nottodamagetheapplianceitself,themetal
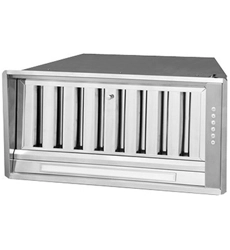
grase lter should be removed. These lter
couldberemovedbypushingthehandlesto-
wardsthebacksideofthecookerhoodand
turningitdownwardstounfasten itfromits
slot.(Fig.3).
To install the appliance please respect the
followinstructions.
The appliance must be install by competent
authorities. In order to do not damage the
electronic parts of the appliance please do
notuseaddedscrews.
Essential precautions to respect before in-
stallingtheappliancearethefollowing:
Tohavemadeacut-outonthebottomofthe
cabinetwhichissuitabletoholdtheapplian-
ceinposition(dis.4):
SL906da600501x265mm,
SL906da850826x265mm,
SL906-Lda850835x265mm,
SL906da1000985x265mm,
SL906da12001100x265mm.
-preparethepowersupply.
- prepare a hole for the exhaust of the air
bothinthelteringandintheexhautingver-
sion.
- Use an exhausting pipe whose maximum
lengthdoesnotexceed5meters.
Donotusescrewstoxtheoutletpipetothe
cookerhoods.
-Limittheno.ofelbowsinthepiping,since
each elbow reduces the aspiration ecien-
cyof1linearmeter.(Ex.:ifyouuseno.2x
90°elbows,thelengthofpipinglmustnot
exceed3meters)
-Avoidabruptdirectionchanges.
-Usea 150mm constantdiameterpipe for
thewholelength.
-Usepipingapprovedbystandardsinforce.
In the units equipped with 2 motors please
usea200mmconstantdiameterpipeforthe
wholelength.
Toinstalltheappliance,adjustthepositionof
thestopside-springsusingtheappropriate
screws(g.5),accordingtothethickness
oftheboardpreviouslydrilled,onwhichthe
appliancewillbexed.
Insert the built-in unit in the hole made in
the cabinet until the stop click of the side-
springsisheardandthebuilt-inunitisblo-
cked.Insertthescrewsprovidedintheholes
inside the appliance (g.6) to block it com-
pletely.
Put the grease lter again
Blocking of the stop valve
Warning!
Beforeconnectingtheexibleexhausting
pipetothemotor,makesurethestopvalve,
which is on the air outlet ofthe motor, can
swing.
Exausting version
Connect the ange to the exhausting hole
with an appropriate pipe. Connect the ap-
pliancewiththeelectricalmainsthroughthe
supplycord.
Filtering version
Connect the ange with a pipe suitable to
conveytheairtothetopofthecabinet.Con-
nect the appliance with the electrical mains
throughthesupplycord.
Rear vented version
All the models with one motor can be rear
vented;ifthecustomerwantstousethisop-
tion,itisnecessarytoremovethe18screws
fromthemotorgroupsupport.Thentakethe
metal support with motor included out (pic.
11a). Turn the motor to have the air outlet
ontherearside(pic.11b)andxthescews
previouslyremoved.
Loading ...
Loading ...
Loading ...
