Loading ...
Loading ...
Loading ...
11
Electrical connection
I WARNING
TO REDUCE THE RISK OF FIRE, USE ONLY METAL DUCT
WORK.
ELECTRICAL SHOCK HAZARD.
I WARNING
TURN OFF POWER CIRCUIT AT THE SERVICE PANEL
BEFORE WIRING THIS UNIT.
120 VAC, 15 OR 20 AMP CIRCUIT REQUIRED.
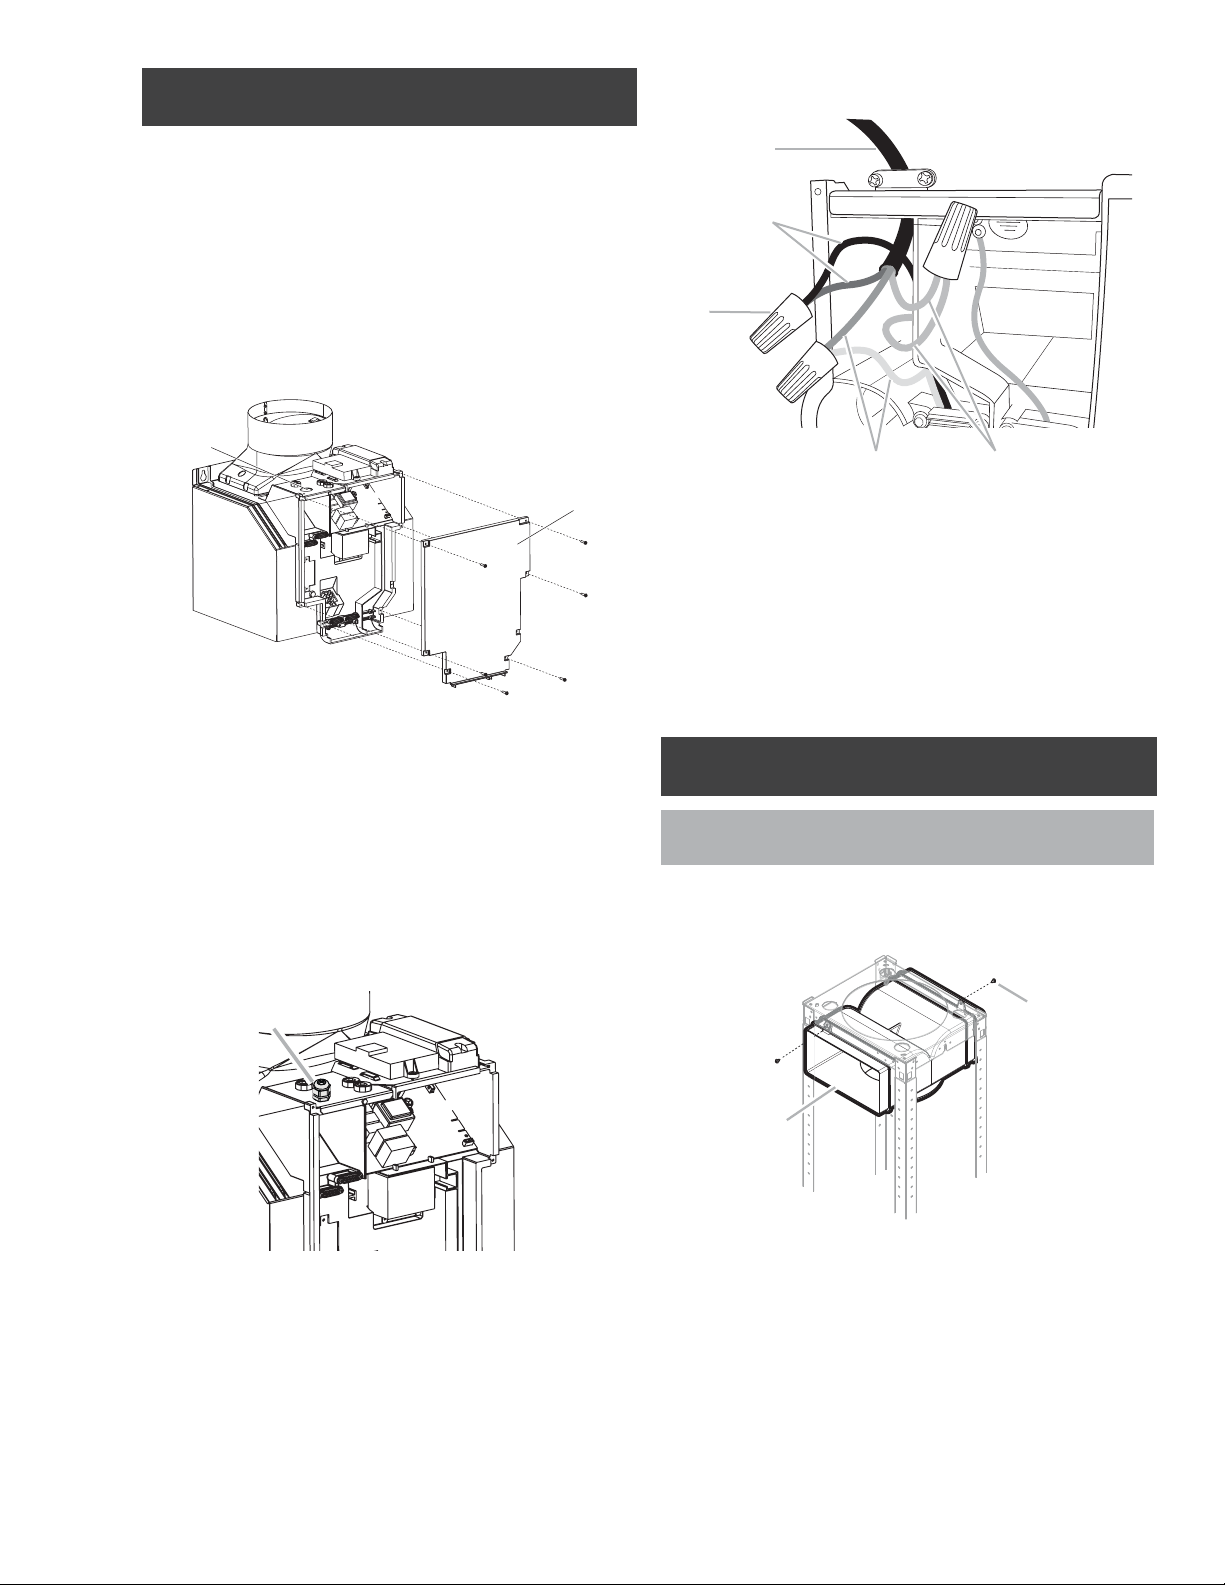
đƫ Facing the front of the range hood, remove the left
knockout and the Junction box cover and install the
conduit connector (cULus listed) in junction box.
B
A. Knockout
B. Junction box cover
A
ELECTRICAL GROUNDING INSTRUCTIONS
This appliance is fitted with an electrical junction box with
3 wires, one of which (green/yellow) serves to ground the
appliance.
To protect you against electric shock, the green and yellow
wire must be connected to the grounding wire in your home
electrical system, and it must under no circumstances be cut
or removed.
Failure to do so can result in death or electrical shock.
đƫ If not already done, install a
1
⁄2” conduit connector in
junction box.
A
A.
1
⁄2” Conduit connector
đƫ Run home power supply cable through the conduit, into
terminal box.
đƫ Use UL listed wire connectors and connect black wires (B)
together.
đƫ Use UL listed wire connectors and connect white wires (D)
together.
A
B
C
D E
A. Home power supply cable
B. Black wires
C. UL listed wire connectors
D. White wires
E. Green (or bare) and yellow-
green ground wires
đƫ Connect green (or bare) ground wire from home power
supply to yellow-green ground wire (E) in terminal box
using UL listed wire connectors.
đƫ Tighten strain relief screw.
đƫ Install terminal box cover.
đƫ Check that all light bulbs are secure in their sockets.
đƫ Reconnect power
Complete the installation
ONLY FOR RECIRCULATING VERSION
(Using Recirculating Kit model KIT0141924)
Air deflector installation
đƫ Assemble the air deflector with the upper horizontal
support with 2 assembly screws.
A
B
A. Air deflector
B. Assembly screws
Loading ...
Loading ...
Loading ...