
Loading ...
2 REMOVE LOWER ACCESS
PANEL ASSEMBLY
• Remove the two screws below the access
panel. Retain screws.
• Loosen the two screws located between the
door and the access panel. Do not attempt
to remove these screws. They are secured
to the access panel with washers.
• Remove the access panel assembly and
toekick from the dishwasher. Set aside.
NOTE: Do not remove the insulation behind
the access panel
or toekick.
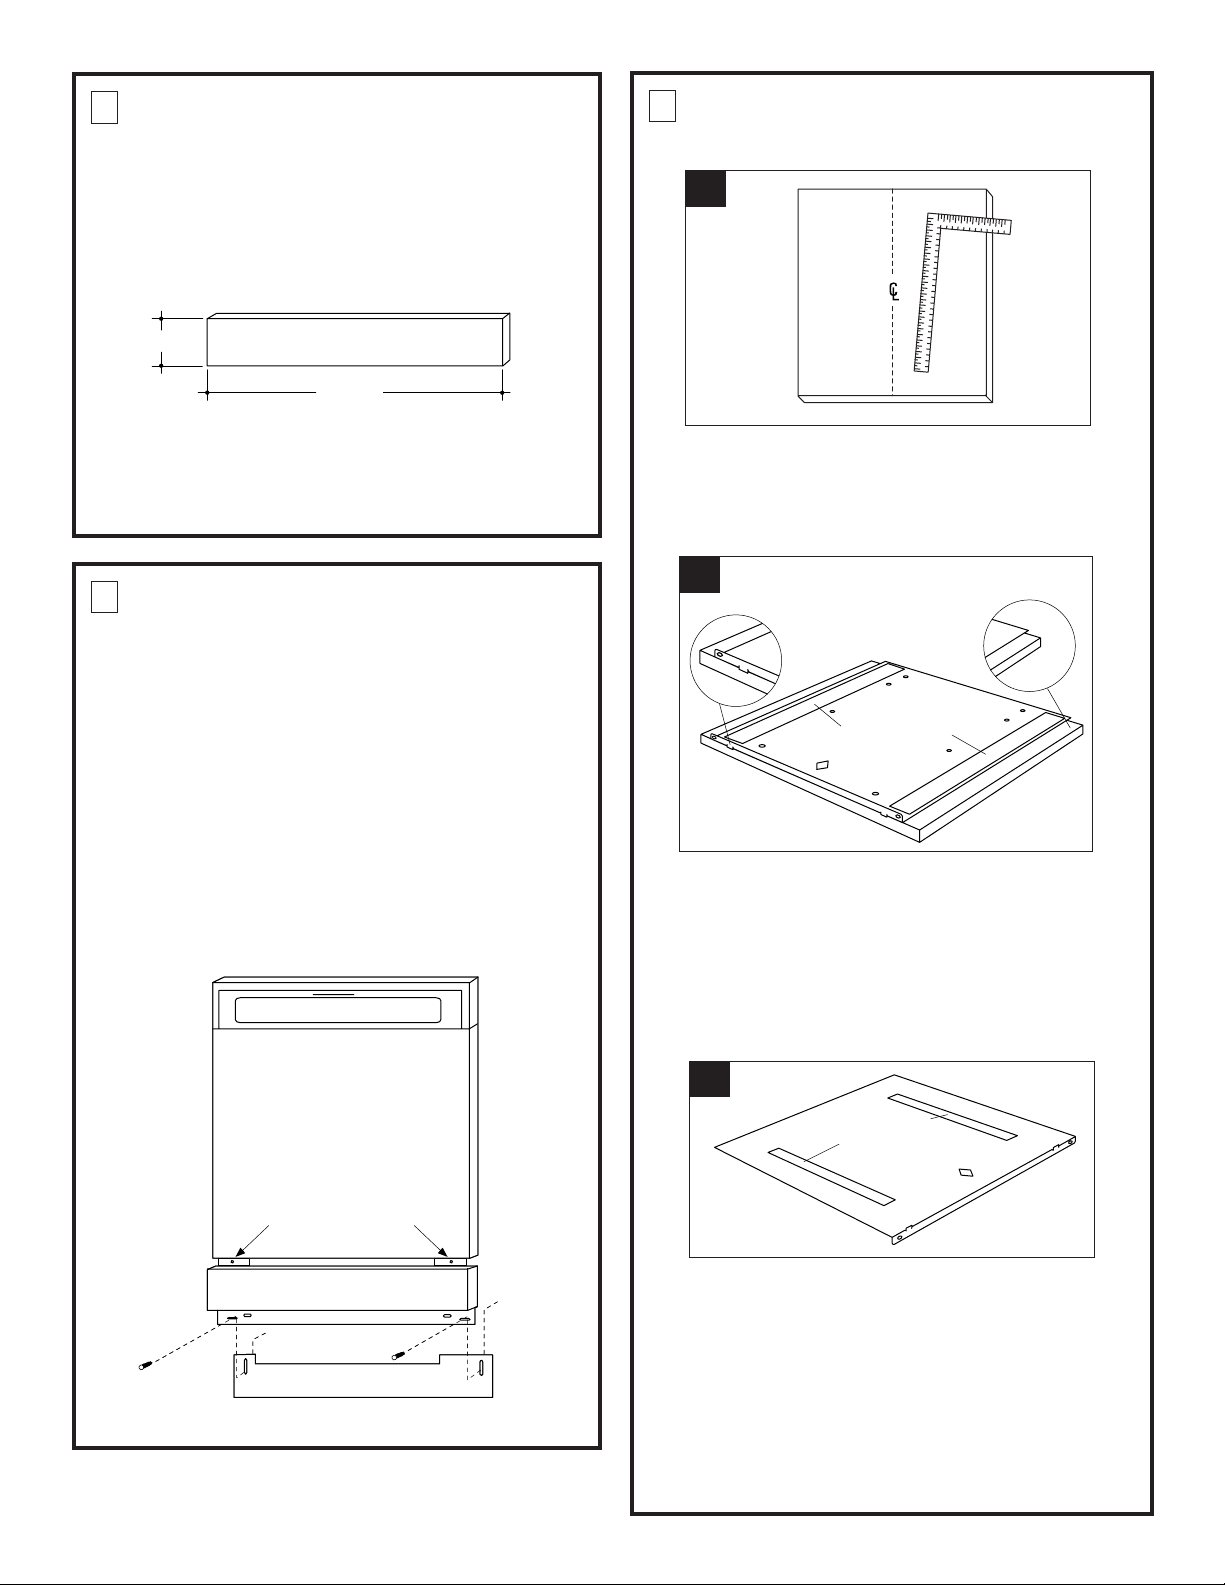
3 MOUNT CUSTOM PANEL TO
METAL SUPPORT PANEL
A
• Place the metal door panel support on the
custom panel, with the projecting tabs
overlapping and against the bottom edge.
Center the support panel by matching the
center line to the diamond cutout.
NOTE: Do not remove tape from adhesive
strips.
• Lay the custom panel on a flat surface with
appearance side down.
• Measure and mark the center line. Use a
carpenters square to draw the center line.
C
• Remove the custom panel from the support.
• Remove tape from adhesive strips on the
metal support – on the side that touches the
custom panel.
• Carefully, position the metal support onto the
custom panel with center line showing
through the diamond. Press the metal sup-
port against the panel.
B
1 CUT 3/4" THICK CUSTOM
PANELS TO SIZE
(CONTINUED)
2
• The access panel height may be 3-3/4" to
4-1/4" max. The access panel height can vary
depending upon toekick height and adjust-
ments made to the leveling legs.
*3-3/4" min., 4-1/4" max. for typical 4" toekicks.
Adjustments may be required to match adjacent cabinet
fronts.
A*
23-5/8"
3/4" Thick Access Panel
Loosen 2 Screws
Escutcheon
Door
Panel
Access Panel
Toekick
Loosen 2 Screws
Escutcheon
Door
Panel
Access Panel
Toekick
Foam
Double Sided
Tape
Tab
Tabs
Overlap
Bottom
Edge
Metal Support
Overlaps
Top
Edge
Remove
Tape Covering
Adhesive Strips
Loading ...
Loading ...
Loading ...