Loading ...
Loading ...
Loading ...
8
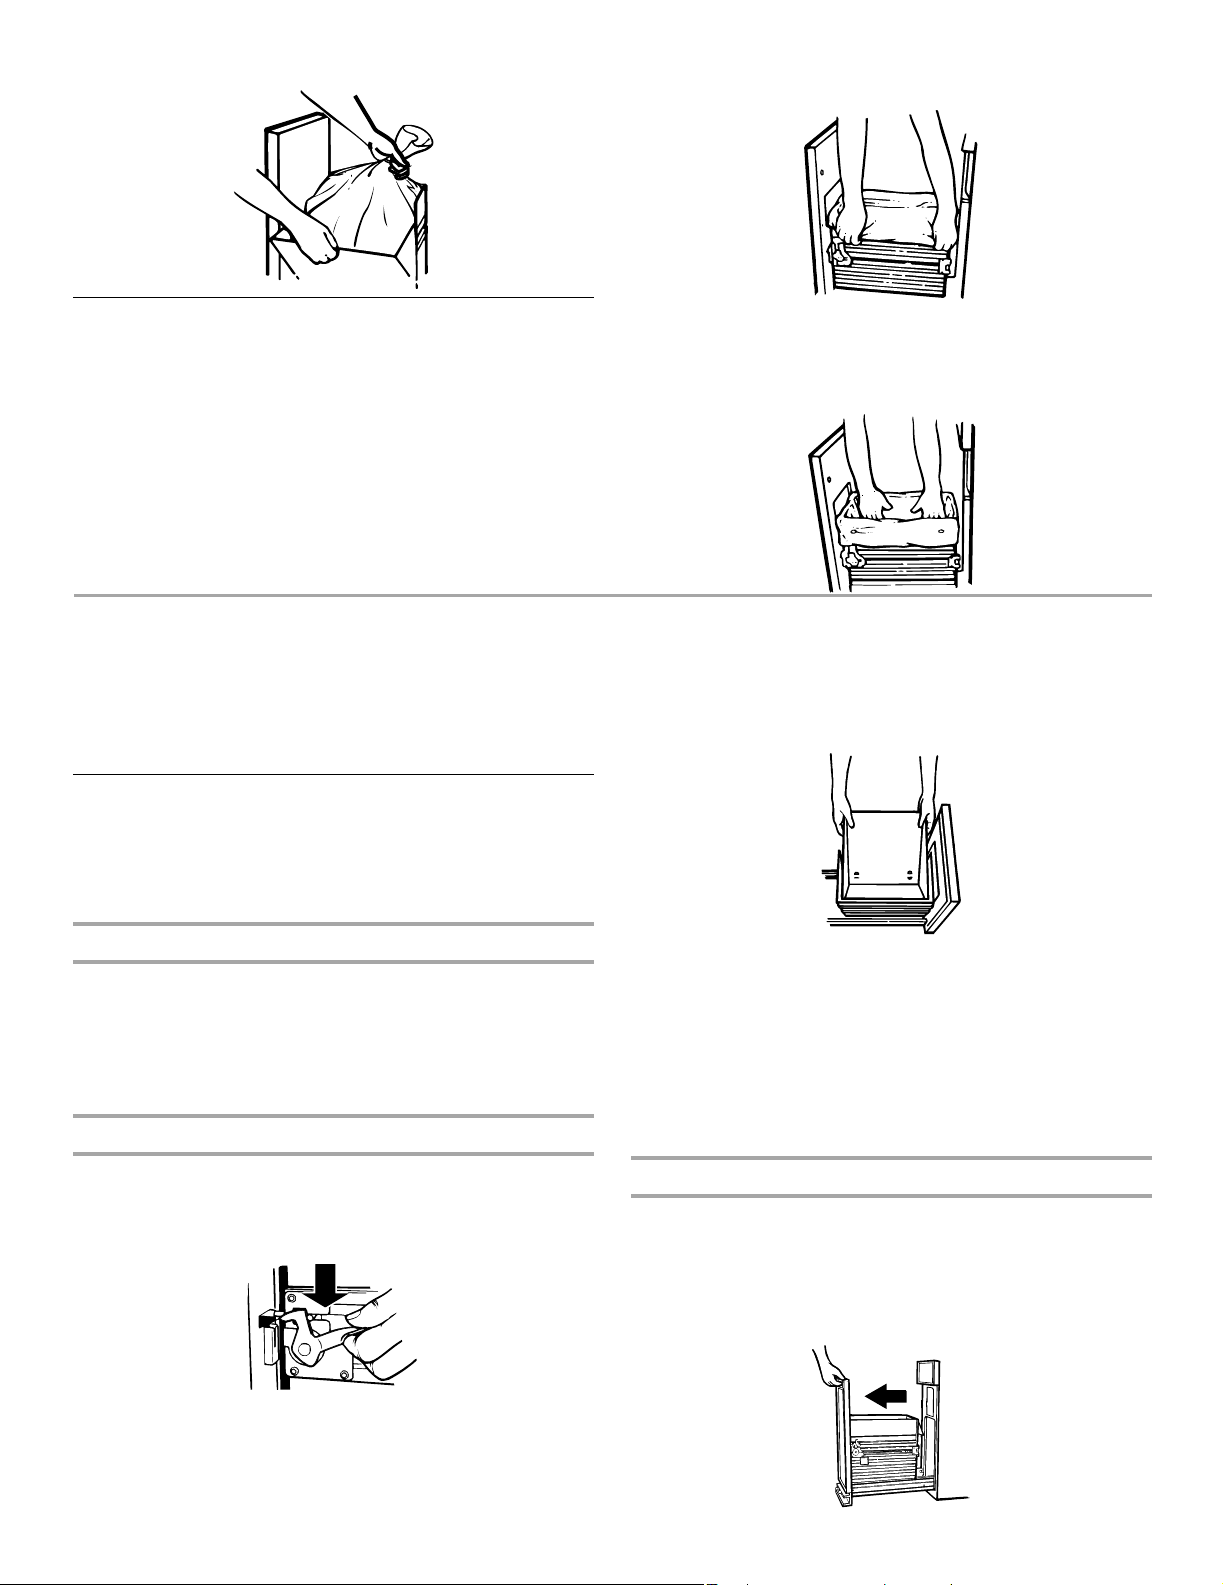
4. Lift out bag.
Installing a New Bag
Do not use any kind of bag other than those designed especially
for use in your compactor. Order replacement compactor bags
through your local dealer or by calling the toll-free number on the
cover or in the “Assistance or Service” section.
IMPORTANT:
Before installing a new bag, be sure:
■ The drawer side is securely locked.
■ The container is clean and free of debris.
1. Place folded bag into the drawer. Open bag and pull top
edges over the drawer top.
2. Lock bag in place by pulling the four prepunched holes over
the bag retainer buttons. Holes will expand over the buttons
without damaging the bag.
3. Press inside of bag against the drawer bottom, sides and
corners for a smooth fit.
COMPACTOR CARE
Your new compactor is designed to give you many years of
dependable service. However, there are a few things you are
expected to do in order to properly maintain your compactor.
This section will tell you how to clean and care for your
compactor.
Cleaning
Before cleaning the compactor, turn the Key-Knob (or Key-
Switch) to the OFF & LOCK position and remove it.
NOTE: Any services other than those outlined in this section
should be performed by a designated service representative.
Cleaning Exterior Surfaces
1. Wash exterior surfaces (including stainless steel) with a clean
sponge or soft cloth and a mild detergent in warm water. Do
not use abrasive or harsh cleaners. Rinse and dry thoroughly
with a soft cloth.
2. Wipe up spills right away. Some foods can damage the finish
if left on the compactor surface.
Cleaning Inside the Drawer
NOTE: You may want to wear gloves since there may be bits of
glass in the drawer.
1. Remove the bag. See “Removing a Filled Bag.”
2. Press down on the lever-action lock (or Side-Lock latch).
3. Hold the lever-action lock down and tilt the side of the drawer
out until the lock clears the drawer front.
NOTE: If desired, the drawer side can be removed by tilting it
up, then lifting it out.
4. Wash the interior of the drawer with a clean sponge or soft
cloth and a mild detergent in warm water. Rinse and dry
thoroughly with a soft cloth.
5. If the drawer side was removed, slide it back into the tilted
position.
6. Press the lever-action lock (or Side-Lock Latch) down while
pushing the drawer side to the upright position.
7. Latch the drawer side by pushing up the lever-action lock (or
Side-Lock Latch).
Cleaning Inside the Cabinet
NOTE: You may want to wear gloves since there may be bits of
glass in the cabinet.
1. Pull the drawer out until it stops.
NOTE: Look to see how the drawer rollers move in the tracks.
It will be easier to replace the drawer after you have finished
cleaning.
Loading ...
Loading ...
Loading ...