Loading ...
Loading ...
Loading ...
Rev.010918-BR 4 www.akiascreens.com
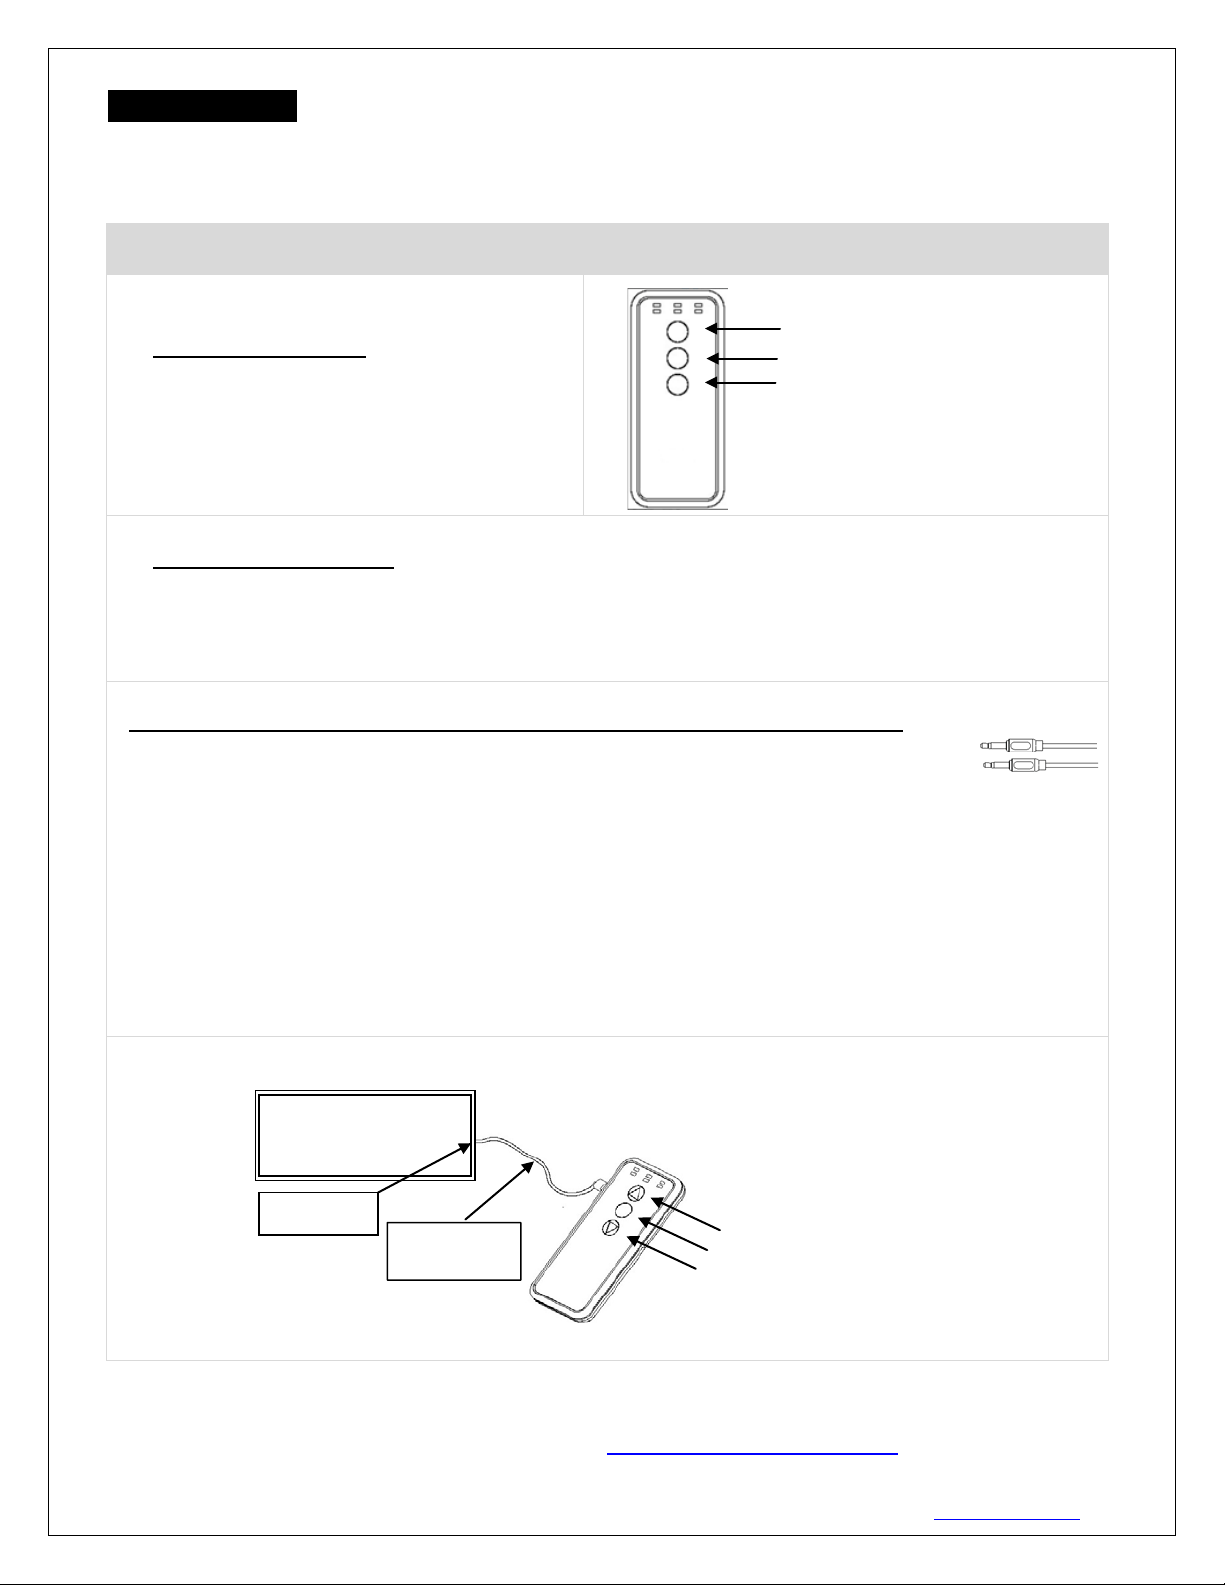
UP
Stop
Down
Screen operation
Electric Current: Depending upon region, your AKIA Screen will operateon 100v, 110v, or 220v voltage.
1. After ensuring the power outlet & screen are compatible (voltage), plug the power cord into the power outlet.
2. Once the screen has power, you’ll be able to control it using any of the 6 methods described below.
2 ways to control your AKIA Motorized screen
1. RF Remote Control
: The radio waves
eliminate the need for a direct line of sight with
a range of 100 feet.
2. Wireless 5-12 volt trigger: The RF remote control serves as a dual purpose, independently as a handheld
remote control, or in conjunction with the Wireless 5-
12 volt trigger cable. The radio frequency
technology can be programmed to send a wireless signal to synchronize its drop & rise with the projector’s
power cycle.
Here’s how to set up your Wireless 5-12 volt trigger | Synchronization Instructions
Step1: Connect one end of the 3.5 mm wireless 5-12 volt trigger cable to the RF remote.
Step 2: Connect the other 3.5 mm end of the wireless 5-12 volt trigger cable to your projector
Step 3: Make sure to unplug your screen from the power outlet
Step 4: Hold the UP button on your RF remote
Step 5: While holding the UP button, plug the screen back to the power outlet
Step 6: Wait 5 seconds and then release the UP button
Step 7: Your 5-12V wireless trigger should now be activated with your screen and ready to be used and able
to control your screen with your projector’s power cycle
Repeat the steps again if not successful.
(Please be aware, the projector on/off cycle may take longer to fully activate. It usually takes around 20-
30seconds for full off and on cycle each time)
For more information, technical support or your local AKIA Screens
contact, please visit www.akiascreens.com
UP
STOP
DOWN
RF remote
DC 5-12V out
Wireless 5-12V
trigger cable
The back of the
projector
Loading ...
Loading ...
Loading ...