Loading ...
Loading ...
Loading ...
11TROLLEY ASSEMBLY
TROLLEY ASSEMBLY
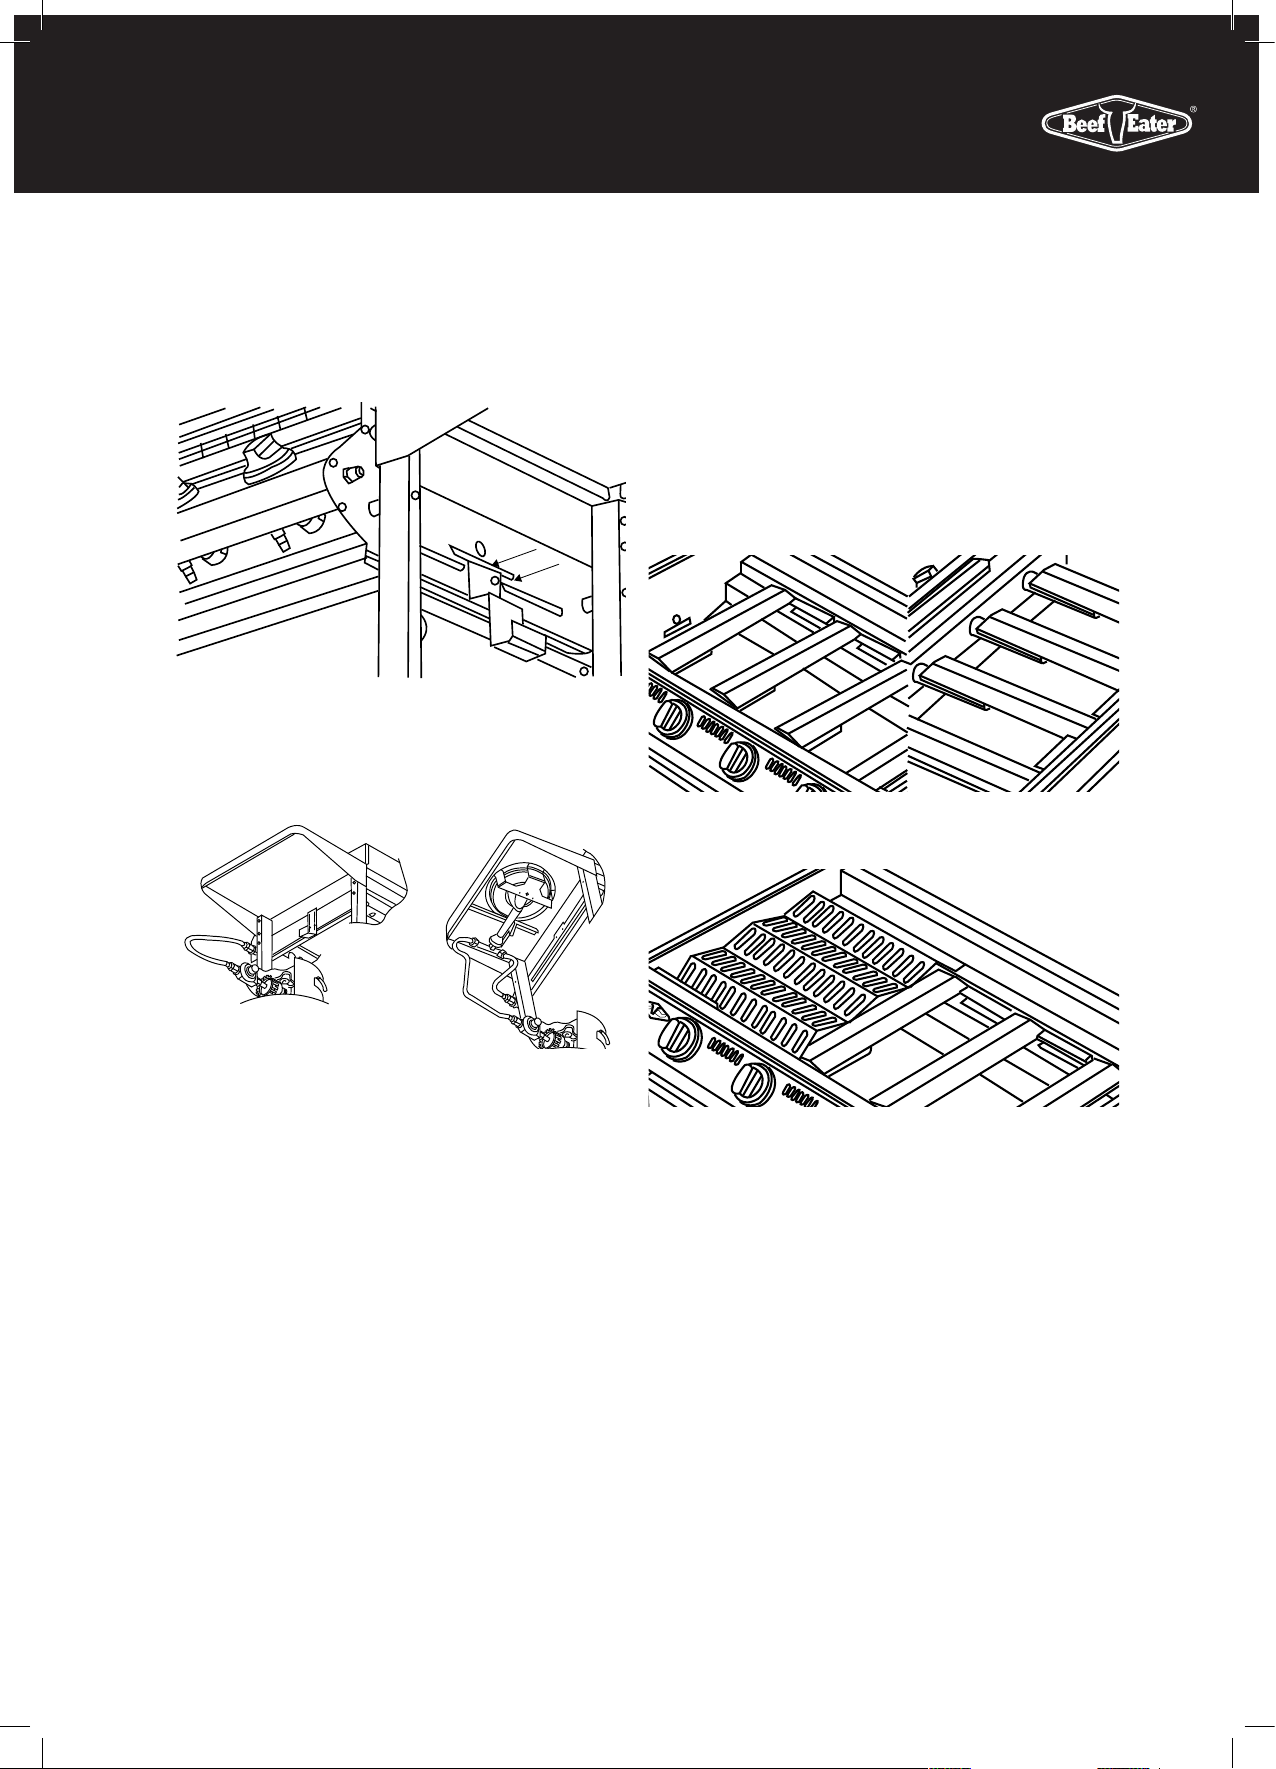
Step 9
2 x ‘E’, 4 x ‘F’, 2 x ‘G’
Attach the Cylinder-Hook on right hand side of BBQ.
Step 10
Connect barbecue to the cylinder and carry out a leak-test.
Refer to Leak Testing Procedure on page 6.
NOTE: When in operation, keep 450mm (18”) clearances
from combustible materials.
General
This barbecue is to be mounted onto a mobile trolley.
The Trolley is packed in a separate carton. Please refer to
the Trolley instruction booklet for assembly of the trolley, and
barbecue mounting.
Once the barbecue had been properly installed on the trolley,
please check the following:
1. Hood is secured by 4 screws to barbecue’s body, and
operating correctly.
2. All burners are in place correctly.
3 Vaporizers are installed above burners, but under the
Grill (not required under the Plate).
4 Cooking surfaces (Grill and Plate) are clean, and
installed over the burners.
Loading ...
Loading ...
Loading ...