Loading ...
Loading ...
Loading ...
6
2. Setting up the monito
r
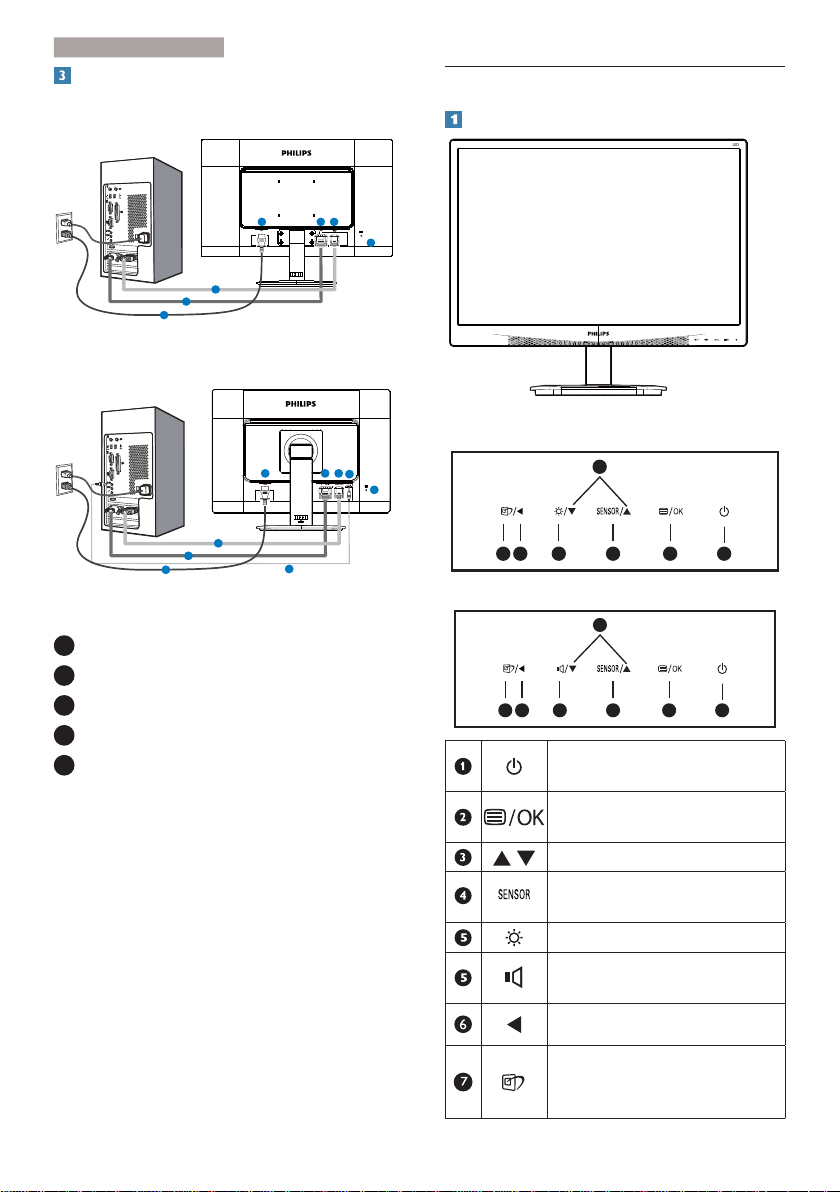
Connecting to your PC
240S4LP
220S4LS
1 2 3
4
1
2
3
240S4LPM
1 2 3
4
1
2
3
5
5
1
AC power input
2
DVI input
3
VGA input
4
Kensington anti-theft lock
5
Audio input (Optional)
Connect to PC
1. Connect the power cord to the back of
WKHPRQLWRUÀUPO\
2. Turn off your computer and unplug its
power cable.
3. Connect the monitor signal cable to the
video connector on the back of your
computer.
4. Plug the power cord of your computer and
your monitor into a nearby outlet.
5. Turn on your computer and monitor. If the
monitor displays an image, installation is
complete.
2.2 Operating the monitor
Description of the control buttons
240S4LP
7
6
25
4
3
1
240S4LPM
7
6
25
4
3
1
Switch monitor’s power ON and
OFF.
Access the OSD menu
.
&RQÀUPWKH26'DGMXVWPHQW
Adjust the OSD menu.
Set the sensor level for backlight
automatic control.
Adjust brightness of the display.
Adjust volume of the display.
Return to previous OSD level.
SmartImage
hot key
. There are 6
PRGHVWRVHOHFW2IÀFH3KRWR
Movie, Game, Economy, Off.
Loading ...
Loading ...
Loading ...