Loading ...
This TL260 features four rubber feet that enable it to be placed on
a smooth-surfaced floor, such as tile or hardwood. Four metal spikes
are supplied for use when the speaker is to be placed on a carpeted
surface to decouple the speaker from the floor. To insert the spikes,
gently lay the speaker on its side (not its front or back) on a soft,
nonabrasive surface. Each spike screws into the threaded insert in
the center of each rubber foot. Make sure all four spikes are
screwed in completely for stability.
NEVER drag the speaker to move it, as this will damage the spikes,
the feet and/or the wood cabinet itself. Always lift the speaker and
carry it to its new location.
CAUTION: Floorstanding (tower) loudspeakers have a high center of
gravity and may become unstable and tip over during earthquakes
or, if rocked, tipped or improperly positioned. If this is a concern,
these speakers should be anchored to the wall behind them, using
the same procedures and hardware customary for anchoring
bookcases and wall units. The customer is responsible for proper
installation and proper selection of hardware.
SPEAKER SETUP
SPEAKER PLACEMENT
Proper placement of the speakers is an important step in obtaining
the most realistic soundstage possible. These recommendations
are for the optimum placement of the loudspeakers. Use these
placement recommendations as a guide. Slight variations will not
diminish your listening pleasure. The TL260 loudspeaker is video-
shielded and may safely be placed near a television.
MODEL: TL260
WIRING THE SYSTEM
IMPORTANT: Make sure all equipment is turned off
before making any connections.
For speaker connections, use a high-quality speaker wire with
polarity coding. The side of the wire with a ridge or other coding
is usually considered positive polarity (i.e., +).
NOTE: If desired, consult your local JBL dealer about speaker wire
and connection options.
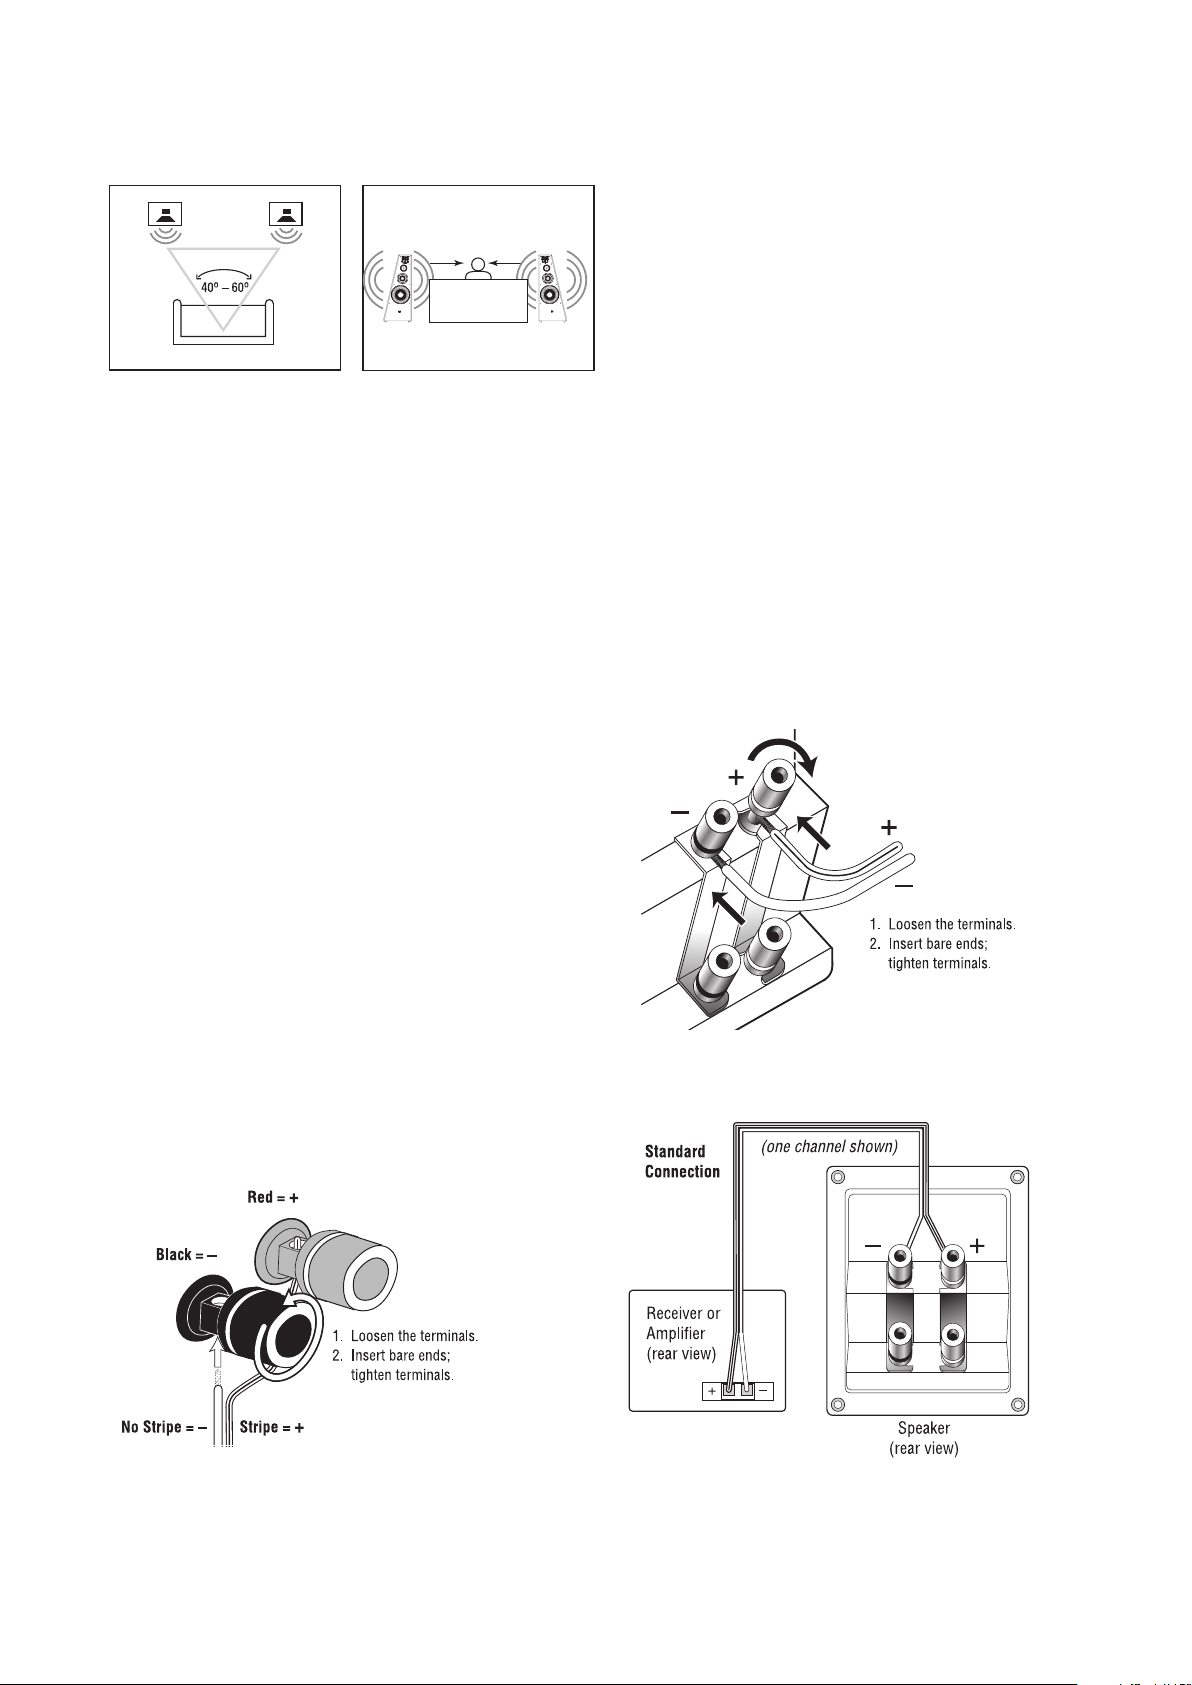
The speakers have coded terminals that accept a variety of wire
connectors. The most common connection is shown in Figure 1.
To ensure proper polarity, connect each + terminal on the back of
the amplifier or receiver to the respective + (red) terminal on each
speaker, as shown in Figure 3. Connect the – (black) terminals in a
similar way. See the owner’s guides that were included with your
amplifier, receiver and television to confirm connection procedures.
IMPORTANT: Do not reverse polarities (i.e., + to –
or – to +) when making connections. Doing so will
cause poor imaging and diminished bass response.
Figure 1. This figure shows how to connect bare wires to the
terminals.
Figure 2. This example shows how to connect bare wires to the
terminals.
Figure 3. Wiring diagram shows polarity connections for one channel
of a stereo or home theater system.
2
26766_TL260 OM_ENG 18/04/06 12:51 Side 2
Loading ...
Loading ...