Loading ...
Loading ...
Loading ...
8 9
PRE-INSTALLATION PROCEDURES
Ducted Mode Recirculating Mode
(Fig. 1) Knob Settings
Ducted Mode: Turn the knob to this
setting for Ducted Installation.
Recirculating Mode: Turn the knob
to this setting for a Recirulating
Installation.
• Please read the instructions carefully. Unpack the Range Hood and check that all
functions are working before installing.
• Ensure that the voltage (V) and the frequency (Hz) indicated on the sticker match the
voltage and frequency at the installation site.
• Check that the area behind the installation surface to be drilled is clear of any electrical
cables or pipes, etc.
• The stainless steel surfaces of the Range Hood are very easily damaged during
installation if scratched or bumped by tools. Please take care to protect the surfaces
during installation.
• Protect the cooktop surface below with cardboard, or the like, to prevent damage
occurring during installation.
• The manufacturer shall not be held liable for failure to observe all safety regulations.
You will need to set the Range Hood mode to either Ducted or Recirculating.
1. Remove Aluminum Filters
2. Locate Knob Settings located under the Motor (Fig. 1)
3. Unlock the Settings Knob by unscrewing and setting to Ducted or Recirculating mode.
4. Lock the Knob into place by replacing the screw from Step 3.
IMPORTANT READ BEFORE INSTALLATION
INSTALLATION INSTRUCTIONS
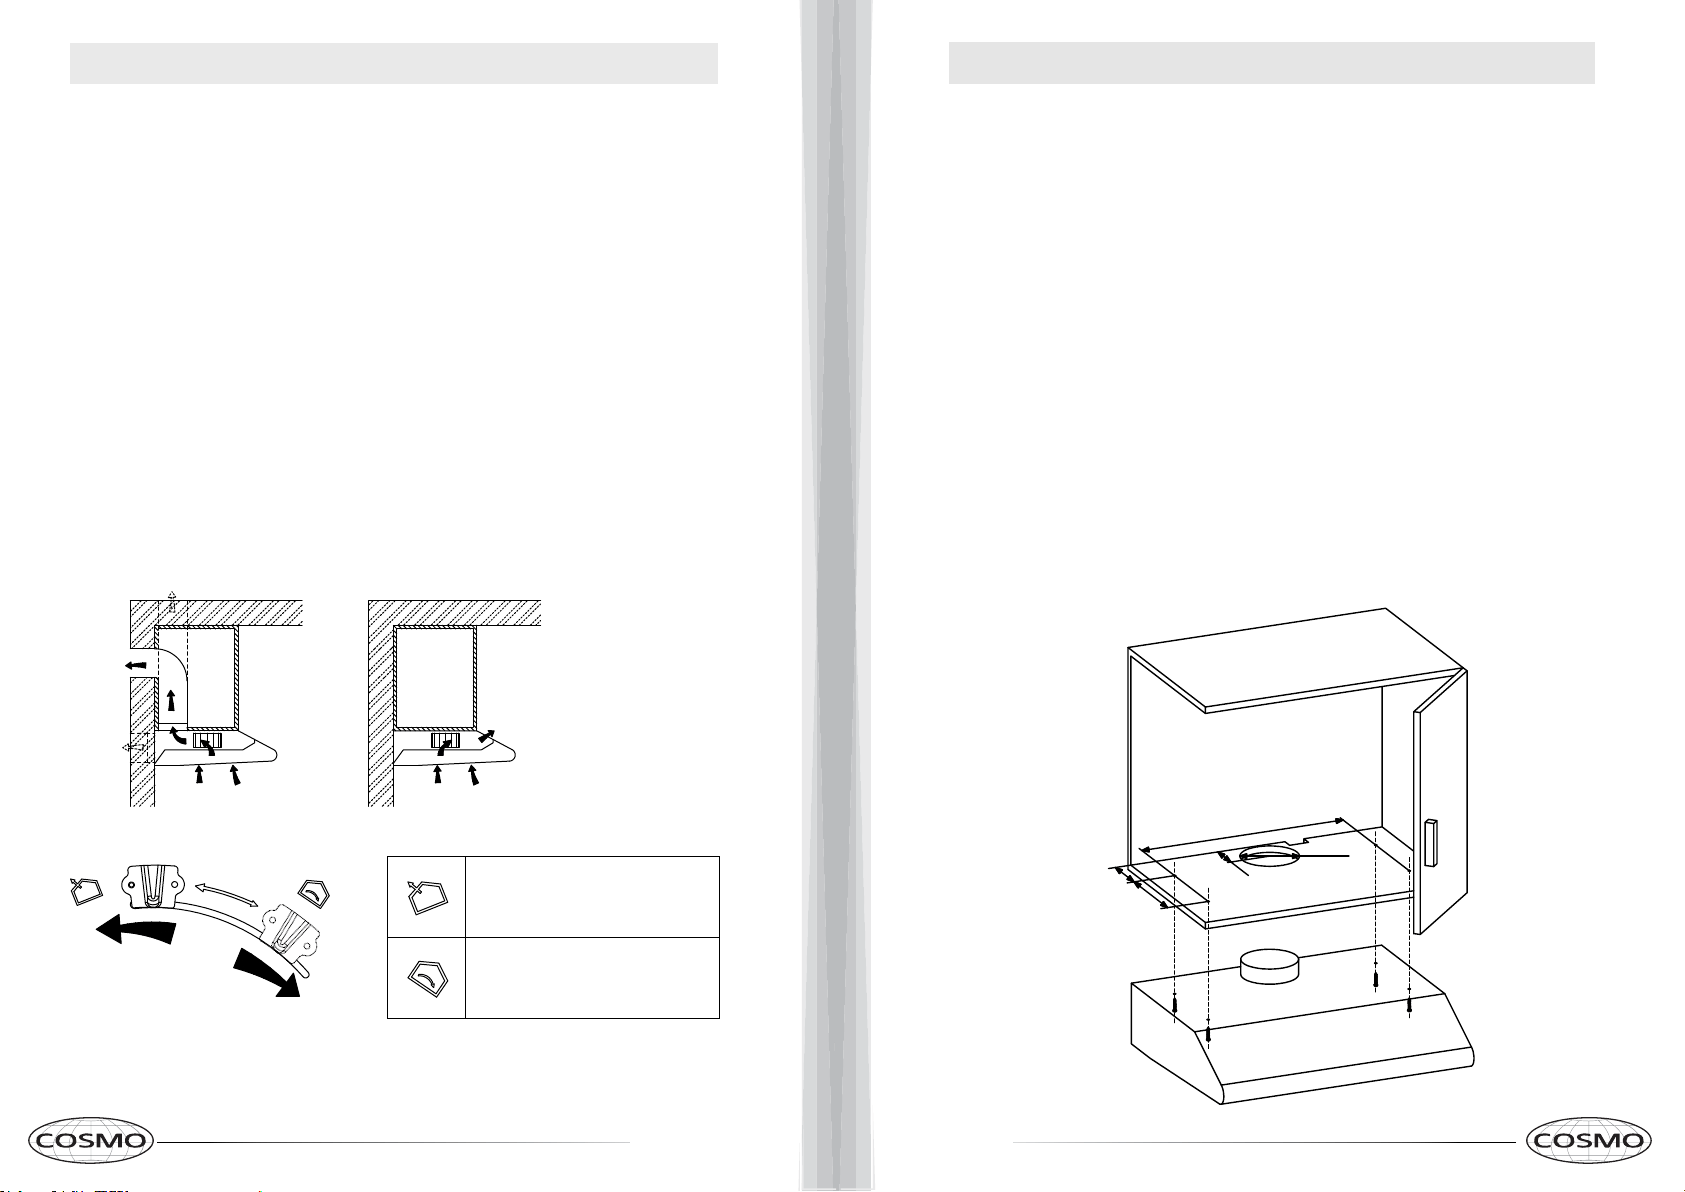
Cabinet Installation Method
1.
2.
Use the 4 screws to mount the Range Hood to the
cabinet. Check that your mounting screws are in
the correct place by temporarily fitting the Range
in place. If correct, lock into position by pushing in
the Range Hood.
130mm
2.75"
3.93"
7.08"
For Ducted installation drill a 130mm diameter hole
into the cabinet and four 3.5mm diameter holes as
pictured below picture.
For Ductless installation do not drill the 130mm
diameter hole in the cabinet. Drill only the four
3.5mm diamater holes as pictured below.
CAUTION: HOOD MAY HAVE VERY SHARP EDGES; PLEASE WEAR
PROTECTIVE GLOVES WHENEVER IT IS NECESSARY TO REMOVE ANY
PARTS FOR INSTALLING, CLEANING OR SERVICING.
Loading ...
Loading ...
Loading ...