Loading ...
Loading ...
Loading ...
7
Installation Instructions
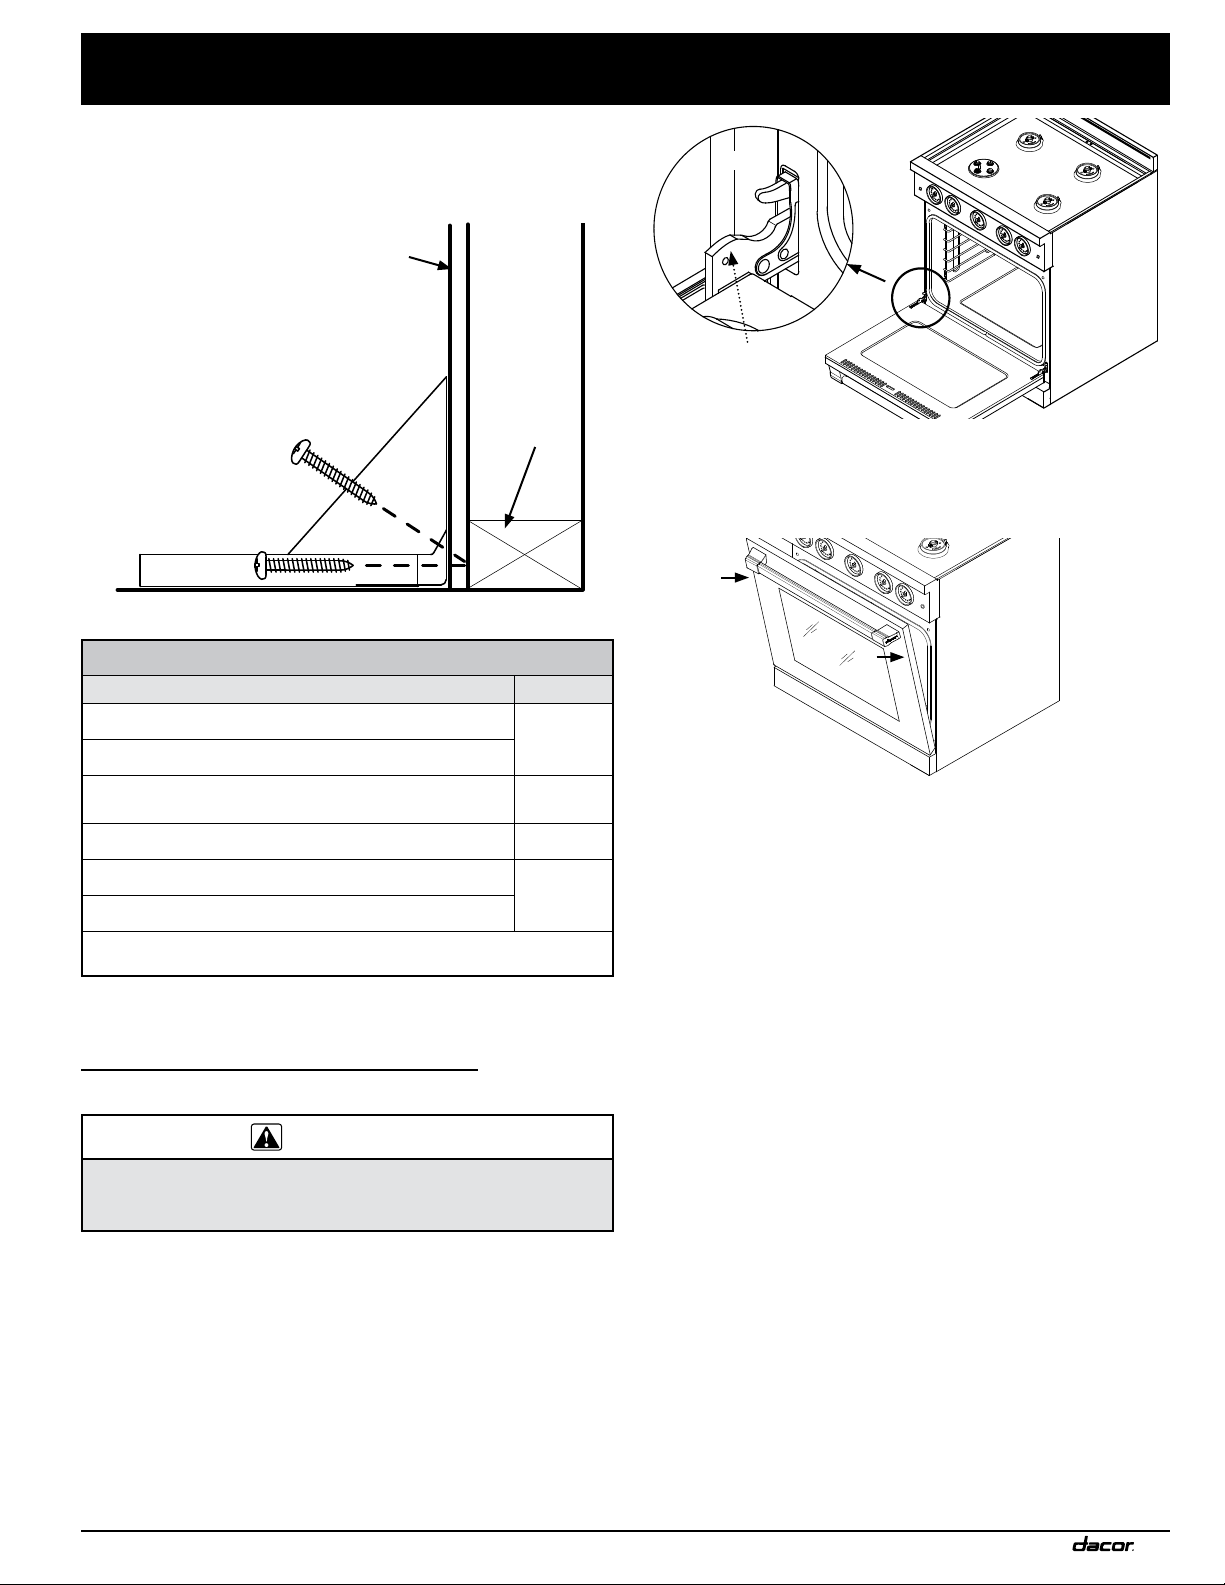
3. Close the oven door three-quarters shut (see below).
4. Grasp each side of the door just below the handle, and pull
the door away from the oven.
Removing the Oven Door
Removing the oven door makes sliding the range into place easier.
WARNING
• Do not try to disengage the hinge catches while the door is
off. The hinge springs could release, causing personal injury.
• Do not lift the oven door by the handle.
NOTE: If using a backguard, install it before sliding the range into
place. (See Pg. 5.)
1. Open the door so it lies flat.
2. With needle-nose pliers and a slotted screwdriver, flip the
catch over the retaining arm on each hinge.
Catch
Retaining Arm
5. Place the bracket against the wall in the mounting location.
Using a 1/8” bit, drill four 1-5/8” deep pilot holes perpendicular
to the screw-seating surfaces shown below. Attach the bracket
to the wall as shown with the included #12 x 1-3/4 screws.
SCREW SIZE TABLE
Sub-Floor Type/Floor Covering Thickness Screw
Concrete or wood sub-floor, no floor covering
#8 x 1*
Concrete/wood sub-floor, floor covering up to ¼” thick
Concrete/wood sub-floor, floor covering over ¼”, up to
½” thick
#8 x 1 ¼ *
Wood sub-floor, floor covering over ½”, up to 1 3/16” thick #12 x 1 ¾ *
Concrete under floor covering over ½” thick
Not
included**
Wood sub-floor, floor covering over 1-3/16” thick
*Included with range; **Determine required depth based on information in
Step 3 and purchase from local hardware store.
Wall
Stud
Base
Plate
Drywall
C
L
C
L
Loading ...
Loading ...
Loading ...