Loading ...
Loading ...
Loading ...
Version - 2/21/2005 25
www.vizioce.com
Chapter 3 - Getting Started
3.1 - Turning your Plasma TV On and Off
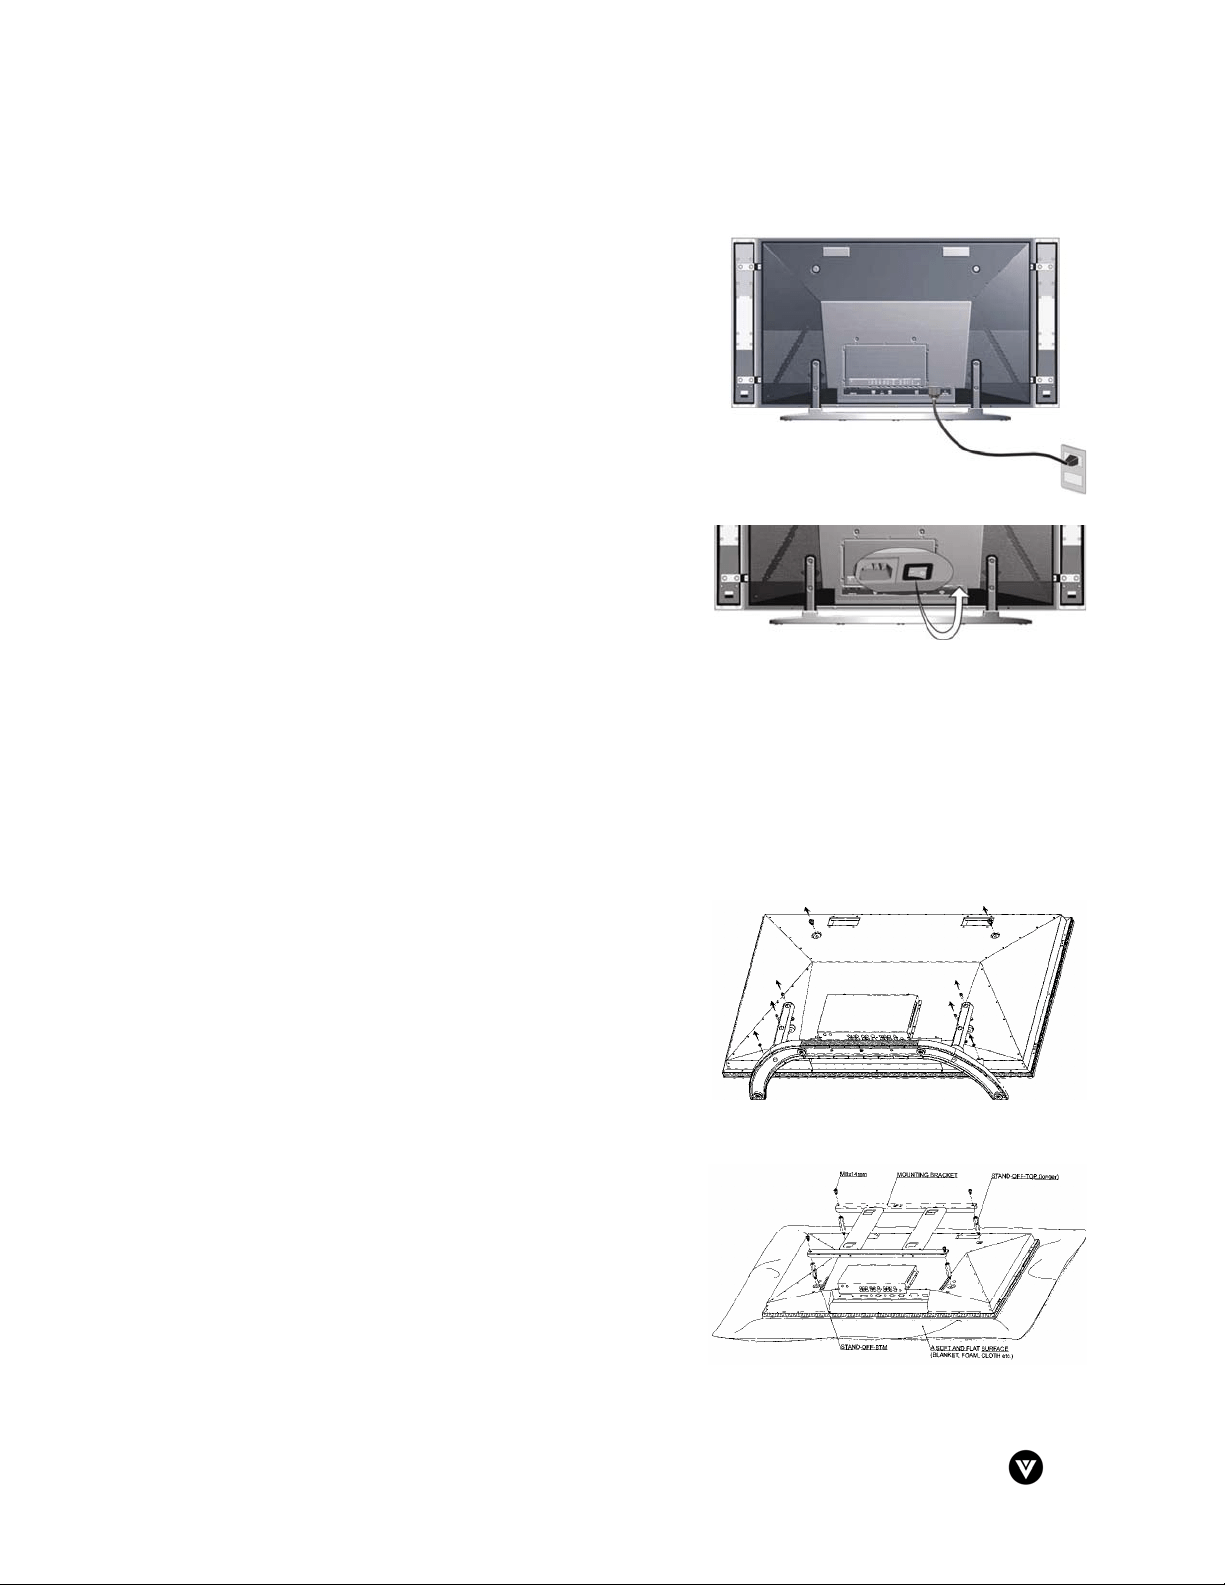
1. Plug the power cord into an AC wall socket.
2. Press the AC switch button on the back of the
Plasma TV. The POWER indicator on the front
panel will light orange.
3. Press the POWER button on the front panel or the
POWER button on the remote control to power on
the Plasma TV. The POWER indicator on the front
panel will light green.
4. Select input source for the Plasma TV, via either
OSD menu or remote control.
5. If connecting to antenna, cable or other RF
source on TV inputs, see page 30 to configure the
product to receive all available channels.
3.2 - Preparing the Plasma for Wall Mounting
The VIZIO P42 can either be kept on the base stand or mounted to the wall for viewing. If you
choose to mount the P42 to the wall, you will need to attach 4 stand-off screws (included within
the product packaging) to back panel so that the TV will fit evenly against a wall mount. Please
follow the instructions below for removing the base stand and adding the stand-off screws to
prepare the TV to be mounted.
To remove the stand base:
1. Unplug all the cables and cords from the Plasma
TV.
2. Place the Plasma TV face down on a soft and flat
surface (blanket, foam, cloth, etc) to prevent any
damage to the display.
3. Remove the 6 screws on the stand base of the
Plasma TV and the 2 screws on the upper part of
the display.
4. The stand can now be removed from the back
panel.
To add the stand-off screws to the back panel:
1. Secure both 55 mm stand-off screws in the screw
holes on the top side of the back panel.
2. Secure both 42 mm stand-off screws in the screw
holes on the bottom side of the back panel.
The Plasma TV will now fit flush against a Plasma TV
wall mount. Please make sure to read the directions of
your specific wall mount to properly hang the P42.
Loading ...
Loading ...
Loading ...