Loading ...
Loading ...
Loading ...
16
31-1000169 Rev. 4
STEP 9 REVERSE DOOR SWING
(if needed) (cont.)
8VLQJDƎ$OOHQZUHQFKUHPRYHWKHVFUHZV
per hinge that secure the door to the unit. Have
someone hold the door while removing these screws
to keep the door from falling.
2SHQWKHKLQJHV8VLQJDƎ$OOHQZUHQFK
remove the 2 screws per hinge that secure the hinge
to the unit cabinet.
5. Remove the trim and hinge pocket from the top of
the unit and install on the opposite sides.
6. Remove the trim and hinge pocket from the bottom
of the refrigerator compartment. Remove the control
panel and gently place in the FZ drawer.
7. Reinstall the control panel.
8. The hinges will be reinstalled in opposite corners.
The hinge from the top will be turned over
and installed at the bottom of the refrigerator
compartment. The hinge from the bottom will be
turned over and installed at the top of the refrigerator
compartment.
9. Install the screws on the refrigerator compartment
cabinet in all 4 places. Screw them in about halfway.
Installation Instructions
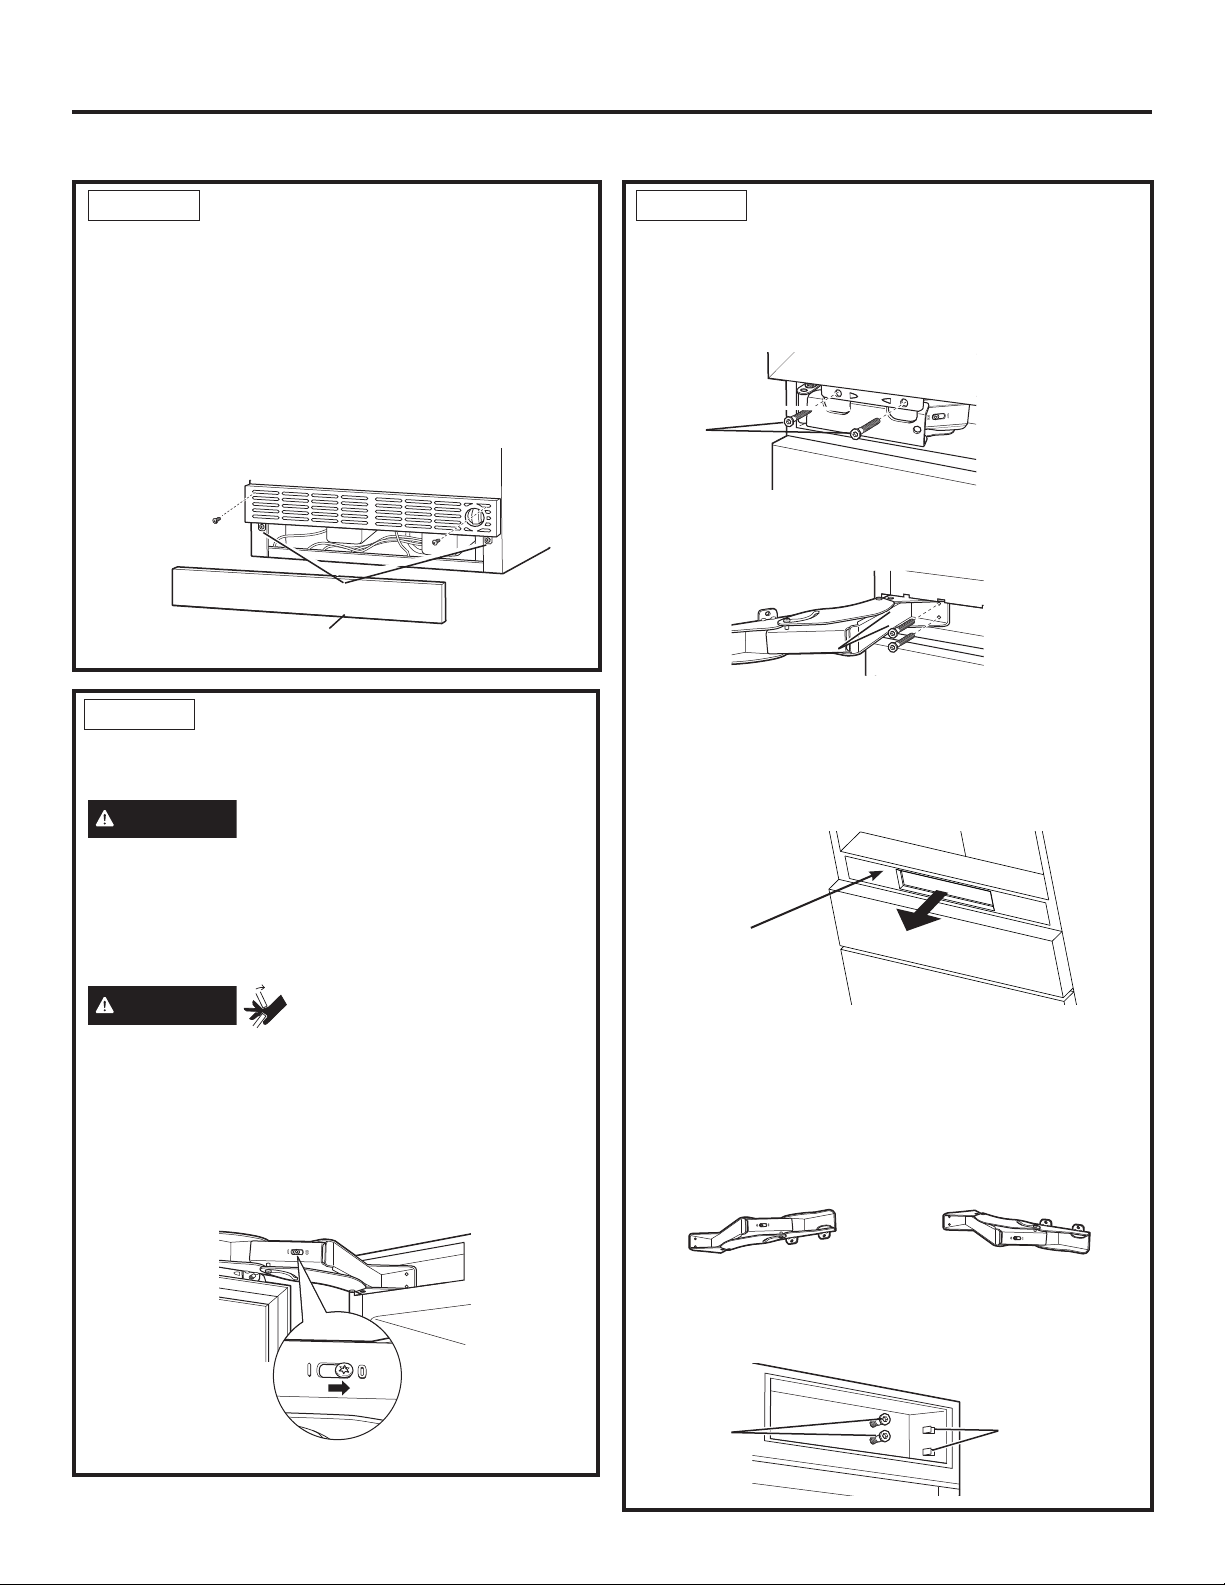
STEP 8 INSTALL TOEKICK AND
VENT
ŶLocate the toekick, vent and screws (removed
earlier).
ŶA custom toekick can be installed to match or
complement the surrounding cabinetry. Use the
supplied toekick as a template.
ŶReinstall the vent using the screws removed earlier.
ŶReinstall the toekick .
Supplied Toekick
Vent Holes
STEP 9 REVERSE DOOR SWING
(if needed)
Skip this step if door swing is satisfactory.
WARNING
Follow all steps when reversing
the door swing. Failure to follow these instructions,
leaving off parts, or overtightening screws, can
lead to the door falling off and result in injury and
property damage.
1. Remove the front tape from unit.
WARNING
Door Hinge Pinch
Point Hazard
This next step is important for safe handling of an
unloaded hinge. Do not skip step 2.
2. Release the hinge springs by using a Torx T-20
wrench to loosen the Torx screw from | to 0 on both
hinges. Close the door.
Top Hinge Bottom Hinge
Slots for
Tabs
Screws
Control Panel
Screws
Screws
INSTALLATION INSTRUCTIONS FOR SINGLE UNIT (cont.)
Loading ...
Loading ...
Loading ...