B07PWY8D87
Notebook Arm Mount Tray
Plateaux avec Bras Articulé pour Ordinateur Portable
Notebook-Ablage mit Armhalterung
Supporto per Notebook a Braccio
Bandeja de Soporte con Brazo para Notebook
Notebookplateau voor Armsteun
ノートパソコンアームマウントトレイ

English .................................................... 3
Français ................................................ 10
Deutsch ................................................. 17
Italiano .................................................. 24
Español ................................................. 31
Nederlands ............................................ 38
日本語 .................................................... 45
3
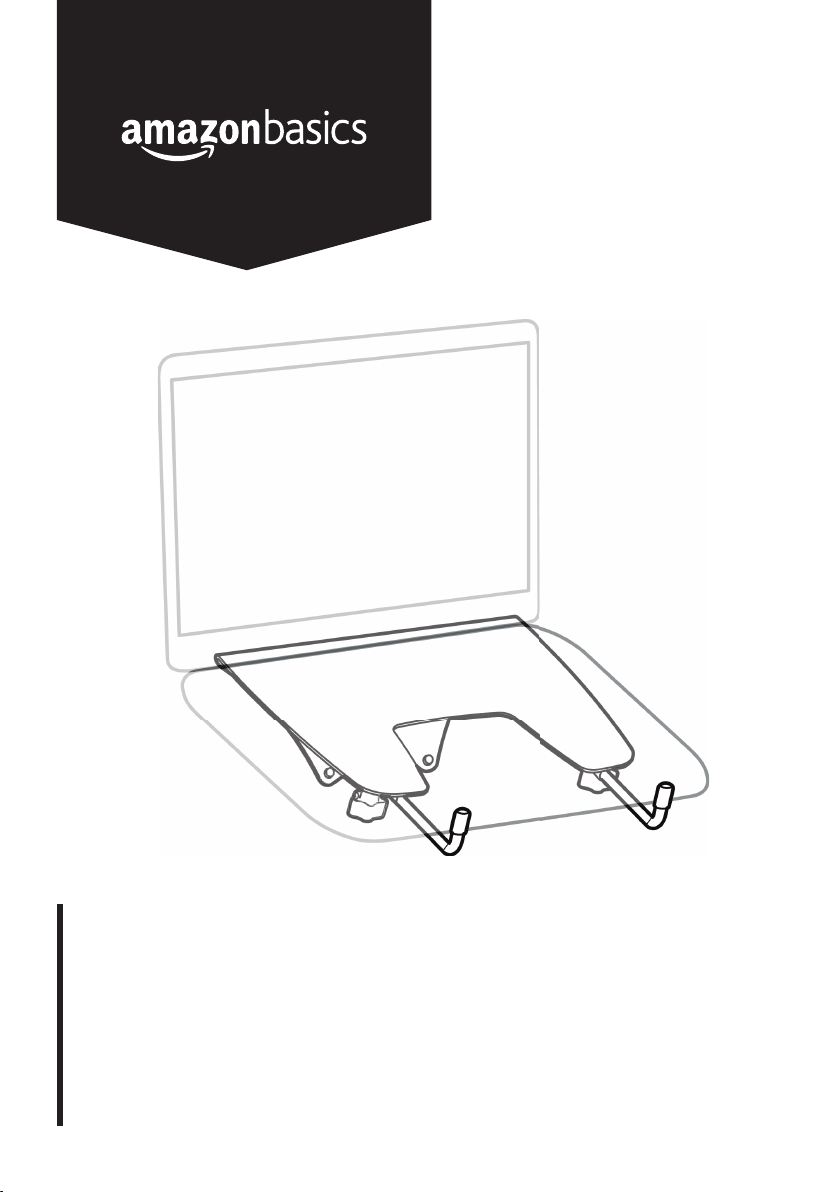
Welcome Guide
•
English
Contents:
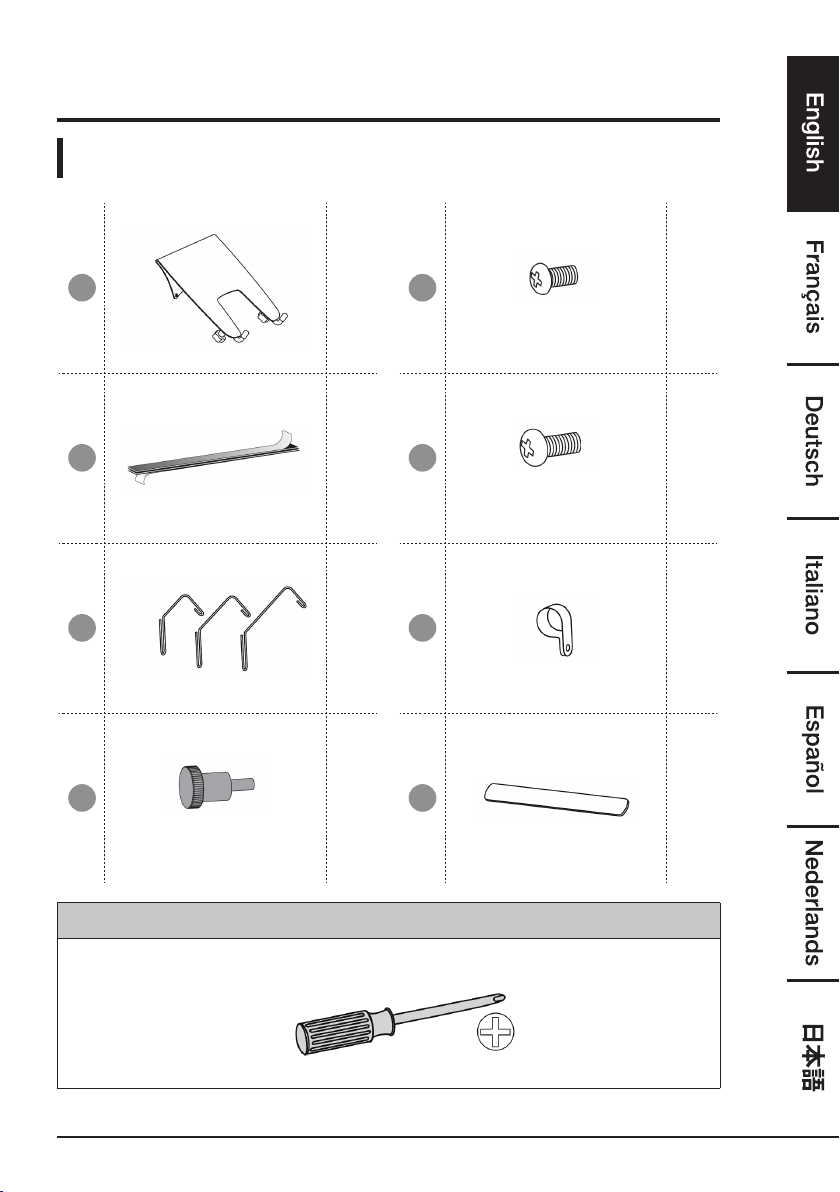
Before getting started, ensure the package contains the following components:
A
x1
E
M3 × 6 mm
x1
B
x3
F
M4 × 10 mm
x4
C
x2
G
x2
D
M4 × 10 mm
x4
H
x2
You will need
4
IMPORTANT SAFEGUARDS
Read these instructions carefully and retain them for future use. If this
product is passed to a third party, then these instructions must be
included.
When using the product, basic safety precautions should always be followed to
reduce the risk of injury including the following:
• This product will need tension adjustments after installation is complete. Make
sure that all equipment is properly installed on the product before attempting
range of motion or tension adjustments. Any time equipment is added or changed
on this product resulting in a different mounted weight, you should repeat the
adjustment steps to ensure safe and optimum operation. This product should
move smoothly and easily through the full range of motion and stay where you set
it. If movement is difficult or the product does not stay where you set it, follow the
adjustment instructions to loosen or tighten the tension to create a smooth, easy
motion. Depending on your product and the adjustment, it may take many turns
to notice a difference.
Before First Use
• Check for transport damages.
DANGER
Risk of suffocation! Keep any packaging materials away from
children – these materials are a potential source of danger, e.g.
suffocation.
Assembly
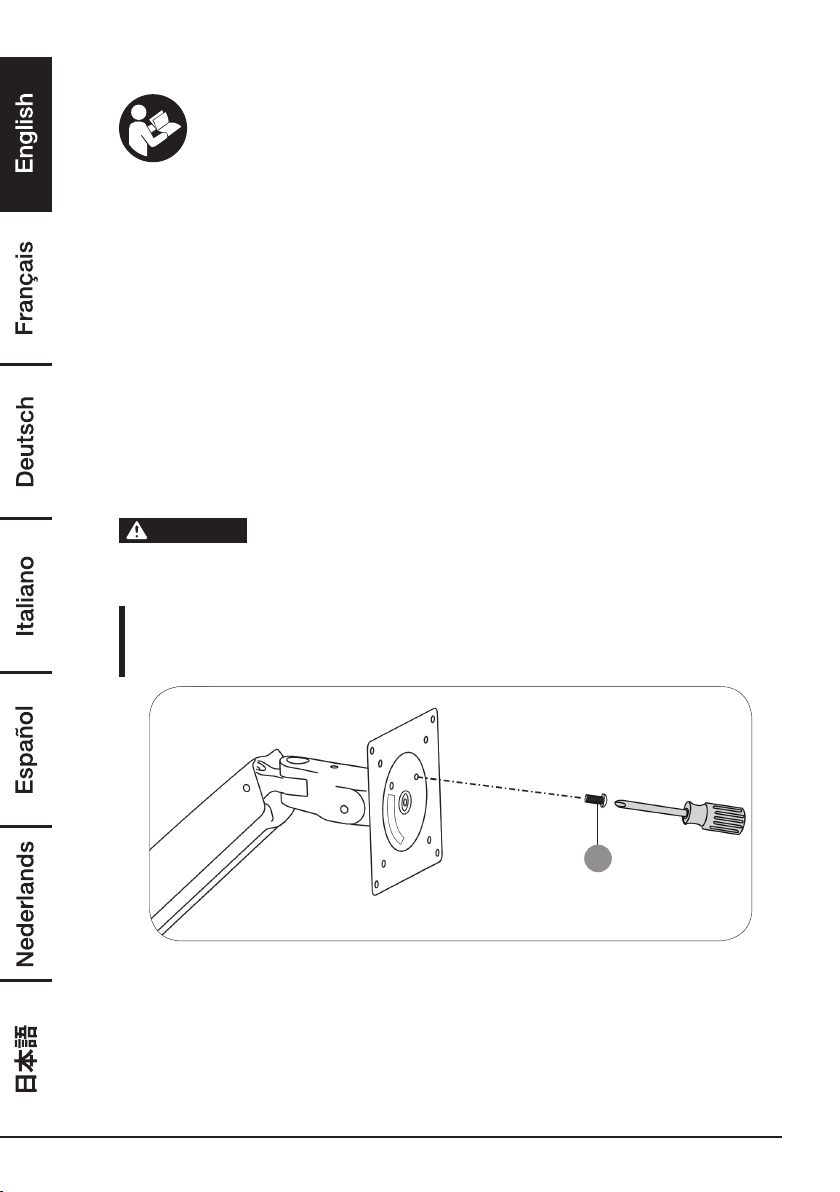
Step 1: Lock the arm orientation
E
• On your existing mount arm, insert the M3 × 6 mm screw into the front of the
plate to lock its orientation.
5
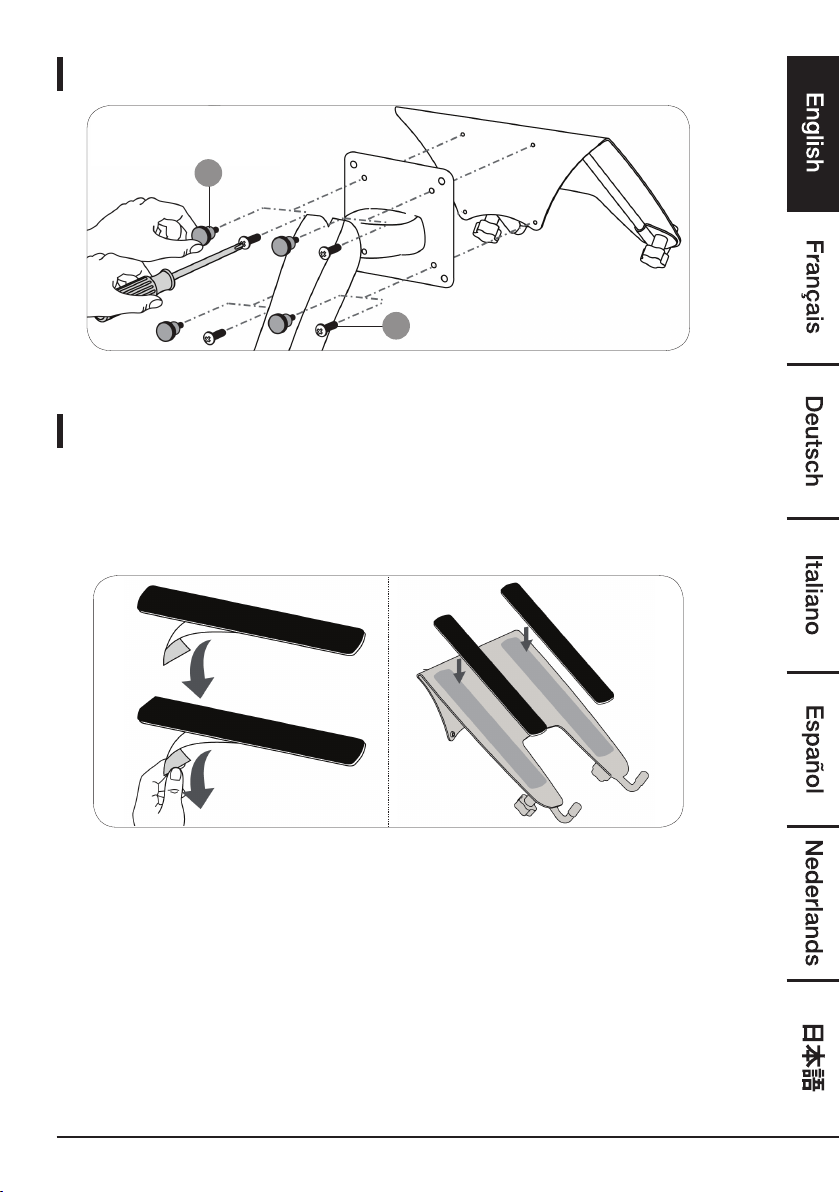
Step 2: Attach the notebook tray
x 4
F
x 4
D
• Attach the notebook tray to the mounting plate with either the M4 × 10 mm
screws and a screwdriver or the M4 × 10 knobs. Hand-tighten the knobs.
Step 3: Determine the connection method
You can place your notebook:
• Directly on the notebook tray.
• On a docking station (not included) that is mounted to the notebook tray.
Notebook tray
• Step A: Remove the backing from the non-slip pads, then place them on the
notebook tray (as shown).
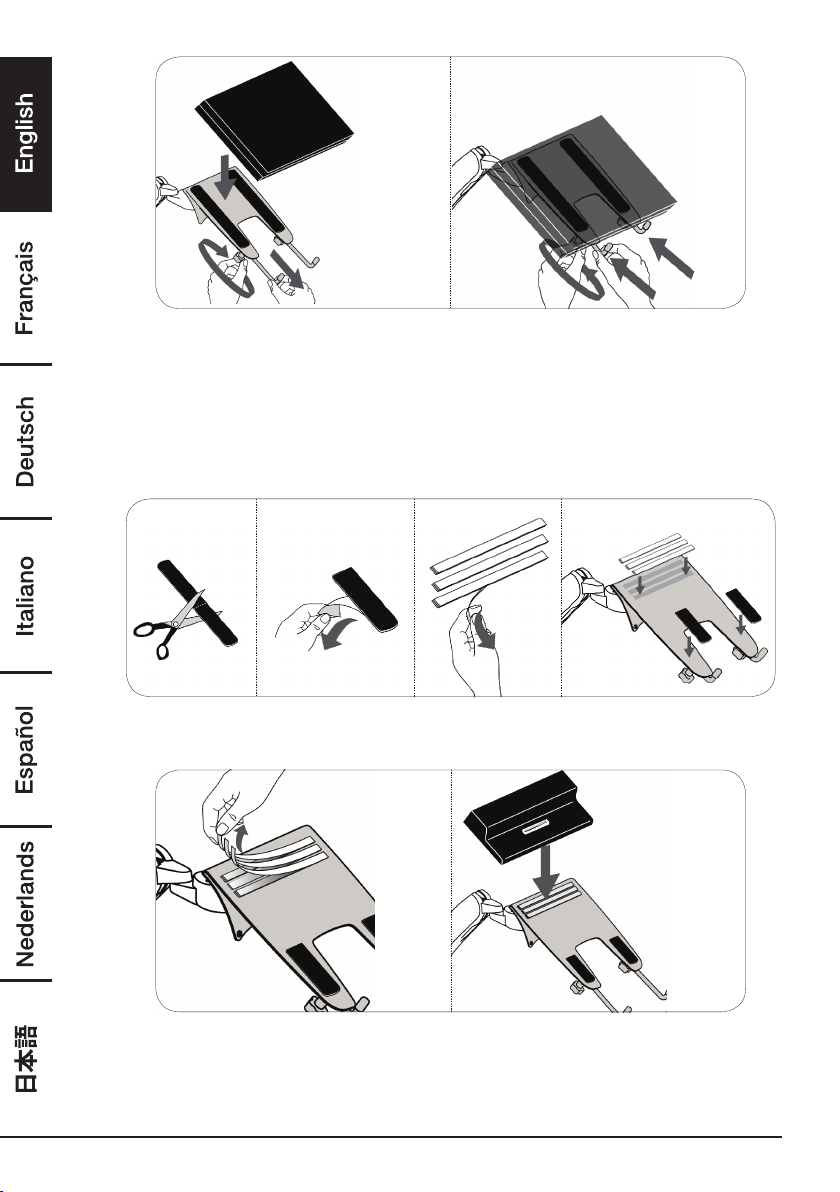
6
• Step B: Loosen the adjustment knobs underneath the notebook tray to adjust the
length of the notebook tray legs, and place notebook on the tray. Then
tighten to secure. Your notebook should fit snugly against the notebook
tray legs.
• Step C: See “Step 4: Adjust your arm’s tension” on page 8 to adjust your
notebook arm’s tension.
Docking station
• Step A: Cut the non-slip pads in half, remove the backing, then place them on the
notebook tray (as shown).
• Step B: Remove the backing from the three adhesive strips on the notebook tray,
then firmly press your docking station onto the strips. The back of the
docking station should be flush with the back of the notebook tray.
7
• Step C: Loosen the adjustment knobs underneath the notebook tray to adjust the
length of the notebook tray legs, and place notebook on the tray. Then
tighten to secure. Your notebook should fit snugly against the notebook
tray legs.
• Step D: Measure a small, medium, and large hook against the back of the
notebook tray and docking station, then pick the hook that fits around
it best. One at a time, loosen the top mounting screws on the arm, then
slide the hook around the screw and your docking station. Tighten the
mounting screw to hold the hook in place.
NOTICE
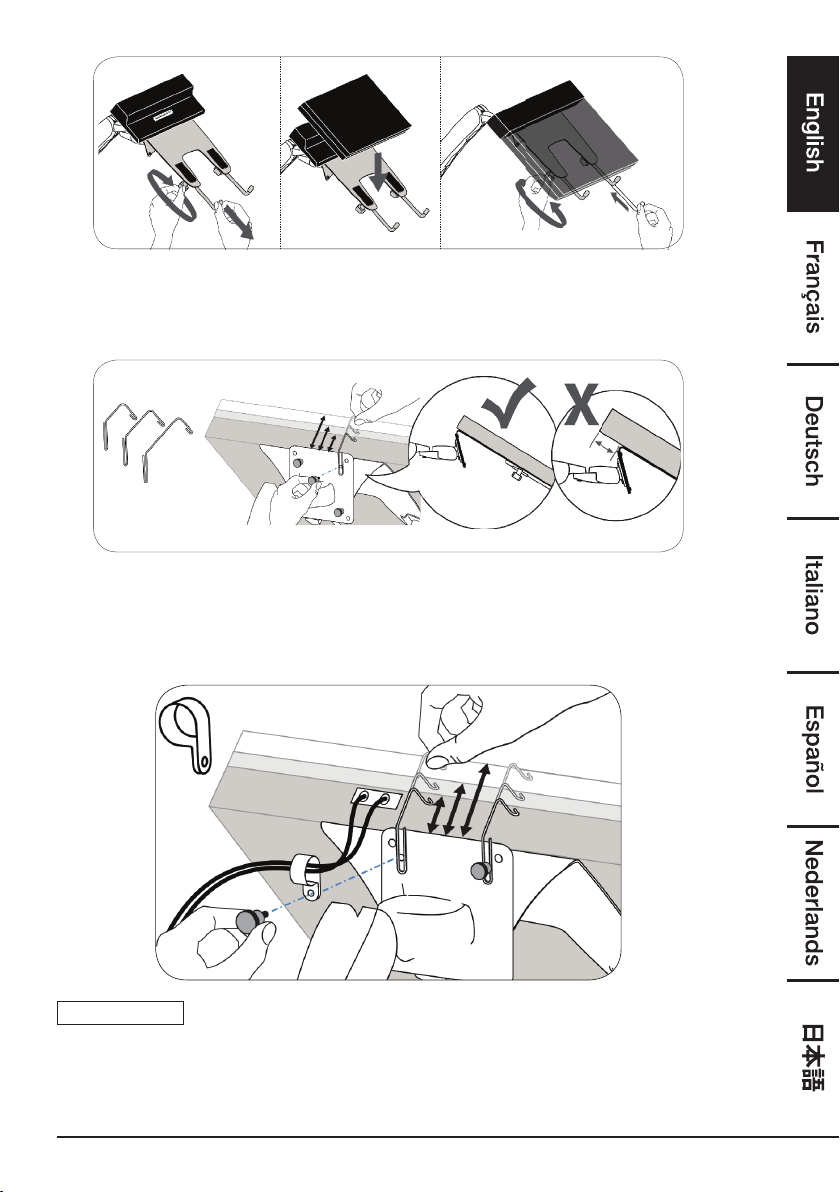
You can also remove a mounting screw to attach the cable clip.
8
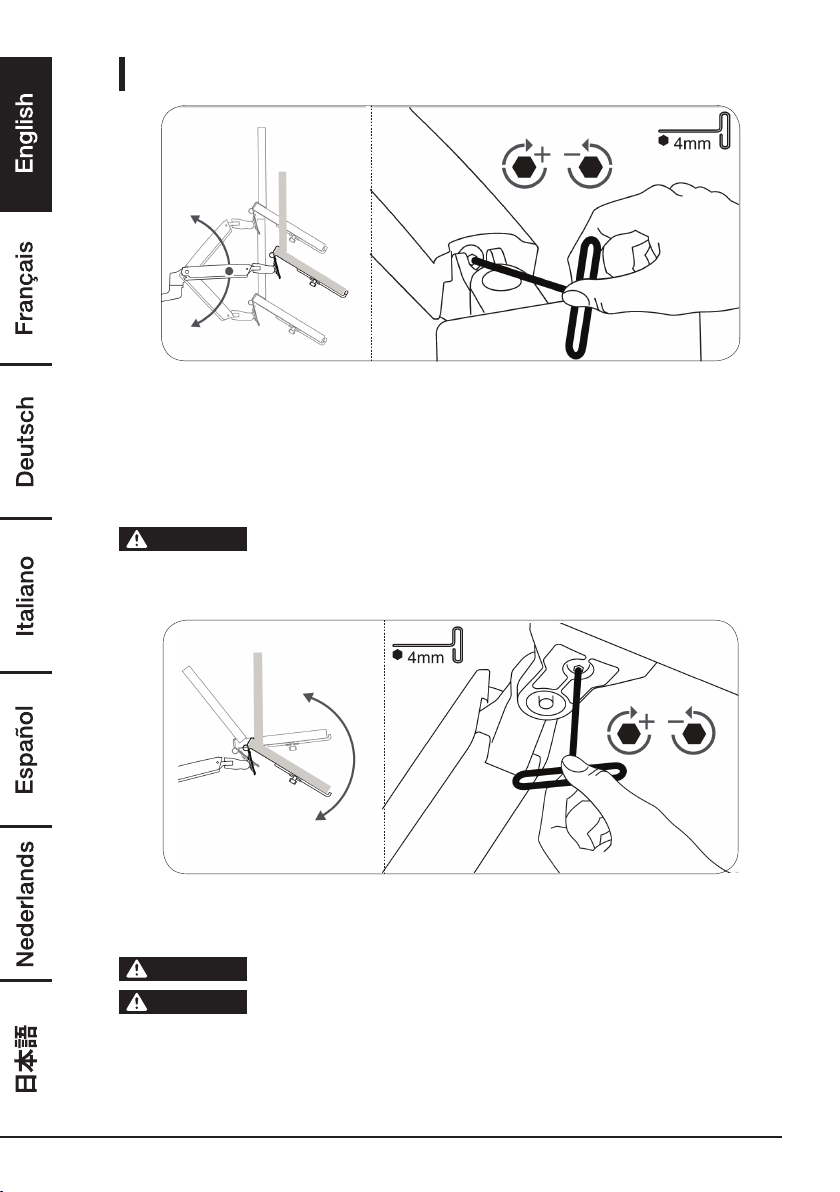
Step 4: Adjust the mounting arm tension
Adjust your notebook mount’s tension. You can adjust the vertical, tilt, and arm
tension so that the notebook stays in place when you move it.
Adjusting the vertical tension
Tilt the notebook down to access the screw. If the notebook is rising up, loosen the
screw by turning it to the left. If the notebook is falling down, tighten the screw by
turning it to the right.
CAUTION
Do not over-tighten the screw. You might damage your notebook
mount.
Adjusting the tilt tension
If the notebook tray is falling forward (tilts towards floor), loosen the screw by turning it
to the left. If the notebook tray is falling back (tilts toward ceiling), tighten the screw by
turning it to the right.
CAUTION
Do not remove the screw. The notebook tray might fall.
CAUTION
Do not over-tighten the screw. You might damage your notebook
mount.

9
Warranty Information
To obtain a copy of the warranty for this product:
US: amazon.com/AmazonBasics/Warranty
UK: amazon.co.uk/basics-warranty
US: +1-866-216-1072
UK: +44 (0) 800-279-7234
Feedback and Help
Love it? Hate it? Let us know with a customer review. AmazonBasics is committed
to delivering customer-driven products that live up to your high standards. We
encourage you to write a review sharing your experiences with the product.
US: amazon.com/review/review-your-purchases#
UK: amazon.co.uk/review/review-your-purchases#
US: amazon.com/gp/help/customer/contact-us
UK: amazon.co.uk/gp/help/customer/contact-us

51
保証について
この製品の保証書のコピーを入手するには:
amazon.jp/AmazonBasics/Warranty
+81 (0) 120-899-276
フィード バ ックとサ ポ ート
気に入っていただけましたか?お気に召しませんでしたか? カスタマー
レビューでお知らせください。 Amazonベーシック は、皆様の高い水準
に答えることのできるような消費者志向型の製品をお届けするのを旨とし
ています。この製品についてのレビューで製品についてのご意見をお聞か
せください。
amazon.jp/review/review-your-purchases#
amazon.jp/gp/help/customer/contact-us

中国製
HECHO EN CHINA
GEMAAKT IN CHINA
PRODOTTO IN CINA
HERGESTELLT IN CHINA
FABRIQUÉ EN CHINE
MADE IN CHINA
amazon.com/AmazonBasics
V1-05/19