Loading ...
Loading ...
Loading ...
9
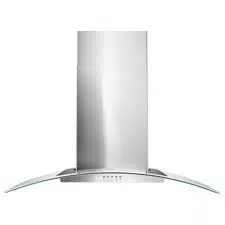
8. Prepare Range Hood Vents
andMounting Tabs
■ Install Strain Relief
Install a UL listed/CSA approved 1/2" (13 mm)
strainrelief(A).
■ Mounting Tabs
Start a #8-18 x 5/8" (4.2 x 16 mm) truss-head screw into
themounting tab (D) on each side of the range hood
asshown in the inset. Insert the screws approximately
2turns into the mounting tab holes.
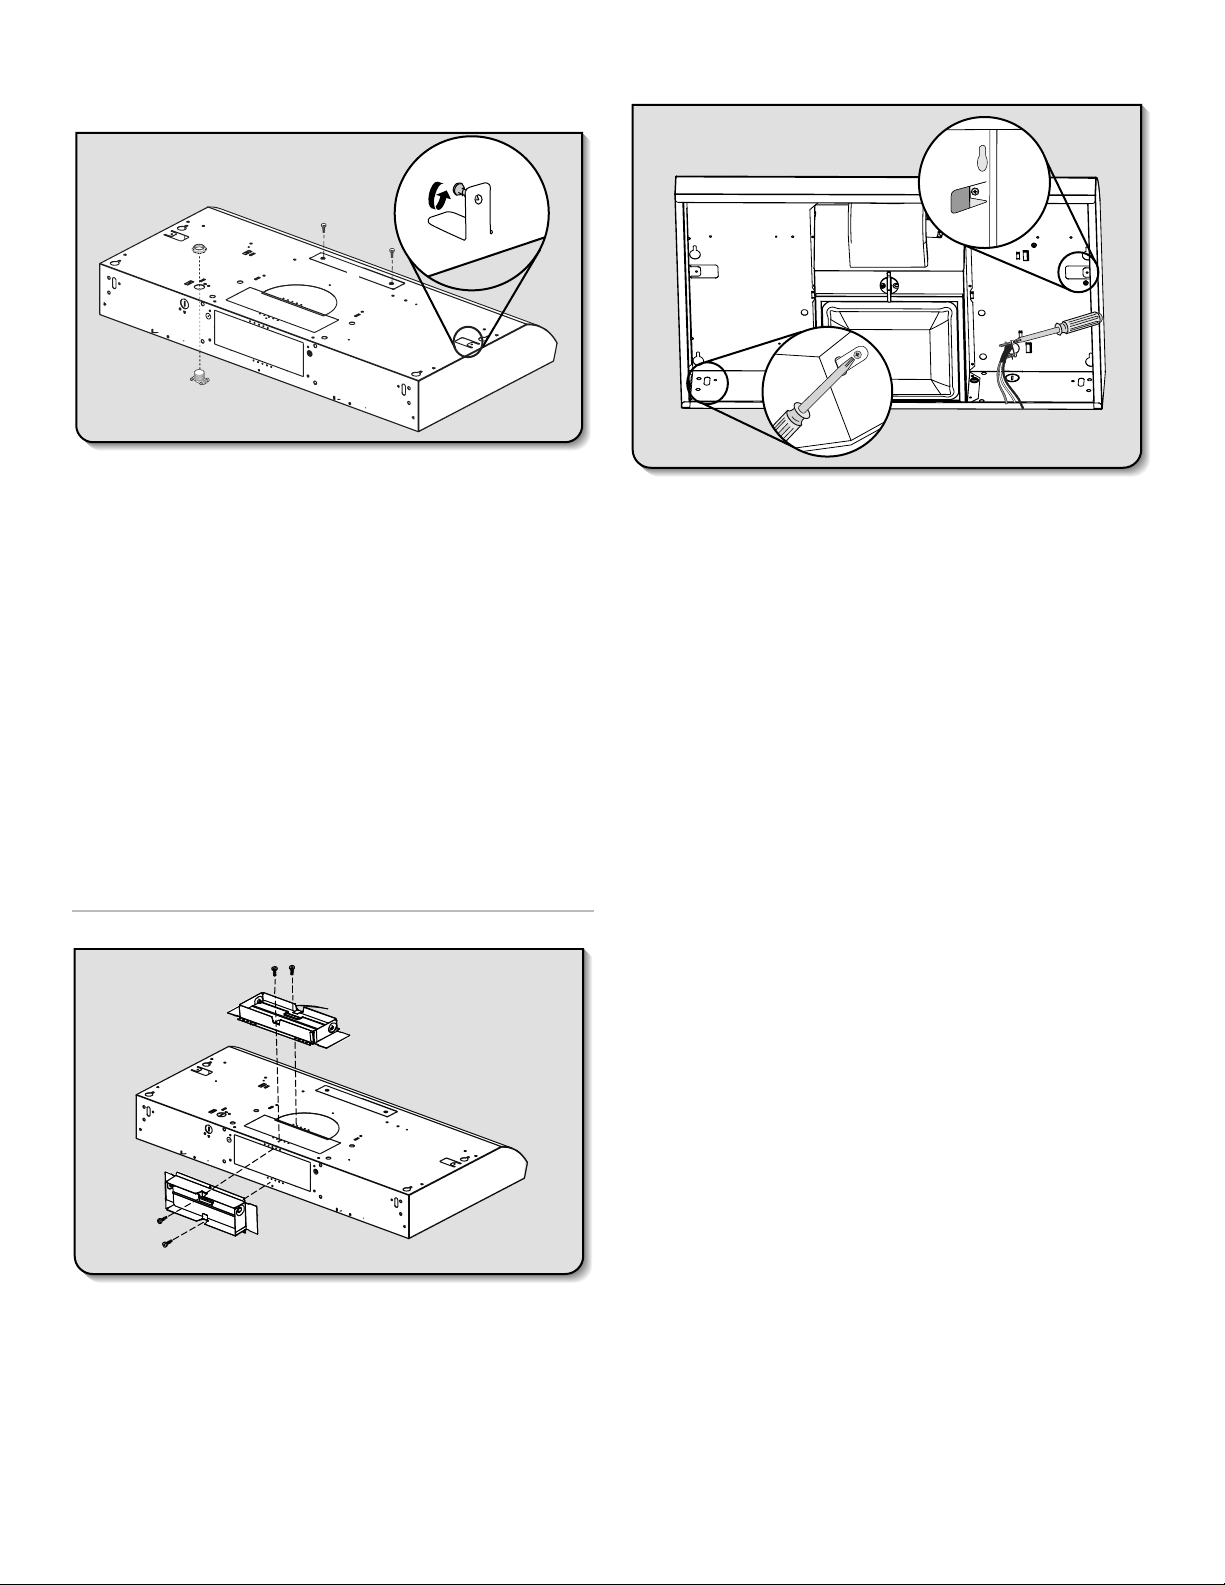
■ Non-vented (Recirculating) Installations
Using a #2 Phillips screwdriver remove the 2 screws
andremove the top, front rectangular vent cover (D).
GotoStep12.
■ 3
1
/
4
" x 10" (8.3 x 25.4 cm) Rectangular Vent Installations
For top vent installations, remove the top rectangular
ventknockout (C).
OR
For wall vent installations, remove the rear rectangular
ventknockout (B).
9. Attach Vent Damper or Transition
3
1
/
4
" x 10" (8.3 x 25.4 cm) Rectangular Vent Damper
Using (2) short Phillips head screws, install the 3
1
/
4
" x 10"
(8.3 x25.4 cm) rectangular damper over the top or rear
ventknockout removed in Step 8.
NOTE: If the wall cap used has a damper and it interferes with
the rectangular damper, remove the rectangular damper ap.
10. Mount Range Hood
■ Lift the range hood into place, positioning the rear slots
overthe mounting brackets.
■ Using a Phillips screwdriver, push on the screws that
arestarted into the top mounting tabs and bend the
tabsagainst the cabinet side walls. Attach the screws
tothecabinet side walls.
IMPORTANT: Do not overtighten the screws.
■ For direct wire installations, run the home power supply
cable according to the National Electric Code or CSA
standards and local codes and ordinances. There must
beenough wiring from the fused disconnect (or circuit
breaker) box to make the connection in the range hood
electrical terminal box.
■ Tighten the strain relief screws.
NOTE: Do not reconnect power until the installation
iscomplete.
OPTIONAL: If you prefer, bend the rear tabs against
therearof the range hood and attach to the wall using
#8-18x 5/8" (4.2 x 1.6 cm) truss-head screws.
11. Connect Vent System
■ Connect the ventwork to the range hood.
■ Seal joints with vent clamps or duct tape to make
secureandairtight.
■ Check that the backdraft dampers work properly.
A
B
C
D
x2
E
Loading ...
Loading ...
Loading ...