Register your product and get support at
www.philips.com/welcome
EN User manual
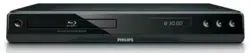
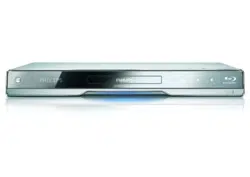
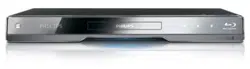
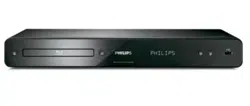
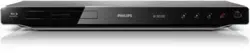
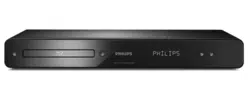
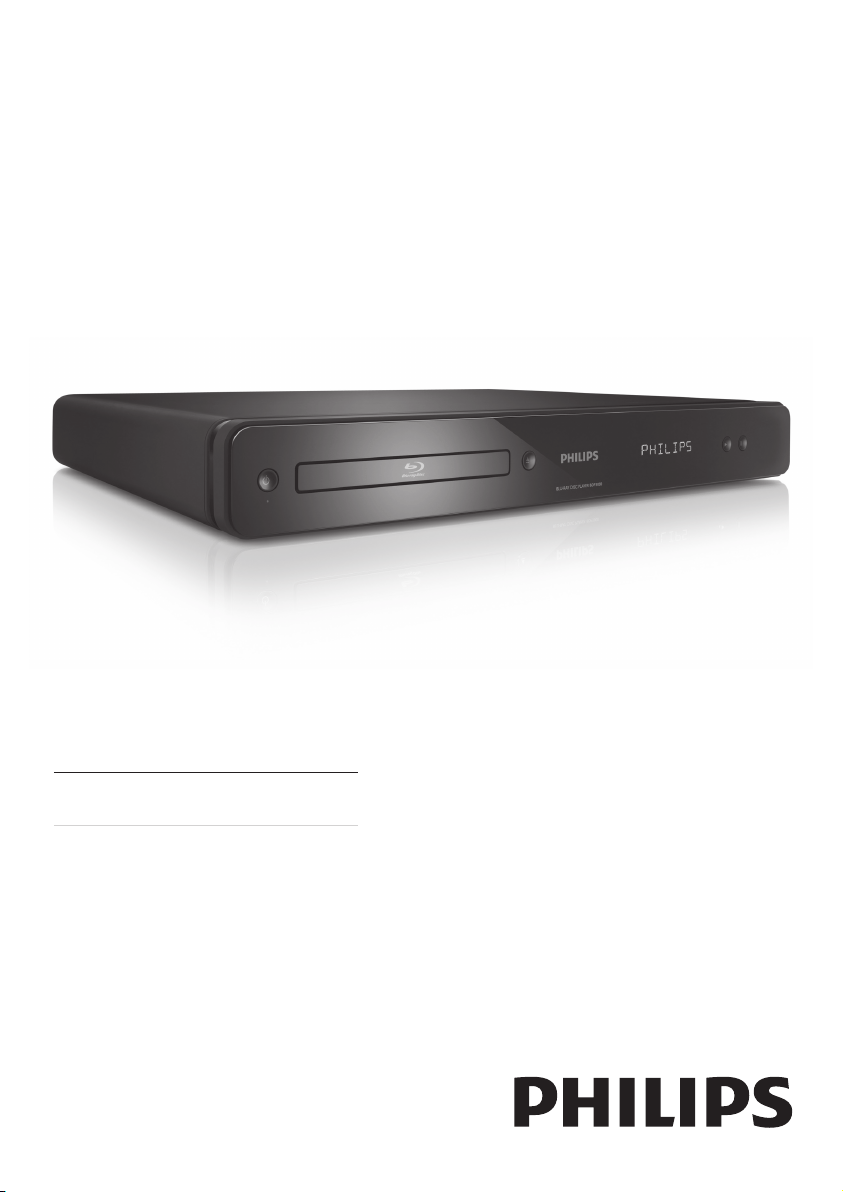
BDP3000

Important notes for users in U.K.
Mains plug
This apparatus is tted with an approved moulded
plug. Should it become necessary to replace the
main fuse, this must be replaced with a fuse of
same value as indicated on the plug (example 10A).
1. Remove fuse cover and fuse.
2. The replacement fuse must comply with
BS1362 and have the A.S.T.A. approval mark. If
the fuse is lost, contact your dealer in order to
verify the correct type.
3. Ret the fuse cover.
In order to maintain conformity to the EMC
directive, the mains plug on this product must not
be detached from the mains cord.
Copyright in the U.K.
Recording and playback of material may require
consent. See Copyright Act 1956 and The
Performer’s Protection Acts 1958 to 1972.
Italia
DICHIARAZIONE DI CONFORMITA’
Si dichiara che l’apparecchio BDP3000, Philips
risponde alle prescrizioni dell’art. 2 comma 1 del
D.M. 28 Agosto 1995 n.548.
Fatto a Eindhoven
Philips Consumer Lifestyles
Philips, Glaslaan 25616 JB Eindhoven,
The Netherlands
DK
Advarsel: Usynlig laserstråling ved åbning når
sikkerhedsafbrydere er ude af funktion. Undgå
utsættelse for stråling.
Bemærk: Netafbryderen er sekundært indkoblet
og ofbryder ikke strømmen fra nettet. Den
indbyggede netdel er derfor tilsluttet til lysnettet
så længe netstikket sidder i stikkontakten.
S
Klass 1 laseraparat
Varning! Om apparaten används på annat sätt
än i denna bruksanvisning speci cerats, kan
användaren utsättas för osynlig laserstrålning, som
överskrider gränsen för laserklass 1.
Observera! Stömbrytaren är sekundärt kopplad
och bryter inte strömmen från nätet. Den
inbyggda nätdelen är därför ansluten till elnätet så
länge stickproppen sitter i vägguttaget.
SF
Luokan 1 laserlaite
Varoitus! Laitteen käyttäminen muulla kuin
tässä käyttöohjeessa mainitulla tavalla saattaa
altistaa käyttäjän turvallisuusluokan 1 ylittävälle
näkymättömälle lasersäteilylle.
Oikeus muutoksiin varataan. Laite ei saa
olla alttiina tippu-ja roiskevedelle. Huom.
Toiminnanvalitsin on kytketty toisiopuolelle,
eikä se kytke laitetta irti sähköverkosta.
Sisäänrakennettu verkko-osa on
kytkettynä sähköverkkoon aina silloin, kun pistoke
on pistorasiassa.
Norge
Typeskilt nnes på apparatens underside.
Observer: Nettbryteren er sekundert innkoplet.
Den innebygde netdelen er derfor ikke
frakoplet nettet så lenge apparatet er tilsluttet
nettkontakten.
For å redusere faren for brann eller elektrisk støt,
skal apparatet ikke utsettes for regn eller fuktighet.
Producent zastrzega możliwość wprowadzania
zmian technicznych.
LASER
CAUTION:
USE OF CONTROLS OR ADJUSTMENTS OR
PERFORMANCE OF PROCEDURES OTHER
THAN THOSE SPECIFIED HEREIN MAY RESULT
IN HAZARDOUS RADIATION EXPOSURE.
CAUTION:
VISIBLE AND INVISIBLE LASER RADIATION
WHEN OPEN AND INTERLOCK DEFEATED.
DO NOT STARE INTO BEAM.
LOCATION:
INSIDE, NEAR THE DECK MECHANISM.

3
English
EN
Contents
1 Important 4
Safety and important notice 4
2 Your product 5
Feature highlights 5
Product overview 6
3 Connect 8
Connect video/audio cables 8
Route audio to other devices 9
Connect network 10
Connect USB device 10
Connect power 10
4 Get started 10
Prepare the remote control 11
Find the correct viewing channel 11
Use the Home menu 11
Navigate the menu 11
Select menu display language 11
Setup network 12
Use Philips EasyLink 12
5 Play 12
Play a disc 12
Play video 13
Play music 15
Play photo 16
6 Adjust settings 17
Video setup 17
Audio Setup 18
Preference Setup 19
EasyLink Setup 19
Advanced Setup 20
7 Additional Information 21
Update software 21
Care 21
Specications 21
8 Troubleshooting 22
9 Glossary 23
Open Source Software 25
ČESKA REPUBLIKA
Výstraha! Tento přístroj pracuje s laserovým
paprskem. Při nesprávné manipulaci s přístrojem
(v rozporu s tímto návodem) můże dojít k
nebezpečnému ozáření. Proto přístroj za chodu
neotevírejte ani nesnímejte jeho kryty. Jakoukoli
opravu vždy svěřte specializovanému servisu.
Nebezpečí! Při sejmutí krytů a odjištění
bezpečnostních spínačů hrozí nebezpečí
neviditelného laserového záření!
Chraňte se před přímým zásahem laserového
paprsku.
Pokud byste z jakéhokoli důvodu přístroj
demontovali, vždy nejdříve vytáhněte síťovou
zástrčku.
Přístroj chraňte před jakoukoli vlhkostí i před
kapkami vody.
Specikace Laseru:
Typ Laseru: •
BD Laser Dioda: InGaN/AlGaN•
DVD Laser Dioda: InGaAlP•
CD Laser Dioda: AlGaAs•
Vlnová délka:•
BD: 405 +5nm/-5nm •
DVD: 650 +13nm/-10nm •
CD: 790 +15nm/-15nm •
Výstupní výkon: •
BD: Max. výkon: 20mW•
DVD: Max. výkon: 7mW•
CD: Max. výkon: 7mW•
4
Copyright notice
This product
incorporates copyright
protection technology
that is protected by method claims of certain U.S.
patents and other intellectual property rights
owned by Macrovision Corporation and other
rights owners. Use of this copyright protection
technology must be authorised by Macrovision
Corporation, and is intended for home and
other limited viewing uses only unless otherwise
authorised by Macrovision Corporation. Reverse
engineering or disassembly is prohibited.
Trademark notice
HDMI, and HDMI logo and
High-Denition Multimedia
Interface are trademarks or registered trademarks
of HDMI licensing LLC.
Windows Media and the Windows
logo are trademarks, or registered
trademarks of Microsoft Corporation
in the United States and/or other countries.
‘DVD Video’ is a trademark of DVD
Format/Logo Licensing Corporation.
‘Blu-ray Disc’ and ‘Blu-ray Disc’ logo
are trademarks.
Manufactured under license from
Dolby Laboratories. Dolby and the
double-D symbol are trademarks
of Dolby Laboratories.
Manufactured under license under
U.S. Patent # s: 5,451,942;
5,956,674; 5,974,380;5,978,762;
6,487,535 & other U.S. and worldwide patents
issued & pending. DTS and DTS 2.0+Digital Out are
registered trademarks and the DTS logos, Symbol
are trademarks of DTS, Inc. ©1996-2008 DTS, Inc.
All Rights Reserved.
DivX, DivX Ultra
Certied, and
associated logos are
trademarks of DivX, Inc. and are used under license.
Ofcial DivX® Ultra Certied product.
Plays all versions of DivX ® video (including DivX
® 6) with enhanced playback of DivX® media les
and the DivX® Media Format.
Plays DivX® video with menus, subtitles and audio
tracks.
1 Important
Safety and important notice
Warning
Risk of overheating! Never install the product in a conned •
space. Always leave a space of at least 4 inches around the
product for ventilation. Ensure curtains or other objects
never cover the ventilation slots on the product.
Never place the product, remote control or batteries near
•
naked ames or other heat sources, including direct sunlight.
Only use this product indoors. Keep this product away
•
from water, moisture and liquid-lled objects.
Never place this product on other electrical equipment.
•
Keep away from this product during lightning storms. •
Where the mains plug or an appliance coupler is used as •
the disconnect device, the disconnect device shall remain
readily operable.
Visible and invisible laser radiation when open. Avoid
•
exposure to beam.
This product complies with the radio
interference requirements of the
European Community.
This product complies with the requirements of the
following directives and guidelines: 2004/108/EC,
2006/95/EC.
Disposal of your old product and batteries
Your product is designed and
manufactured with high quality
materials and components, which can
be recycled and reused.
When this crossed-out wheeled bin
symbol is attached to a product it
means that the product is covered by
the European Directive 2002/96/EC.
Please inform yourself about the local
separate collection system for electrical
and electronic products.
Please act according to your local rules and do not
dispose of your old products with your normal
household waste.
Correct disposal of your old product helps to
prevent potential negative consequences for the
environment and human health.
Your product contains batteries
covered by the European Directive
2006/66/EC, which cannot be disposed
with normal household waste.
Please inform yourself about the
local rules on separate collection of batteries
because correct disposal helps to prevent negative
consequences for the environmental and human
health.
EN
5
BD-Live
Connect this product to the movie studios website
via the LAN port to access a variety of up-to-date
content (e.g. refreshed previews and exclusive
special features). You can also enjoy next generation
possibilities, such as ringtone/wallpaper downloads,
peer-to-peer interactions, live events and gaming
activities.
Upscale DVD for enhanced picture quality
Watch the discs in the highest picture quality
available for the HDTV. Video upscaling increases
the resolution of standard denition disc to high
denition up to 1080p over an HDMI connection.
A highly detailed picture and increased sharpness
delivers a more true-to-life picture.
Region codes
You can play discs with the following region codes.
Region code Country
DVD BD
(Blu-ray Disc)
Europe, United
Kingdom
Java and all other Java trademarks and logos
are trademarks or registered trademarks of
Sun Microsystems, Inc. in the United States
and/or other countries.
BONUSVIEW™
‘BD LIVE’ and ‘BONUSVIEW’ are
trademarks of Blu-ray Disc
Association.
‘x.v.Colour’ is a trademark of Sony
Corporation.
2 Your product
Congratulations on your purchase, and welcome to
Philips! To fully benet from the support that Philips
offers, register your product at www.philips.com/
welcome.
Feature highlights
Philips EasyLink
Your product supports Philips EasyLink, which uses
the HDMI CEC (Consumer Electronics Control)
protocol. EasyLink-compliant devices that are
connected through HDMI connectors can be
controlled by a single remote control.
Note
Philips does not guarantee 100% interoperability with all •
HDMI CEC devices.
High-Denition entertainment
Watch high-denition content disc with HDTV
(High Denition Television). Connect it through
a high speed HDMI cable (1.3 or category 2). You
can enjoy excellent picture quality up to 1080p
resolution with the frame rate of 24 frames per
second with progressive scan output.
BONUSVIEW/PIP (Picture-in-Picture)
This is a new function of BD-Video that plays the
primary video and secondary video simultaneously.
Blu-ray players with Final Standard Prole or Prole
1.1 specs can play Bonus View features.
CLASS 1
LASER PRODUCT
English
EN

6
Front panel
display
Description
LOADING Loading a disc.
UNSUPP The disc is not supported.
BD Blu-ray disc is recognized.
HDMI ERR The HDMI video resolution is
not supported by TV.
FASTFWD Fast forward mode.
FASTBWD Fast reverse mode.
SLOWFWD Slow forward mode.
SETTINGS Setup menu is displayed.
HOME Home menu is displayed.
CHAPTER Current chapter is in chapter
repeat mode.
DOLBY D Dolby Digital audio is being
played.
DOLBY HD Dolby HD audio is being
played.
UPGRADE Software upgrade is in
progress.
Product overview
Main unit
a
Turn on this product or switch to •
standby mode.
b Disc compartment
c
Open or close the disc compartment. •
d IR sensor
Point the remote control at the IR sensor.•
e Display panel
f
Start or resume play.•
g
Pause play.•
Move the paused picture one step •
forward.
EN
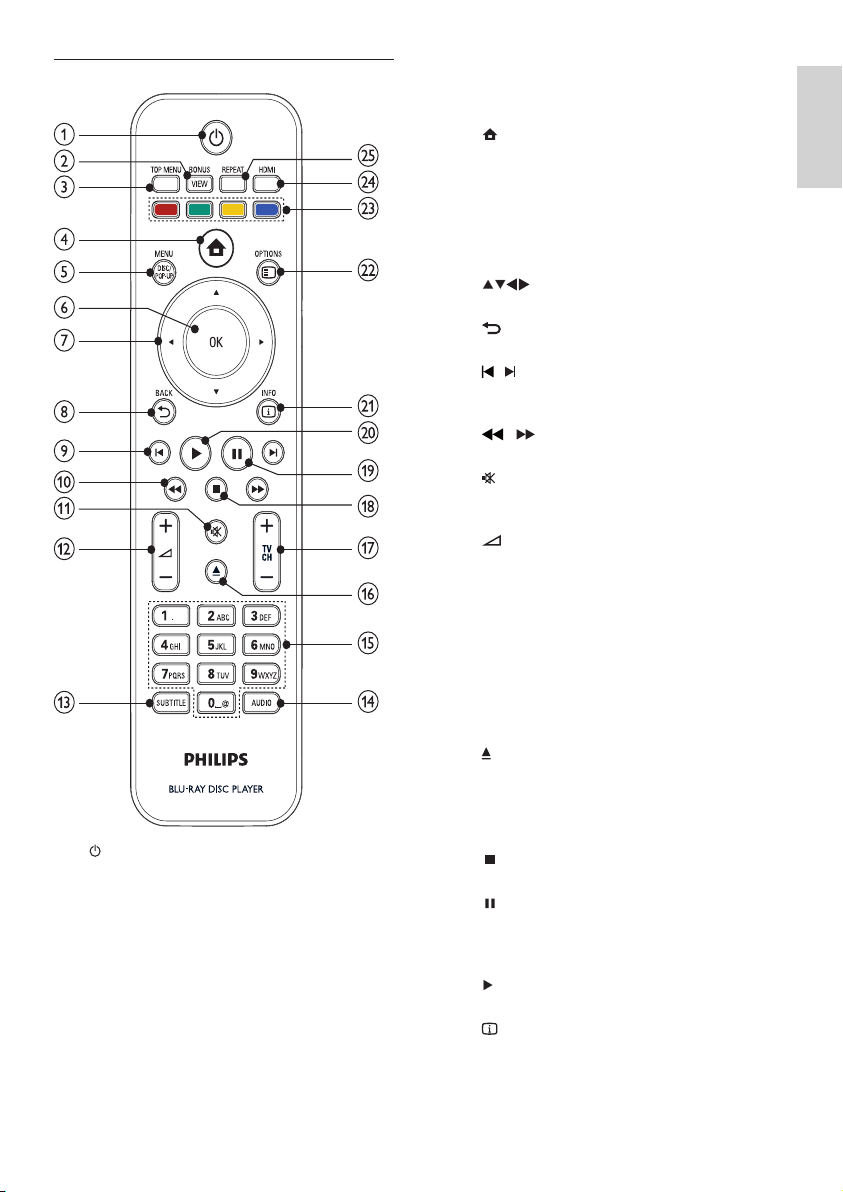
7
c TOP MENU
• BD: Display the top menu.
• DVD: Display the title menu.
d
Access the home menu.•
e DISC MENU / POP-UP MENU
• BD: Access or exit the pop-up menu.
• DVD: Access or exit the disc menu.
f OK
Conrm an entry or selection.•
g
Navigate through the menus.•
h
BACK
Return to a previous display menu.•
i
/
Skip to the previous or next title, chapter, •
or track.
j
/
Search backward or forward.•
k
Mute volume (applicable only to certain •
Philips brand TVs).
l
+/-
Adjust volume (applicable only to certain •
Philips brand TVs).
m SUBTITLE
Select a subtitle language on a disc.•
n AUDIO
Select an audio language or channel on •
a disc.
o Alphanumeric buttons
Select an item to play.•
p
Open or close the disc compartment.•
q TV CH +/-
Select a TV channel (applicable only to •
certain Philips brand TVs).
r
Stop play.•
s
Pause play.•
Move the paused picture one step •
forward.
t
Start or resume play.•
u
INFO
Display the current status or the disc •
information.
Remote control
a
Turn on this product or switch to •
standby mode.
When EasyLink is enabled, press and •
hold for at least three seconds to turn all
connected HDMI CEC compliant devices
to standby.
b BONUSVIEW
Turn on or off the secondary video •
in a small screen window during play
(applicable only to BD-video that
supports the BONUSVIEW or Picture-
In-Picture feature).
English
EN
8
Note
You must connect this product directly to a TV. •
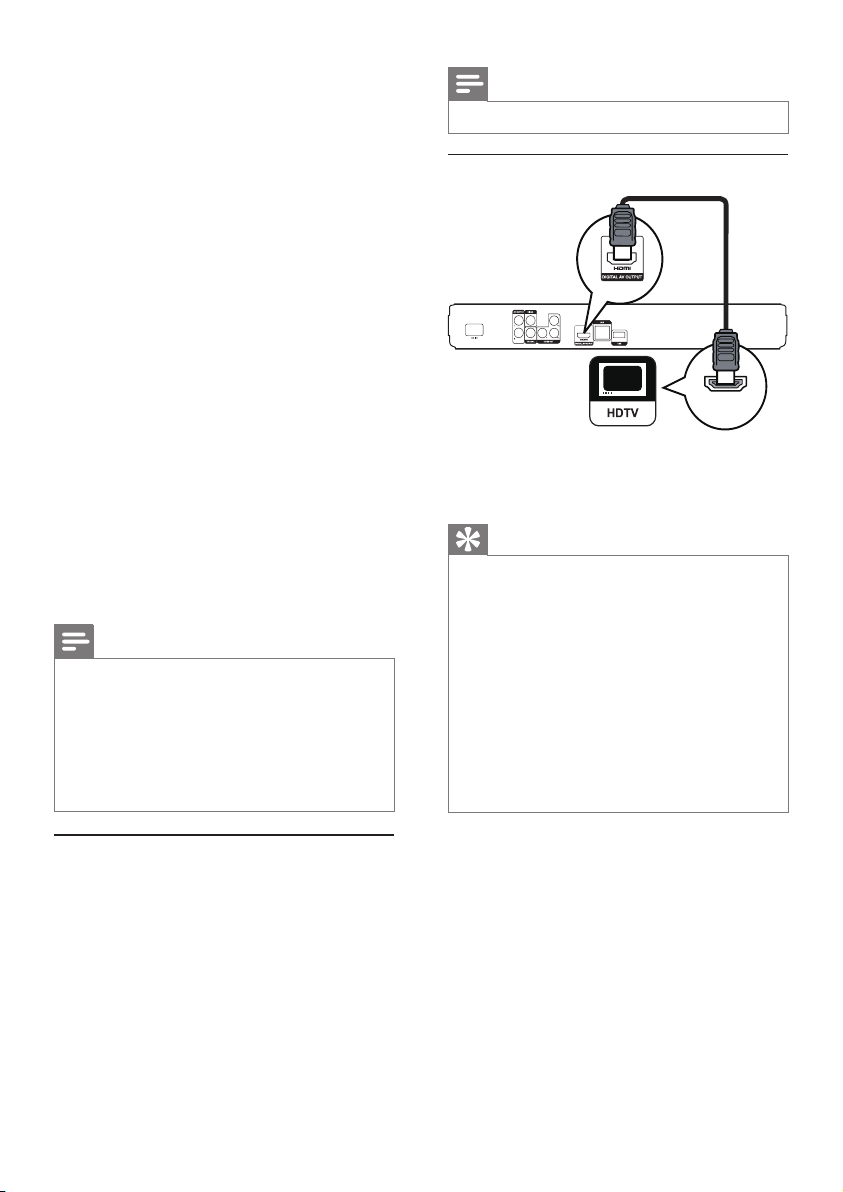
Option 1: Connect to the HDMI jack
1 Connect an HDMI cable (not supplied) to
the • HDMI jack on this product.
the HDMI input jack on the TV. •
Tip
If the TV has a DVI connector only, connect via an •
HDMI/DVI adaptor. Connect an audio cable for sound
output.
You can optimize the video output. Press the
• HDMI
button repeatedly to select the best resolution the TV
can support.
Philips recommends HDMI category 2 cable, also known
•
as High Speed HDMI cable, for optimal video and audio
output.
To play the digital video images of a BD-video or DVD-
•
video via an HDMI connection, it is necessary that both
this product and the display device (or an AV receiver/
amplier) support a copyright protection system called
HDCP (high-bandwidth digital content protection
system).
This type of connection provides best picture quality.
•
HDMI IN
v OPTIONS
Access options for the current activity or •
selection.
w Color buttons
• BD: Select tasks or options.
x HDMI
Select the video resolution of HDMI •
output.
y REPEAT
Select repeat play or random play.•
3 Connect
Make the following connections to use this product.
Basic connections:
Video•
Audio•
Power•
Optional connections:
Route audio to other devices•
Digital amplier/receiver•
Analog stereo system•
LAN•
USB device (As additional memory for •
software updates and BD-Live bonus contents.
NOT for media play)
Note
Refer to the type plate at the back or bottom of the •
product for identication and supply ratings.
Before you make or change any connections, ensure that
•
all devices are disconnected from the power outlet.
Different types of connectors can be used to connect
•
this product, depending on availability and your needs.
A comprehensive interactive guide to help you connect
your product is available at www.connectivityguide.
philips.com.
Connect video/audio cables
Connect this product to TV to view disc play.
Select the best video connection that the TV can
support.
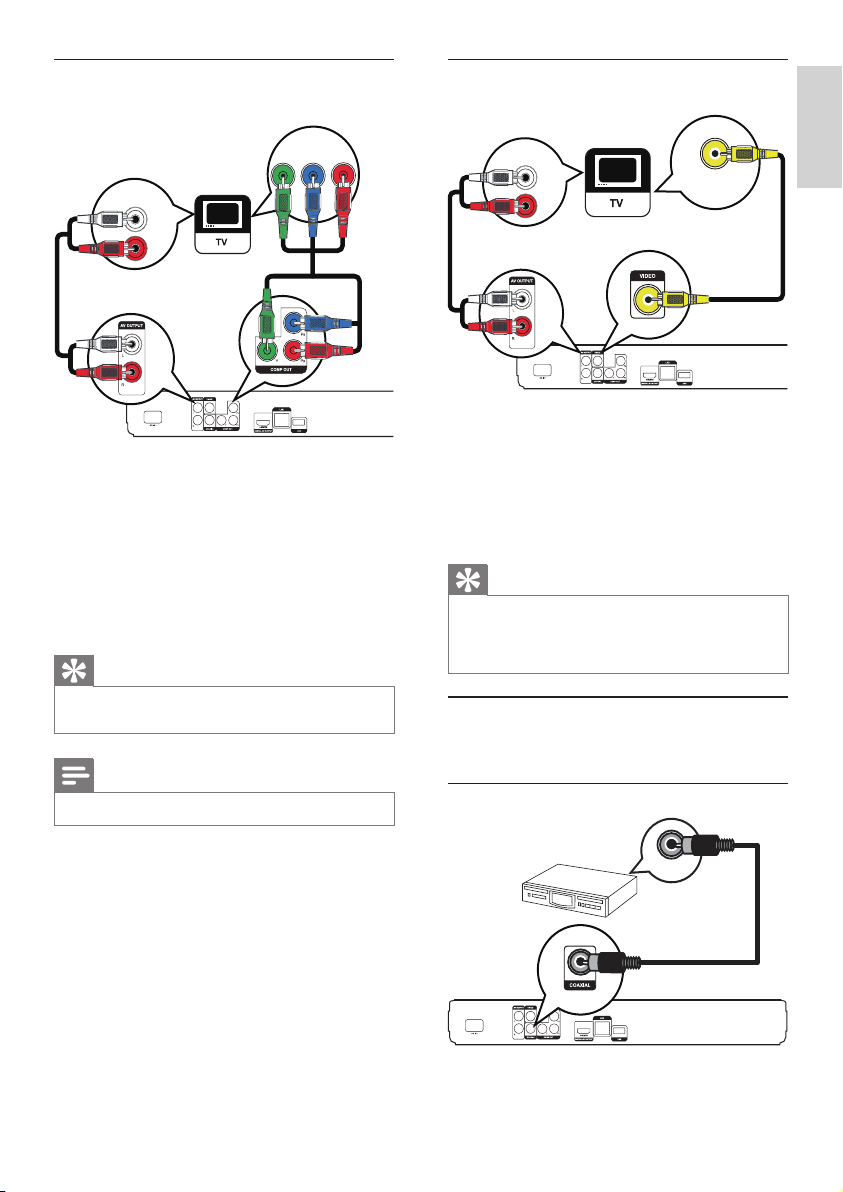
• Option 1: Connect to the HDMI jack (for a
HDMI, DVI or HDCP-compliant TV).
Option 2:• Connect to the component video
jacks (for a standard TV or Progressive Scan
TV).
• Option 3: Connect to the composite video
jack (for a standard TV).
EN
9
Option 3: Connect to the composite
video jack
1 Connect a composite video cable to:
the • VIDEO jack on this product.
the VIDEO input jack on the TV.•
2 Connect the audio cables to:
the • AUDIO L/R-AV OUTPUT jacks on
this product.
the AUDIO input jacks on the TV.•
Tip
The video input jack on the TV might be labeled as A/V •
IN, VIDEO IN, COMPOSITE or BASEBAND.
This type of connection provides standard picture
•
quality.
Route audio to other devices
To enhance audio play, you can route the audio from
this product to other devices.
Connect to digital amplier/receiver
AUDIO IN
VIDEO IN
COAXIAL
Option 2: Connect to the component
video jack
1 Connect the component video cables (not
supplied) to:
the • Y Pb Pr jacks on this product.
the COMPONENT VIDEO input jacks •
on the TV.
2 Connect the audio cables to:
the • AUDIO L/R-AV OUTPUT jacks on
this product.
the AUDIO input jacks on the TV.•
Tip
The component video input jack on the TV might be •
labeled as Y Pb/Cb Pr/Cr or YUV.
Note
This type of connection provides good picture quality. •
PbY
Pr
AUDIO IN
English
EN
10
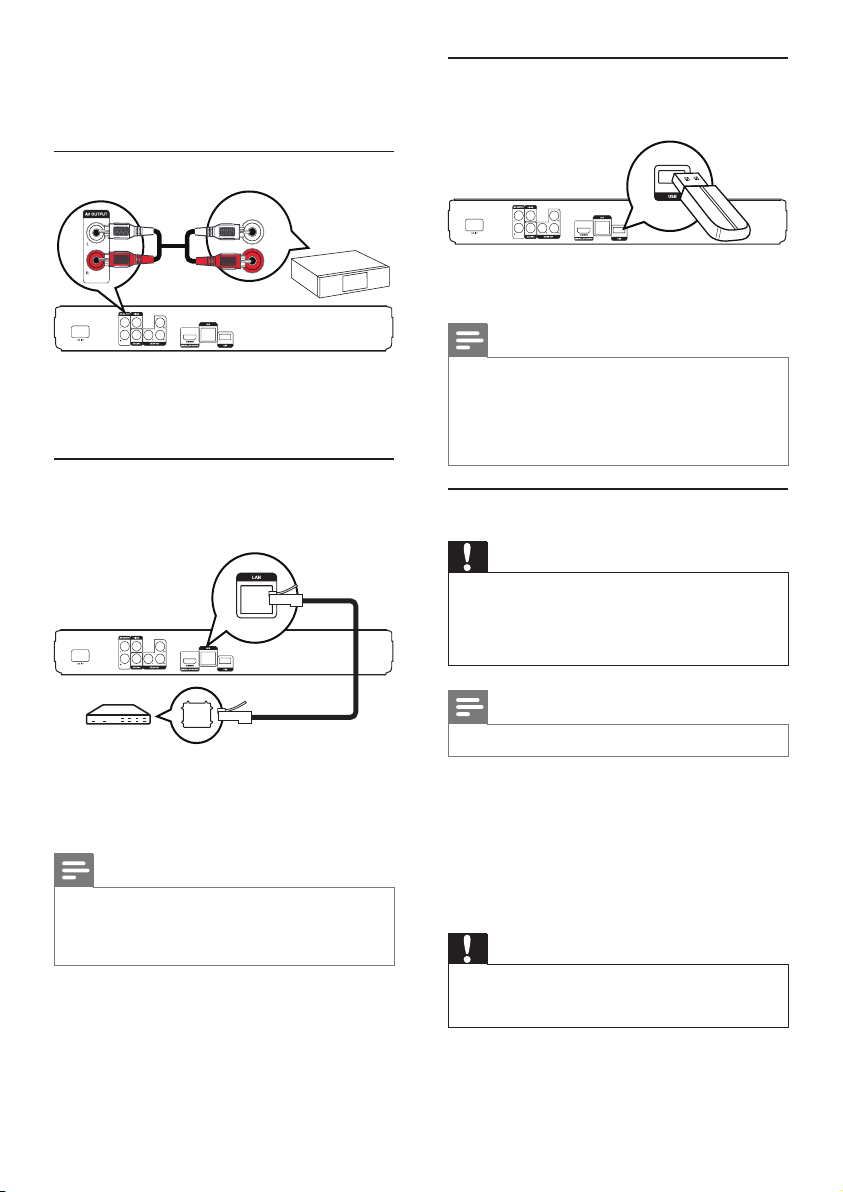
Connect USB device
A USB device provides an additional memory to
enjoy software updates and BD-Live bonus content.
1 Connect the USB device to the USB jack on
this product.
Note
This product cannot play any audio/video/photo le •
stored on a USB device.
Connect a USB device only to the
• USB jack on this
product.
Philips does not guarantee 100% compatibility with all
•
USB devices.
Connect power
Caution
Risk of product damage! Ensure that the power supply •
voltage corresponds to the voltage printed on the back
of the unit.
Before connecting the AC power cord, ensure you have
•
completed all other connections.
Note
The type plate is located on the back of the product. •
1 Connect the AC power cable to:
this product.•
the wall socket.•
This product is ready to be set up for use. »
4 Get started
Caution
Use of controls or adjustments or performance of •
procedures other than herein may result in hazardous
radiation exposure or other unsafe operation.
Always follow the instructions in this chapter in
sequence.
1 Connect a coaxial cable (not supplied) to:
the • COAXIAL jack on this product.
the COAXIAL/DIGITAL input jack on •
the device.
Connect analogue stereo system
1 Connect the audio cables to:
the • AUDIO L/R-AV OUTPUT jacks on
this product.
the AUDIO input jacks on the device.•
Connect network
Connect this product to the network to enjoy
software updates and BD-Live bonus content.
1 Connect the network cable (not supplied) to:
the • LAN jack on this product.
the LAN jack on the broadband modem •
or router.
Note
Internet access to Philips website for software update •
may not be allowed, depending on the router you use
or the Internet Service Provider’s policy. Contact your
Internet Service Provider for more information.
AUDIO IN
EN
11
Navigate the menu
1 When a menu is displayed, press the buttons
on the remote control to navigate.
Button Action
Move up or down.
Move left or right.
OK Conrm a selection.
Enter numbers.
Select menu display language
Note
If this product is connected to a HDMI CEC compliant •
TV, skip this setting. It switches automatically to the
same OSD menu language as per your TV setting (if the
language set on TV is supported by this product).
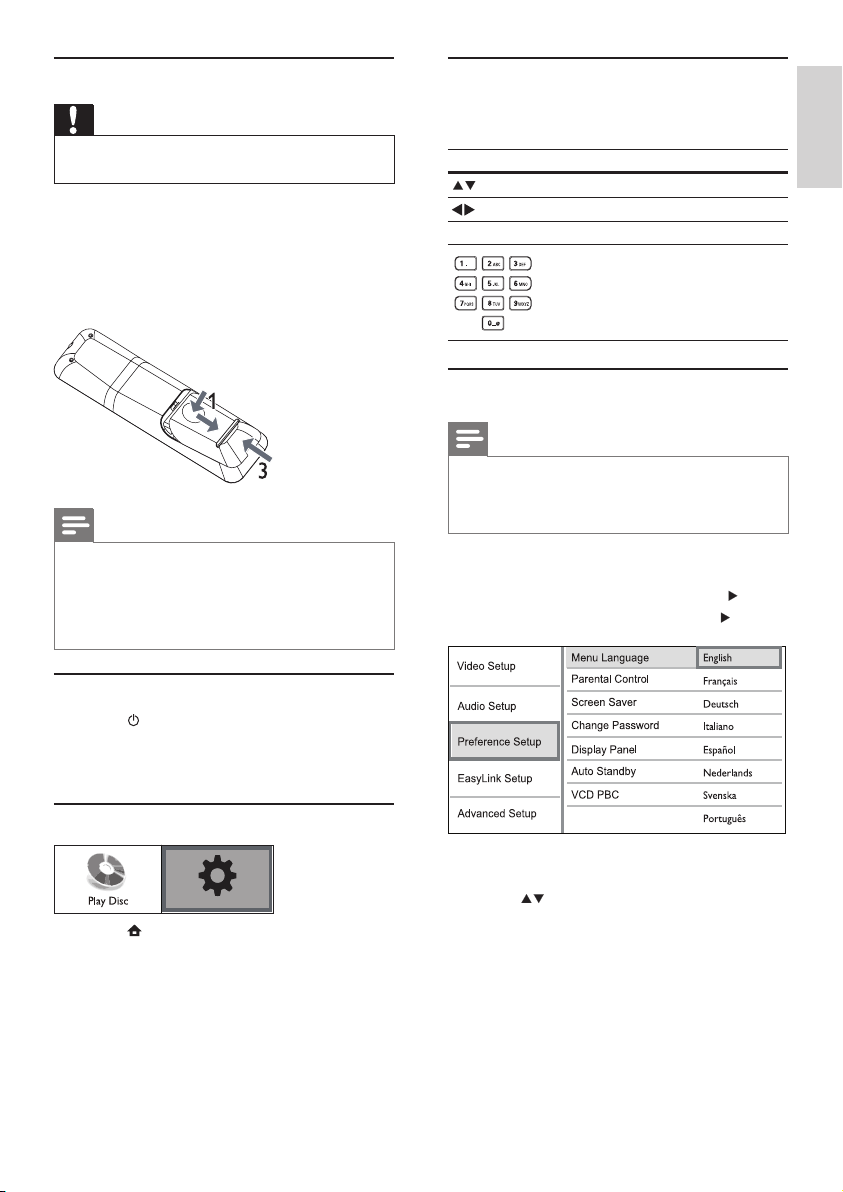
1 In the Home menu, select [Settings] and press
OK.
2 Select [Preference Setup], then press .
3 Select [Menu Language], then press .
The language options may vary from •
different regions.
4 Press to select a language, then press OK.
Prepare the remote control
Caution
Risk of explosion! Keep batteries away from heat, •
sunshine or re. Never discard batteries in re.
1 Press and push the battery compartment to
slide it open (see “1” in the illustration).
2 Insert two AAA batteries with correct
polarity (+/-) as indicated.
3 Push and slide back the battery compartment
(see “3” in the illustration).
Note
If you are not going to use the remote control for a long •
time, remove the batteries.
Do not use old and new or different types of batteries
•
in combination.
Batteries contain chemical substances, so they should be
•
disposed of properly.
Find the correct viewing channel
1 Press to turn on this product.
2 Turn on the TV and switch to the correct
video-in channel (refer to the TV user manual
on how to select the correct channel).
Use the Home menu
1 Press .
To start disc play, select • [Play Disc].
To access the setup menus, select •
[Settings].
Settings
English
EN
12
One-touch play
1
Press the STANDBY button to turn on this
product.
The TV (if the TV supports one-touch play) »
automatically turns on and switches to the
correct video-in channel.
If a disc is loaded in this product, disc play »
automatically starts.
One-touch standby
1
Press and hold the STANDBY button on the
remote control for more than 3 seconds.
All the connected devices (if the device »
supports one-touch standby) automatically
switch to standby.
Note
Philips does not guarantee 100% interoperability with all •
HDMI CEC devices.
5 Play
Play a disc
Caution
Do not place any objects other than discs into the disc •
compartment.
Do not touch the disc optical lens inside the disc
•
compartment.
1 Press to open the disc compartment.
2 Insert a disc with its label facing up.
3 Press to close the disc compartment and
start disc play.
To view disc play, turn on the TV to the •
correct viewing channel for this product.
To stop disc play, press•
.
Note
Check the types of discs supported (see “Specications” •
> “Play media”).
If the password entry menu is displayed, enter the
•
password before you can play the locked or restricted
disc (see “Adjust settings” > “Preference Setup” >
[Parental Control]).
If you pause or stop a disc, the screen saver appears after
•
10 minutes of inactivity. To deactivate the screen saver,
press any button.
After you pause or stop a disc and no button is pressed
•
within 30 minutes, this product automatically switches
to standby.
Setup network
To enjoy software updates of this product and BD-
Live bonus contents for certain Blu-ray discs, set up
the network connection.
Note
Ensure that the network cable is properly connected and •
the router is switched on.
1 Connect this product to the broadband
modem or router.
2 In the Home menu, select [Settings] and press
OK.
3 Select [Advanced Setup], then press .
4 Select [Network], then press OK.
5 Select [Next] in the menu, then press OK.
This product starts to detect if there is a »
connection to the network.
If the connection test fails, select » [Retry]
and press OK to re-connect again to the
network.
6 Once connected, an IP address is obtained
automatically.
If no IP address is obtained, select •
[Retry] and press OK to try to obtain
the IP address again.
7 Select [Finish] in the menu, then press OK to
exit.
Note
This product does not support automatic detection of an •
Ethernet crossover cable.
Loading BD-Live content from the internet may take
•
some time, depending on the le size and the speed of
the internet connection.
Use Philips EasyLink
This product supports Philips EasyLink which uses the
HDMI CEC (Consumer Electronics Control) protocol.
You can use one single remote control to control
EasyLink-compliant devices that are connected
through HDMI connectors.
Note
To enable the EasyLink feature, you must turn on the •
HDMI CEC operations on the TV and on other devices
connected to TV. Refer to the TVs/devices manual for
details.
EN
13
Change video play
1
Play a title.
2 Use the remote control to change the play.
Button Action
AUDIO Select an audio language or
channel on a disc.
SUBTITLE Select the subtitle language on
a disc.
REPEAT Select or turn off repeat or
shufe mode.
Repeat options may vary •
from the disc type.
For VCDs, repeat play is •
only possible when the PBC
mode is turned off.
INFO
Display the current status or disc
information.
OPTIONS
Access options relating to the
current activity or selection.
BONUSVIEW Turn on or off the secondary
video in a small screen window
during play (applicable only to
BD-video that supports the
BONUSVIEW or Picture-In-
Picture feature).
Note
Some operations may not work with some discs. See the •
information accompanying the disc for details.
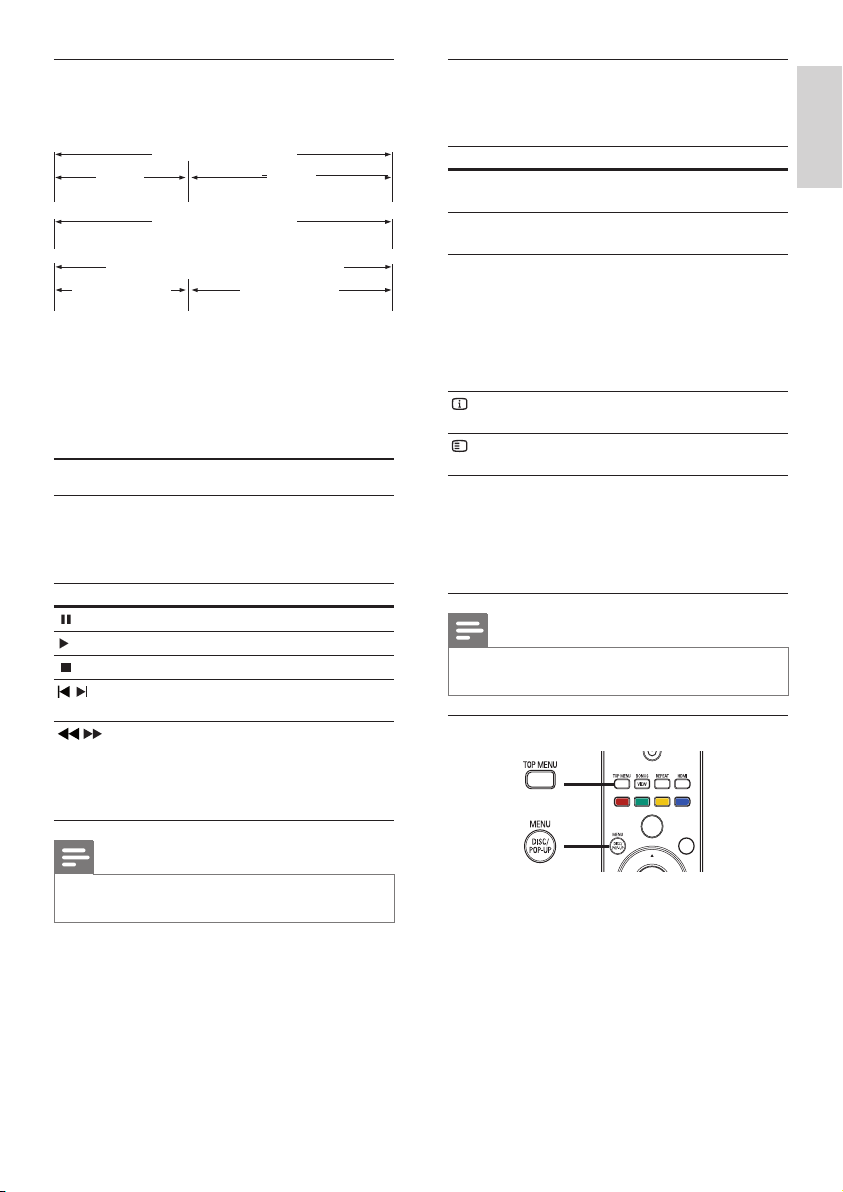
Display menu
BD-video disc
• TOP MENU stop the video play and shows
the disc menu. This feature is disc-dependent.
• POP-UP MENU access to the BD-video disc
menu without interrupting disc play.
DVD-video disc
• TOP MENU display the root menu of a disc.
• DISC MENU display disc information and
guide you through the available functions in
the disc.
Disc content structure
The structure of a disc content is generally divided
as shown below.
[title/chapter] (title/chapter) refers to the •
contents on a BD/DVD.
[track] (track) refers to the contents on an •
audio CD.
[folder/le] (folder/le) refers to the contents •
on a disc in MP3/WMA/JPEG format.
Play video
Control video play
1
Play a title.
2 Use the remote control to control the play.
Button Action
Pause play.
Start or resume play.
Stop play.
/
Skip to a previous/next title or
chapter.
/
Search fast-backward or fast-
forward. Press repeatedly to
change the search speed.
In pause mode, slow a play •
backward or forward.
Note
For BD disc with Java application, the resume function •
is not available.
BD-video, DVD-video
title 1
title 2
chapter 2chapter 1chapter 3chapter 2chapter 1
track 2track 1track 5track 4track 3
Audio CD
MP3, Windows Media™ Audio, JPEG
folder (group) 1
folder (group)
2
file 3file 2file 1 file 2file 1
English
EN
14
Note
The marked section for repeat play is only possible •
within a track/title.
View video play from different camera
angles
1
During play, press OPTIONS.
The play options menu is displayed. »
2 Select [Angle List] in the menu then press .
3 Select an angle option, then press OK.
Play changes to the selected angle. »
Note
Applicable only to discs that contain multi-angle scenes. •
Shift subtitle display
This feature is only available if you have set the [TV
Display] to [Cinema 21:9] (see ‘Adjust settings’ >
‘Video Setup’).
1 During play, press OPTIONS.
9
The play options menu is displayed.
2 Select [Subtitle Language] > [Shift Subtitle] in
the menu, then press B.
3 Press the Navigation buttons (v V) to shift
the subtitle, then press OK.
Tip
You can press • SUBTITLE on the remote control to
access Shift Subtitle feature.
Subtitle Shift is not supported for DivX video with
•
external subtitles.
Subtitle Shift setting will be not retained after disc is
•
removed.
Play BD-video
Blu-ray video disc has a larger capacity and supports
features such as high-denition videos, multi-
channel surround sounds, interactive menus and
so on.
1 Insert a BD-video disc.
2 Press , select [Play Disc] then press OK.
VCD/SVCD/DivX disc:
• DISC MENU display the content of the disc.
Tip
If the PBC setting is off, the VCD/SVCD skips the •
menu and starts play from the rst title. To display the
menu before play, turn on the PBC setting (see “Adjust
settings” > [Preference Setup] > [VCD PBC]).
Select title/chapter
1
During play, press OPTIONS.
The play options menu is displayed. »
2 Select [Title] or [Chapter] in the menu, then
press OK.
3 Select the title or chapter number, then press
OK.
Skip play to a specic time
1
During play, press OPTIONS.
The play options menu is displayed. »
2 Select [Time Search] in the menu, then press
OK.
3 Press the Navigation buttons ( ) to change
the time to skip to, then press OK.
Zoom in/out
1
During play, press OPTIONS.
The play options menu is displayed. »
2 Select [Zoom] in the menu, then press OK.
3 Press the Navigation buttons ( )to select a
zoom factor, then press OK.
4 Press the Navigation buttons to pan through
the zoomed picture.
To cancel zoom mode, press •
BACK
or OK to display the zoom factor bar,
then press the Navigation buttons (
)
until the zoom factor [x1] is selected.
Repeat play for a specic section
1
During play, press OPTIONS.
The play options menu is displayed. »
2 Select [Repeat A-B] in the menu, then press
OK to set the starting point.
3 Forward the video play, then press OK to set
the ending point.
Repeat play starts. »
To cancel repeat play mode, press •
OPTIONS, select [Repeat A-B] and
press OK.
EN
15
Play DivX® video
DivX video is a digital media format that retains high
quality despite a high rate of compression. You can
enjoy DivX video on this DivX certied product.
1 Insert a disc that contains the DivX videos.
2 Press , select [Play Disc], then press OK.
A contents menu is displayed. »
3 Select a video folder, then press OK.
4 Select a title to play, then press OK.
5 Use the remote control to control the play.
Button Action
AUDIO Select an audio language or
channel.
SUBTITLE Select a subtitle language.
Stop play.
Note
You can only play DivX videos that were rented or •
purchased with the DivX registration code of this
product (see “Adjust Settings” > [Advanced Setup] >
[DivX® VOD Code]).
You can play DivX video les of up to 4GB.
•
This product can display up to 45 characters in the •
subtitle.
Play music
Control a track
1
Play a track.
2 Use the remote control to control the play.
Button Action
Pause play.
Start or resume play.
Stop play.
/
Skip to a previous/next track.
Select an item to play.
/
Search fast-backward or fast-
forward. Press repeatedly to
change the search speed.
REPEAT Select or turn off repeat or
shufe mode.
3 Play automatically starts, or select a play
option in the menu and press OK.
During play, you can press • TOP MENU
to display additional information, features
or content stored in the disc.
During play, you can press • POP-UP
MENU to display the disc menu without
interrupting disc play.
Enjoy BONUSVIEW
(Applicable only to a disc compatible with the
BONUSVIEW or Picture-in-Picture feature)
You can instantly view additional content (such as
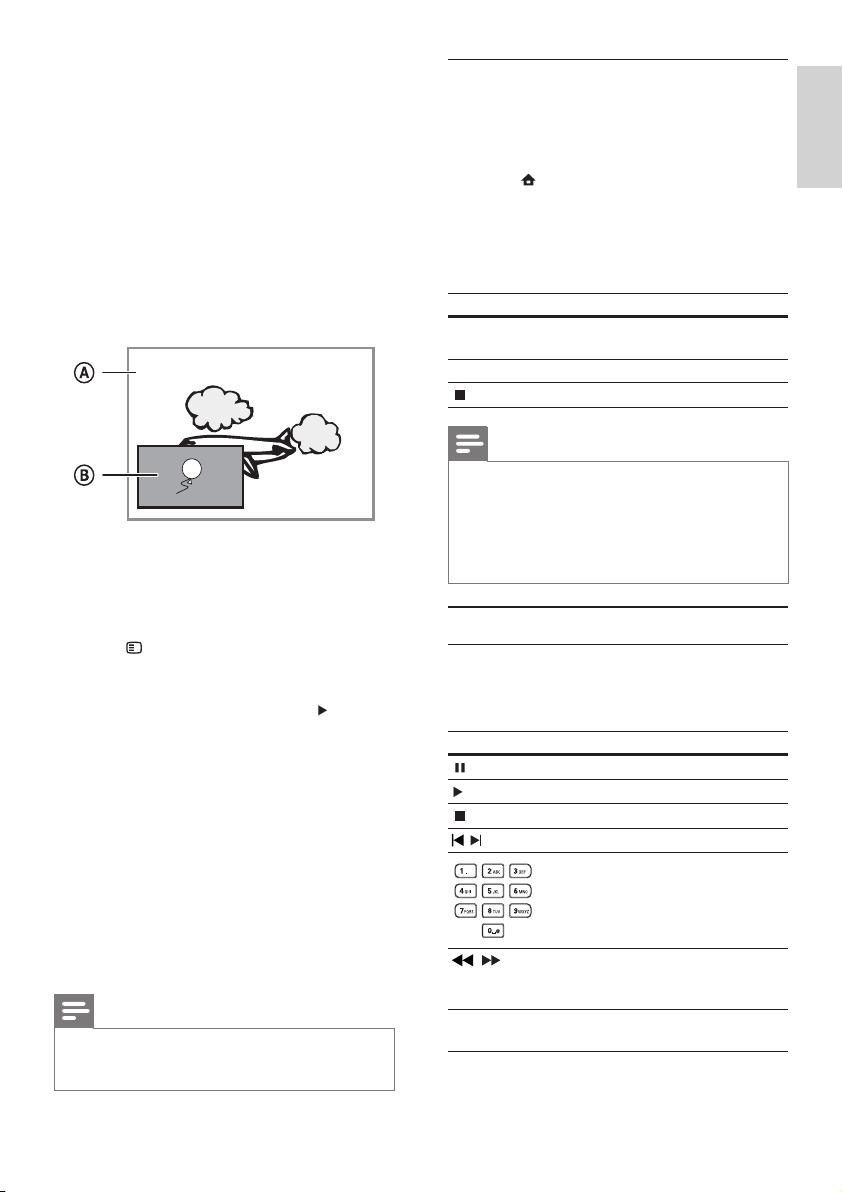
commentaries) in a small screen window.
A Primary video
B Secondary video
1 Press BONUSVIEW to turn on the secondary
video window.
2 Press OPTIONS.
The play options menu is displayed. »
3 Select [2nd Audio Language] or [2nd Subtitle
Language] in the menu, then press
.
4 Select the language to play, then press OK.
Enjoy BD-LIVE
(Applicable only to a disc that enables BD-Live
bonus content.)
Additional contents (such as movie trailers,
subtitles, etc.,) can be downloaded to this product’s
local storage or a connected USB storage device.
Special video data may be played while they are
being downloaded.
When the disc supporting BD-Live is played, this
product or disc’s ID can be sent to the content
provider via the internet. Services and functions to
be provided vary from discs.
Note
It is recommended to use a USB with no data (at least •
1GB free space) or format the USB before you copy data
from the internet or disc.
English
EN
16
Control photo play
1
Play a photo slideshow.
2 Use the remote control to control the play.
Button Action
/
Rotate a photo anti-clockwise/
clockwise.
/
Flip a photo horizontally/vertically.
Stop play.
Note
Some operations may not work with some discs or les. •
Set slideshow interval and animation
1
During play, press OPTIONS.
The play options menu is displayed. »
2 Select [Duration per slide] in the menu, then
press OK.
3 Select a duration, then press OK.
4 Select [Slide Animation] in the menu, then
press OK.
5 Select a type of animation effect, then press OK.
Play musical slideshow
Create a musical slideshow to play simultaneously
MP3/WMA music les and JPEG photo les.
Note
To create a musical slideshow, you must store the MP3/ •
WMA and JPEG les on the same disc.
1 Play MP3/WMA music.
2 Press BACK to return to the main menu.
3 Navigate to enter a photo folder, then press
OK to start slideshow play.
Slideshow begins and continues till the end »
of the photo folder.
Audio continues to play until the end of »
the disc.
To stop the slideshow play, press•
.
To stop the music play, press•
again.
Play MP3/WMA music
MP3/WMA is a type of highly compressed audio le
(les with .mp3, .wma extensions).
1 Insert a disc that contains the MP3/WMA
music.
2 Press , select [Play Disc], then press OK.
A contents menu is displayed. »
3 Select a music folder, then press OK.
4 Select a le to play, then press OK.
To return to the main menu, press •
BACK.
Note
For disc recorded in multiple sessions, only the rst •
session is played.
For a WMA le that is protected by Digital Rights
•
Management (DRM), it cannot be played on this product.
This product does not support MP3PRO audio format.
•
For any special character that is present in the MP3 track •
name (ID3) or album name, it might not be displayed
correctly on the screen because these characters are not
supported.
Folders/les that exceed the supported limit of this
•
product cannot be displayed or played.
Play photo
Play photo as slideshow
You can play JPEG photos (les with .jpeg or .jpg
extensions).
1 Insert a disc that contains the JPEG photos.
2 Press , select [Play Disc], then press OK.
A contents menu is displayed. »
3 Select a photo folder, then press OK to enter.
To select a photo, press the • Navigation
buttons.
To enlarge the selected photo and start •
slideshow, press OK.
4 Press OK to start slideshow play.
Note
It may require longer time to display the disc content •
on the TV due to the large number of songs/photos
compiled onto one disc.
This product can only display digital camera pictures
•
according to the JPEG-EXIF format, typically used by
almost all digital cameras. It cannot display Motion JPEG,
or pictures in formats other than JPEG, or sound clips
associated with pictures.
Folders/les that exceed the supported limit of this
•
product cannot be displayed or played.
EN
17
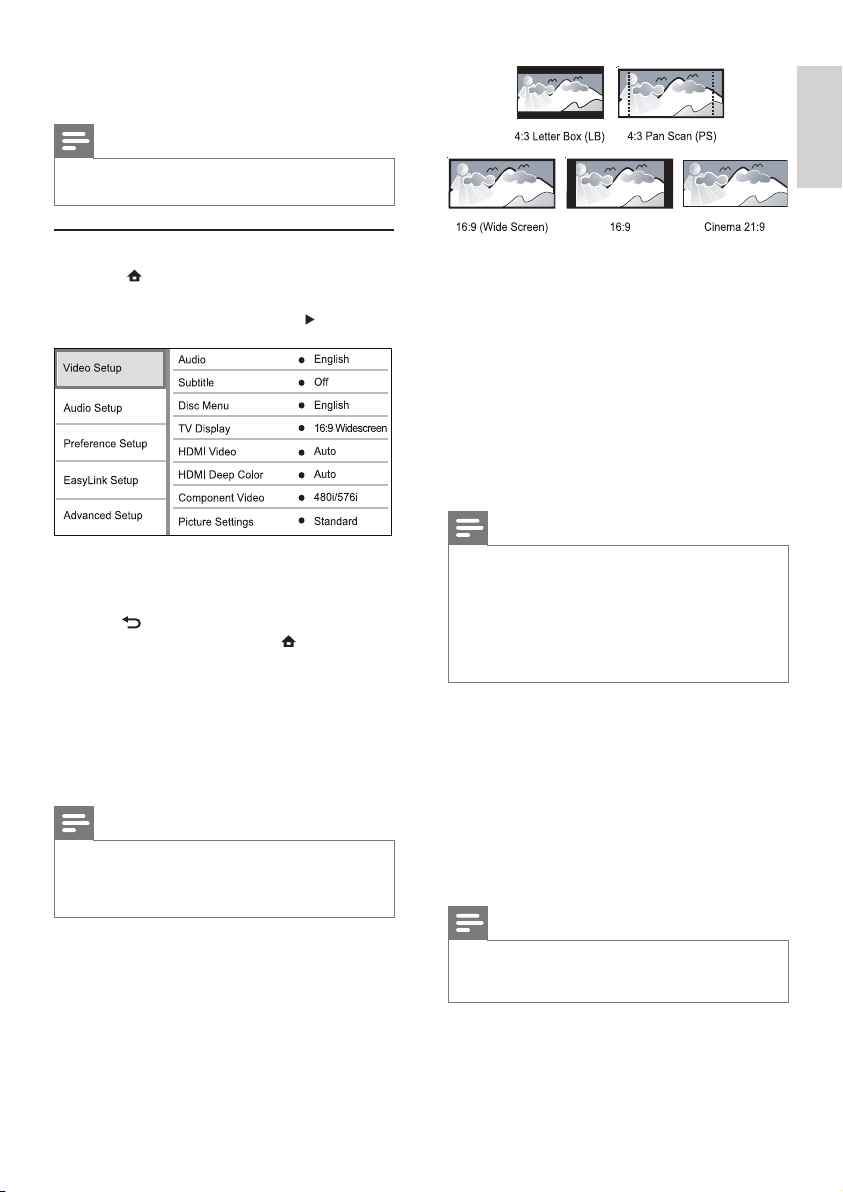
• [4:3 Letterbox] – For 4:3 screen TV: wide-
screen display with black bars on the top and
bottom of the screen.
• [4:3 Panscan] – For 4:3 screen TV: full-height
display with the trimmed sides.
• [16:9 Widescreen] – For wide-screen TV:
display ratio 16:9.
• [16:9] – For 16:9 screen TV: display picture at
ratio 4:3 for a disc with 4:3 ratio, with black
bars on the left and right side of the screen.
[Cinema 21:9]• – For wide-screen TV of display
ratio 21:9, remove black bars at the bottom
and top of the screen.
Note
If • [4:3 Panscan] you have selected is not supported by the
disc, the screen displays in the [4:3 Letterbox] format.
Help text display will be available in all modes, except
•
[Cinema 21:9].
Subtitle Shift function is enabled only in
• [Cinema 21:9]
mode.
For optimum viewing with Philips Cinema 21:9 TV, refer
•
to the TV’s user manual.
[HDMI Video]
Select a HDMI video output resolution that is
compatible with your TV display capability.
• [Auto] - Detect and select the best supported
video resolution automatically.
• [Native] - Set to original video resolution.
• [480i/576i], [480p/576p], [720p], [1080i],
[1080p], [1080p/24Hz] - Select a video
resolution setting that is best supported by the
TV. See the TV manual for details.
Note
If the setting is not compatible with your TV, a blank screen •
appears. Wait for 10 seconds for auto recovery, or press
repeatedly the HDMI button until the picture appears.
[HDMI Deep Color]
This feature is available only when the display
device is connected by a HDMI cable, and when it
supports deep color feature.
6 Adjust settings
Note
If the setup option is grayed out, it means the setting •
cannot be changed at the current state.
Video setup
1 Press .
2 Select [Settings], then press OK.
3 Select [Video Setup], then press .
4 Select an option, then press OK.
5 Select a setting, then press OK.
To return to the previous menu, press •
BACK.
To exit the menu, press •
.
[Audio]
Select an audio language for disc play.
[Subtitle]
Select a subtitle language for disc play.
[Disc Menu]
Select a language for disc menu.
Note
If the language you have set is not available on the disc, •
the disc uses its own default language.
For some discs, the subtitle/audio language can only be
•
changed from the disc menu.
[TV Display]
Select a display format:
English
EN
18
[Night Mode]
Make a loud sound level softer and a soft sound
level louder to play the disc at a low volume,
without disturbing other persons.
• [Auto] - Applicable to tracks with Dolby True
HD audio.
• [On] – For quiet viewing at night.
• [Off] – For surround sound with a full dynamic
range.
Note
Applicable only to Dolby encoded DVD-video or BD- •
video.
[HDMI Audio]
Select an HDMI audio output when you connect this
product and the TV/audio device with an HDMI cable.
• [Bitstream] – Select the best original HD
audio experience (only via an HD audio
compatible receiver).
• [Auto] – Detect and select the best supported
audio format automatically.
[Digital Audio]
Select an audio format for the sound output from
the DIGITAL OUT jack (coaxial/optical).
• [Auto] - Detect and select the best supported
audio format automatically.
• [PCM] - The audio device does not support
multi-channel format. Audio is downmixed to
two-channel sound.
• [Bitstream] - Select the original audio to
experience Dolby or DTS audio (BD-video
special sound effect is disabled).
Note
Ensure that the audio format is supported by the disc •
and the connected audio device (amplier/receiver).
When
• [Bitstream] is selected, interactive audio like
button sound is muted.
[PCM Downsampling]
Set the sampling rate for PCM audio output from
the DIGITAL OUT jack (coaxial/optical).
• [On] - PCM audio is down-sampled at 48kHz.
• [Off] - For BD or DVD recorded in LPCM
without copyright protection, two-channel
audio signals up to 96 kHz are output as LPCM
signals with no conversion.
• [Auto] - Enjoy vivid images in over a billion
colors on Deep Color enabled TV.
• [Off] - Output standard 8 bit color.
[Component Video]
Select a component video output resolution that is
compatible with the TV display capability.
• [480i/576i], [480p/576p], [720p], [1080i] -
Select a video resolution setting that is best
supported by the TV. See the TV manual for
details.
Note
If the setting is not compatible with the TV, a blank •
screen appears. Wait for 10 seconds for auto recovery.
Copy protected DVDs can only output 480p/576p or
•
480i/576i resolution.
[Picture Settings]
Select a predened set of picture color settings.
• [Standard] – Original color setting.
• [Vivid] – Vibrant color setting.
• [Cool] - Soft color setting.
• [Action] – Sharp color setting. It enhances the
details in the dark area. Ideal for action movies.
• [Animation] – Contrast color setting. Ideal for
animated pictures.
[Black Level]
Improve black color contrast.
• [Normal] - Standard black level.
• [Enhanced] - Enhance black level.
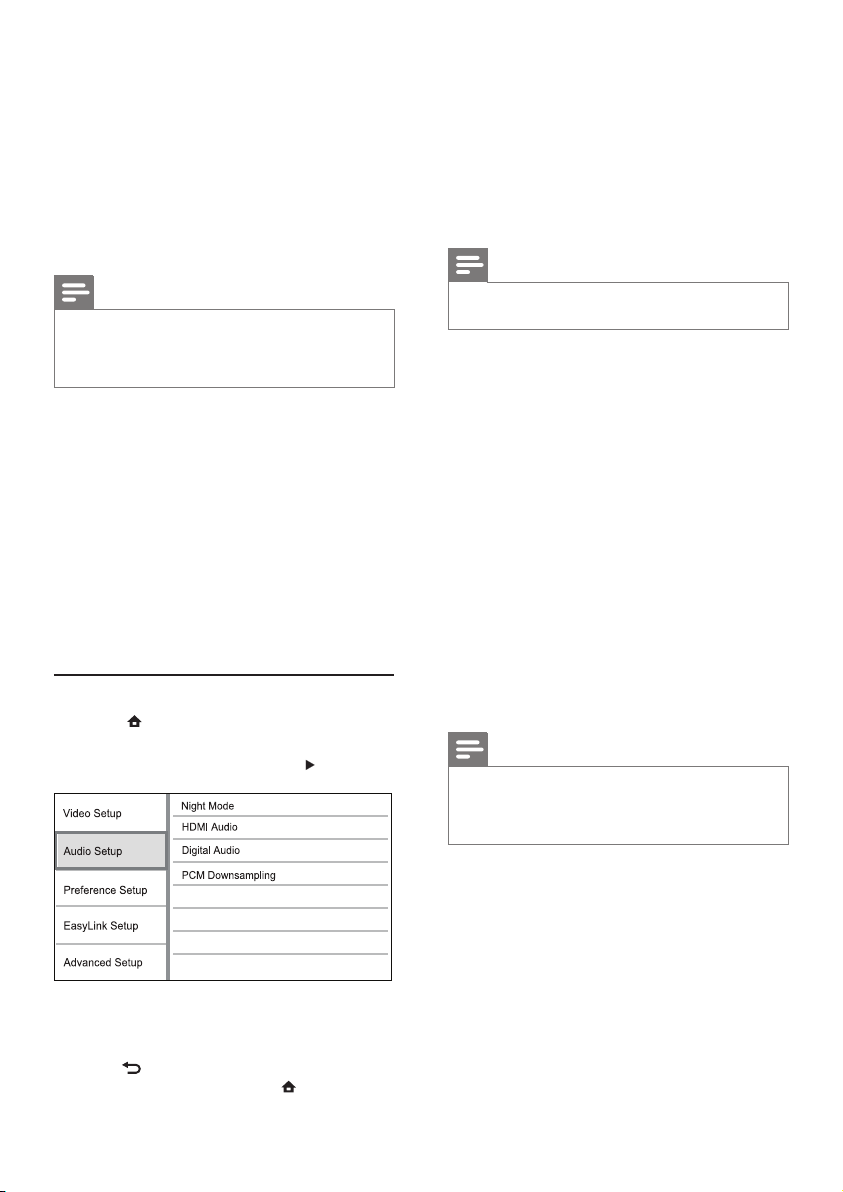
Audio Setup
1 Press .
2 Select [Settings], then press OK.
3 Select [Audio Setup], then press .
4 Select an option, then press OK.
5 Select a setting, then press OK.
To return to the previous menu, press •
BACK.
To exit the menu, press •
.
EN
19
1) Press the Numeric buttons to enter the
password or your last set password. If you forget
the password, enter ‘0000’, then press OK.
2) Enter the new password.
3) Enter the same password again.
4) Move to [Conrm] in the menu and press OK.
[Display Panel]
Select a brightness level of the front panel display.
• [Normal] - Normal brightness.
• [Dim] - To dim display.
[Auto Standby]
Turn on or off auto standby mode. It is an energy
saving feature.
• [On] - Switch to standby after 30 minutes of
inactivity (for example, in pause or stop mode).
• [Off] - Disable auto standby mode.
[VCD PBC]
Turn on or off the content menu of VCDs/SVCDs
with PBC (playback control) feature.
• [On] - Display the index menu when you load
a disc for play.
• [Off] - Skip the menu and start play from the
rst title.
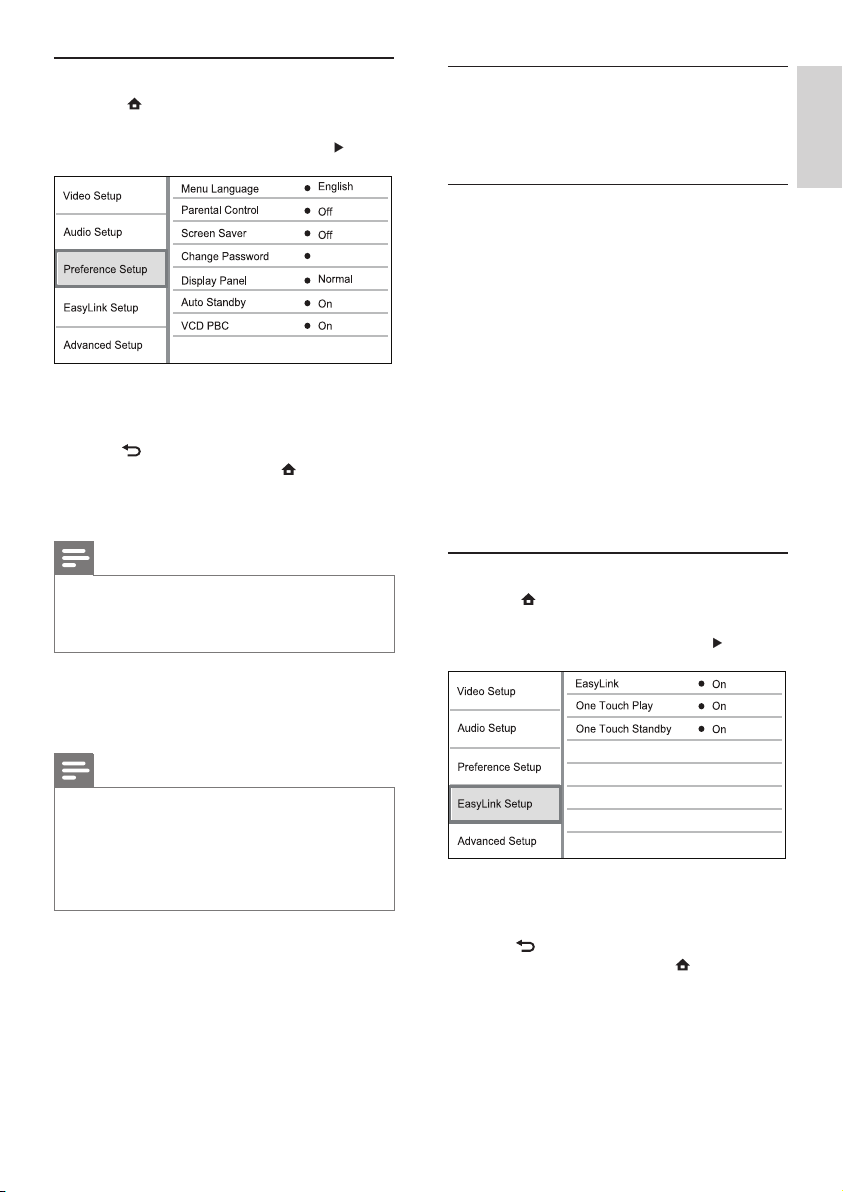
EasyLink Setup
1 Press .
2 Select [Settings], then press OK.
3 Select [EasyLink Setup], then press .
4 Select an option, then press OK.
5 Select a setting, then press OK.
To return to the previous menu, press •
BACK.
To exit the menu, press •
.
[EasyLink]
This product supports Philips Easylink which uses
the HDMI CEC (Consumer Electronics Control)
protocol. You can use one single remote control
to control all EasyLink-compliant devices that are
connected through HDMI connectors.
Preference Setup
1 Press .
2 Select [Settings], then press OK.
3 Select [Preference Setup], then press .
4 Select an option, then press OK.
5 Select a setting, then press OK.
To return to the previous menu, press •
BACK.
To exit the menu, press •
.
[Menu Language]
Select an on-screen menu language.
Note
If this product is connected to an HDMI CEC compliant •
TV using a HDMI cable, it switches automatically to the
same menu display language as per your TV setting (if the
language set on TV is supported by this product).
[Parental Control]
Restrict access to discs that are unsuitable for children.
These types of discs must be recorded with ratings.
To access, enter your last set password or ‘0000’.
Note
Rated discs above the level you set in • [Parental Control]
require a password to be played.
The ratings are country-dependent. To allow all discs to
•
play, select ‘8’ for DVD-video and BD-Video.
Some discs have ratings printed on them but are not
•
recorded with ratings. This function has no effect on
such discs.
[Screen Saver]
Turn on or off the screen saver mode. It helps to
protect the TV screen from being damaged due to
over exposure to static image for being too long.
• [On] - Set the screen saver active after 10
minutes of inactivity (for example, in the pause
or stop mode)
• [Off] - Disable screen saver mode.
[Change Password]
Set or change the password.
English
EN
20
• [Off]- Internet access is permitted for all BD-
Live contents.
[Network]
Set up a connection to internet to download
updated software and access BD-Live bonus
contents. It guides you through a step-by-step
network installation procedure.
Note
For detailed network setup, see “Get started” > “Set up •
network”.
[Software Download]
Update the software of this product (if a latest
version is available on Philips website) to enhance
the playability of this product.
• [USB] - Download software from the USB
device which is connected to this product.
• [Network] - Download software from network.
Note
For detailed software updating, see “Additional •
information” > “Update software”.
[Clear Memory]
Note
When you clear the local storage, previous download of •
BD-Live bonus contents is no longer available.
If the internal memory of this product is not enough
to download BD-Live bonus contents for a BD disc,
reformat the local storage to clear all the contents.
Note
You can use a USB device as an external storage to store •
the downloaded les.
Local storage is a folder (BUDA) located on the
•
connected USB device.
[DivX® VOD Code]
Display the DivX® registration code.
Tip
Use this product’s DivX registration code when you rent •
or purchase video from www.divx.com/vod. The DivX
videos rented or purchased through the DivX® VOD
(Video On Demand) service can be played only on the
device to which it is registered.
[Version Info.]
Display the software version and the MAC address
of this product.
• [On] - Turn on EasyLink features.
• [Off] - Disable EasyLink features.
[One Touch Play]
When you press the STANDBY
button to turn
on this product, the TV (if the TV supports one-
touch play) automatically turns on and switches to
the video-in channel. Disc play starts if there is a
disc in this product.
• [On] - Turn on one-touch play feature.
• [Off] - Disable one-touch play feature.
[One Touch Standby]
When you press and hold the STANDBY
button
on the remote control, all the connected HDMI
CEC devices (if the device supports one-touch
standby) switch to standby mode simultaneously.
• [On] - Turn on one-touch standby feature.
• [Off] - Disable one-touch standby feature.
Note
You must turn on the HDMI CEC operations on the TV/ •
devices before you can enjoy the EasyLink controls. See
the TV/devices manual for details.
Philips does not guarantee 100% interoperability with all
•
HDMI CEC compliant devices.
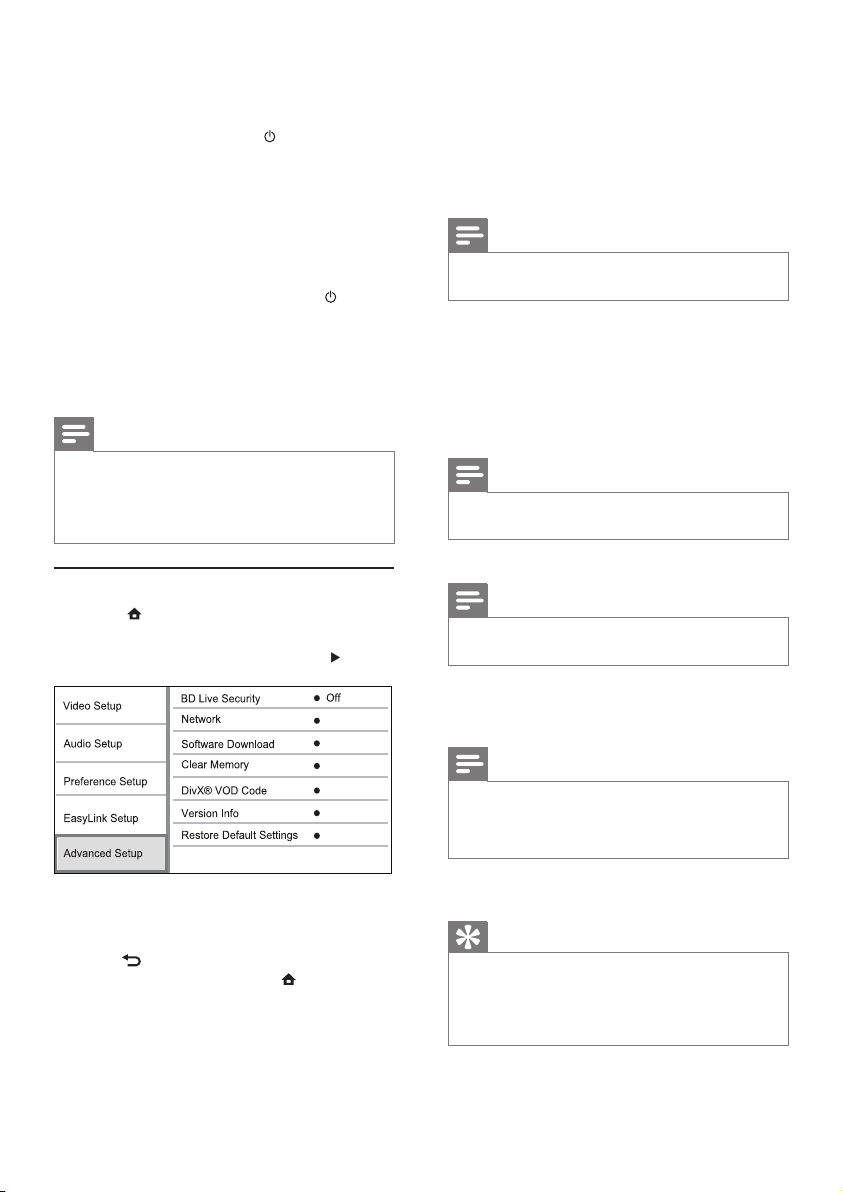
Advanced Setup
1 Press .
2 Select [Settings], then press OK.
3 Select [Advanced Setup], then press .
4 Select an option, then press OK.
5 Select a setting, then press OK.
To return to the previous menu, press •
BACK.
To exit the menu, press •
.
[BD-Live Security]
You can restrict internet access for BD-Live bonus
contents which are available to certain Blu-ray discs.
• [On] - Internet access is prohibited for all BD-
Live contents.
EN
21
4 In the Home menu, select [Settings] >
[Advanced Setup] > [Software Download] >
[USB].
5 Follow the instructions on the TV screen to
conrm update operation.
Once software update is complete, this »
product automatically turns off to standby.
6 Disconnect the power cord for a few seconds
and connect again to turn on this product.
Note
Do not turn off the power or remove the USB ash •
drive when software updating is in progress to prevent
possible damage of this product.
Care
Caution
Never use solvents such as benzene, thinner, cleaners •
available commercially, or anti-static sprays intended
for discs.
Clean discs
Wipe the disc with a micro bre cleaning cloth from
the centre to the edge in a straight line movement.
Specications
Note
Specication and design are subject to change without •
notice
Play media
BD-Video, DVD-Video, DVD+R/+RW, DVD-•
R/-RW, DVD+R/-R DL, CD-R/CD-RW, Audio
CD, Video CD/SVCD, Picture CD, MP3-CD,
WMA-CD, DivX (Ultra)-CD.
Accessories supplied
Remote control and batteries•
Audio/Video cables•
Power cable•
Quick start guide•
User manual•
CD-ROM built in multi-lingual user manual •
(only available for the continental Europe
version)
Video
Signal system: PAL / NTSC•
Composite video output: 1 Vp-p (75 ohm)•
Tip
This information is needed for you to check if a latest •
software version is available at the Philips website so that
you can download and install on this product.
[Restore Default Settings]
Reset all the settings of this product to the factory
settings, except for [Parental Control] setting.
7 Additional Information
Update software
For software updates to enhance performance,
check the current software version of this product to
compare with the latest software (if available) at the
Philips website.
1 Press .
2 Select [Settings], then press OK.
3 Select [Advanced Setup] > [Version Info.],
then press OK.
Update software via network
1
Set up the network connection (see “Get
started’ > “Set up network”).
2 In the Home menu, select [Settings] >
[Advanced Setup] > [Software Download] >
[Network].
You are prompted to start upgrading »
processs if upgrade media is detected.
3 Follow the instructions on the TV screen to
conrm update operation.
Once software update is complete, this »
product automatically turns off to standby.
4 Disconnect the power cord for a few seconds
and connect again to turn on this product.
Update software via USB
1
Go to www.philips.com/support to check if
the latest software version is available for this
product.
2 Download the software into a USB ash drive:
a Un-zip the download, and make sure that
the un-zipped folder is named “UPG”.
b Put the “UPG” folder in the root
directory.
3 Insert the USB ash drive to the USB jack of
the rear panel.
English
EN

22
8 Troubleshooting
Warning
Risk of electric shock. Never remove the casing of the •
product.
To keep the warranty valid, never try to repair the
product yourself.
If you encounter problems when using the product,
check the following points before requesting service. If
the problem remains unsolved, register your product
and get support at www.philips.com/welcome.
If you contact Philips, you will be asked for the model
and serial number of your product. The model
number and serial number are on the back of your
product. Write the numbers here:
Model No. __________________________
Serial No. ___________________________
Main unit
No reaction to the remote control.
Connect this product to the power outlet.•
Point the remote control at the IR sensor •
located on the front panel of this product.
Insert the batteries correctly.•
Insert new batteries in the remote control.•
Picture
No picture.
See TV manual for correct video input channel •
selection. Change the TV channel until you see
the Philips screen.
No picture on HDMI connection.
If this product is connected to an unauthorized •
display device with an HDMI cable, the audio/
video signal may not be output.
Check if the HDMI cable is faulty. Replace a •
new HDMI cable.
If this happens when you change the • [HDMI
Video] setting, press HDMI on the remote
control repeatedly until picture appears.
No high-denition video signal on the TV.
Ensure that the disc contains high-denition •
video.
Ensure that the TV supports high-denition •
video.
Component video output: 480/576i, 480/576p, •
720p, 1080i
Y: 1 Vp-p (75 ohm)•
Pb: 0.7 V-pp (75 ohm)•
Pr: 0.7 V-pp (75 ohm)•
HDMI output 480p, 576p, 720p, 1080i, 1080p, •
1080p24
Audio
2 Channel analog output•
Audio Front L&R : 2 Vrms (> 1 kohm)•
Digital output: 0.5 Vp-p (75 ohm)•
Coaxial•
HDMI output•
Sampling frequency:•
MP3: 32 kHz, 44.1 kHz, 48 kHz•
WMA: 44.1 kHz, 48 kHz•
Constant bit rate:•
MP3: 112 kbps - 320 kpbs•
WMA: 48 kpbs - 192 kpbs•
USB
As additional memory for software updates •
and BD-Live bonus contents. Not for media
play.
Main unit
Power supply rating•
Europe: 220~240V ~AC, ~50 Hz•
Russia: 220~230V ~AC, ~50 Hz•
Asia Pacic: 110~240V ~AC, 50~60 Hz•
Latin America: 110~240V ~AC, 50~60 Hz•
China: 110~240V ~AC, ~50 Hz•
Power consumption: 25W•
Power consumption in standby mode: 0.5W•
Dimensions (w x h x d): 435 x 62 x 237 (mm) •
Net Weight: 2.5 kg•
Laser Specication
Laser Type: •
BD Laser Diode: InGaN/AIGaN•
DVD Laser Diode: InGaAIP•
CD Laser Diode: A IGaAs•
Wave length: •
BD: 405 +5nm/-5nm•
DVD: 650 +13nm/-10nm•
CD: 790 +15nm/-15nm•
Output power: •
BD: Max. ratings: 20mW•
DVD: Max. ratings: 7mW•
CD: Max. ratings: 7mW•
EN

23
EasyLink feature does not work.
Ensure that this product is connected to the •
Philips brand EasyLink TV and the [EasyLink]
in the menu is set to [On].
The USB device cannot be played on this product.
This product cannot play any audio/video/•
photo le stored on a USB device. USB
connection works only for software updates
and BD-Live bonus contents.
Unable to access BD-Live feature.
Check the network connection or ensure that •
the network has been set up.
Clear local storage, internal memory (if any) •
or USB.
Ensure that the BD disc supports BD Live •
feature.
9 Glossary
A
Aspect ratio
Aspect ratio refers to the length to height ratio of
TV screens. The ratio of a standard TV is 4:3, while
the ratio of a high-denition or wide TV is 16:9.
The letter box allows you to enjoy a picture with a
wider perspective on a standard 4:3 screen.
B
Blu-ray Disc (BD)
Blu-ray Disc is a next generation optical video
disc capable of storing ve times more data than
a conventional DVD. The large capacity makes it
possible to benet from the features such as high-
denition videos, multichannel surround sound,
interactive menus and so on.
BONUSVIEW
This is a BD-Video (Final Standard Prole or Prole
1.1) that supports interactive content encoded on
the disc, such as picture-in-picture. This means you
can play the primary video and secondary video
simultaneously.
D
Digital Audio
Digital Audio is a sound signal that has been
converted into numerical values. Digital sound
can be transmitted through multiple channels.
Sound
No audio output from the TV.
Ensure that the audio cables are connected to •
the audio input of the TV.
Assign the audio input of the TV to the •
corresponding video input. See the TV user
manual for details.
No audio output from the loudspeakers of the
audio device (stereo system/amplier/receiver).
Ensure that the audio cables are connected to •
the audio input of the audio device.
Turn on the audio device to its correct audio •
input source.
No sound on HDMI connection.
You may not hear any sound from the HDMI •
output if the connected device is non-HDCP
compliant or only DVI-compatible.
No secondary audio output for Picture-in-Picture
feature.
When • [Bitstream] under the [HDMI Audio]
or [Digital Audio] menu is selected, interactive
sound like secondary sound for Picture-in-
Picture feature is muted. Deselect [Bitstream].
Play
Disc cannot be played.
Ensure that the disc is correctly loaded.•
Ensure that this product supports the disc. See •
‘Specications’.
Ensure that this product supports the region •
code of the DVD or BD.
For DVD±RW or DVD±R, ensure that the •
disc is nalized.
Clean the disc. •
Data les (JPEG, MP3, WMA) cannot be played
or read.
Ensure that the data le was recorded in the •
UDF, ISO9660 or JOLIET format.
Ensure that the selected group (folder) does •
not contain more than 9,999 les for DVD,
and 999 les for CD.
Ensure that the JPEG le extension is.jpg, .JPG, •
.jpeg or .JPEG.
Ensure that the MP3/WMA le extension •
is .mp3 or .MP3, and .wma or .WMA for
windows Media™ Audio.
DivX video les cannot be played.
Ensure that the DivX video le is complete. •
Ensure that the le name extension is correct. •
‘No entry’ sign appears on the TV.
The operation is not possible.•
English
EN

24
L
LAN (Local Area Network)
A group of linked devices in a company, school
or home. Indicates the boundaries of a particular
network.
Local storage
This storage area is used as destination for storing
additional contents from BD-Live enabled BD-
Video.
M
MP3
A le format with a sound data compression
system. MP3 is the abbreviation of Motion Picture
Experts Group 1 (or MPEG-1) Audio Layer 3. With
the MP3 format, one CD-R or CD-RW can contain
about 10 times more data than a regular CD.
P
PBC
Playback Control. A system where you navigate
through a Video CD/Super VCD with on-screen
menus that are recorded onto the disc. You can
enjoy interactive playback and search.
PCM
Pulse Code Modulation. A digital audio encoding
system.
R
Region code
A system that allows discs to be played only in the
region designated. This unit only plays discs that
have compatible region codes. You can nd the
region code of your unit on the product label. Some
discs are compatible with more than one region (or
ALL regions.)
W
WMA
Windows Media™ Audio. Refers to an audio
compression technology developed by Microsoft
Corporation. WMA data can be encoded with
Windows Media player version 9 or Windows
Media player for Windows XP. Files are recognized
by their le extension ‘.wma.’
Analogue sound can only be transmitted through
two channels.
DivX Video-On-Demand
This DivX Certied ® device must be registered
in order to play DivX Video-on-Demand (VOD)
content. To generate the registration code, locate
the DivX VOD section in your device setup menu.
Go to vod.divx.com with this code to complete the
registration process and learn more about DivX
video.
Dolby Digital
A surround sound system developed by Dolby
Laboratories that contains up to six channels of
digital audio (front left and right, surround left and
right, center and subwoofer.)
DTS
Digital Theatre Systems. A surround sound system
for providing 5.1 channels of discrete digital audio
in consumer electronics products and software
content. It is not developed by Dolby Digital.
H
HDCP
High-bandwidth Digital Content Protection. This is
a specication that provides a secure transmission
of digital contents between different devices (to
prevent unauthorized copyright.)
HDMI
High-Denition Multimedia Interface (HDMI) is
a high-speed digital interface that can transmit
uncompressed high denition video and digital
multichannel audio. It delivers high quality picture
and sound quality, completely free from noise.
HDMI is fully backward-compatible with DVI.
As required by the HDMI standard, connecting to
HDMI or DVI products without HDCP (High-
bandwidth Digital Content Protection) will result in
no Video or Audio output.
J
JPEG
A very common digital still picture format. A still-
picture data compression system proposed by the
Joint Photographic Expert Group, which features
small decrease in image quality in spite of its high
compression ratio. Files are recognized by their le
extension ‘.jpg’ or ‘.jpeg.’
EN

25
Open Source Software
This product contains the following open source software packages, which are subject to their respective licenses.
1. Zlib general purpose compression library
See http://www.zlib.net/, and in particular http://www.zlib.net/zlib_license.html.
/* zlib.h -- interface of the ‘zlib’ general purpose compression library version 1.2.3, July 18th, 2005
Copyright (C) 1995-2005 Jean-loup Gailly and Mark Adler
This software is provided ‘as-is’, without any express or implied warranty. In no event will the authors be held
liable for any damages arising from the use of this software.
Permission is granted to anyone to use this software for any purpose, including commercial applications, and to
alter it and redistribute it freely, subject to the following restrictions:
1. The origin of this software must not be misrepresented; you must not claim that you wrote the original
software. If you use this software in a product, an acknowledgment in the product documentation would be
appreciated but is not required.
2. Altered source versions must be plainly marked as such, and must not be misrepresented as being the
original software.
3. This notice may not be removed or altered from any source distribution.
Jean-loup Gailly [email protected]
Mark Adler [email protected]
2. Freetype, a Free, High-Quality, and Portable Font Engine
The software is based in part of the work of the FreeType Team.
See http://freetype.sourceforge.net/, and in particular http://freetype.sourceforge.net/FTL.TXT.
Portions of the relevant license conditions are copied below.
The FreeType Project LICENSE 2006-Jan-27
Copyright 1996-2002, 2006 by David Turner, Robert Wilhelm, and Werner Lemberg
1. No Warranty
THE FREETYPE PROJECT IS PROVIDED `AS IS’ WITHOUT WARRANTY OF ANY KIND, EITHER EXPRESS
OR IMPLIED, INCLUDING, BUT NOT LIMITED TO, WARRANTIES OF MERCHANTABILITY AND FITNESS
FOR A PARTICULAR PURPOSE. IN NO EVENT WILL ANY OF THE AUTHORS OR COPYRIGHT
HOLDERS BE LIABLE FOR ANY DAMAGES CAUSED BY THE USE OR THE INABILITY TO USE, OF THE
FREETYPE PROJECT.
2. Redistribution
This license grants a worldwide, royalty-free, perpetual and irrevocable right and license to use, execute,
perform, compile, display, copy, create derivative works of, distribute and sublicense the FreeType Project (in
both source and object code forms) and derivative works thereof for any purpose; and to authorize others to
exercise some or all of the rights granted herein, subject to the following conditions:
Redistribution in binary form must provide a disclaimer that states that the software is based in part of the •
work of the FreeType Team, in the distribution documentation. We also encourage you to put an URL to
the FreeType web page in your documentation, though this isn’t mandatory.

26
3. IJG: JPEG software decoder
This software is based in part on the work of the Independent JPEG Group. See http://www.ijg.org/, and in
particular http://picasa.google.com/about/ijg.txt. Portions of the relevant license conditions are copied below.
The authors make NO WARRANTY or representation, either express or implied, with respect to this software,
its quality, accuracy, merchantability, or tness for a particular purpose. This software is provided “AS IS”, and
you, its user, assume the entire risk as to its quality and accuracy.
This software is copyright (C) 1991-1998, Thomas G. Lane.
All Rights Reserved except as specied below.
Permission is hereby granted to use, copy, modify, and distribute this software (or portions thereof) for any
purpose, without fee, subject to these conditions:
(2) If only executable code is distributed, then the accompanying documentation must state that “this software
is based in part on the work of the Independent JPEG Group”.
(3) Permission for use of this software is granted only if the user accepts full responsibility for any undesirable
consequences; the authors accept NO LIABILITY for damages of any kind.
4. OpenSSL.
Open SSL is an Open Source toolkit implementing the Secure Sockets Layer (SSL v2/v3) and Transport Layer
Security (TLS v1) protocols as well as a full-strength general purpose cryptography library.
See http://www.openssl.org/, and in particular http://www.openssl.org/source/license.html.
The license conditions are copied below.
The OpenSSL toolkit stays under a dual license, i.e. both the conditions of the OpenSSL License and the
original SSLeay license apply to the toolkit.
See below for the actual license texts. Actually both licenses are BSD-style
Open Source licenses. In case of any license issues related to OpenSSL, please contact openssl-core@openssl.
org.
OpenSSL License
Copyright (c) 1998-2008 The OpenSSL Project. All rights reserved.
Redistribution and use in source and binary forms, with or without modication, are permitted provided that
the following conditions are met:
1. Redistributions of source code must retain the above copyright notice, this list of conditions and the
following disclaimer.
2. Redistributions in binary form must reproduce the above copyright notice, this list of conditions and the
following disclaimer in the documentation and/or other materials provided with the distribution.
3. All advertising materials mentioning features or use of this software must display the following
acknowledgment: “This product includes software developed by the OpenSSL Project for use in the
OpenSSL Toolkit. (http://www.openssl.org/)”.
4. The names “OpenSSL Toolkit” and “OpenSSL Project” must not be used to endorse or promote products
derived from this software without prior written permission. For written permission, please contact openssl-
5. Products derived from this software may not be called “OpenSSL” nor may “OpenSSL” appear in their
names without prior written permission of the OpenSSL Project.

27
6. Redistributions of any form whatsoever must retain the following acknowledgment: “This product includes
software developed by the OpenSSL Project for use in the OpenSSL Toolkit (http://www.openssl.org/)”
THIS SOFTWARE IS PROVIDED BY THE OpenSSL PROJECT ``AS IS’’ AND ANY EXPRESSED OR
IMPLIED WARRANTIES, INCLUDING, BUT NOT LIMITED TO, THE IMPLIED WARRANTIES OF
MERCHANTABILITY AND FITNESS FOR A PARTICULAR PURPOSE ARE DISCLAIMED. IN NO EVENT
SHALL THE OpenSSL PROJECT OR ITS CONTRIBUTORS BE LIABLE FOR ANY DIRECT, INDIRECT,
INCIDENTAL, SPECIAL, EXEMPLARY, OR CONSEQUENTIAL DAMAGES (INCLUDING, BUT NOT LIMITED
TO, PROCUREMENT OF SUBSTITUTE GOODS OR SERVICES; LOSS OF USE, DATA, OR PROFITS; OR
BUSINESS INTERRUPTION). HOWEVER CAUSED AND ON ANY THEORY OF LIABILITY, WHETHER
IN CONTRACT, STRICT LIABILITY, OR TORT (INCLUDING NEGLIGENCE OR OTHERWISE) ARISING IN
ANY WAY OUT OF THE USE OF THIS SOFTWARE, EVEN IF ADVISED OF THE POSSIBILITY OF SUCH
DAMAGE.
This product includes cryptographic software written by Eric Young (eay@cryptsoft.com). This product includes
software written by Tim Hudson (tjh@cryptsoft.com).
Original SSLeay License
Copyright (C) 1995-1998 Eric Young (eay@cryptsoft.com). All rights reserved.
This package is an SSL implementation written by Eric Young (eay@cryptsoft.com).
The implementation was written so as to conform with Netscapes SSL.
This library is free for commercial and non-commercial use as long as the following conditions are aheared to.
The following conditions apply to all code found in this distribution, be it the RC4, RSA, lhash, DES, etc., code;
not just the SSL code. The SSL documentation included with this distribution is covered by the same copyright
terms except that the holder is Tim Hudson (tjh@cryptsoft.com).
Copyright remains Eric Young’s, and as such any Copyright notices in the code are not to be removed.
If this package is used in a product, Eric Young should be given attribution as the author of the parts of the
library used.
This can be in the form of a textual message at program startup or in documentation (online or textual)
provided with the package.
Redistribution and use in source and binary forms, with or without modication, are permitted provided that
the following conditions are met:
1. Redistributions of source code must retain the copyright notice, this list of conditions and the following
disclaimer.
2. Redistributions in binary form must reproduce the above copyright notice, this list of conditions and the
following disclaimer in the documentation and/or other materials provided with the distribution.
3. All advertising materials mentioning features or use of this software must display the following
acknowledgement: “This product includes cryptographic software written by Eric Young (eay@cryptsoft.
com)”. The word ‘cryptographic’ can be left out if the rouines from the library being used are not
cryptographic related :-).
4. If you include any Windows specic code (or a derivative thereof) from the apps directory (application
code) you must include an acknowledgement: “This product includes software written by Tim Hudson (tjh@
cryptsoft.com)”

28
THIS SOFTWARE IS PROVIDED BY ERIC YOUNG ``AS IS’’ AND ANY EXPRESS OR IMPLIED
WARRANTIES, INCLUDING, BUT NOT LIMITED TO, THE IMPLIED WARRANTIES OF MERCHANTABILITY
AND FITNESS FOR A PARTICULAR PURPOSE ARE DISCLAIMED. IN NO EVENT SHALL THE AUTHOR
OR CONTRIBUTORS BE LIABLE FOR ANY DIRECT, INDIRECT, INCIDENTAL, SPECIAL, EXEMPLARY, OR
CONSEQUENTIAL DAMAGES (INCLUDING, BUT NOT LIMITED TO, PROCUREMENT OF SUBSTITUTE
GOODS OR SERVICES; LOSS OF USE, DATA, OR PROFITS; OR BUSINESS INTERRUPTION). HOWEVER
CAUSED AND ON ANY THEORY OF LIABILITY, WHETHER IN CONTRACT, STRICT LIABILITY, OR
TORT (INCLUDING NEGLIGENCE OR OTHERWISE) ARISING IN ANY WAY OUT OF THE USE OF THIS
SOFTWARE, EVEN IF ADVISED OF THE POSSIBILITY OF SUCH DAMAGE.
The licence and distribution terms for any publically available version or derivative of this code cannot be
changed. i.e. this code cannot simply be copied and put under another distribution licence [including the GNU
Public Licence.]

29
NOTICE
SOFTWARE END USER LICENSE AGREEMENT
THIS SOFTWARE END USER LICENSE AGREEMENT (“THIS AGREEMENT”) IS A LEGAL AND BINDING
AGREEMENT BETWEEN YOU (EITHER AN INDIVIDUAL OR ENTITY) AND PHILIPS CONSUMER
LIFESTYLE B.V. A DUTCH LIMITED LIABILITY COMPANY, WITH ITS PRINCIPAL OFFICE AT HIGH
TECH CAMPUS 37, 5656 AE EINDHOVEN, THE NETHERLANDS AND ITS SUBSIDIARY COMPANIES
(INDIVIDUALLY AND COLLECTIVELY “PHILIPS”). THIS AGREEMENT GIVES YOU THE RIGHT TO USE
CERTAIN SOFTWARE (THE “SOFTWARE”) INCLUDING USER DOCUMENTATION IN ELECTRONIC
FORM WHICH MAY HAVE BEEN PROVIDED SEPARATELY OR TOGETHER WITH A PHILIPS PRODUCT
(THE “DEVICE”) OR A PC. BY DOWNLOADING, INSTALLING OR OTHERWISE USING THE SOFTWARE,
YOU ACCEPT AND AGREE TO BE BOUND BY ALL OF THE TERMS AND CONDITIONS OF THIS
AGREEMENT. IF YOU DO NOT AGREE TO THESE TERMS AND CONDITIONS, DO NOT DOWNLOAD,
INSTALL OR OTHERWISE USE THE SOFTWARE. IF YOU ACQUIRED THE SOFTWARE IN TANGIBLE
MEDIA E.G. CD WITHOUT THE OPPORTUNITY TO REVIEW THIS LICENSE AND DO NOT ACCEPT
THESE TERMS, YOU MAY RECEIVE A FULL REFUND OF THE AMOUNT, IF ANY, THAT YOU PAID FOR
THE SOFTWARE IF YOU RETURN THE SOFTWARE UNUSED WITH PROOF OF PAYMENT WITHIN 30
DAYS FROM THE DATE OF PURCHASE.
1. Grant of License. This Agreement grants you a non-exclusive, nontransferable, non-sub licensable license
to install and use, on the Device or a PC, as applicable, one (1) copy of the specied version of the Software
in object code format as set out in the user documentation solely for your personal use. The Software is “in
use” when it is loaded into the temporary or permanent memory (i.e. RAM, hard disk, etc.) of the PC or
the Device.
2. Ownership. The Software is licensed and not sold to you. This Agreement grants you only the right to
use the Software, but you do not acquire any rights, express or implied, in the Software other than those
specied in this Agreement. Philips and its licensors retain all right, title, and interest in and to the Software,
including all patents, copyrights, trade secrets, and other intellectual property rights incorporated therein.
The Software is protected by copyright laws, international treaty provisions, and other intellectual property
laws. Therefore, other than as expressly set forth herein, you may not copy the Software without prior
written authorization of Philips, except that you may make one (1) copy of the Software for your back-up
purposes only. You may not copy any printed materials accompanying the Software, nor print more than
one (1) copy of any user documentation provided in electronic form, except that you may make one (1)
copy of such printed materials for your back-up purposes only.
3. License Restrictions. Except as provided otherwise herein, you shall not rent, lease, sublicense, sell, assign,
loan, or otherwise transfer the Software. You shall not, and you shall not permit any third party, to reverse
engineer, decompile, or disassemble the Software, except to the extent that applicable law expressly
prohibits the foregoing restriction. You may not remove or destroy any product identication, copyright
notices, or other proprietary markings or restrictions from the Software. All titles, trademarks, and
copyright and restricted rights notices shall be reproduced on your back up copy of the Software. You may
not modify or adapt the Software, merge the Software into another program or create derivative works
based upon the Software.
4. Termination of certain functionality. The Software may contain components of certain licensed software
including software licensed from Microsoft Corporation (“Microsoft”) which implements Microsoft’s
digital rights management technology for Windows Media. Content providers are using the digital
rights management technology for Windows Media (“WM-DRM”) to protect the integrity of their
content (“Secure Content”) so that their intellectual property, including copyright, in such content is
not misappropriated. Your Device may also use WM-DRM software to transfer or play Secure Content
(“WM-DRM Software”). If the security of such WM-DRM Software is compromised, Microsoft may revoke
(either on its own or upon the request of the owners of Secure Content (“Secure Content Owners”))
the WM-DRM Software’s right to acquire new licenses to copy, store, transfer, display and/or play Secure
Content. Revocation does not alter the WM-DRM Software’s ability to play unprotected content. A list of
revoked WM-DRM Software is sent to your PC and/or your Device whenever you download a license for
EULA-English (UK)
September 2009

30
Secure Content. Microsoft may, in conjunction with such license, also download revocation lists onto your
Device on behalf of Secure Content Owners, which may disable your Device’s ability to copy, store, display,
transfer, and/or play Secure Content. Secure Content Owners may also require you to upgrade some of
the WM-DRM components distributed with this Software (“WM-DRM Upgrades”) before accessing their
content. When you attempt to play Secure Content, WM-DRM Software built by Microsoft will notify
you that a WM-DRM Upgrade is required and then ask for your consent before the WM-DRM Upgrade
is downloaded. WM-DRM Software built by Philips may do the same. If you decline the upgrade, you will
not be able to access Secure Content that requires the WM-DRM Upgrade; however, you will still be able
to access unprotected content and Secure Content that does not require the upgrade. WM-DRM features
that access the Internet, such as acquiring new licenses and/or performing a required WM-DRM Upgrade,
can be switched off. When these features are switched off, you will still be able to play Secure Content if
you have a valid license for such content already stored on your Device. However, you will not be able to
use certain of the WM-DRM Software features that require Internet access such as the ability to download
content that requires the WM-DRM Upgrade. All title and intellectual property rights in and to the Secure
Content is the property of the respective Secure Content owners and may be protected by applicable
copyright or other intellectual property laws and treaties. This Agreement grants you no rights to use such
Secure Content. To summarize, if the Software contains Microsoft WM-DRM components – Secure
Content you desire to download, copy, store, display, transfer, and/or play is protected by the Microsoft
WM-DRM components of the Software. Microsoft, Secure Content Owners, or Secure Content
distributors may deny you access, or restrict your access, to Secure Content even after you have paid
for, and/or obtained, it. Neither your consent nor the consent or approval of Philips is necessary for
any of them to deny, withhold or otherwise restrict your access to Secure Content. Philips does not
guaranty that you will be able to download, copy, store, display, transfer, and/or play Secure Content.
5. Open Source Software. (a) This software may contain components that are subject to open-source terms,
as stated in the documentation accompanying the Device. This Agreement does not apply to this software
as such. (b) Your license rights under this Agreement do not include any right or license to use, distribute
or create derivative works of the Software in any manner that would subject the Software to Open
Source Terms. “Open Source Terms” means the terms of any license that directly or indirectly (1) create,
or purport to create, obligations for Philips with respect to the Software and/or derivative works thereof;
or (2) grant, or purport to grant, to any third party any rights or immunities under intellectual property or
proprietary rights in the Software or derivative works thereof.
6. Termination. This Agreement shall be effective upon installation or rst use of the Software and shall
terminate (i) at the discretion of Philips, due to your failure to comply with any term of this Agreement;
or (ii) upon destruction of all copies of the Software and related materials provided to you by Philips
hereunder. Philips’s rights and your obligations shall survive the termination of this Agreement.
7. Upgrades. Philips may, at its sole option, make upgrades to the Software available by general posting on a
website or by any other means or methods. Such upgrades may be made available pursuant to the terms
of this Agreement or the release of such upgrades to you may be subject to your acceptance of another
agreement.
8. Support Services. Philips is not obligated to provide technical or other support (“Support Services”) for the
Software. If Philips does provide you with Support Services, these will be governed by separate terms to be
agreed between you and Philips.
9. Limited Software Warranty. Philips provides the Software ‘as is’ and without any warranty except that the
Software will perform substantially in accordance with the documentation accompanying the Software for
a period of one year after your rst download, installation or use of the Software, whichever occurs rst.
Philips’ entire liability and your exclusive remedy for breach of this warranty shall be, at Philips’ option, either
(i) return of the price paid by you for the Software (if any); or (b) repair or replacement of the Software
that does not meet the warranty set forth herein and that is returned to Philips with a copy of your receipt.
This limited warranty shall be void if failure of the Software has resulted from any accident, abuse, misuse
or wrongful application. Any replacement Software will be warranted for the remainder of the original
warranty period or thirty (30) days, whichever is longer. This limited warranty shall not apply to you if the
Software was provided to you free of charge on an evaluation only basis.
EULA-English (UK)
September 2009

31
10. NO OTHER WARRANTIES. EXCEPT AS SET FORTH ABOVE, PHILIPS AND ITS LICENSORS DO
NOT WARRANT THAT THE SOFTWARE WILL OPERATE ERROR FREE OR UNINTERRUPTED,
OR WILL MEET YOUR REQUIREMENTS. YOU ASSUME ALL RESPONSIBILITIES FOR SELECTION
OF THE SOFTWARE TO ACHIEVE YOUR INTENDED RESULTS, AND FOR THE INSTALLATION
OF, USE OF, AND RESULTS OBTAINED FROM THE SOFTWARE. TO THE MAXIMUM EXTENT
PERMITTED BY APPLICABLE LAW, PHILIPS AND ITS LICENSORS DISCLAIM ALL WARRANTIES AND
CONDITIONS, WHETHER EXPRESS OR IMPLIED, INCLUDING BUT NOT LIMITED TO THE IMPLIED
WARRANTIES OF MERCHANTABILITY, FITNESS FOR A PARTICULAR PURPOSE, AND ACCURACY
OR COMPLETENESS OF RESULTS WITH RESPECT TO THE SOFTWARE AND THE ACCOMPANYING
MATERIALS. THERE IS NO WARRANTY AGAINST INFRINGEMENT. PHILIPS DOES NOT WARRANT
THAT YOU WILL BE ABLE TO DOWNLOAD, COPY, STORE, DISPLAY, TRANSFER, AND/OR PLAY
SECURE CONTENT.
11. LIMITATION OF LIABILITY. UNDER NO CIRCUMSTANCES WILL PHILIPS OR ITS LICENSORS BE
LIABLE FOR ANY CONSEQUENTIAL, SPECIAL, INDIRECT, INCIDENTAL OR PUNITIVE DAMAGES
WHATSOEVER, INCLUDING, WITHOUT LIMITATION, DAMAGES FOR LOSS OF PROFITS OR
REVENUES, BUSINESS INTERRUPTION, LOSS OF BUSINESS INFORMATION, LOSS OF DATA, LOSS
OF USE OR OTHER PECUNIARY LOSS, EVEN IF PHILIPS OR ITS LICENSORS HAVE BEEN ADVISED
OF THE POSSIBILITY OF SUCH DAMAGES. IN NO EVENT SHALL PHILIPS’ OR ITS LICENSORS’
AGGREGATE LIABILITY FOR DAMAGES ARISING OUT OF THIS AGREEMENT EXCEED THE
GREATER OF THE PRICE ACTUALLY PAID BY YOU FOR THE SOFTWARE OR FIVE POUNDS
STERLING (5.00).
12. Trademarks. Certain of the product and Philips names used in this Agreement, the Software, and the
printed user documentation may constitute trademarks of the Philips, its licensors or other third parties.
You are not authorized to use any such trademarks.
13. Export Administration. You agree that you will not directly or indirectly, export or re-export the Software
to any country for which the United States Export Administration Act, or any similar United States law or
regulation requires an export license or other U.S. Government approval, unless the appropriate export
license or approval has rst been obtained. By downloading or installing the Software you agree to abide by
this Export provision.
14. Governing law. This Agreement is governed by the laws of your country of residence , without reference to
its conict of laws principles. Any dispute between you and Philips regarding this Agreement shall be subject
to the non-exclusive jurisdiction of the courts of your country of residence.
15. General. This Agreement contains the entire agreement between you and Philips and supersedes any prior
representation, undertaking or other communication or advertising with respect to the Software and user
documentation. If any part of this Agreement is held invalid, the remainder of this Agreement will continue
in full force and effect. This Agreement shall not prejudice the statutory rights of any party dealing as a
consumer.
EULA-English (UK)
September 2009

© 2009 Koninklijke Philips Electronics N.V.
All rights reserved.
BDP3000_12_UM_V5.0_1008