Loading ...
Loading ...
Loading ...
15
Use extra caution when
blending hot liquids in
the pitcher.
Steam and splatters can escape
through the vented lid, potentially
causing scalding and/or burns.
NEVER blend hot liquids in your
pitcher without the pitcher lid
and vented lid cap attached. The
vented lid cap is ventilated to allow
steam and pressure to release,
while guarding against excess
splashing. NEVER blend hot liquids
in your Nutribullet cups or any
other sealed vessel.
When blending hot liquids, add
liquid and solid ingredients to your
pitcher below their respective
MAX lines. Attach the pitcher lid
with the vented lid cap inserted.
Press the POWER icon, then begin
blending on the LOW setting. Once
ingredients are integrated and
the mixture is level (no splashing),
increase speed as needed.
PLEASE KEEP THESE
IMPORTANT SAFEGUARDS IN
MIND WHEN USING
THE APPLIANCE:
• Make sure the base is plugged in
for use.
• DO NOT attempt to operate the pitcher
on the appliance without attaching
the pitcher lid and vented lid cap.
• Never run the appliance while empty.
• Appliance accessories are not
intended to be used in the microwave
as it may damage the accessories.
• Never leave the appliance
unattended while in use.
Never blend hot ingredients
when using any sealed
NutriBullet
®
cups.
Heated ingredients can pressurize
sealed containers when agitated
and violently expel hot contents upon
opening. Always start the blending
process with room temperature or
refrigerated ingredients and liquids
(21°C/70°F or cooler).
WARNING!
WARNING!
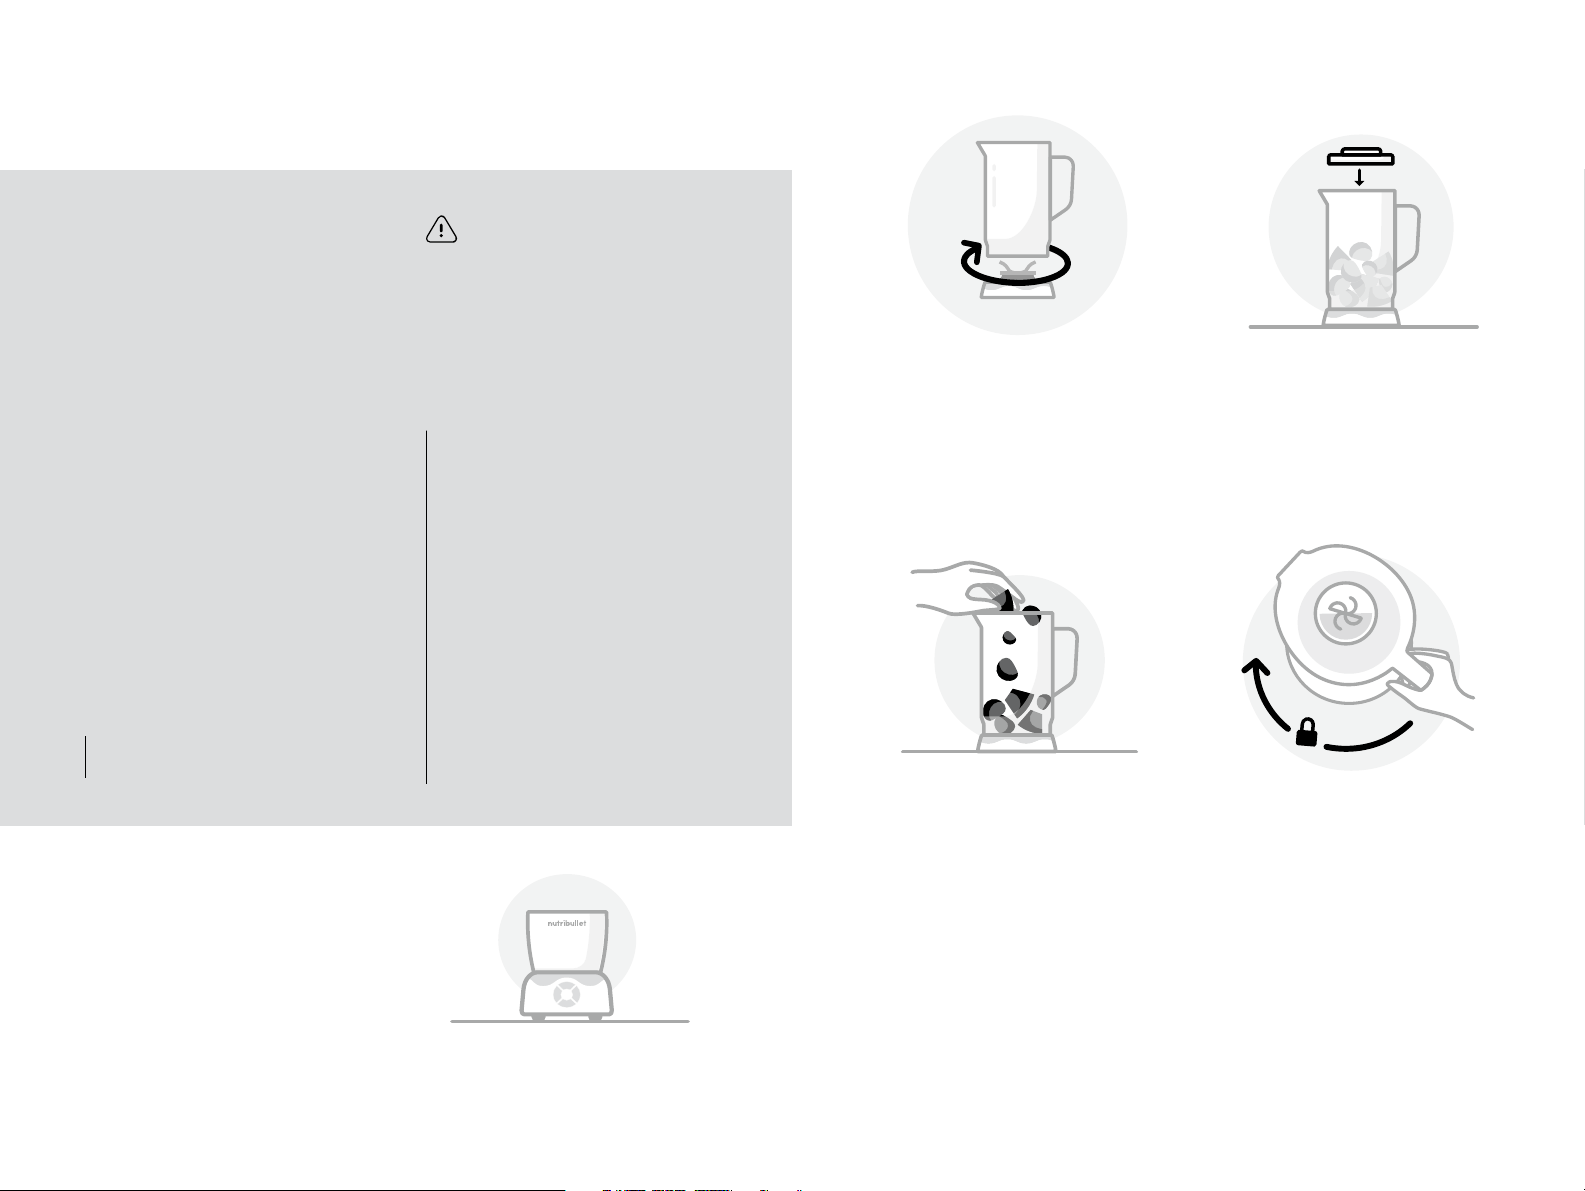
Getting started.
Pitcher assembly
& use.
1 Review all warning and
caution statements in the
Important Safeguards
section (pg 3-9) and on
the previous page before
proceeding to Step 2.
2 Place the motor base on
a clean, dry, level surface
such as a counter or table.
Place the pitcher onto the
motor base and gently twist
clockwise so it locks in place.
When you hear the click, it’s
locked and ready to blend.
NOTE: If you are left-handed, place
the handle facing towards the center
of the blending control panel and
twist clockwise.
Twist the easy-twist
extractor blade onto the
base of the pitcher, making
sure the components are
properly aligned and
securely fastened.
6
3
4
Place the pitcher on a
clean, dry, level surface
such as a counter or table.
Add the ingredients to the
pitcher, making sure they do
not exceed the MAX line.
NOTE: The blending pitcher is
marked with two MAX lines: one for
solid ingredients (higher line) and
one for liquids (lower line). When
filling the blender, make sure your
ingredients do not exceed their
respective MAX lines.
5
Place the pitcher lid with
vented lid cap attached on
the pitcher, making sure it’s
aligned to the handle.
14
Loading ...
Loading ...
Loading ...