Loading ...
Loading ...
Loading ...
ENGLISH
10
(Only OLED65/77W7T, OLED65/77W7V,
OLED65/77W7Y)
• The installation should be done by a qualified and
licensed electrician in accordance with wiring rules in
the Australian and New Zealand Standards AS/NZS 3000
for Electrical Installations. (Depending on country)
Provided item
Wall mount Punching Guide
Wall mounting screw
Ø5 x L65
Wall mounting anchor
Wall mounting screw for wood
Ø3 x L18
• Check the material of the wall and the thickness of the finishing.
• Use the Wall mount anchor for wall material of concrete, light
concrete, strong natural stone, soft natural stone masonry brick and
hallow block that do not crack.
Wall Material Tools Wall Width
Concrete
Wall mounting
anchor, Wall
mounting screw,
Ø 3/6/8 mm
Drill bit
70 mm
Brick
Natural stone
Metal Panel
Plywood
Wall mounting
screw, Ø 1.8 mm
Drill bit
30 mm
EPS Panel Penetrate the wall
Plasterboard + Plywood 30 mm
• When installing on a gypsum board or medium-density fiberboard
(MDF) wall, fasten the screws to the studs that support the wall. If
there are no studs, check the distance from the inner wall before
installing.
- 30 mm or below: Install directly on the inner wall using a 65 mm
screw.
- 30 mm or above: Install using a separate hanger.
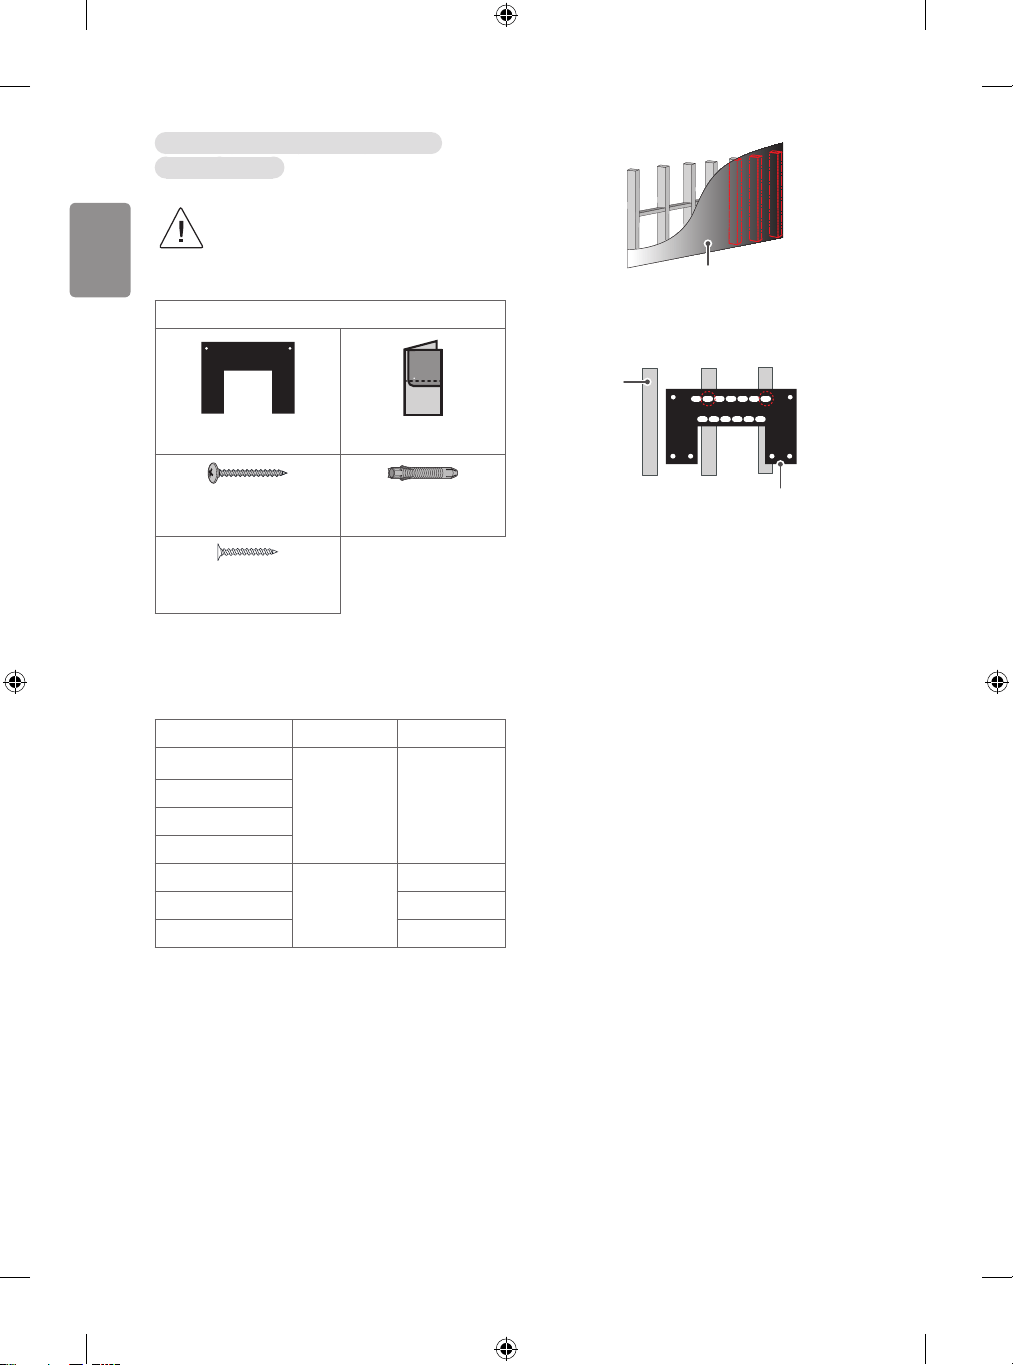
Wall
• When installing the wall mount, check the positions of the wooden
studs using a stud finder. Then, fasten the screws on at least two
separate studs before proceeding.
Wall mount
Stud
• When installing the product on wall material not designated, install
the product so that each location can withstand the pull out load of
70 kgf (686 N) and shear load of 100 kgf (980 N) or above.
• Use the Ø 8 mm drill bit for concrete and hammer (Impact) drill.
Tools you will need
• Phillips head + driver (manual or motorized), Ø 3/6/8 mm Drill bit,
Level, Stud finder, Drill
Loading ...
Loading ...
Loading ...