Loading ...
Loading ...
Loading ...
Rails en
29
Starting
Caution!
■ Risk of damage to the appliance: Only use liquid
descalers recommended by us for the descaling
programme. The time the product needs to work
during descaling depends on the type of descaler
used. Other descalers may damage the appliance.
Descaler order no. 311 680
■ Descaling solution: Do not allow any descaling
solution or descaler to come into contact with the
control panel or other surfaces on the appliance.
This damages the surfaces. If this does happen,
remove the descaling solution immediately with
water.
If you have used a steam-assisted operation
immediately before descaling, you must first switch the
appliance off so that the residual water is pumped out
of the evaporator system.
1. Mix 400 ml water with 200 ml liquid descaler to
make a descaling solution.
2. Use the ÿ On/Off button to start.
3. Remove the water tank and fill it with descaling
solution.
4. Once the water tank has been filled with descaling
solution, push it back in again fully.
5. Close the control panel.
6. Touch the Menu field.
The list of operating modes is displayed.
7. Touch the "Cleaning" text field.
8. Touch the "Descaling" text field.
The duration of the descaling programme is
displayed. It cannot be changed.
9. Press the Start/Stop button l to start.
The appliance is now descaled. The time counts down
in the display.
Once the cooking time has elapsed, an audible signal
sounds.
First rinsing cycle
1. Open the control panel.
2. Remove the water tank, rinse thoroughly, fill with
water and reinsert.
3. Close the control panel.
4. Press the l Start/Stop button to start.
The appliance rinses.
Once the duration has elapsed, an audible signal
sounds.
Second rinsing cycle
1. Open the control panel.
2. Remove the water tank, rinse thoroughly, fill with
water and reinsert.
3. Close the control panel.
4. Press the l Start/Stop button to start.
The appliance rinses.
Once the duration has elapsed, an audible signal
sounds.
Rinsing
1. Open the control panel.
2. Empty and dry the water tank.
3. Press the # On/Off button to switch off the
appliance.
Descaling is complete and the appliance is ready for
use again.
pRails
Ra i l s
With good care and cleaning, your appliance will retain
its appearance and remain fully functional for a long
time to come. This will tell you how to remove the
shelves and clean them.
Detaching and refitting the rails
:Warning – Risk of burns!
The rails become very hot. Never touch the hot rails.
Always allow the appliance to cool down. Keep children
away from the appliance.
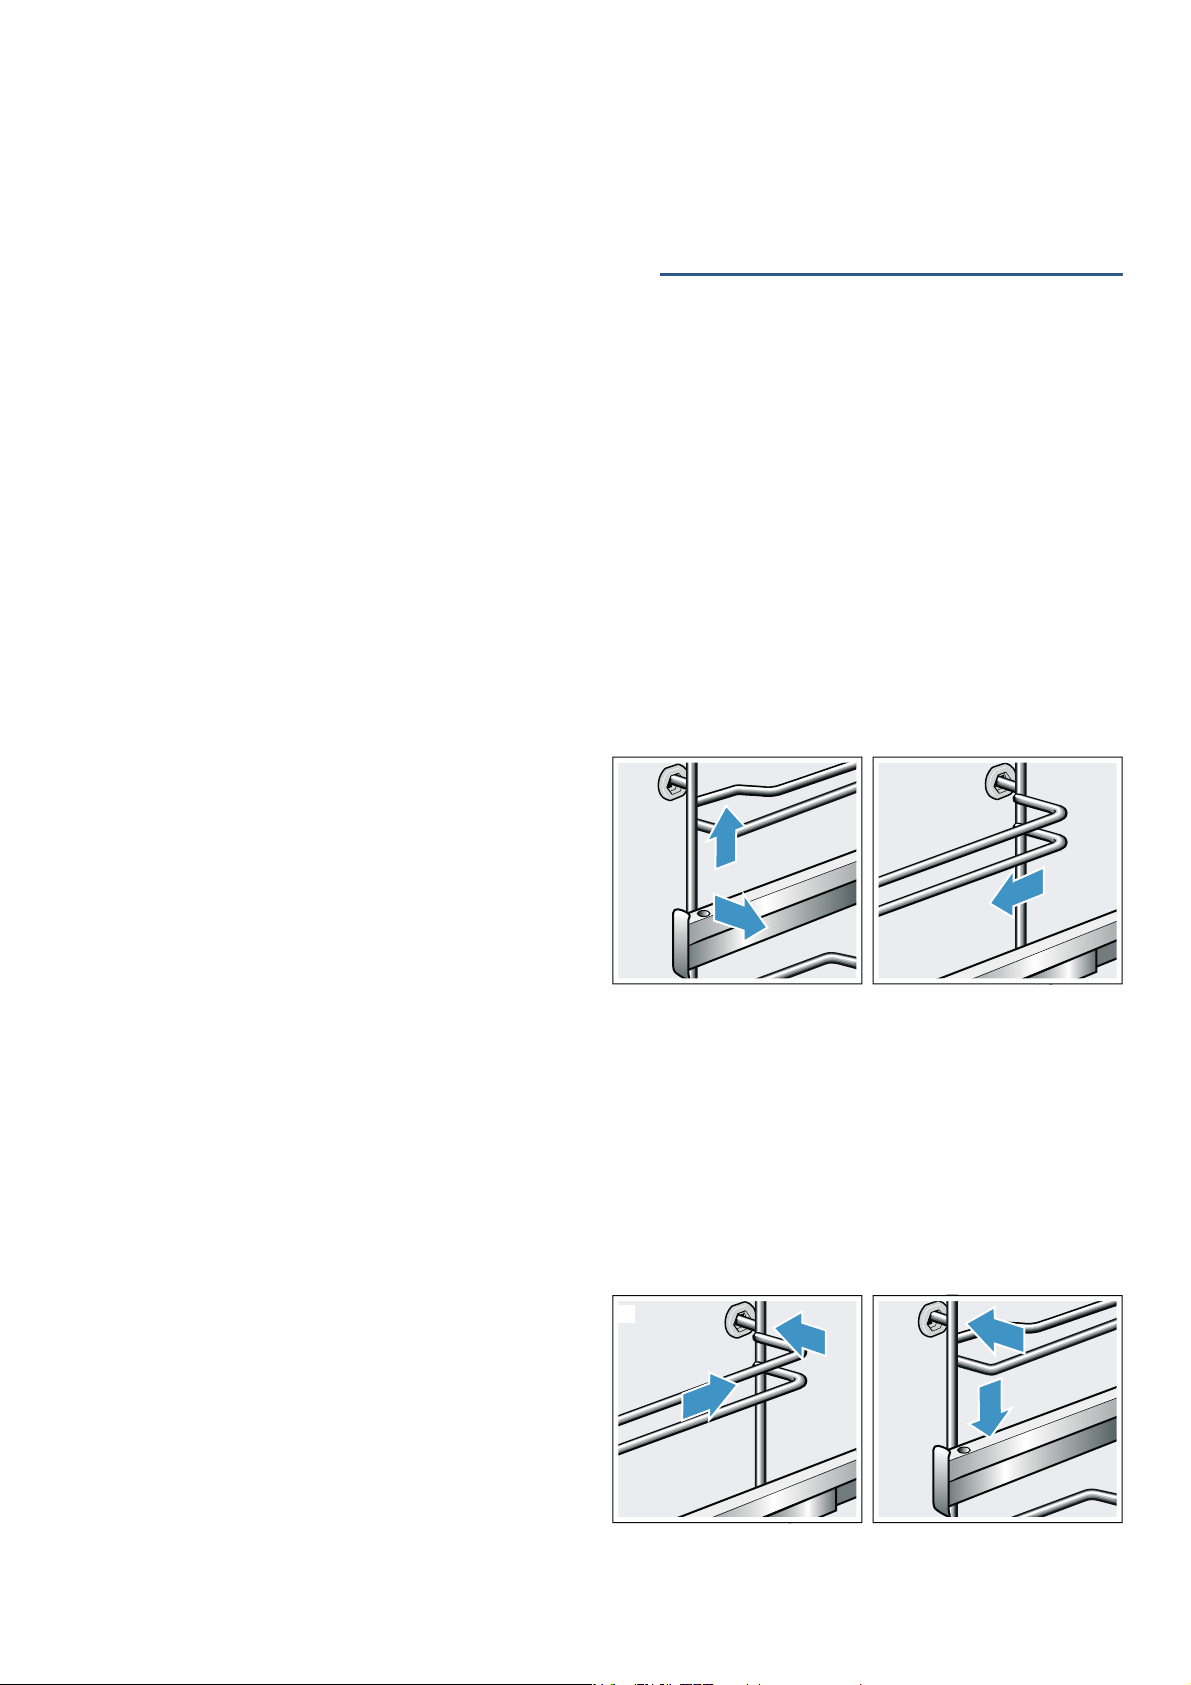
Detaching the rails
1. Lift the rail slightly at the front ‚ and detach it ƒ
(figure !).
2. Then pull the whole rail towards you and take it out
(figure ").
Clean the rails with cleaning agent and a sponge. For
stubborn deposits of dirt, use a brush.
Attaching the rails
The rails only fit on the right or the left side. The pull-out
rails must pull out towards you.
1. First, insert the rail in the middle of the rear socket ‚,
until the rail rests against the cooking compartment
wall, and push it back ƒ (figure !).
2. Then insert the rail into the front socket „, until the
rail also rests against the cooking compartment wall
here, and press it downwards … (figure ").
2
D
E
1
F
G
2
1
D
E
Loading ...
Loading ...
Loading ...