Loading ...
Loading ...
Loading ...
15
Install Warming Drawer Deflector Kit
(Only for Ovens Installed Above
Warming Drawers)
On single and double oven models installed above a warming
drawer, a warming drawer deflector kit must be installed. See
the “Tools and Parts” section for information on ordering.
Parts Supplied in Deflector Kit
Install Deflector Kit
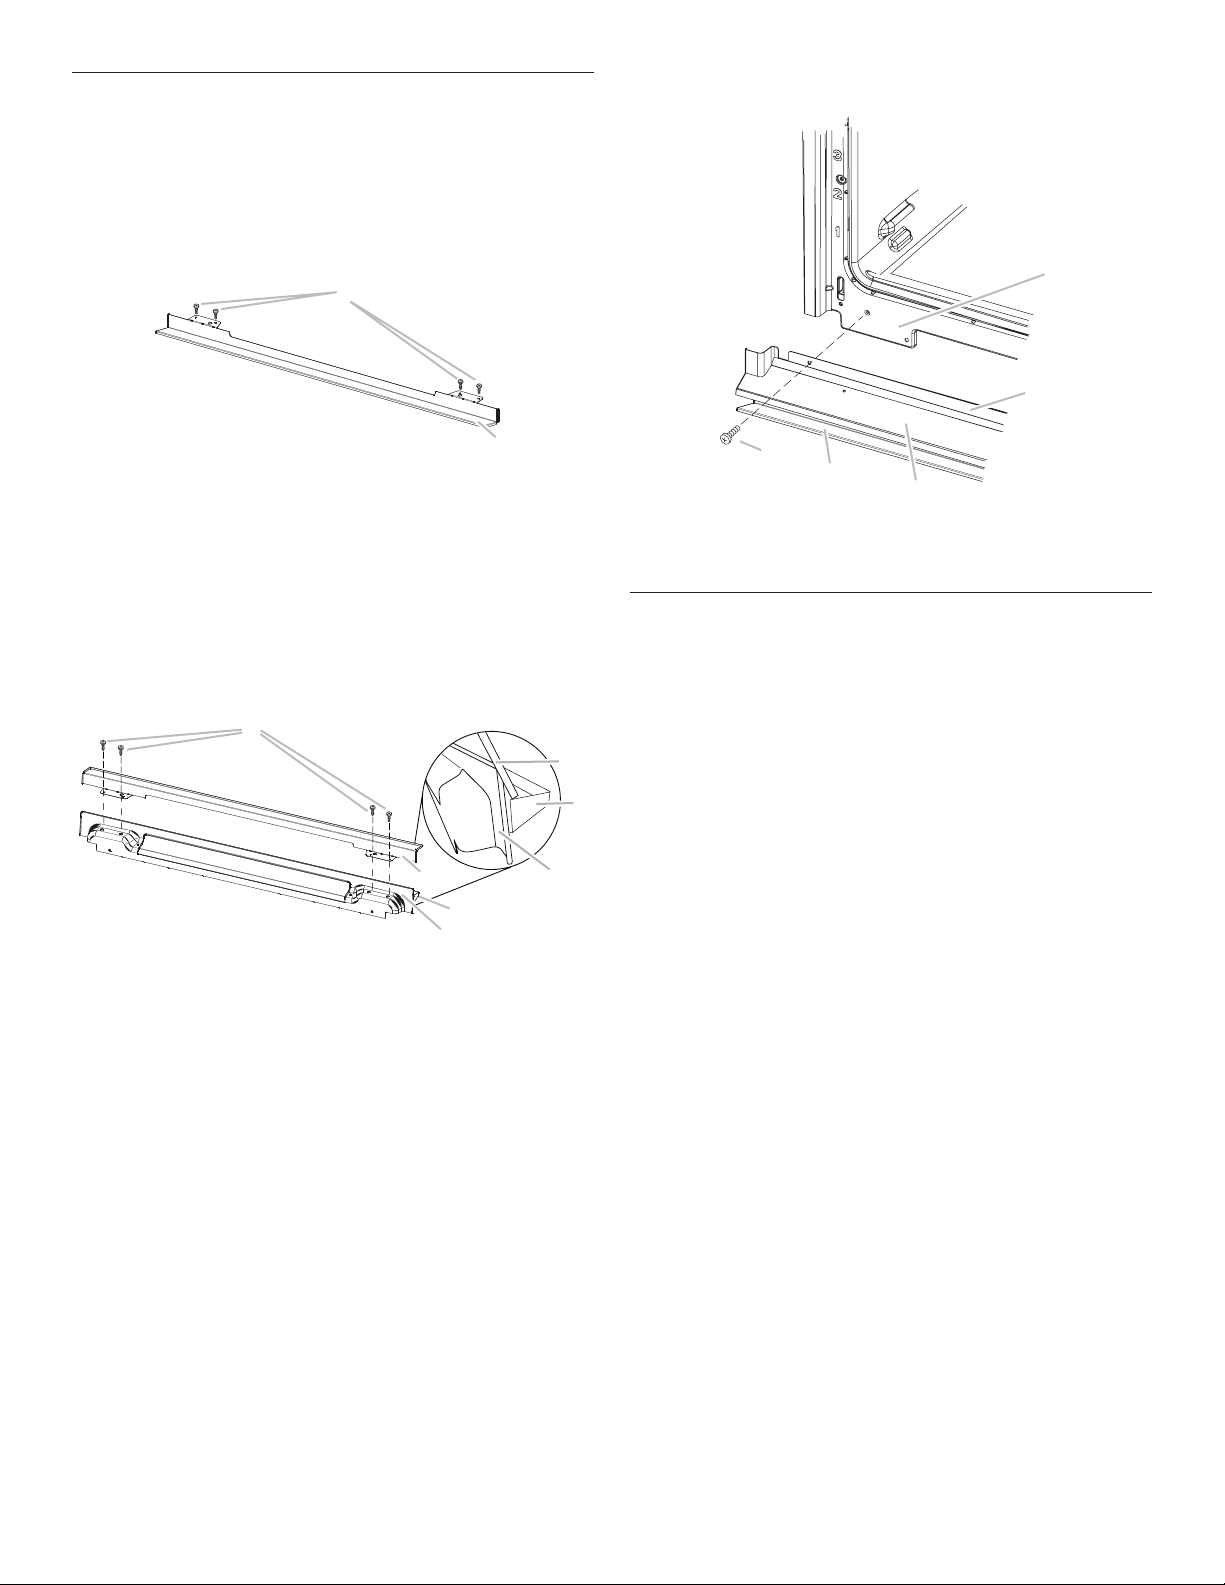
1. Flex the upper vent piece (C) away from the lower vent piece
(D) to slide the warming drawer deflector (B) between them.
Some force may be required to flex the upper vent trim (C)
away from the lower vent trim (D). Some force may also be
required to flex the warming drawer deflector (B) and slide
it into position. Make sure screw holes are properly aligned
between the two pieces. See the following illustration.
2. Install the warming drawer deflector (B) to the lower vent
piece (D) using two #8-18 x
1
/
4
" screws on each side.
3. Align vent tab (B) with oven frame (A) as shown
in the following illustration.
4. Using one #8-18 x
3
/
8
" screw (E) on each side of the
vent tab (B), fasten the vent securely to the oven.
Complete Installation
1. Check that all parts are now installed. If there is an extra part,
go back through the steps to see which step was skipped.
2. Check that you have all of your tools.
3. Dispose of/recycle all packaging materials.
4. For oven use and cleaning, read the Use and Care Guide.
Check Operation of Single and Double Ovens
1. Turn on power.
2. At first use, set up the clock and any other preferences
if available. For more information, read the Use and
Care Guide.
3. Press BROIL on single oven models.
NOTE: Press UPPER BROIL or LOWER BROIL
on double oven models.
4. Set the temperature.
5. Press START.
If Oven(s) Does Not Operate, Check the Following:
■ Household fuse is intact and tight, or circuit breaker
has not tripped.
■ Electrical supply is connected.
■ See “Troubleshooting” section in the Use and Care Guide.
6. When oven has been on for 5 minutes, feel for heat.
If you do not feel heat or if an error message appears in the
display, turn off the oven and contact a qualified technician.
7. Press UPPER CANCEL/LOWER CANCEL on double ovens,
or press CANCEL on single ovens.
If You Need Assistance or Service:
Please reference the “Warranty” section of the Use
and Care Guide.
B
A
A. Phillips head screws (4)
B. Warming drawer deflector (1)
D
B
A
C
B
D
C
A. #8-18 x
1
/
4
" screws
B. Warming drawer deflector
C. Upper vent piece
D. Lower vent piece
A
C
D
B
E
A. Oven frame
B. Vent tab
C. Oven vent
D. Warming drawer deflector
E. #8-18 x
3
/
8
" screw
Loading ...
Loading ...
Loading ...