Loading ...
Loading ...
Loading ...
13
Cleaning agents
To ensure that the different surfaces are not damaged by using
the wrong type of cleaning agent, observe the information in the
table. Do not use
■ harsh or abrasive cleaning agents,
■ cleaning agents with a high concentration of alcohol,
■ hard scouring pads or sponges,
■ high-pressure cleaners or steam cleaners.
Wash new sponge cloths thoroughly before use.
Cleaning the self-cleaning surfaces in the cooking
compartment
The back wall, ceiling and side walls of the cooking
compartment are coated with a highly porous ceramic layer.
This coating absorbs and disintegrates splashes from baking
and roasting while the oven is in operation. The higher the
temperature and the longer the oven is in operation, the better
the result will be.
Never treat the self-cleaning surfaces with oven cleaner.
If the self-cleaning surfaces no longer clean sufficiently, they
can be regenerated with the cleaning system. For more
information, please see the Cleaning system section.
Light discolouration of the coating does not affect automatic
self-cleaning.
Caution!
■ Never use abrasive cleaning agents. You will scratch or
destroy the highly porous coating.
■ Never treat the ceramic coating with oven cleaner. If oven
cleaner accidentally gets onto it, remove it immediately with a
sponge and plenty of water.
Cleaning the cooking compartment floor
Use a dish cloth and hot soapy water or a vinegar solution.
If there are heavy deposits of dirt, use a stainless steel scouring
pad or oven cleaner. Only use when the cooking compartment
is cold. Never treat the self-cleaning surfaces with a scouring
pad or oven cleaner.
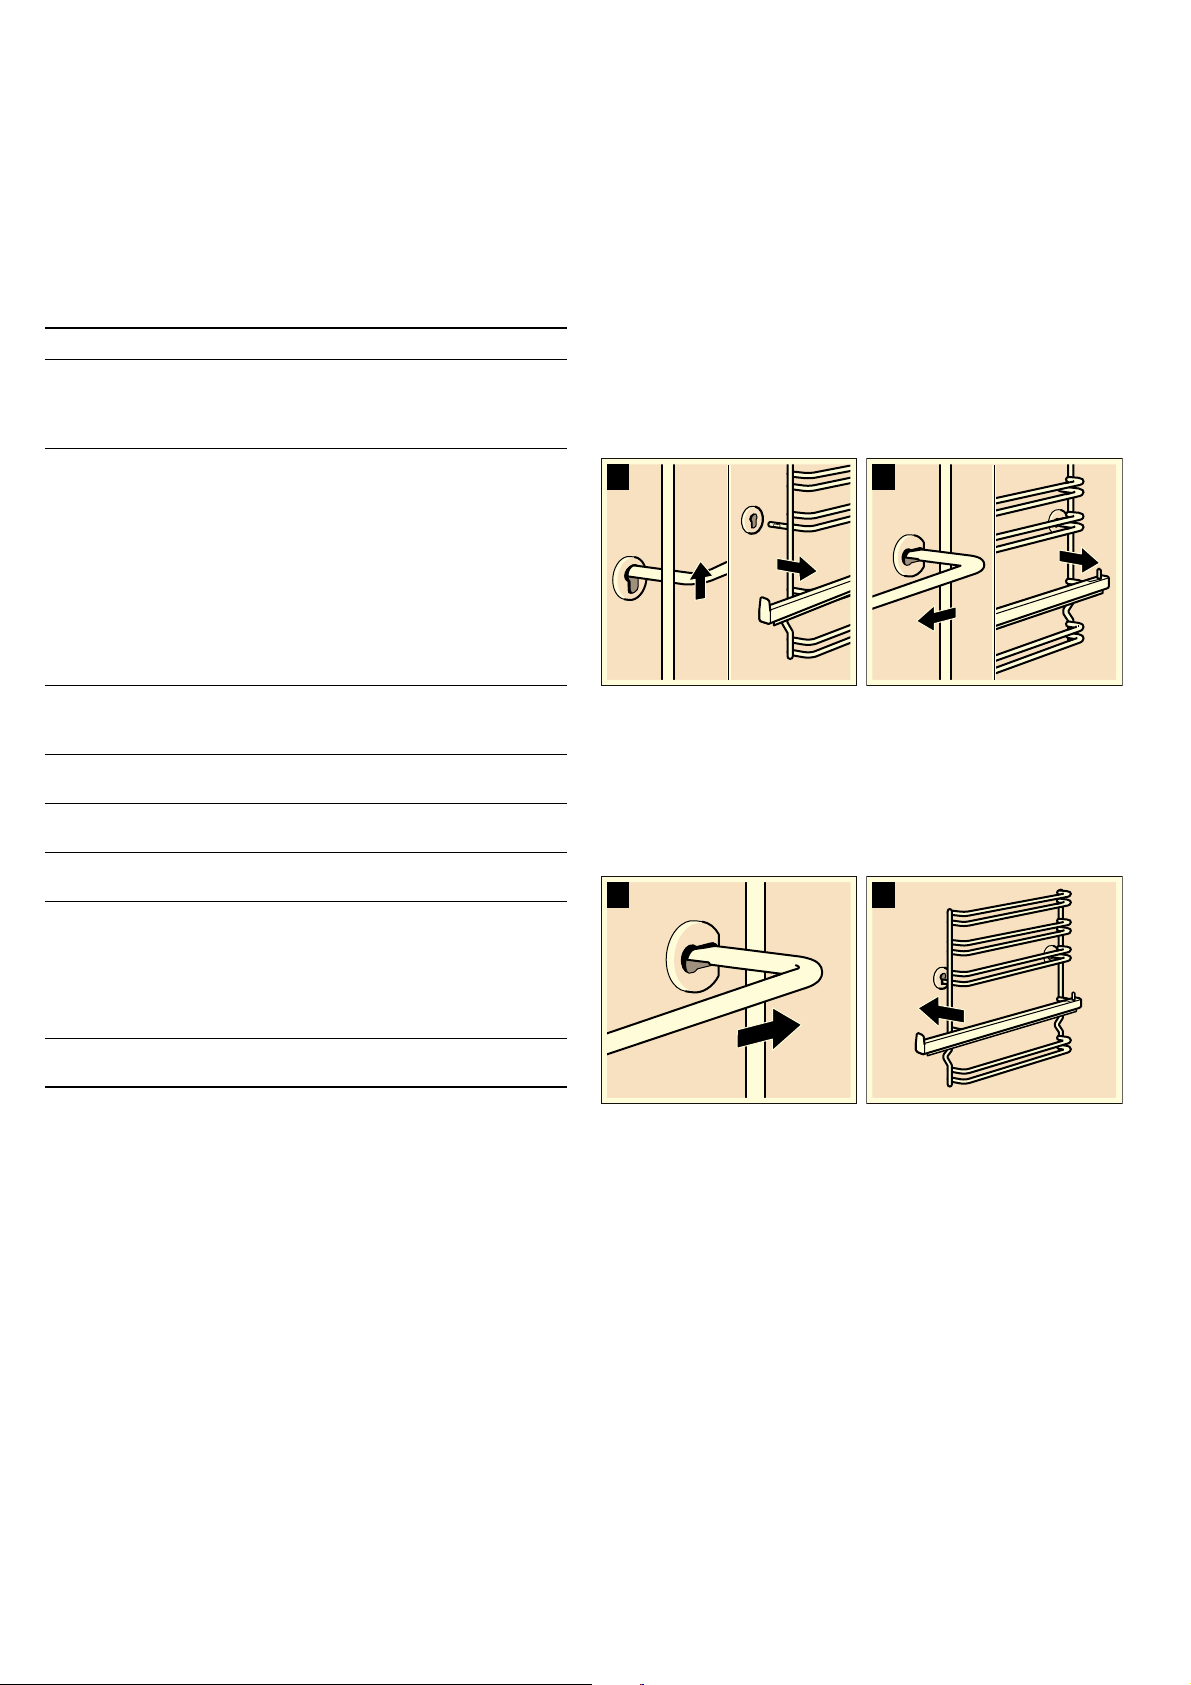
Detaching and refitting the rails
The rails can be removed for cleaning. The oven must have
cooled down.
Detaching the rails
1. Lift up the front of the rail
2. and unhook it (figure A).
3. Then pull the whole rail forward
4. and remove it (Fig. B).
Clean the rails with cleaning agent and a sponge. For stubborn
deposits of dirt, use a brush.
Refitting the rails
1. First insert the rail into the rear socket, press it to the back
slightly (figure A),
2. and then hook it into the front socket (figure B).
The rails only fit on the right or the left side. Ensure that, as
shown in figure B, levels 1 and 2 are below and levels 3, 4 and
5 are above. The pull-out rail must be pulled out forwards.
Detaching and attaching the oven door
For cleaning purposes and to remove the door panels, you can
detach the oven door.
The oven door hinges each have a locking lever. When the
locking levers are closed (figure A), the oven door is secured in
place. It cannot be detached. When the locking levers are open
in order to detach the oven door (Fig. B), the hinges are locked.
They cannot snap shut.
Area Cleaning agents
Control panel Hot soapy water:
Clean with a dish cloth and dry with a soft
cloth. Do not use glass cleaners or glass
scrapers.
Stainless steel Hot soapy water:
Clean with a dish cloth and dry with a soft
cloth. Remove traces of limescale, grease,
starch and albumin (e.g. egg white) immedi-
ately. Corrosion can form under such resi-
dues.
Special stainless steel cleaning products
suitable for hot surfaces are available from
our after-sales service or from specialist
retailers. Apply a very thin layer of the
cleaning product with a soft cloth.
Door panels Glass cleaner:
Clean with a soft cloth. Do not use a glass
scraper.
Glass cover for
the oven light
Hot soapy water:
Clean with a dish cloth.
Seal
Do not remove.
Hot soapy water:
Clean with a dish cloth. Do not scour.
Rails Hot soapy water:
Soak and clean with a dish cloth or brush.
Telescopic
shelves
Hot soapy water:
Clean with a dish cloth or a brush.
Do not remove the lubricant while the pull-
out rails are pulled out – it is best to clean
them when they are inserted. Do not soak
or clean in the dishwasher.
Accessories Hot soapy water:
Soak and clean with a dish cloth or brush.
%
$
%
$
Loading ...
Loading ...
Loading ...