Loading ...
Loading ...
Loading ...
9
4. Run home power supply cable through strain relief and into
the terminal box.
5. Use UL listed wire connectors and connect black wires (C)
together.
6. Use UL listed wire connectors and connect white wires (E)
together.
7. Connect green (or bare) ground wire from home power supply
to yellow-green ground wire (F) in terminal box using UL listed
wire connectors.
8. Tighten strain relief screw.
9. Install terminal box cover.
10. Check that all light bulbs are secure in their sockets.
11. Reconnect power.
Optional Power Cord Kit Installations
For optional power cord kit installations, follow the instructions
supplied with the power cord kit. See the “Assistance or Service”
section for information on ordering.
NOTE: Use only with range hood cord connection kits that have
been investigated and found acceptable for use with this model
range hood.
Install Duct Covers
NOTE: Remove the film from the duct covers.
1. Assemble the upper duct covers together, and then install the
duct covers around the support frame. The larger hole in the
flanges of the upper duct cover must be outside the smaller
hole in the mating flange of the other upper duct cover.
2. Secure the upper duct covers together with two 3.5 x 6.5 mm
screws at the top and two 2.9 x 3 mm screws at the bottom.
Install 1 screw on each side at the top and bottom of the
assembled duct covers.
NOTE: For non-vented (recirculating) installation, the slotted
holes in the upper duct covers will be visible when assembled.
For vented installations, the slotted holes will be hidden down
inside the lower duct covers.
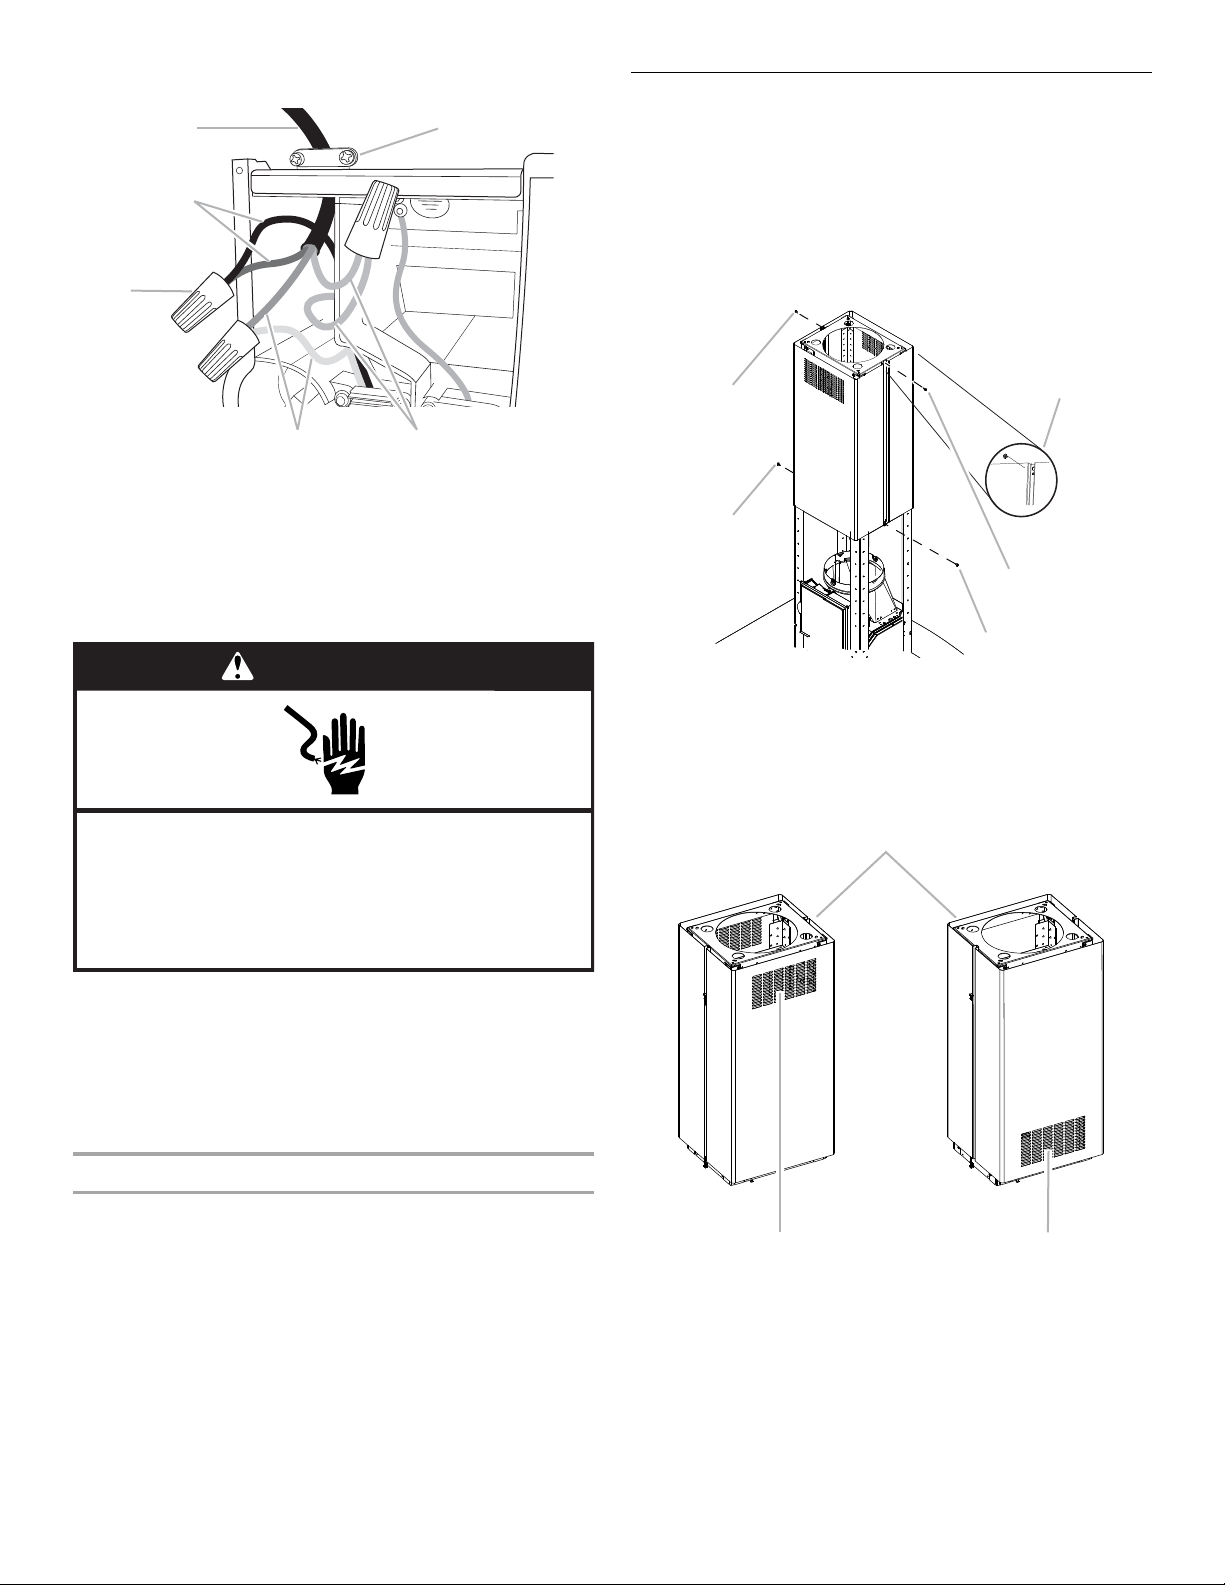
A. Home power supply cable
B. UL listed or CSA approved
strain relief
C. Black wires
D. UL listed wire connectors
E. White wires
F. Green (or bare) and yellow-
green ground wires
A
B
C
D
E
F
WARNING
Electrical Shock Hazard
Electrically ground blower.
Connect ground wire to green and yellow ground wire
in terminal box.
Failure to do so can result in death or electrical shock.
A. 3.5 x 6.5 mm screws (2)
B. Assembly holes (larger hole outside of
smaller hole on both sides)
C. 2.9 x 3 mm screws (2)
A. Top toward ceiling
B. Slots installed up for non-vented installations
C. Slots installed down for vented installations
A
A
B
C
C
A
B
C
Loading ...
Loading ...
Loading ...